

Page 1
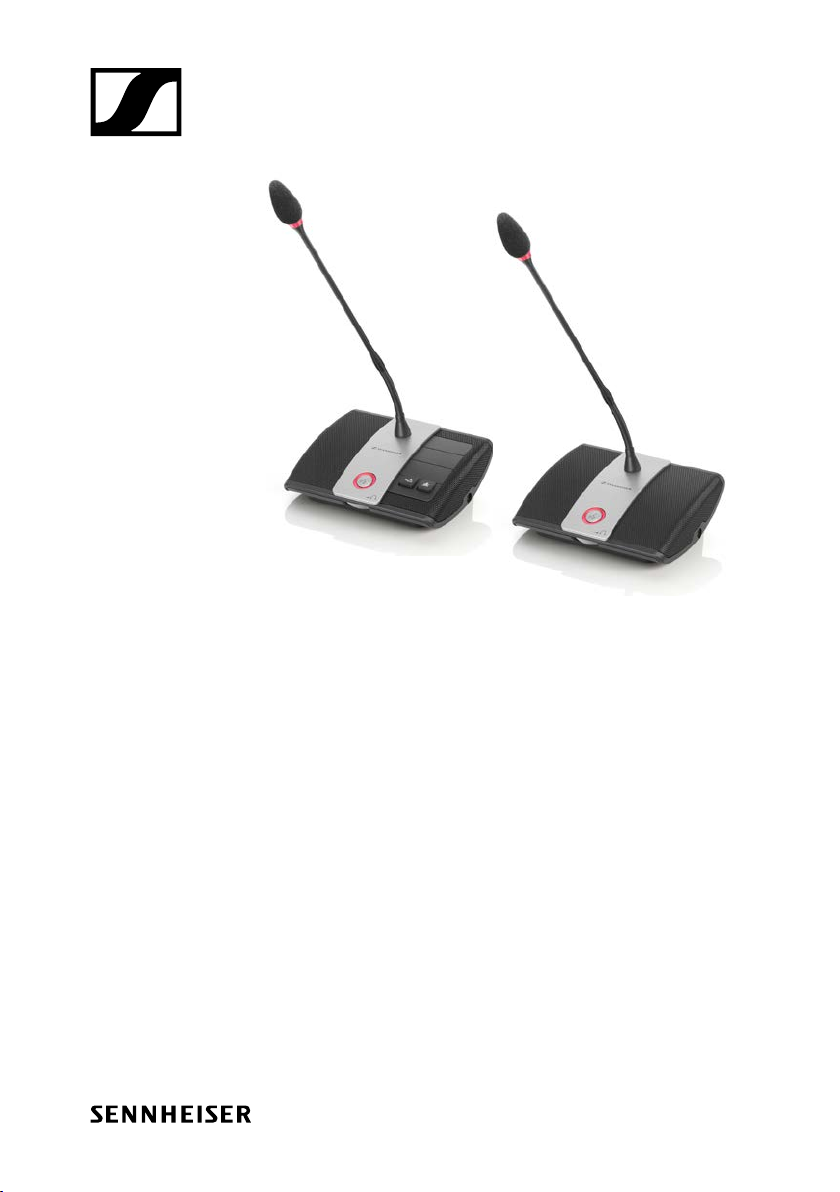
ADN-W C1 / D1
Wireless Units
ADN C1 / D1
Wired Units
Instruction manual
Sennheiser electronic GmbH & Co. KG
Am Labor 1, 30900 Wedemark, Germany,
www.sennheiser.com
Publ. 05/19, 583944/A01
Page 2
For your safety
For your safety
Please make sure to read the “Safety information” supplement
included separately with the ADN CU1 central unit. This supplement contains important information on the safe operation of the
ADN conference system as well as the manufacturer’s declaration and warranty notes.
A detailed instruction manual for the overall ADN conference
system can be found
• on the Internet at www.sennheiser.com or
• on the DVD-ROM supplied with the ADN CU1 central unit.
The ADN D1/C1 and ADN-W D1/C1 conference units
The ADN D1 wired delegate unit and the ADN C1 wired chairperson unit as well
as the ADN-W D1 wireless delegate unit and the ADN-W C1 wireless chairperson unit are part of the Sennheiser ADN conference system.
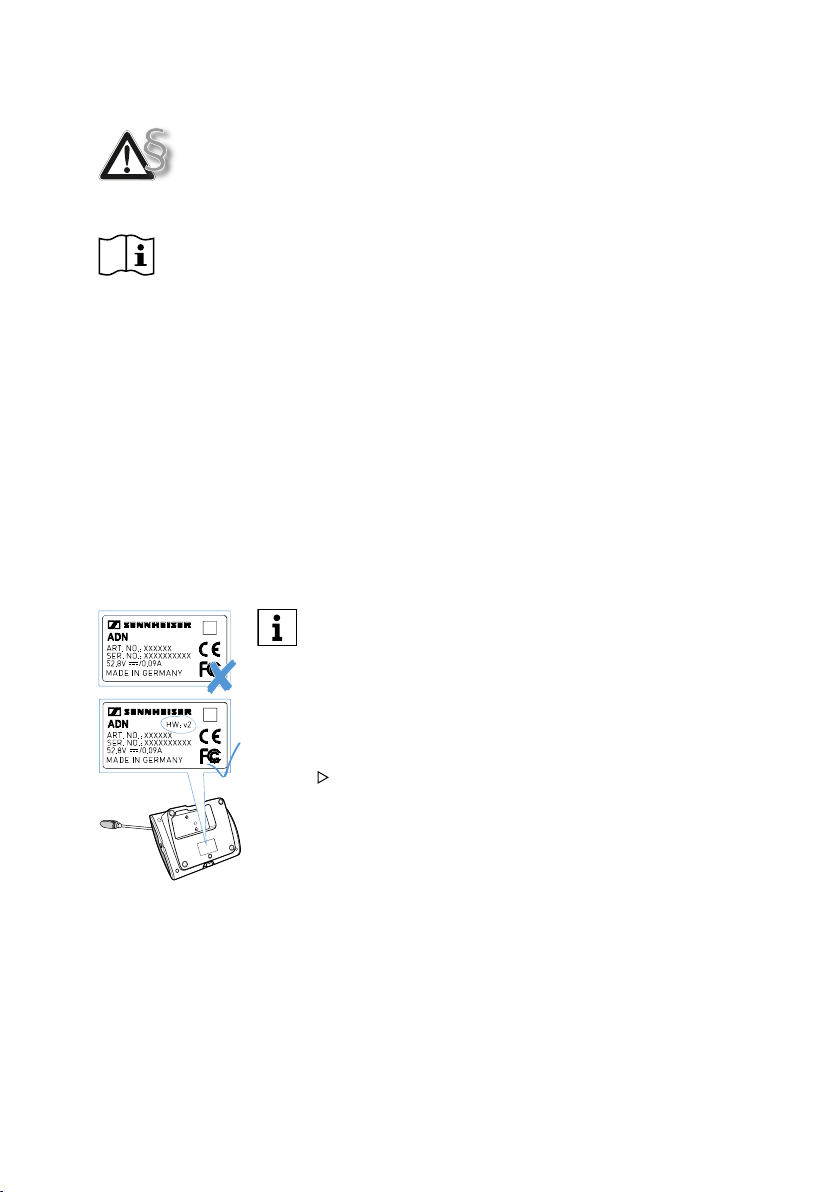
To ensure full operational reliability in a redundant
ring topology, the hardware of the ADN C1 and ADN
D1 has been revised. If you combine conference
units with hardware revision 1 (no marking on the
type plate) and conference units with hardware revision 2 (“HW: v2” is printed on the type plate), failsafe operation is only possible to a limited extent.
In a redundant ring topology, only use conference units with hardware revision 2.
T
OU
IN
Page 3

Package contents
Package contents
ADN standard system components
1 ADN D1 delegate unit
or ADN C1 chairperson unit
1 Instruction manual
The ADN D1 and ADN C1 wired conference units are ready for operation upon delivery. You have to connect the conference units to the
ADN CU1 central unit by means of system cables (detailed information can be found in the ADN system manual).
ADN wireless components
Console of the wireless conference unit
1 Console of the ADN-W D1 wireless delegate unit or ADN-W C1 wire-
less chairperson unit (without battery pack and gooseneck microphone)
1 Instruction manual
Wireless conference unit kit for delegate unit
1 Console of the ADN-W D1 wireless delegate unit
1 ADN-W BA Lithium-Ion battery pack
1 Gooseneck microphone
(ADN-W MIC 15-39 or 36-29, depending on version of the kit)
3 Instruction manuals (one for the wireless conference unit, one for
the battery pack and one for the gooseneck microphone)
For operating a wireless conference unit, you additionally require
one ADN-W BA battery pack and one ADN-W MIC 15 or ADN-W
MIC 36 gooseneck microphone.
Page 4
Components required for operation
Components required for operation
Wired and wireless components can be combined arbitrarily.
Central unit
Number Description Cat. No. Function
1 ADN CU1-EU central unit,
EU version
ADN CU1-UK central unit,
UK version
ADN CU1-US central unit,
US version
Wired standard components
Power supplies
Number Description Cat. No. Function
1 - 15
(optional)
ADN PS-EU power supply,
EU version
ADN PS-UK power supply,
UK version
ADN PS-US power supply,
US version
505553 Controls the conference
(wired and wireless com-
505554
505555
505546 Supplies power to con-
505547
505548
ponents) and supplies
power to a max. of 40
conference units and/or
one antenna module
ference units connected
in simple strings or in
redundant ring topology,
for conferences with up
to 400 conference units
Conference units
Number Description Cat. No. Function
max. 400 ADN D1 delegate unit 502758 Allows to make contribu-
tions to the conference
1 - 10
(optional)
ADN C1 chairperson unit 502759 Allows to manage the
conference
Page 5
Components required for operation
System cables
The system cables are black and have two shielded RJ45 plugs.
Number Description, length Cat. No. Function
Divers SDC CBL RJ45-2, 2 m 009842 Allows to interconnect
SDC CBL RJ45-3, 3 m 009843
SDC CBL RJ45-5, 5 m 009844
SDC CBL RJ45-10, 10 m 009845
SDC CBL RJ45-20, 20 m 009846
SDC CBL RJ45-50, 50 m 009847
components and conference units
Wireless components
Antenna module
Number Description Cat. No. Function
1 - 4 ADN-W AM antenna module 504743 Allows to transmit data
ADN-W AM-US antenna
module US-version
505715
Wireless conference units
Number Description Cat. No. Function
max. 150 ADN-W D1 wireless dele-
gate unit
1 - 10
(optional)
depending on the
number of
wireless
conference units
ADN-W C1 wireless chairperson unit
ADN-W BA battery pack 504744 Supplies power to wire-
ADN-W MIC 15-39 504750 Gooseneck microphones
ADN-W MIC 36-29 504751
ADN-W MIC 15-50 504752
ADN-W MIC 36-50 504753
504748 Allows to make contribu-
504745 Allows to manage the
via RF
tions to the conference
conference
less conference units
to make contributions
Additional accessories for the ADN conference system can be found
at www.sennheiser.com.
Page 6

Product overview ADN D1/C1
Product overview ADN D1/C1
1
2
1
2
ADN C1 ADN D1
12
11
10
9
8
7
6
5
4
3
8
7
6
9
3
1 Sound inlet basket with glued
7 Microphone key
windshield
2 Signal light ring 8 Microphone LED
3 Headphone socket 9 Loudspeaker
4
Priority key
5
Next-key
6 Headphone volume control for
10 IN socket
11 OUT socket
12 Type plate (see bottom)
headphone socket
Page 7

Product overview ADN-W D1/C1
4
Product overview ADN-W D1/C1
1
2
1
2
ADN-W MIC 15-39
ADN-W MIC 15-50
10
11
9
ADN-W C1
8
7
6
5
1 Sound inlet basket with glued wind-
1
2
ADN-W MIC 36-50
ADN-W MIC 36-29
1
2
10
11
10
10
11
11
12
3
13
14
14
9
8
7
6
15
12
8 Microphone LED
shield
ADN-W MIC 15: glued windshield
ADN-W MIC 36: plug-on windshield
2 Signal light ring 9 Loudspeaker
3 Headphone socket 10 Fastening thread
4
Priority-key
5 Next-key
11 Sliding contacts
12 Microphone connection
ADN-W D1
3
6 Headphone volume control for
headphone socket
7
Microphone key
13 Guide rails for ADN-W BA
battery pack
14 Connection for ADN-W BA
battery pack
15 Type plate
Page 8

Preparing the ADN-W D1/C1 wireless conference units for operation
Preparing the ADN-W D1/C1 wireless conference units for operation
To operate the wireless conference unit, you have to connect a gooseneck
microphone (ADN-W MIC 15 or ADN-W MIC 36; available in different lengths)
to the console of the conference unit. The ADN-W BA battery pack supplies
power to the wireless conference unit. The conference system automatically
recognizes if the connected wireless conference unit is a chairperson unit
(ADN-W C1) or a delegate unit (ADN-W D1) and initializes it automatically.
Information on how to configure the wireless conference components can be
found in the ADN system manual or in the instruction manuals of the ADN CU1
central unit and the ADN-W AM antenna module.
If you do not connect a microphone to the wireless conference unit,
you can use the console as a loudspeaker to output the floor channel.
Screwing on/unscrewing the ADN-W MIC 15/36
gooseneck microphone
To screw on the gooseneck microphone:
Put the gooseneck microphone onto the
12
microphone connection 12.
Screw the microphone to the micro-
phone connection by turning the fastening thread 10 clockwise.
The microphone is securely connected
to the conference unit.
To unscrew the gooseneck microphone:
Unscrew the microphone by turning the
10
fastening thread 10 counterclockwise.
Carefully remove the gooseneck micro-
phone from the microphone connection.
Function check of the microphone
After switch-on, the wireless conference unit checks the proper functioning of
the gooseneck microphone.
If errors occur during the check of the microphone, the microphone LED 8 and,
if the microphone is power supplied, the signal light ring 2 flash red rapidly and
the microphone is automatically deactivated.
Page 9

Preparing the ADN-W D1/C1 wireless conference units for operation
Replace the defective microphone by a new one.
If you screw the microphone to or unscrew it from the wireless conference
unit during operation (wireless conference unit is switched on), proper functioning of the conference unit cannot be guaranteed, i.e. volume differences
or noise may occur.
First connect the microphone and then switch the conference unit on.
Inserting/removing the battery pack
To insert the ADN-W BA battery pack into the wireless conference unit:
Check the battery pack before using it in order to ensure sufficient battery
capacity and to exclude a defective battery pack (see the instruction manual
of the battery pack).
Charge the battery pack if necessary (see the instruction manual of the battery pack).
Slide the battery pack into the battery guide rails 13 of the wireless conference unit.
813
The battery release clip 8 locks into place with an audible click and secures
the battery pack.
To remove the battery pack from the wireless conference unit:
Press the battery release clip 8 and pull the battery pack out of the battery
guide rails.
Switching the wireless conference unit on/off
To switch the wireless conference unit on:
Press the microphone key 7.
The microphone LED 8 and the signal light ring 2 flash red and the RF status
indicator 2 on the ADN-W BA battery pack flashes blue slowly. Once the
initialization process is complete and after connection to the ADN-W AM antenna module is established, the microphone LED 8 and the signal light ring
2 go off. The RF status indicator 2 on the ADN-W BA battery pack indicates
the transmission quality:
8
Page 10

Preparing the ADN-W D1/C1 wireless conference units for operation
2
ADN-W BA
Status-LED RF status indictor 2
2
Color Meaning
- good transmission quality
8
slowly
blue, flashing
rapidly
7
blue, flashing
transmission quality is
temporarily reduced
transmission quality is
permanently reduced
If no connection to an antenna module can be established within 5
minutes, the wireless conference unit automatically switches off.
To switch all wireless conference units off:
Set the on/off switch of the ADN CU1 central unit to position „0“.
The central unit is switched off and the display panel goes off. The ADN-W AM
antenna module connected to the central unit is switched off. All switchedon and connected wireless conference units are automatically switched off
after 5 minutes.
If you are using the “Conference Manager” software, you can also
switch off all wireless conference units with a mouse click (detailed
information can be found in the ADN system manual).
To switch individual wireless conference units off:
Press the microphone key 7 for 5 seconds
or:
Remove the ADN-W BA battery pack from the conference unit (see „Inserting/removing the battery pack“).
The conference unit switches off. All LEDs go off.
If the conference mode is set to “Push to talk”, you can only switch off
the wireless conference unit by removing the battery pack.
The manual switch-off function via the microphone key can be deactivated (detailed information can be found in the ADN system manual).
Page 11

Operating a delegate unit
Operating a delegate unit
The operation of the ADN D1 wired conference unit and the ADN-W D1 wireless
conference unit is identical.
Taking the floor/Making a request to speak
If the conference mode is set to “Direct Access” or “Override” (detailed information can be found in the ADN system manual):
Press the microphone key .
2
8
7
Your microphone switches on and you can
take the floor immediately. The microphone
LED 8 and the signal light ring 2 light up
red. The loudspeaker 9 is muted. Depending on the conference mode and the speaker limit set, the microphone of the previous
speaker will be deactivated.
If the conference mode is set to „Push To Talk“:
Press the microphone key 7 and keep it
pressed for the duration of your contribution.
Your microphone switches on and you can
take the floor immediately. The microphone
LED 8 and the signal light ring 2 light up
red. The loudspeaker 9 is muted.
If the conference mode is set to “Request”, you have to be granted speaking
privileges:
Press the microphone key 7.
Depending on the setting adjusted in the operating menu (detailed informa-
tion can be found in the ADN system manual)
• the microphone LED 8 flashes green and the signal light ring 2 flashes red
or
• only the microphone LED 8 flashes green.
When the chairperson grants you speaking privileges, your microphone is
activated. The microphone LED 8 and the signal light ring 2 light up red. The
loudspeaker 9 is muted. Depending on the conference mode and the speaker
limit set, the microphone of the previous speaker will be deactivated.
Deactivating the microphone/Canceling a request to speak
To deactivate the microphone when you have finished speaking or to cancel
a request to speak (“Direct Access”, “Override” or “Request” mode):
Page 12

Press the microphone key 7 once more.
The microphone LED 8 and the signal light ring 2 go off.
If the conference mode is set to “Push to talk”:
Release the pressed microphone key 7.
The microphone LED 8 and the signal light ring 2 go off.
Connecting headphones
Connect headphones with a 3.5 mm jack plug to
the headphone socket 3.
3
Adjusting the headphone volume
CAUTION
HEARING DAMAGE DUE TO HIGH VOLUMES!
Listening at high volume levels for long periods can lead to
permanent hearing defects.
Set the volume to a medium level.
Do not continuously expose yourself and other conference par-
ticipants to high volumes.
Operating a delegate unit
To adjust the volume:
6
Vol -
Vol +
The volume of the conference units’ loudspeakers can be set via the
central unit (detailed information can be found in the ADN system
manual).
Turn the headphone volume control 6
• to the right to increase the volume
or
• to the left to reduce the volum.
At switch-off, the headphone volume is reset
to a medium level.
Page 13

Operating a chairperson unit
Operating a chairperson unit
The operation of the ADN C1 wired conference unit and the ADN-W C1 wireless
conference unit is identical.
Beside the chairperson functions, chairperson units offer the same functions
as delegate units.
A chairperson unit allows you to take the floor at any time without having to
“apply” for a comment. If your conference system comprises several chairperson units, all chairperson units have equal rights.
Granting speaking privileges
All participants who have made a request to speak will join a request-to-speak
list. Depending on the setting adjusted in the operating menu:
• the microphone LED 8 flashes green and the
signal light ring 2 flashes red.
or
• only the microphone LED 8 flashes green.
To grant speaking privileges to the next participant from the request-to-speak list:
Press the Next key 5.
The next participant from the request-to-speak
list is granted speaking privileges.
5
If you are using the “Conference Manager” software, you can also
grant speaking privileges with a mouse click (detailed information can
be found in the ADN system manual).
Ending a conference or withdrawing speaking privileges (cancel function)
Main Menu
Conference Menu
Clear Request List on Cancel
Set the function (“Clear Request List on
Cancel”) of the chairperson unit’s priority
key 4 via the central unit’s operating menu:
Page 14

Operating a chairperson unit
Setting Function of the priority key
„On“ Pressing the priority key 4 deactivates all delegate units. All
requests to speak are deleted.
„Off“ Pressing the priority key 4 deactivates all currently active
delegate units. All requests to speak are retained.
Briefly press the priority key 4.
The conference system behaves as set.
4
If you are using the “Conference Manager” software, you can also
deactivate all delegate units with a mouse (detailed information can
be found in the ADN system manual).
Muting all delegate units temporarily (priority function)
Using the priority function, the chairperson can interrupt a discussion at any
time. The speaking privileges of all chairperson units remain active at any time.
Keep the priority key 4 pressed for as long as you
2
want to mute the delegate units. All conference
units – except for the chairperson units – are muted
immediately. The microphone LED 8 and the signal
light ring 2 of the previously active conference units
8
flash red. You can take the floor immediately. The
microphone LED 8 and the signal light ring 2 of your
chairperson unit light up red.
Release the priority key 4.
The muting of the conference units is canceled. The
discussion is continued.
4
Page 15

Cleaning and maintaining the conference units
Cleaning and maintaining the conference
units
Remove the ADN-W BA battery pack from the ADN-W C1 or ADN-W D1 wireless
conference units (see „Inserting/removing the battery pack“).
Only use a dry and soft cloth to clean the products.
Clean the grids of the conference units with a soft brush or paintbrush in
order to avoid dust deposits.
Specifications
ADN D1 and ADN C1 conference units
Console
Supply voltage 35 V to 52.8 V$
Power consumption 2 W (without reproduction via loudspeakers)
Headphone socket 3.5 mm stereo jack socket
Output level at
headphone socket
THD (at 1 kHz) 0.03 % at 50 mW/16 Ω
Frequency response 100 Hz to 14.5 kHz
Signal-to-noise ratio > 70 dB(A)
Temperature range operation: +10 °C to +40 °C
Relative humidity operation: 10 to 80 %
Dimensions (W x H x D) 185 x 63 x 140 mm; without gooseneck
Weight approx. 700 g
Microphone
Pick-up pattern super-cardioid
Frequency response 190 Hz to 14.5 kHz
50 mW/16 Ω
storage: -25 °C to +70 °C
storage: 10 to 90 %
ADN-W D1 and ADN-W C1 wireless conference units
Console
RF frequency ranges 2.4 GHz, 5.1 to 5.9 GHz
RF output power max. 100 mW
Audio quality 16 bit / 32 kHz
Operating time > 20 hours (ADN-W BA battery pack)
Page 16

Specifications
ADN-W D1 and ADN-W C1 wireless conference units
Voltage for optional external
power supply
Charging time of battery
pack
Headphone socket 3.5 mm stereo jack socket
Output level at headphone
socket
THD (at 1 kHz) 0,03 % at 50 mW/16 Ω
Frequency response 100 Hz to 14.5 kHz
Signal-to-noise ratio > 70 dB(A)
Temperature range operation: +5 °C to +45 °C
Relative humidity operation: 20 to 80 %
Dimensions (W x H x D) 185 x 67 x 180 mm; without gooseneck
Weight approx. 940 g
Microphone see the instruction manual of the ADN-W MIC
12 V$ via ADN-W BA battery pack
typ. 4 hours
50 mW/16 Ω
storage: -25 °C to +70 °C
storage: 10 to 90 %
15 or ADN-W MIC 36 gooseneck microphone
 Loading...