

Page 1
PT300 QuickStart Guide
Part Number BFA10068 (for Verizon)
Welcome
Thanks for choosing the Sendum PT300 as
your Package Tracking solution!
The purpose of this Quick Start Guide is to
help you get your system up and running
as quickly as possible.
Your PT300 device (model BFA10068) has
been configured for use with the Verizon
wireless service.
Step 1: Get Familiar
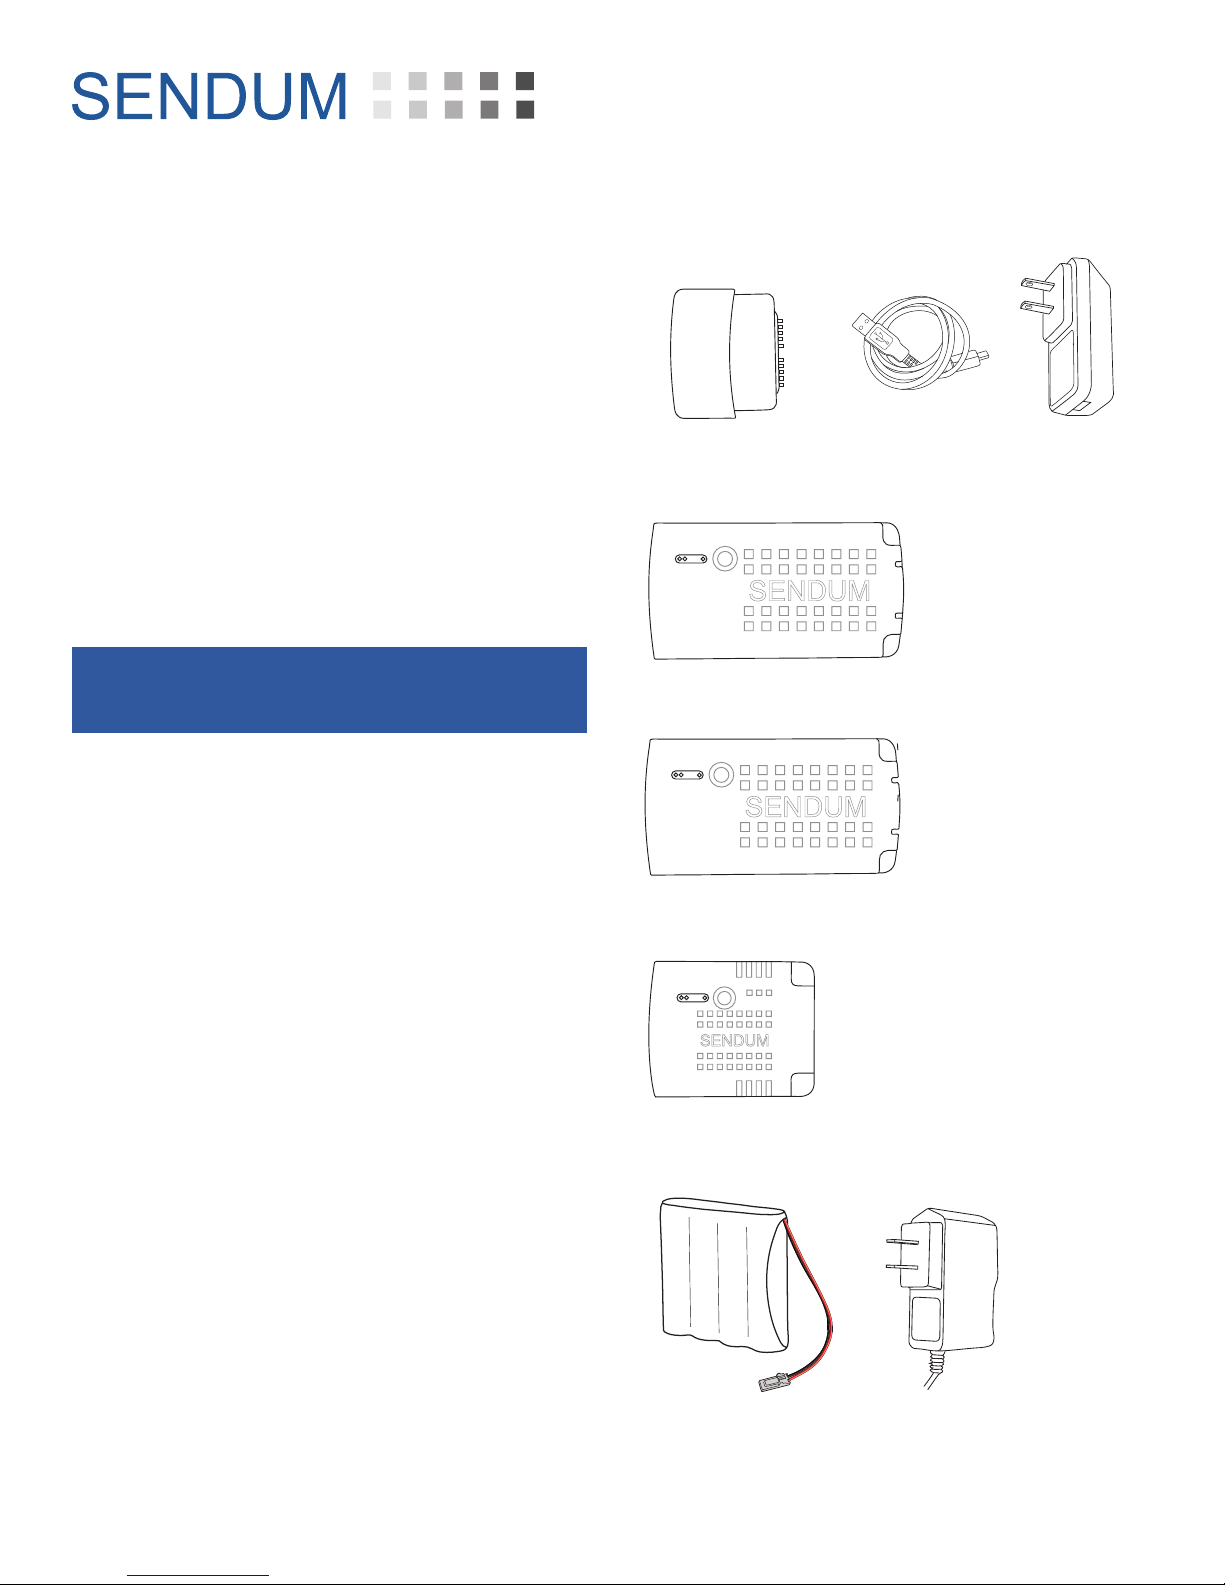
PT300 Trackers come in many different
varieties and configurations. Depending on
what you ordered, you may have some, or all,
of the components listed in “Figure 1 - PT300
Component List”.
PT300
Command Module
Basic Sensor Pack
Advanced Sensor Pack
USB to
mini-USB
Cable
P/N: MCA10017
P/N: BFA10062
P/N: BFA10063
AC Adapter
P/N: BFA10069
To get started working with your new PT300,
at a minimum you will need the PT300
Command Module complete with one of the
following:
• a Basic Sensor Pack with the AC Adapter
and Data Cable
• an Advanced Sensor Pack with the AC
Adapter and Data Cable, OR
• the Accessory Pack, complete with an
external power source such as the 10K
mAh Battery Pack (and Battery Charger)
Accessory Pack
P/N: BFA10077
10k mAh
Battery Pack
P/N: BFA10179
Figure 1 - PT300 Component List
Battery Charger
for 10k mAh Battery
P/N: BFA10095
-- 1 --
Page 2
Step 2: Charging
Just like with any new mobile device, you’ll
need to charge your device battery before you
can start using it. This is normally an overnight
process, or at least six hours.
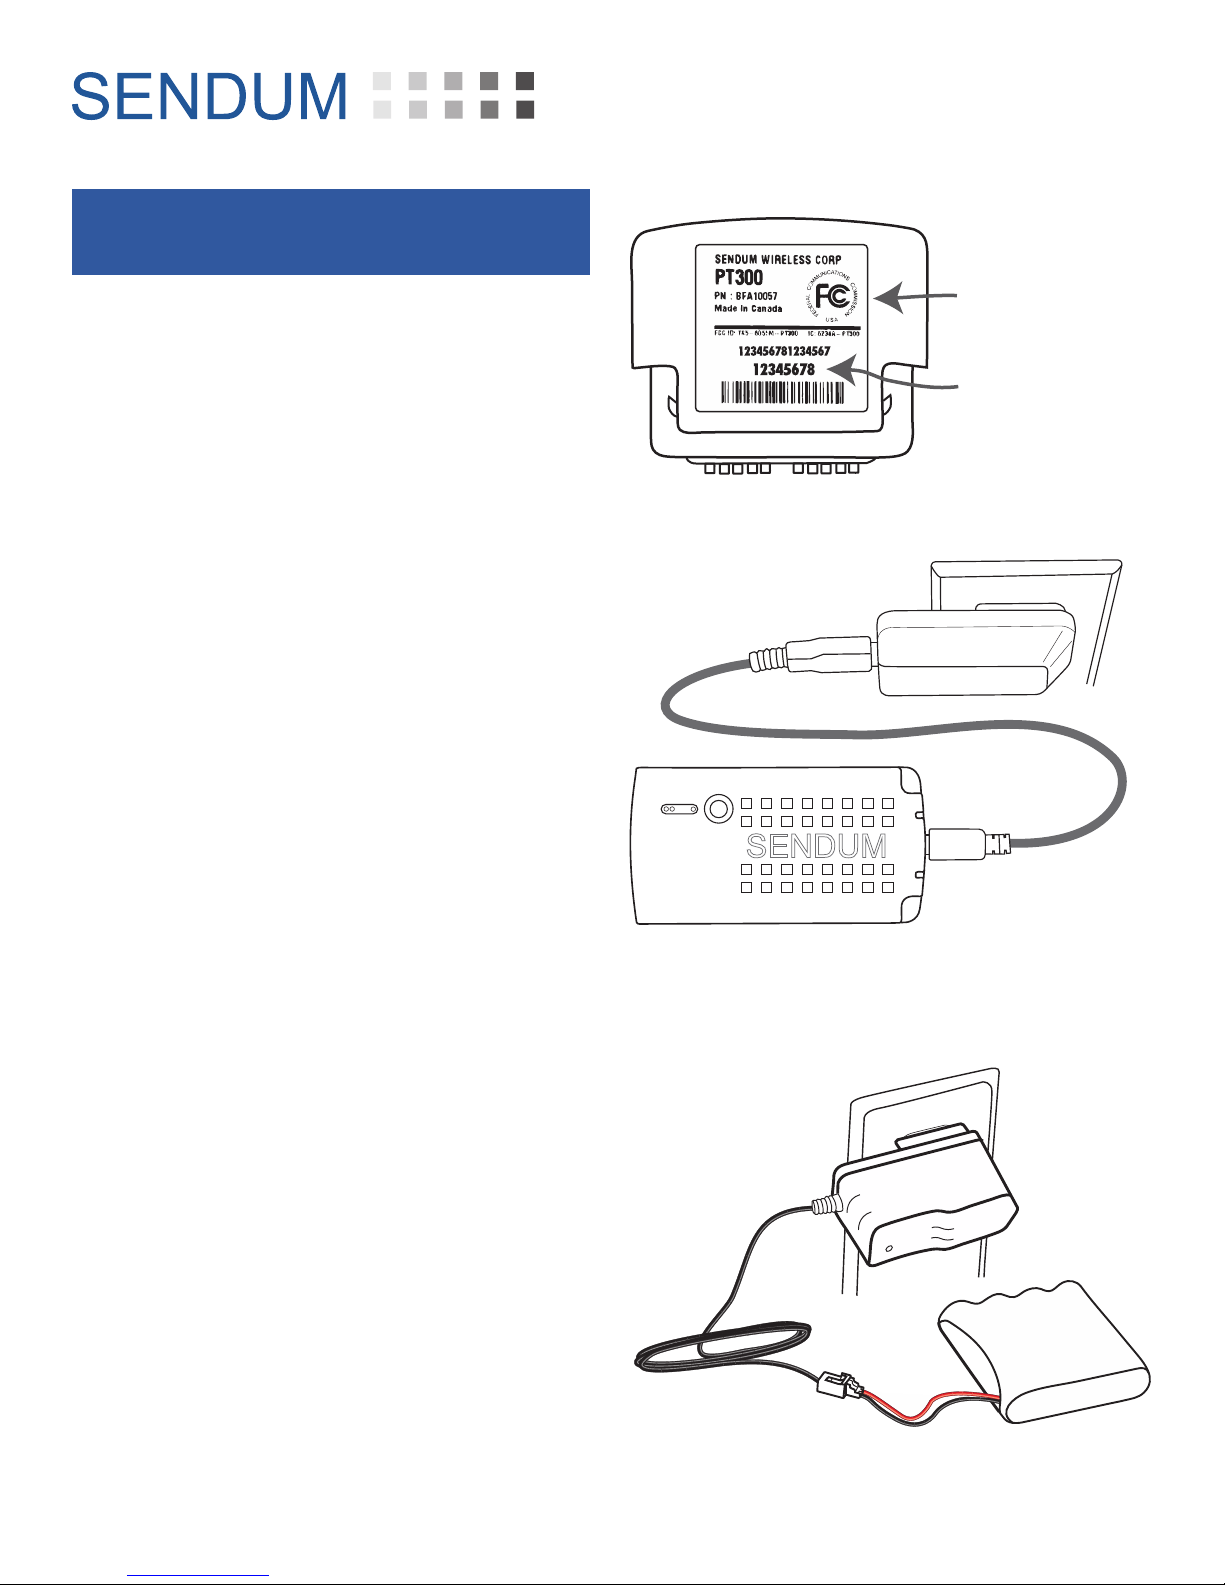
• If you are using either the Basic Sensor
Pack or the Advanced Sensor Pack, you can
charge it by connecting it to the AC Adapter
and then plugging the adapter into any
standard electrical receptacle (see “Figure
3 - Charging up a Sensor Pack”).
• If you are using an Accessory Pack with
the 10K mAh Battery Pack, the process is
similar. Just connect the battery to the AC
adapter and then plug the adapter into
the electrical receptacle (see “Figure 4 Charging the 10k mAh Battery Pack”)
PT300 QuickStart Guide
Part Number BFA10068 (for Verizon)
PT300 Command
Module
Device Identifier
Figure 2 - Locating the PT300 Device ID
AC Adapter
PT USB Cable
Sensor Pack
Figure 3 - Charging up a Sensor Pack
Figure 4 - Charging the 10k mAh Battery Pack
-- 2 --
Page 3
PT300 QuickStart Guide
Part Number BFA10068 (for Verizon)
Step 3: Airtime Account
In order for your device to operate and
communicate properly, you need to have a
machine-to-machine (M2M) airtime account
set up. If you don’t have an account, please
contact your Verizon representative and
provide them the ‘Device Identifier’ number of
your device.
The Device Identifier is device-specific
serial number found on the back of the
PT300 Command Module (see “Figure
2 - Locating the PT300 Device ID”
on page 2). This identifier is also
known as ESN, MEID, or IMEI.
What’s needed is an M2M airtime account with
SMS texting capability. Typical data plan sizes
are 1 MB, 5 MB, and 10 MB (with the 5 MB
plan being a popular choice).
Step 4 - Provision
Provisioning is a one-time, secure,
and anonymous process in which your
PT300 links with both the Verizon
network and the Sendum device
software to communicate registration
information and initiate operation of
the device.
The process for provisioning your device for
Verizon service is simple:
a) Turn on your PT300 (see “1. Turning
on your PT300” on page 5). This
step initiates communication with both
the Verizon wireless network and with
Sendum.
b) While communicating, both the Network
and Battery LEDs should go on and off
periodically. (See “3. LED Lights and
Status Button” on page 6.)
-- 3 --
c) When complete (about a minute), both
Network and Battery lights will go solid
green (indicating success).
d) Unplug the PT300 Command Module
from your pack. This ensures the device
is power-cycled, a necessary step before
the device can be operational.
e) The final step to provisioning is to make
at least one configuration change for
your device. Please refer to “Step 5 Web Access” and “Step 6 - Configure”.
You can also learn the Provisioning
process by watching our video at
www.sendum.com/pt300av
Page 4
PT300 QuickStart Guide
Part Number BFA10068 (for Verizon)
Step 5 - Web Access
a) Once you have an airtime account in
place and with your device successfully
provisioned, please open up your web
browser and go to Sendum’s web portal
(called Findum™) at
findum.sendum.com
b) If you already have a Findum account
in place and you ordered your new
product with the same email address,
your new PT300 device will have been
automatically added to your existing
account. Just log in using that email
address and your existing password.
c) If you are new to Findum, a new Findum
account would have been created for
you as a part of the purchase process.
The username for this new account is the
email address that you used, or specified,
during purchasing. To obtain a password
for this account, please go to findum.
sendum.com and click the “Forgot your
Password” link. Then just log into Findum
using your email address and your new
password. For a demo of this process,
please visit
www.sendum.com/getpassword
Step 6 - Configure
For complete information and tutorials on how
to use your PT300 trackers within Findum,
please refer to the detailed Findum Help Guide.
Once you are logged into Findum, the guide is
accessible by clicking the Help link in the upper
left hand corner of any Findum page.
Note that when first get your new tracker, you
will have to configure your device with an
Assisted Location, Autonomous Location, or
Sensor Reports interval before the device will
report data.
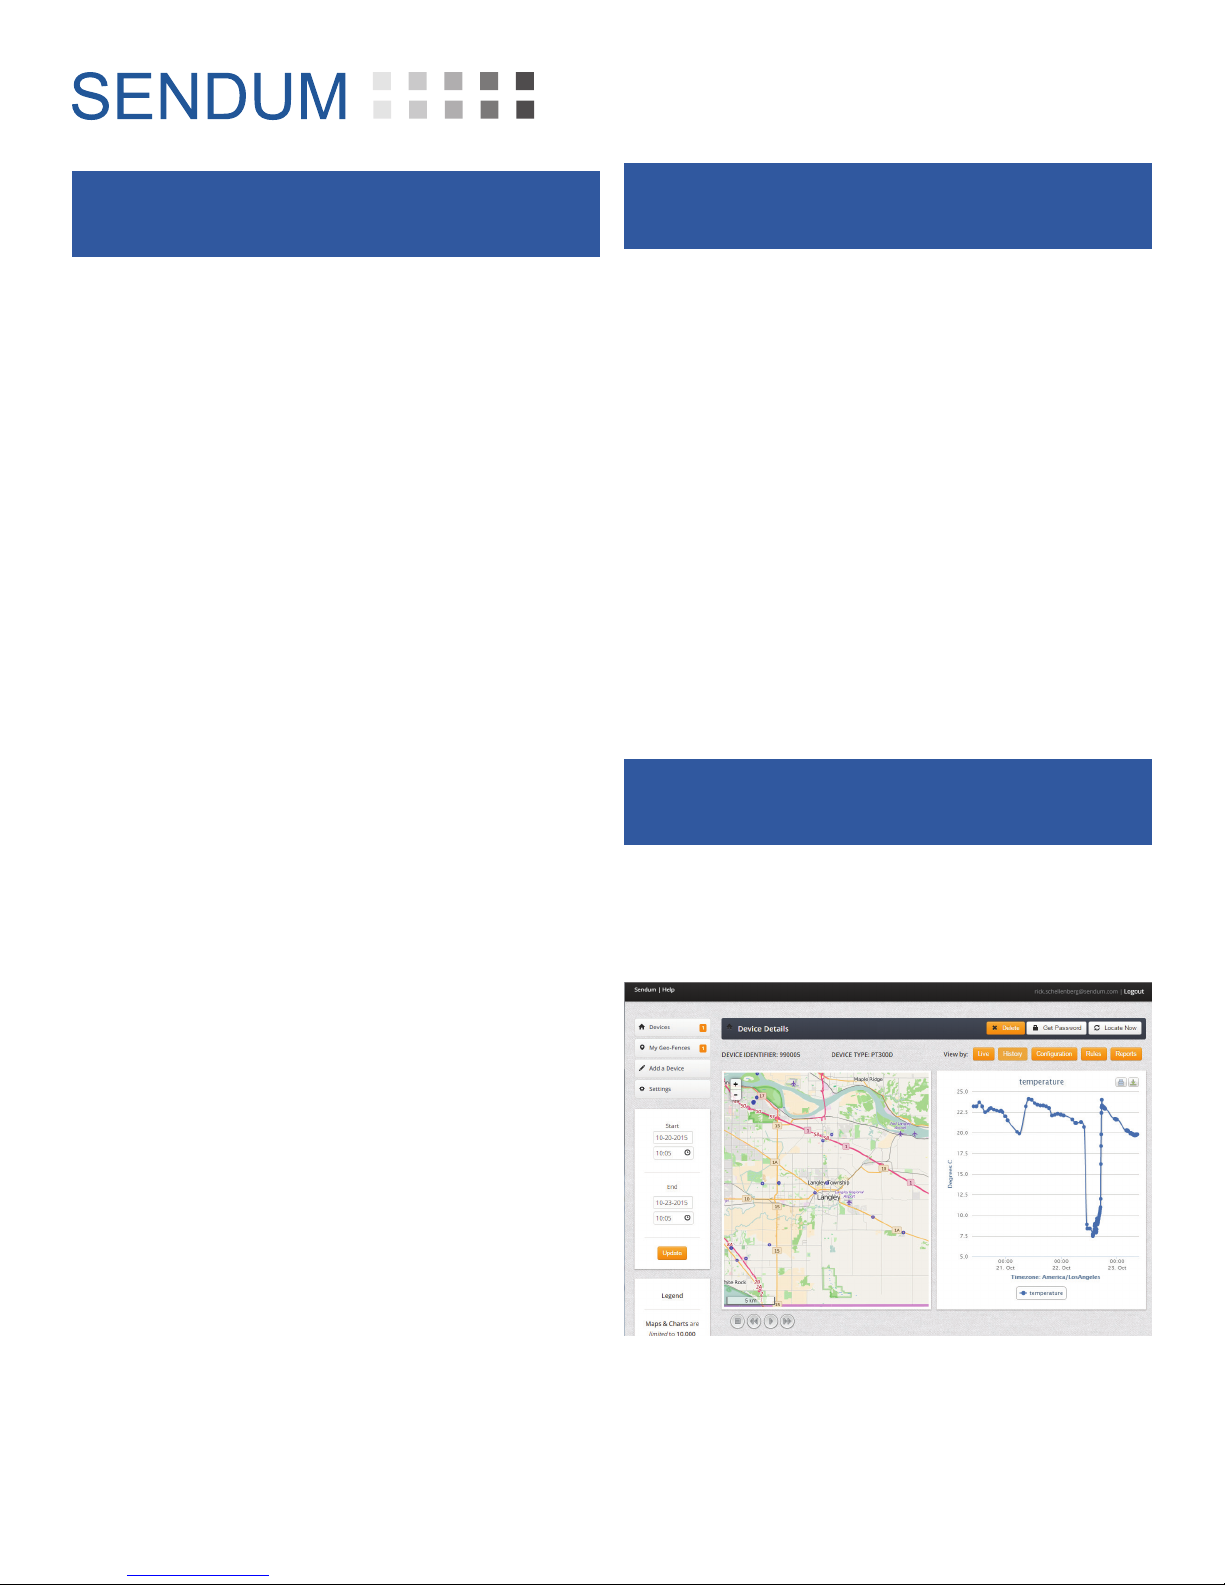
To access the Device Configuration page within
Findum, click the Devices menu item on the
left side, choose your device, then click the
Configuration tab.
Step 7 - View your Data
Once your PT300 has been configured, you will
be able to track location, gather data, and view
reports.
-- 4 --
Page 5
PT300 QuickStart Guide
Part Number BFA10068 (for Verizon)
Appendix
1. Turning on your PT300
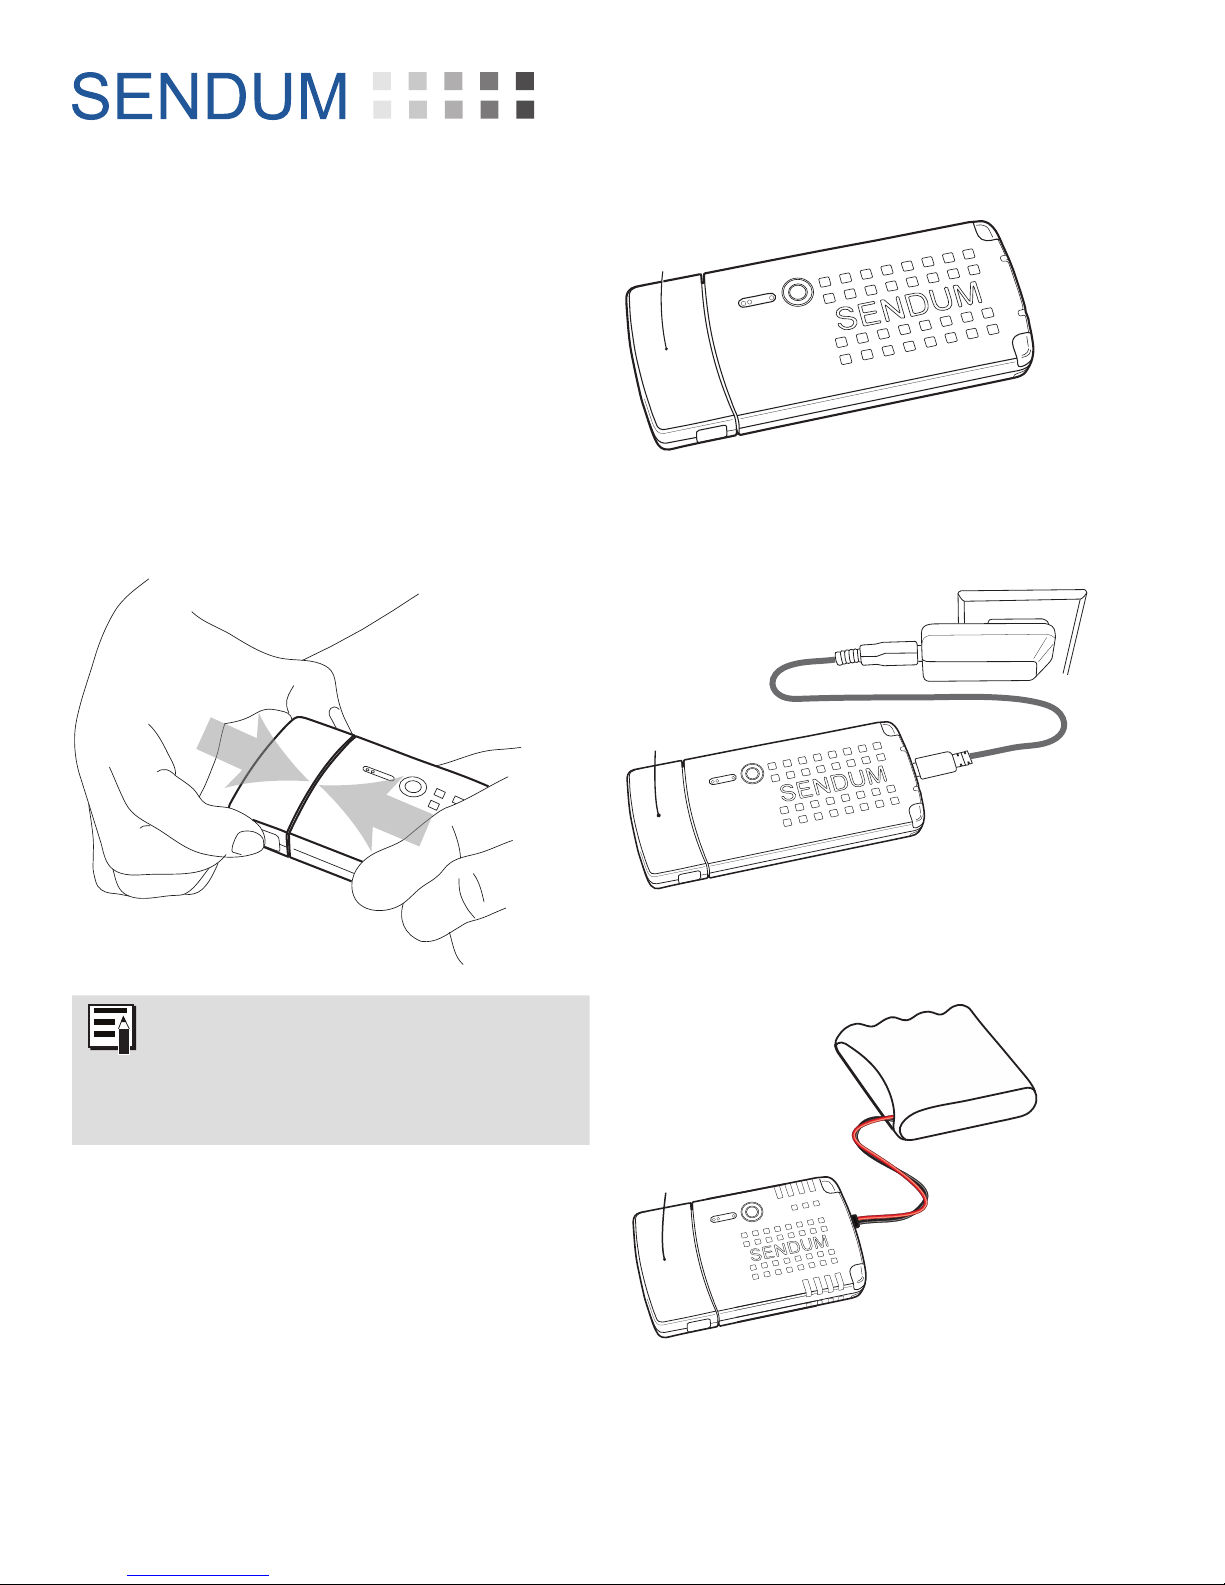
You can turn on (i.e. power up) your PT300 by
connecting the command module to a Sensor
or Accessory Pack.
To make the connection, simply push the
command module into the pack until you hear
a click sound. Once connected, ensure the
Charger LED is ON. The color will be either red
or green.
PT300
Command
Module
Sensor Pack with sufficient
battery charge
Figure 5 - Turning the PT300 on by connecting it
with a charged Sensor Pack
AC Adapter
PT300
Command
Module
Data Cable
When connecting any type of Sensor
or Accessory Pack to the Command
Module, always make sure the
connection is solid and that you hear
the confirming “Click” sound.
Sensor Pack
Figure 6 - Turning the PT300 on by connecting it
with a Sensor Pack being charged
10K mAh Battery Pack
with sucient charge
PT300
Command
Module
Accessory Pack
Figure 7 - Turning the PT300 on by connecting it
with an Accessory Pack and a charged 10K mAH
Battery Pack
-- 5 --
Page 6
PT300 QuickStart Guide
2. Turning off your PT300
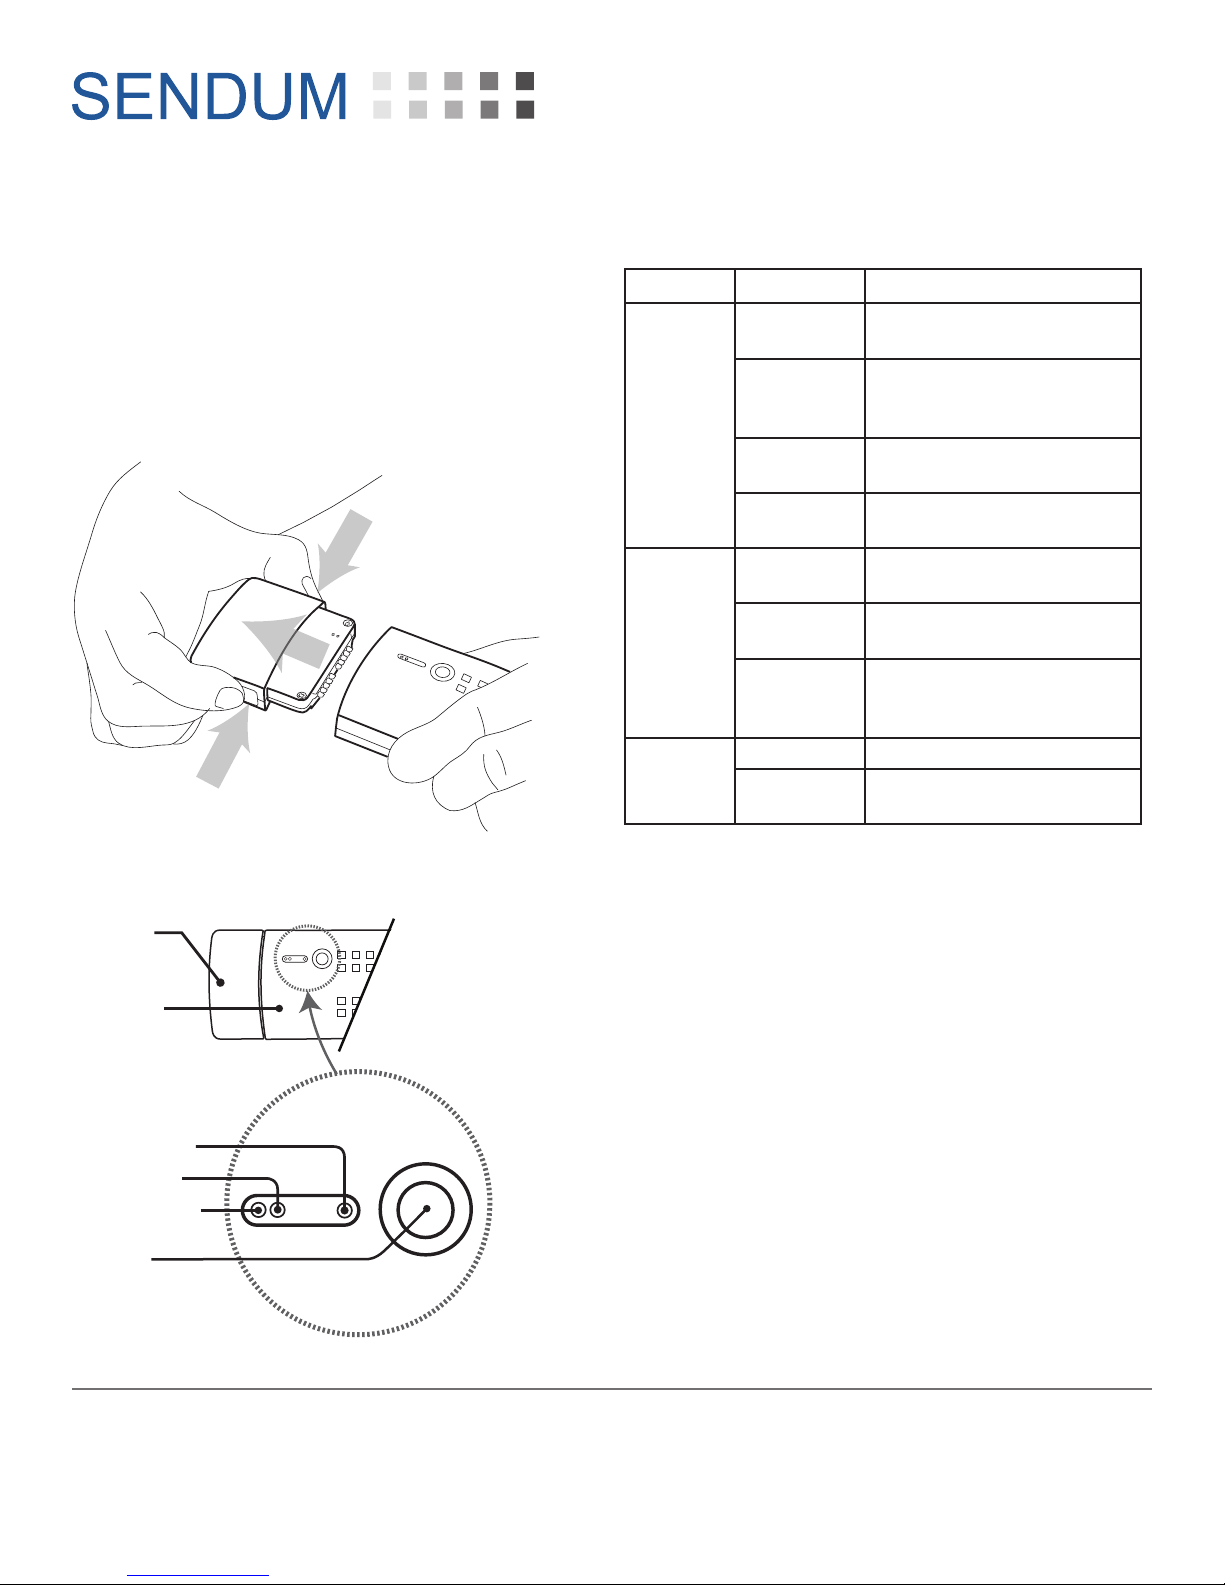
To turn off (or power down) your PT300, simply
unplug the PT300 Command Module from your
Sensor or Accessory Pack.
To do this, squeeze the two tabs on the side of
the command module, then pull the module
straight out of the pack.
4. LED Light Indications
LED Status Description
Device in carrier coverage
area
Device is in Aircraft
Transmission Suppression
Mode
Device out of carrier
coverage area
Device is in Coverage Sleep
Mode
Sensor Pack charge level
near full (80%+)
Sensor Pack needs
recharging
Sensor Pack charge level
good (approximately
20-80%)
Sensor Pack charging is
complete
Network
Battery
Charger
Green
Green
(Blinking)
Red
Red
(Blinking)
Green
Red
Red
(Blinking)
Red Sensor Pack is charging
Green
3. LED Lights and Status Button
PT300/
PT300D
Sensor or
Accessory
Pack
LED Indicators:
Charger
Battery
Network
Status
Button
SENDUM
4500 Beedie Street, Burnaby, BC V5J 5L2
Sendum Wireless Corporation
www.sendum.com
-- 6 --
 Loading...