

Page 1
z100.book Page 40 Wednesday, September 18, 2002 4:03 PM
4
Chapter 4 Messaging Features
This chapter introduces messaging features, such as
sending and receiving e-mail, viewing and
managing your message folders, customizing
message notifications, and using MSN® Messenger
and Short Message Service (SMS) messages, sending
and receiving Enhanced Message Service (EMS)
Messaging Features
messages, sending and receiving Multimedia
Message System (MMS) messages.
z Before you can use e-mail, you must have set
up your Z100 to send and receive e-mail
messages. The easiest way to do this is to visit
www.sendo.com/config.
sends an SMS to your phone (or sends the
information to your phone directly if it’s
connected to your PC using ActiveSync)
containing the settings you require to start using
e-mail.
z Note: EMS and MMS messages are handled by
the Multimedia Inbox. See for more
information.
The configurator
SMS messages
You can send and receive SMS messages of up to
160 GSM characters, or 70 Unicode characters.
GSM characters are used for all the Latin based
languages, whereas non-Latin characters use
Unicode characters which take up more space.
z Note: Unicode characters are used to enter
non-Latin characters on your phone. Unicode
characters take up more room on your phone,
so the length of the messages you can send is
restricted.
If an SMS message you send, or receive, is longer, it
is automatically broken down into several small SMS
messages, which are joined together as one SMS
message when all of the small SMS messages have
been received.
z Note: When you send a long SMS message, if
the phone receiving the messages is not
concatenated SMS enabled, then the messages
are separate and not necessarily in the correct
order. The Z100 IS concatenated SMS enabled.
The advantages of SMS messages include the
following:
• SMS messages are sent instantly.
• SMS messages can be sent or received during a
voice or data call.
• Most mobile phones support SMS, so most
recipients can read SMS messages you send.
z Note: SMS messages are not synchronized, so
you cannot use them to send or receive
attachments.
X
To import SMS messages from the SIM card to your
Inbox
1. On the Home screen, press Programs d,
select Inbox/SMS, and then press Action A.
2. Press Menu g, select Options, Import
Messages from SIM, and then press Action A.
z Note: You cannot export anything in your Inbox
from your phone to a SIM card.
SMS messages are not moved from the SIM
40 Sendo Z100 User Guide
Page 2
z100.book Page 41 Wednesday, September 18, 2002 4:03 PM
4
Messaging Features
card when they are imported to Inbox, they are
copied.
Sending e-mail and SMS messages
There are several ways to send e-mail and SMS
messages using your Z100. The easiest way to send
messages is from Inbox or from a contact card.
z Note: For information on text input see Entering
text and numbers on your phone
Sending messages from Inbox
You can send SMS messages directly from your
phone to any compatible device.
You can send e-mail messages by synchronizing with
your PC, or by connecting directly to an e-mail
server through your Internet service provider (ISP) or
a corporate network.
For more information on setting up your phone to
send and receive e-mail, please see E-mail set up.
For more information on Microsoft ActiveSync™see
Chapter 6 - Synchronizing Information
3. Move Down ; and enter a subject in the Subj:
field.
4. Move Down ;, enter your message, and then
select Send d.
z Note: To insert the @ sign for an e-mail
address, press 1 repeatedly, in multitap
mode, until the @ sign is displayed.
z Note: To send e-mail messages to multiple
recipients, separate each name with a
semicolon by repeatedly pressing 1, in
multitap mode, until a semicolon is displayed. If
you add the recipients from the contact list the
semicolon is inserted automatically.
z Note: If you have started to compose a message
and you decide you do not want to send it press
Menu g and select Cancel compose.
X
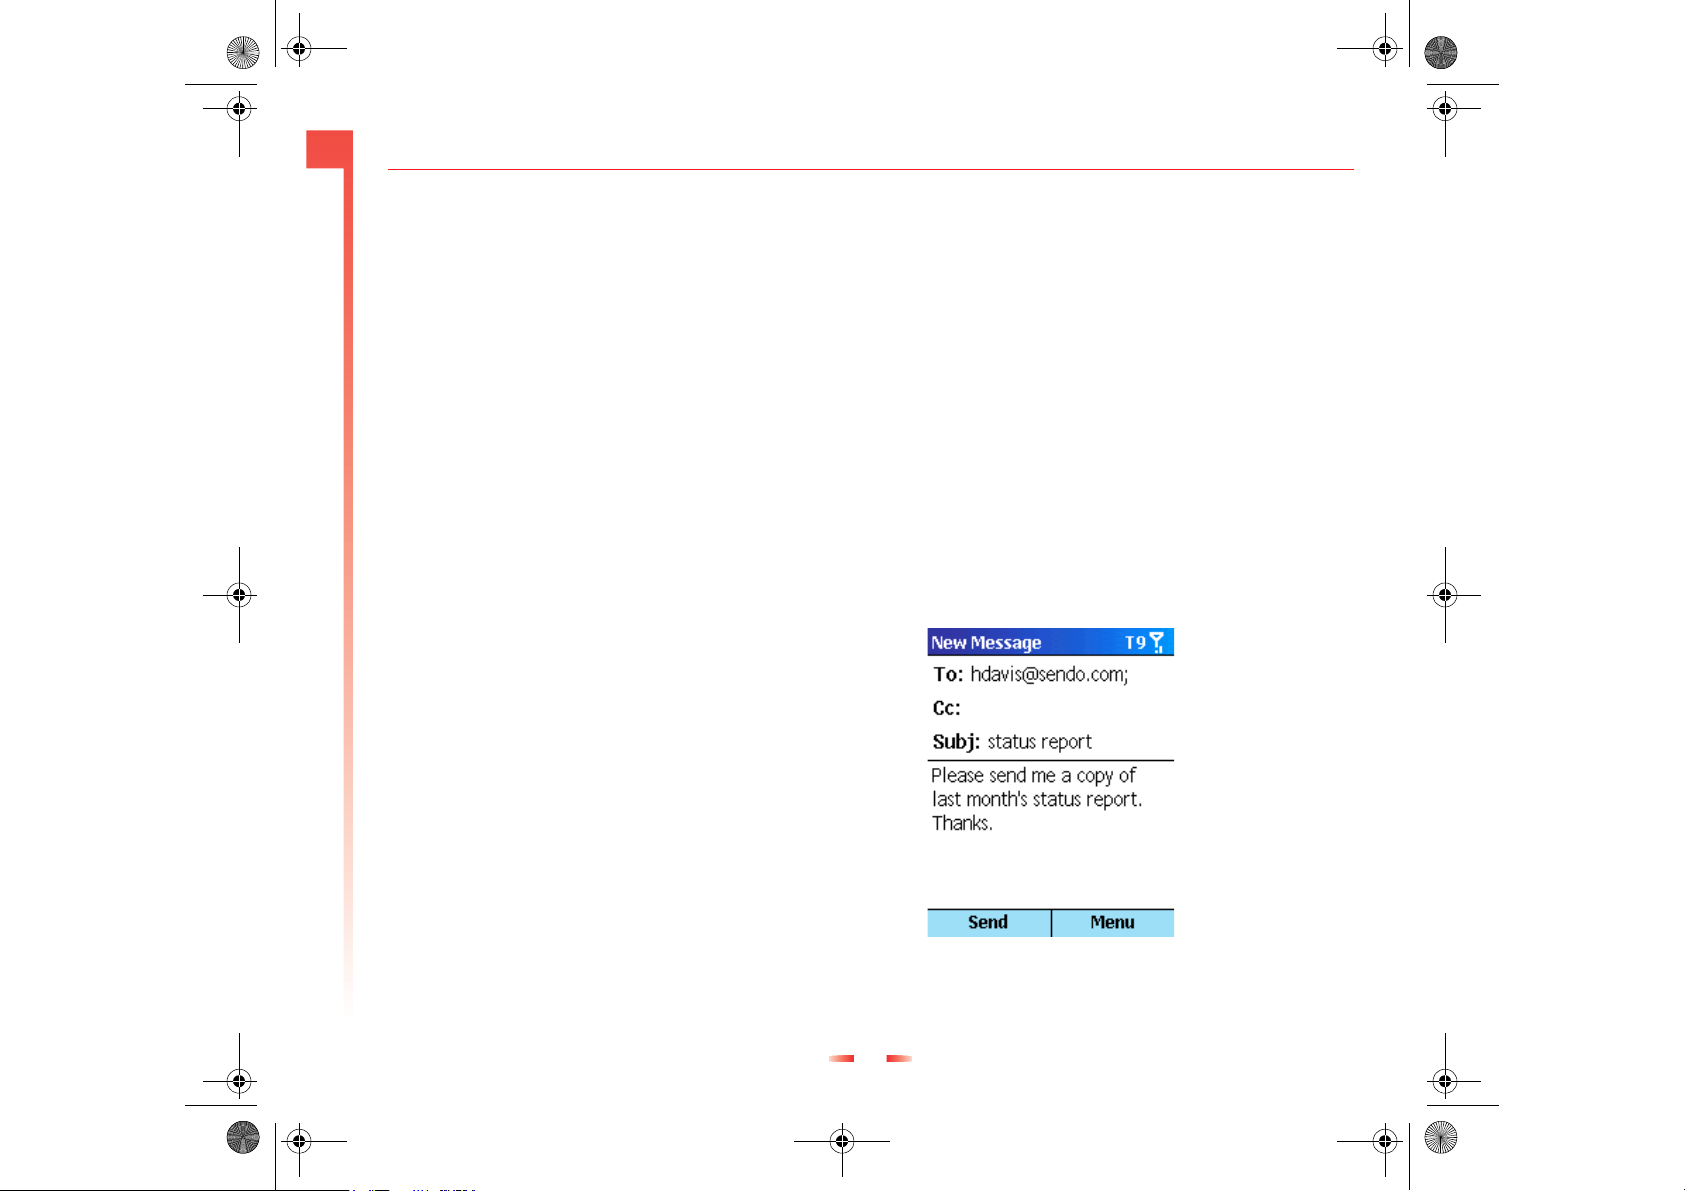
To compose an e-mail or SMS message from Inbox
1. On the Home screen, press Programs d,
select Inbox/SMS and then press Action A.
2. Select New d, enter an e-mail address or SMS
number in the To field.
z Tip: You can also select a name from your
Contacts. Press Action A and use the joystick to
select the relevant address or number for the
contact. Press Action A.
Figure 10 New e-mail
41 Sendo Z100 User Guide
Page 3
z100.book Page 42 Wednesday, September 18, 2002 4:03 PM
4
X
To request a delivery receipt for a SMS message
1. Before you send the SMS message, select Menu
g, select Message Options, and then press
Action A.
2. Select the Request SMS text message delivery
notification check box by pressing Action and
Messaging Features
then select Done d.
Sending messages from a Contact card
You can send a message to a contact quickly if you
have an e-mail address or SMS number included in
their contact card.
X
To compose an e-mail or SMS message from a
contact card
1. On the Home screen, press Contacts g.
2. Use the : and ; keys to select a contact and
press Action A.
3. Use the : and ; keys to select the e-mail
address or SMS number and press Action A.
4. Move Down ; to enter a Subj: (subject).
5. Press Down ;, enter your message, and then
press Send d.
X
To insert predefined text into a message
1. On the Home screen, select Programs d,
select Inbox/SMS, and then press Action A.
2. Press New d and enter the contact details and
subject as required. When the cursor is in the
body text field, press Menu g, select Insert
Te xt , and press Action A.
3. Use the : and ; keys to select the text you
want to insert into your message and press Insert
d.
X
To edit predefined text
1. On the Home screen, press Programs d,
select Inbox/SMS, then press Action A.
2. Press Menu g, select Options, Predefined Text,
and then press Action A.
3. Select the text you want to modify using the:
and ; keys. Overtype the text as required and
press Done d.
Inserting voice recordings into e-mails
You can insert a voice message into an e-mail
message.
Inserting predefined text into messages
You can save time when writing messages by
inserting predefined text. Your phone comes with
some predefined text already set up, but you can
change it to words or phrases that you use most
often.
X
To insert a voice recording into an e-mail
1. On the Home screen, press Programs d,
select Inbox/SMS, and then press Action A.
2. Press New d and enter the contact details and
subject as required. Move down to the body text
field and press Menu g, Insert Recording.
3. Press Record d to start recording and select
Stop d to stop recording.
42 Sendo Z100 User Guide
Page 4
z100.book Page 43 Wednesday, September 18, 2002 4:03 PM
4
4. Select Done d to insert the recording into your
message.
z Note: Only one voice recording can be stored.
When you make a new voice recording, it
replaces the previous one.
Messaging Features
z Note: You cannot insert a voice message into an
SMS message.
Receiving e-mail and SMS messages
This section deals with how you are notified when
you receive messages and how you can view and
manage all messages that you receive.
Message notifications
Your phone makes a sound to alert you when a new
message arrives. The number of unopened
messages is displayed on the Home screen
(depending on your Home screen settings) and an
envelope icon is displayed in the title bar. You are
notified in different ways for the types of messages
you receive.
SMS messages: These messages are delivered
immediately to your phone. If your phone is turned
off when SMS messages arrive, you are notified the
next time you turn your phone on. A closed envelope
icon , indicating an unopened SMS message, is
displayed in the title bar, accompanied by an SMS
sound alert. Use your Inbox to view new SMS
messages.
E-mail messages: When you connect to your e-mail
server, you are notified of new e-mail messages by a
closed envelope icon displayed in the title bar,
accompanied by an e-mail sound alert. Use your
Inbox to view new e-mail messages.
Voice mail messages: You are notified of new voice
mail messages by the new voice mail icon
displayed in the title bar. You can listen to your new
voice mail messages by selecting the Voice Mail soft
key if it is displayed, by pressing 1, which is the
default speed dial for voice mail services, or by
calling your voice mail service number.
X
To modify a sound alert for notifications
1. On the Home screen, press Programs d,
select Settings, Sounds, and then press Action
A.
2. Select the item to modify, move Left [ or Right
] to select a new sound, and then press Done
d.
All SMS and e-mail messages you received are
displayed in the Inbox. You can receive e-mail
messages through Inbox synchronization with your
PC or by connecting to your e-mail server.
When you connect to the e-mail server, or
synchronize your Inbox with your desktop, only the
first 1000 bytes of each new message are
downloaded to your phone, by default. If you are
using an IMAP4 or POP3 server, only the first 1 KB of
each new message is downloaded. Only small
attachments are downloaded and the original
messages remain on the e-mail server or your
desktop computer.
43 Sendo Z100 User Guide
Page 5
z100.book Page 44 Wednesday, September 18, 2002 4:03 PM
4
Messaging Features
z Note: For more information on synchronizing
your Inbox, see Chapter 6 - Synchronizing
Information.
Opening messages
E-mail and SMS messages sent to you are stored in
your Inbox.
X
To open a message
1. On the Home screen, press Programs d,
select Inbox/SMS, and then press Action A.
2. Select the message to open using the : and ;
keys and press Action A.
z Tip: If you want to create a contact card for the
sender, press Menu g, select Add Sender to
Contacts, and then press Action A.
X
To forward a message
1. On the Home screen, press Programs d,
select Inbox/SMS, and then press Action A.
2. Use the : and ; keys to select the message to
forward. Press Action A.
3. Press Menu g and select Forward. Press
Action A.
4. Enter the phone number or e-mail address to
forward the message to in the To field. Press
Send d.
X
To delete a message
1. On the Home screen, press Programs d,
select Inbox/SMS, and then press Action A.
2. Use the : and ; keys to select the message to
forward. Press Action A.
3. Press Menu g and select Delete. Press Action
A.
z Note: When you delete a message on your
phone, it is also deleted from the e-mail server
the next time you connect.
Receiving meeting requests
When you accept a meeting request that arrives in
Inbox, the meeting is displayed in Calendar, and an
acceptance message is returned to the meeting
organizer the next time you synchronize Inbox.
X
To accept a meeting request
1. On the Home screen, press Programs d,
select Inbox/SMS, and then press Action A.
2. Select the meeting request, press Action, and
then select Accept A.
Receiving complete messages
You can receive messages in full, instead of only
receiving the default 1000 bytes.
X
To receive a complete message
1. On the Home screen, press Programs d,
select Inbox/SMS, and then press Action A.
2. Select the message to receive in full, press Menu
g, select Mark for Download, and then press
Action A.
3. The complete message is retrieved the next time
you synchronize or connect to your e-mail server.
44 Sendo Z100 User Guide
Page 6
z100.book Page 45 Wednesday, September 18, 2002 4:03 PM
4
Messaging Features
Receiving message attachments
You can download message attachments to your
phone. Attachments are displayed as a list of icons
and hyperlinks at the bottom of an e-mail message.
The text of the hyperlink contains the file name
followed by the size of the attachment, so you can
decide whether to download the attachment.
z Note: On POP3 messages, the attachment size
is not displayed.
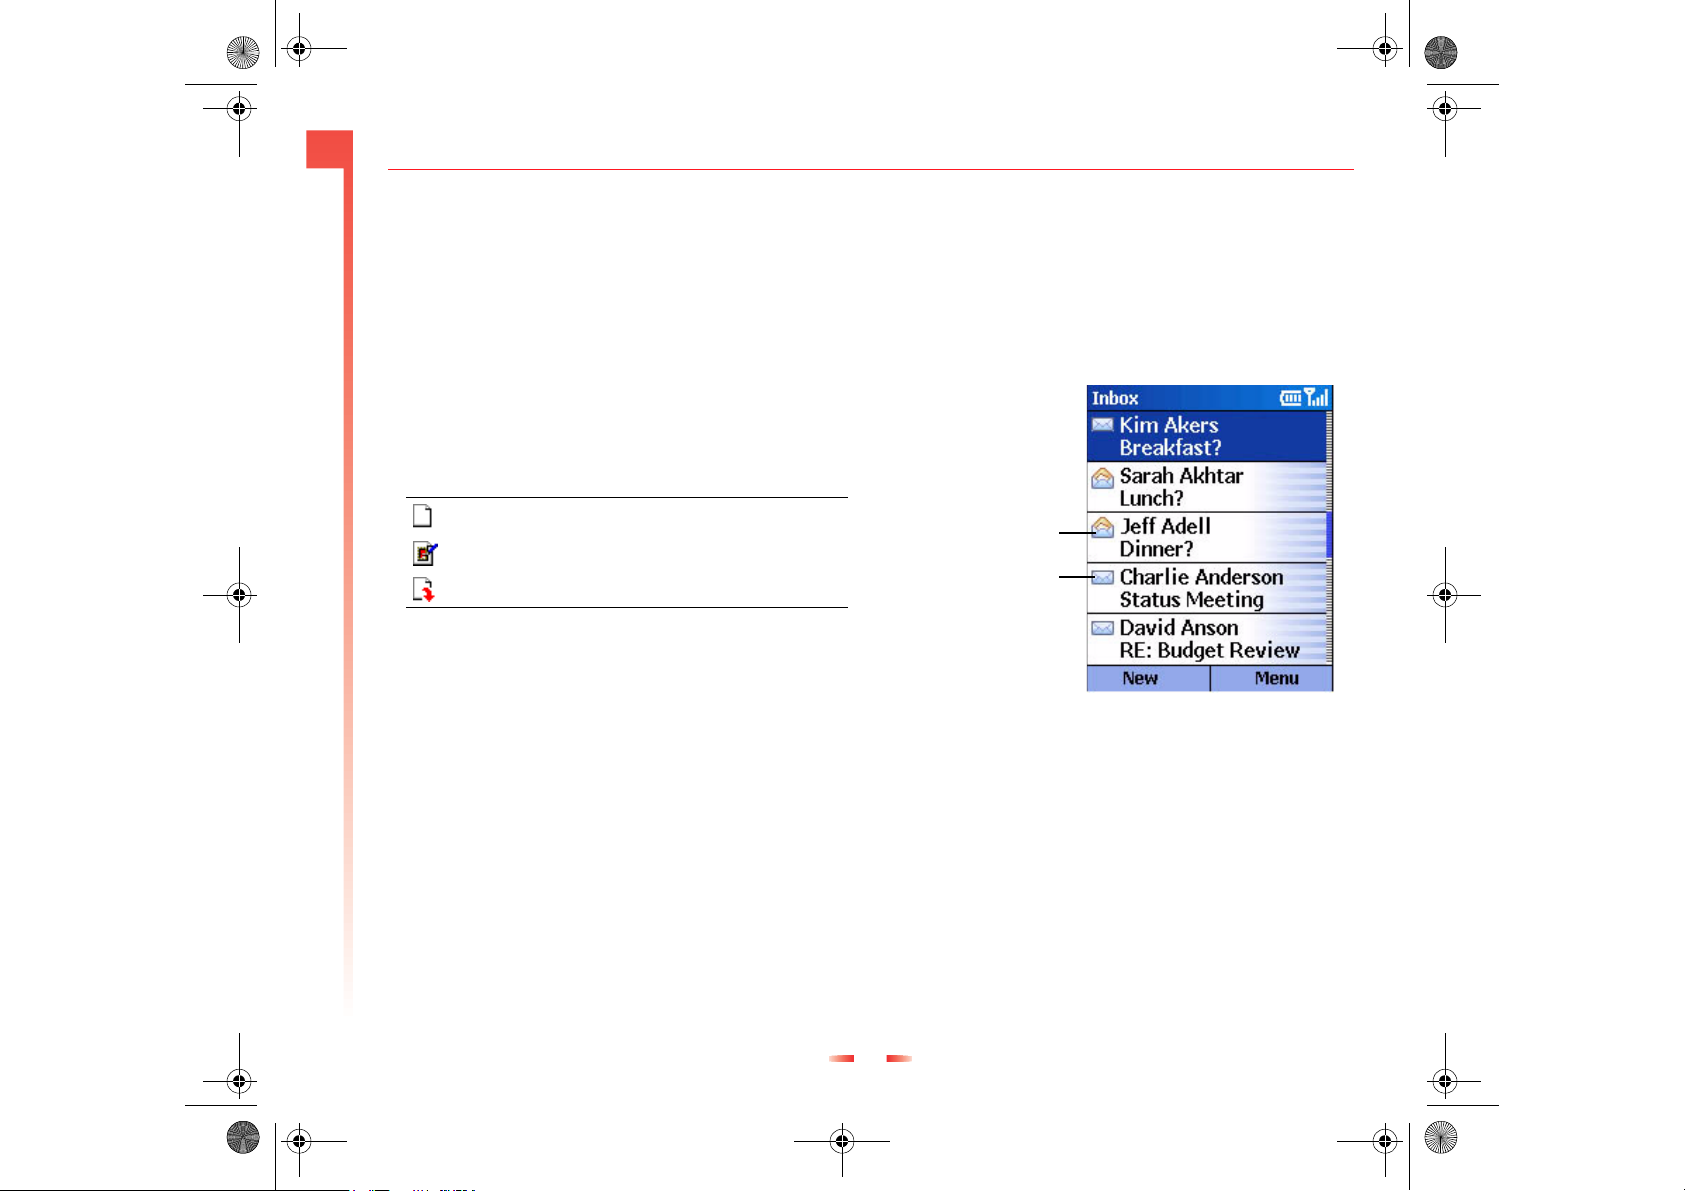
The attachment icon appears in three different ways,
depending on the attachment status:
Not downloaded
Downloaded
Marked for download
X
To download an attachment
• In an open message containing an attachment
for download, use the : and ; keys to select
the attachment and press Action A.
The attachment is downloaded when you
synchronize or request to send and receive email.
X
To view a downloaded attachment
• In an open message containing a downloaded
attachment, select the attachment and press
Action.
z Note: You can only view attachments for file
types that are supported by your phone.
Managing your Inbox
All e-mail and SMS messages are stored in the
Inbox. The most recently received messages are
displayed at the top. You can quickly create, delete,
forward, and reply to messages in your Inbox. You
can also customize your Inbox settings to control the
way you send, receive, and view messages.
Indicates opened e-mailIndicates opened e-mail
Indicates new e-mail
Figure 11 Inbox
X
To vie w y ou r I nbo x
• On the Home screen, press Programs d, select
Inbox/SMS, and then press Action A.
Using Inbox menu options
It’s easy to complete common messaging tasks using
your Inbox.
45 Sendo Z100 User Guide
Page 7
z100.book Page 46 Wednesday, September 18, 2002 4:03 PM
4
X
To view Inbox menu options
• On the Inbox/SMS screen, press Menu g.
Select To:
New Message Open a new message.
Reply Reply to an open or selected message.
Messaging Features
Forward Forward the selected message.
Delete Delete the selected message.
Mark for
Download
Mark as Read Display the header text of a message in your
Mark as
Unread
Options Display a list of Inbox options that you can
Send/Receive
E-mail
Show Folders Display all message folders.
Retrieve the entire e-mail message from the email server the next time you connect.
Inbox in lightface, indicating that the message
has been read.
Display the header text of a message in your
Inbox in bold, indicating that the message has
not been read.
customize. For more information see
Customizing your Inbox
Connect to your e-mail server to send and
receive messages.
Customizing your Inbox
You can set up your Inbox to work the best way for
you. For example, you can change the way your
messages are displayed, specify how you want your
messages to be sorted, specify the volume or limit
the size of messages you want to automatically
download, change your synchronization schedule,
and more.
X
To view Inbox Options
1. On the Inbox/SMS screen, press Menu g,
select Options, and then press Action A.
Display
Use the Display settings to change the message
information displayed in your Inbox.
X
To show date and time information in the message
list
1. On the Options screen select Display.
2. Select the Show Date and Time in the message
list checkbox, by selecting the field and pressing
Action A. A tick is displayed in the box.
3. Press Done d.
X
To So r t m es sa ges
1. On the Options screen select Display and press
Action A.
2. Use the ; key to move to the Sort messages by
fields.
3. Use the [ and ] keys to select whether to
display messages by Date received, Subject or
Sender and whether the messages are displayed
in Ascending or Descending order.
4. Press Done d.
46 Sendo Z100 User Guide
Page 8
z100.book Page 47 Wednesday, September 18, 2002 4:03 PM
4
Messaging Features
Sending
Use the Sending options to set up defaults for
sending messages. Select one of the following
checkboxes:
Select this To
Include copy of
original
message when
replying to an
e-mail
Save copies of
sent items
Use Unicode
for SMS when
necessary
Server requires
Authentication
Always include the e-mail you are replying to in
your outgoing e-mail message.
Always save copies of outgoing e-mails. This
does not apply to SMS messages which are
always stored.
If you insert a Unicode character into a
message, the whole message is changed to
Unicode. Remember that using Unicode
characters limits the size of your message.
This is only relevant if you are using an SMTP
server to send e-mails. If you select this
checkbox, every time you send an e-mail your
user details are verified by the SMTP server
before the e-mail is delivered.
Receiving
Use the Receiving options to limit the size of new
messages that are automatically downloaded.
X
To set the size limit of messages which are
downloaded automatically
1. On the Options screen select Receiving and
press Action A.
2. Use the [ and ] keys to scroll through the
options: Header only, Entire message, first
500 bytes, first 1000 bytes or first 5000 bytes.
3. Press Done d.
Pre-defined text
Use this option to edit the predefined text that you
can insert in messages.
X
To amend pre-defined text
1. On the Options screen select Pre-defined text
and press Action A.
2. Use the : and; keys to select the text you want
to change. You can edit the existing text or
change it completely.
3. Press Done d.
E-mail set up
The easiest way to set your Z100 up to send and
receive e-mail is to visit www.sendo.com/support/
config to autoconfigure your e-mail settings. The
configurator sends an SMS to your phone (or sends
the information to your phone directly if it connected
to your PC using ActiveSync) containing all the
settings you require to start using e-mail.
z Note: You can also use the Smartphone
Configuration Wizard on the Z100 Companion
CD to set up e-mail, but you will need to know
the required settings.
Alternatively, use this option to configure your phone
to send and receive e-mail messages. Your service
provider or network administrator will need to
provide you with the necessary information to
connect to your e-mail server.
47 Sendo Z100 User Guide
Page 9
z100.book Page 48 Wednesday, September 18, 2002 4:03 PM
4
Messaging Features
z Warning: Before you can complete the e-mail
set up, you must have set up data connections
which allow you to connect to the internet.
Refer to Data Connections.
X
To set up an e-mail connection
1. On the Home screen, Press Programs d,
select Inbox/SMS and press Action A.
2. Press Menu g, select Options and then press
Action A.
3. Select E-mail Setup and press Action A.
4. Press Next g.
5. Enter You r N a me , your E-mail address and the
Server type (This defines the mail protocol your
mailbox service provider recommends). You can
use the [ and ] keys to select the type of
server: POP3 or IMAP4. You can get this
information from your Internet Service Provider
or your corporate IT admistrator. Press Next g.
6. Enter the Incoming mail server - this could be an
IP address or the host name. You can get this
information from your Internet Service Provider
or your corporate IT admistrator.
7. Enter the outgoing mail server - This could be
the IP address or host name). You can get this
information from your Internet Service Provider
or your corporate IT admistrator.
8. Use the [ and ] keys to select the type of
Network to connect to: Internet, secure WAP
network, WAP network or My Corporate
Network.
z Note: You must have already set up the data
connections for the type of network you want to
connect to. Please refer to Data Connections
for more information on how to do this.
9. Press Next g.
10. Enter your Username, Password and Domain, if
required. You can also select the Save Password
checkbox if you want your password to be
remembered on your phone.
11. Press Next g.
12. Press Finish g. You can now send and receive
e-mails.
Automatic Synchronization
Use this option to define how often your Z100
synchronizes with your desktop PC or server
automatically.
X
Set up your Synchronization schedule
1. On the Options screen select Automatic
Synchronization and press Action A.
2. Under the Connect on timed basis field, use the
[ and ] keys to select how often the phone
synchronizes.
3. Press Done d.
z Note: The processing speed of the phone is
considerably slowed while synchronising, so
that you may not be able to receive calls. Do
not set automatic synchronisation too often if it
will interrupt useof your phone.
48 Sendo Z100 User Guide
Page 10
z100.book Page 49 Wednesday, September 18, 2002 4:03 PM
4
Messaging Features
Import Messages from SIM
Use this option to import SMS messages from a SIM
card to your Inbox. The messages are not removed
from the SIM card when they are imported, they are
copied.
X
Import messages from a SIM card
1. On the Options screen select Import Messages
from SIM and press Action A.
2. The messages are imported – the next time you
check your Inbox, all the messages from your
SIM card are displayed.
Transport Options (IMAP only)
This option is only displayed when you are using an
IMAP server. Select this to set up mail transport
options for IMAP servers. For example, IMAP4 allows
you to download e-mail messages received during a
specified number of days.
X
Set up IMAP server options
1. Under the When downloading e-mail, get: field,
use the [ and ] keys to select how often emails are downloaded from the server: All
messages, Today’s messages, last 3 days of email, last 5 days of e-mail, last 30 days of email.
2. Press Done d.
Managing your message folders
All incoming messages are stored in your Inbox, but
there are more folders, which you can use to
manage your messages more effectively.
Messages are stored in the following folders:
Folder Messages
Inbox All messages that you receive are sent here by
Deleted Items Messages that you delete are stored here until
Drafts Messages that you save before sending are
Outbox E-mail messages are stored here until you
Sent Items Copies of all e-mail and SMS messages that
X
To view message folders
1. On the Home screen, press Programs d,
select Inbox/SMS, and then press Action A.
2. Press Menu g, Show Folders, and then press
Action A.
z Note: If your e-mail account supports folders,
you can view multiple folders to reflect the
folder structure that you have created on your email server. Messages you download from the
server are automatically placed in the correct
folders on your phone.
default.
you empty this folder.
stored here.
synchronize or connect to your e-mail server.
SMS messages are sent immediately over the
network and only appear in your Outbox folder
for a few seconds.
you send are stored here.
49 Sendo Z100 User Guide
Page 11
z100.book Page 50 Wednesday, September 18, 2002 4:03 PM
4
z Note: Remember to make backup copies of all
important data. In the event that your phone
needs to be sent for repair, delete all security
sensitive data.
Communicating with MSN Messenger
Messaging Features
You can use MSN® Messenger on your phone to
send instant messages. MSN Messenger on your
phone has the same chat environment as MSN
Messenger on your desktop computer, so you can
chat to anyone who is using MSN Messenger
anywhere in the world. Features include:
• Sending and receiving instant messages.
• Seeing the status of others in your Messenger
contacts list, or changing your own status (e.g.,
available, busy, out to lunch).
• Inviting other people to a chat conversation.
• Blocking contacts from seeing your status or
sending you messages.
Getting started with MSN Messenger
• To use MSN Messenger, you need a Microsoft®
.NET Passport account unless you already have a
Hotmail account. To set up a Microsoft .NET
Passport account, go to: http://
www.passport.com.
2. Enter your Sign-in name and Password, and
press Sign In d.
3. To sign out, press Menu g, select Sign out,
and then press Action A.
z Note: If you do not sign out of MSN Messenger,
the internet connection stays open. This may
result in additional charges from your service
provider.
X
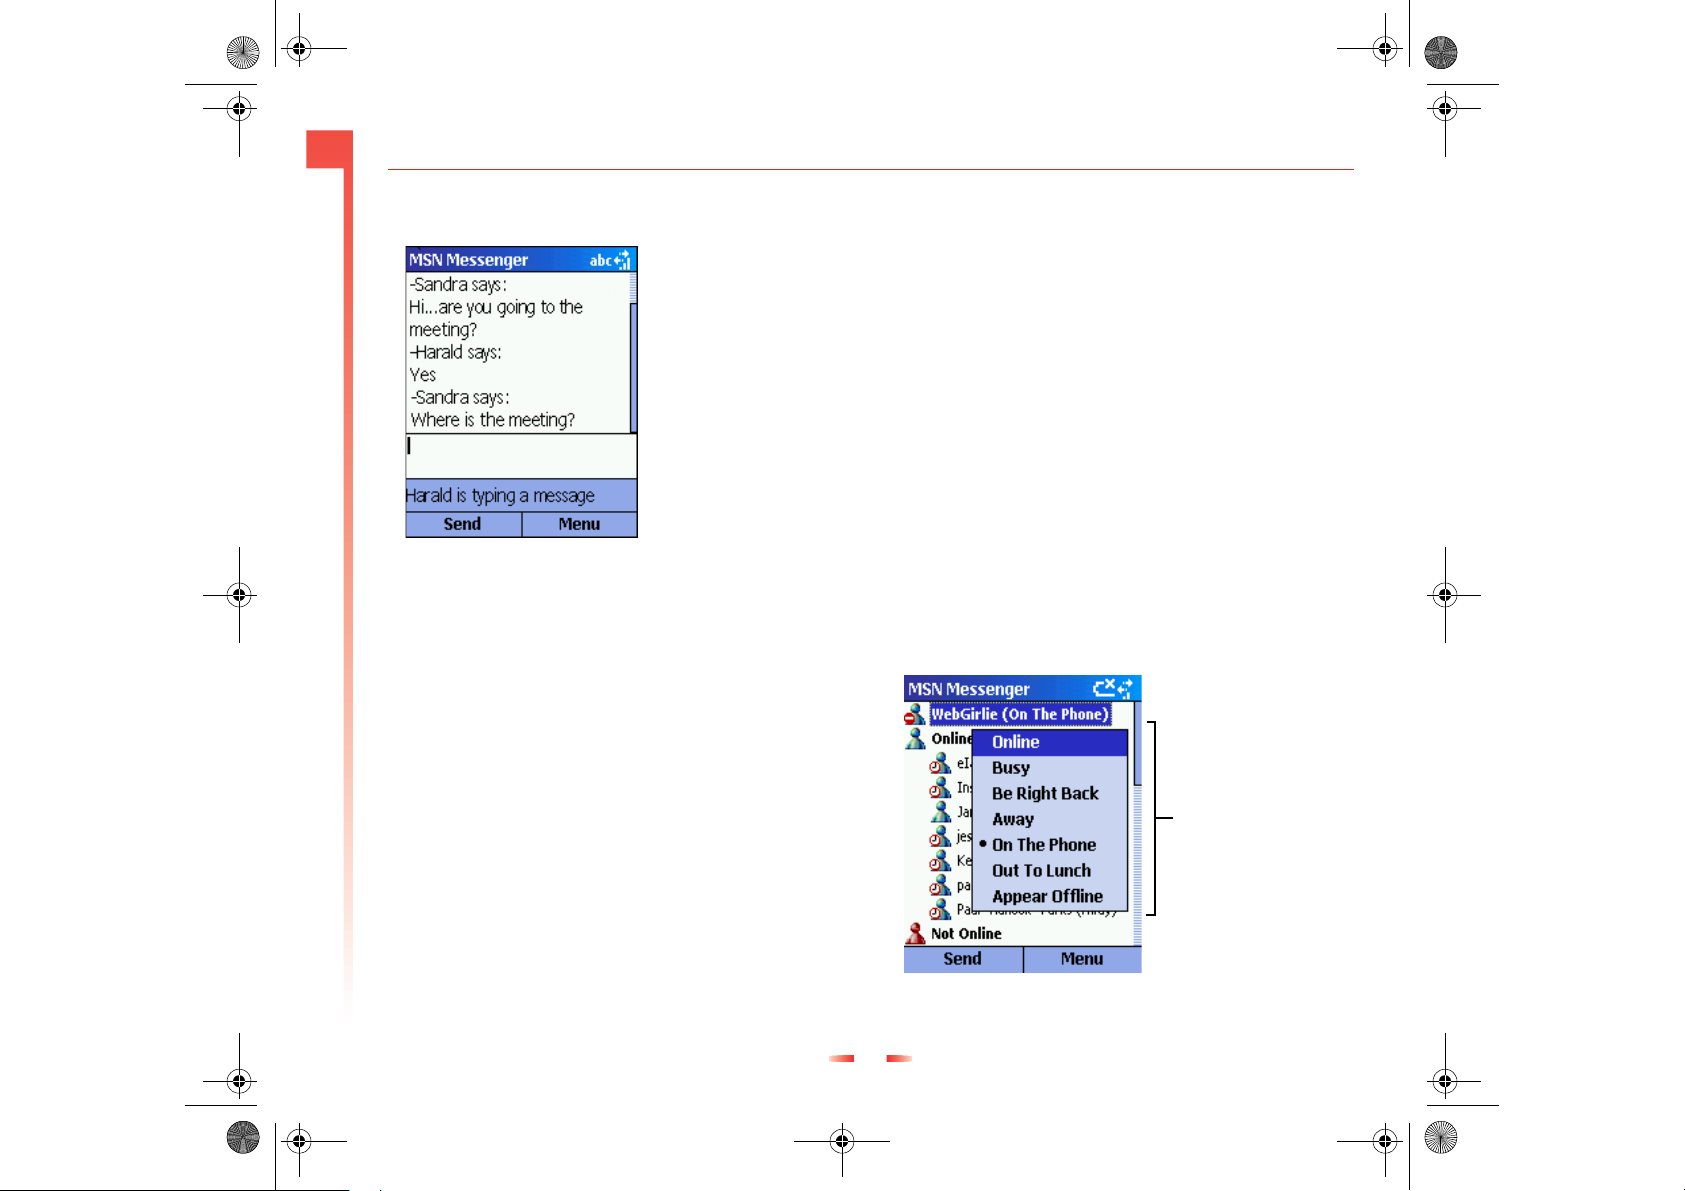
To send an instant message
1. Sign in to MSN Messenger. A list of all your
contacts is displayed – these are split into online
contacts and offline. You can only send instant
messages to the online contacts.
2. Use the : and ; keys to select the person to
send an instant message to and press Send d.
3. Enter your message, and press Send d.
z Note: To quickly add common messages, press
Menu, select My Text, and then select the text
you want to use in the message.
X
To sign in and out of MSN Messenger
1. On the Home screen, press Programs d,
select MSN Messenger, press Action A, and
then press Sign In d.
50 Sendo Z100 User Guide
Page 12
z100.book Page 51 Wednesday, September 18, 2002 4:03 PM
4
Messaging Features
z For information on text input, see Entering text
and numbers on your phone.
Figure 12 MSN Messenger Options
X
To invite a contact to an ongoing chat
• Press Menu g, select Invite, and then use the
: and ; keys to select a contact.
X
To see who is already chatting, or to switch between
chats
• Press Menu g, and select Chats.
3. A message is displayed which tells you that the
contact has been added successfully. Press Done
d.
X
To delete a contact
• In the Messenger contacts list, use the : and ;
keys to select the contact's name, press Menu
g, and then select Delete Contact.
X
To block or unblock a contact from seeing your
status and sending you messages
• In the Messenger contacts list, use the : and ;
keys select the contact's name, press Menu g,
and then select Block or Unblock.
X
To change your status
1. In the Messenger contacts list, select your name,
and press Action A.
2. Use the : and ; keys to select a status
description, such as Away, and press Action A.
X
To accept or switch between chats
• Press Menu g, select Chats, and then select the
contact to begin chatting.
X
To add a contact
1. In the Messenger contacts list, press Menu g,
select Add Contact, and press Action A.
2. Enter the full address for the contact and press
Next g.
Highlight your status
and press the Action
button
Figure 13 Changing Status
51 Sendo Z100 User Guide
Page 13
z100.book Page 52 Wednesday, September 18, 2002 4:03 PM
4
X
To c h ang e you r d isp l ay e d na m e
1. In the Messenger contacts list, press Menu g,
select Options, Passport Account and press
Action A.
2. Enter the name that you want other users to see
when you send instant messages and press
Messaging Features
Done d.
z Note: You must be signed in to MSN Messenger
to change your displayed name.
z Note: Using the Passport account option you
can also change your sign-in name, Password
and select whether MSN Messenger should
always run when you have an internet
connection running.
52 Sendo Z100 User Guide
Page 14
z100.book Page 53 Wednesday, September 18, 2002 4:03 PM
5
Contacts, Calendar,
Chapter 5 Contacts, Calendar, and Tasks
This chapter introduces features on your phone that
help you manage and keep track of contacts,
appointments, your schedule, and maintain a task
list. This chapter also explains how to send and
receive contact and appointment information
between your phone and another IR equipped
compatible mobile device or an IR equipped
compatible desktop PC, sometimes called beaming
data, by using infrared.
For more information on using ActiveSync to
synchronize Contacts, Calendar, and Tasks, see
Chapter 6 - Synchronizing Information
Using Contacts
Use Contacts like an address book on your phone.
You can set up a contact card for each person or
business you communicate with. This “card” stores
lots of information about the contact, for example,
multiple phone numbers, e-mail and street
addresses, web pages, plus more personal
information, such as birthdays and anniversaries.
You can also store your contacts in categories, so
that you can identify business, personal and
miscellaneous contacts at a glance. You can set up
more categories using Outlook on your desktop PC.
Please refer to Outlook Help on your desktop PC for
more information.
z Warning: You should store all contact phone
numbers, both in Outlook and your phone, in
international GSM format. That is, the
international access code(+), the country code
without leading zeros, city or area code and
phone number. For most contries, including the
leading zero in the country code will cause the
call to fail, however it is required for others.
Please check locally.
You can make a call and write e-mails and SMS
messages, directly from a contact card.
New Contacts
You can create a new contact card to add to the
Contacts list at any time.
When you create a new contact on your phone, you
can synchronize Contacts with your desktop PC, or a
server to keep your contact information up-to-date
in all locations.
X
To add a new contact
1. On the Home screen, press Contacts g, and
then press New d.
2. Enter the details for the contact such as name,
phone numbers and e-mail address. Use the :
and ; keys to move through the fields and
enter as much or as little information as you
want. Press Done d.
z Note: You must enter full phone numbers
including the international access code and
country code. Remember you must leave the
leading zeros out of the country code for most
countries.
z Note: To assign the contact to a category, select
the Categories field and press Action A. You
can add the contact to more than one category
– simply select each relevant checkbox.
53 Sendo Z100 User Guide
Page 15
z100.book Page 54 Wednesday, September 18, 2002 4:03 PM
5
X
To add a new contact from a call
1. During a call, select Menu g.
2. Use the : and ; keys to select Save Contact
and press Action A.
3. Select New Item and press Action A.
Contacts, Calendar,
4. Use the : and ; keys to scroll through the
fields and enter the information for the new
contact. Press Done d. You can continue with
your call throughout.
z Tip: To copy the incoming number into a phone
number field, select the relevant filed and press
Insert d.
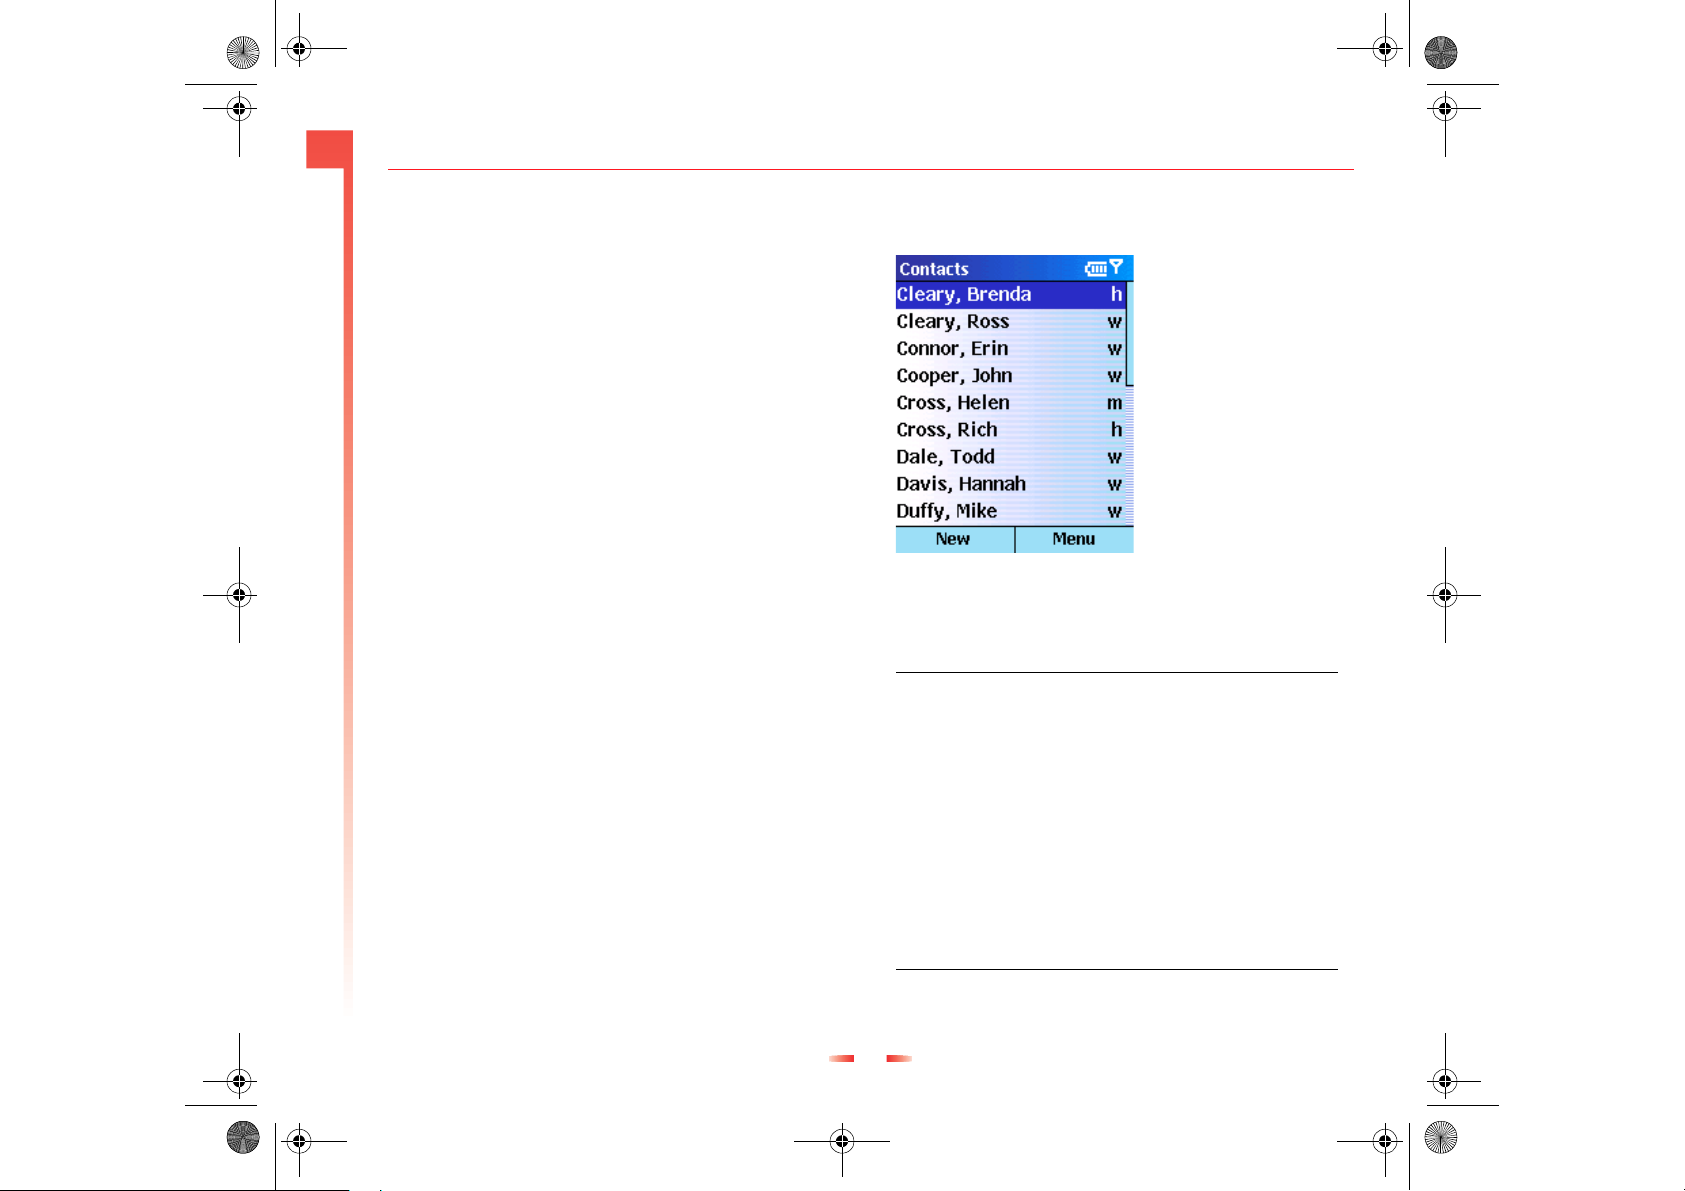
The Contacts list
The Contacts list displays the names of all your
contacts alphabetically, along with an abbreviation
for the default communication method. If you prefer,
you can filter the list so that only contacts belonging
to a certain category are displayed.
z Note: If the contact card includes a work phone
number, it is always automatically set it as the
default number, but you can change this.
X
To vie w C on ta cts
• On the Home screen, press Contacts g.
Figure 14 The Contacts list
The following table shows the abbreviations that are
used in the Contacts list:
w Work phone
w2 Second work phone
h Home phone
h2 Second home phone
m Mobile phone
pgr Pager
car Car phone
sms Mobile phone number for SMS messages.
e E-mail address
e2 Second e-mail address
e3 Third e-mail address
54 Sendo Z100 User Guide
Page 16
z100.book Page 55 Wednesday, September 18, 2002 4:03 PM
5
X
To call a contact using the default number
1. On the Home screen, press Contacts g.
2. Select the contact to call using the : and :
keys, and press Talk f.
z Tip: If you have a long list of contacts and you
Contacts, Calendar,
can’t see the contact you want to call on the first
screen, enter the first few letters of the contact’s
name. See To find a contact by entering their
name below.
X
To call a contact using a number other than the
default number
1. On the Home screen, press Contacts g.
2. Select the contact using the : and ; keys. Now
move Left [ or Right ] until the abbreviation
for the number you want to use is displayed.
Press Ta lk f.
z Note: Whatever abbreviation you select here
becomes the default number for this contact.
X
To find a contact by entering their name
1. On the Home screen, press Contacts g.
2. Begin entering the name of the contact you want
until the name is displayed.
X
To filter contacts
1. On the Home screen, press Contacts g, select
Menu, Filter, and then press Action A.
2. Select a filter, for example Business or Personal,
and press Action A.
X
To delete a contact
1. On the Home screen, press Contacts g.
2. Select the contact to delete, press Menu g,
select Delete, and press the Action key A. You
will be asked whether you are sure you want to
permanently delete this contact - press Ye s d.
Contact cards
A contact card displays all of the information that
you have entered for a contact, such as name of the
person or business, phone numbers, e-mail
addresses, and more. From a contact card, just
select a phone number and press the Ta lk key f to
call that contact. You can also select an e-mail
address and press Action to start writing a message.
X
To view a contact card
1. On the Home screen, press Contacts g.
z Note: To find Sandra, press 7, 2, 6,
3, 7, 2 because these numbers
correspond with the letters for that name on the
keypad. The phone finds all matches for the
letters you enter. For example, when you type
7 for S, all contacts that begin with S are
displayed, as you type 2 for a, all contacts
that begin with Sa are displayed and so on.
55 Sendo Z100 User Guide
Page 17
z100.book Page 56 Wednesday, September 18, 2002 4:03 PM
5
Contacts, Calendar,
2. Select the contact to view, using the : and ;
keys, and press Action A.
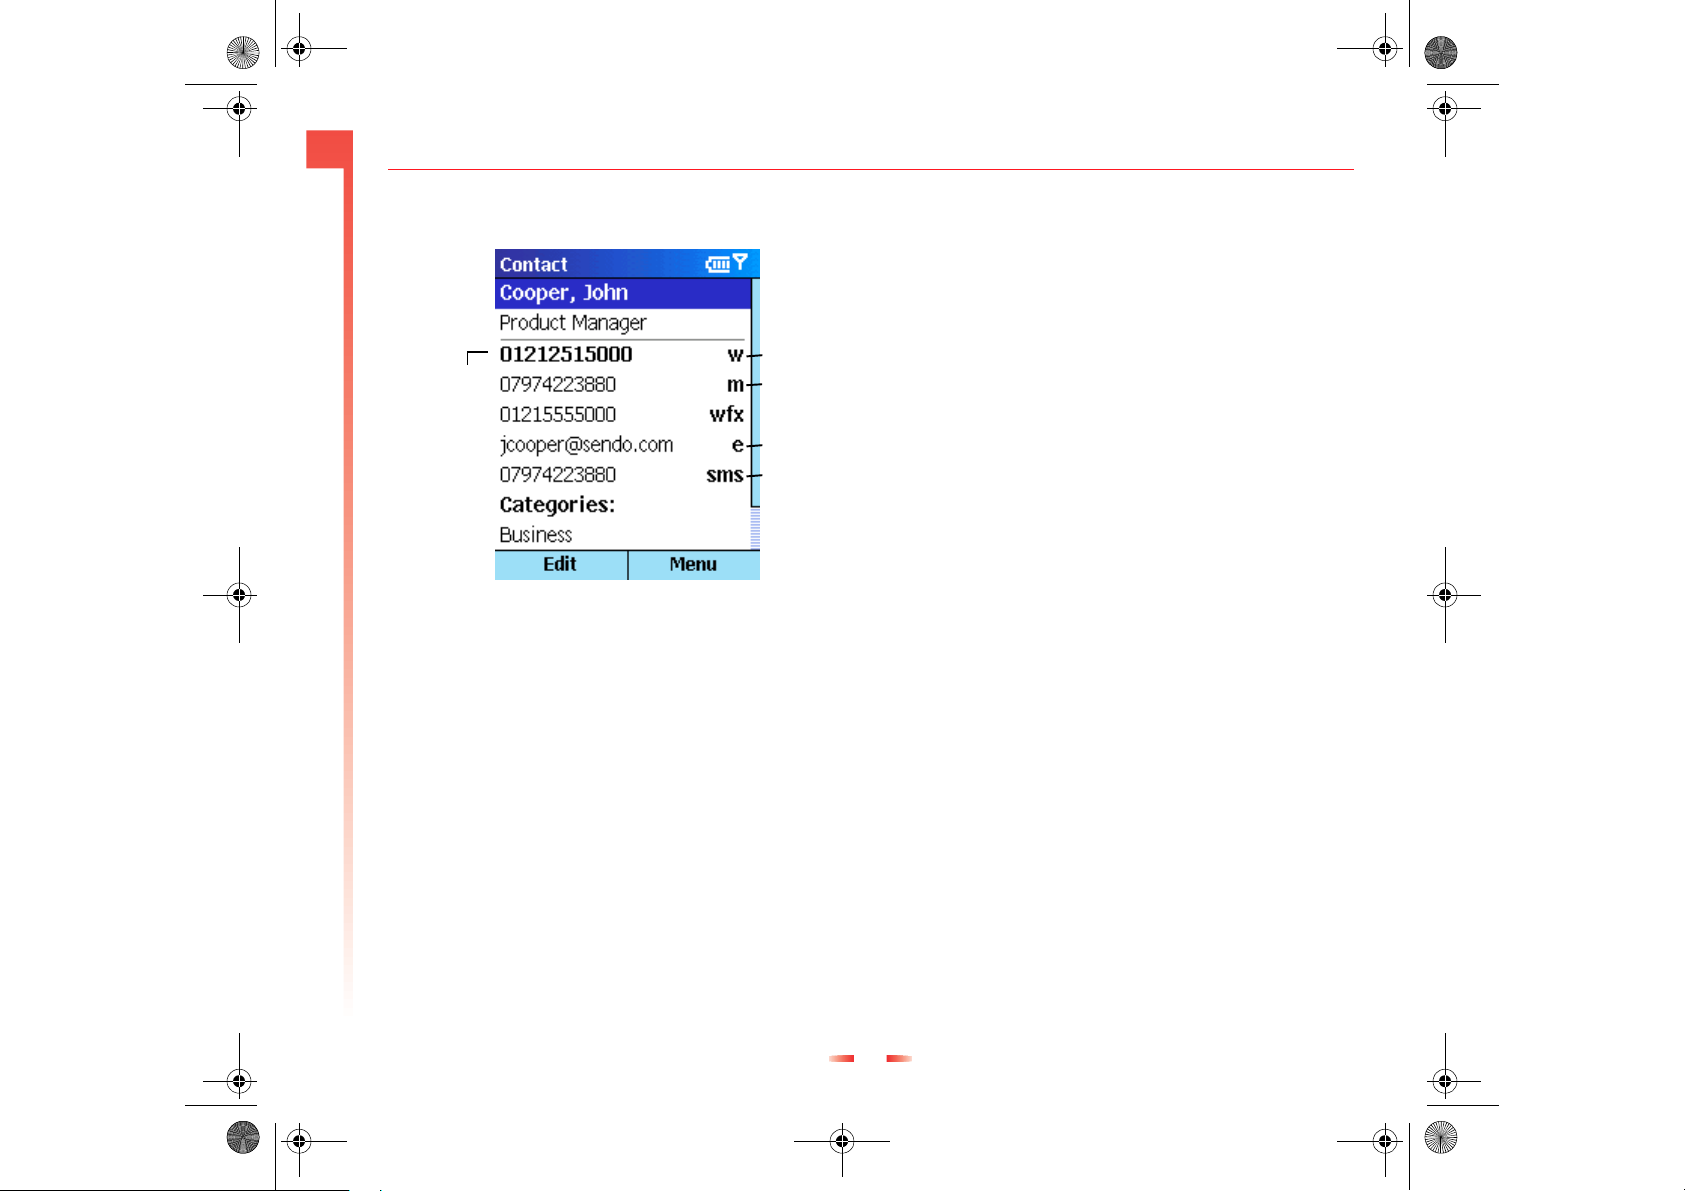
Work number
Number in
bold denotes
default
number
Figure 15 Contact card
X
To call a contact from a contact card
Mobile
number
E-mail number
SMS message
number
1. On the Home screen, press Contacts g.
2. Select the contact, using the : and ; keys, and
press Action A to open the contact card.
3. Select the number to use, using the : and ;
keys, and press Talk f.
X
To send an e-mail from a contact card
1. On the Home screen, press Contacts g.
2. Select the contact to send an e-mail message to
and press Action A to open the contact card.
3. Select the e-mail address, and press Action A.
4. Move down to enter a subject, and down again
to enter your message in the body text field.
Press Send d.
X
To edit a contact
1. On the Home screen, press Contacts g.
2. Select the contact to edit, and press Action A to
open the contact card.
3. Press Menu g, select Edit, and then press
Action A.
4. Make the changes, and press Done d.
Using contact card menu options
Using the contact card menu options, you can
quickly attach a speed dial or voice tag to the
contact, change the default method for
communicating with the contact, beam the contact
card to another mobile device or a desktop PC using
infrared, delete the entire contact card, or edit the
contact card information.
X
To view contact card menu options
1. On the Home screen, press Contacts g, and
then press Action A.
2. Select the contact to open, and press Menu g.
56 Sendo Z100 User Guide
Page 18
z100.book Page 57 Wednesday, September 18, 2002 4:03 PM
5
The following table lists the contact card menu
options and their functions:
Select To
Add Speed
Dial
Contacts, Calendar,
Add Voice Tag Create a shortcut to a phone number, e-mail
Set As Default Make the selected phone number or e-mail
Beam Contact Send the contact card to another IR equipped
Delete Remove the whole contact card from the
Edit Modify information in the contact card.
Using Calendar
Use the Calendar to schedule your appointments,
you can create or view appointments and view your
calendar by day, week, or month.
Create a shortcut to a phone number, e-mail
address, or Web URL by assigning one or two
keypad numbers as a speed dial. For more
information about creating speed dials, see
Speed dials.
address, or Web URL by assigning a recording.
For more information about creating voice
tags, see Voice tags.
address the default for the contact.
compatible mobile device, or an IR equipped
compatible desktop PC, using infrared.
Contacts list.
3. Enter information in the fields displayed.
4. Press Done d.
z Tip: To set a reminder for the appointment,
under Reminder, select the amount of time
before the appointment that you want the
reminder to appear.
z Note: When you have created a new
appointment on your phone, you can
synchronize Calendar with your desktop PC or a
server to keep your schedule information up-todate in all locations.
X
To access Calendar
• On the Home screen, press Programs d, select
Calendar, and then press Action A.
X
To create a new appointment
1. On the Home screen, press Programs d,
select Calendar, and then press Action A.
2. Press Menu g and select New. Press Action A.
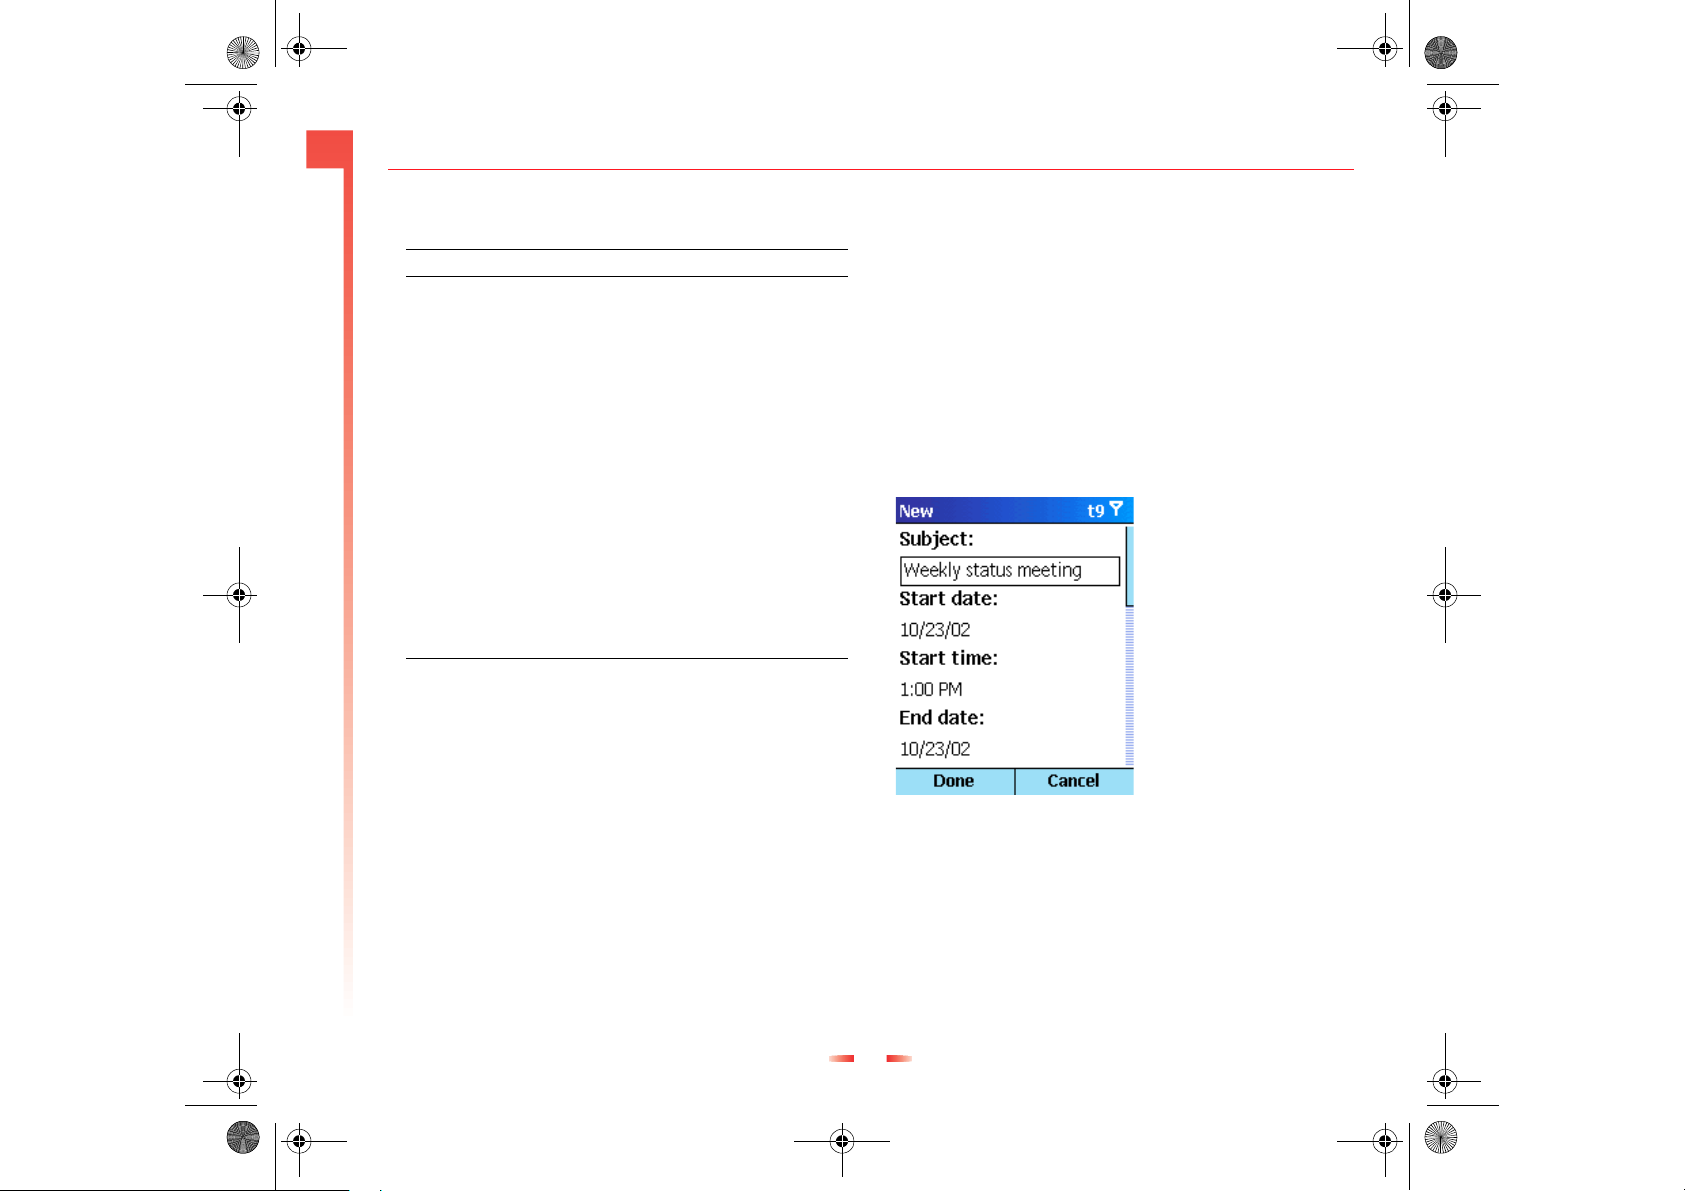
Figure 16 New Appointment
X
To view an appointment
1. On the Home screen, press Programs d,
select Calendar, and then press Action A.
2. Select the appointment to open, using the :
ands ; keys, and press Action A.
57 Sendo Z100 User Guide
Page 19
z100.book Page 58 Wednesday, September 18, 2002 4:03 PM
5
Contacts, Calendar,
X
To edit an appointment
1. On the Home screen, press Programs d,
select Calendar, and then press Action A.
2. Select the appointment to edit, press Action, and
then select Edit.
3. Make the necessary changes, and press Done
d.
X
To delete an appointment
1. On the Home screen, press Programs d,
select Calendar, and then press Action A.
2. Using the : ands ; keys, select the
appointment to delete and press Menu d.
Select Delete, and then press Action A. An Alert
message is displayed - you are asked whether
you want to permanently delete this
appointment. Press Ye s d.
Viewing your schedule
You can view your schedule using three different
views:
Agenda, Week, and Month.
Agenda view
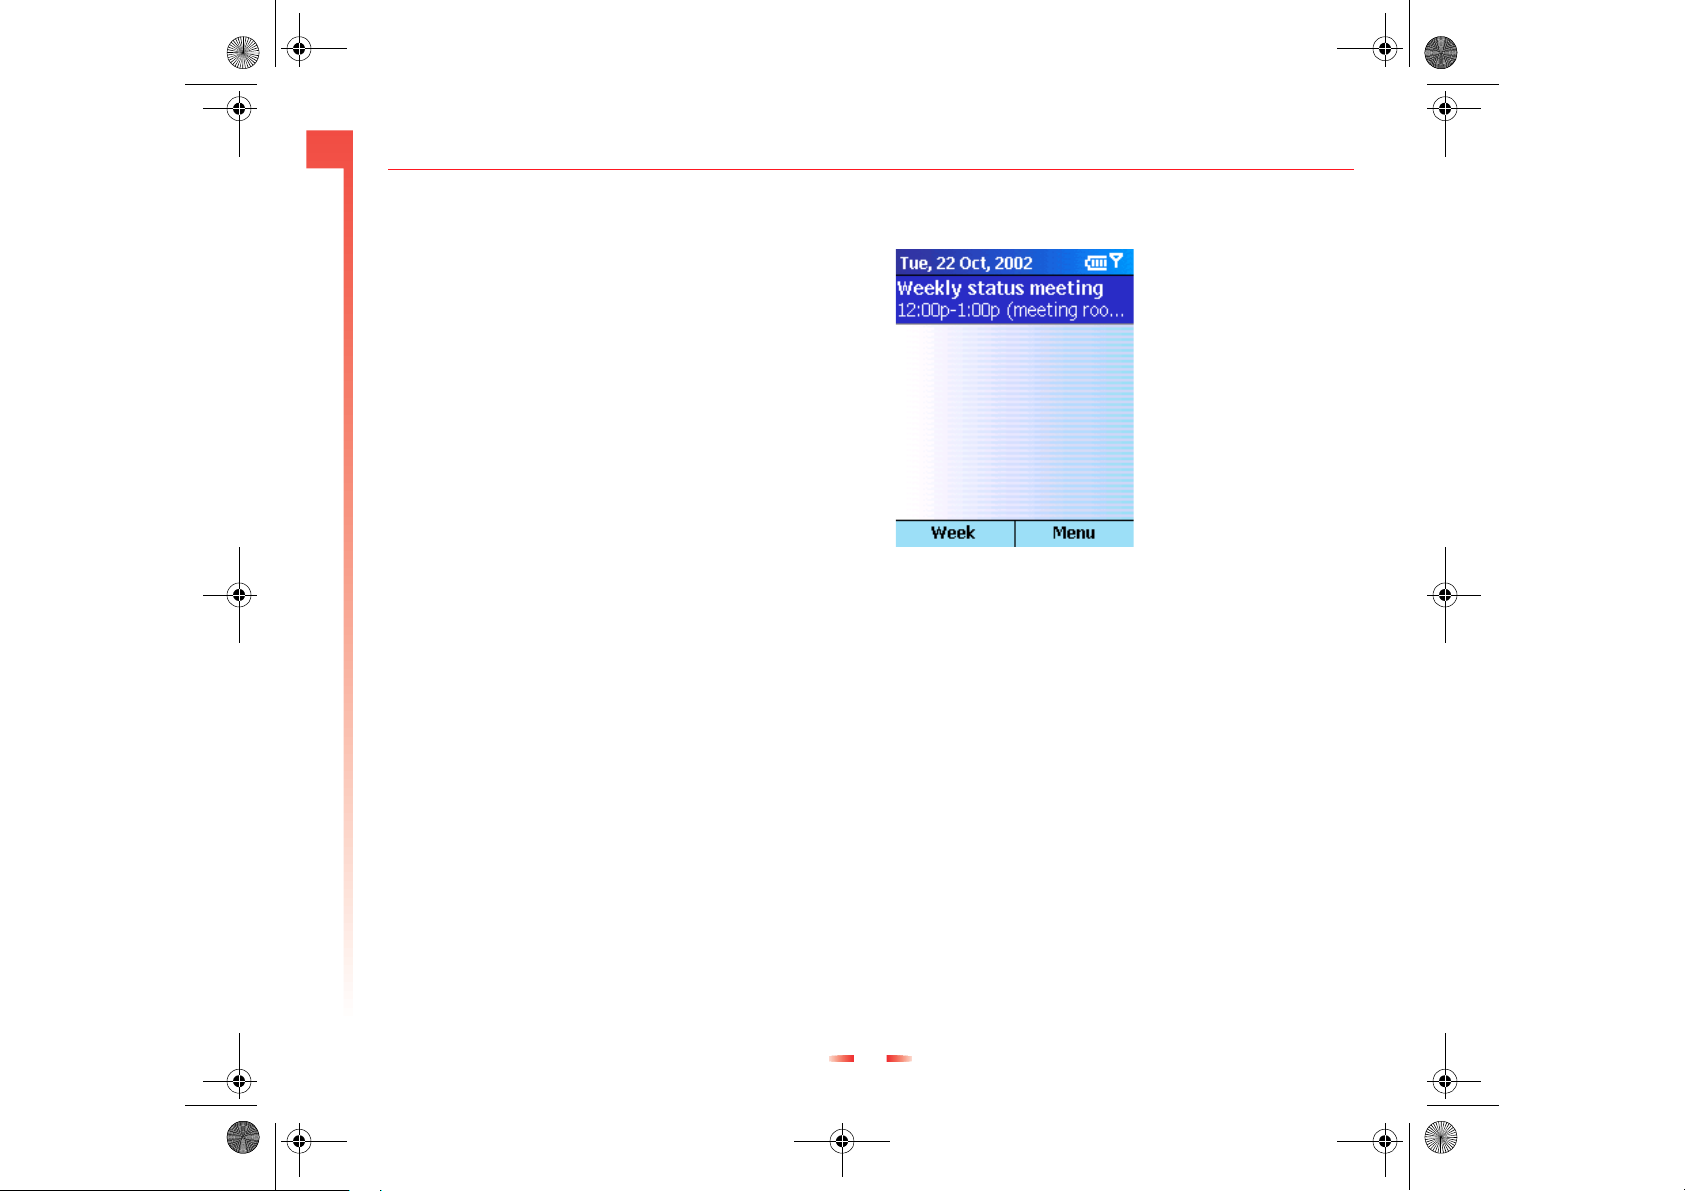
The Agenda is the default view in Calendar. It
displays all meetings and appointments scheduled
for the current day in chronological order (according
to start time). All-day appointments are shown as a
single line at the top of the Agenda screen. Up to
three all-day events can be displayed.
You can quickly change to the Week view by pressing
Week d.
Figure 17 Agenda View
X
To view your agenda for the current day
• On the Home screen, press Programs d, select
Calendar, and then press Action A.
• If you are using the Week or Month view in
Calendar, press Menu g, select Agenda View,
and then press Action A.
z Tip: To view your agenda for previous dates
press Left [, or to check future dates move
Right ].
X
To view your agenda for a specific date
1. On the Home screen, press Programs d and
select Calendar.
2. Press Menu g, select Go to Date, and press
Action A.
58 Sendo Z100 User Guide
Page 20
z100.book Page 59 Wednesday, September 18, 2002 4:03 PM
5
Contacts, Calendar,
3. Enter the date you want to view, and press Done
d.
Week view
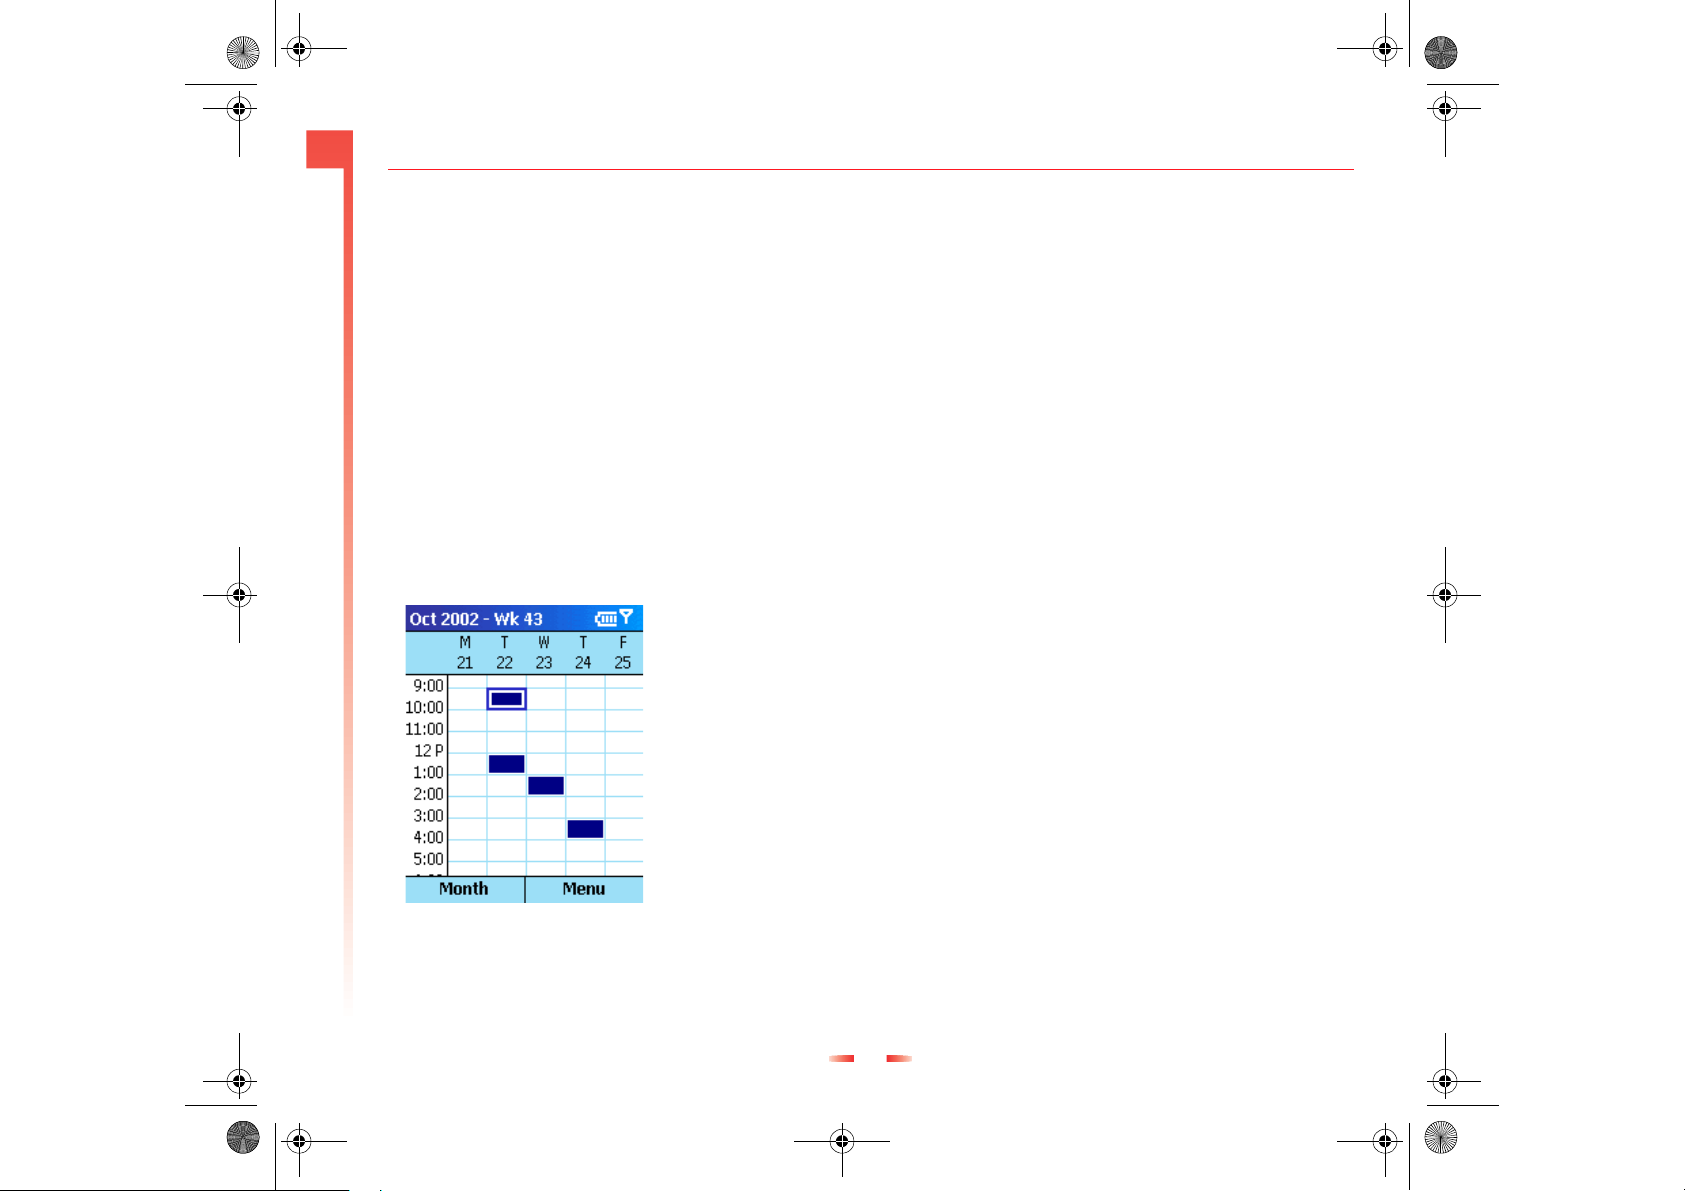
The Week view displays your schedule for the current
week.
The Week view below displays the hours from 9:00
am to 5:00 pm on the left side of the screen. Move
Up : or Down ; to display all 24 hours.
Press [ to scroll through previous weeks or ] to
scroll through future weeks.
You can quickly change to the Month view by
pressing Month d
z Tip: When you go to Week view, the hours last
shown are displayed until you change them..
X
To view appointments for the week
1. On the Home screen, press Programs d,
select Calendar, and then press Action A.
2. Press Menu d, select Week View, and then
press Action A.
z Note: To change settings for Week View, press
Menu, select Options, and then press Action A.
Month view
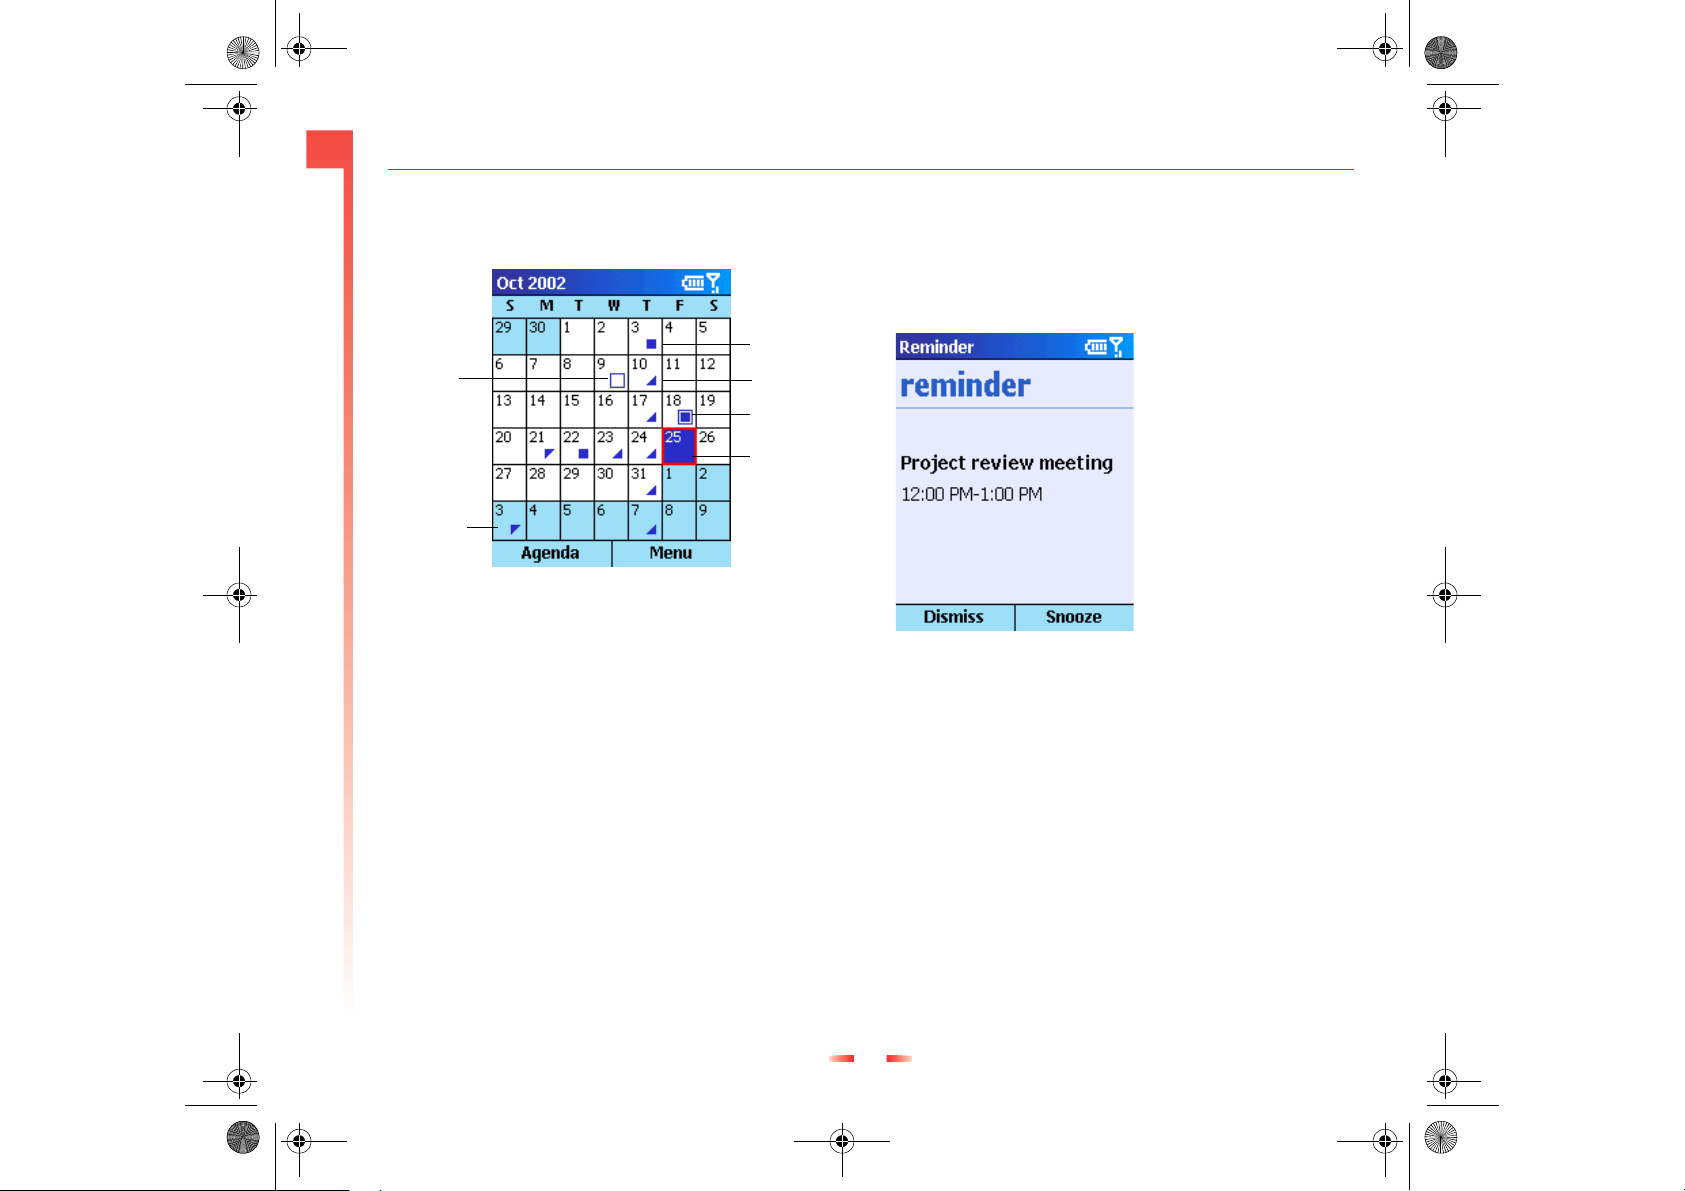
The Month view displays an overview of your
monthly schedule. Arrows indicate your
appointments - An up arrow represents a morning
appointment and a down arrow represents an
afternoon appointment. If you have morning and
afternoon appointments a blue box is displayed on
the relevant day. An all day event is indicated by a
clear box on the relevant day. If you have morning
and afternoon appointments and an all day event, a
blue box is displayed with a further box around it.
See the screen below for examples.
The selected date is indicated by a red box.
Figure 18 Week View
59 Sendo Z100 User Guide
Page 21
z100.book Page 60 Wednesday, September 18, 2002 4:03 PM
5
Contacts, Calendar,
You can move Up : to scroll through previous
months and Down ; to scroll through future
months.
All day
All-day
event
y
morning
appointment
Figure 19 Month View
X
To view your schedule for the month
appointment
Afternoon
appointment
AM, PM and allday apointment
currently selected
date
1. On the Home screen, press Programs d,
select Calendar, and then press Action A.
2. Press Menu g, select Month View, and then
press Action A.
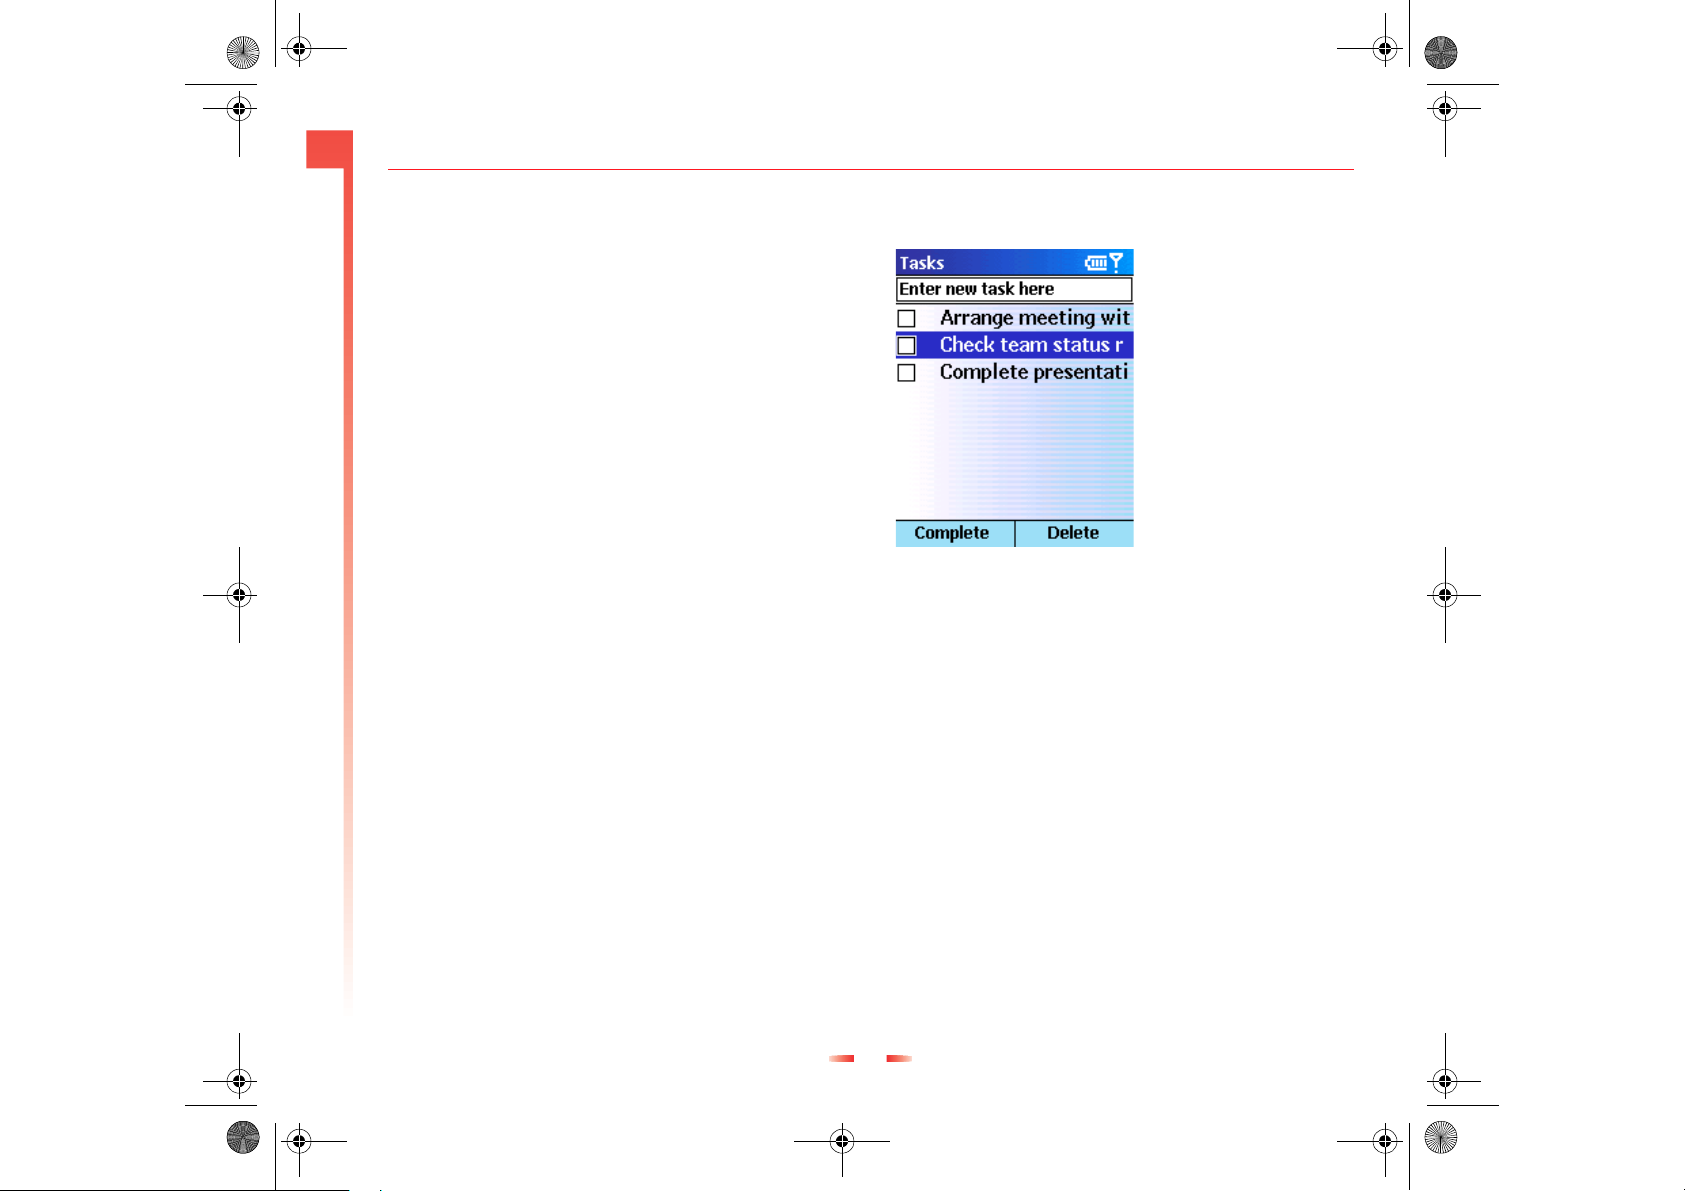
Receiving reminders
If you have set reminders for the appointments on
your calendar, you will receive notification before the
appointment. You can dismiss the reminder (the item
will still remain on your calendar, but you won’t
receive any further reminders), or you can be
reminded again later and at regular intervals – this
is sometimes called Snooze. If you select snooze, the
reminder for this appointment will keep appearing
at five minute intervals until you press Dismiss d.
z Tip: You can select the way in which the phone
alerts you to reminders using the Sounds option
from the Settings menu.
Figure 20 Reminder screen
X
To “snooze” on an appointment
1. On the Reminder screen, press Snooze g. You
are alerted to the appointment again after five
minutes.
Importing Calendar information
You can import calendar information from another
calendar program, providing it uses the iCal or vCal
format. Calendar information can be imported from
attachments in e-mail messages, SMS text
messages, links in Microsoft® Pocket Internet
Explorer, or by infrared.
60 Sendo Z100 User Guide
Page 22
z100.book Page 61 Wednesday, September 18, 2002 4:03 PM
5
Using Tasks
Contacts, Calendar,
A task is a personal or work-related project,
assignment, or errand, which you can track through
to completion. A task can occur once or repeatedly.
A recurring task can be repeated at regular intervals
or repeated based on the last date you mark the task
complete. For example, you might want to pay a bill
either on the 1st of every month, or when one month
has passed since your last payment.
You can set tasks on your phone, but you must set all
timescales in Outlook on your desktop PC. Please
see Outlook Help on your desktop PC for more
information.
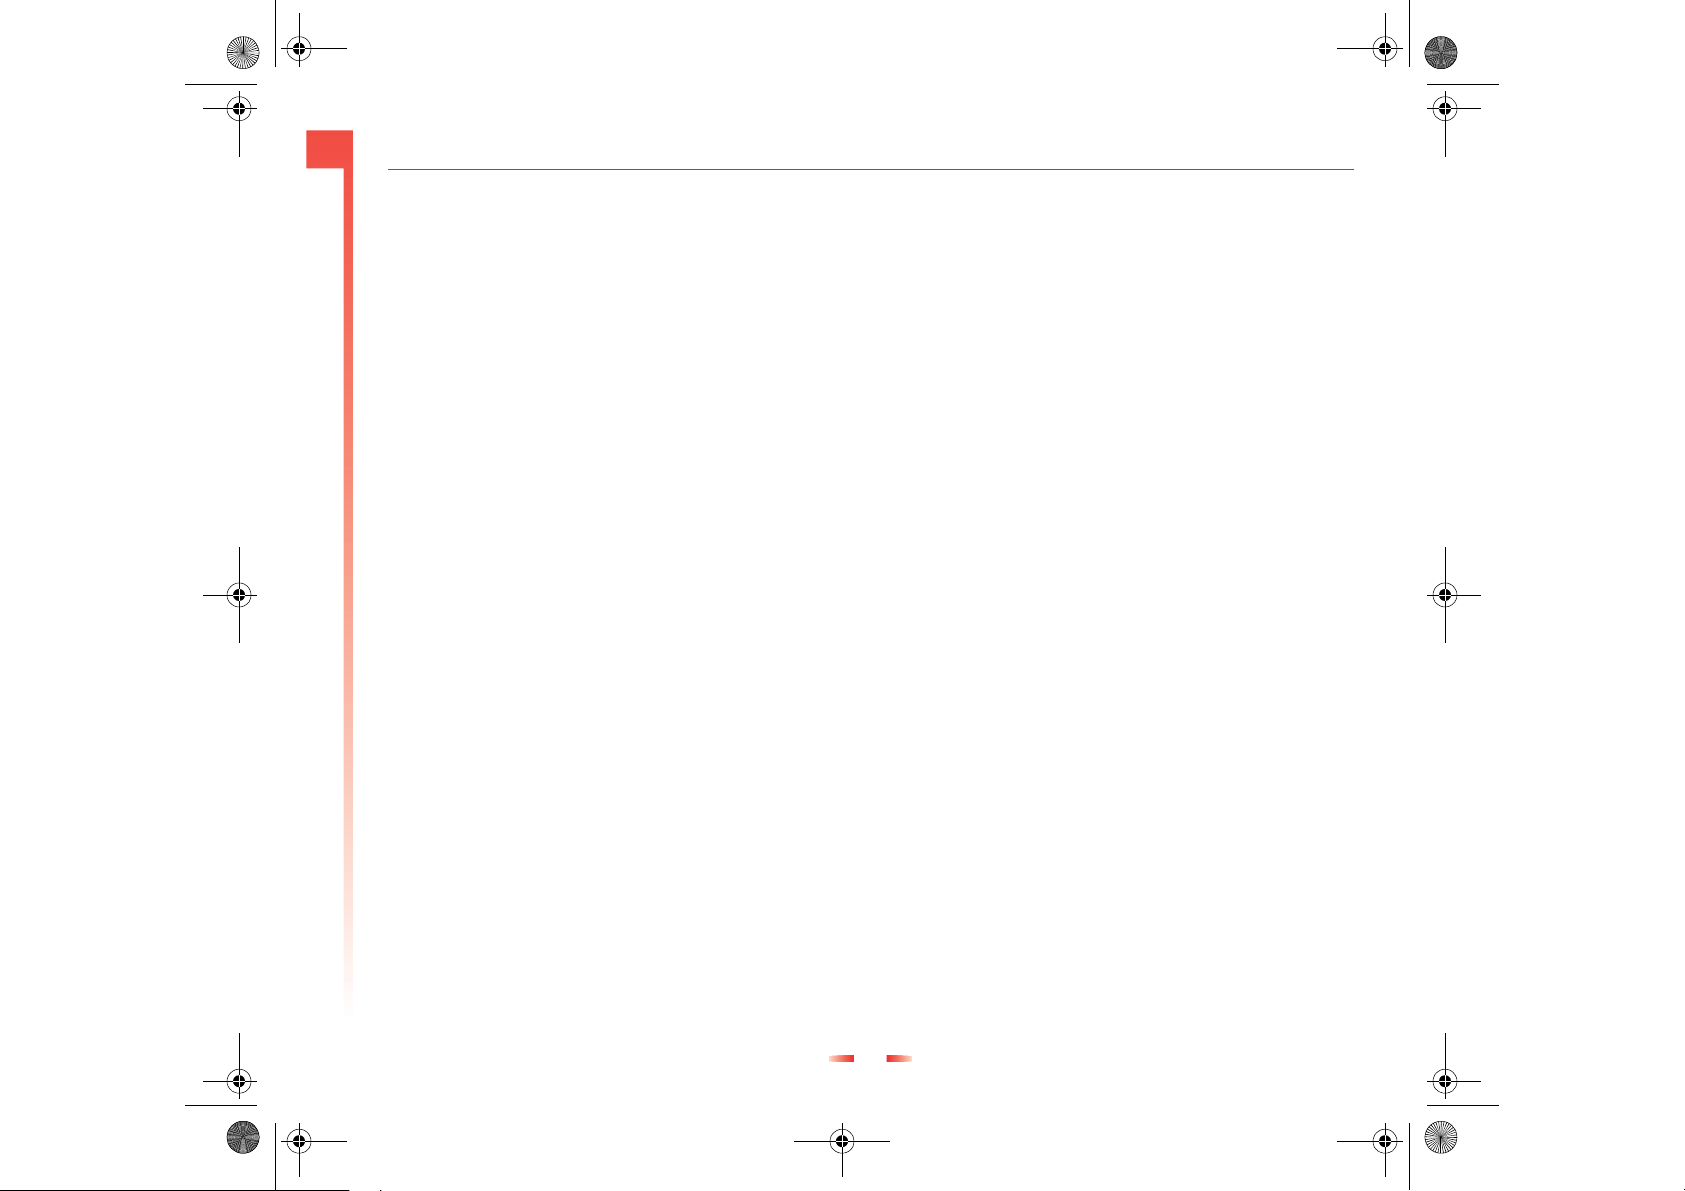
The task list
The Task list displays your “things to do” list. An item
is followed by an exclamation mark if it has been
marked as high priority and a down arrow if it has
been marked as low priority. Overdue tasks are
displayed bold and red. Completed tasks are
displayed with the corresponding check box
selected.
z Note: If you synchronize Tasks with your desktop
PC, completed tasks are removed from your
phone after synchronization. They are displayed
in grey with a strikethrough on your desktop PC.
Figure 21 Tas k L is t
Using the task list
X
To create a new task
1. On the Home screen, press Programs d,
select Tas ks , and then press Action A.
2. Select the Enter new task here field, and press
Up :.
3. Enter the text for the task, and press Action A.
The task is displayed in the list below.
z Note: When you create a new task on your
phone, you can synchronize Tasks with your
desktop PC to keep your Task list up to date in
both locations.
z Note: If you create a new task with a reminder
on your desktop PC, you can synchronize Tasks
61 Sendo Z100 User Guide
Page 23
z100.book Page 62 Wednesday, September 18, 2002 4:03 PM
5
Contacts, Calendar,
with your phone so that you will get a reminder
on your Z100.
X
To mark a task as complete
1. On the Home screen, press Programs d,
select Ta sk s, and then press Action A.
2. Select the task using the : and ; keys and
press Action A to place a tick in the checkbox.
Press Complete d.
X
To mark a completed task as incomplete
1. On the Home screen, press Programs d,
select Ta sk s, and then press Action A.
2. Select the task, and press Activate d.
X
To delete a task from the Task list
1. On the Home screen, press Programs d,
select Ta sk s, and then press Action A.
2. Select the task, and press Delete g.
Sending information via Infrared
You can use the infrared port on your phone to send
and receive information , for example calendar
appointments and contact cards, between your
phone and another mobile device, or a desktop PC.
The other device must have an infrared port and
support vCard and vCal formats.
z Note: The IR ports of your phone and any other
IR equipped devices must be pointed at each
other, with no obstructions, and must be within
0.5 m of each other.
X
To beam a contact
1. On the Home screen, press Contacts g.
2. Select the contact to beam, press Menu g,
select Beam Contact, and then press Action A.
Align the infrared ports so that they are
unobstructed and within close range of each
other, now press Beam d.
z Note: While the information is transferred,
status information is displayed about the device
your phone is beaming to. When the process is
complete a message is displayed to tell you
whether the transfer is pending, done, or failed.
X
To beam an appointment
1. On the Home screen, press Programs d,
select Calendar and press Action A.
2. Select the appointment to beam, and press
Action to open the appointment.
3. Press Menu g, select Beam Appointment, and
press Action A.
4. Align the infrared ports so that they are
unobstructed and within close range of each
other, and press Beam d.
z Note: While the information is transferred,
status information is displayed about the device
your phone is beaming to. When the process is
complete a message is displayed to tell you
whether the transfer is pending, done, or failed.
X
To receive beamed information
1. On the Home screen, press Programs d,
select Accessories, and then press Action A.
62 Sendo Z100 User Guide
Page 24
z100.book Page 63 Wednesday, September 18, 2002 4:03 PM
5
2. Select Infrared Receive and press Action A.
3. Align the infrared ports so that they are
unobstructed and within close range of each
other. When the Z100 is ready to receive the
information, the left soft key changes to Yes .
Press Ye s, d to receive the information.
Contacts, Calendar,
z Note: Your phone can receive beamed files of
any type, but some files may need to be copied
to your desktop computer for viewing.
63 Sendo Z100 User Guide
Page 25
z100.book Page 64 Wednesday, September 18, 2002 4:03 PM
6
Chapter 6 Synchronizing Information
This chapter introduces basic concepts and features
of Microsoft® ActiveSync®, and explains how to set
up Server ActiveSync®, synchronize remotely, and
create a synchronization schedule. This chapter also
gives an overview of the different types of
Microsoft® Outlook® information you can
synchronize.
Synchronizing Informa-
For more information about ActiveSync®, see
ActiveSync® Help on your desktop computer.
When creating a partnership, you can connect using
infrared, a USB cable, or a cradle connection.
You can use an infrared connection to create a direct
connection between your phone and another mobile
device or desktop computer. This method is ideal for
quickly switching between multiple devices since
there are no cables or adapters to change.
z Note: Before synchronizing data with a third
party network/server, including your employer's
server, please check with the system
administrator for any restrictions.
z Note: Remember to make backup copies of all
important data. Be careful not to lose or
misplace your phone. If your phone is lost or
misplaced there is a risk that your data could be
viewed or stolen. Delete security sensitive data
before sending your phone in for repair.
ActiveSync®compares the information on your
phone with the information on your desktop
computer and/or the server and updates all
locations with the most recent information. With
ActiveSync®, you can:
• Keep your Outlook information up-to-date by
synchronizing your phone with your desktop
computer.
• Choose to synchronize Inbox, Calendar, and
Contacts with a server so that you have the latest
information, even when your desktop computer is
turned off.
• Copy, rather than synchronize, files between your
phone and your desktop computer.
• Control when synchronization occurs by selecting
a synchronization schedule.
• Select which information types are synchronized
and control how much information is
synchronized. For example, you can choose how
many weeks of past appointments to
synchronize.
z Note: You can synchronize information directly
with a Microsoft Exchange Server if your
company, or in some cases, your service
provider, is running Microsoft® Mobile
Information Server 2002 or later.
Using Activesync
You can synchronize information on your desktop
computer and/or a Microsoft® Exchange server with
the information on your phone.
64 Sendo Z100 User Guide
Page 26
z100.book Page 65 Wednesday, September 18, 2002 4:03 PM
6
Synchronizing Informa-
Microsoft® ActiveSync® 3.6 System
Requirements
Minimum Desktop Computer Requirements
• Microsoft® Windows® XP, Microsoft® Windows®
2000, Microsoft® Windows® Millennium Edition,
Microsoft® Windows NT® Workstation 4.0 with
SP 6 or later, or Microsoft® Windows 98
• Microsoft Outlook® 98 or later required for
synchronization to the desktop or portable
computer of e-mail, calendar, contacts, tasks,
and notes.
• Microsoft Internet Explorer 4.01 SP1 or later
• Hard disk drive with 12 to 65 MB of available
hard disk space (actual requirements will vary
based on selection of features and user’s current
system configuration)
• Available 9 or 25-pin communications port
(adaptor required for 25-pin communications
port), infrared port, or USB port (available for
Windows 98, Windows Millennium Edition,
Windows 2000, Windows® XP only)
• One CD-ROM drive
• VGA graphics card or compatible video graphics
adapter at 256 colour or higher
• Keyboard
• Microsoft Mouse or compatible input device
z Note: If you’re using NT4.0, ActiveSync only
works with Service Pack 6 or greater. Contact
your local Microsoft country office or check the
local Microsoft website for upgrade details.
Options for Windows XP, Windows 2000,
Windows Millennium Edition, Windows NT
Workstation 4.0, or Windows 98
• Audio card/speakers for sound
• Microsoft Office 97, Microsoft Office 2000, or
Microsoft Office XP
• Modem for remote synchronization
• Ethernet LAN connection for remote
synchronization
Getting Started with ActiveSync®
ActiveSync®is already installed on your phone, but
before you can begin synchronizing with your
desktop PC you may need to install ActiveSync® on
your desktop. You can install ActiveSync®, from the
Z100 Companion CD.
When ActiveSync® is installed you must connect
your phone to your desktop PC.
X
To connect the Z100 to your desktop computer using
a cable
1. Plug the data cable into the Accessory connector
on the bottom of your Z100.
2. Plug the other end of the cable into the USB port
of your desktop computer.
X
To connect the Z100 to your desktop computer using
a cradle
1. Plug the cable into the USB port on your desktop
computer.
65 Sendo Z100 User Guide
Page 27
z100.book Page 66 Wednesday, September 18, 2002 4:03 PM
6
Synchronizing Informa-
2. Plug the other end of the cable into the cable
connector on the underside of the cradle.
3. Slot the accessory connector on the phone firmly
into the cradle.
Creating a Partnership
After ActiveSync® installation on your desktop PC is
complete, the New Partnership Wizard helps you set
up a partnership between your phone and your
desktop computer (and/or a server) so that you can
start synchronizing information and customizing
your synchronization settings. Your first
synchronization process will automatically begin
when you finish using the wizard. After the first
synchronization, you will notice that your Outlook
information now appears on your phone.
z Warning: To prevent synchronization problems,
only select Synchronize with Microsoft Mobile
Information Server and/or this desktop
computer in the New Partnership Wizard if you
are certain that your company is running
Microsoft Mobile Information Server 2002 or
later and you know the server name. Otherwise,
select Synchronize with this desktop computer.
z Tip: When your Z100 is actively synchronizing,
the performance of the phone is significantly
slower. This may cause you to miss calls or
prevent you from using other functions on the
phone. Sendo recommends that you select to
synchonize manually instead of automically. If
you do want to synchronize automatically, select
only the time intervals required.
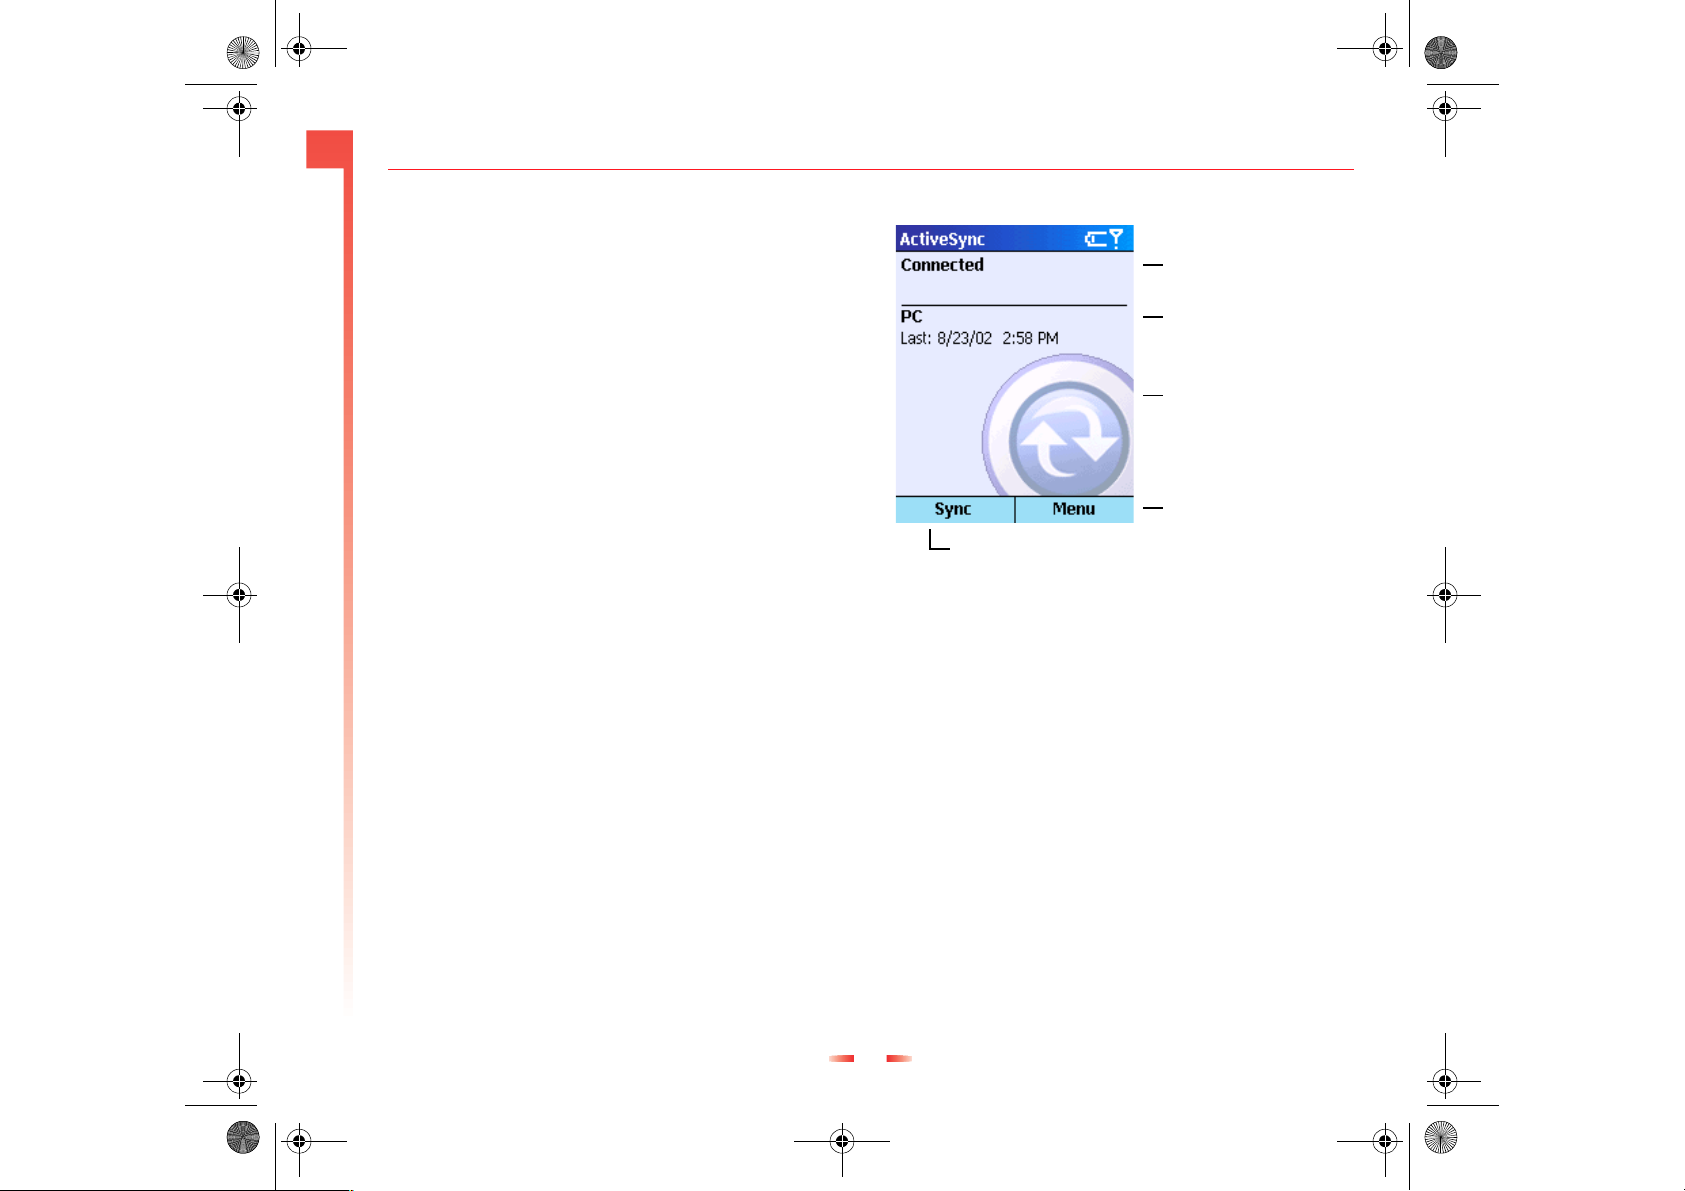
l
Connection statusConnection status
Desktop synchronization
status
Server synchronization
status
Select to synchronize via IR
or change synchronization
settings
Server synchronization
status
Figure 22 Synchronization in progress
X
To start synchronization
1. Depending on the connection you are using to
synchronize, either line up the infrared ports on
your Z100 and your PC, connect the USB cable
to your Z100 and your desktop PC or place your
Z100 in the synchronization cradle.
2. On the Home screen, press Programs d,
select ActiveSync®, and press Action.
3. To start synchronization, press Sync d.
Setting up Server ActiveSync®
Before you can begin to synchronize information
with a server, you may need to request server
66 Sendo Z100 User Guide
Page 28
z100.book Page 67 Wednesday, September 18, 2002 4:03 PM
6
Synchronizing Informa-
configuration information, such as your user name,
password, and the name of the Microsoft Mobile
Information Server, either from your service provider
or from your corporate network administrator. This
configuration information may have already been
set up on your phone, or you may have already
been given this information.
X
To set up Server ActiveSync®
1. On the Home screen, press Programs d,
select ActiveSync®, and then press Action A.
2. Press Menu g, select Options, and press
Action A.
3. Select Connection, and press Action A.
4. Under Username, enter your Microsoft Exchange
user name.
5. Under Password, enter your Microsoft Exchange
password.
6. Under Domain, enter the name of the domain
for your Microsoft Exchange Server (if required).
7. Select the Save password checkbox, by selecting
it and pressing Action, if you want your phone to
save your password so that you need not enter it
every time you synchronize.
8. In Server name, enter the name of the Microsoft
Mobile Information Server to connect to.
9. Press Done d twice.
10. To begin synchronizing with the server, press
Sync d.
z Note: You can also set up a connection to
synchronize remotely with a server when you
first create a partnership between your phone
and desktop computer.
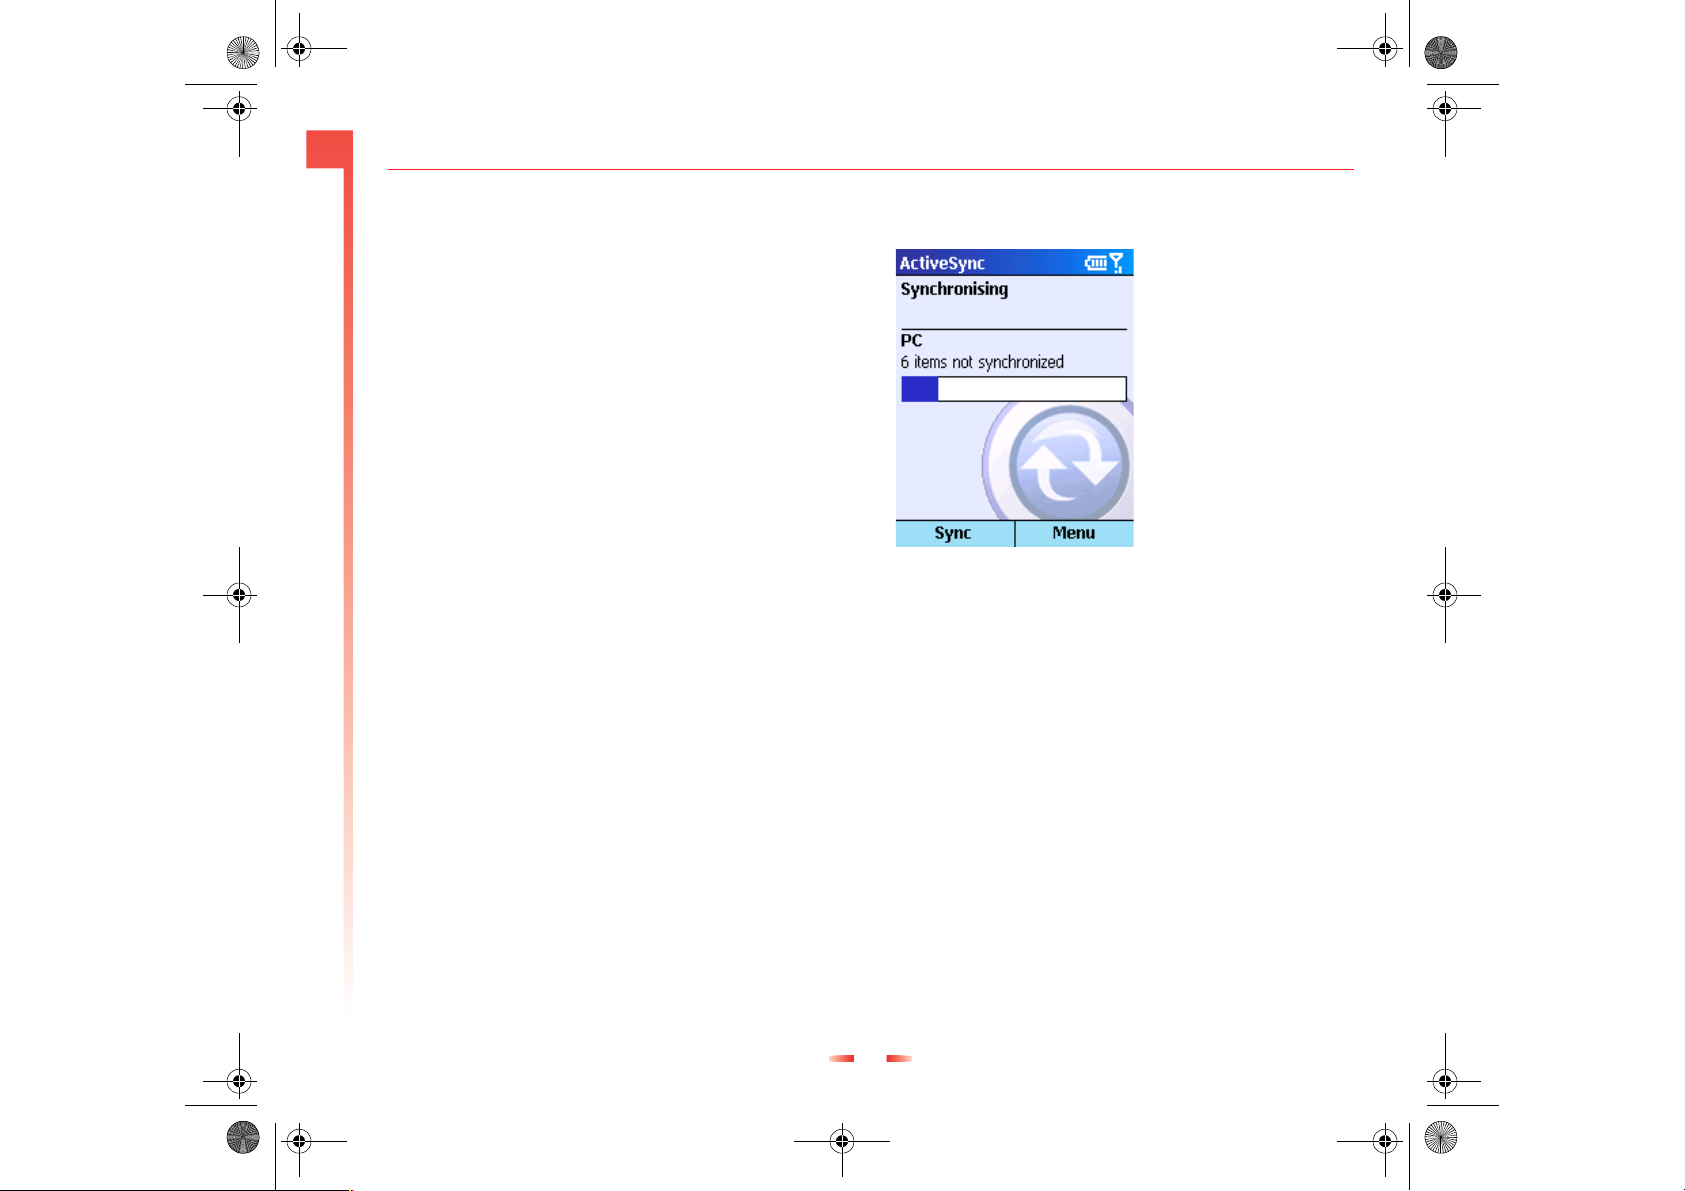
Figure 23 ActiveSync® Status screen
X
To stop synchronizing with a server
You can stop synchronizing an information type with
a server on your phone. However, to switch to
synchronizing that information type with your
desktop computer instead, you will need to change
the synchronization settings on the desktop
computer. For more information about
synchronization, see ActiveSync®Help on your
desktop computer.
1. On the Home screen, press Programs d,
select ActiveSync®, and then press Action A.
2. Press Menu g, select Options, and then using
the : and ; keys, select the information type
that you no longer want to synchronize with a
server, for example, Calendar, Contacts, or
Inbox.
67 Sendo Z100 User Guide
Page 29
z100.book Page 68 Wednesday, September 18, 2002 4:03 PM
6
Synchronizing Informa-
3. Press Action A to clear the checkbox – the tick in
the box disappears, and press Done d.
Synchronizing Remotely
You can synchronize remotely with your desktop
computer or with a server if you have set up Server
ActiveSync®.
X
To synchronize remotely with a desktop computer
1. On the Home screen, press Programs d,
select ActiveSync®, and press Action A.
2. Press Menu g, select Options, and press
Action A.
3. Select PC Settings, and press Action A.
4. Select Include PC sync remotely when
synchronizing, and press Action A.
5. Under Connect To, select the appropriate
computer name, and press Done d.
6. To start synchronization, press Sync d.
X
To synchronize remotely with a server
1. On the Home screen, press Programs d,
select ActiveSync®, and press Action A.
2. Press Menu g, select Options and then press
Action A.
3. Select the information type to synchronize with
the server and press Action A. Select the
Synchronize check box by selecting it and
pressing Action so that a tick appears in the box.
Press Done d.
Creating a server synchronization schedule
You can create a server synchronization schedule so
that your information is automatically synchronized
with the server at time intervals that you specify.
X
To create a schedule to synchronize with a server
when your phone is connected to a desktop
computer
1. On the Home screen, press Programs d,
select ActiveSync®, and then press Action A.
2. Press Menu g, select Options, Schedule, and
press Action A.
3. Select the When connected to my PC,
synchronize with the server every check box by
pressing Action, and select a length of time. This
is the time interval at which the phone will check
the server.
4. Press Done d.
X
To create a schedule to synchronize with a server
when your phone is not connected to a desktop
computer (sync wirelessly)
1. On the Home screen, press Programs d,
select ActiveSync®, and press Action A.
2. Press Menu g, select Options, Schedule, and
then press Action A.
3. Select the When not connected to my PC,
synchronize with the server every check box and
select a length of time. This is the time interval at
which the phone will check the server.
4. Press Done d.
68 Sendo Z100 User Guide
Page 30
z100.book Page 69 Wednesday, September 18, 2002 4:03 PM
6
z Note: When you set up a wireless sync schedule,
you phone will briefly connect to the server to
check for new information and to send and
receive data at the intervals you choose. You
may be charged for every connection and the
amount of data sent and/or received. See your
service providers rate information for details.
Synchronizing Informa-
Synchronizing information
This section provides an overview of the types of
Outlook information you can synchronize. By
default, ActiveSync® does not automatically
synchronize all types of Outlook information. Use
ActiveSync® options on your desktop PC to turn
synchronization on and off for specific information
types.
Synchronizing Inbox
When you select Inbox for synchronization in
ActiveSync®, e-mail messages are synchronized as
part of the general synchronization process. During
synchronization, the following events occur:
• Messages are copied from the Outlook Inbox
folder on your desktop computer, or from a
Microsoft Exchange Server, to the Inbox folder on
your phone.
• By default, when synchronizing Inbox information
with your desktop computer, you’ll receive only
messages from the last three days and only the
first 5k of each new message. You can also
choose to download file attachments.
• The messages on your phone and on your
desktop computer are linked. When you delete a
message on your phone, it is deleted from your
desktop computer the next time you synchronize,
and vice versa.
• Messages in subfolders in Outlook are only
synchronized if you have selected the folders for
synchronization, in your phones Inbox.
z Note: SMS messages are not received through
synchronization. They are sent to your phone
via your service provider.
Synchronizing Calendar
Calendar items stored on your phone can be
synchronized with calendar items stored on your
desktop computer or on a Microsoft Exchange
Server. By default, only calendar items from the last
two weeks are synchronized.
Calendar items created on your phone are copied to
your desktop computer and/or server during
synchronization, and vice versa. Similarly, Calendar
items deleted from your phone are deleted from
your desktop computer and/or server during
synchronization, and vice versa. This keeps your
calendar information up to date in all locations.
Synchronizing Contacts
Contacts stored on your phone can be synchronized
with contacts stored on your desktop computer or on
a Microsoft Exchange Server. By default, all your
contacts are synchronized.
69 Sendo Z100 User Guide
Page 31
z100.book Page 70 Wednesday, September 18, 2002 4:03 PM
6
Synchronizing Informa-
Contacts created on your phone are copied to your
desktop computer and/or server during
synchronization, and vice versa. Similarly, contacts
deleted from your phone are deleted from your
desktop computer and/or server during
synchronization, and vice versa. This keeps your
contact information up to date in all locations.
z Warning: You should store all contact phone
numbers, both in Outlook and your phone, in
international GSM format. That is, the
international access code(+), the country code
without leading zeros, city or area code and
phone number. For most contries, including the
leading zero in the country code will cause the
call to fail, however it is required for others.
Please check locally. You should also change
your e-mail signature to follow this format as
the Z100 converts all phone numbers to
clickable links.
z Tip: ActiveSync and Mobile Information Server
cannot copy your corporate e-mail addres book
to your phone, but you don’t have to copy each
address over individually. In Outlook, put the
name of colleagues you mail frequently into one
of the e-mail fields in Contacts. You don’t have
to enter their e-mail address, just type their
name and Outlook will automatically convert it
to the appropriate e-mail address. When you
write a new e-mail on your Z100, the address is
available for you to select.
Synchronizing Tasks
Tasks stored on your phone can be synchronized
with tasks stored on your desktop computer. By
default, all of your incomplete tasks are
synchronized.
Tasks created on your phone are copied to your
desktop computer during synchronization, and vice
versa. Similarly, tasks deleted from your phone are
deleted from your desktop computer during
synchronization, and vice versa. This keeps your Task
information up to date in all locations.
z Note: Tasks can only be synchronized with your
desktop computer; they cannot be synchronized
with a server.
ActiveSync® Errors
Whenever ActiveSync® cannot successfully
synchronize your information; it displays an error
message on your phone.
X
To view more information about an ActiveSync®
error
• Press Action when the error text is displayed.
ActiveSync® displays more information about the
error that has occurred.
z Note: Some types of errors can interfere with
automatic synchronization. If you suspect that a
scheduled automatic synchronization has not
occurred, you should try to manually
synchronize your information. If manual
synchronization is successful this resets
automatic synchronization. For more
70 Sendo Z100 User Guide
Page 32
z100.book Page 71 Wednesday, September 18, 2002 4:03 PM
6
information, see the Synchronizing Information
section of ActiveSync® Help on your desktop
computer.
Synchronizing Informa-
71 Sendo Z100 User Guide
Page 33
z100.book Page 72 Wednesday, September 18, 2002 4:03 PM
7
Chapter 7 Internet, Entertainment and More
This chapter explains how to browse the Web using
Pocket Internet Explorer, play audio and video files
using Windows Media™ Player, set up a modem
link, play Solitaire, and use the Calculator.
Using Pocket Internet Explorer
Internet, Entertainment
You can browse the Web on your Z100. Pocket
Internet Explorer on your phone supports WAP
(Wireless Application Protocol), HTML (Hypertext
Markup Language), and cHTML (compact Hypertext
Markup Language).
z Note: The browser supports images and
sounds, but it does not support frames on a
Web page.
X
To connect to the Internet
• On the Home screen, press Programs d, select
Internet Explorer, and press Action A.
X
To disconnect from the Internet
• Press the End key c.
z Note: If you are using a GPRS connection, you
never lose your connection to the internet.
When you have finished browsing, press the
Home key s.
Navigating in Pocket Internet Explorer
Your Favorites list is displayed as the default main
screen in Internet Explorer instead of a home page.
You can add your own favorite web addresses to this
list.
z Tip: Press Favorites d to access your Favorites
list from any web page.
X
To view a favorite
1. On the Home screen, press Programs d,
select Internet Explorer, and press Action A.
2. Select a favorite to view, and press Go d.
z Note: You can stop the connection at any time,
by pressing Stop d.
X
To activate a link
• Select a link, and press Action A.
z Note: Use the : and ; keys to move through
the list and view all available links.
X
To enter the address of a Web site
1. On the Home screen, press Programs d,
select Internet Explorer, and press Action A.
2. Press Menu g, select Go To, and press Action
A.
3. Enter the Web address, and press Go d.
X
To return to a Web page you previously visited in the
same session
1. On the Home screen, press Programs d,
select Internet Explorer, and press Action A.
2. Press Back r.
X
To view a list of Web pages you visited most recently
1. On the Home screen, press Programs d,
select Internet Explorer, and press Action A.
2. Press Menu g, select Go To, and press Action.
72 Sendo Z100 User Guide
Page 34
z100.book Page 73 Wednesday, September 18, 2002 4:03 PM
7
Internet, Entertainment
3. Select View History, and press Go d.
X
To visit a Web page on the History list
1. On the Home screen, press Programs d,
select Internet Explorer, and press Action A.
2. Press Menu g, select Go To, and press Action
A.
3. Select View History, and press Go d.
4. Using the : and ; keys, select the URL for a
Web page, and press Go d.
z Tip: While you are connected to the Internet,
you can switch between Pocket Internet Explorer
and other programs – simply press the Home
key s. This does not close your Internet
connection (you must select End c to do this),
to return to the web page you were viewing,
press Back r.
Using the Favorites list
If you find a Web page you want to visit again, you
can save it as a favorite. The next time you want to
visit that web page, you can just select it from your
Favorites list instead of having to enter the whole
address. You can also create different folders within
your Favourites folder, so that you can split your
favourites by category - for example, you could have
separate folders for work, music and travel
addresses.
X
To add a Web page to your Favorites list
1. On the Home screen, press Programs d,
select Internet Explorer, and press Action A.
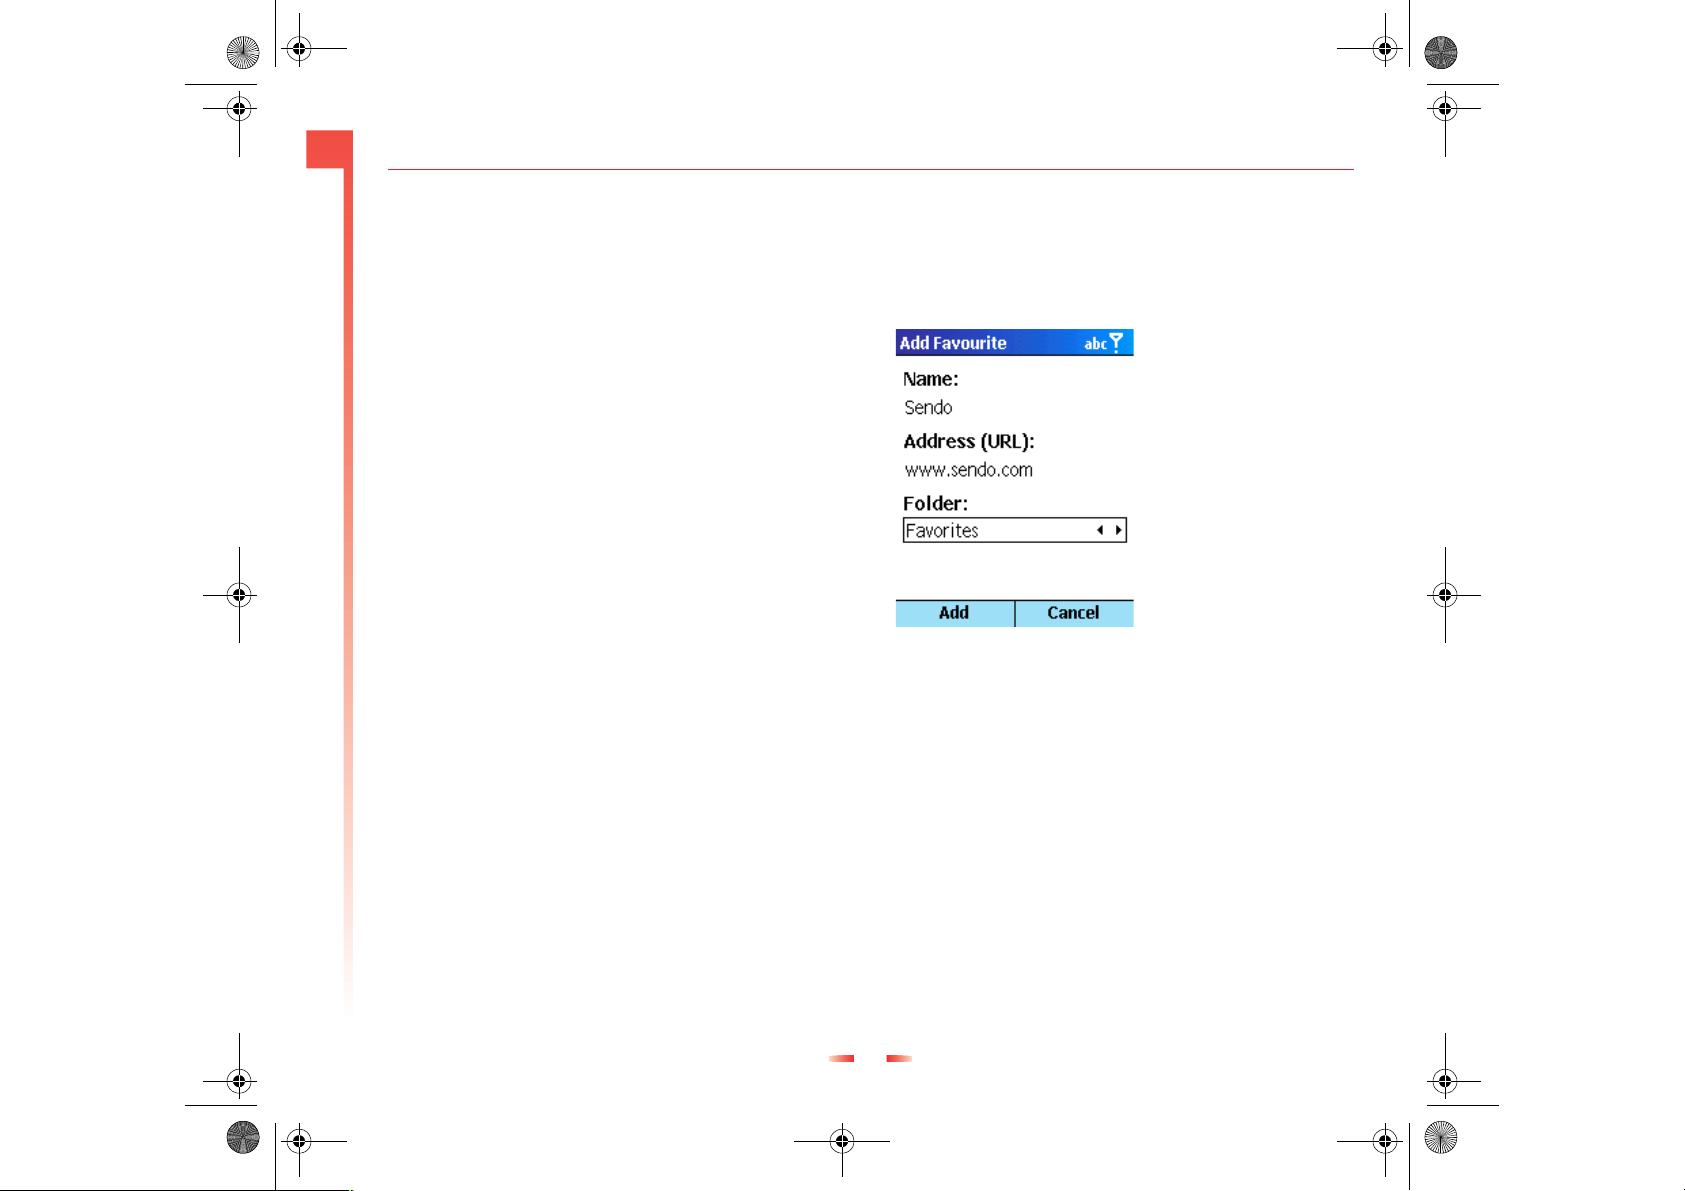
2. Press Menu g, select Add Favourite, and press
Action A.
3. Enter the Name for the web site, as you want it
to appear on your Favorites list, and press Add
d.
Figure 24 Adding a favorite
4. Enter the web Address (URL) for the website.
5. Press Add d.
z Tip: You can also add a favourite at any time
when you are browsing the internet. Just press
Menu g, Add Favourite and press Add - the
website you are looking at is added to your
Favourites folder.
X
To create a new folder in Favorites
1. On the Home screen, press Programs g,
select Internet Explorer, and press Action A.
2. Press Menu g, select Add Folder, and press
Action A.
73 Sendo Z100 User Guide
Page 35
z100.book Page 74 Wednesday, September 18, 2002 4:03 PM
7
Internet, Entertainment
3. Under Name, enter a name for the folder, and
press Add d. The folder is added to your
Favourites list and is displayed in alphabetical
order.
X
To delete a favourite
1. On the Home screen, press Programs g,
select Internet Explorer, and press Action A.
2. Select the favorite to delete, press Menu g,
select Delete, and press Action A. An Alert
message is displayed – you are asked whether
you’re sure you want to permanently delete the
favourite, press Yes d.
Cached web pages
The phone caches Web pages as they are
downloaded to your phone and stores them on your
phone until the cache is full. If you go to a web page
that is already stored on your phone, you will see the
stored version when you select the page. Choose
Refresh from the menu to see the latest Web content
for that page.
X
To refresh a Web page you have recently visited
1. On the Home screen, press Programs d,
select Internet Explorer, and press Action A.
2. Select the Web page to revisit from your
Favorites list or the History list, and press Go
d.
3. Press Menu g, select Refresh, and press Action
A.
Pocket Internet Explorer options
Use Pocket Internet Explorer options to change the
way Web pages are displayed, change the network
you connect to, and manage free space on your
phone.
X
To view Pocket Internet Explorer Options
1. On the Home screen, press Programs d,
select Internet Explorer, and then press Action
A.
2. Press Menu g, select Options, and then press
Action A.
Select To
General Change the way Web pages are downloaded
and displayed. For example, you can choose to
turn off images or sound, fit the Web page to
the screen, request a warning before viewing
non-secure Web pages, allow cookies, or
change the language.
Connections Change the network you connect to. For
Memory Clear all temporary Internet files, cookies, and
example, change from Internet to your
corporate network.
Web history.
Media Player
You can play Windows Media audio and video files,
and MP3 audio files on your phone Using Microsoft
Windows Media™ Player 7.0. You can also copy
digital music and video directly from your desktop
computer to your phone using Media Player or
ActiveSync™. For more information about copying
74 Sendo Z100 User Guide
Page 36
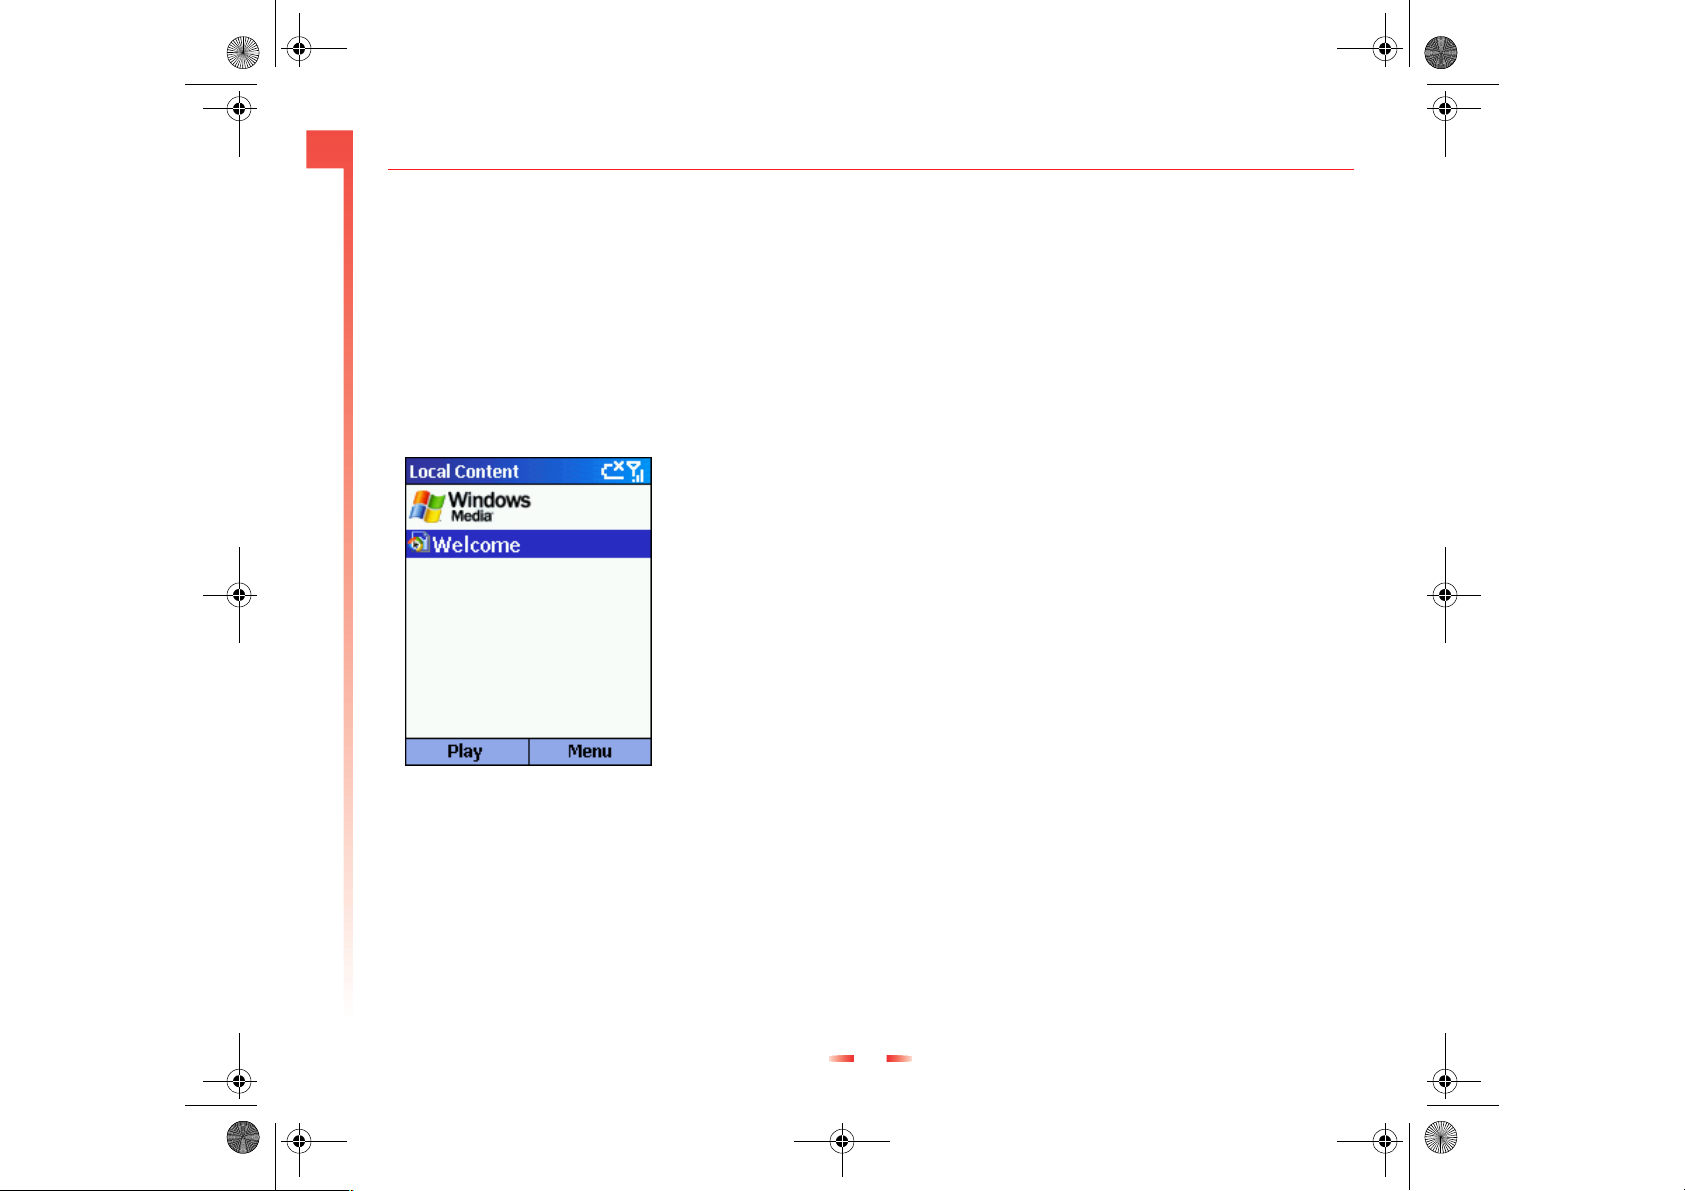
z100.book Page 75 Wednesday, September 18, 2002 4:03 PM
7
Internet, Entertainment
files to your phone, see the Media Player Help on
your desktop PC.
Media Player is easy to use as the controls are
similar to the keys on a compact disc player.
z Note: You can also install other media players
on your Z100.
X
To access Media Player
• On the Home screen, press Programs d, select
Windows Media, and press Action A.
Figure 25 Local Content Screen
Playing files
You can play audio or video files, skip to another
song or video, or increase and decrease the volume.
X
To play or stop a file
• On the Local Content screen, press Play d.
• To stop, press Action at any time.
X
To skip to the beginning of the current file
• Move Left [ with the joystick.
X
To skip to the beginning of the previous file
• Move Left [ twice, quickly.
X
To skip to the next file
• Move Right ] with the joystick.
X
To adjust the volume
• Use the Volume control, on the side of the phone,
to increase or decrease the volume.
X
To play a streaming media file on a network
1. On the Local Content view, press Menu g,
select Open URL, and press Action A.
2. Enter the Web URL, and press Play d.
z Note: You can also select an audio or video link
in Pocket Internet Explorer to play streaming
media.
X
To play files in a random order
1. On the Local Content screen, press Menu g,
select Settings, and press Action A.
2. Select the Shuffle check box and press Done
d. To select the checkbox, use the : and ;
keys to move to the checkbox and press Action –
a tick is displayed in the box.
X
To play files repeatedly
1. On the Local Content screen, press Menu g,
select Settings, and press the Action button A.
75 Sendo Z100 User Guide
Page 37
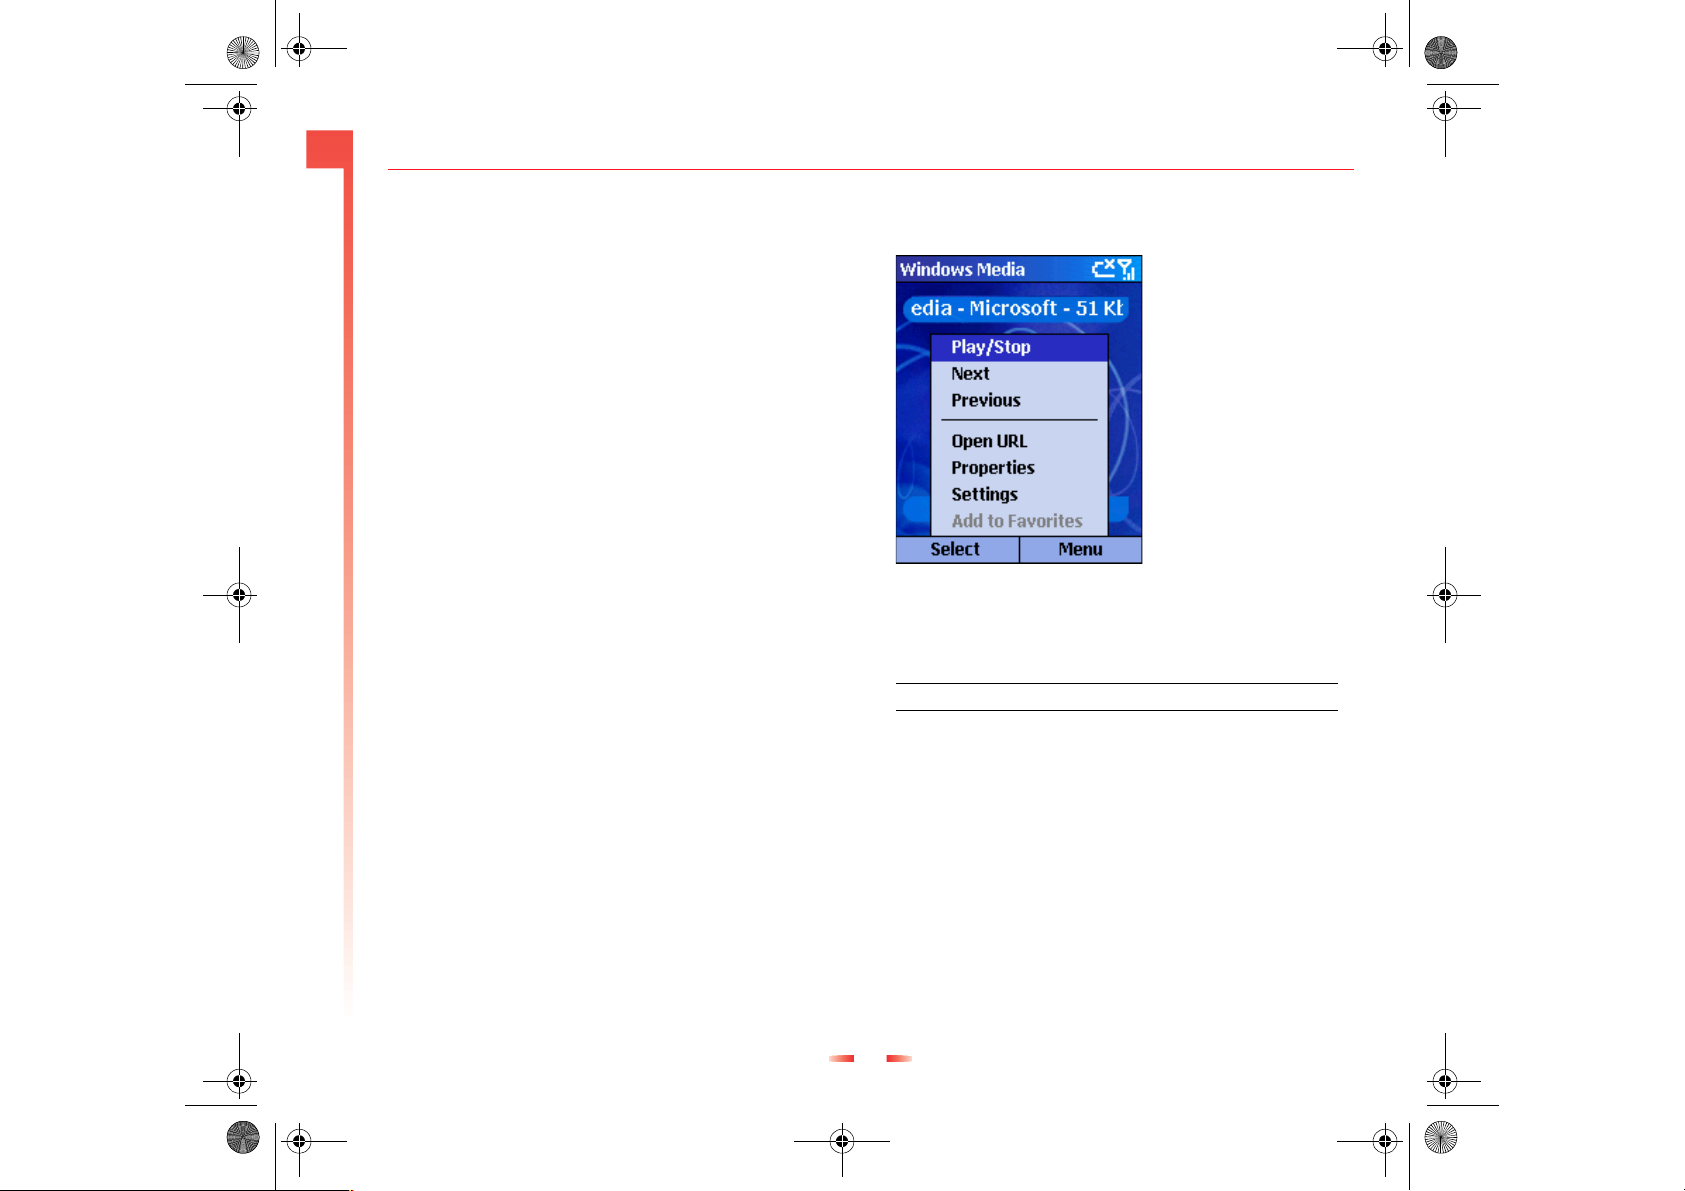
z100.book Page 76 Wednesday, September 18, 2002 4:03 PM
7
Internet, Entertainment
2. Select the Repeat check box, and press Done
d.
X
To stop playback while using another program
1. On the Local Content screen, press Menu d,
select Settings, and press the Action A.
2. Select Background play, and press Done d. To
select the checkbox, use the : and ; keys to
move to the checkbox and press Action – a tick is
displayed in the box.
Menu options when playing a file
When you are playing a file, you can use the menu
options to start and stop playback, skip to the next or
previous file, display information about a file,
configure volume and playback settings, or add files
to your Favorites playlist.
X
To access menu options when playing a file
• Press Menu g.
Figure 26 Playback Controls
The following table lists the menu options and their
functions that are available when you play a file.
Select this To
Play/Stop Play or stop playback of the current file.
Next Skip to the next file on the current playlist. This
option is not available if the last file is the
current selection.
Previous Skip to the beginning of the current file on the
Open URL Play a streaming media file on a network, for
Properties Display information about the file that is
current playlist. If no file is playing, this
command skips to the previous file on the
current playlist.
example, content streamed from an Internet
radio station.
playing.
76 Sendo Z100 User Guide
Page 38
z100.book Page 77 Wednesday, September 18, 2002 4:03 PM
7
Internet, Entertainment
Select this To
Settings Display the Settings options, which enable you
to adjust the volume and various playback
options.
Add to
Favorites
Add the streaming media file that is playing, to
the Favorites playlist.
Local Content screen menu options
By using the menu options from the Local Content
screen, you can start and stop playback, add files to
your Favorites playlist, display information about a
file, configure volume and playback settings, or
delete a file.
X
To access Local Content screen menu options
• On the Local Content screen, press Menu g.
This table lists the Local Content screen menu
options and their functions.
Select this To
Play/Stop Play or stop playback of the current file.
Local Content Display the Local Content view playlist.
Favorites Display the Favorites view playlist.
Open URL Play a streaming media file on a network, for
example, content streamed from an Internet
radio station.
Properties Select this to display information about the
Settings Select this to display the Settings screen, which
Delete Select this to permanently delete the selected
selected file.
you can use to adjust the volume and specify
various playback options.
file from the phone.
Using Media Player favorites
You can connect to your favorite streaming media
file and add it to your Favorites. The next time you
want to listen to the streaming media file, just select
it from Favorites.
X
To connect to a streaming media file
1. On the Local Content screen, press Menu g,
select Open URL, and press Action A.
2. Enter the URL, and press Play d.
X
To add a streaming media file to Favorites
1. Connect to a streaming media file on the
Internet or other network.
2. Press Menu g, select Add to Favorites, and
press Action A.
X
To pla y a fa vo rite
1. On the Local Content screen, press Menu g,
select Favorites, and press Action A.
2. Select an item, and press Play d.
X
To delet e a fa vorit e
1. On the Local Content screen, press Menu g,
select Favorites, and press Action A.
2. Select an item, press Menu g, select Delete,
and press Action A.
Licenses
Some digital media content from the Internet, CD
tracks, and videos have associated licenses that
77 Sendo Z100 User Guide
Page 39
z100.book Page 78 Wednesday, September 18, 2002 4:03 PM
7
Internet, Entertainment
protect them from being unlawfully distributed or
shared.
Licenses are managed and created using digital
rights management (DRM), which is the technology
for securing content and managing the rights for its
access. Some licenses prevent you from playing
content that is copied to your phone.
z Note: To ensure that the license is copied with
the content, use the Portable Device (or Copy to
CD or Device) feature in Windows Media Player
7 or later on your desktop PC to copy content to
your phone. For more information about
copying content to your phone and other
portable devices, see the Windows Media Player
Help on your desktop PC.
Supported File Formats
The Media Player supports the following types of file
formats.
Format File name extensions
Windows Media .asf, .asx, .wax, .wm, .wma, .wmv,
Moving Picture Experts
Group (MPEG)
.wmx, .wvx
.mp3
Supported Audio and Video Codecs
Media Player can play files that have been
compressed by using any of the following audio and
video codecs.
Audio codecs Microsoft Windows Media Audio codec version
2.0, 7.0, and 8.0
Fraunhofer IIS-A MPEG-1 Audio Layer-3 codec
Video codecs Microsoft Windows Media Video codec version
7.0 and 8.0
Microsoft MPEG-4 video codec version 3.0
ISO MPEG-4 video codec version 1.0
Modem Link
Using Modem Link, you can use your phone as an
external modem for another device or a computer.
Modem Link allows you to use a serial port, infrared,
or USB port for this connection.
X
To set up an infrared or USB modem connection
1. Make sure that your phone is not connected to
another device.
2. On the Home screen, press Programs d,
select Accessories, and press Action A.
3. Select Modem Link, and press Action A.
4. Under Connection, select USB or IrCOMM, and
press Menu g. Select Activate.
5. Connect your phone to the device with which
you want to use your phone as a modem, or if
you are connecting using infrared line up the
infrared ports on the devices.
78 Sendo Z100 User Guide
Page 40
z100.book Page 79 Wednesday, September 18, 2002 4:03 PM
7
Internet, Entertainment
X
To set up a serial port modem connection
1. Make sure that your phone is not connected to
another device.
2. On the Home screen, press Programs d,
select Accessories, and press Action A.
3. Select Modem Link, and press Action A.
4. Under Connection, select Serial (COM1), and
press Menu g. Select Activate.
z Note: (For serial ports only). The default baud
rate is set at 115,200. You do not need to
change this default unless the port speed of the
phone or computer requires you to do so.
X
To activate the Modem Link
1. On the Home screen, press Programs d,
select Accessories, and press Action A.
2. Select Modem Link, and press Action A.
3. Press Menu g, select Activate, and press
Action A.
4. Align the phone’s IR port or connect the cable to
the device
X
To deactivate the Modem Link
1. On the Home screen, press Programs d,
select Accessories, and press Action A.
2. Select Modem Link, and press Action A.
3. Press Menu g, select Deactivate, and press
Action A.
z Note: Failing to deactivate the Modem Link
when you are finished using it may result in
problems with using ActiveSync™ in the same
session.
Voice Notes
Voice Notes are used to create short voice
recordings. Recordings are included in the All Notes
list and are named consecutively (Recording 1,
Recording 2, and so on). The notes are named
automatically but you can rename them.
z Note: You can only use the Voice Note
functionality when the radio functionality is
active.
X
To create a Voice Note
1. Hold the phone’s microphone close to your
mouth.
2. Do a quick press on the Record key, located on
the side of the Z100, and then press Record d
to begin recording.
3. Press Stop d when you’ve finished recording
the voice note.
X
To view Voice Notes
1. Do a quick press on the Record key on the side
of the phone to display the All Notes screen. All
existing voice notes are listed.
X
To pla y a Voice No te
1. Do a quick press on the Record key, and use the
: and ; keys to select the recording you want
to play.
79 Sendo Z100 User Guide
Page 41
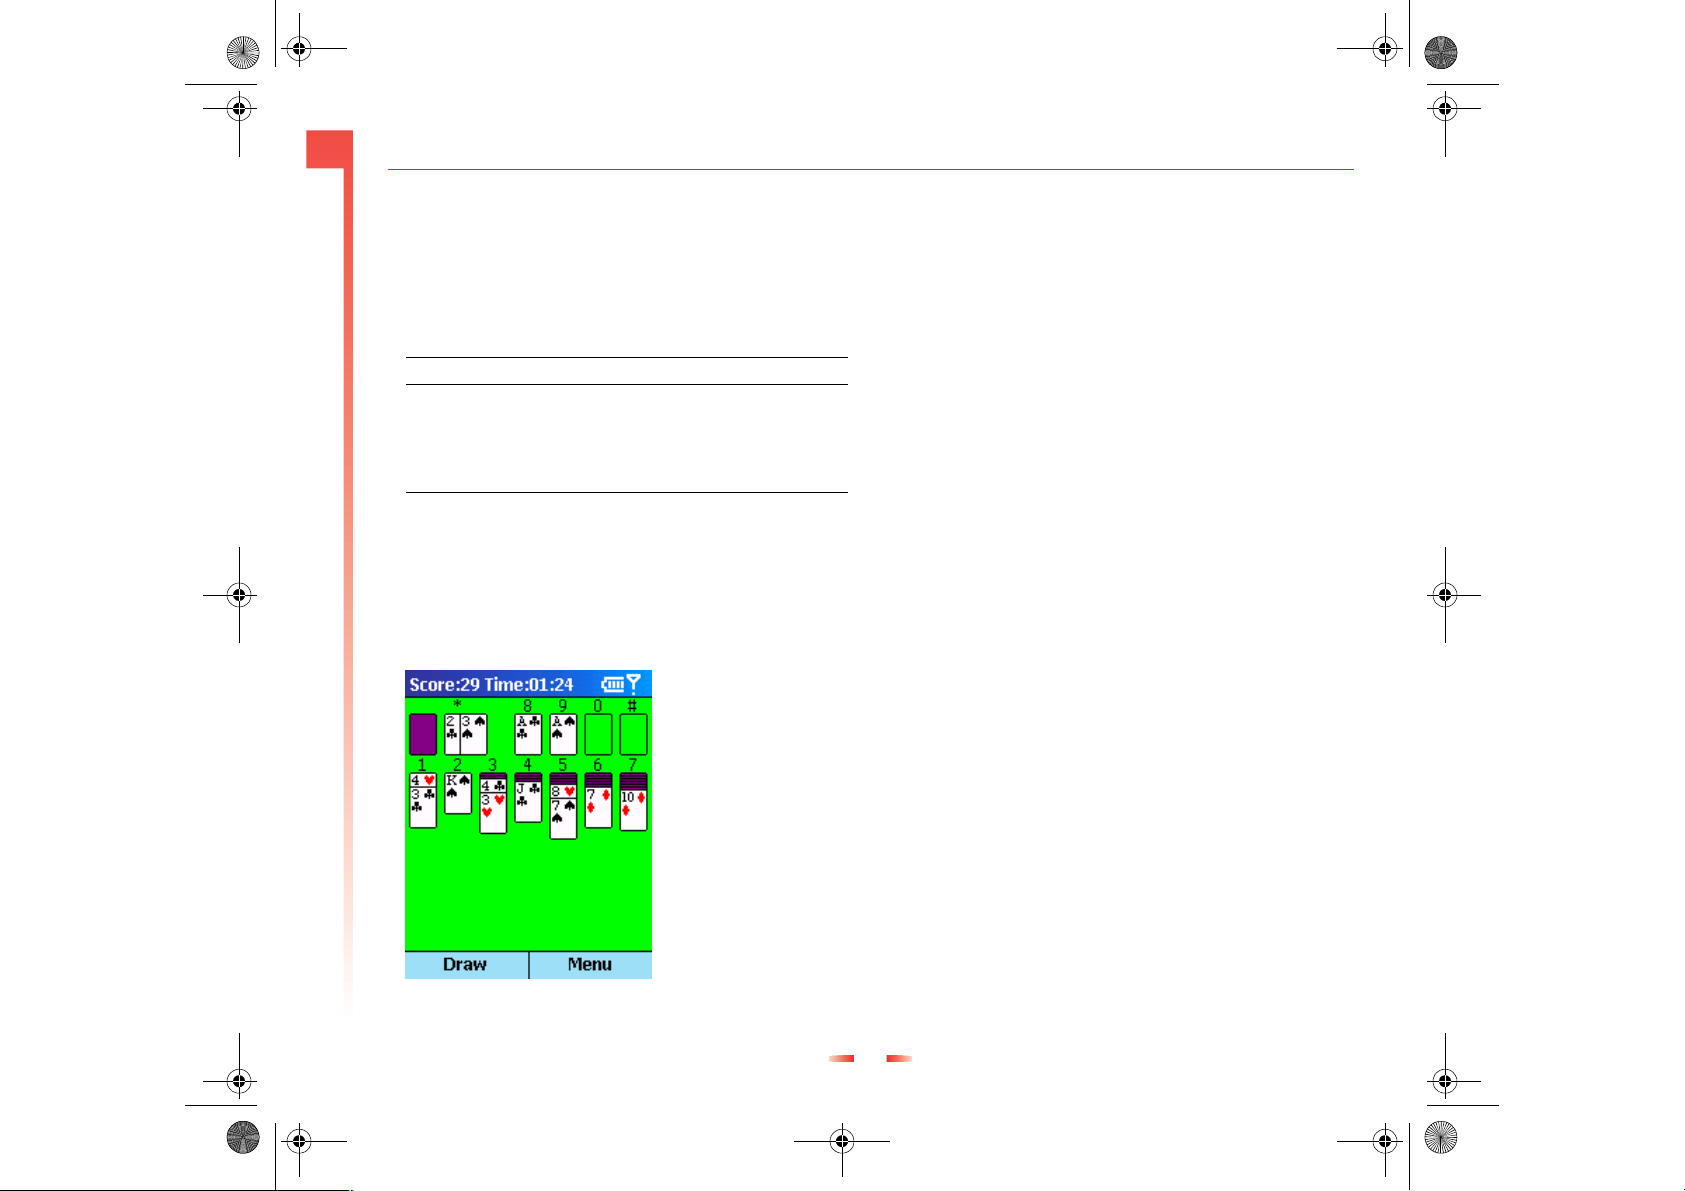
z100.book Page 80 Wednesday, September 18, 2002 4:03 PM
7
Internet, Entertainment
2. Press Menu g, select Play, and press Action
A.
Voice Note menu
Use the Voice Note menu options to perform further
tasks:
Select this To
Play Play the selected voice note.
Record Start recording a new voice note.
Rename Rename the selected voice note.
Delete Delete the selected voice note.
Solitaire
The object of Solitaire is to use all the cards in the
deck to build up the four suit stacks in ascending
order, beginning with the aces. You win the game
when all cards are on the suit stacks.
X
To start a game of Solitaire
• On the Home screen, press Programs d, select
Games, Solitaire, and press Action A.
• In Solitaire, press Menu g and select New
Game.
Playing Solitaire
X
To move cards in Solitaire
• Press the number or character above the card
stack displaying the card you want to move, and
then press the number or character above the
card stack to move the card to.
z Tip: Move Up : to move a card to one of the
four card stacks on the upper right corner of the
screen if it belongs there. For example, if you
have an ace displayed on top one of the seven
stacks, press the number above the ace, and
then move Up.:.
X
To play Solitaire
1. Move any aces on the seven stacks to the four
card spaces at the top right of the screen, and
then make any other available plays.
2. When you have made all available plays, press
Draw d to turn over new cards from the stack
in the top left corner.
Figure 27 Solitaire
z Tip: The card that is face up on the deck is
always available for play.
80 Sendo Z100 User Guide
Page 42
z100.book Page 81 Wednesday, September 18, 2002 4:03 PM
7
X
To prevent the Home screen from displaying during
a game
1. On the Home screen, press Programs d,
select Settings, Home Screen, and press Action
A.
2. Move to the Time out field, and press Left [or
Right ] to change the value to Never. Press
Internet, Entertainment
Done d.
Calculator
You can use Calculator to perform any of the
standard operations for which you would normally
use a handheld calculator. The Calculator performs
basic arithmetic, such as addition, subtraction,
multiplication, and division.
X
To open Calculator
• On the Home screen, press Programs d, select
Accessories, Calculator, and then press Action
A.
X
To enter numbers and perform calculations
• Use the keypad to enter numbers.
• Press Hash # to cycle through the available
mathematical symbols, and press the Asterisk *
key to enter a decimal point.
• Press Action A to display the answer.
z Tip: You can also use the joystick to display the
available mathematical symbols. Move Up :
for the plus sign (+), Down : for the minus
sign (-), Left [ for the division sign (/), and
Right ] for the multiplication sign (X).
X
To clear the current calculation or displayed number
• Press Clear d.
X
To clear the last digit entered in a multiple digit entry
• Press Back r.
81 Sendo Z100 User Guide
Page 43
z100.book Page 82 Wednesday, September 18, 2002 4:03 PM
7
Z-i Capture
Internet, Entertainment
X
You can use your Z-i to take snapshots of your
friends and family. The Z-i is an easy to use, high
performance digital camera. All you need to do is
slot the camera onto your phone and use the screen
non the handset as the viewfinder.
You can send your photos by e-mail, data-call or
ActiveSync.
If you receive a call when you are using the camera,
the Incoming Call screen is displayed. You can
accept or reject the call as you would normally. If you
accept the call, the camera screen is displayed when
the call ends. If you reject the call, the camera screen
is redisplayed.
Getting Started
Simply slot the camera onto your Z100 handset to
get ready. Once the camera is attached to your
phone, the Z-i capture screen is displayed
automatically.
Picture
z Warning: If the camera is not attached correctly,
an Alert message is displayed. Remove the
camera and replace it firmly on the handset.
Try again.
Take a photo
The camera lens is located on the back of the
camera, so it’s on the back of the phone at the
bottom.
1. Use the screen as the viewfinder for your picture.
2. Once your happy with the picture on screen,
press any of the keys on the side of the camera
(Record or Volume). The picture is displayed on
the screen:
• If you don’t like the photo press Discard g.
• If you want to keep the photo press Save d.
The picture is stored in the location you’ve
specified for new photos.
The following options are also available from the Z-i
Capture screen:
Select this To
Light Level Select whether the llight level is low or normal -
Preview Level Choose the quality level yu want to view the
Image Size Choose from 3 pre-defined sizes for your
Image
Quality
Save Images toSpecify whether to save the
where?
image previews ar
images
Using the Viewer
Use the Z-i Viewer to display all the photos stored on
your phone, or on your storage card if you are using
one.
X
To display the Z-i Viewer
On the Z-i Capture screen, press Viewer d.
82 Sendo Z100 User Guide
Page 44
z100.book Page 83 Wednesday, September 18, 2002 4:03 PM
7
Your photos are displayed as thumbnail images.
Use the : and ; and [ and ] keys to scroll to
select the image you want.
X
View photos in detail
1. Select the required photo using the joystick.
2. Press Action A to view image as full screen.
Internet, Entertainment
X
Rename a photo
1. On the enlarged image screen, press Menu
g.
2. Select Rename.
3. Delete the number assigned to the image and
enter the new name. Press Confirm d.
The following menu options are also available from
the Z-i Capture screen:
Select this To
View View the selected image at full screen size.
Send As Send the selected image as either an MMS
message or an e-mail. The Send Message
screen is displayed.
Delete Delete the selected image. You will be asked to
confirm the delete.
Rename All images are called numbers by default Enter
a new name for the image
Thumbs Update the images in the Viewer file to include
recent photos you have taken
Display thumbnails as large or small.
83 Sendo Z100 User Guide
Page 45
z100.book Page 84 Wednesday, September 18, 2002 4:03 PM
8
Further Z100 Applica-
Chapter 8 Further Z100 Applications
This chapter explains
Packet Video
You can experience wireless access to multimedia
content using Packet Video mobile media technology
on your Z100. Use Packet Video Player software to
play clips directly from your device or memory card,
and download, or stream, clips from a web site.
Packet Video delivers audio, video, animation and
graphics.
X
To install Packet Video on your Z100
1. Connect the device to your desktop PC, using the
Serial/USB cable. (Plug the data cable into the
USB port on your PC and then plug the other
end of the cable into your Z100 or cradle)
2. Start ActiveSync (version 3.6 andabove) by
selecting Programs d, ActiveSync, press Action
A and then press Sync d.
3. Double click on the PacketVideo.exe file on your
desktop.
4. Follow the install instructions (Next, Next, Next
etc) displayed. Now you can open PacketVideo
on your Z100.
Playing Clips
You can play clips stored on your Z100, a memory
card if you are using one or play streaming media
files.
X
Open and play a clip stored on your Z100 or
memory card:
1. On the Home screen, press Programs, select
Accessories, Packet Video and press Action A.
2. All clips that are either stored on your phone or
on the memory card (if you have one installed)
are displayed.
3. Using the : and ; keys, select the clip you
want to watch. Press Play d or Action A.
X
View a stream or clip located on a web site
1. On the Home screen, press Programs d and
select Internet Explorer.
2. Browse to the web site that has the clip or stream
you want to play. For more information about
how to browse the Internet, see ????
3. Select the clip or stream, Packet Video Player
automatically starts playing the content.
z Note: You can play clips from links that you
have received via email. Just select the link and
Packet Video Player automatically starts playing
the clip.
X
Pause a clip
1. To pause a clip, press Pause d.
X
Stop a clip
1. ????????
84 Sendo Z100 User Guide
Page 46
z100.book Page 85 Wednesday, September 18, 2002 4:03 PM
8
Further Z100 Applica-
Managing clips
By using the menu options from the Clips screen,
you can start playback, delete a file or rename a
clip.
X
To access Clips screen menu options
• On the Clips screen, Press Menu d.
Select this To
Play Play a clip from the list.
Delete Delete a clip from your device or memory card.
Properties Rename a clip or change the location of the
Note that this option is only available when you
are viewing a list of clips stored on your device.
clip.
Managing clips accessed from a web site
How to ??? Are clips from website stored differently?
Manage clips you have accessed from a web site
using the following features:
Select this To
Play Play a clip.
Pause Pause a clip or stop a stream that is playing.
Clips Display a list of all clips stored on your Z100 or
memory card.
Save Saves a clip to your device or memory card.
Please note that this option is not available for
streaming media.
Select this To
Options Note: The media buffer only applies to
streaming media.
The media buffer controls the amount of data
that is stored before playback begins.
Increasing the media buffer may improve the
consistency of your viewing, but will increase
the time before the media playback starts.
To adjust the buffer, move Left
depending on your preference. You can also
move Down
available media buffer values.
Accepting the default setting is recommended.
; to scroll through the list of
[or Right ],
Emblaze Player
Where do you install it from?
You can use the Emblaze Player to view offline
media clips, that is, clips stored on your Z100 or on
your memory card if you are using one. The main
screen displays the name of the clip, the total length
of the clip and a counter to show how much of the
clip has already played.
X
To install the Emblaze Player
1. Connect the device to your desktop, using the
Serial/USB cable. (Plug the data cable into the
USB port on your PC and then plug the other
end of the cable into your Z100 or cradle)
2. Start ActiveSync (version 3.6 and above) by
selecting Programs d, ActiveSync, press Action
A and then press Sync d.
3. Double click on the EmblazePlayer.exe file on
your desktop.
85 Sendo Z100 User Guide
Page 47
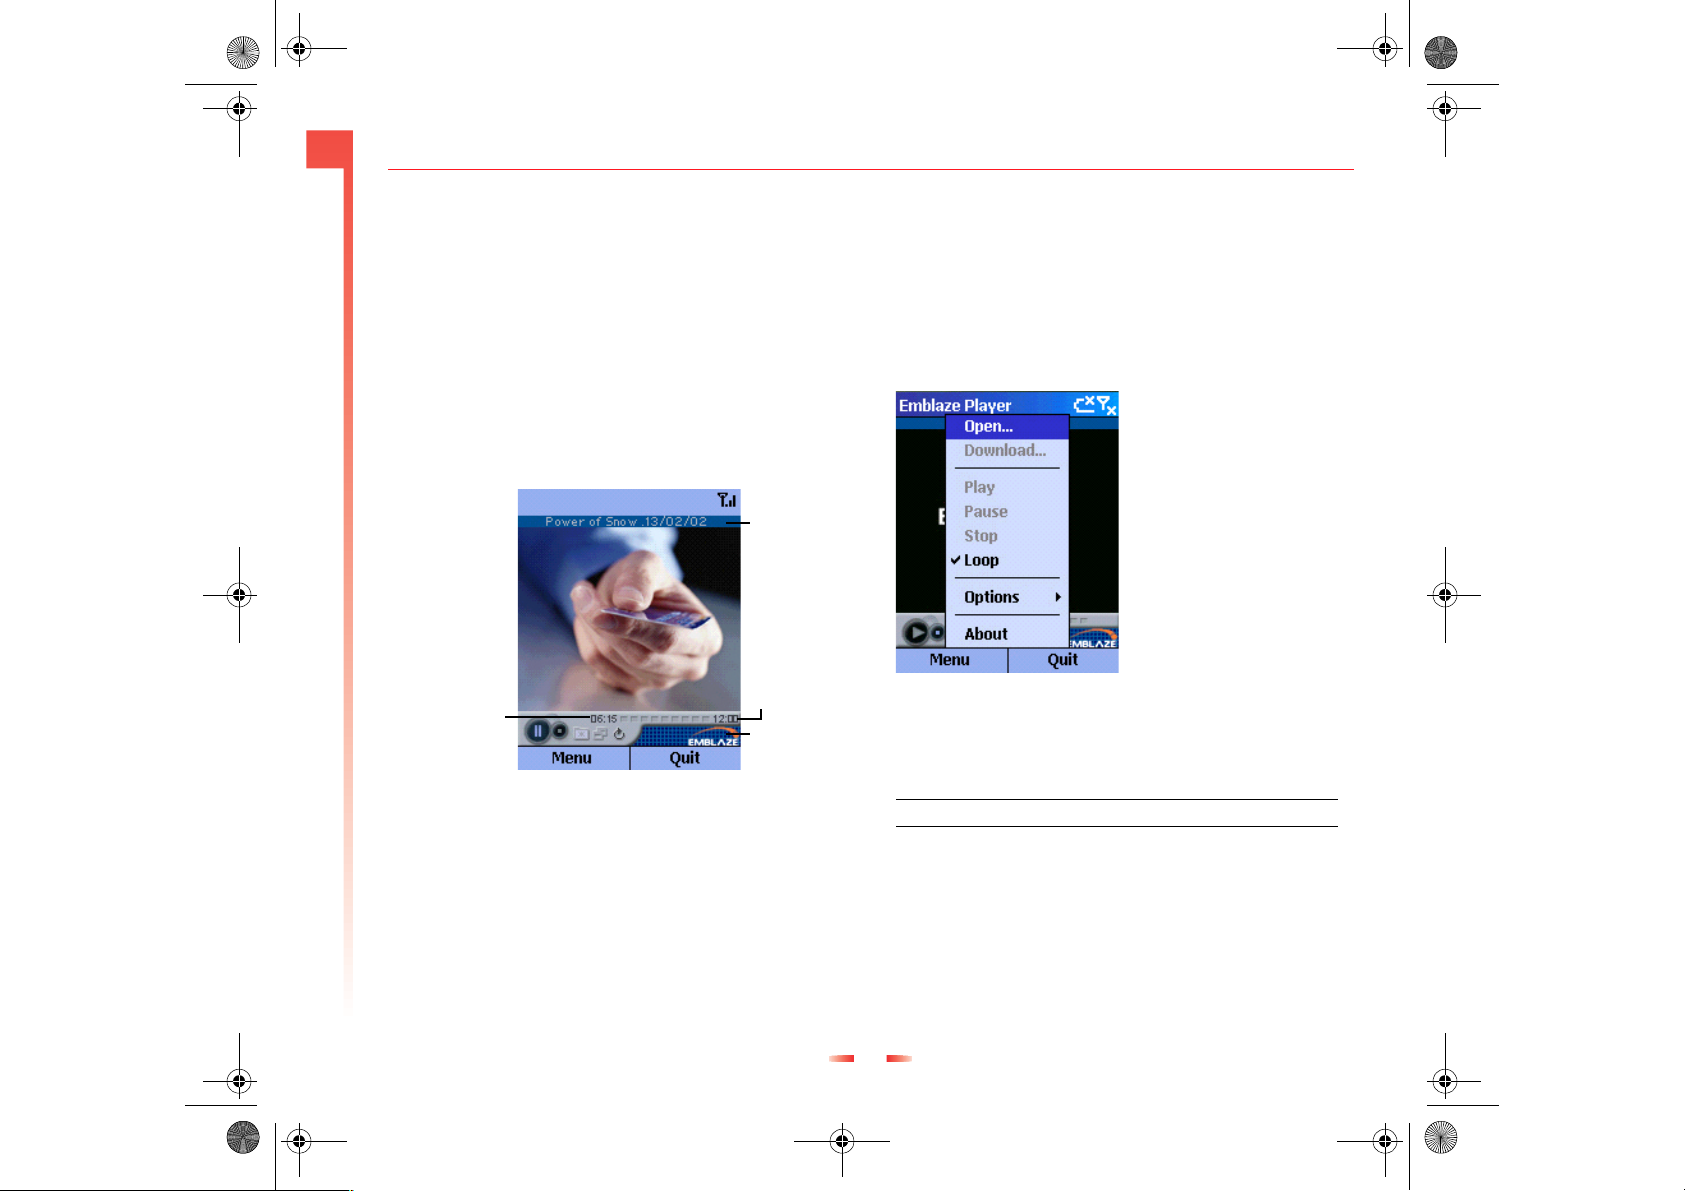
z100.book Page 86 Wednesday, September 18, 2002 4:03 PM
8
Further Z100 Applica-
4. Follow the install instructions (Next, Next, Next
etc) displayed.
5. Now you can open the Emblaze Player on your
Z100.
X
To open Emblaze Player
1. On the Home screen, press Programs, select
Accessories, Emblaze Player and press Action
A.
X
To close the Emblaze Player
• Press Quit g.
Name of clip
Total duration of
Current time
counter
Figure 28 Emblaze main screen
X
To play a clip
clip
Loop indicator
1. On the Emblaze main screen, press Menu d,
select Open and press Action A.
2. Use the : and ; keys to select the clip from the
Emblaze directory. Press Action A.
3. Press Menu d, select Play and press Action A.
z Tip: The name of the clip is displayed at the top
of the screen and the duration of the clip is
displayed at the bottom of the screen.
Using Emblaze menu options
Use the menu options to perform all the functions
within Emblaze Player.
Figure 29 Emblaze menu options
X
To view the Emblaze menu options
1. On the Emblaze main screen, press Menu d.
Select To
Open Open a clip
Play Play an opened clip
Pause Pause a clip that’s playing
Stop Stop the clip that’s playing
Loop Plays the selected clip in a loop
Options Display Emblaze automatic feature options.
86 Sendo Z100 User Guide
Page 48
z100.book Page 87 Wednesday, September 18, 2002 4:03 PM
8
Further Z100 Applica-
Select To
About Displays information about the Emblaze Player
software version.
Automatic features
You can set certain features within Emblaze to run
automatically. Auto Loop plays clips you have
opened in a constant loop until you stop it. Auto start
plays all clips you have opened.
X
To set Auto Loop
1. On the Home screen, press Programs d,
select Emblaze Player and press Action A.
2. On the Emblaze main screen, press Menu d.
3. Select Options and press Action A.
4. Select Auto Loop and use the [ and ] keys to
switch to On.
X
To s e t Au t o Sta r t
1. On the Home screen, press Programs d,
select Emblaze Player and press Action A.
2. On the Emblaze main screen, press Menu d.
3. Select Options and press Action A.
4. Select Auto Start and use the [ and ] keys to
switch to On.
IA Album
Use IA Album to browse and view photo images
stored on your Z100 or storage card, if you are
using one. You can simply view the photos or you
can use the various features of IA Album to
manipulate the images. You can:
• View images as thumbnails, in enlarge the size.
There’s also a Zoom function to see pictures in
more detail.
• Images that are too big for the Viewing area can
be panned into view.
• Rotate photos to the left or right, "flip them over"
horizontally or vertically,
• Display at actual size or fit-to-viewing-are.
• You can use all the functions with animated .gif
files.
X
To start the IA Album
• On the Home screen, press Programs d, select
Accessories, IA Album and press Action A.
Viewing Modes
There are three ways of viewing your files using IA
Album:
• Thumbnail View
• Image View
• Slide Show
Thumbnail Mode
When you start the Album, the Thumbnail mode is
always started. All the pictures in the My Documents
folder are displayed by default. Use Thumbnail
87 Sendo Z100 User Guide
Page 49
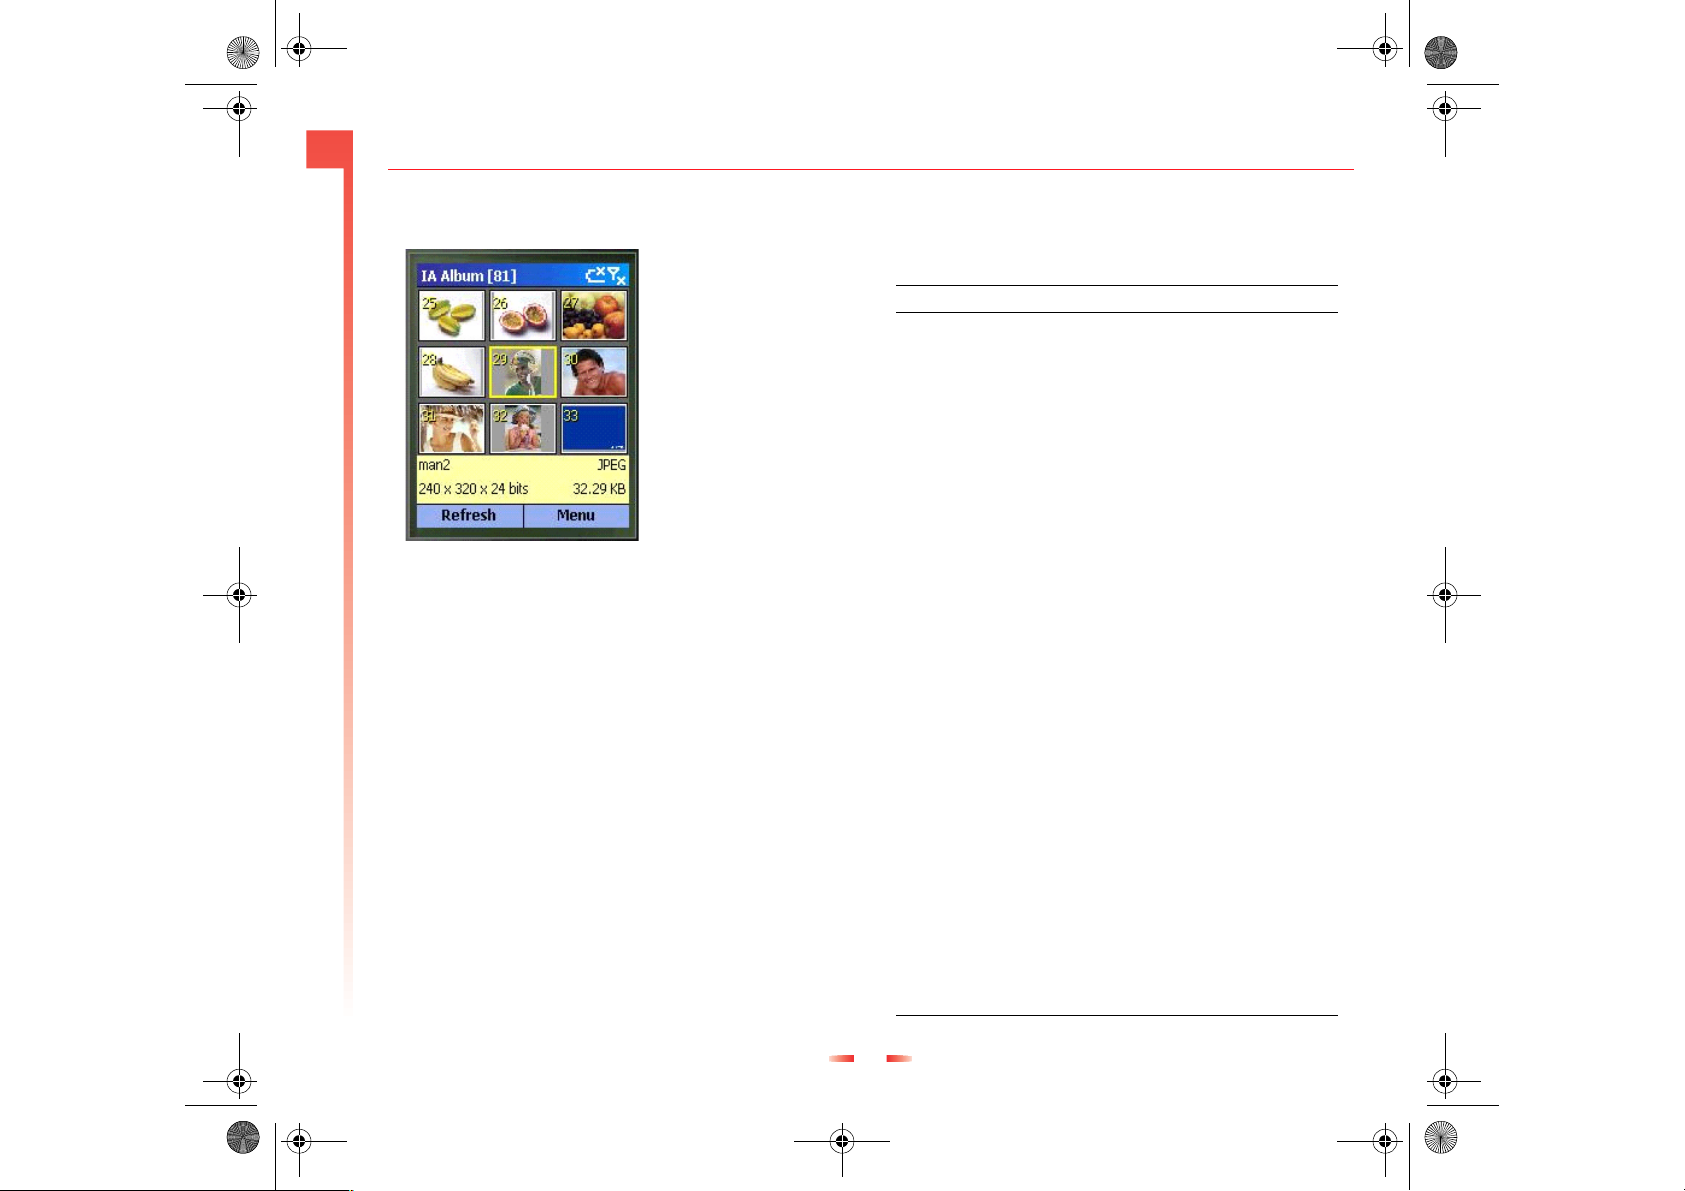
z100.book Page 88 Wednesday, September 18, 2002 4:03 PM
8
Further Z100 Applica-
mode to quickly scroll through all the images in a
selected folder.
Figure 30 IA Album Thumbnail mode
X
To view an image in more detail
1. Use the :, ;, [ and ] keys to select an
image.
2. Press Menu g and select View Image (Action).
Press Action A. The image is displayed in View
Image mode (to fit the screen).
or,
1. Use the :, ;, [ and ] keys to select an
image.
2. Press Action A.
X
To view information about the image
1. Press Menu g and select Show Image Info.
Thumbnail View menu options
The following options are available when you are in
Thumbnail mode.
Select To
Slide Show
(O)
View Image
(Action)
Show Image
Info
Thumbnail Choose the size of the thumbnails displayed.
Refresh Refresh the display. The Album re-reads and
Delete Delete the selected image. You must confirm
Folder Browse the folders on your Z100 and search
About Display copyright and version information.
Exit Close the IA Album.
Switch to Slide Show mode. All the items in the
current folder are displayed one by one. See
the Slide Show section for more information.
Switch to Image View mode. The selected
thumbnail is enlarged to fit the screen. See the
Image View section for more information.
Open a status pane at the bottom of the screen
which displays data about the selected image.
Note: This reduces the number of pictures you
can view on screen in Thumbnail mode.
Select Large to display six at a time (four if the
status pane is displayed) or Small to display
twelve at a time (nine if the status pane is
displayed).
re-displays the thumbnail images in the current
folder. For example, if you have added new
pictures to the folder while you’ve been running
IA Album, you can refresh to include all the
new images.
that you want to delete the file.
for image files. . When you select a folder, the
IA Album scans the folder for image files – it
opens any that it finds. Select the folder you
want to change to. If you select All Folders, IA
Album searches all the folders on your Z100
and memory card (if you are using one).
88 Sendo Z100 User Guide
Page 50
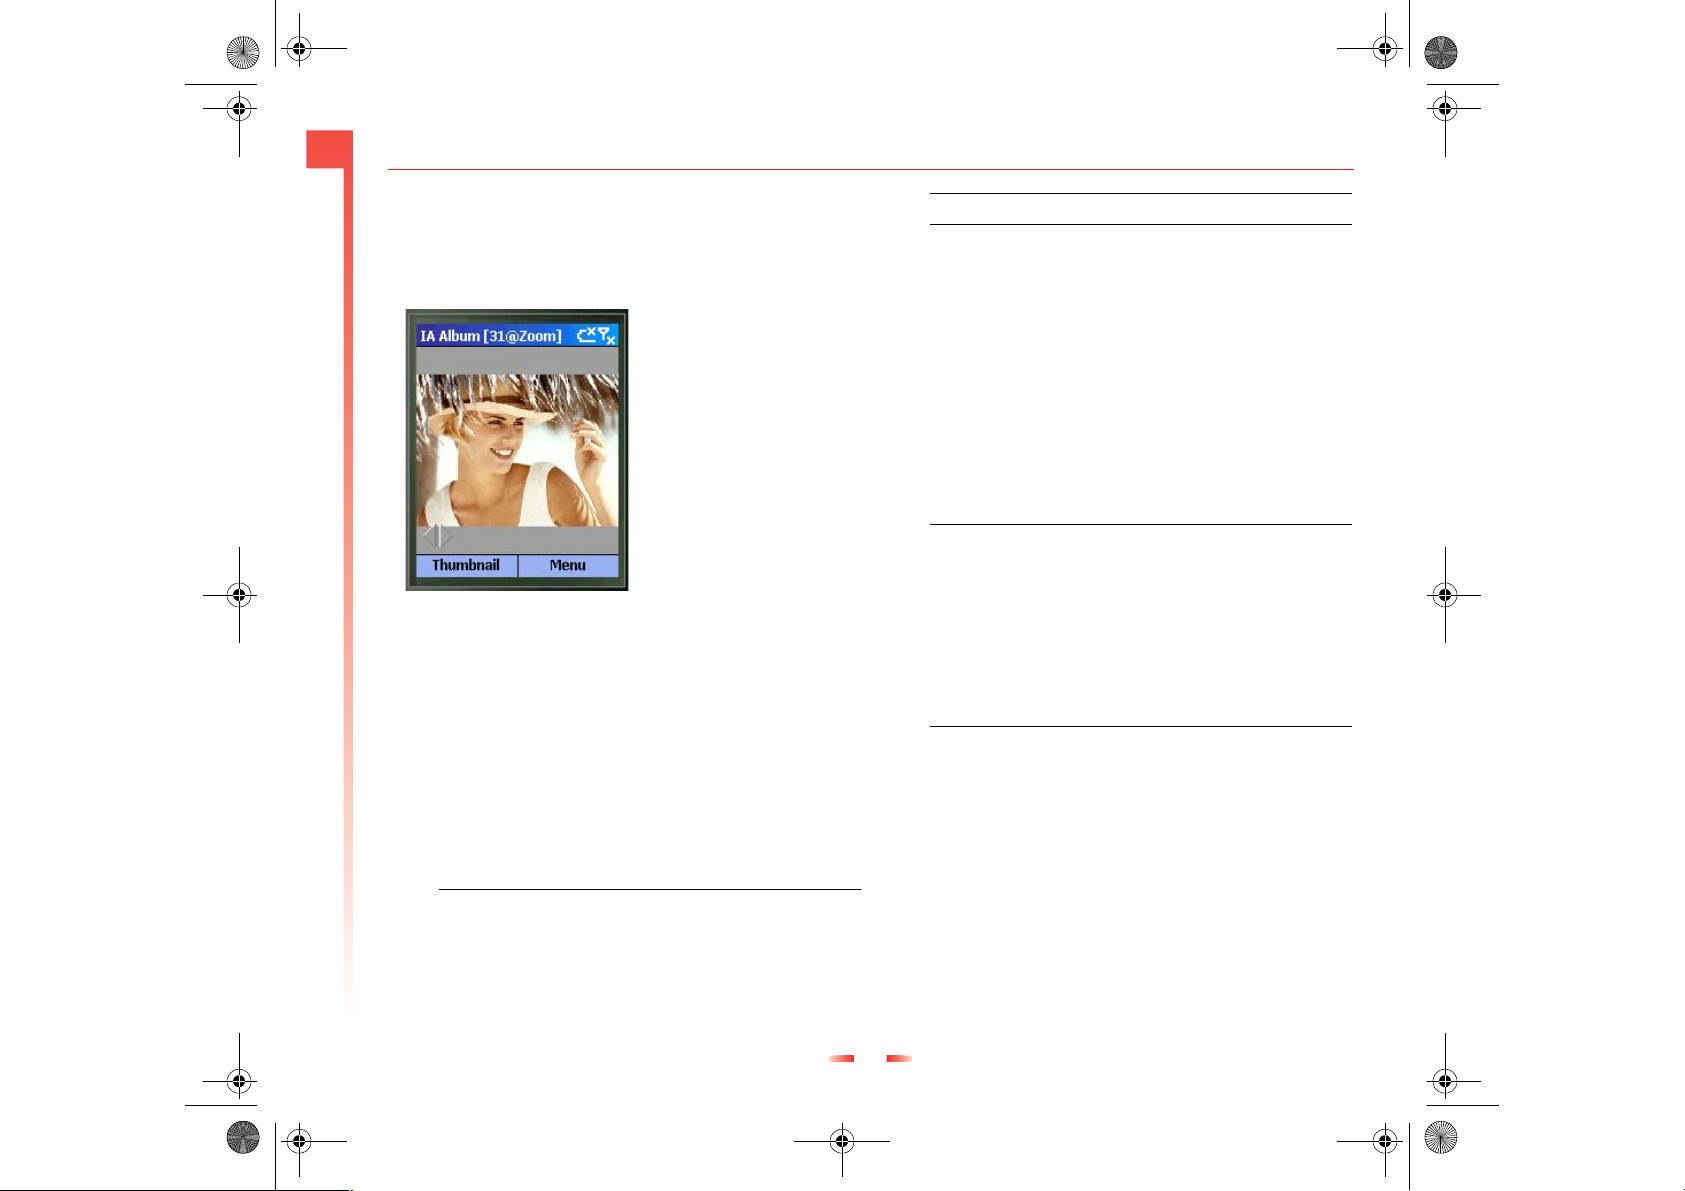
z100.book Page 89 Wednesday, September 18, 2002 4:03 PM
8
Further Z100 Applica-
Image View mode
Use Image View mode to view the image in detail.
You can zoom in and out, pan the image, rotate and
flip the image.
Figure 31 IA Album Image View Mode
X
To view in Image View mode
1. On the Thumbnail mode screen, press Menu
gand select View Image (Action).
2. Press Action A.
X
To zoom in on an image
1. On the image view screen, press Menu g and
select Zoom (Action). Use the following keys to
control the zoom function:
#
Display the image so that it fits the window
z Note: When you’re in zoom mode, # @ zoom
is displayed in the title bar. Where # denotes the
image number.
z Tip: To toggle between zoom and pan mode,
press Action A.
X
To pan on an image
1. On the image view screen, press Menu g and
select Zoom (Action). Use the following keys to
control the pan function:
:
;
[
]
*
#
Moves the image down in a display area
Moves the image up in a display area
Moves the image right in a display area
Moves the image left in a display area
Display the image in it’s actual (1:1 pixel
ratio) size
Display the image so that it fits the window
z Note: When you’re in panning mode, # @ pan
is displayed in the title bar. Where # denotes the
image number.
:
;
*
Zoom in on the image
Zoom out on the image
Display the image in it’s actual (1:1 pixel
ratio) size
89 Sendo Z100 User Guide
Page 51
z100.book Page 90 Wednesday, September 18, 2002 4:03 PM
8
Image View menu options
Select this To
Slide Show
Mode
Thumbnail Switch to Thumbnail mode. All the images in
Further Z100 Applica-
Zoom (Action) Use Zoom mode.
Pan (Action) Use panning mode.
Delete Delete the selected image.
View Ratio Zoom in and out on an image even when the
Rotate/Flip Rotate and flip images
Exit Close the IA Album.
Switch to Slide Show mode. All the items in the
current folder are displayed one by one. See
the Slide Show section for more information.
the folder are displayed as thumbnails. The
number of thumbnails displayed on screen
depends on the thumbnail size you have set.
See the Thumbnail mode section for more
information.
IA Album is in Panning mode.
Slide Show View Mode
Use Slide Show View mode to view the images in an
automatic slide show sequence. All the images in the
selected folder are displayed in sequence. You can
customize the way your slide show works.
X
To use Slide Show View mode
1. On the Image View mode screen, press Menu
gand select Slide Show Mode.
2. Press Action A.
Slide Show View menu options
Select this To
Delay Time Choose the amount of time that each
individual picture is displayed. Select None,
0.5, 1, 2, 3, 5, 10 or 30 seconds.
Rotate Specify a rule for the orientation of each image
displayed during a slide show. The default is
Never, which means that the picture is
displayed in it’s unaltered state every time you
use this view mode.
Transitions Choose the effect between pictures.
Stop (Action) To stop Slide show mode and return to the
previous view you were using.
Exit Close the IA Album.
Sendo Explorer
Use the Explorer function to navigate easily around
all the files in your Z100’s internal memory or the
memory card if you are using one.
Soft Texter
Use the Softtexter to use
The Softexter provides you with an innovative way to
use your Z100. You can:
• Type information quickly and accurately, using a
fully functional keyboard similar to the one you
would use with your desktop computer.
• Select, cut, copy and paste text.
• Launch applications and choose commands with
a single key press.
90 Sendo Z100 User Guide
Page 52
z100.book Page 91 Wednesday, September 18, 2002 4:03 PM
8
• When you want to use your Softexter, it opens out
flat on any hard surface. No cable or adapter is
required, the Softexter plugs directly into your
Z100.
z Note: The Softexter cover has been treated to be
resistant to common accidents such as spilt
drinks. The coating can be wiped clean with a
Further Z100 Applica-
damp cloth or soft sponge. Use clear water
only, do not apply detergent.
Setting up the Soft Texter
The Soft Texter comes with default settings, but you
can amend these so that the keypad is most suited to
you.
X
To view the Soft Texter Settings
1. From the Home screen, press Programs d,
select Te xt er and press Action.
2. Keyclicks on
3. Backlight on
4. Settings
5. Calibrate
6. Hotkeys
Typing and Editing
This section explains how to type and edit text using
the Softtexter. It describes techniques that will help
you speed up your data entry, and some of the
subtle differences between text entry using your
Softexter and a conventional keyboard.
The Softextter is smaller than a conventional
keyboard, and the keys have a different feel, but it’s
easy to adapt to using it. Most users find that they
can enter text quickly with only a few minutes
practice.
The main differences are:
• Keys are pressure sensitive.
• You cannot press keys simultaneously. This
impacts on the way you use the Shift and Ctrl
keys and type upper case letters. With a
conventional keyboard, the primary keys that you
press in conjunction with other keys are Shift and
Ctrl. For example, you would hold down the Shift
key and press a letter to type it in upper case, or
hold down the Ctrl key and press C to copy, and
so on.
• Text shortcuts can be used to speed up data entry.
You can enter text shortcuts as you type, to speed
up the entry of commonly used words or phrases.
They work similarly to the AutoText feature on
some word processors, whereby a word is
completed for you based on the first couple of
characters you type. For example, if you are in
shortcut mode and enter the letters 'br', your
handheld computer assumes that you require the
word 'Breakfast', and so completes this for you.
• Additional functions are available to carry out
functions you would perform with a mouse on a
desktop computer, such as move the cursor,
select text and cut copy and paste When typing,
you can use the arrow keys to move the cursor
within the text as you would normally, either
91 Sendo Z100 User Guide
Page 53
z100.book Page 92 Wednesday, September 18, 2002 4:03 PM
8
Further Z100 Applica-
character or line at a time. The arrow keys are
pressure sensitive, for speed control.
Selecting Text
To select text, you must use Select mode. When you
are in Select mode, you can select characters or lines
of text using the arrow keys. You can also work in
Select mode and Shift mode concurrently to select
entire words or chunks of text.
X
To e n te r Sel e ct m o de
• Press the Select key on the top row of the keypad.
You remain in Select mode until you press the
Select key again.
X
Select Text
Whilst in Select mode, press one of the following
keys:
Press To Select
Í From the character to the left of the cursor
Î From the character to the right of the cursor.
Ï From the current cursor position to the same
Ð From the current cursor position to the same
Í
Shift
Î
Shift
Shift
Ï
position in the line above.
position in the line below.
From the current cursor position to the
beginning of the current word. If the cursor is
already at the beginning of a word, selects the
previous word.
From the current cursor position to the end of
the current word. If the cursor is already at the
end of a word, selects the next word.
From the current cursor position to the top of
the page.
Press To Select
Shift Ð
X
Use the Shift and Ctrl keys
From the current cursor position to the bottom
of the page.
1. Press the Shift or Ctrl key, release the key, and
then press the key that the Shift or Ctrl applies
to.
z Note: You can also use Shift mode to jump to
the beginning or end of a line or page, or skip
between words
X
Insert a Tab
1. To generate a tab while typing, press and release
Ctrl, and then press Tab .
X
Type Upper Case letters
1. Press and release the Shift key. The next
character you type is uppercase; subsequent
characters are lower case.
2. Press and release the Caps Lock key. All
characters you type are uppercase until you
deactivate upper case mode by pressing Caps
Lock again.
3. An onscreen indicator, ? or ?, is displayed to
show the Shift or Caps Lock state.
X
Use Text Shortcuts
1. Press Shift, Cmd ? and ?. The icon is displayed
indicating that you are in shortcut mode.
2. Type the first couple of characters of the word or
phrase you require. Your handheld checks these
characters against the shortcuts it recognizes.
92 Sendo Z100 User Guide
Page 54
z100.book Page 93 Wednesday, September 18, 2002 4:03 PM
8
Further Z100 Applica-
When it finds a match, it completes the word for
you.
X
Move the Cursor
1. Press Í to skip to the beginning of the current
word. If the cursor is already at the beginning of
a word, moves to the beginning of the previous
word
2. Press Î to skip to the end of the current word. If
the cursor is already at the end of a word, moves
to the end of the next word.
3. Press Ï to skip to the top of the page.
4. Press Ð to skip to the bottom of the page.
Cut, Copy and Paste
Press To
Cut Equivalent to selecting Cut from the Edit menu.
Deletes the selected text and stores it
temporarily in the memory of your handheld.
You can then paste the text into another area of
the application, or into a different application.
Copy Equivalent to selecting Copy from the Edit
menu. Copies the selected text (leaving it intact)
and stores it temporarily in the memory of your
handheld. You can then paste the text into
another area of the application, or into a
different application.
Paste Equivalent to selecting Paste from the Edit
menu. Inserts the text cut or copied into the
current application at the cursor position.
Special Characters
You can type special characters using the Softexter,
including:
• Accented characters, such as à á â.
• Fractions, such as ½, ¾.
• Symbols, such as ™, ®.
To generate special characters, press the Alt key.
Each key press then generates the corresponding
character from the extended character set. When
you have finished, you return to normal typing either
by pressing the Alt key again, or by pressing any key
different to the last one pressed. For example,
pressing Alt, a, Alt, a generates àa; pressing Alt, a, b
generates àb.
Some keys have more than special character
associated with them, such as the a key which is
93 Sendo Z100 User Guide
Page 55
z100.book Page 94 Wednesday, September 18, 2002 4:03 PM
8
Further Z100 Applica-
used to generate all of the following special
characters: à á â ã ä å æ. After Alt, keep pressing a
until you get the character you want. For example,
pressing Alt, a generates à; pressing Alt, a, a
generates á.
You can us e th e Shift or Caps keys to generate upper
case special characters, in the same way that you
would when typing normally. For example, pressing
Alt, Shift, a generates À.
The following table lists the special characters
available with Alt:
Press To display
Upper Case
1¡ ¡
A À Á Â Ã Ä Å Æ à á â ã ä å æ
B• ß • ß
C Ç © ¢ ç © ¢
D° ÷ ° ÷
E _ È É Ê Ë _ è é ê ë
Fƒ ƒ
H½ ½
I Ì Í Î Ï Ð ì í î ï ð
Mµ µ
NÑ ñ
O Ò Ó Ô Õ Ö Ø Œ ò ó ô õ ö ø œ
P £ ¶ ± £ ¶ ±
Q¼ ¼
R® ®
Sß § ß §
TÞ ™ ¾ Þ ™ ¾
U Ù Ú Û Ü µ ù ú û ü µ
YÝ ¥ Ÿ ý ¥ ÿ
[« «
]» »
To dis pla y
Lower Case
Press To display
Upper Case
?¿ ¿
“‘
.“ ‘
To display
Lower Case
Comfort Guidelines - Important
Ergonomic Information
THIS DEVICE IS NOT INTENDED FOR EXTENDED
OR INTENSIVE USE.
Long periods of repetitive hand motions, incorrect
body posture, and poor work habits may be
associated with physical discomfort and injury to
nerves, tendons, and muscles. To reduce the risk of
such injuries, follow these precautions when using
this device:
• Take frequent short breaks.
• Keep your wrists straight.
• Take frequent short breaks.
• Keep your wrists and shoulders relaxed.
• Avoid supporting your wrists on sharp edges.
• Be alert to signs of discomfort. If you feel pain,
numbness, tingling, weakness, swelling, burning,
cramping, or stiffness in your hands, wrists, arms,
shoulders, neck, or back, see a qualified health
professional.
94 Sendo Z100 User Guide
Page 56
z100.book Page 95 Wednesday, September 18, 2002 4:03 PM
9
Troubleshooting
Chapter 9 Troubleshooting
Problem Possible Cause Possible Corrective Action
Phone does not power on Battery empty Fully charge the battery and press p.
Battery contacts dirty Clean contacts on the battery and on the
Phone does not charge Battery empty Charge for 2 hours. Don’t worry if the
Charger incorrectly inserted Check the charger is properly inserted into
Battery How long should I charge the battery the
first time?
I don’t get as much battery life as I expected The phone uses battery power all the time it
‘No Network’ displayed when I switch on
my phone
The PIN code is blocked 3 incorrect entries Enter the PUK code. This may have been
is switched on, even if it is not in a call.
Making calls and using the different
functions of the phone, for example, games,
playing MP3’s and synchronizing with your
PC will run down the battery faster. The
stated battery life is under optimum
conditions.
SIM card is inserted incorrectly or missing Check that the SIM card is inserted correctly
SIM card is damaged or dirty Visally check the SIM and clean the golden
phone with a dry cloth. Re-insert battery,
wait for a few seconds and press p.
battery charging icon does not appear
immediatly, if the battery has been
completely discharged, it can take up to 2
hours for the icon to appear.
Disconnect and try again
the mains socket and properly connected to
the phone. Check that the mains socket is
switched on.
12 hours continuous
Charge the phone regularly
ActiveSync manually not automatically
and press p.
coloured contacts with a dry cloth. Try
again.
supplied with your SIM, but if not you must
contact your service provider. Sendo cannot
supply your PUK code.
95 Sendo Z100 User Guide
Page 57
z100.book Page 96 Wednesday, September 18, 2002 4:03 PM
9
Problem Possible Cause Possible Corrective Action
The PIN2 code is blocked 3 incorrect entries Enter the PIN2 code. This may have been
Troubleshooting
‘NCK code’ is displayed on my phone The handset is locked to a network and a
‘Blocked’ is displayed on my handset. The NCK code has been incorrectly entered
Poor display Low temperature Ideally the phone should be kept at room
Can’t connect to the network Weak signal Move into an area of better coverage. If
supplied with your SIM, but if not contact
your service provider. Sendo cannot supply
your PUK code.
SIM from another network has been
inserted into the phone.
10 times and the phone has been security
disabled.
High temperature Ideally the phone should be kept at room
Display and backlight settings power saving Check the phone is set up with a bright
Wallpaper settings If you’ve added your own wallpaper, check
Invalid SIM card Contact your service provider
‘Network denied’/’No network’ Try reselecting the netwrok. Switch the
operating band is incorrect Check the band you are operating on.
Remove the SIM and insert the correct
netwrok SIM. Contact your service provider
Return the phone to your service provider or
to an authorized Sendo service centre to be
reset.
temperature. Move to a warmer place and
allow the phone to warm up. Try again.
temperature. Move to a cooler place and
allow the phone to cool down.
enough display and that the display time
out is not too fast.
that the colours do not clash with the text
colours used on screen as this could make it
difficult to distinguish.
you are inside try moving closer to a
window
phone off and on again.
North America operates on 1900, but
Europe and Aisa operate on 900/1800
band. Check with your service provider.
96 Sendo Z100 User Guide
Page 58
z100.book Page 97 Wednesday, September 18, 2002 4:03 PM
9
Problem Possible Cause Possible Corrective Action
Can’t make or receive call Weak signal Check that the service provider name is
Troubleshooting
I am missing lots of calls Synchronizing too often The phones performance is slowed
displayed on the screen. If not try to
reconnect to the network
Phone is switched off Press p.
Check the number Use the full area code and country code in
the correct international format.
Call key not pressed After dialling the number, you must press
the Call key f.
Network is busy If you hear rapid beeps, the network is busy.
Hang up and try again.
Call barring or fixed dialling is activated Check the Telephony settings on your
phone. Check your call barring settings with
your service provider.
Not registered with service provider After purchasing your phone, you may need
to call your service provider to activate the
line.
No credit left on your prepaid card Recharge your credit in the normal way
Check operating band Check the band you are operating on.
North America operates on 1900, but
Europe and Aisa operate on 900/1800
band. Check with your service provider.
Roaming agreement Check with your service provider on the
terms and conditions of your roaming
agreement
considerably while synchronization is taking
place between your phone and your
desktop computer. This could cause some
calls to be missed. Check the ActiveSync
settings (Programs>ActiveSync>Schedule).
You can set it up so that the phone and PC
only synchronize manually instead of at
regular intervals which may be too often for
your needs.
97 Sendo Z100 User Guide
Page 59
z100.book Page 98 Wednesday, September 18, 2002 4:03 PM
9
Problem Possible Cause Possible Corrective Action
Low earpiece volume Low setting Increase the volume using the Volume key
Low ringer tone low setting Check which profile you are using. Some
Troubleshooting
Cannot enter some words Wrong entry mode Your phone has T9 predictive text input. To
Some features do not work Feature not supported by your service
Some menus are missing There are restrictions on your SIM card or
Names on my contact card are not stored
on my SIM card
Received messages are not stored on my
SIM
Phone does not recognize MMC card Type of MMC card not supported Check www.sendo.com to make sure the
My infrared link does not work Infrared is not activated on your phone Activate IrDA on your phone.
llocated on the side of the phone.
profiles are designed to have low ringtones.
If this is unsuitable you can either select a
different profile or edit the current one.
enter a word which is not in the T9
dictionary, do a long press on ? to switch to
multitap mode. Enter the word you require.
Check the language settings for the T9
dictionary
Call your service provider
provider or your subscription
Call your service provider
subscription
Licence has expired
Contacts that you store on your Z100 are
only stored on the phone and are not
copied to your SIM
Messages are stored on your phone only
and not copied to your SIM
MMC card type is supported
MMC card not inserted Make sure that the MMC card is inserted
and try again
MMC card is dirty Remove MMC card and clean contacts with
a dry cloth. Reinsert and try again
MMC card is not formatted Reformat the card and try again
Programs>Settings>Power Settings
Infrared is not activated on your PC Check infrared settings on your PC
Infrared drivers are not installed Download infrared drivers onto your PC
98 Sendo Z100 User Guide
Page 60
z100.book Page 99 Wednesday, September 18, 2002 4:03 PM
9
Problem Possible Cause Possible Corrective Action
Troubleshooting
I can’t synchronize with my PC ActiveSync has not been installed properly Check ActiveSync is installed correctly.
E-mail I can’t send e-mail
Can’t find contacts stored on my SIM All SIM contacts are listed at the bottom of
Low memory Too many applications or data have been
MP3/4 is not in stereo Type of headset You must use an authorized Sendo headset
‘Can’t save photos’message Camera settings Check ? to make sure that the camera
Infrared lenses are too far apart Check that both IrDA lenses are within close
range (about 0.5m) of each other and that
they are unobstructed
Infrared lens is dirty Check that both lenses are clean. Clean
only with a dry cloth
INSTALL WIZARD
USB cable is not connected Check that both ends of the USB cable are
securely plugged in
PC does not meet minimum requirements
for use of ActiveSync
PC is NT USB is not supported by NT
I can’t receive e-mail
your contacts list
stored on your phone.
Poor connection Make sure that the headset connector is
Check the minimum PC requirements for
ActiveSync. You can find these listed in the
Z100 User Guide.
Do a short press on ; to jump to the bottom
of the list. All SIM contacts are indicated by
the ? symbol.
Check Programs>Settings>About to view
the available memory on your phone. You
may need to remove applications or data to
free some memory.
pushed fully home into the Z100 accessory
connector
photos are stored in the correct place. For
example, you cannot save new photos to the
MMC card if there is not an MMC card
inserted.
99 Sendo Z100 User Guide
Page 61
z100.book Page 100 Wednesday, September 18, 2002 4:03 PM
10
Chapter 10 Safety
Important Safety Information
Safety
You should observe and follow these guidelines for
the safe and efficient use of your phone. Failure to
comply with these guidelines and requirements may
void your warranty and may invalidate any
approvals given to your phone.
Drive Safely
Do not use a hand-held telephone while driving. Give
your full attention to driving. If using a hand-held
phone, pull over safely and park the vehicle in a safe
location first. Always place the phone in its holder; do
not place the phone on the passenger seat or where it
can break loose in a collision or sudden stop.
Always obey local laws and regulations regarding
the use of a cellular phone in the areas where you
drive. In some areas, it is illegal to use a cellular
telephone while driving, and hands free operation is
required in many other areas. Do not hold your
phone in your hand while driving.
Do not use a headset (such as a headset that covers
both ears) that interferes with your ability to hear
emergency vehicle sirens or the warning horns of
other vehicles. Driving safely always comes first!
Operation
Remember to follow any special regulations in force
in any area and always switch off your phone
whenever you are instructed not to use it, or when its
use may be illegal or cause interference or danger.
Most modern electronic equipment is shielded from
RF signals. However, certain electronic equipment
may not be shielded against the RF signals from
your wireless phone.
Read the user’s manual of any accessory or device
and its operation and safety instructions before using
it with your phone. Do not connect incompatible
products.
Do not use your phone if the antenna is damaged.
Replace the antenna only with one approved by the
manufacturer. Unapproved antennas or
modifications may damage your phone, degrade its
performance and violate local regulations. Do not
touch the antenna unnecessarily while a call is in
progress. Contact with the antenna affects call
quality and may cause your phone to transmit at a
higher power level than otherwise needed. Hold
your phone as you would any other phone. The
antenna should point up and over your shoulder.
Do not point the infrared beam at anyone’s eye or
allow it to interfere with other infrared devices.
The charger is compatible only with power sources
indicated on its label. Do not connect the charger to
a power source of a different voltage or frequency.
Do not use the charger outdoors or in areas where it
may become wet. Unplug the charger from the wall
socket using the body of the charger, not the cord.
Locate the cord so that it will not be tripped over,
stepped on or damaged. Do not use the charger if it
is damaged. Unplug the charger from the wall
socket before cleaning it. Use a slightly damp cloth
for cleaning, and allow the charger to dry fully
before plugging it in.
Only use accessories approved by Sendo. Using
unapproved accessories with your phone may result
100 Sendo Z100 User Guide
Page 62
z100.book Page 101 Wednesday, September 18, 2002 4:03 PM
10
in degraded performance, fire, electric shock or
Safety
injury, and may void the warranty. Please check with
your dealer for the availability of approved
accessories. Your phone is intended for use only with
chargers approved by the manufacturer. Any other
use will invalidate any approval given to your phone
and may be dangerous.
Children
Your phone is not a toy. Do not allow small children
to play with it. They could hurt themselves or others.
Children could also damage the phone or make
calls that increase your telephone bill.
Pacemakers
Sendo recommends that a minimum separation of
20 cm (or 6 inches) be maintained between a
wireless phone and a pacemaker to avoid potential
interference with the pacemaker. These
recommendations are consistent with the
independent research by and recommendations of
Wireless Technology Research. Persons with
pacemakers:
• Should always keep the phone more than 20 cm
(or 6 inches) from their pacemaker when the
phone is switched on;
• Should not carry the phone in a breast pocket;
• Should use the ear opposite the pacemaker to
minimize the potential for interference.
• If you have any reason to suspect that
interference is taking place, switch off your phone
immediately.
Hearing Aids
Some wireless phones may interfere with some
hearing aids. In the event of such interference, you
should consult your service provider.
Medical Equipment
Operation of wireless phones may interfere with the
inadequately protected medical devices. Consult a
physician or the manufacturer of the medical device
to determine if they are adequately shielded from
external RF energy. Turn off your phone in hospital
and other health care facilities when any regulations
posted in these areas instruct you to do so, as
equipment that could be sensitive to external RF
energy may be in operation.
Vehicles
RF signals may affect improperly installed or
inadequately shielded electronic systems in motor
vehicles (e.g. electronic fuel injection systems,
electronic anti-skid (anti-lock) braking systems,
electronic speed control systems, air bag systems).
Check with the supplier or its representative
regarding your vehicle. You should also consult the
supplier of any equipment that has been added to
your vehicle.
Do not place your phone or any accessories in the
area over an airbag or in the airbags deployment
area. An airbag inflates with great force, and serious
injury could occur.
Using your phone in a vehicle demands special
considerations. The fitting of any accessories to a
101 Sendo Z100 User Guide
Page 63
z100.book Page 102 Wednesday, September 18, 2002 4:03 PM
10
vehicle should only be undertaken by a suitably
Safety
qualified person to ensure that vehicle systems are
not adversely affected, and that the accessory gives
optimum performance.
Posted Areas
Turn off your phone in any area where posted
notices so require.
Potentially Explosive Atmospheres
Turn off your phone and do not remove its battery
when in any area with a potentially explosive
atmosphere and obey all signs and instructions. It is
rare, but your phone or its accessories could
generate sparks. Sparks in such areas could cause
an explosion or fire resulting in property damage,
bodily injury or even death. Areas with potentially
explosive atmospheres are often, but not always,
clearly marked. They include: Fuelling areas, such as
petrol stations, below deck on boats, and fuel or
chemical transfer and storage facilities. Follow these
guidelines also when you enter areas where fuel
odors are present, such as when a gas leak occurs in
a home; areas where the air contains chemicals or
particles, such as grain, dust or metal powders; and
any other area where you would normally be
advised to turn off your vehicle engine.
Turn off your phone when at gas or petrol stations
(service station). Users are reminded of the need to
observe restrictions on the use of radio equipment in
fuel depots (fuel storage and distribution areas),
chemical plants or where blasting operations are in
progress.
Areas with a potentially explosive atmosphere are
often but not always clearly marked. They include
below deck on boats; chemical transfer or storage
facilities; vehicles using liquefied petroleum gas
(such as propane or butane); areas where the air
contains chemicals or particles, such as grain, dust
or metal powders; and any other area where you
would normally be advised to turn off your vehicle
engine.
Blasting Areas
To avoid interfering with blasting operations, turn
your phone off when in a “blasting area” or in areas
posted “turn off two-way radio”. Obey all signs and
instructions.
Vehicles
Only qualified personnel should service the phone,
or install the phone in a vehicle. Faulty installation or
service may be dangerous and may invalidate any
warranty that may apply to the unit.
Check regularly that all wireless phone equipment in
your vehicle is mounted and operating properly.
Do not store or carry flammable liquids, gases or
explosive materials in the same compartment as the
phone, its parts or accessories.
For vehicles equipped with an air bag, do not install
or place wireless equipment in the area over the air
bag or in the air bag deployment area. If in-vehicle
wireless equipment is improperly installed and the
air bag inflates, serious injury could result.
102 Sendo Z100 User Guide
Page 64
z100.book Page 103 Wednesday, September 18, 2002 4:03 PM
10
Switch off your phone before boarding a non-
Safety
commercial aircraft or when instructed to do so on a
commercial airline. The use of wireless telephones in
an aircraft may interfere with the operation of the
aircraft and may be illegal.
If certain features are in use (Keyguard, Locking,
Call Restricting etc.), you may first need to turn those
features off before you can make an emergency call.
When making an emergency call, follow all
instructions of the emergency operation and do not
hang up until requested do so.
Emergency Calls
IMPORTANT!
This phone, like any wireless phone, operates using
radio signals, wireless and landline networks as well
as user-programmed functions that cannot
guarantee connection in all conditions. Do not rely
solely upon your wireless phone for emergency
communications (e.g. medical emergencies).
Remember, to make or receive any calls the phone
must be switched on and in a service area with
adequate signal strength. Emergency calls may not
be possible on all wireless phone networks or when
certain network services and/or phone features are
in use. Check with local service providers.
To make an emergency call:
1. If the phone is not on, switch it on.
z Note: Some networks may require that a valid
SIM card is properly inserted in the phone.
2. Press and hold the Home s key for several
seconds to ready the phone for calls.
3. Key in the emergency number for your present
location (e.g. 911, 112 or other official
emergency number). Emergency numbers vary
by location.
4. Press the Tal k key f.
Servicing
Do not attempt to disassemble or repair your phone,
as you may damage the phone or injure yourself
and will void your warranty. Only qualified
personnel at an authorized service center should
perform repairs. Your phone does not contain any
consumer serviceable parts. Make back up copies of
all data and delete security sensitive data before
sending your phone in for repair.
Back Up Data
To avoid loss of important information, remember to
make back up copies of all data regularly.
Disposal
Your battery and other components may require
precautions to be taken for safe disposal. The
battery type is indicated on the battery label. Please
follow all local and/or governmental laws and
regulations when disposing of your phone or battery.
103 Sendo Z100 User Guide
Page 65
z100.book Page 104 Wednesday, September 18, 2002 4:03 PM
10
Care and Maintenance
Safety
Follow these care and maintenance instructions to
improve the performance and life of your phone.
Failure to follow the suggestions may invalidate you
phone’s warranty:
• Keep it and all its parts and accessories out of
small children's reach.
• Keep it dry.
• Do not use or store it in dusty or dirty areas.
• Do not attempt to take the phone apart.
• Do not drop, throw or shake it.
• Do not use soaps, chemicals, cleaning solvents,
or strong detergents to clean it. Use a moist cloth
to wipe it.
• Avoid exposing your phone to any severe shocks,
extreme (hot or cold) temperatures or moisture.
• Keep your phone away from open flames such as
lit candles or cigarettes
• Use only the supplied or an approved
replacement antenna. Unauthorised antennas,
modifications or attachments could damage the
phone and may violate regulations governing
radio devices. When removing the antenna, keep
it out of small children’s reach.
• If the phone, battery, or any accessory is not
working properly, take it to your nearest qualified
service facility. Back up all data before taking
your phone to a service center as maintenance or
recovery of data is not guaranteed. If you have
any sensitive information, please back it up and
then delete it from your phone before taking your
phone to the service center.
104 Sendo Z100 User Guide
Page 66
z100.book Page 105 Wednesday, September 18, 2002 4:03 PM
10
SAR Statement
Safety
This mobile phone meets requirements for exposure
to radio frequency energy.
Your mobile phone is a radio transmitter and
receiver. It is designed and manufactured not to
exceed the limits for exposure to radio frequency (RF)
recommended by international guidelines. These
limits are part of comprehensive guidelines and
establish permitted levels of RF energy for the
general population. The guidelines were developed
by independent scientific organizations through
periodic and thorough evaluation of scientific
studies. The guidelines include a substantial safety
margin designed to assure the safety of all persons,
regardless of age and health.
The exposure standard for mobile phones employs a
unit of measurement known as the Specific
Absorption Rate, or SAR. The SAR limit
recommended by international guidelines is
2.0 Watts/kg*. Tests for SAR are conducted using
standard operating positions with the phone
transmitting at its highest operating power level.
Although the SAR is determined at the highest
operating power level, the actual SAR of the phone
while operating can be well below the maximum
value. This is because the phone is designed to
operate at multiple power levels so as to use only the
power required to communicate with the network. In
general, the closer you are to a base station, the
lower the power output of the phone.
The highest SAR value for Sendo Z100 phone when
tested for use at the ear is 0.00 W/Kg
Always read and follow the operating and safety
instructions that came with your phone.
* The SAR limit for mobile phones used by the public
is 2.0 Watts/Kg (W/kg) averaged over ten grams of
body tissue. The guidelines incorporate a substantial
margin of safety to give additional protection for the
public and to account for any variations in
measurements.
105 Sendo Z100 User Guide
Page 67
z100.book Page 106 Wednesday, September 18, 2002 4:03 PM
10
The U.S. Food and Drug Administration’s Center for Devices and Radiological
Health Consumer Update on Mobile Phones
Safety
FDA has been receiving inquiries about the safety of
mobile phones, including cellular phones and PCS
phones. The following summarizes what is known—
and what remains unknown—about whether these
products can pose a hazard to health, and what can
be done to minimize any potential risk. This
information may be used to respond to questions.
Why the concern?
Mobile phones emit low levels of radiofrequency
energy (i.e., radiofrequency radiation) in the
microwave range while being used. They also emit
very low levels of radiofrequency energy (RF),
considered non-significant, when in the stand-by
mode. It is well known that high levels of RF can
produce biological damage through heating effects
(this is how your microwave oven is able to cook
food). However, it is not known whether, to what
extent, or through what mechanism, lower levels of
RF might cause adverse health effects as well.
Although some research has been done to address
these questions, no clear picture of the biological
effects of this type of radiation has emerged to date.
Thus, the available science does not allow us to
conclude that mobile phones are absolutely safe, or
that they are unsafe. However, the available
scientific evidence does not demonstrate any
adverse health effects associated with the use of
mobile phones.
What kinds of phones are in question?
Questions have been raised about hand-held
mobile phones, the kind that have a built-in antenna
that is positioned close to the user’s head during
normal telephone conversation. These types of
mobile phones are of concern because of the short
distance between the phone’s antenna—the primary
source of the RF— and the person’s head. The
exposure to RF from mobile phones in which the
antenna is located at greater distances from the user
(on the outside of a car, for example) is drastically
lower than that from hand-held phones, because a
person’s RF exposure decreases rapidly with distance
from the source.The safety of so-called “cordless
phones,” which have a base unit connected to the
telephone wiring in a house and which operate at
far lower power levels and frequencies, has not been
questioned.
How much evidence is there that hand-held
mobile phones might be harmful?
Briefly, there is not enough evidence to know for
sure, either way; however, research efforts are ongoing. The existing scientific evidence is conflicting
and many of the studies that have been done to date
have suffered from flaws in their research methods.
Animal experiments investigating the effects of RF
exposures characteristic of mobile phones have
yielded conflicting results. A few animal studies,
however, have suggested that low levels of RF could
106 Sendo Z100 User Guide
Page 68
z100.book Page 107 Wednesday, September 18, 2002 4:03 PM
10
accelerate the development of cancer in laboratory
animals. In one study, mice genetically altered to be
Safety
predisposed to developing one type of cancer
developed more than twice as many such cancers
when they were exposed to RF energy compared to
controls. There is much uncertainty among scientists
about whether results obtained from animal studies
apply to the use of mobile phones. First, it is
uncertain how to apply the results obtained in rats
and mice to humans. Second, many of the studies
that showed increased tumor development used
animals that had already been treated with cancercausing chemicals, and other studies exposed the
animals to the RF virtually continuously—up to 22
hours per day. For the past five years in the United
States, the mobile phone industry has supported
research into the safety of mobile phones. This
research has resulted in two findings in particular
that merit additional study:
1. In a hospital-based, case-control study,
researchers looked for an association between
mobile phone use and either glioma (a type of
brain cancer) or acoustic neuroma (a benign
tumor of the nerve sheath). No statistically
significant association was found between
mobile phone use and acoustic neuroma. There
was also no association between mobile phone
use and gliomas when all types of types of
between mobile phone use and one rare type of
glioma, neuroepithelliomatous tumors. It is possible
with multiple comparisons of the same sample that
this association occurred by chance. Moreover, the
risk did not increase with how often the mobile
phone was used, or the length of the calls. In fact,
the risk actually decreased with cumulative hours of
mobile phone use. Most cancer causing agents
increase risk with increased exposure. An ongoing
study of brain cancers by the National Cancer
Institute is expected to bear on the accuracy and
repeatability of these results.
1
2. Researchers conducted a large battery of
laboratory tests to assess the effects of exposure
to mobile phone RF on genetic material. These
included tests for several kinds of abnormalities,
including mutations, chromosomal aberrations,
DNA strand breaks, and structural changes in
the genetic material of blood cells called
lymphocytes. None of the tests showed any effect
of the RF except for the micronucleus assay,
which detects structural effects on the genetic
material. The cells in this assay showed changes
after exposure to simulated cell phone radiation,
but only after 24 hours of exposure. It is possible
that exposing the test cells to radiation for this
long resulted in heating. Since this assay is
known to be sensitive to heating, heat alone
gliomas were considered together. It should be
noted that the average length of mobile phone
exposure in this study was less than three years.
When 20 types of glioma were considered
separately, however, an association was found
1. Muscat et al. Epidemiological Study of Cellular
Telephone Use and Malignant Brain Tumors. In: State of the
Science Symposium;1999 June 20; Long Beach, California.
107 Sendo Z100 User Guide
Page 69
z100.book Page 108 Wednesday, September 18, 2002 4:03 PM
10
could have caused the abnormalities to occur.
The data already in the literature on the
Safety
response of the micronucleus assay to RF are
conflicting. Thus, follow-up research is
necessary.
1
FDA is currently working with government, industry,
and academic groups to ensure the proper followup to these industry-funded research findings.
Collaboration with the Cellular Telecommunications
Industry Association (CTIA) in particular is expected
to lead to FDA providing research recommendations
and scientific oversight of new CTIA-funded research
based on such recommendations. Two other studies
of interest have been reported recently in the
literature:
1. Two groups of 18 people were exposed to
simulated mobile phone signals under
laboratory conditions while they performed
cognitive function tests. There were no changes
in the subjects’ ability to recall words, numbers,
or pictures, or in their spatial memory, but they
were able to make choices more quickly in one
visual test when they were exposed to simulated
mobile phone signals. This was the only change
noted among more than 20 variables
compared.
1. Tice et al. Tests of mobile phone signals for activity
in genotoxicity and other laboratory assays. In: Annual Meeting of the Environmental Mutagen Society; March 29, 1999,
Washington, D.C.; and personal communication, unpubished results.
2
2. In a study of 209 brain tumor cases and 425
matched controls, there was no increased risk of
brain tumors associated with mobile phone use.
When tumors did exist in certain locations,
however, they were more likely to be on the side
of the head where the mobile phone was used.
Because this occurred in only a small number of
cases, the increased likelihood was too small to
be statistically significant.
3
In summary, we do not have enough information at
this point to assure the public that there are, or are
not, any low incident health problems associated
with use of mobile phones. FDA continues to work
with all parties, including other federal agencies and
industry, to assure that research is undertaken to
provide the necessary answers to the outstanding
questions about the safety of mobile phones.
What is known about cases of human
cancer that have been reported in users of
hand-held mobile phones?
Some people who have used mobile phones have
been diagnosed with brain cancer. But it is important
2. Preece, AW, Iwi, G, Davies-Smith, A, Wesnes, K,
Butler, S, Lim, E, and Varey, A. Effect of a 915-MHz simulated mobile phone signal on cognitive function in man. Int.
J. Radiat. Biol., April 8, 1999.
3. 4 Hardell, L, Nasman, A, Pahlson, A, Hallquist, A
and Mild, KH. Use of cellular telephones and the risk for
brain tumors: a case-control study. Int. J. Oncol., 15: 113116, 1999.
108 Sendo Z100 User Guide
Page 70
z100.book Page 109 Wednesday, September 18, 2002 4:03 PM
10
to understand that this type of cancer also occurs
Safety
among people who have not used mobile phones. In
fact, brain cancer occurs in the U.S. population at a
rate of about 6 new cases per 100,000 people each
year. At that rate, assuming 80 million users of
mobile
phones (a number increasing at a rate of about 1
million per month), about 4800 cases of brain
cancer would be expected each year among those
80 million people, whether or not they used their
phones. Thus it is not possible to tell whether any
individual’s cancer arose because of the phone, or
whether it would have happened anyway. A key
question is whether the risk of getting a particular
form of cancer is greater among people who use
mobile phones than among the rest of the
population. One way to answer that question is to
compare the usage of mobile phones among people
with brain cancer with the use of mobile phones
among appropriately matched people without brain
cancer. This is called a case-control study. The
current case-control study of brain cancers by the
National Cancer Institute, as well as the follow-up
research to be sponsored by industry, will begin to
generate this type of information.
What is FDA’s role concerning the safety of
mobile phones?
Under the law, FDA does not review the safety of
radiationemitting consumer products such as mobile
phones before marketing, as it does with new drugs
or medical devices. However, the agency has
authority to take action if mobile phones are shown
to emit radiation at a level that is hazardous to the
user. In such a case, FDA could require the
manufacturers of mobile phones to notify users of
the health hazard and to repair, replace or recall the
phones so that the hazard no longer exists. Although
the existing scientific data do not justify FDA
regulatory actions at this time, FDA has urged the
mobile phone industry to take a number of steps to
assure public safety. The agency has recommended
that the indusry:
• support needed research into possible biological
effects of RF of the type emitted by mobile
phones;
• design mobile phones in a way that minimizes
any RF exposure to the user that is not necessary
for device function; and
• cooperate in providing mobile phone users with
the best possible information on what is known
about possible effects of mobile phone use on
human health.
At the same time, FDA belongs to an interagency
working group of the federal agencies that have
responsibility for different aspects of mobile phone
safety to ensure a coordinated effort at the federal
level. These agencies are:
• National Institute for Occupational Safety and
Health
• Environmental Protection Agency
• Federal Communications Commission
• Occupational Health and Safety Administration
109 Sendo Z100 User Guide
Page 71
z100.book Page 110 Wednesday, September 18, 2002 4:03 PM
10
• National Telecommunications and Information
Safety
Administration
The National Institutes of Health also participates in
this group.
In the absence of conclusive information
about any possible risk, what can
concerned individuals do?
If there is a risk from these products—and at this
point we do not know that there is—it is probably
very small. But if people are concerned about
avoiding even potential risks, there are simple steps
they can take to do so. For example, time is a key
factor in how much exposure a person receives.
Those persons who spend long periods of time on
their hand-held mobile phones could consider
holding lengthy conversations on conventional
phones and reserving the hand-held models for
shorter conversations or for situations when other
types of phones are not available. People who must
conduct extended conversations in their cars every
day could switch to a type of mobile phone that
places more distance between their bodies and the
source of the RF, since the exposure level drops off
dramatically with distance. For example, they could
switch to
• a mobile phone in which the antenna is located
outside the vehicle,
• a hand-held phone with a built-in antenna
connected to a different antenna mounted on the
outside of the car or built into a separate
package, or
• a headset with a remote antenna to a mobile
phone carried at the waist.
Again, the scientific data do not demonstrate that
mobile phones are harmful. But if people are
concerned about the radiofrequency energy from
these products, taking the simple precautions
outlined above can reduce any possible risk.
Where can I find additional information?
For additional information, see the following
websites:
Federal Communications Commission (FCC) RF Safety
Program (select “Information on Human Exposure to
RF Fields from Cellular and PCS Radio Transmitters”):
http://www.fcc.gov/oet/rfsafety
World Health Organization (WHO) International Commission on Non-Ionizing Radiation Protection (select
Qs & As):
http://www.who.int/emf
United Kingdom, National Radiological Protection
Board:
http://www.nrpb.org.uk
Cellular Telecommunications Industry Association
(CTIA):
http://www.wow-com.com
110 Sendo Z100 User Guide
Page 72
z100.book Page 111 Wednesday, September 18, 2002 4:03 PM
10
U.S. Food and Drug Administration (FDA) Center for
Devices and Radiological Health:
Safety
http://www.fda.gov/cdrh/consumer/
111 Sendo Z100 User Guide
Page 73
z100.book Page 112 Wednesday, September 18, 2002 4:03 PM
10
Declaration of Conformity
Safety
We: Sendo International Ltd
Of: 1601-1603 Kinwick Centre, 32 Hollywood
Road, Central, Hong Kong.
Declare under our sole responsibility that the
product depicted on the front cover of this manual
and uniquely identified by the IMEI and type number
affixed to the transceiver, to which this declaration
relates, is in compliance with the essential
requirements of the Radio and Telecommunications
Terminal Directive (R&TTE) 1999/5/EC
The conformity assessment procedure referred to in
Article 10 and detailed in Annex IV of directive
1999/5/EC has been followed with the involvement
of BABT, Claremont House, 34 Molesey Road,
Walton-On-Thames, KT12 4RQ England.
A copy of the declaration of conformity is available
for download from the Sendo website http://
www.sendo.com/
112 Sendo Z100 User Guide
Page 74
z100.book Page 113 Wednesday, September 18, 2002 4:03 PM
11
Chapter 11 Warranty
Limited Warranty
Sendo International Limited (“Sendo”) warrants,
Warranty
subject to the exclusions and limitations set forth
below, that your cellular phone, battery and
accessories (collectively “Product”) will be free from
defect in materials and workmanship according to
the following terms and conditions:
1. The limited warranty extends from the date of
purchase (as evidenced by your receipt) and in
respect of the cellular phone for a period of 12
months thereafter and in respect of your battery
and accessories for a period of 6 (six) months
after the date of purchase (as evidenced by your
receipt).
2. The limited warranty extends to the original
purchaser of the Product ("Consumer") and is not
assignable or transferable to any subsequent
purchaser or user.
3. The warranty extends only to Consumers who
purchase the Product in the market for its
intended sale.
4. During the limited warranty period, Sendo will
repair, or replace, at Sendo's sole option, any
defective parts, or any parts that will not properly
operate for their intended use with new or
refurbished replacement items if such repair or
replacement is needed because of a malfunction
or failure of the Product during normal usage.
No charge will be made to the Consumer for
any such parts. Sendo will also pay for the
labour charges incurred by Sendo in repairing
or replacing the defective parts. This warranty
does not apply to any damage or failure to
operate caused by use of the Product other than
in accordance with the instructions contained in
the User Manual, or for periodic maintenance or
repair due to normal wear and tear. Sendo's
limit of liability under the limited warranty shall
be the actual cash value of the Product at the
time the Consumer returns the Product for repair,
determined by the price paid by the Consumer
for the Product less a reasonable amount for
usage. Sendo shall not be liable for any other
losses or damages. These remedies are the
Consumer's exclusive remedies for breach of
warranty
5. The warranty will be invalidated if any of the
following circumstances are applicable:
a) The Product has been subject to abnormal
use, abnormal conditions, improper storage,
exposure to moisture or dampness,
unauthorized modifications, unauthorized
connections, unauthorized repair, misuse,
neglect, abuse, accident, alteration,
improper installation, or other acts which are
not the fault of Sendo, including damage
caused by shipping.
b) Physical damage to the surface of the
Product, including scratches or cracks in or
to the outside casing or LCD, or damages
caused by dropping the Product.
c) The Product has been damaged from
external causes such as liquid, water,
collision with an object, or from fire,
flooding, sand, dirt, windstorm, lightening,
113 Sendo Z100 User Guide
Page 75
z100.book Page 114 Wednesday, September 18, 2002 4:03 PM
11
Warranty
earthquake or damage from exposure to
weather conditions, an Act of God, or
battery leakage, theft, blown fuse, or
improper use of any electrical source,
damage caused by computer or internet
viruses, bugs, worms, Trojan Horses,
cancelbots or damage caused by the
connection to other products not
recommended for interconnection by Sendo.
d) The Product has been altered or repaired by
anyone other than an approved Sendo
service center or if it has been used with
unapproved accessories or other ancillary
items.
e) For adaptations or adjustments made to the
Product to comply with local standards in
any country other than one for which the
Product was designed and manufactured.
f) Loss or integrity of any user data stored in
the Product or any storage device used in
conjunction with the Product at any time
g) The Sendo Authorised Service Centre was
not advised by the Consumer in writing of
the alleged defect or malfunction of the
Product within fourteen (14) days after the
expiration of the applicable limited warranty
period.
h) The Product serial number plate or the
accessory data code has been removed,
defaced or altered.
i) The defect or failure to operate was caused
by the defective function of the cellular
system or by inadequate signal reception.
6. Any implied warranty of merchantability, or
fitness for a particular purpose or use, shall be
limited to the duration of the foregoing written
warranty. Otherwise, the foregoing warranty is
the Consumer’s sole and exclusive remedy and
is in lieu of all other warranties, express or
implied. Sendo does not warrant uninterrupted
or error free internet or data connections. Sendo
shall not be liable for special, incidental or
consequential damages, including but not
limited to, loss of anticipated benefits or profits,
loss of savings or revenue, punitive damages,
loss of use of the product or any associated
equipment, loss of data, cost of capital, cost of
any substitute equipment or facilities, downtime,
the claims of any third parties, including
customers, and injury to property, resulting from
the purchase or use of the product or arising
from breach of the warranty, breach of contract,
negligence, strict tort, or any other legal or
equitable theory, even if Sendo knew of the
likelihood of such damages. Sendo shall not be
liable for delay in rendering service under the
limited warranty, or loss of use during the period
that the product is being repaired or loss of
data.
7. Some jurisdictions do not allow limitations of
warranty, and to the extent the limitations are not
allowed, the above limitations do not apply to
you (the Consumer). This limited warranty gives
114 Sendo Z100 User Guide
Page 76
z100.book Page 115 Wednesday, September 18, 2002 4:03 PM
11
Warranty
the Consumer specific legal rights and the
Consumer may also have other rights that vary
from jurisdiction to jurisdiction. Nothing
contained in this limited warranty shall prejudice
the statutory rights of the Consumer, except to
the extent permitted by the law of the
Consumer’s jurisdiction.
8. The Consumer shall take the following steps to
make a claim under this limited warranty:
• Please do not ship the Product for service without
first contacting the nearest Sendo Authorised
Service Centre.
• Contact information for the world-wide network
of Sendo Authorised Service Centres is available
at www.sendo.com
• If the Product qualifies for in-warranty service, the
Consumer must prove the date of the original
purchase of the Products by a dated proof of
purchase.
• Back up all data. If the Consumer has sensitive
information stored on the Product copy it to
another device and delete it from the Product
before repair.
• The Consumer must ship the Product prepaid
and insured. Expenses related to removing the
Product from an installation are not covered
under this limited warranty.
• If the Product is returned for service and the
Product is deemed out of warranty under the
terms and conditions of this warranty, the
Consumer will be notified and given an estimate
of the applicable charges. If the estimate is
refused a minimum service fee for collection,
inspection and quotation of said product would
be due.
9. Sendo neither assumes nor authorizes any
authorised service centre or any other person or
entity to assume for it any other obligation or
liability beyond that which is expressly provided
for in this limited warranty including the provider
or seller of any extended warranty or service
agreement.
10. This is the entire warranty between Sendo and
the Consumer, and supersedes all prior and
contemporaneous agreements or
understandings, oral or written, and all
communications relating to the Product, and no
representation, promise or condition not
contained herein shall modify these terms.
11. This limited warranty allocates the risk of failure
of the Product between the Consumer and
Sendo. The allocation is recognized by the
Consumer and is reflected in the purchase price
of the Product.
12. Diagnostic instructions and other service
information is available free of charge at
www.sendo.com
. Information on out of warranty
repair costs and charges is available at
www.sendo.com
.
115 Sendo Z100 User Guide
 Loading...