

Page 1

Contents
2 Getting started 2
3 Powering up/down 4
4 Making a call 6
5 Answering a call 10
6 Using the contact list 14
7 Menu navigation 20
8 Messages 22
9 Extras 26
10 Agenda 30
11 Sounds 32
12 Settings 34
13 Services 36
14 Display indicators 40
15 Troubleshooting 42
16 Safety information 46
The phone
Getting started
Powering up/down
Making a call
Answering a call
Using the contact list
Menu navigation
Messages
Page 2
2 Getting started
To use your phone, you must first insert the miniature SIM card supplied by your service provider,
and then charge the battery.
The SIM card contains a computer chip and stores information that enables your phone to function
correctly. This card contains your subscription information, and also memory for storing your
contact numbers and text messages.
Inserting the SIM card
Insert the SIM card as follows:Insert the SIM card as follows:
Insert the SIM card as follows:
Insert the SIM card as follows:Insert the SIM card as follows:
1 Ensure that the metal plate, to the left of the
space reserved for the SIM card, is moved to
the left.
2 Place the SIM in the phone, starting with the
right side first, making sure that the golden
contacts of the card are touching the
contacts of the phone.
3 Hold the SIM card in place and slide the
metal plate to the right, in order to cover the
left hand side of the SIM card.
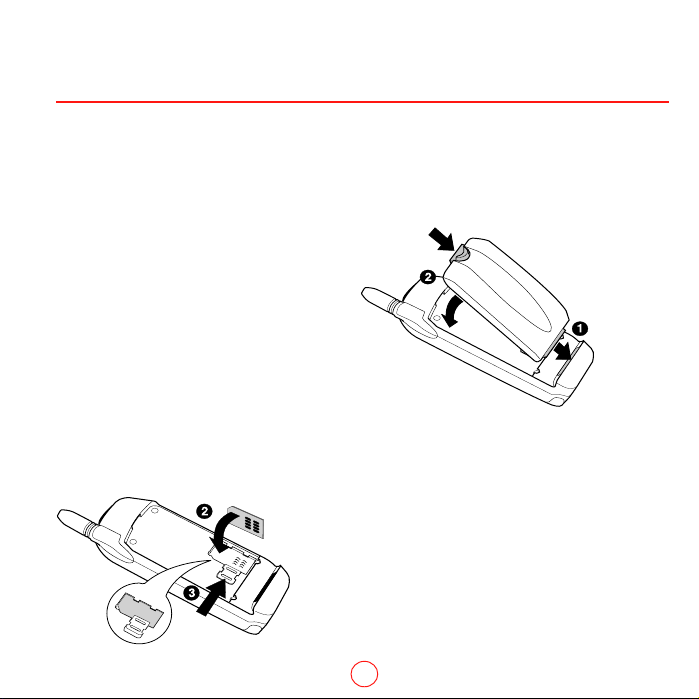
Fitting the battery
Once the SIM card is correctly in place,Once the SIM card is correctly in place,
Once the SIM card is correctly in place,
Once the SIM card is correctly in place,Once the SIM card is correctly in place,
clip on the battery as follows:clip on the battery as follows:
clip on the battery as follows:
clip on the battery as follows:clip on the battery as follows:
1 Place the bottom of the battery onto the
bottom end of the phone.
2 Fix firmly by pressing the top of the battery
until you hear it click into place.
To remove the battery, push down the clip and
lift it out from the top.
2
Page 3

Charging the battery
TT
o charge the battery:o charge the battery:
T
o charge the battery:
TT
o charge the battery:o charge the battery:
1 Insert the connector on the charger lead into the left-hand side of the
connector at the base of the phone.
2 Plug the charger into a mains AC socket.
When charging commences, the battery icon will change into a charger cable
icon.
When the battery is fully charged, the battery icon will reappear and you can
disconnect the charger.
Note: Note:
!
Note: If the phone is powered off, the battery icons will scroll and no cable icon will
Note: Note:
appear on the display. When the scrolling stops, the battery is fully charged. If the
bars do not scroll when the charger is plugged in, check that the battery is correctly
fitted and that everything is plugged in correctly. If the battery is completely empty, it
may take a few minutes for the bars to start scrolling.
3
The phone
Getting started
Powering up/down
Making a call
Answering a call
Using the contact list
Menu navigation
Messages
Page 4
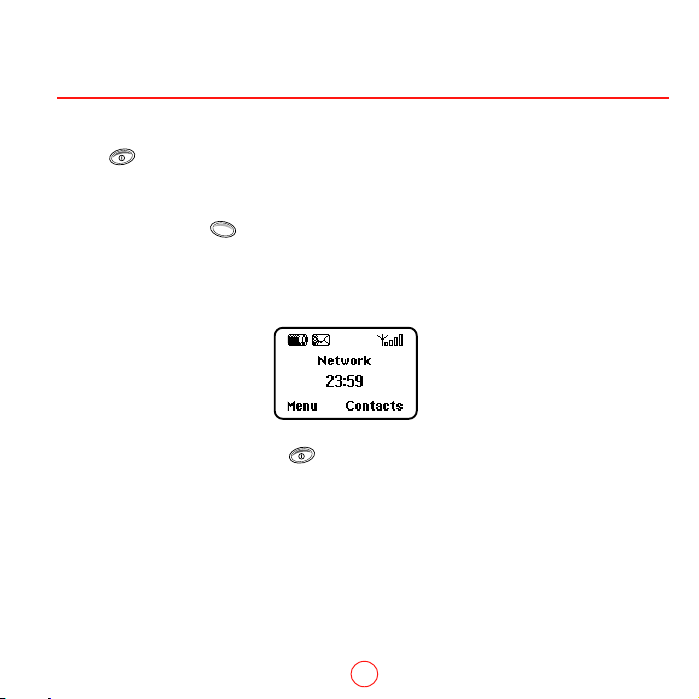
3 Powering up/down
TT
o switch the phone on:o switch the phone on:
T
o switch the phone on:
TT
o switch the phone on:o switch the phone on:
1 Press
If the phone asks for a PIN code:If the phone asks for a PIN code:
If the phone asks for a PIN code:
If the phone asks for a PIN code:If the phone asks for a PIN code:
2 Enter the code that is supplied with the SIM card. The code will be displayed as asterisks.
3 When complete, press
Wait a few seconds while the phone searches for the network. Once the network has been found,
the main screen appears and your phone is ready to be used. The main screen shows the network
name and two icons giving the signal strength (top right) and battery level (top left).
To switch the phone off, press and hold .
.
OKOK
,
OK.
OKOK
4
Page 5

The phone
Getting started
Powering up/down
Making a call
Answering a call
Using the contact list
Menu navigation
Messages
5
Page 6

4 Making a call
Dialling a number
1 Key in the area code and number that you
want to call.
To correct a mistake, press
To move the cursor backwards and forwards,
press the side keys
To delete the entire number and return to the
main screen, press and hold
2 When you have entered the number,
press
3 During the call, you can adjust the earpiece
volume using the side keys , .
4 To end the call, press
, .
CallCall
,
Call, to dial.
CallCall
,
.
.
EndEnd
End.
EndEnd
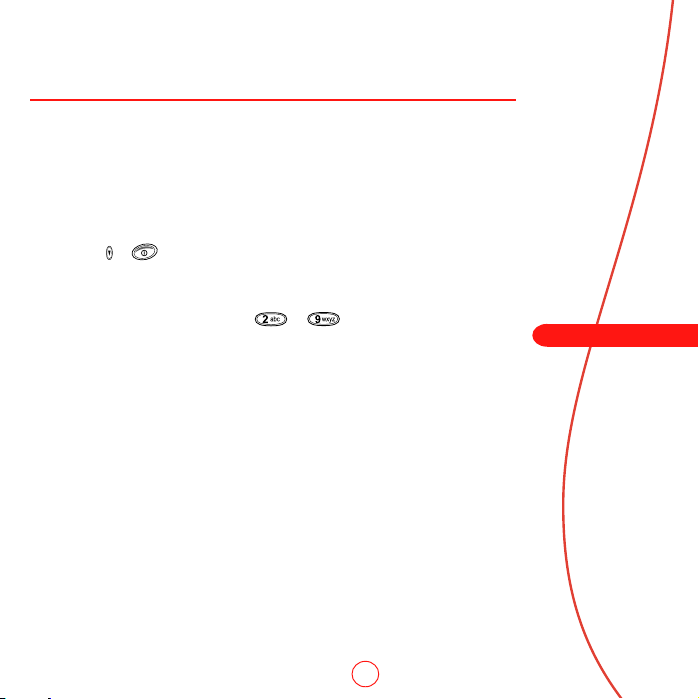
Making an international call
TT
o make an international call:o make an international call:
T
o make an international call:
TT
o make an international call:o make an international call:
1 Press and hold
displayed. This replaces the international
access code.
2 Enter the country code, area code, and
phone number.
3 Press
until the plus sign "+" is
CallCall
,
Call, to dial.
CallCall
Making an emergency call
TT
o make an emergency call:o make an emergency call:
T
o make an emergency call:
TT
o make an emergency call:o make an emergency call:
112112
112
112112
..
.
..
CallCall
Call, to dial.
CallCall
1 Enter
There may be other numbers which are used in
your country. For more information contact
your service provider.
2 Press ,
Making a call from the contact list
TT
o dial a number stored in your contacto dial a number stored in your contact
T
o dial a number stored in your contact
TT
o dial a number stored in your contacto dial a number stored in your contact
list:list:
list:
list:list:
from the main screen. You can also
1 Press
press
option.
2 Find and select the name or number you
wish to call (see “Using the contact list”
section for details).
3 Press
6
ContactsContacts
,
Contacts, then select the
ContactsContacts
CallCall
,
Call, to dial.
CallCall
SearchSearch
Search
SearchSearch
Page 7
Speed dialling
The speed dialling feature allows you to assign an entry in your contact list to a
key. You can then dial this number simply by pressing and holding the assigned
key.
TT
o assign a contact list entry to a key:o assign a contact list entry to a key:
T
o assign a contact list entry to a key:
TT
o assign a contact list entry to a key:o assign a contact list entry to a key:
1 Press
2 Find and select the name or number you wish to be able to speed dial.
(see “Using the contact list” section for details).
3 Press and hold one of the keys
on the left of the screen, beside the name. This indicates that the speed dial
is successfully assigned.
ContactsContacts
or ,
Contacts, to access your contact list entries.
ContactsContacts
to until the key number appears
7
The phone
Getting started
Powering up/down
Making a call
Answering a call
Using the contact list
Menu navigation
Messages
Page 8
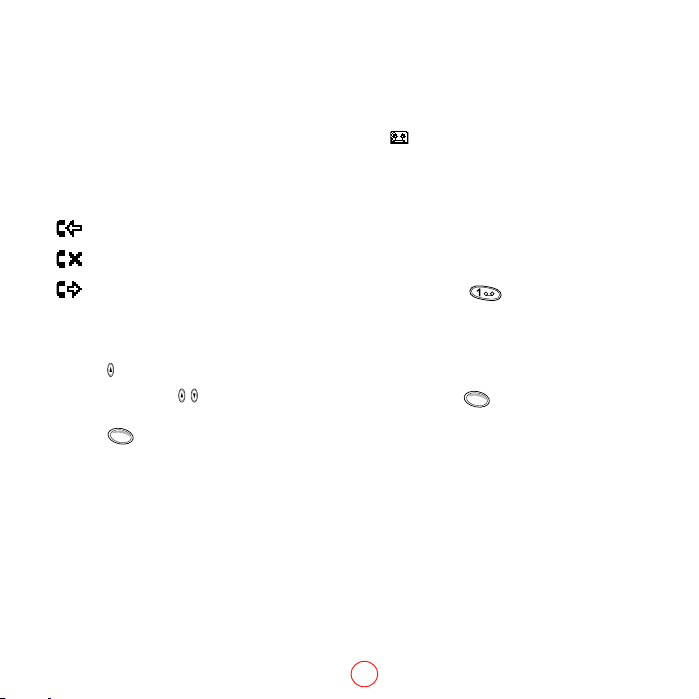
Making a call from the Redial/
Calls list
The phone stores a list of your recent calls,
incoming, outgoing or missed. Up to
30 entries can be stored in this list.
An icon on the left of the screenAn icon on the left of the screen
An icon on the left of the screen
An icon on the left of the screenAn icon on the left of the screen
indicates the type of call:indicates the type of call:
indicates the type of call:
indicates the type of call:indicates the type of call:
Incoming call
Missed call
Outgoing call
TT
o dial a number from the Ro dial a number from the R
T
o dial a number from the R
TT
o dial a number from the Ro dial a number from the R
list:list:
list:
list:list:
to access the list.
1 Press
2 Use the side keys
or number you wish to call
3 Press
/ to scroll to the name
CallCall
,
Call, to dial.
CallCall
edial/Callsedial/Calls
edial/Calls
edial/Callsedial/Calls
Calling your voice mail
When you have a new message in your voice
mail, your phone displays either the voice mail
icon
in the main screen or a text message
sent from the network. This depends on your
service provider.
Your service provider may also call to inform
you that you have a voice mail message.
TT
o call your voice mail, you can do anyo call your voice mail, you can do any
T
o call your voice mail, you can do any
TT
o call your voice mail, you can do anyo call your voice mail, you can do any
of the following:of the following:
of the following:
of the following:of the following:
1 Press and hold
2 Dial the voice mail number directly
VV
3 Select the
MessagesMessages
Messages menu.
MessagesMessages
If the phone asks for the voice mail number,
enter it and press
be obtained from your service provider.
oice mailoice mail
V
oice mail option from the
VV
oice mailoice mail
CallCall
,
Call. The number can
CallCall
8
Page 9
Keypad lock
You can lock the keys on the keypad to avoid making calls by mistake.
♦ To lock the keypad, press
♦ To unlock the keypad, press
Note: Note:
!
Note: You can still receive and answer an incoming call even when the keypad is
Note: Note:
locked. The keypad is automatically unlocked for the duration of the call.
MenuMenu
,
Menu, then .
MenuMenu
UnlockUnlock
,
Unlock, then .
UnlockUnlock
Using the Personal Handsfree Headset
Some models include a personal handsfree headset that allows you to answer
calls, end calls and adjust the headset earpiece volume. The headset is also
available as an accessory. Check with your dealer for details.
TT
o use the headset:o use the headset:
T
o use the headset:
TT
o use the headset:o use the headset:
1 Plug the headset into the right side of the bottom connector on your phone,
with the headset symbol facing up.
2 Put the earpiece in your ear, then clip the microphone to your clothing.
3 When a call comes in, press
make a call using the phone keypad as usual.
4 Adjust the headset earpiece volume using the dial on the headset remote.
5 To end the call, press
Note: Note:
!
Note: When the headset is plugged in, only the microphone and earpiece on the
Note: Note:
headset are active. Unplug the headset if you wish to speak and listen directly with
the phone.
on the headset remote. You can also
again.
The phone
Getting started
Powering up/down
Making a call
Answering a call
Using the contact list
Menu navigation
Messages
9
Page 10

5 Answering a call
When you receive an incoming call, your phone
either rings or vibrates or both, depending
upon your settings in the
The phone also displays the caller’s number (or
name if the number is in your contact list), but
only if this is transmitted by the network:
♦ If the caller has requested that his identity be
hidden, then ”Withheld" is displayed instead.
♦ If the network cannot provide the number,
then “Unavailable” is displayed instead.
To answer a call, press
To reject a call, press ,
If you do not answer your phone in time, then
“1 missed call(s)” is displayed on the screen and
the caller’s number or name is logged in the
Redial/Calls list. To consult this list, use
If you have your calls diverted to your voice mail
when busy and you reject the call, the caller is
forwarded to your voice mailbox.
Note: Note:
!
Note: If the keypad is locked when you receive
Note: Note:
an incoming call, you do not have to unlock
the phone first. The keypad is automatically
unlocked for the duration of the call.
SoundsSounds
Sounds menu.
SoundsSounds
AcceptAccept
,
Accept.
AcceptAccept
RR
ejecteject
R
eject.
RR
ejecteject
.
Call waiting
This feature allows you to manage an incoming
call while you are already in a call. You are
informed of a second incoming call by an
audible tone in the earpiece.
When you receive a second incomingWhen you receive a second incoming
When you receive a second incoming
When you receive a second incomingWhen you receive a second incoming
call, you can:call, you can:
call, you can:
call, you can:call, you can:
♦ Press
♦ Press
on hold and activate the second call.
To end the active call and return to the held call,
press
To reactivate the held call press
OptionsOptions
Options, then select the
OptionsOptions
To switch between calls, press ,
then select the
!
10
RejectReject
,
Reject, to reject the second call.
RejectReject
AcceptAccept
,
Accept, to put the current call
AcceptAccept
EndEnd
,
End.
EndEnd
UnholdUnhold
Unhold option.
UnholdUnhold
SwapSwap
Swap option.
SwapSwap
Note: Note:
Note: Your network may not support call
Note: Note:
waiting. If it does not, accepting a second call
will end the first call. You will not have the option
to switch between calls.
,
OptionsOptions
Options,
OptionsOptions
Page 11

In call options
When you are in a call, you can press ,
available to you during the call. Depending on the context, these options are:
ConferenceConference
Conference Allows you to start a conference call.
ConferenceConference
Add to conf.Add to conf.
Add to conf. Allows you to add another caller to a conference call.
Add to conf.Add to conf.
ContactsContacts
Contacts Gives you access to the contact list.
ContactsContacts
Hold/UnholdHold/Unhold
Hold/Unhold Puts the active call on hold or reactivates the held call.
Hold/UnholdHold/Unhold
Mute/UnmuteMute/Unmute
Mute/Unmute Switches the microphone off/on.
Mute/UnmuteMute/Unmute
Send messageSend message
Send message Allows you to send a text message.
Send messageSend message
SIM tool kitSIM tool kit
SIM tool kit Gives you access to the SIM tool kit.
SIM tool kitSIM tool kit
SwapSwap
Swap Swaps between the current call and the call on hold.
SwapSwap
TT
ransferransfer
T
ransfer Connects the call on hold and the current call,
TT
ransferransfer
and disconnects you from both.
End allEnd all
End all Ends all calls.
End allEnd all
OptionsOptions
Options, to display a list of options
OptionsOptions
11
The phone
Getting started
Powering up/down
Making a call
Answering a call
Using the contact list
Menu navigation
Messages
Page 12

Conference call
The network may provide a service allowing you to connect up to six people into a single conference
call.
When you have one call on hold and one active call, you start the conference call as follows:When you have one call on hold and one active call, you start the conference call as follows:
When you have one call on hold and one active call, you start the conference call as follows:
When you have one call on hold and one active call, you start the conference call as follows:When you have one call on hold and one active call, you start the conference call as follows:
1 Press ,
a 3-party conference call (the icons change to show this).
TT
o add another person to the conference:o add another person to the conference:
T
o add another person to the conference:
TT
o add another person to the conference:o add another person to the conference:
2 Either dial the person’s number or receive their call and accept it. This connects you to the new
person and puts the others on hold.
3 Press
a 4-party conference call.
TT
o disconnect someone from the call:o disconnect someone from the call:
T
o disconnect someone from the call:
TT
o disconnect someone from the call:o disconnect someone from the call:
4 Press
participants.
5 Select the person that you want to disconnect and press
and you return to your conference.
To disconnect everybody and end the conference call, press
OptionsOptions
Options, and select
OptionsOptions
and select
and select
ConferenceConference
Conference from the list. This connects everybody into
ConferenceConference
Add to confAdd to conf
Add to conf
Add to confAdd to conf
Private callPrivate call
Private call from the
Private callPrivate call
..
. from the
..
Options Options
Options menu. This connects everybody into
Options Options
Options Options
Options menu. This displays a list of all the
Options Options
. This person is disconnected
.
12
Page 13

13
The phone
Getting started
Powering up/down
Making a call
Answering a call
Using the contact list
Menu navigation
Messages
Page 14

6 Using the contact list
The names and numbers you enter into your
contact list are stored on the SIM card. Your
phone can support up to 200 names, but the
real limit depends on the SIM card. The length
of the names and numbers that can be stored
also depends on the SIM card.
To access your contact list entries, press
from
the main screen.
Storing a name and number
in the contact list
TT
o store a name and number in theo store a name and number in the
T
o store a name and number in the
TT
o store a name and number in theo store a name and number in the
contact list:contact list:
contact list:
contact list:contact list:
1 Press
to display the contact list menu.
2 Use the side keys or to scroll to the
newnew
new option, then press
newnew
ContactsContacts
,
Contacts, from the main screen
ContactsContacts
AddAdd
Add
AddAdd
SelectSelect
,
Select.
SelectSelect
3 Enter the area code and phone number,
then press
OKOK
,
OK.
OKOK
4 Enter the name you wish to store in the
contact list, then press
OKOK
,
OK.
OKOK
Use the keypad as explained in the following
table to enter the characters and to switch
between lower case, upper case, and
numeric modes.
Tip: Tip:
Tip: It is a good idea to include the "+" symbol
Tip: Tip:
and country code, even for local numbers. This
way, you do not have to re-enter the numbers when
travelling abroad.
To enter a pause while dialling press and hold
until the letter p appears. This will insert a pause of
3 seconds.
An alternative and quicker way to create a
contact list entry is to first enter the phone
number from the main screen and press
OptionsOptions
Options. Select
OptionsOptions
prompted and press
14
SaveSave
Save. Then enter the name when
SaveSave
SaveSave
,
Save.
SaveSave
,
Page 15
Entering characters
When entering names or text messages, you type the characters with the numeric
keypad. The characters that are available on each key are listed in the following
table:
Ke y
To enter 2 characters, which are on the same key, successively, enter the first one
and then wait for the cursor to reappear before entering the second.
Example: Example:
Example: To enter the name "Paul"
Example: Example:
♦ Press to enter upper case mode,
♦ Press
♦ Press
♦ Press twice, to display "u",
♦ Then press
Lowercase mode Uppercase mode Numeric mode
1 1.,@‘?!“:;¿¡ 1.,@‘?!“:;¿¡ 1
2 abc2адежз 2
3d
4ghi4ì 4
5jkl5 JKL5 5
6 mno6ñòöø 6
7 pqrs7ß 7
8tuv8üù 8
9wxyz9 9
0 0
#
f3éè 3
e
space space space
A B C 2 À Ä Å Æ Ç
D E F 3 É È
G H I 4 Ì
M N O 6 Ñ Ò Ö Ø
P Q R S 7 ß
TUV8
Ü Ù
W X Y Z 9
00
when you are in lower case mode:
once, to display "P", you will then return to lower case mode,
once, to display "a",
three times, to display "l".
15
The phone
Getting started
Powering up/down
Making a call
Answering a call
Using the contact list
Menu navigation
Messages
Page 16
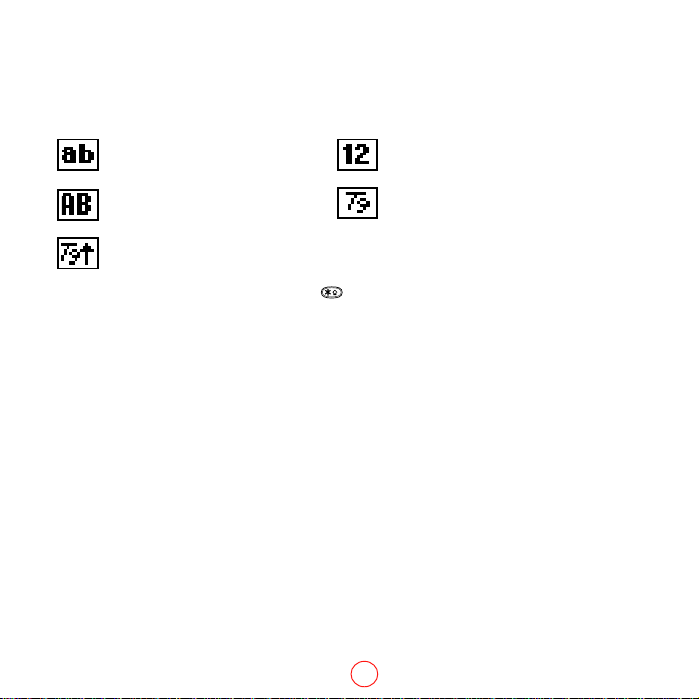
Changing the editing mode
When you are entering names or text messages, the current editing mode is indicated at the bottom of
the screen by one of the following icons.
Lowercase text mode Numeric mode
Uppercase text mode T9 Text Input (lowercase)
T9 Text Input (uppercase)
You can switch between all modes by pressing
repeatedly.
16
Page 17

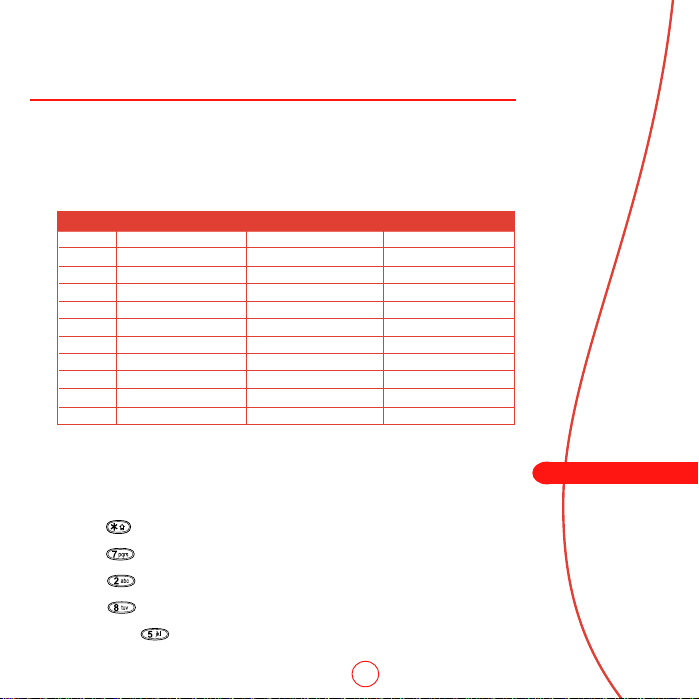
Entering symbols
If you cannot remember which keys generate which symbols, then a long press
on
displays a table showing all the symbols available to you. Scroll down
the table to display more symbols.
The phone
.,-!?@():
&' " / _ ; $%+
*=<>#£
¥¤∆
§ θ∧Ξ∏∑φ
ψΩ¿ i адежз
йим ДЕЙтсЖ
цшЯьщСЦШЬ
TT
o enter a symbol:o enter a symbol:
T
o enter a symbol:
TT
o enter a symbol:o enter a symbol:
1 Scroll to the row containing the symbol you want
2 Press whichever numeric key
containing the symbol.
Example: Example:
Example: To enter the symbol , scroll to the 4th row then press
Example: Example:
to corresponds to the column
.
17
Getting started
Powering up/down
Making a call
Answering a call
Using the contact list
Menu navigation
Messages
Page 18

Correcting an entry
Pressing deletes the character immediately to
the left of the cursor. Pressing and holding
deletes all of the text that you have entered.
Finding a name in your contact list
TT
o find a name in your contact list:o find a name in your contact list:
T
o find a name in your contact list:
TT
o find a name in your contact list:o find a name in your contact list:
from the main screen. You can also
1 Press
press ,
option.
2 Type in the first letters of the name. The
phone automatically searches as you type.
You can also use the side keys
scroll up and down through the list.
ContactsContacts
Contacts, then select the
ContactsContacts
and to
SearchSearch
Search
SearchSearch
Modifying a name in your
contact list
TT
o change a name in your contact list:o change a name in your contact list:
T
o change a name in your contact list:
TT
o change a name in your contact list:o change a name in your contact list:
from the main screen. You can also
1 Press
press
option.
2 Type in the first letters of the name, to find
the entry that you want to modify.
3 Press
option.
ContactsContacts
,
Contacts, then select the
ContactsContacts
OptionsOptions
,
Options, and select the
OptionsOptions
ChangeChange
Change
ChangeChange
ChangeChange
Change
ChangeChange
4 Change the entry.
5 When you finish the entry will be changed
and stored in your SIM card.
Erasing a name from your
contact list
TT
o delete a name from your contacto delete a name from your contact
T
o delete a name from your contact
TT
o delete a name from your contacto delete a name from your contact
list:list:
list:
list:list:
1 Find the name you want to delete, then press
OptionsOptions
,
Options, to display the contact list
OptionsOptions
menu.
2 Scroll to the
SelectSelect
Select. You are asked to confirm if you
SelectSelect
would like to delete the entry.
3 Press
your mind press any other key to avoid
erasing the entry.
DeleteDelete
Delete option, then press
DeleteDelete
OKOK
,
OK, to confirm. If you change
OKOK
Displaying the contact list status
TT
o display the number of entries thato display the number of entries that
T
o display the number of entries that
TT
o display the number of entries thato display the number of entries that
you have used from your contact list:you have used from your contact list:
you have used from your contact list:
you have used from your contact list:you have used from your contact list:
1 Press ,
list menu.
2 Scroll to the
The number of entries that you have used out of
the number available is displayed.
ContactsContacts
Contacts, to display the contact
ContactsContacts
MemoryMemory
Memory option, then press
MemoryMemory
SelectSelect
,
Select.
SelectSelect
,
18
Page 19

Fixed names
This service allows you to restrict
your outgoing calls to certain
selected numbers from your SIM
card. This feature is dependent on
your service provider.
Your phone will ask for the PIN2
code to activate this function. You
can obtain this code from your
service provider.
When this feature is activated, a
new contact list is made visible in
place of your standard one. Only
numbers from this contact list can
be dialled. You can add numbers to
this contact list in the same way as
adding numbers to your normal
contact list, with the exception that
you have to enter the PIN2 code.
Note: Note:
!
Note: It is still possible to make
Note: Note:
an emergency call (112 or other
country specific emergency
number) with this feature active.
Service numbers
Your service provider may have preprogrammed some useful numbers
into your SIM card. These numbers
normally give access to special
services. For more information
contact your service provider.
TT
o display these numbers:o display these numbers:
T
o display these numbers:
TT
o display these numbers:o display these numbers:
ContactsContacts
,
1 Press
display the contact list menu.
2 Scroll to the
option, then press
You can scroll through the list using
the side keys and .
Contacts, to
ContactsContacts
Service noService no
Service no.
Service noService no
SelectSelect
,
Select.
SelectSelect
The phone
Getting started
Powering up/down
Making a call
Answering a call
Using the contact list
Menu navigation
Messages
19
Page 20

7 Menu navigation
All menus can be accessed through the main menu.
To enter the main menu, press ,
Scrolling
You can scroll from one menu to another using the side keys / .
When you find the menu that you are looking for, press
Some menus contain further submenus and others give a simple list of options. Navigation is always
the same: use the side keys
BackBack
,
Press
Press and hold
Back, to return to the previous level.
BackBack
to exit the menus and return directly to the main screen.
SIM Toolkit
Your service provider may offer some special services or applications. These could be information
services, banking services, etc. The name of the menu may change to indicate the type of service,
for example “Information”.
This menu only appears if the service is offered by the service provider.
For more details, please contact your service provider.
MenuMenu
Menu, from the main screen.
MenuMenu
/ to scroll and ,
SelectSelect
Select.
SelectSelect
SelectSelect
,
Select.
SelectSelect
20
Page 21

21
The phone
Getting started
Powering up/down
Making a call
Answering a call
Using the contact list
Menu navigation
Messages
Page 22

8 Messages
General
The phone enables you to send and receive
text messages. You can also retrieve your voice
mail from the network and manage messages
broadcast by the network.
Reading a text message
When you receive a text message, the
envelope icon
of the main screen and the phone beeps.
TT
o read the message:o read the message:
T
o read the message:
TT
o read the message:o read the message:
1 Press
directly or enter the
select the option
of messages.
The name or number of the sender is
displayed above the message text.
is displayed at the top
ReadRead
,
Read, to display the message
ReadRead
MessagesMessages
Messages menu and
MessagesMessages
ReadRead
Read to consult your list
ReadRead
2 Use the side keys and to scroll through the
message.
3 Press
message options:
DeleteDelete
Delete Removes the message from the
DeleteDelete
ReplyReply
Reply Sends a text message
ReplyReply
CallCall
Call Calls the sender (or, if there
CallCall
SaveSave
Save Adds the sender’s phone
SaveSave
no.no.
no.
no.no.
Time/dateTime/date
Time/date Displays the date and time
Time/dateTime/date
ForwardForward
Forward Sends the message to
ForwardForward
22
OptionsOptions
,
Options, to access the following
OptionsOptions
memory
to the sender
is a number enclosed in
quotes in the message, this
number is called instead.)
number to your contact list
of the message
someone else
Page 23

Sending a text message
You can send messages of up to 160 characters to another GSM phone.
TT
o send a message:o send a message:
T
o send a message:
TT
o send a message:o send a message:
1 Enter the
MessagesMessages
Messages menu and select the option
MessagesMessages
2 Type in a new message or select a message from a list of saved messages.
You can type in a new message the normal way or use T9 predictive text
input.
3 When you have entered the text, press
4 Enter the destination phone number, or press
a name from your contact list.
5 Press ,
!
SendSend
Send, to send the message.
SendSend
Note: Note:
Note: If you reply to a message, you do not have to re-enter the number. This is
Note: Note:
done automatically.
SendSend
Send.
SendSend
SendSend
,
Send.
SendSend
ContactsContacts
,
Contacts, and select
ContactsContacts
23
The phone
Getting started
Powering up/down
Making a call
Answering a call
Using the contact list
Menu navigation
Messages
Page 24

Predictive text input
®
To save time when you are writing a text
message, your phone has a feature which
guesses the letters that you are typing and tries
to complete the word.
This input method allows you to simply press
each key once. For example, to write ”agenda”,
press
then
, then , then , then ,
and .
The word may change as you type, but don’t
worry about what is on the screen until you
have finished the word.
Sometimes different words share the same
sequence of key presses. If the finished word
is wrong, press
to scroll through other
possibilities.
If the word that you are looking for is still not
there, press
mode to
repeatedly to change the text
and enter the word again.
For more information on changing between
different input modes, see section ”Changing the
editing mode”.
After you have completed a word, press the
space key
to enter the next word.
Press and hold to pick a symbol to insert
from the character table.
Some intelligent punctuation (including full
stops, hyphens and apostrophes) are also
available on . The punctuation mark is
completed when you enter the next keystroke.
Voice mail
Calls your voice mail number.
24
Page 25

Broadcast messages
Your service provider may offer Cell Broadcast. This could be information on the
traffic, weather, events, or local information which is broadcast by the network to
all mobiles in a specific area.
When you activate this feature, you may receive messages about the selected
topics.
Channel Channel
Select the
Channel option to add and remove topics from the list. You can also
Channel Channel
enter the channel number and associate a name to this number.
Contact your service provider to find out which topics are available on the
network.
When you receive a new cell broadcast message, you are informed by
a message in the main screen and an audible tone.
RR
To consult your broadcast messages, select
or enter the broadcast menu.
eadead
,
R
ead, from the main screen
RR
eadead
The phone
Getting started
Powering up/down
Making a call
Message settings
This menu offers three options:This menu offers three options:
This menu offers three options:
This menu offers three options:This menu offers three options:
StatusStatus
Status Allows you to set whether or not you wish to be informed when
StatusStatus
reportreport
report your correspondent has received the text message.
reportreport
CentreCentre
Centre Allows you to enter or change the service centre number
CentreCentre
numbernumber
number for text messaging.
numbernumber
VV
oiceoice
V
oice Allows you to enter or change your voice mail number.
VV
oiceoice
mailmail
mail
mailmail
25
Answering a call
Using the contact list
Menu navigation
Messages
Page 26

9 Extras
FlippIT
Go into the
Extras Extras
Extras menu and select
Extras Extras
to continue.
The game has 6 levels; 3x3 being the easiest.
The objective of the game is to change the white discs to black discs. You do this by selecting one
of the white discs by pressing the key. This turns the white disc to black, but also turns all of
the discs directly above, below, to the left and to the right of the selected discs to black.
YY
ou can move the cursor from one counter to another using the following keys:ou can move the cursor from one counter to another using the following keys:
Y
ou can move the cursor from one counter to another using the following keys:
YY
ou can move the cursor from one counter to another using the following keys:ou can move the cursor from one counter to another using the following keys:
FlippITFlippIT
FlippIT. You will see an animated display. Press any key
FlippITFlippIT
Up
Up and left
Left
Down and left
Down
Up and right
Right
Down and right
On the right of the screen you will see the number of moves that you have made so far, and also
the smallest number of moves that it is possible to complete the level in.
With each higher level the grid gets bigger and bigger, and harder!
26
Page 27

Quaddro
Go into the
Extras Extras
Extras menu and select
Extras Extras
Press any key to continue.
YY
ou can select the number of players:ou can select the number of players:
Y
ou can select the number of players:
YY
ou can select the number of players:ou can select the number of players:
♦ Demonstration mode lets you watch the computer play against itself.
♦ You against the computer.
♦ You against a friend
The objective of the game is to drop your counters into the slots along the top of
the board, in the attempt to create a line of four, horizontally, vertically or
diagonally.
When you drop a counter, it will fall all the way to the bottom or sit on top of
any other counters that are in that column. So, think carefully before you play!
You move the flashing cursor left and right along the top of the screen using
the
and keys. Pressing will drop the counter into the column.
QuaddroQuaddro
Quaddro. You will see an animated display.
QuaddroQuaddro
27
Extras
Agenda
Sounds
Settings
Services
Display indicators
Troubleshooting
Safety Information
Page 28

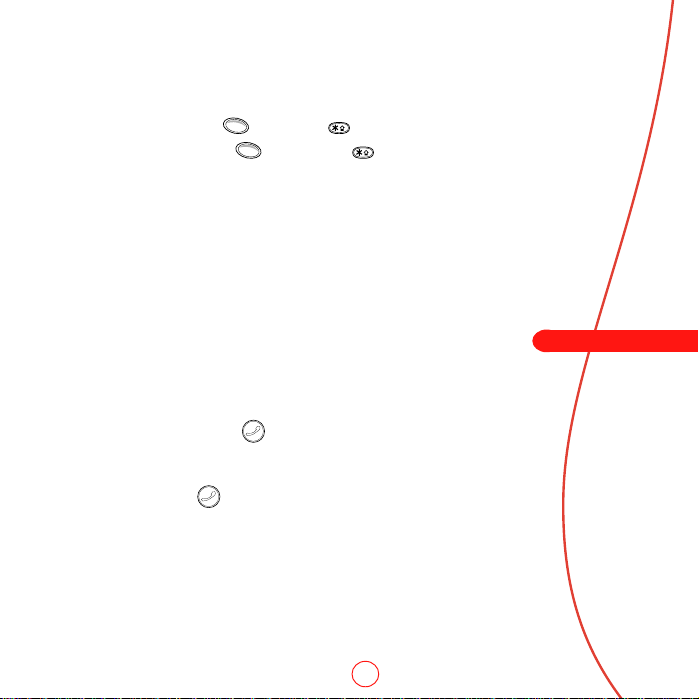
Splash
Go into the
Extras Extras
Extras menu and select
Extras Extras
to continue.
An incomplete curly pipeline is displayed starting at the top left of the screen and water is slowly
flowing towards the open end. The goal is to connect the open end of this pipe to the outlet at the
bottom right of the screen before the water overflows!
To do this you are supplied with pieces of straight and bent pipe, which are shown at the right of
the screen. The piece at the top of these is the next piece that you must place on the board.
YY
ou move the cursor using the following keys:ou move the cursor using the following keys:
Y
ou move the cursor using the following keys:
YY
ou move the cursor using the following keys:ou move the cursor using the following keys:
SplashSplash
Splash. You will see an animated display. Press any key
SplashSplash
Up
Up and left
Left
Down and left
Down
Up and right
Right
Down and right
Drop bomb
The key places the section in the position of the flashing cursor. However, be careful.
Once you have put down a piece you cannot move it.
You are provided with 3 bombs. These bombs will delete the piece where the cursor is positioned.
Use them wisely.
Once you have managed to complete the pipeline to the outlet, you can press the
key to speed
up the water, to finish the level. With each level it gets faster and faster.
Good luck!Good luck!
Good luck!
Good luck!Good luck!
28
Page 29

Scizzors
Go into the
Extras Extras
Extras menu and select
Extras Extras
display.
In order to select the stone, press
To select the scissors, press
The object of the game is to try to beat the computer by selecting one of the
3 objects. When you do this the computer also selects one of the 3 objects.
The rules are simple:
♦ Scissors (2 fingers out) cuts paper, therefore scissors wins,
♦ Paper (flat palm) wraps stone, therefore paper wins,
♦ Stone (fist) blunts scissors, therefore stone wins,
Two of the same result in a draw.
ScizzorsScizzors
Scizzors. You will see an animated
ScizzorsScizzors
. To select the paper, press .
.
Extras
Agenda
Sounds
Settings
Services
Display indicators
Troubleshooting
Safety Information
29
Page 30

10 Agenda
In this menu you can plan and store your
meetings, birthdays or other events. You can
set the phone to sound at particular times to
inform you of the event.
When you enter the menu you will see the
current week displayed and the date. Pressing
Options Options
,
Options will show you the list of options.
Options Options
Searching for an entry
When you see the current week displayed you
can scroll up and down through the dates using
the side keys. Press
entries for that day. If there are no entries you
will be prompted to add one.
You can also go to a date directly by pressing
OptionsOptions
,
Options, from the week view, and
OptionsOptions
selecting the option
you wish to go to.
SelectSelect
,
Select, to display the
SelectSelect
Go toGo to
Go to. Enter the date that
Go toGo to
Adding an entry
Select the day on which you would like to store
the event.
AddAdd
newnew
Select
menu. You will be presented with a screen,
which allows you to enter the text and set the
options of the event.
When you have finished, press
to store.
Add
new
from the list of options in the
AddAdd
newnew
,
OKOK
OK,
OKOK
Alarm clock
You can use your phone as an alarm clock.
In this menu you can set the time, in 24-hour
format, that you wish the alarm to ring.
When the alarm sounds, press:When the alarm sounds, press:
When the alarm sounds, press:
When the alarm sounds, press:When the alarm sounds, press:
OffOff
,
Off, to switch it off,
OffOff
SnoozeSnooze
,
Snooze, to stop the alarm for ten minutes.
SnoozeSnooze
The alarm will then sound again.
30
Page 31

Note: Note:
!
Note: The alarm will sound even if the phone is switched off. The phone will power on
Note: Note:
temporarily but you will not be able to receive or make calls. This does not, therefore,
cause any problems in areas where use of a mobile phone is prohibited. Once you
have acknowledged the alarm, the phone will switch off.
Extras
List all
This option displays all of your stored events
Deleting entries
You can delete an entry by selecting it and choosing,
options. Any missed events will be automatically deleted once they have been
consulted.
DeleteDelete
Delete, from the list of
DeleteDelete
31
Agenda
Sounds
Settings
Services
Display indicators
Troubleshooting
Safety Information
Page 32

11 Sounds
This menu allows you to configure the various
tones that the phone plays when you receive a
call or a new text message, or some other
event occurs.
Ringer
Select this option to set the ringing tone for
incoming calls.
Volume
Select this option to change the volume setting
for the different tones that the phone plays.
Key tones
This menu allows you to set the type of keypad
tones that you would like to hear when pressing
the keys.
YY
ou have three options:ou have three options:
Y
ou have three options:
YY
ou have three options:ou have three options:
OffOff
Off No sound emitted upon a key press
OffOff
OnOn
On Short, low volume tones
OnOn
DTMFDTMF
DTMF These are standard tones, as used in
DTMFDTMF
touch tone phones. Each number has
its own specific tone.
To activate or deactivate silent mode press
MenuMenu
Menu, then
MenuMenu
from the main screen.
Vibrator
Select this menu to set the vibrator for incoming
calls or text messages.
YY
ou have three options:ou have three options:
Y
ou have three options:
YY
ou have three options:ou have three options:
OffOff
Off Deactivates the vibrator function
OffOff
OnOn
On Sets the phone to vibrate for an
OnOn
VibrateVibrate
Vibrate Sets the phone to vibrate for a few
VibrateVibrate
then ringthen ring
then ring seconds before the phone starts
then ringthen ring
None of the above settings affects any of the
sounds settings.
,
32
incoming call or text message
to ring
Page 33

Events
New message
This sets the alert tone to on or off for
when you receive a new text message.
New broadcast
This sets the alert tone on or off for
when you receive a new broadcast
message.
Equalizer
This menu allows you to alter the
earpiece audio settings of your
phone.
Choose from 3 settings:Choose from 3 settings:
Choose from 3 settings:
Choose from 3 settings:Choose from 3 settings:
♦ Treble
♦ Normal
♦ Bass
Extras
Agenda
Sounds
Low battery
This sets the alert tone on or off for
when the battery level gets low.
Low credit
This sets the alert tone on or off for
when the credit on your subscription
gets low. This is only with certain
subscriptions.
For more information contact your
service provider.
Settings
Services
Display indicators
Troubleshooting
Safety Information
33
Page 34

12 Settings
This menu allows you to configure all of the
features that are specific to the setup of your
phone.
Languages
This menu allows you to change the language
of the display of the phone.
This also changes the language of the T9 Text
Input dictionary if available.
Infrared
Your phone has the ability to perform fax and
data communications, using infrared, with a
computer or another device with infrared
capability.
This option activates the infrared function.
Before trying to transmit the data from your PC,
activate this option in the menu.
Once activated, your phone will search for
incoming data for a few minutes.
An icon indicates when the phone is searching.
Once connected the icon changes.
Setting time and date
In this menu you can set the time and date of the
phone.
Set dateSet date
♦ Go to
Set date and press
Set dateSet date
♦ Enter the date,
♦ Press
♦ Go to
♦ Enter the time in 24 hour format,
♦ Press ,
The date and time will be stored.
OKOK
,
OK,
OKOK
Set timeSet time
Set time and press
Set timeSet time
OKOK
OK.
OKOK
SelectSelect
,
Select,
SelectSelect
SelectSelect
,
Select,
SelectSelect
Auto redial
When this function is activated, the phone will
automatically redial a number when the call
attempt fails. If the other user’s phone is busy,
the phone will wait for a few seconds before
each attempt, and then beep when it succeeds.
Auto answer
This function is only applicable when certain
handsfree accessories (e.g., a personal handsfree
headset) are connected to the phone.
When you receive an incoming call with this
feature activated, the phone rings for a short time
before automatically accepting the call.
34
Page 35

Any key answer
When this function is activated, you can answer an incoming call by pressing
any key, except
RR
ejecteject
,
R
eject.
RR
ejecteject
Security
PIN code:PIN code:
PIN code: Your PIN (Personal Identity Number) code is a code which you
PIN code:PIN code:
This menu allows you to:This menu allows you to:
This menu allows you to:
This menu allows you to:This menu allows you to:
1 Activate PIN entry requirement at switch on
(if your SIM card supports this)
2 Deactivate PIN entry requirement at switch on
(if your SIM card supports this)
3 Change PIN
4 Change PIN2
To activate the PIN code requirement or change the PIN code, you need
to enter the current PIN code.
Some network services require a separate security code. This code is the PIN2.
If you don’t know your PIN code, contact your service provider.
can use to protect unwanted users from using your phone.
This is the number that the phone asks for at switch on.
35
Extras
Agenda
Sounds
Settings
Services
Display indicators
Troubleshooting
Safety Information
Page 36

13 Services
Commands
This menu allows you to send special commands
to the network to get specific information. This
could be information such as the time and date,
your own phone number, or the amount of
credit remaining on your SIM card.
The commands, and whether this feature is
available, can be obtained from your service
provider.
You can store the number of the command and
a name.
Once stored, scroll to the command and press
SendSend
,
Send,
to get the required information from
SendSend
the network.
Network selection
This menu allows you to choose how the phone
searches for the network.
YY
ou have two options:ou have two options:
Y
ou have two options:
YY
ou have two options:ou have two options:
AutomaticAutomatic
Automatic The phone searches all available
AutomaticAutomatic
ManualManual
Manual The phone searches all available
ManualManual
You can scroll up and down with
the network that you wish to use.
Once you select a network, your phone will
always try to select this network.
Network selection stays manual until you switch
to automatic mode.
networks and automatically selects
one.
networks and, when finished,
displays a list of all the networks
found.
/ to select
Send number
This menu allows you to select whether you hide
your identity or not when you call someone.
36
Page 37

There are two options:There are two options:
There are two options:
There are two options:There are two options:
ActivateActivate
Activate Your telephone number is sent to your correspondent
ActivateActivate
when you make a call
DeactivateDeactivate
Deactivate Your telephone number is not sent to your correspondent
DeactivateDeactivate
when you make a call
Extras
Agenda
Cost/timers
This menu contains all information relevant to the amount of time you have
spent on different calls. Your service provider may also support “Advice of
Charge” allowing you to monitor the exact number of units used. Contact
your service provider to find out if you have this feature available.
This menu offers five options:This menu offers five options:
This menu offers five options:
This menu offers five options:This menu offers five options:
BalanceBalance
Balance Displays the amount of credit that you have left on your
BalanceBalance
OutgoingOutgoing
Outgoing Displays the total time that you have spent on your phone
OutgoingOutgoing
IncomingIncoming
Incoming Displays the total time that you have spent on your phone
IncomingIncoming
LimitLimit
Limit Allows you to view and set the maximum cost limit that
LimitLimit
RateRate
Rate Allows you to set the price per unit, and enter the currency in
RateRate
!
prepaid card
on outgoing calls
on incoming calls
you can go up to
which you wish the call costs to be displayed
Note: Note:
Note: Some of the above features are network dependent and you will be required
Note: Note:
to enter a PIN2 code.
37
Sounds
Settings
Services
Display indicators
Troubleshooting
Safety Information
Page 38

Divert
This network feature allows you to divert your incoming calls to your voice mailbox or to another
number.
This menu offers five options:This menu offers five options:
This menu offers five options:
This menu offers five options:This menu offers five options:
If busyIf busy
If busy When activated, all of your calls will be diverted if you are already in a call
If busyIf busy
If no answerIf no answer
If no answer When activated, all of your calls will be diverted if you do not get to your phone
If no answerIf no answer
UnreachableUnreachable
Unreachable When activated, all of your calls will be diverted if you have switched your phone
UnreachableUnreachable
All callsAll calls
All calls When activated, all of your incoming calls will be diverted
All callsAll calls
CancelCancel
Cancel Cancels all diverts
CancelCancel
When you select one of the above options, you can choose between:
♦ Checking the status of the service
♦ Activating the divert
♦ Cancelling the divert
in time
off or if you are out of coverage
Call waiting
This menu allows you to activate or deactivate the call waiting feature.
38
Page 39

39
Extras
Agenda
Sounds
Settings
Services
Display indicators
Troubleshooting
Safety Information
Page 40

14 Display indicators
SymbolSymbol
Symbol
SymbolSymbol
Battery indicator. Empty icon indicates a very weak battery level.
Signal strength indicator. No bars indicates a very weak signal.
DescriptionDescription
Description
DescriptionDescription
Solid icon indicates a fully charged battery level.
Battery charging
Four bars indicates a very strong signal.
New text message
All incoming calls are diverted
Keypad locked
New voice mail message. The display of this icon is network dependent.
Silent mode active
Infrared connected
40
Page 41

SymbolSymbol
Symbol
SymbolSymbol
DescriptionDescription
Description
DescriptionDescription
Infrared connecting
Extras
Alarm clock set
In calls list shows that a call was incoming
In calls list shows that a call was outgoing
In calls list shows that a call was missed
In message list indicates the messages which
have not yet been read
In message list indicates the messages which
have been read
In lists shows the option that is currently activated
41
Agenda
Sounds
Settings
Services
Display indicators
Troubleshooting
Safety Information
Page 42

15 Troubleshooting
ProblemProblem
Problem
ProblemProblem
Phone does not power on Battery empty
PP
ossible causeossible cause
P
ossible cause
PP
ossible causeossible cause
______________________________________________________________________________________________________________
Battery contacts dirty
Phone does not charge Battery empty
______________________________________________________________________________________________________________
Charger incorrectly connected
Battery How long should I charge the battery the first time?
I don’t get as much battery life The phone uses battery power when it is switched on even if
as I expected. it is not in a call. Making calls and playing with the different functions
“Insert SIM” is displayed when SIM card is incorrectly inserted or missing
I switch on the phone
of the phone will run down the battery faster.
The stated battery life is under optimum conditions.
______________________________________________________________________________________________________________
SIM card is damaged or dirty
The PIN code is blocked 3 incorrect entries
The PIN2 code is blocked 3 incorrect entries
Poor display Low temperature
Can’t connect to network Weak signal
______________________________________________________________________________________________________________
Invalid SIM card
______________________________________________________________________________________________________________
Network not allowed
42
Page 43

PP
ossible corrective actionossible corrective action
P
ossible corrective action
PP
ossible corrective actionossible corrective action
Fully charge the battery and then press
_______________________________________________________________________________________________________________________________
Clean contacts on battery and phone with a dry cloth, attach battery, wait
a few seconds and press .
Charge for 2 hours. Don’t worry if the battery icon does not change
immediately. Disconnect and try again.
_______________________________________________________________________________________________________________________________
Check the mains socket, and the connection to the phone.
.
12 hours continuous.
Charge the phone regularly.
Check that the SIM card is positioned correctly and that the metal
clip is slid across. Try again.
_______________________________________________________________________________________________________________________________
Visually check the SIM and clean the contacts with a dry cloth. Try again.
Enter the PIN unblocking code supplied with the SIM card. If you do not have
this code, contact your service provider.
Enter the PIN2 unblocking code supplied with the SIM card. If you do not have
this code, contact your service provider.
Move to a warmer place and let the phone warm up.
Move into an area of better coverage. If you are in a building, move towards
a window.
_______________________________________________________________________________________________________________________________
Contact your service provider.
_______________________________________________________________________________________________________________________________
Try reselecting the network. Switch off and then back on.
43
Extras
Agenda
Sounds
Settings
Services
Display indicators
Troubleshooting
Safety Information
Page 44

ProblemProblem
Problem
ProblemProblem
PP
ossible causeossible cause
P
ossible cause
PP
ossible causeossible cause
Can’t make/receive calls Weak signal
______________________________________________________________________________________________________________
Phone is switched off
______________________________________________________________________________________________________________
Check the number
______________________________________________________________________________________________________________
Call key not pressed
______________________________________________________________________________________________________________
Network is busy
______________________________________________________________________________________________________________
Call barring or fixed dialling is activated
______________________________________________________________________________________________________________
Not registered with service provider
______________________________________________________________________________________________________________
No credit left on your prepaid card
Low earpiece volume Low setting
Low ringer tone Low setting
Cannot enter some words Wrong entry mode
“Message list full” is displayed Your SIM card memory is full of text messages, therefore
in the main screen you can not receive any more messages.
Some features do not work Feature not supported by the operator or your subscription.
Some menus are missing There are restrictions on your SIM card or subscription.
44
Page 45

PP
ossible corrective actionossible corrective action
P
ossible corrective action
PP
ossible corrective actionossible corrective action
Check that the service provider name is displayed on the screen. If not try
to reconnect to the network.
_______________________________________________________________________________________________________________________________
Press for a few seconds.
_______________________________________________________________________________________________________________________________
Use the full area code and country code in the number.
_______________________________________________________________________________________________________________________________
After dialling the number you must press ,
_______________________________________________________________________________________________________________________________
If you hear rapid beeps, then the network is busy. Hang up and try again.
_______________________________________________________________________________________________________________________________
Check the fixed dialling settings. Otherwise check the call barring settings
with your service provider.
_______________________________________________________________________________________________________________________________
After purchasing your phone, you may need to call your service provider
to activate the line.
_______________________________________________________________________________________________________________________________
Recharge your credit.
CallCall
Call.
CallCall
Press when you are in a call to increase the volume.
Go into the
Your phone has T9 Text Input (i.e. it guesses what words you are trying
to enter). To enter a special word, press
multitap mode.
Go into the
messages.
SoundsSounds
Sounds menu, select
SoundsSounds
ReadRead
Read menu of the message menu and delete some of your
ReadRead
VV
olumeolume
V
olume and increase the setting.
VV
olumeolume
repeatedly to change to normal
Call your service provider.
Call your service provider.
Extras
Agenda
Sounds
Settings
Services
Display indicators
Troubleshooting
Safety Information
45
Page 46

16 Safety information
You should observe and follow these guidelines for the safe and efficient use of your phone. Failure to
comply with these guidelines and requirements may void your warranty and may invalidate any
approvals given to your phone.
Radio Frequency Signals
Your phone transmits and receives radio frequency (RF) signals whenever it is switched on. The
design of your phone complies with all relevant standards and recommendations for human
exposure to RF energy.
Your phone’s transmission power is controlled by the cellular network at the lowest possible level
to maintain a good signal. You may also choose to reduce your exposure to RF signals by
controlling the duration of your calls or by using an accessory such as a handsfree device.
Your phone has been designed to comply with applicable standards when used correctly in
accordance with the user instructions.
A sample of this phone model has been tested and found to comply with the following directives,
standards or recommendations:
♦ 1999/5/EC
♦ 89/336/EEC
♦ 73/23/EEC as amended by 93/68/EEC
♦ 1999/519/EC
♦ AS/NZS 2772.1 (Int):1998
♦ IEEE Std C95.1, 1999 Edition
Antenna Care and Efficient Operation
Do not use your phone if the antenna is damaged. Replace the antenna only with one approved by
the manufacturer. Unapproved antennas or modifications may damage your phone, degrade its
performance and violate local regulations.
46
Page 47

Do not touch the antenna unnecessarily while a call is in progress. Contact with
the antenna affects call quality and may cause your phone to transmit at a
higher power level than otherwise needed.
Hold your phone as you would any other phone. The antenna should point up
and over your shoulder.
Batteries
All batteries can cause property damage, injury or burns if a conductive
material such as jewellery or keys comes into contact with the exposed
terminals. The material may complete an electrical circuit and become quite
hot. Exercise care in handling your phone battery. For example, avoid carrying
your phone battery loose in a pocket or purse.
This product is designed for use with manufacturer-approved batteries only.
Use of unapproved batteries may be dangerous and may cause damage to the
battery or the phone and may void your warranty.
Accessories
Only use accessories approved by the manufacturer. Using unapproved
accessories with your phone may result in degraded performance, fire, electric
shock or injury, and may void the warranty. Please check with your dealer for
the availability of approved accessories.
Your phone is intended for use only with chargers approved by the
manufacturer. Any other use will invalidate any approval given to your phone
and may be dangerous.
The mains (AC) charger is compatible only with power sources indicated on its
label. Do not connect the charger to a power source of a different voltage or
frequency. Do not use the charger outdoors or in areas where it may become
wet.
47
Extras
Agenda
Sounds
Settings
Services
Display indicators
Troubleshooting
Safety Information
Page 48

Unplug the charger from the wall socket using the body of the charger, not the cord. Locate the cord
so that it will not be tripped over, stepped on or damaged. Do not use the charger if it is damaged.
Unplug the charger from the wall socket before cleaning it. Use a slightly damp cloth for cleaning,
and allow the charger to dry fully before plugging it in.
Infrared
Avoid pointing the infrared port on the top of the phone at eyes when it is active.
Children
Your phone is not a toy. Do not allow children to play with it. They could hurt themselves or others.
Children could also damage the phone or make calls that increase your telephone bill.
Electronic Devices
Most modern electronic equipment is shielded from RF signals. However, certain electronic
equipment may not be shielded against the RF signals from your wireless phone.
Pacemakers
The Health Industry Manufacturers Association recommends that a minimum separation of
20 cm (or 6 inches) be maintained between a handheld phone and a pacemaker to avoid
potential interference with the pacemaker. The recommendations are consistent with the
independent research by and recommendations of Wireless Technology Research.
Persons with a pacemaker:
♦ Should always keep the phone more than 20 cm (or 6 inches) from their pacemaker when
the phone is turned on.
♦ Should not carry the phone in a breast pocket.
♦ Should use the ear opposite the pacemaker in order to minimize the potential for
interference.
Consult your doctor or the manufacturer of the medical device if you have any questions.
Hearing Aids
Some digital wireless phones may interfere with some hearing aids. In the event of such
interference, you may want to consult your cellular dealer or hearing aid manufacturer to discuss
alternatives.
48
Page 49

Other Medical Devices
Operation of any radio transmitting equipment, including your cellular phone,
may interfere with the functionality of inadequately protected medical devices.
Consult your doctor or the manufacturer of the medical device if you have any
questions.
Turn your phone off in health care facilities when any regulations require that
you do so. Hospitals or health care facilities may be using equipment that
could be sensitive to external RF energy.
Vehicles
Using your phone in a vehicle demands special considerations. The fitting of
any accessories to a vehicle should only be undertaken by a suitably qualified
person to ensure that vehicle systems are not adversely affected, and that the
accessory gives optimum performance.
Interference
RF signals may affect improperly installed or inadequately shielded electronic
systems in motor vehicles (e.g., electronic fuel injection systems, antilock
braking systems and air bag systems). Check with the manufacturer or
representative regarding your vehicle. You should also consult the
manufacturer of any equipment that has been added to your vehicle.
Driving
Always obey local laws and regulations regarding the use of a cellular phone
in the areas where you drive. In some areas, it is illegal to use a cellular
telephone while driving, and handsfree operation is required in many other
areas.
Do not hold your phone in your hand while driving. Give your full attention to
driving. Use handsfree operation if possible. Pull off the road and park before
making or answering a call if it is safe and legal to do so.
Airbags
Do not place your phone or any accessories in the area over an airbag or in
the airbag’s deployment area. An airbag inflates with great force, and serious
injury could occur.
49
Extras
Agenda
Sounds
Settings
Services
Display indicators
Troubleshooting
Safety Information
Page 50

Aircraft
Switch off your phone when in an aircraft and follow any instructions from the aircraft crew. The use
of cellular telephones in an aircraft may be dangerous to the operation of the aircraft, may disrupt
the cellular network and is often illegal. Failure to observe this instruction may lead to suspension
or denial of cellular telephone service to the offender, or legal action or both.
Blasting Areas
To avoid interfering with blasting operations, turn your phone off when in a “blasting area” or in
areas posted “turn off two-way radio”. Obey all signs and instructions.
Potentially Explosive Atmospheres
Turn your phone off and do not remove its battery when in an area with a potentially explosive
atmosphere. It is rare, but your phone or its accessories could generate sparks. Sparks in such
areas could cause an explosion or fire resulting in property damage, bodily injury or even death.
Areas with potentially explosive atmospheres are often, but not always, clearly marked. They
include:
♦ Fuelling areas, such as petrol stations, below deck on boats, and fuel or chemical transfer and
storage facilities.
♦ Areas where fuel odours are present, such as when a gas leak occurs in a home.
♦ Areas where the air contains chemicals or particles, such as grain, dust or metal powders.
♦ Any other area where you would normally be advised to turn off your vehicle engine.
Posted Facilities
Turn your phone off in any area where posted notices so require.
Emergency Calls
Some networks may require that a valid SIM card be properly inserted in your phone before you can
make an emergency call. Also, emergency numbers vary by location. Check with your service
provider or the local cellular network in advance if you are not sure.
50
Page 51

To make an emergency call, enter the valid emergency number for your location
(e.g., 112 in many countries) and press the
CALL CALL
CALL key. You may need to turn off
CALL CALL
features such as keypad lock before making the call. Consult this user manual
for details.
! Never rely solely on your mobile phone to make emergency or essential communica-
tions.
Extras
Taking care of your phone
Use a slightly damp cloth to clean your phone. Never use any chemical or
abrasive cleaners, as they could damage the phone.
Avoid exposing your phone to any severe shocks, extreme (hot or cold)
temperatures or moisture. Keep your phone away from open flames such as lit
candles or cigarettes.
Servicing
Do not attempt to disassemble or repair your phone, as you may damage the
phone or injure yourself and will void your warranty. Only qualified personnel
at an authorized service centre should perform repairs. Your phone does not
contain any consumer serviceable parts.
Disposal
Your battery and other components may require precautions to be taken for
safe disposal. The battery type is indicated on the label. Please ensure that all
local and/or governmental regulations are followed when you dispose of this
product or its packaging. Refer to your point of sale or local government for
information on regulations that apply to this product.
Licensing
Your phone is authorised for use in GSM networks in countries where it is
approved. Use in other areas may be illegal and may disrupt other radio
communications.
51
Agenda
Sounds
Settings
Services
Display indicators
Troubleshooting
Safety Information
Page 52

52
 Loading...