


You are now the proud owner of a SEIKO Analogue Quartz Watch Cal.
Y182. For best results, please read the instructions in this booklet
carefully before using your SEIKO Analogue Quartz Watch. Please keep
this manual handy for ready reference.
Siete ora in possesso di un orologio SEIKO Analogico al Quarzo Cal. Y182.
Per ottenere i migliori possibili risultati dal vostro orologio, leggere
attentamente le istruzioni di questo manuale prima di utilizzare il vostro
orologio SEIKO analogico al quarzo. Conservare poi il manuale stesso per
ogni qualsiasi eventuale futuro riferimento.

English
2
ENGLISH
CONTENTS
Page
FEATURES .................................................................................................................. 3
DISPLAY AND CROWNS/BUTTONS .......................................................................... 4
DATE SETTING ........................................................................................................... 5
TIME SETTING ............................................................................................................ 6
ALARM ....................................................................................................................... 7
STOPWATCH .............................................................................................................. 10
TACHYMETER ............................................................................................................ 13
ADJUSTING THE HAND POSITION ............................................................................ 15
RESETTING THE BUILT-IN IC ..................................................................................... 16
BATTERY LIFE INDICATOR ........................................................................................ 17
BATTERY CHANGE ..................................................................................................... 17
SPECIFICATIONS........................................................................................................ 18
✩
For the care of your watch, see “TO PRESERVE THE QUALITY OF YOUR
WATCH” in the attached Worldwide Guarantee and Instruction Booklet.

English
3
FEATURES
SEIKO ANALOGUE QUARTZ
Cal. Y182
TIME/CALENDAR STOPWATCH
●
Hour & minute hands with small
second hand
●
Date displayed in numerals
●
Measures up to 30 minutes in 1/5
second increments.
●
Can measure repeatedly up to 6
hours.
TACHYMETER
●
For models with tachymeter scale
ALARM
●
Can be set on a 12-hour basis
with small alarm hands.

English
4
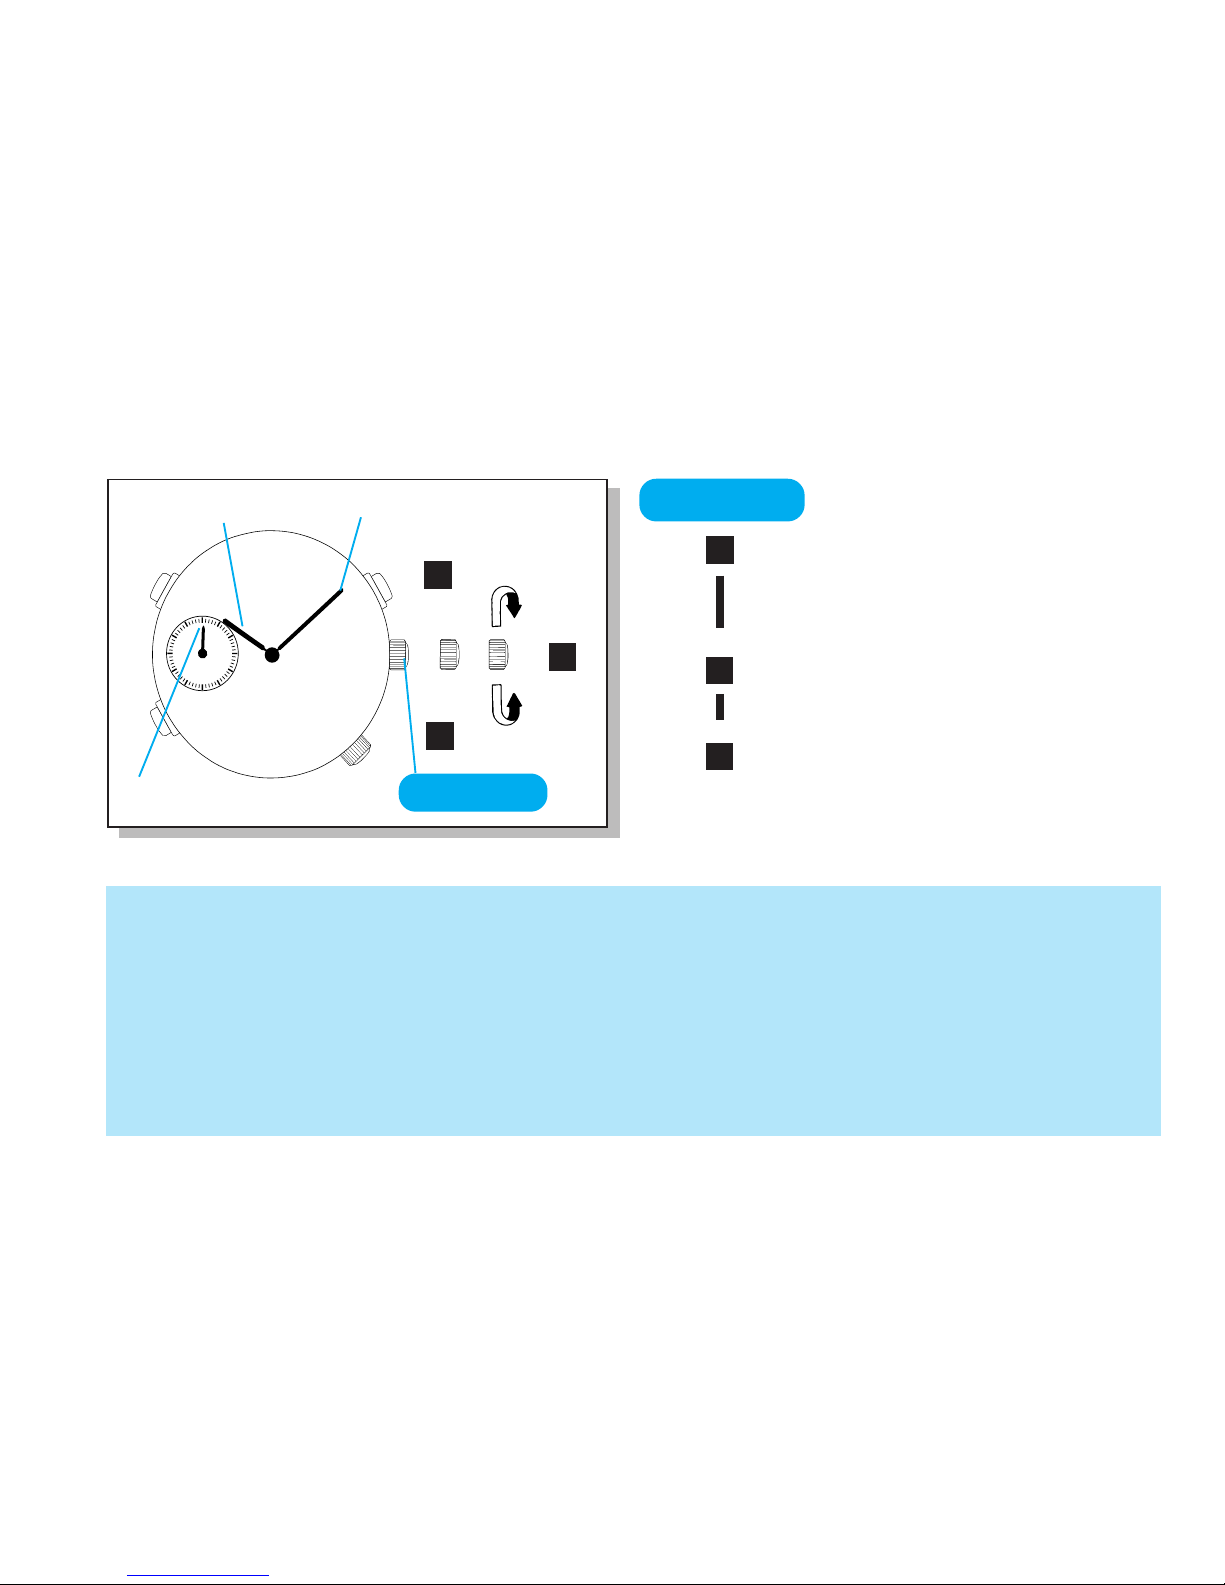
DISPLAY AND CROWNS/BUTTONS
There are three buttons and two crowns.
STOPWATCH 1/5 second handSTOPWATCH minute hand
Minute hand
(MAIN TIME)
ALARM
1
2
3
9
10
11
5
25
30
10
20
MIN
.
12
8
7
6
5
4
a b c
Hour hand
(MAIN TIME)
Second hand
(MAIN TIME)
a b c
ALARM hour hand ALARM minute hand
a: Normal position b: First click c: Second click
B
C
CROWN 1
CROWN 2
A
Date

English
5
Pull out to
first click
.
Turn clockwise until the date for
the previous day appears.
Pull out to
second click
and turn
until the desired date appears.
Push back in to
normal position
.
1
2
3
4
▼
▼
▼
➠
3
➠
4
Date
1 Do not set the date between 9:00 p.m. and 3:00 a.m. Otherwise, the date may not
change properly.
* If it is necessary to set the date during that time period, first change the time to any time outside
this period, set the date and then reset the correct time.
2 It is necessary to adjust the date at the end of February and 30-day months.
➠
DATE SETTING
1
2
1
NOTES
CROWN 1
CROWN 1
➡
English
6
Pull out to
second click
when
Second hand is at the 12 o’clock
position.
Turn to set Hour and Minute
hands.
Push back in to
normal position
in accordance with a time signal.
Minute hand
TIME SETTING
1 When setting Hour hand, check that AM/PM is correctly set.
* The watch is so designed that the date changes once in 24 hours. Turn the hands past the 12
o’clock marker to determine whether the watch is set for the A.M. or P.M. period. If the date
changes, the time is set for the A.M. period. If the date does not change, the time is set for
the P.M. period.
2 When setting Minute hand, advance it 4 to 5 minutes ahead of the desired time and
then turn it back to the exact minute.
Second hand
Hour hand
1
2
3
▼
▼
➠
1
15
30
45
60
➠
2
3
NOTES
CROWN 1
CROWN 1
 Loading...