How it Works
Log In / Sign Up
Buy Points
How it Works
FAQ
Contact Us
Questions and Suggestions
Users
Seiko
Loading...
S
SSC493P1
SSC499P1
SSC553P1
SSC555P1
SSC559P1
SSC595P1
SSC597P1
SSC607P1
SSC609P1
SSC611P1
SSC618P1
SSC645P1
SSC647P1
SSC663P1
SSC664P1
SSC666P1
SSE011J1
SSE015J1
SSE017J1
SSE021J1
SSE043J1
SSE047J1
SSE051J1
SSE055J1
SSE085J1
SSE087J1
SSE089
SSE089J1
SSE095
SSE095J1
SSE115J1
SSE147J1
SSE149J1
SSE159J1
SSE161J1
SSH007J1
SSH-8BLD
SSH-8BLD-25
2
SSLD-128R-FL
SSLD-28R
ST01
ST02
ST-306
STH-8BL
2
STH-8BLD
2
STH-8BLD-2
STH-8BLD-3
5
STMX1
STOPWATCH S055
STOPWATCH S143
STOPWATCH S149
STOPWATCH S321
STOPWATCH S351
STOPWATCH W073
STP-H1000
STP-H600 Series
STW-26
STW-26B
STW-27
STW-27B
STW-28
STW-28B
STW-7
STW-7B
STW-8B
STX1
STX5
SUK
SUN028P1
SUN035P1
SUN043P1
SUN051P1
SUN061P1
SUN065P1
SUN067P1
SUN069P1
SUN070P1
SUP381P1
SUP382P1
SUP384P1
SUP428P1
SUP433P1
SUP870P1
SUP872P1
SUP873P1
SUR009P1
SUR133P1
SUR134P1
SUR138P1
SUR150P1
SUR212P1
SUR217P1
SUR221P1
SUR223P1
SUR241P1
SUR245P1
SUR249P1
SUR251P1
SUR252P1
2
SUR263P1
Loading...
Loading...
Nothing found
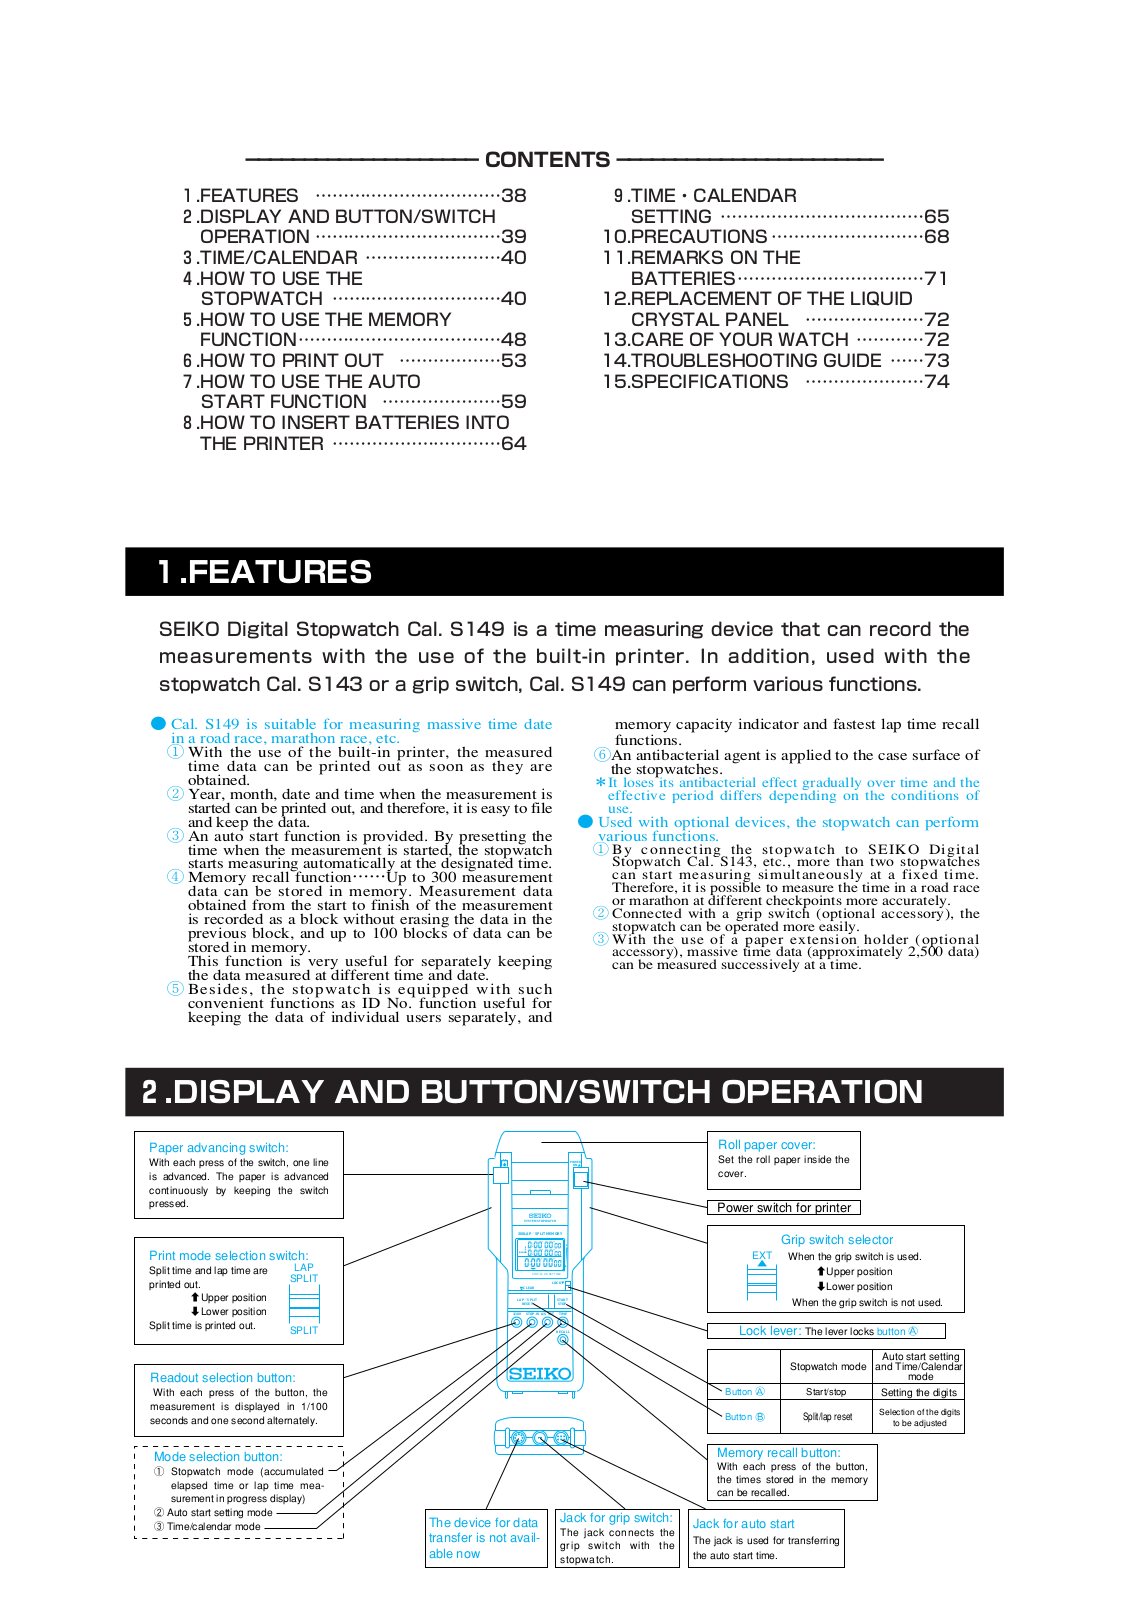
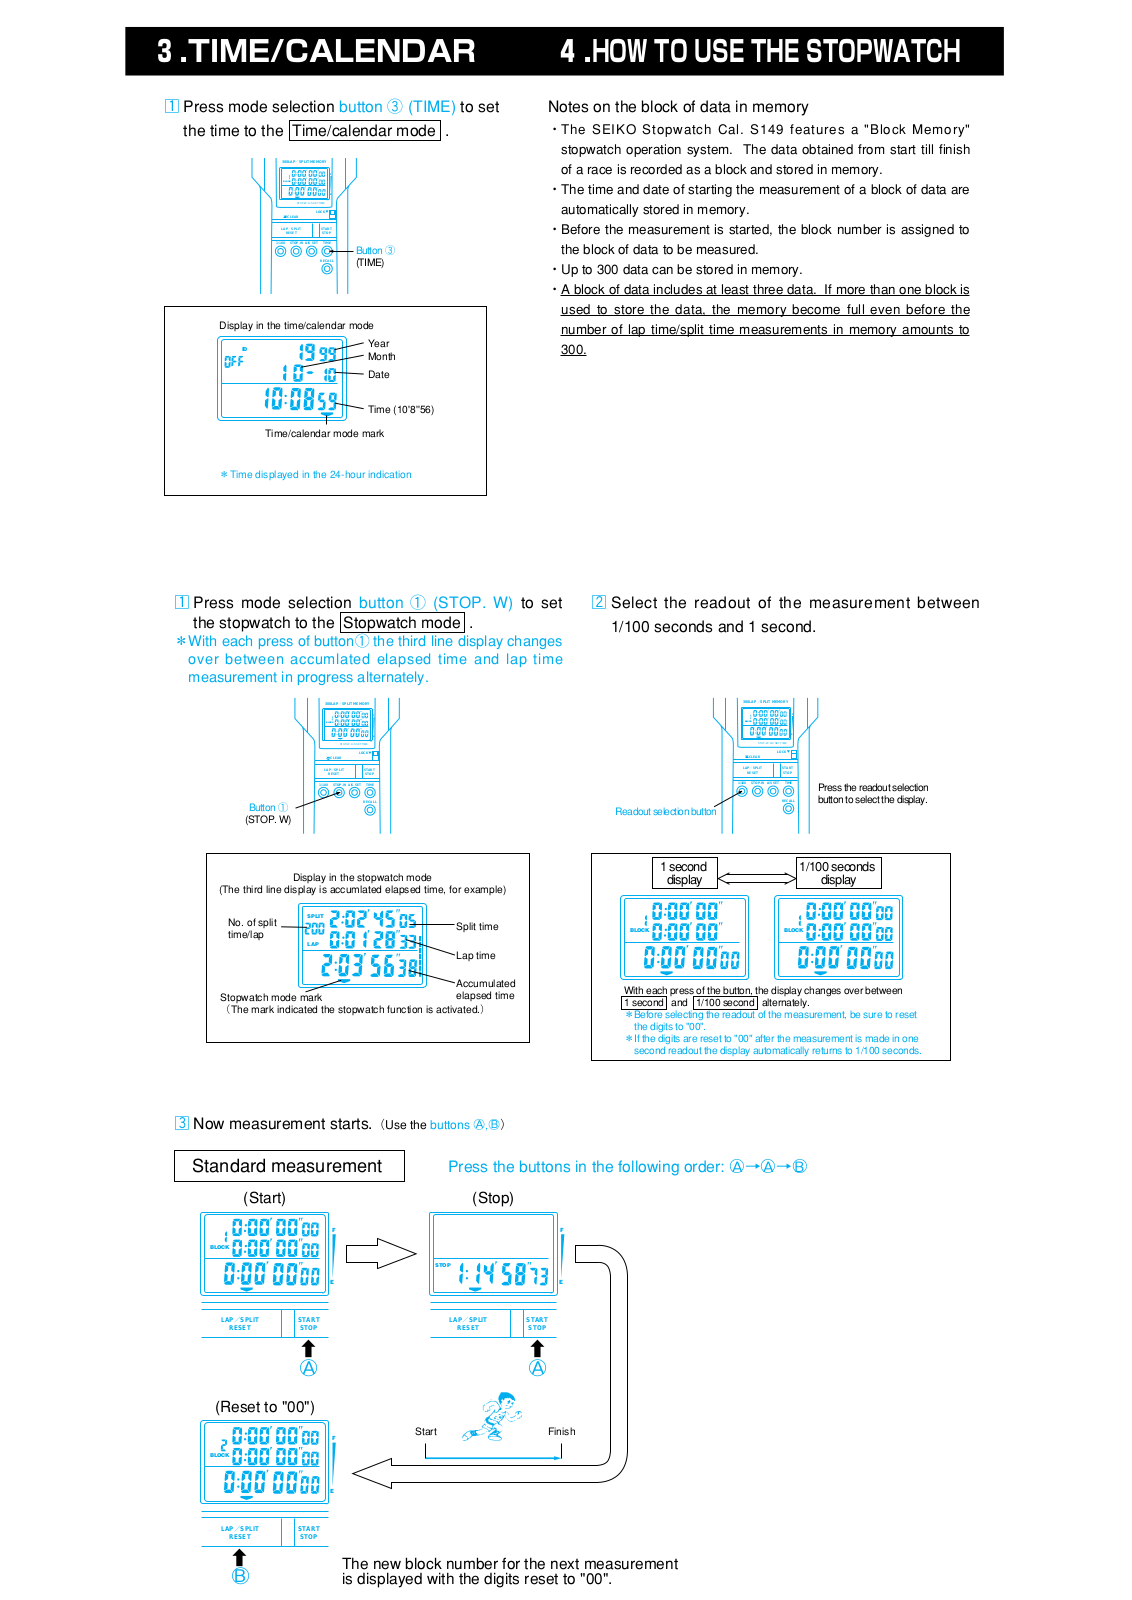
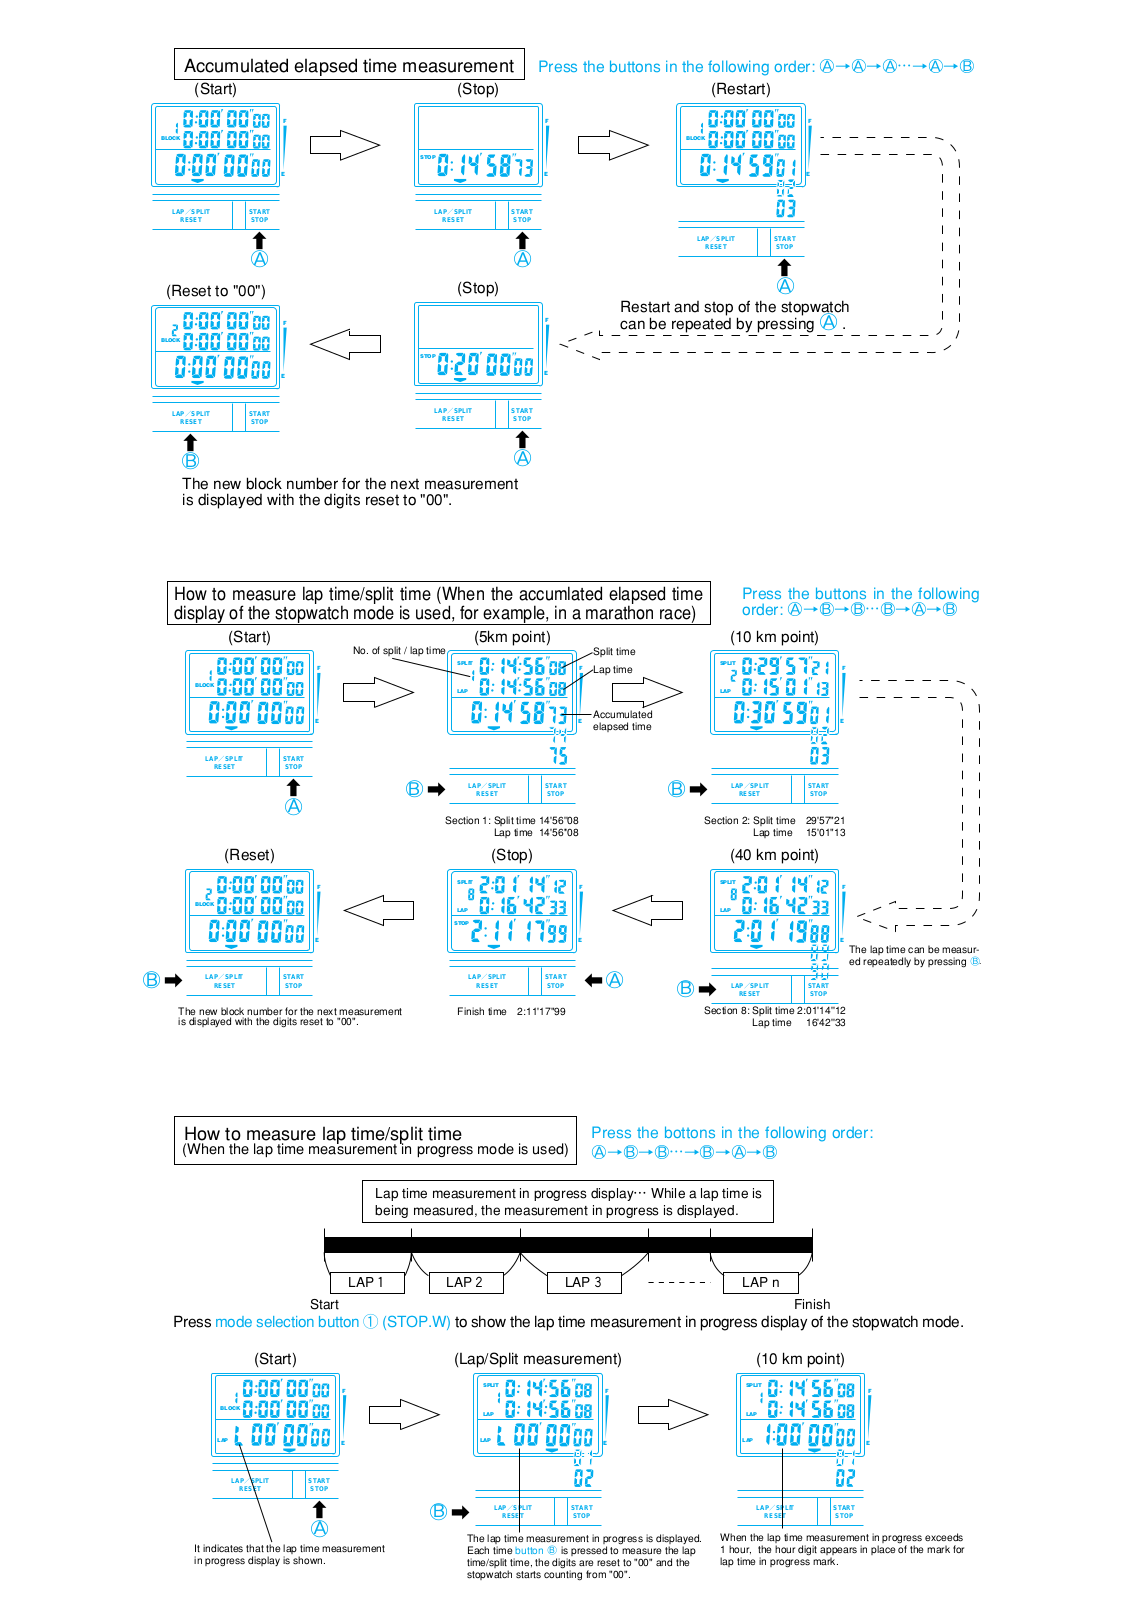
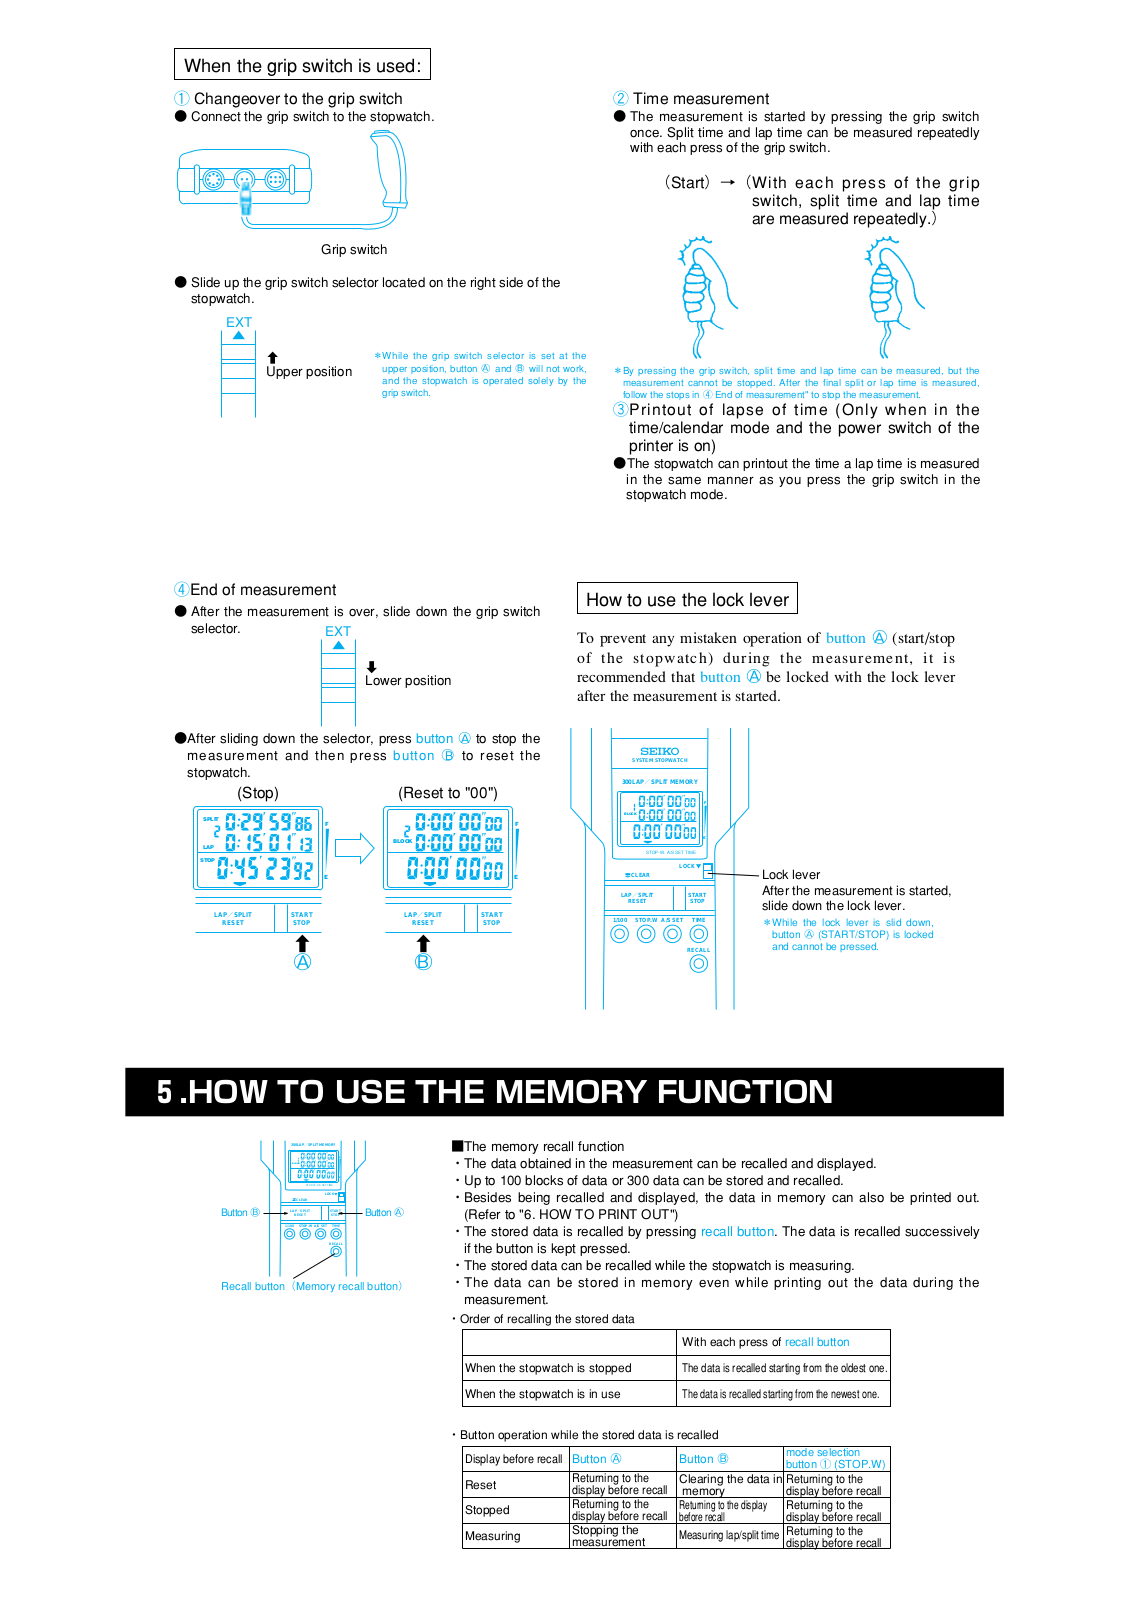
STOPWATCH S149
User Manual
14 pgs
1.89 Mb
1
Table of contents
Loading...
Seiko STOPWATCH S149 User Manual
...
Seiko User Manual
Download
Specifications and Main Features
Frequently Asked Questions
User Manual
Download
Page 1
Page 2
Page 3
Page 4
Page 5
Page 6
Page 7
Page 8
Page 9
Page 10
Page 11
Page 12
Page 13
Page 14
Loading...
+
hidden pages
Unhide
You need points to download manuals.
1 point = 1 manual.
You can buy points or you can get point for every manual you upload.
Buy points
Upload your manuals
 Loading...