

Page 1
CHROMATIC TUNER SAT500
INSTRUCTION MANUAL
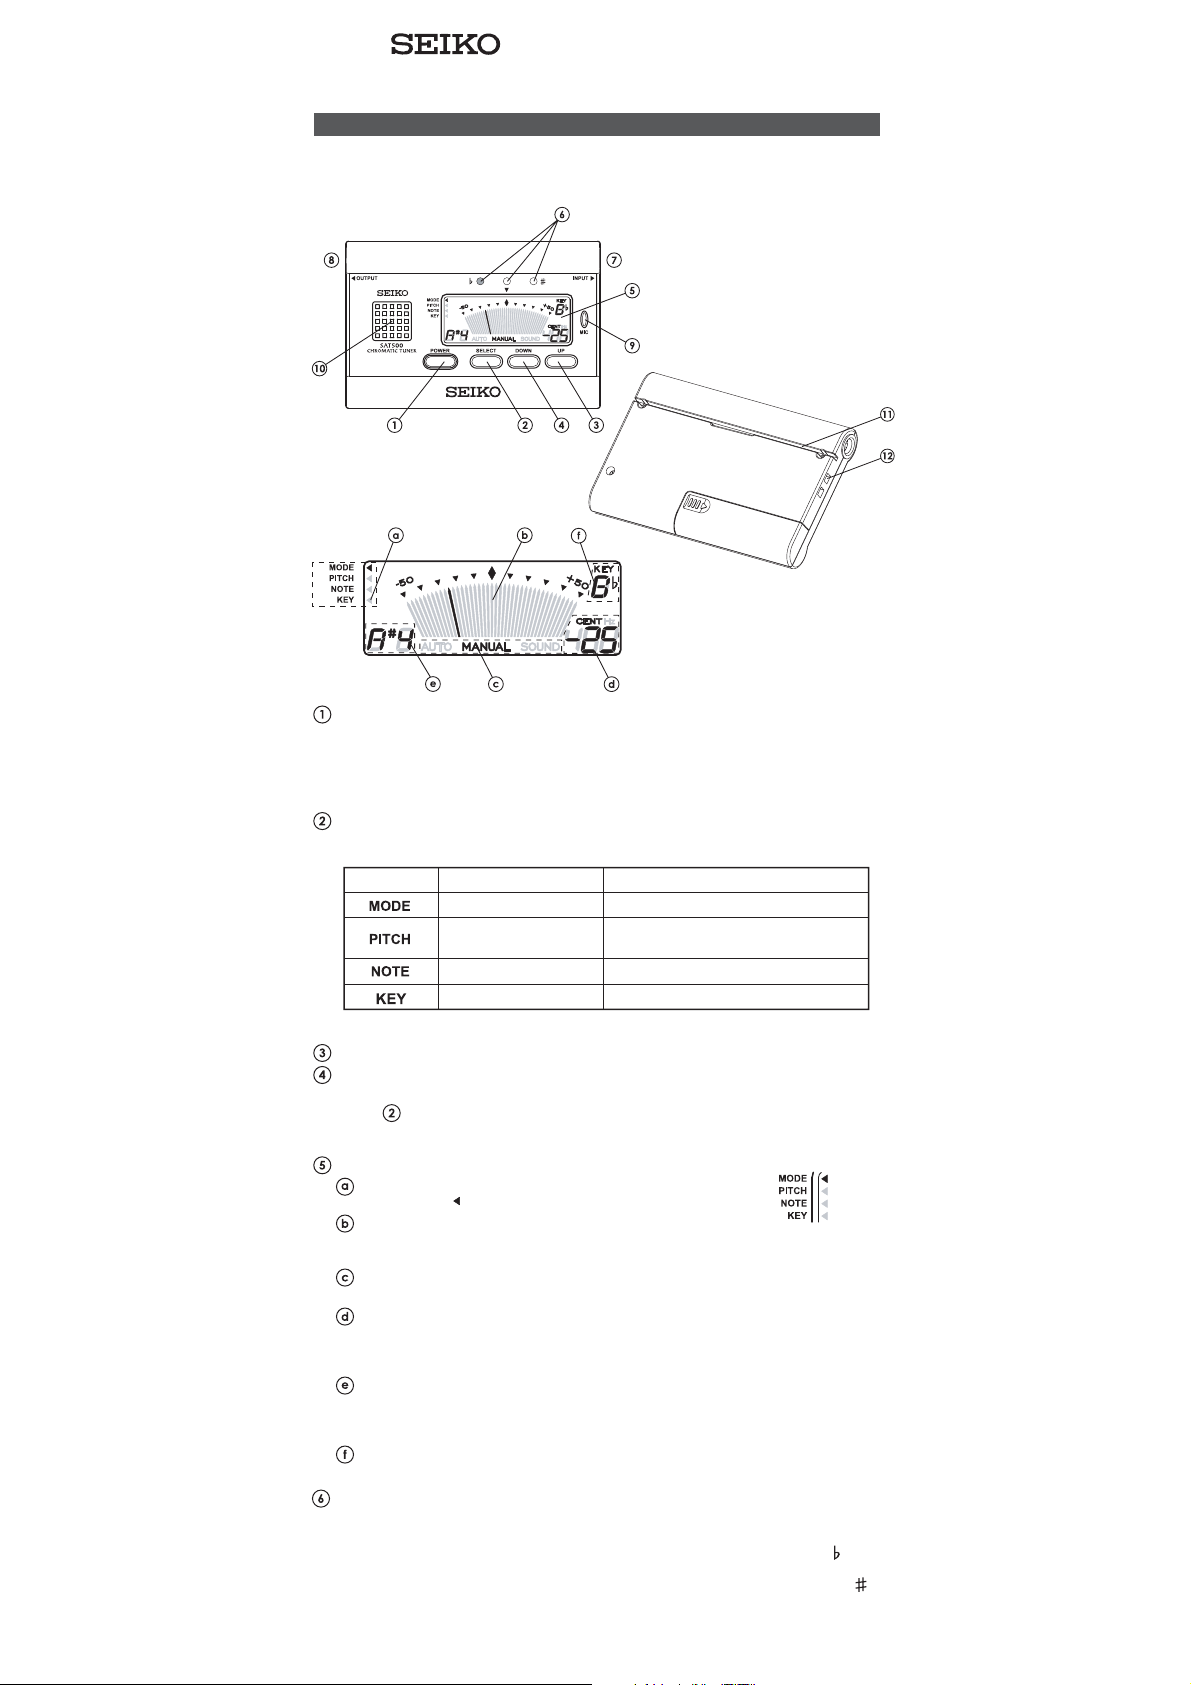
PARTS OF YOUR TUNER AND THEIR OPERATION
Before use, install the batteries included with the tuner, following the instructions in
“BATTERY CHANGE”.
Note: The batteries included with the tuner are monitor batteries, and the battery life may be shorter than
the specified period.
Power button
With each press, the tuner is turned on and off alternately.
● Auto power-off function
If no button operation is made or no sound is input into the tuner for approximately
20 minutes while the tuner is turned on, it will be turned off automatically to save the
battery energy.
Selector button
Use the button to select the item of tuner setting. With each press, the setting item is
selected in order.
Printed mark Setting item Description
Mode setting
Reference pitch setting
Note setting
Key setting
* For details, see “TUNER SETTING”.
To set the tuning mode.
To set the frequency of the reference
pitch (A4).
To set the note you wish to tune.
To tr anspose the key.
UP button
DOWN button
Use the buttons to change the settings of the item selected by pressing the selector
button
order. For details, see “TUNER SETTING”.
. The two buttons change the setting of the selected item in the opposite
Liquid crystal display
Setting item indication
The pointer “
Tuning meter
It shows the difference in pitch between the note indicated on the display and that
given by the instrument.
Tuning mode indication
The tuning mode currently selected is shown.
Cent/reference pitch indication
The difference in pitch between the note indicated on the display and the one given
by the instrument is shown numerically. While the pitch setting is made, the
current reference pitch is shown.
Note indication
AUTO mode: The tuner automatically identifies and indicates the note given by
MANUAL and SOUND modes: The note you have set is indicated.
Key indication
The current key setting is shown.
” indicates the item currently selected.
the instrument.
Tuning guide
As a guide in tuning, it visually shows the difference in pitch between the note indicated
on the display and the one given by the instrument by means of the LED lights.
• When the pitch of the input note is lower than that of the indicated note, the “
lights up.
• When the pitch of the input note is higher than that of the indicated note, the “
LED lights up.
• When the instrument is in tune, the LED at the center lights up in green.
” LED
”
Page 2
Input jack
When tuning an electric/electronic instument, connect the output cord of the instrument
to the input jack
microphone
. While the cord is connected to the input jack , the built-in
will not work.
Output jack
● Bypass function
The tuner outputs the signal input from the instrument connected with the input jack
to an amplifier and other devices through the output jack .
● Precautions on using the bypass function
1. Before connecting an amplifier to the output jack , be sure to set its volume control
to the lowest level, and turn it off, to prevent any malfunction of the tuner and the
amplifier. After checking that both the tuner and amplifier are turned off, properly
connect the amplifier to the output jack
2. Turn on the tuner first, and then turn on the amplifier.
3. Even if the volume control is set at the lowest level, noise may be heard when they
are turned on. This is not a malfunction.
Built-in microphone
Use it to tune acoustic instruments.
of the tuner.
● Precautions on using the microphone:
When tuning, bring the instrument as close as possible to the microphone. Make sure
that no cord is connected to the input jack
Built-in speaker
In SOUND mode, it gives out the reference note you have selected.
.
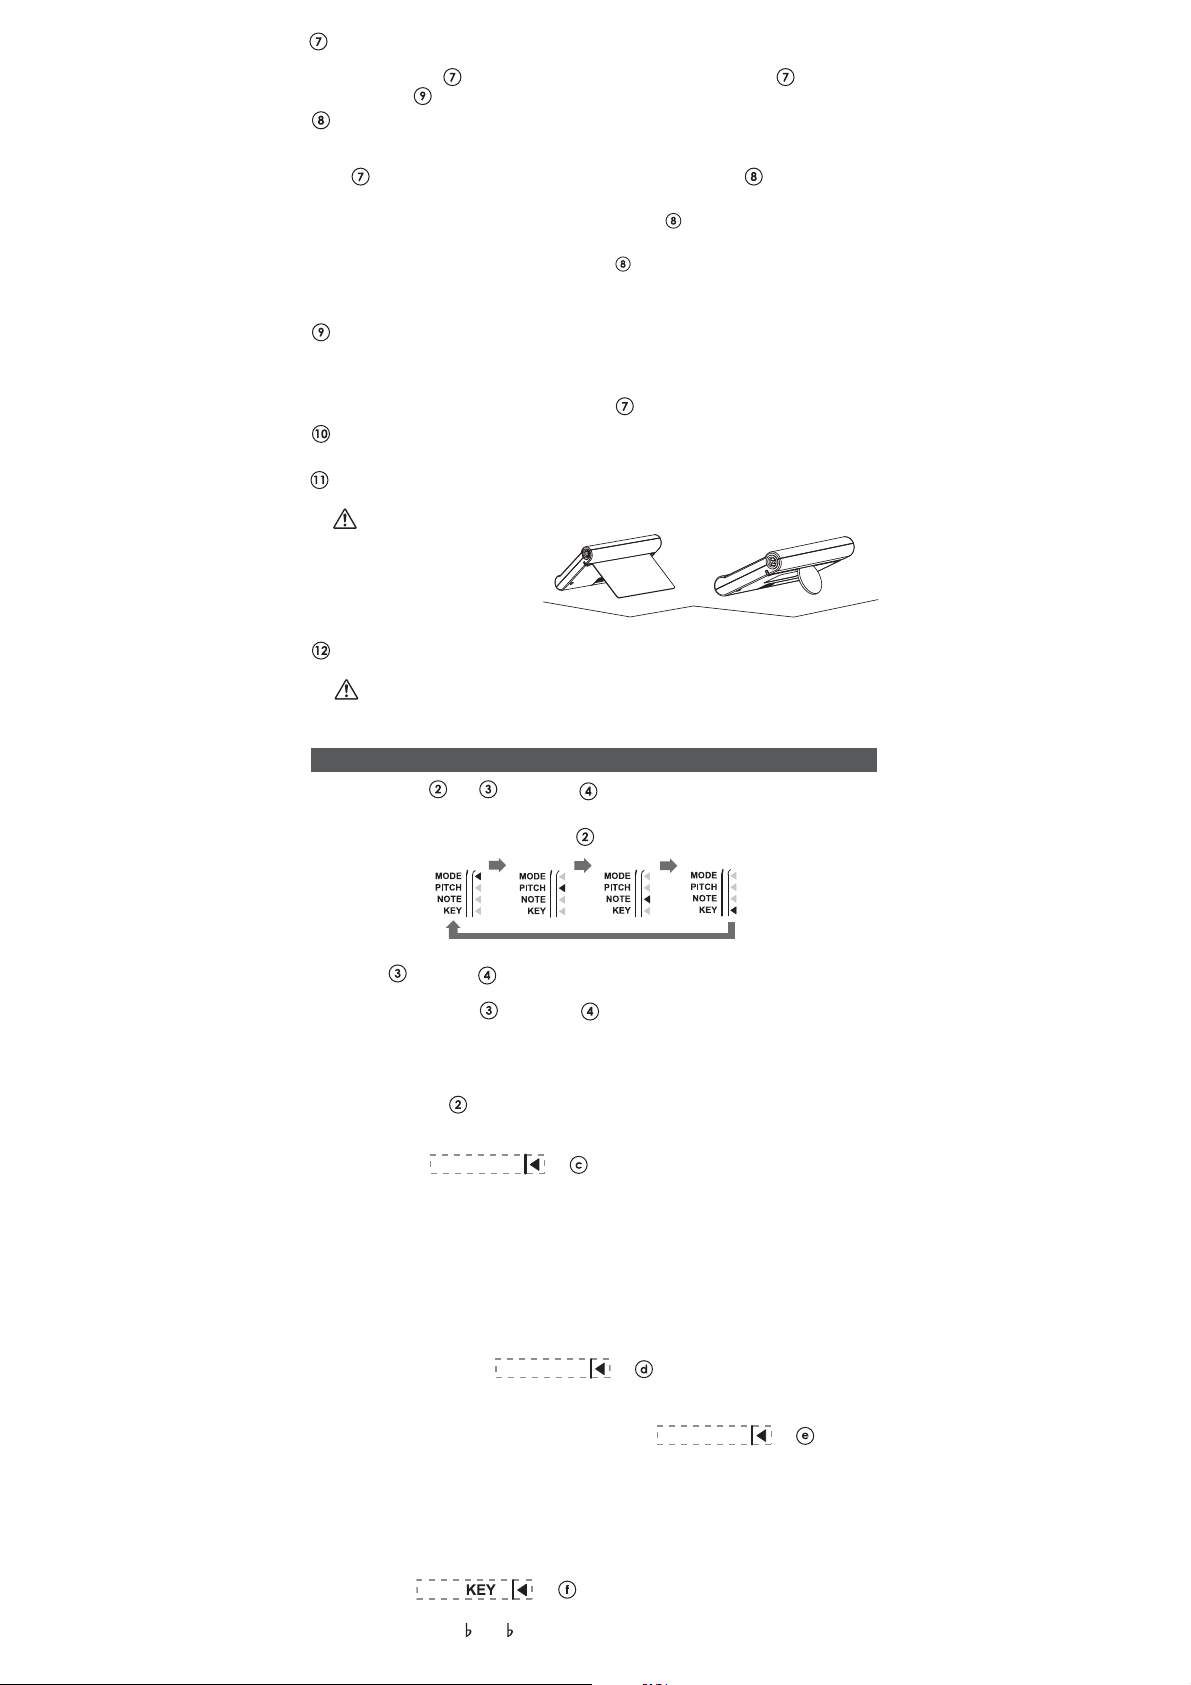
Slit stand
Insert a card or coin into the slit on the rear of the tuner to prop it up.
Caution:
Do not forcibly insert a card or
coin that will not fit into the slit,
as this may cause damage to the
tuner or injuries. Also, note that
the card or coin used to prop up
the tuner may get scratched or
damaged accidentally.
Strap hole
Use the hole to attach a strap to the tuner.
Caution:
Do not apply undue force to the tuner by swinging it with the strap or pulling the strap
forcibly, as this may cause damage to the tuner or injuries.
TUNER SETTING
Press the selector , UP and DOWN buttons to set the tuner as desired.
● Selection of the setting item:
With each press of the selector button , the setting item is selected in the following
order:
● Setting of items:
Press UP or DOWN button to set the selected setting item.
The two buttons change the setting of the selected item in the opposite order. In setting
the reference pitch, UP
value, respectively. In setting the reference pitch, note, and key, the settings change
continuously by keeping the respective buttons pressed.
● Flashing of the indication and registration of the setting:
The flashing indication shows that the setting procedure is still in process. By pressing
the selector button
the tuner is left untouched with the indication flashing, the flashing stops, and the setting
is automatically registered in a certain period of time.
■ Mode setting
Select the tuning mode.
AUTO mode : By inputting a note of the instrument, the tuner automatically
MANUAL mode : Set the note you wish to tune, and then input a note. The tuner
SOUND mode : The tuner gives out the note you have set. Tune the instrument on
■ Reference pitch setting
Set the reference pitch (frequency of A4).
Settable range : 415 Hz and 435 ~ 446 Hz at 1 Hz steps
■ Note setting (for MANUAL and SOUND modes)
Set the note you wish to tune.
In AUTO mode, the tuner automatically identifies the name of the input note, and the note
you have set will be disregarded.
● Settable range
AUTO mode : Not applicable.
MANUAL mode : C ~ B (at one-semitone steps, when the key is set at “C”)
SOUND mode : C4 ~ B4 (at one-semitone steps, when the key is set at “C”)
■ Key setting +
Set the key for the transposition tuning.
Selectable keys : E
and DOWN buttons increases and decreases the pitch
to select another setting item, the current setting is registered. If
MODE
identifies and indicates the note having the pitch closest to it. It also
indicates that the pitch of the input note is lower or higher than that
of the indicated note.
indicates that the pitch of the input note is lower or higher than that
of the note you have set.
+
the basis of the reference note the tuner produces.
PITCH
+
NOTE
+
, F, B , C
Page 3

HOW TO TUNE THE INSTRUMENT
■ AUTO/MANUAL mode
Tune the instrument according to the indication of the tuning meter on the liquid crystal
display.
1. To tune an electric instrument, connect its output cord to the input jack
2. Press the power button
3. Select the tuning mode. Press the selector button
or DOWN button to select “AUTO” or “MANUAL” tuning mode.
4. If you have selected “MANUAL” mode, select the note you wish to tune.
Press the selector button
to set the desired note.
5. To change the reference pitch, press the selector button
UP
6. For transpositon tuning, press the selector button
7. Play the instrument to give a note. When tuning an acoustic instrument, bring it as
8. Tune the instrument until the LED at the center of the tuning guide
or DOWN button to set the desired frequency.
or DOWN button to set the desired key.
close as possible to the built-in microphone
green and the pointer of the tuning meter
To tune the instrument more accurately, tune it further until the cent indication
reaches “0”.
[Flat] [In tune] [Sharp]
■ SOUND mode
The tuner gives out the note you wish to tune.
1. Press the power button
2. Select the tuning mode. Press the selector button
or DOWN button to select “SOUND” tuning mode.
3. Select the note you wish to tune.
Press the selector button
set the desired note.
4. To change the reference pitch, press the selector button
UP
5. For transposition tuning, press the selector button
or DOWN button to set the desired frequency.
or DOWN button to set the desired key.
6. Tune the instrument on the basis of the reference note the tuner produces.
● Precautions on tuning
1. The tuner may pick up noise from the surrounding environment or the hum noise
generated by electric appliances, and shows indications as if a note is played. This
is not a malfunction, and the tuner operates properly when a note is played.
2. To tune acoustic instruments, the note is received through the built-in microphone.
It is recommended, therefore, that the tuning procedure be performed in a quiet
environment for accurate tuning. Also, bring the instrument close to the tuner to
register a note. If it is difficult to tune the instrument with the built-in microphone, it
is recommended that a microphone, such as SEIKO STM-20, sold separately from the
tuner, be used together with the tuner.
to turn on the tuner.
to select “MODE”. Press UP
to select “NOTE”. Press UP or DOWN button
to select “PITCH”. Press
to select “ KEY”. Press UP
.
stays in the center (“0” position).
lights up in
to turn on the tuner.
to select “MODE”. Press UP
to select "NOTE". Press UP or DOWN button to
to select “PITCH”. Press
to select “ KEY ”. Press UP
.
MEMORY BACKUP FUNCTION
Even after the tuner is turned off, the following settings are stored in memory and will not
be erased. The descriptions in the parentheses represent the initial settings made at the
factory. If the batteries are replaced with new ones, the tuner will return to the initial settings.
1. Setting item [MODE]
2. Tuning mode [AUTO]
3. Reference pitch [440 Hz]
4. Note [A]
5. Key [C]
BATTERY CHANGE
● When the batteries near their end, the liquid crystal display will become dim. In that case,
replace the batteries with new ones immediately. If the batteries are exhausted, the tuner
may not operate properly.
● When replacing the batteries, replace both of them with new ones at the same time. It
is recommended that batteries of the same manufacturer and of the same type be
installed.
1. While pressing the battery hatch, slide it in the
direction of the arrow until it stops, and lift it to
remove.
2. Install two AAA dry batteries (R03 or LR03),
checking the + and – terminals are properly
aligned.
* If the batteries are set with their terminals improperly
aligned, it may result in a malfunction.
● If you decide not to use the tuner for a long time, be
sure to remove the batteries from the tuner.
* When disposing of the batteries, observe the regulations of the
authorities concerned.
CAUTION ON USING THE TUNER
If the power button is not pressed properly, or if the battery change procedure is not
performed properly, the tuner may malfunction. In that case, press the power button
turn off the tuner immediately. Then, press it again, and check if the tuner operates properly.
to
Page 4

SPECIFICATIONS
1. MODE : AUTO mode/ MANUAL mode/ SOUND mode
2. DISPLAY : Liquid crystal display and tuning guide
3. TUNING RANGE : AUTO/ MANUAL mode A0 ~ C8
4. ACCURACY : ±1 cent
5. REFERENCE NOTE : C4 ~ B4 (at one-semitone steps, when the key is set at “C”)
6. REFERENCE PITCH RANGE : 415 Hz and 435 Hz ~ 446 Hz (at 1 Hz steps)
7. ADDITIONAL FUNCTIONS : Auto power off, memory backup, transposition tuning, and bypass
8. TRANSPOSITION TUNING : E , F, B , C
9. POWER SUPPLY : 1.5 V AAA dry battery (R03 or LR03), 2 pieces
10. TERMINALS : Input jack (ø 6 mm), output jack (ø 6 mm)
11. OVERALL DIMENSIONS
AND WEIGHT : 106 (W) x 69 (H) x 16.5 (D) mm, 90 g (including batteries)
12. ACCESSORIES : Monitor battery (AAA dry battery R03/LR03), 2 pieces and
* The design and specifications are subject to change without prior notice for product improvement.
functions
instruction manual
 Loading...