

Page 1

INSTRUCTION MANUAL
N877
Bluetooth Link Watch
Page 2

Thank you very much for choosing a SEIKO watch.
For proper and safe use of your SEIKO watch,
please read carefully the instructions in this
booklet before using it.
Keep this manual handy for easy reference.
Length adjustment service for metallic bands is available
※
at the retailer from whom the watch was purchased. If you
cannot have your watch repaired by the retailer from whom
the watch was purchased because you received the watch as
a gift or you moved to a distant place, please contact SEIKO
CUSTOMER SERVICE CENTER.
The service may also be available on a chargeable basis at
other retailers, however, some retailers may not undertake
the service.
If your watch has a protective film for preventing scratches,
※
make sure to peel it off before using the watch. If the watch
is used with the film on it, dirt, sweat, dust, or moisture may
be attached to the film and may cause rust.
1
Page 3

CONTENTS
1. ABOUT THIS PRODUCT
Handling Precautions ........................................................................3
About the Radio Act .......................................................................... 5
About the Radio Act ..................................................................... 5
About Radio frequency ...............................................................5
Cautions for Use of 2.4 GHz Equipment .................................... 5
Use of Bluetooth Communication Function of the Watch
outside Japan .............................................................................. 5
About BluetoothⓇ .............................................................................8
Specifications of Bluetooth ......................................................... 8
Caution for Use of Bluetooth Connection .................................8
License and Trademark ............................................................... 8
Features ............................................................................................. 9
Names of Parts .................................................................................. 9
Functions of Each Mode ................................................................. 10
2. TIME SYNCHRONIZATION VIA BLUETOOTH COMMUNICATION
Registration of Watch ..................................................................... 11
Precautions on Using Time Synchronization Function via
Bluetooth Communication ........................................................ 11
Before Registering the Watch ................................................... 11
To Start Registration .................................................................. 11
How to Receive Time/Calendar Data ............................................. 12
Automatic Reception ................................................................. 12
Manual Reception ...................................................................... 12
Display of Reception Result ...................................................... 13
4. CALENDAR FUNCTION
How to Show Calendar Display ..................................................... 16
Calendar Display ........................................................................ 16
Operation Method ...................................................................... 16
How to Adjust Calendar Manually ................................................. 17
Operation Method ...................................................................... 18
5. SIMPLIFIED WORLD TIME FUNCTION
How to Use Simplified World Time Function ............................... 19
Operation Method ...................................................................... 19
6. HAND POSITION ADJUSTMENT
How to Adjust Hand Position ......................................................... 20
Operation Method ......................................................................20
7. TO PRESERVE THE QUALITY OF YOUR WATCH
Daily Care ......................................................................................... 21
Performance and Type ................................................................... 21
Water Resistance ............................................................................. 22
Band .................................................................................................23
Remarks on Battery ........................................................................24
After-Sales Service .........................................................................25
8. TROUBLESHOOTING
Troubleshooting ..............................................................................26
How to Reset Built-In IC (System Reset) ....................................... 29
Operation Method ......................................................................29
3. MANUAL TIME ADJUSTMENT FUNCTION OF TIME MODE
How to Adjust Time Manually ....................................................... 14
Operation Method ...................................................................... 15
9. SPECIFICATIONS
Specifications .................................................................................. 30
22
Page 4
1. ABOUT THIS PRODUCT
Handling Precautions (1)
WARNING
To indicate the risks of serious consequences such as
severe injuries unless the following safety regulations
are strictly observed.
Immediately stop wearing the watch in the following cases.
・
If the watch body or band becomes edged by corrosion, etc.
○
○If the pins protrude from the band
Immediately consult the retailer from whom the watch was
※
purchased or SEIKO CUSTOMER SERVICE CENTER.
Keep the watch and accessories out of the reach of babies and children.
・
Care should be taken to prevent a baby or a child from accidentally
swallowing accessories.
If a baby or a child swallows the battery or accessories, immediately
consult a doctor as it will be harmful to the health of the baby or child.
Do not remove the battery from the watch.
・
Replacement of the battery requires professional knowledge and
skill. For battery replacement, please ask the retailer from whom
the watch was purchased .
Do not charge the batter y.
It may explode, generate heat or catch fire.
CAUTION
To indicate the risks of light injuries or material damage
unless the following safety regulations are strictly observed.
Avoid wearing or storing the watch in the following places.
・
Places where volatile agents (such as polish remover, bug
○
repellent, thinners, etc.) are vaporizing
Places where the temperature drops below 5 ℃ or rises above 35
○
for a long time
℃
Places of high humidity
○
static electricity
Dust y places
○
Do not leave the old battery inside the watch for a long time.
※
Battery leakage may occur.
If you observe any allergic symptoms or skin irritation,
・
Stop wearing the watch immediately and consult a specialist
such as a dermatologist or an allergist.
Other cautions
・
Replacement of the metal band requires professional
○
knowledge and skill. Please ask the retailer from whom the
watch was purchased for replacement of the metal band, as
there is a risk of hand or finger injury and fear of losing parts.
Do not disassemble or tamper with the watch.
○
Keep the watch out of the reach of babies and children. Extra
○
care should be taken to avoid risks of any injury or allergic
rash or itching that may be caused when they touch the watch.
○ When disposing of used batteries, follow the instruc tions of
your local authorities.
If your watch is of the fob or pendant type, the strap or chain
○
attached to the watch may damage your clothes, or injure the
hand, neck, or other parts of your body.
Places affected by strong vibrations
○
Places af fected by strong magnetism or
○
3
Page 5
1. ABOUT THIS PRODUCT
Handling Precautions (2)
WARNING
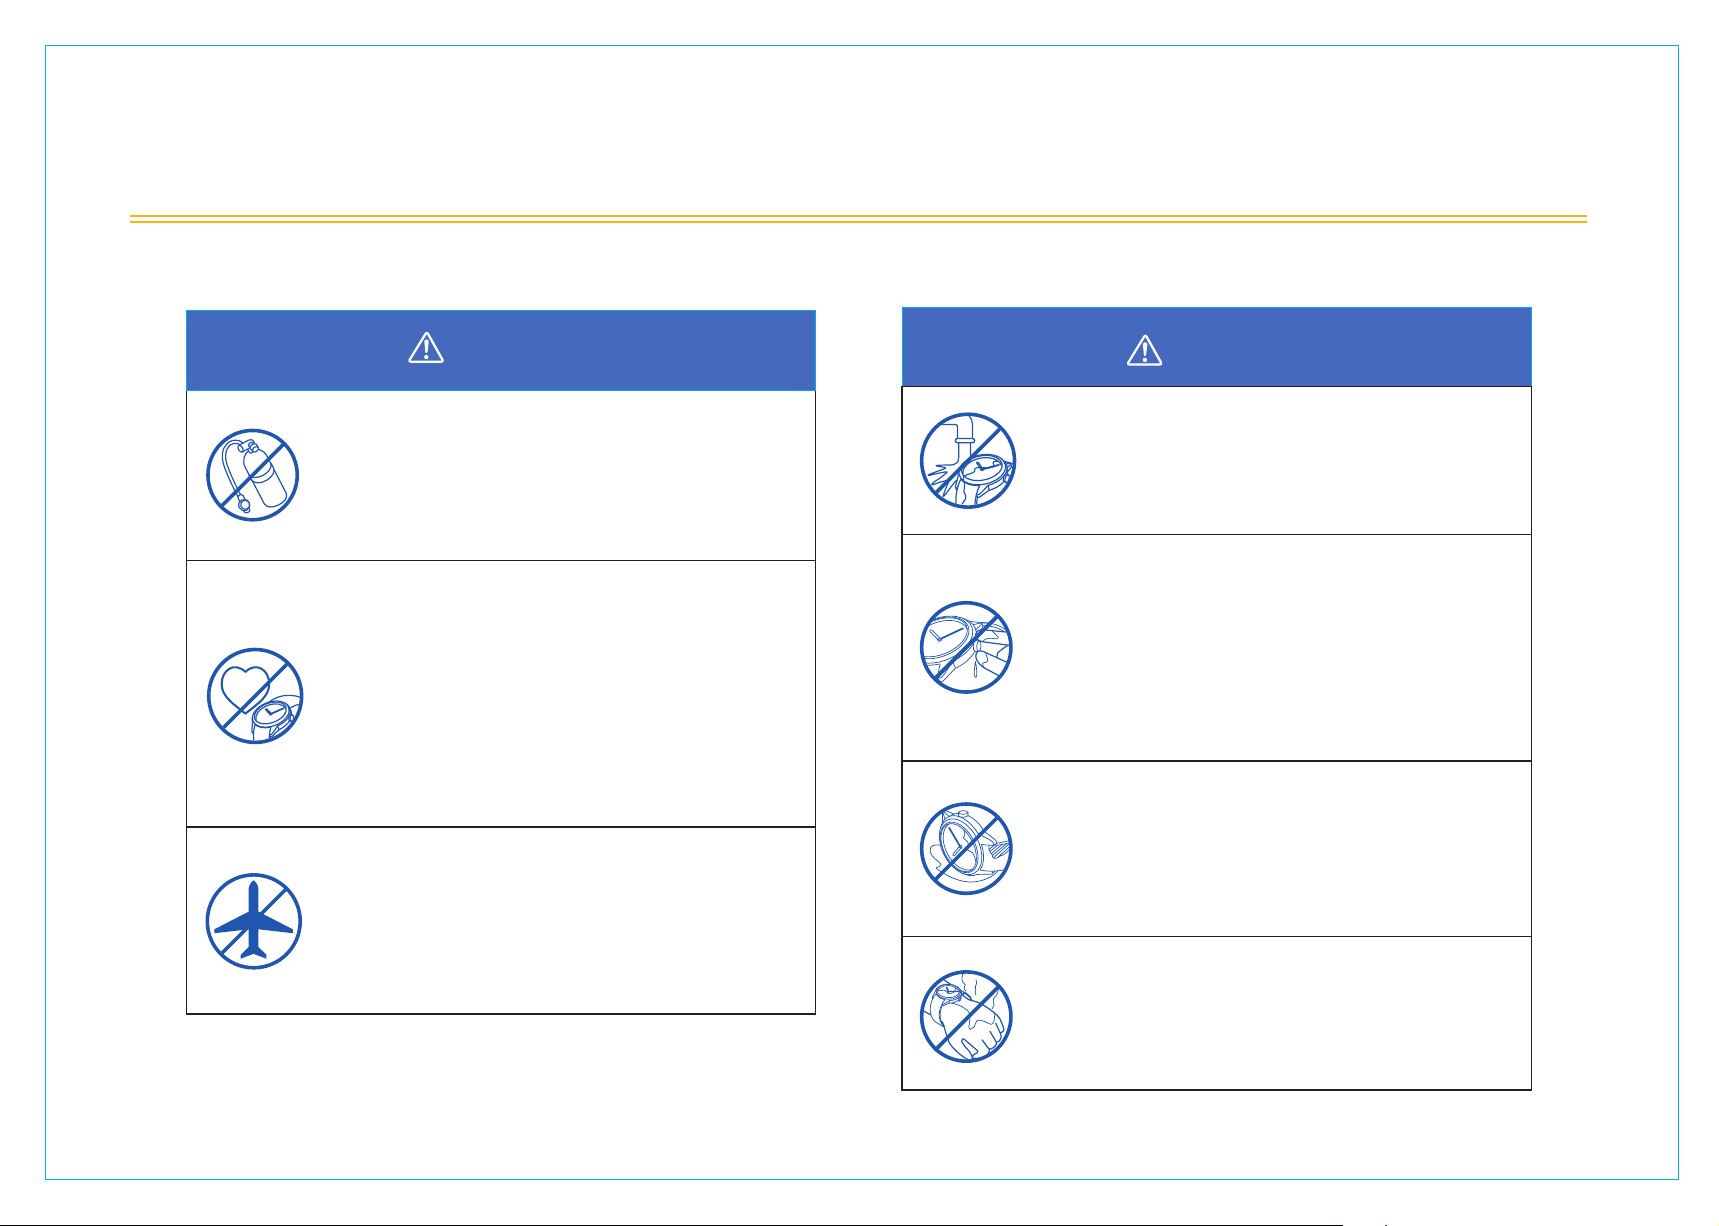
Do not use the watch for scuba diving or saturation diving.
The various tightened inspections under simulated
harsh environment, which are usually required for
watches designed for scuba diving or saturation
diving, have not been conducted on this watch. For
diving, use special watches for diving.
The radio waves emitted from this product may have
a negative impact and cause an accident due to a
malfunction.
Do not use this product near medical equipment.
・
The radio waves may affect pacemakers and
electric medical equipment . Do not use it in
crowded places such as packed trains, and inside
of medical institutions.
Do not use this product near automatic control devices
・
such as automatic doors and fire alarm systems.
In the places where transmission of radio waves
is prohibited, such as in airplanes, turn off the
automatic reception function of the watch, and do
not perform manual reception.
The radio waves emitted from this product may
adversely affect other devices.
CAUTION
Do not pour running water directly from faucet onto
the watch.
The water pressure of tap water from a faucet is high
enough to degrade the water resistant per formance of
a water resistant watch for everyday life.
Do not push the buttons when the watch is wet.
Water may get inside of the watch.
If the inner surface of the glass is clouded with
※
condensation or water droplets appear inside of the
watch for a long time, the water resistant performance
of the watch is deteriorated. Immediately consult the
retailer from whom the watch was purchased or SEIKO
CUSTOMER SERVICE CENTER .
Do not leave moisture, sweat and dirt on the watch
for a long time.
Be aware of a risk that a water resistant watch may
lessen its water resistant performance because of
deterioration of the adhesive on the glass or gasket, or
the development of rust on stainless steel.
Do not wear the watch while taking a bath or a
sauna.
Steam, soap or some components of a hot spring
may accelerate the deterioration of water resistant
performance of the watch.
4
Page 6
1. ABOUT THIS PRODUCT
About the Radio Act (1)
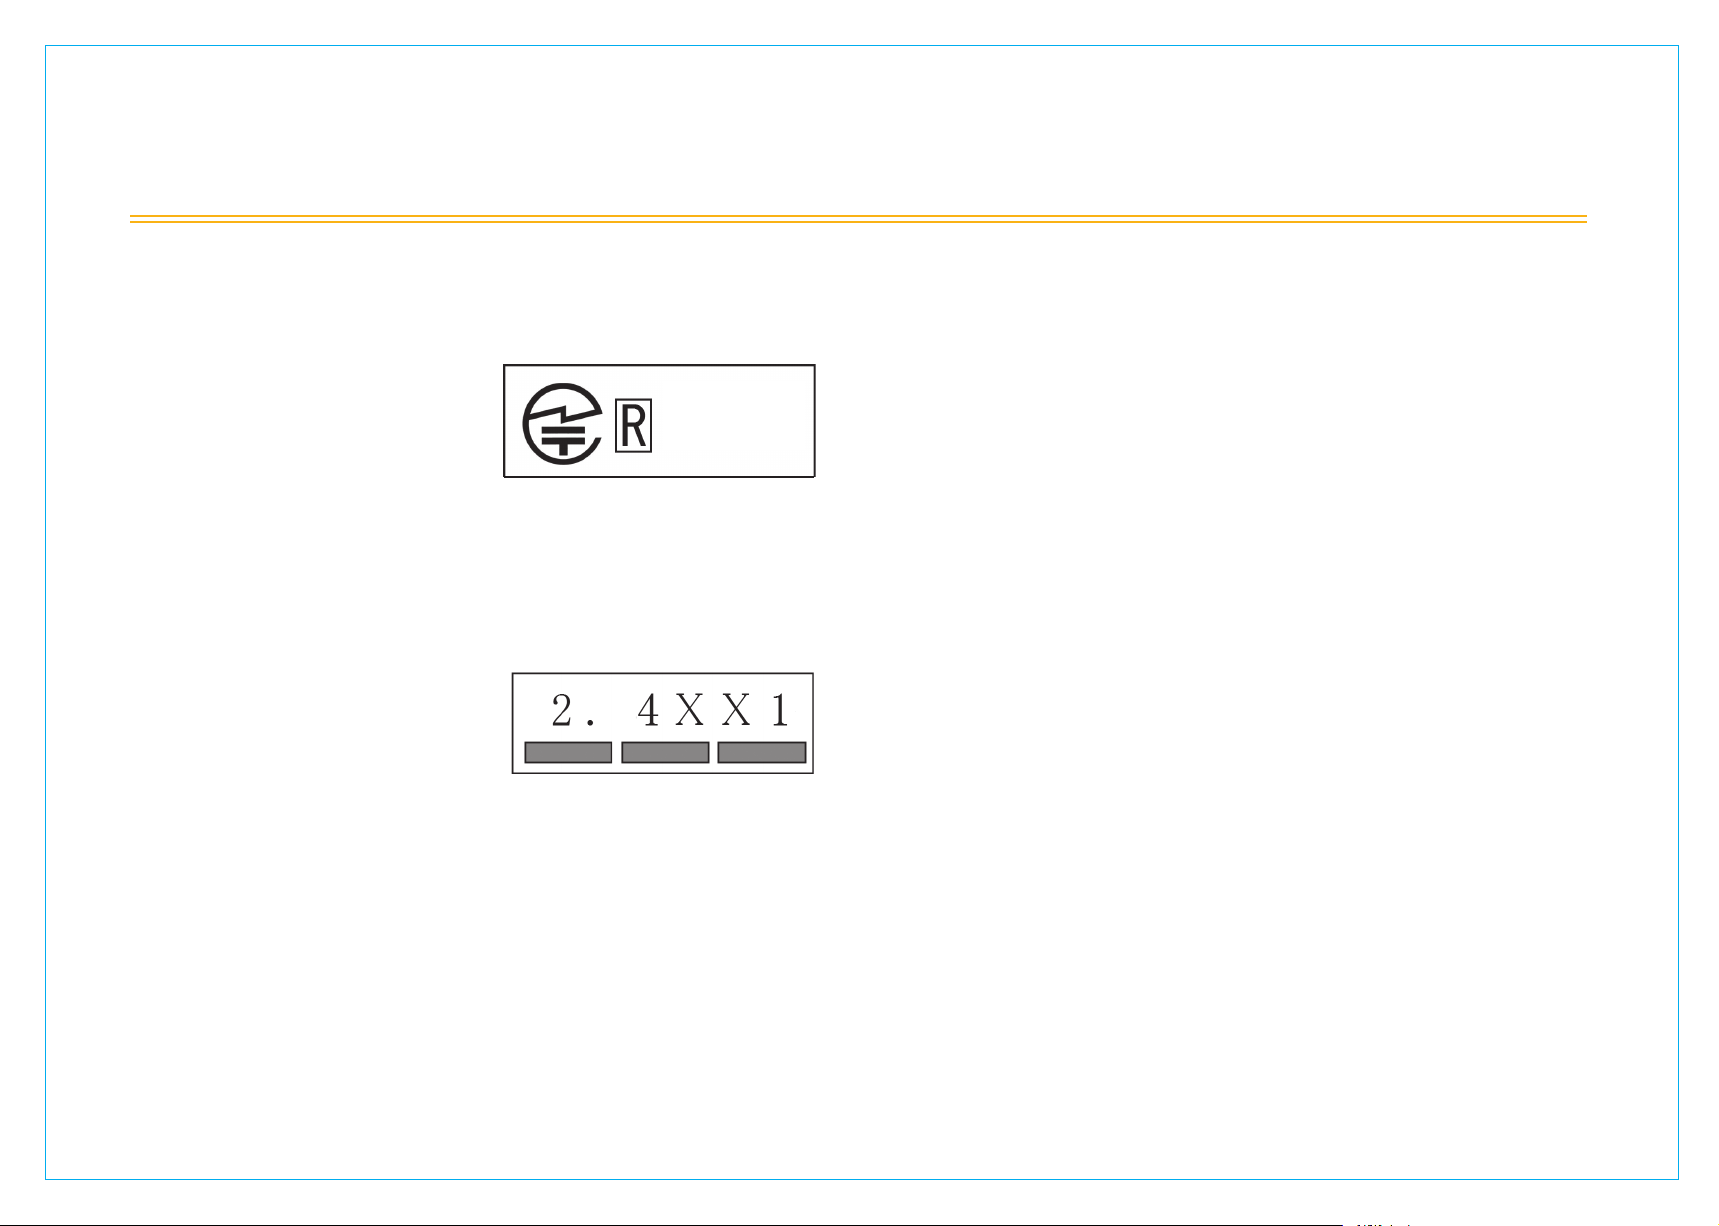
■About the Radio Act
This product is certified as a low
power data communication system
based on the Radio Act in Japan.
It is not necessary to obtain a
license, etc., to use this product
in Japan.
It is illegal to disassemble and
modify this product.
[Certification No.]
(
N85
001-A
)
15298
■About Radio frequency
The frequency used by this product may be used also by other
wireless equipment. To prevent radio wave interference with other
radio equipment, be careful about the following when using this
product.
This radio product uses the
2.4 GHz band. As a modulation
method, the GFSK modulation
method is adopted, and the
interference distance is 10 m.
■Cautions for Use of 2.4 GHz Equipment
The operation frequency of this product is 2.4 GHz band.
In this frequency band, besides industrial/scientific/medical equipment
such as microwave ovens, other similar radio stations, in-plant radio
stations for mobile object identification that require licenses used for
manufacturing lines, etc., of plants, specific low power radio stations
that do not require licenses, amateur radio stations, etc. (hereinafter
referred to as "other radio stations") are operated.
・ Before using this product, make sure that "other radio stations" are
not operating nearby.
・ If radio wave interference occurs between this product and "other
radio stations", change the location in which this product is used or
stop using this product (stop emitting radio waves) immediately.
・ If you have any questions or troubles, please contact the SEIKO
CUSTOMER SERVICE CENTER.
■Use of Bluetooth Communication Function of
the Watch outside Japan
This watch connects with a smartphone using the Bluetooth wireless
technology to perform time synchronization. To use its Bluetooth
function in countries or regions outside Japan, the watch must be
certified by the radio law thereof. Use of the function in a country or
region where such certification has not been obtained may subject the
user to punishment.
Use of the Bluetooth function of the watch other than the following
countries and regions may be illegal (as of March 2020).
Japan, U. S. A., Canada, Australia, New Zealand, Korea, Belgium,
Bulgaria, Czech, Denmark, Germany, Estonia, Ireland, Greece,
Spain, France, Croatia, Italy, Cyprus, Latvia, Lithuania, Luxembourg,
Hungary, Malta, the Netherlands, Austria, Poland, Portugal,
Rumania, Slovenia, Slovakia, Finland, Sweden, U. K., Turkey,
Norway, Iceland, Liechtenstein, Hong Kong, Macau, Ecuador,
Colombia, Vietnam, and Peru
When the watch is used in countries or regions other than those
above, turn off the automatic reception function, and refrain from
using the manual reception function.
For details, visit our website: https://www.seikowatches.com/jp-ja/
customerservice/bluetooth
5
Page 7
1. ABOUT THIS PRODUCT
About the Radio Act (2)
REGULATORY COMPLIANCE/ CONFORMITÉ RÉGLEMENTAIRE/
USA
●
FCC Notice
This device complies with Part 15 of the FCC Rules. Operation is
subject to the following two conditions:
(1) this device may not cause harmful interference, and
(2) this device must accept any interference received, including
interference that may cause undesired operation.
FCC Caution
Changes or modifications not expressly approved by the party
responsible for compliance could void the user's authority to
operate the equipment.
This transmitter must not be co-located or operated in conjunction
with any other antenna or transmitter.
Canada
●
IC Notice
This device complies with Industry Canada's applicable licenceexempt RSSs. Operation is subject to the following two conditions:
(1) This device may not cause interference; and
(2) This device must accept any interference, including interference
that may cause undesired operation of the device.
EU
●
대한민국
●
Australia
●
규정 준수
This product is in compliance with the essential
requirements and other relevant provisions of the
RE Directive (2014/53/EU) & RoHS Directive (2011/65/
EU).
https://www.seikowatches.com/global-en/products/
declaration-conformity
・등록번호 :R-R-skw-N877
・신청자 :SEIKOWATCHCORPORATION
・제조자 :SEIKOWATCHCORPORATION
・제품명 :Bluetoothwatch
・모델명 :N877
・제조년월 :구입처에문의해주십시오
・제조국 :중국
IC Avis
Le présent appareil est conforme aux CNR d'Industrie Canada
applicables aux appareils radio exempts de licence. L'exploitation
est autorisée aux deux conditions suivantes:
(1) l'appareil ne doit pas produire de brouillage;
(2) l'utilisateur de l'appareil doit accepter tout brouillage
radioélectrique subi, même si le brouillage est susceptible d'en
compromettre le fonctionnement.
6
New Zealand
●
R-NZ
Page 8

1. ABOUT THIS PRODUCT
About the Radio Act (3)
REGULATORY COMPLIANCE FOR USA/CANADA
Caution: The user is cautioned that changes or modifications not expressly
approved by the party responsible for compliance could void
the user's authority to operate the equipment.
This device complies with Part 15 of the FCC Rules and Industry Canada
licence-exempt RSS standard(s). Operation is subject to the following
two conditions:
(1) this device may not cause harmful interference, and
(2) this device must accept any interference received, including
interference that may cause undesired operation.
Le présent appareil est conforme aux CNR d'Industrie Canada applicables
aux appareils radio exempts de licence. L'exploitation est autorisée aux
deux conditions suivantes:
(1) l'appareil ne doit pas produire de brouillage, et
(2) l'utilisateur de l'appareil doit accepter tout brouillage radioélectrique
subi, même si le brouillage est susceptible d'en compromettre le
fonctionnement.
NOTE: This equipment has been tested and found to comply with the
limits for a Class B digital device, pursuant to Part 15 of the FCC
Rules. These limits are designed to provide reasonable protection
against harmful interference in a residential installation. This
equipment generates, uses and can radiate radio frequency energy
and, if not installed and used in accordance with the instructions,
may cause harmful interference to radio communications.
However, there is no guarantee that interference will not occur
in a particular installation.
If this equipment does cause harmful interference to radio or
television reception, which can be determined by turning the
equipment off and on, the user is encouraged to try to correct
the interference by one or more of the following measures:
FCC & IC Radiation Exposure Statement:
This equipment complies with FCC and Canada radiation exposure limits
set forth for an uncontrolled environment.
This transmitter must not be co-located or operating in conjunction with
any other antenna or transmitter.
Déclaration d'IC sur l'exposition aux radiations:
Cet équipement est conforme aux limites d'exposition aux radiations
définies par le Canada pour des environnements non contrôlés.
Cet émetteur ne doit pas être installé au même endroit ni utilisé avec
une autre antenne ou un autre émetteur.
Reorient or relocate the receiving antenna.
・
Increase the separation between the equipment and receiver.
・
Connect the equipment into an outlet on a circuit different
・
from that to which the receiver is connected.
Consult the dealer or an experienced radio/TV technician for
・
help.
7
Page 9

1. ABOUT THIS PRODUCT
About BluetoothⓇ
■Specifications of Bluetooth
Communication method: Bluetooth Standard Ver. 5.0
・
Frequency band used: 2.4 GHz band (2,402 to 2,480 MHz)
・
Modulation method: GFSK (1 MHz)
・
■Caution for Use of Bluetooth Connection
The range in which the Bluetooth connection of this product is
・
possible varies depending on obstacles (human bodies, metal,
walls, etc.) and the surrounding radio wave state.
Under the following conditions, the Bluetooth connection may take
a long time or a connection error may occur.
Places where a wireless LAN exists;
Around microwave ovens in use; and
When other products with a communication function are used.
In such cases, data sending/receiving may fail, however, it is not a
malfunction.
Use the product in other environment.
The radio waves emitted by this product may affect operations of
・
electronic medical equipment, etc.
In some cases, this may lead to serious accidents. Therefore, avoid
Bluetooth connections in the following places:
Hospitals; near priority seats in trains; airplanes; places such as
gas stations where flammable gas is generated; near automatic
doors; and fire alarm systems.
■License and Trademark
BluetoothⓇ is a trademark or registered trademark of Bluetooth SIG,
Inc.
Seiko Watch Corporation uses this logo mark under license.
Note that we are not liable for any information leakage that may
・
occur with the Bluetooth connection.
8
Page 10
1. ABOUT THIS PRODUCT
Features
Your watch is a Bluetooth® Link Watch that corrects the time
automatically by connecting with a smartphone using the dedicated
application Time Connect※.
To transmit data between the watch and the smartphone, make sure
that the smartphone is installed with Time Connect.
In addition to the time display function, the watch is equipped with
perpetual calendar and Simplified World Time Function.
Time Synchronization via Bluetooth Communication
■
Time data is transmitted between the watch and the dedicated
application via Bluetooth communication to correct the time/calendar
of the watch. The data can be received either automatically or
manually as required by operating the button. The watch indicates
whether the reception has succeeded or failed.
Perpetual Calendar
■
The day of week and date are indicated by the hour hand and minute
hand respectively. The calendar adjusts automatically for odd and
even months including February of leap years up to February 28,
2100.
Simplified World Time
■
By setting the city hand to a desired city initial on the dial, the time
of five cities in the world can be indicated by the hands. When the
time is synchronized either automatically or manually via Bluetooth
communication, the city hand moves to the initial of the current location.
Battery Life Indicator
■
When the battery nears its end, the city hand locks in the 9 o'clock
direction to warn that it needs to be replaced with a new one
immediately. (Once in this state, the operations of all of the buttons
become disabled (the buttons do not function).)
Time Connect supports the following OSs (as of March 2020).
※
iOS 11 or later
・
For the latest information on the supported OS, please visit our
website below:
https://www.seikowatches.com/jp-ja/customerservice/bluetooth
Android Ver. 7 or later
・
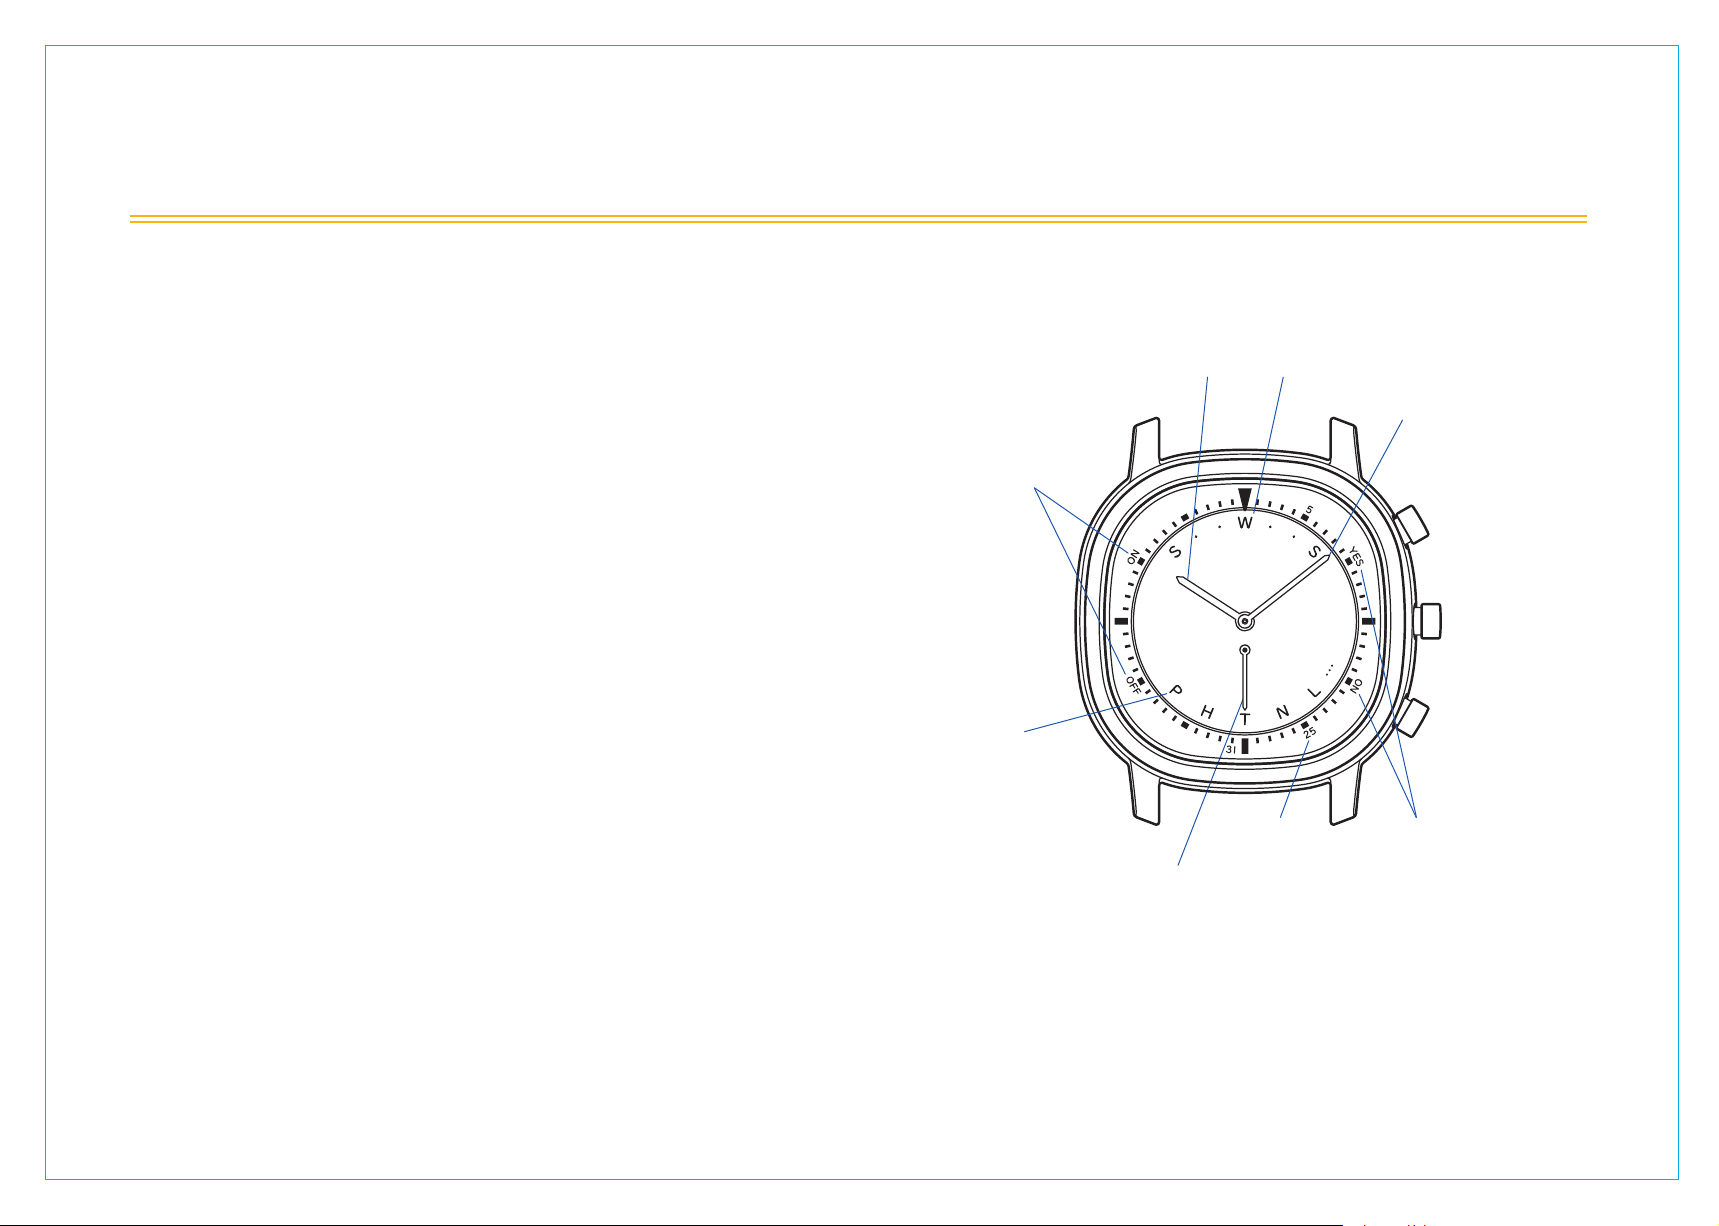
Names of Parts
Hour hand
ON/OFF indications for
automatic reception
City initial
: Paris
P
: Hong Kong
H
: Tok yo
T
: New York
N
: London
L
: Other city
…
City hand
The markings on the bezels and the design of the watch may
※
differ from model to model.
Day-of-week scale
Date scale
Minute hand
Button
Button
Reception result
(YES, NO)
Ⓐ
Button
Ⓒ
Ⓑ
9
Page 11

1. ABOUT THIS PRODUCT
Functions of Each Mode
The mode changes as follows by pressing Button Ⓐ.
●
About Simplified World Time
■
Function
TIME mode CALENDAR mode
Button
Time display
■
Simplified World Time Function (P. 19 )
■
Display of reception result (P. 1 3 )
■
Automatic time synchronization via
■
Bluetooth communication (P. 1 2 )
Turning on/off of automatic time
■
synchronization function (P. 1 2 )
Manual time synchronization via Bluetooth
■
communication (P. 1 2 )
Time setting with watch buttons (P. 14 )
■
Hand position adjustment with watch buttons
■
(P. 20)
Ⓐ
Ⓐ
Ⓐ
Button
Day of week and date display with hour hand
■
and minute hand (P. 1 6 )
Simplified World Time Function (P. 1 9 )
■
Display of reception result (P. 1 3 )
■
Automatic time synchronization via
■
Bluetooth communication (P. 1 2 )
Manual time synchronization via Bluetooth
■
communication (P. 1 2 )
Turning on/off of automatic time
■
synchronization function (P. 1 2 )
Calendar setting with watch buttons (P. 1 7 )
■
Ⓐ
When Button Ⓒ is pressed, the city hand moves
to display the current time in 5 cities around the
world. (Refer to P. 1 9 for details)
Button
City hand
Ⓒ
10
Page 12

2. TIME SYNCHRONIZATION VIA BLUETOOTH COMMUNICATION
Registration of Watch
■Precautions on Using Time Synchronization
Function via Bluetooth Communication
When using the time synchronization function via Bluetooth
communication, please observe the following:
CAUTION
Keep the dedicated application running at all times.
※
Keep your smartphone within 3 meters from the watch.
※
In the places where use of radio waves is prohibited, such as in
※
airplanes and hospitals, turn off the automatic reception function
of the watch, and do not perform manual reception.
Your watch is compliant with or certified by the radio law of
※
various countries and regions. Use of it in areas other than those
may be illegal and subject you to punishment. (Refer to P. 5 .)
Before using the watch with a smartphone for thefirst time, be sure
●
to register it to the dedicated application. Registration procedure is no
longer required for Bluetooth communication thereafter.
■Before Registering the Watch
For the information on downloading and installation of the
●
dedicated application "Time Connect," refer to the "Application
Operating Guide for N8 Series Watches".
https://www.seikowatches.com/jp-ja/customerservice/bluetooth)
(
1. Enable the Bluetooth function on the smartphone.
The method of enabling the Bluetooth function differs
※
depending on the model of the smartphone. For details, please
refer to the instruction manual for your smartphone.
2. Start up the dedicated application "Time Connect."
While registering the watch, make sure that the application screen
is kept displayed on the smartphone.
■To Start Registration
When the watch connects with the application of the smartphone,
Checking that the watch is in TIME mode, press and hold Button
①
at the 3 o'clock position for more than 2 seconds. The hour
Ⓑ
hand and minute hand point to the 3 o'clock position, and the
communication with the smartphone starts.
Button
[ Press and hold Button Ⓑ for more than 2 seconds in TIME mode]
Check that the registration of the watch is completed successfully.
②
"Watch registered" is shown on the application screen, indicating
that the watch has been successfully registered to the application.
Each time the watch is used with a new smartphone, be sure to
install the dedicated application on the smartphone, and follow the
procedure in “Registration of Watch” above.
Ⓑ
Press and
hold for
more than
2 seconds
11
Page 13

2. TIME SYNCHRONIZATION VIA BLUETOOTH COMMUNICATION
How to Receive Time/Calendar Data (1)
■Automatic Reception
To enable the automatic reception function, follow the procedure
●
below to turn it ON.
Press and hold Button Ⓒ for more than 2 seconds. The hour hand
①
and minute hand point to “ON” or “OFF,”indicating the current
setting status of the automatic reception function for 5 seconds.
With each continuous press of Button Ⓒ for more than 2 seconds
②
during the setting status display, the hour hand and minute hand
move and the automatic reception function is turned “ON”and
“OFF” alternately.
When the automatic reception function is turned on, the watch
※
automatically receives the time data once in 24 hours at the same
time of day when the time synchronization was performed previously.
"ON"
If the time of automatic reception comes while in CALENDAR
※
mode, the mode changes over to TIME after the communication is
completed.
If the time of automatic reception comes while the manual
※
adjustment of time (see P. 14) or calendar (see P. 17), or hand
position adjustment (see P. 20) is being made, the reception is
performed after the adjustment procedure is completed.
"OFF"
Button
Press and hold
for more than
2 seconds
Ⓒ
[ Automatic reception is turned OFF ][ Automatic reception is turned ON ]
Button
Press and hold
for more than
2 seconds
Ⓒ
■Manual Reception
Checking that the watch is in TIME mode, press and hold Button Ⓑ
●
at the 3 o'clock position for more than 2 seconds. The hour hand and
minute hand point to the 3 o'clock position, and the communication
with the smartphone starts.
Button
[ TIME mode ]
The manual reception can be performed whenever necessary
irrespective of whether the automatic reception function is turned
on or off.
[ When the reception was successful ]
[ When the reception failed ]
The hour hand and minute hand point to “YES” near the 2 o’clock
①
position.
After this, the city hand moves to the position of the received current
②
city, and the hour hand and minute hand move to the current time in
the city indicated by the city hand.
(For cities other than the five cities on the dial, the city hand moves
to “...(Other city)”.)
The hour hand and minute hand point to “NO” near the 4 o’clock
①
position.
The displayed time does not change from the display before reception.
②
Ⓑ
Press and
hold for
more than
2 seconds
12
Page 14

2. TIME SYNCHRONIZATION VIA BLUETOOTH COMMUNICATION
How to Receive Time/Calendar Data (2)
■Display of Reception Result
After the communication was performed either automatically or
●
manually, the hour hand and minute hand indicate the reception result
for 5 seconds.
If the time of automatic reception comes while in CALENDAR mode,
※
the mode changes over to TIME after the reception result is displayed.
[ When the reception was successful ]
When the data was received normally, the hour hand and minute
hand point "YES" near the 2 o'clock position.
Press Button Ⓑwhile in TIME mode. The hour hand and minute
●
hand point to "YES" or "NO" to indicate the result of the last
reception performed in the past 24 hours for 5 seconds.
"
YES
"
"
"
YES
[ When the reception failed ]
When the data reception failed, the hour hand and minute hand
point "NO" near the 4 o'clock position.
"
"
NO
Button
[ TIME mode ]
If no reception succeeded or no communication was performed
※
in the past 24 hours, the hour hand and minute hand point to
"NO."
If the reception failed, check the following before performing manual
reception again:
Is the smartphone kept within 3 meters from the watch?
・
Is the dedicated application on the smartphone kept running?
・
Is the watch registered to the dedicated application, and is the
・
application configured properly?
Ⓑ
[ Reception succeeded ]
[ Reception failed ]
"
NO
"
13
Page 15

3. MANUAL TIME ADJUSTMENT FUNCTION OF TIME MODE
How to Adjust Time Manually (1)
If the time synchronization function of the watch via the Bluetooth communication cannot be used for some reason, such as you do not have the
●
smartphone at hand, or it runs out of battery, it is possible to adjust the time manually in TIME mode using the watch alone.
When the time is adjusted manually, the Simplified World Time display is fixed at "...".
To change the Simplified World Time, perform synchronization of the time/calendar using time synchronization via Bluetooth communication. (Refer
to P. 1 1 .)
[ TIME mode ]
Button
Press and hold both
Buttons Ⓐand
at the same time
for more than
2 seconds
Ⓐ
Ⓒ
Button
Ⓒ
Press and hold both
Buttons Ⓐand
at the same time
[ Minute hand setting ] [ Hour hand setting ] [ AM/PM setting ]
Button
Button
Ⓒ
Button Ⓑor returns automatically in 3 minutes
Ⓐ
Press to
advance
Ⓒ
Press to
move back
Button
Ⓑ
Button
Press to
advance
Button
Press to
move back
Button
Ⓐ
Ⓒ
Ⓑ
Button
Hour hand/minute hand:
AM: point to 11 o'clock position
PM: point to 1 o'clock position
Button
Ⓐ
Press to
advance
Ⓒ
Press to
move back
14
Page 16

3. MANUAL TIME ADJUSTMENT FUNCTION OF TIME MODE
How to Adjust Time Manually (2)
■Operation Method
①
②
③
④
⑤
Pressing Button Ⓐ switches between TIME mode and CALENDAR
mode. Switch to TIME mode.
Press and hold both Buttons
than 2 seconds to activate the manual time setting function.
The minute hand moves to the "0 second" position of the minute
next to the one currently displayed. Then, the minute hand moves
to indicate that it is ready for setting.
[ Ex.) If the time is 10:08 PM when the time adjustment function is
activated ]
By pressing and holding Buttons Ⓐ and Ⓒ simultaneously for
more than 2 seconds, the hour and minute hands move to the
positions indicating "10:09 00."
Press Button
With each press of Button Ⓐor Ⓒ, the minute hand advances
※
or moves back 1 minute, respectively. It moves quickly if the respective buttons are kept pressed.
After the minute hand setting is completed, press Button Ⓑ.
The hour hand moves to indicate that it is ready for setting.
Press Button
With each press of Button Ⓐor Ⓒ, the hour hand advances
※
or moves back 1 hour, respectively. It moves quickly if the
respective buttons are kept pressed.
If the time period changes from AM to PM or vice versa by
※
moving the hour and minute hands, the AM/PM setting will
also change accordingly. The calendar display, however, will
not change even if the time is advanced from PM to AM period.
To set the calendar manually, use the calendar adjustment
function (see P. 17).
or Ⓒto set the minute hand.
Ⓐ
or Ⓒto set the hour hand.
Ⓐ
and Ⓒat the same time for more
Ⓐ
⑥
⑦
⑧
After all the time setting procedure is completed, press Button Ⓑ.
The hour hand and minute hand move to indicate that it is ready
for AM/PM setting.
Press Button
Set to the 11 o’clock position if the display time is AM or the 1
※
o’clock position if the display time is PM.
After all the time setting procedure is completed, press Button Ⓑ
in accordance with a time signal. The time is set and the display
returns to the time. If the watch is left untouched for 3 minutes,
the time setting function is also deactivated, and the time you
have set is registered.
or Button Ⓒ to set AM or PM.
Ⓐ
15
Page 17

4. CALENDAR FUNCTION
How to Show Calendar Display
■Calendar Display
The day of the week and the date are indicated by the hour hand and minute hand. The watch is equipped with a perpetual calendar function
that adjusts automatically for odd and even months including February of leap years up to February 28, 2100
.
■Operation Method
Press Button Ⓐ in TIME mode to change the mode to CALENDAR.
①
[ TIME mode ]
Button
Ⓐ
Button
Returns automatically
in 10 seconds
or
Button
Ⓐ
Ⓐ
[ CALENDAR mode ]
Button
Date scale (on outer edge of dial)
Ex.: 25th
The minute hand indicates "date." Read the date scale on the
②
outer edge of the dial that the minute hand points to.
The hour hand indicates "day of the week." Read the day-of-week
scale on the inner edge of the dial that the hour hand points to.
The mode automatically returns from CALENDAR to TIME in
10 seconds.
Pressing Button Ⓐ while in CALENDAR mode also returns the
※
mode to TIME.
Day-of-week scale (inner circumference of dial)
Ex.: Wednesday
Ⓐ
16
Page 18

4. CALENDAR FUNCTION
How to Adjust Calendar Manually (1)
If the time synchronization function of the watch via the Bluetooth communication cannot be used, it is possible to adjust the calendar manually using
●
the watch alone.
When the calendar is adjusted manually, the Simplified World Time display is fixed at "...".
To change the Simplified World Time, perform synchronization of the time/calendar using time synchronization via Bluetooth communication. (Refer
to P. 1 1 .)
Ex.) To set calendar to August 25, 2021
●
[ Calendar display ] [ Date setting ] [ Month setting ] [ Leap year setting ]
Hour hand:
Day of week display
(Wednesday)
Minute hand:
Indicating date (25th)
Button
Press and hold both
Buttons Ⓐand
at the same time
for more than
2 seconds
Button
Press and hold both
Buttons Ⓐand
at the same time
[ Day of week setting ]
Ⓐ
Ⓒ
Ⓒ
Setting the day of week
(Sunday to Saturday)
Ⓒ
Button
Button
Button
Button Ⓑor returns automatically in 3 minutes
Ⓐ
Press to
advance
Ⓒ
Press to
move
back
Set date
(1~31)
Ⓑ
Button
Press to
advance
Button
Press to
move
back
Button
Ⓐ
Ⓒ
Ⓑ
Set month
(1~12)
Button
Press to
advance
Button
Press to
move
back
Button
Ⓑ
Ⓐ
Ⓒ
Set number
of years
elapsed from
leap year
(0~3)
Button
Button
Ex.)
2020 : 0
2021 : 1
2022 : 2
2023 : 3
Ⓐ
Press to
advance
Ⓒ
Press to
move
back
17
Page 19

4. CALENDAR FUNCTION
How to Adjust Calendar Manually (2)
■Operation Method
①
Press Button Ⓐ to change the mode to CALENDAR.
Press and hold both Buttons
②
than 2 seconds to activate the manual calendar setting function.
The city hand moves to other "..." while the hour hand moves to
indicate that it is ready for day of week setting.
Press Button Ⓐ or Ⓒ to set the hour hand to the proper day.
③
With each press of Button Ⓐ, the hour hand advances 1 day.
※
With each press of Button Ⓒ, it moves back 1 day.
After the day setting is completed, press Button Ⓑ.
④
The minute hand moves to indicate that it is ready for date
setting.
Press Button Ⓐ or Ⓒ to set the minute hand to the proper date.
⑤
With each press of Button Ⓐ, the minute hand advances 1 day.
※
With each press of Button Ⓒ, it moves back 1 day. It moves
quickly if the respective buttons are kept pressed.
If the date is advanced from "31st" to "1st," the month will not
※
be advanced by one.
After the date setting is completed, press Button Ⓑ.
⑥
The hour hand and minute hand move to indicate that it is ready
for month setting.
Press Button Ⓐ or Ⓒ to set the hour hand and minute hand to the
⑦
proper month.
With each press of Button Ⓐ, the hour hand and minute hand
※
advance 1 month. With each press of Button Ⓒ, they move
back 1 month.
If the month is advanced from "December (12)" to "January
※
(1)," the number of years elapsed from leap year will not be
advanced by one.
and Ⓒat the same time for more
Ⓐ
After the month setting is completed, press Button Ⓑ.
⑧
The hour hand and minute hand move to indicate that it is ready
for leap year setting.
Press Button Ⓐ or Ⓒ to set the hour hand and minute hand to the
⑨
proper number of years elapsed from leap year.
With each press of Button Ⓐ, the hour hand and minute hand
※
advance one year. With each press of Button Ⓒ, the hour hand
and minute hand move back one year.
After the leap year setting is completed, press Button Ⓑ. The
⑩
calendar setting function is deactivated, and the display returns
to the calendar. If the watch is left untouched for 3 minutes, the
calendar setting function is also deactivated, and the calendar
you have set is registered.
When the display returns to the calendar, it returns to the time
※
in 10 seconds. The display also returns to the time by pressing
Button Ⓑ while the calendar is displayed.
18
Page 20

5. SIMPLIFIED WORLD TIME FUNCTION
How to Use Simplified World Time Function
By setting the city hand to a desired city initial on the dial, the time of five cities in the world can be indicated by the hands.
●
P(Paris
)
[Tokyo:10:08] [New York:20:08]
H(Hong Kong
[ …(Other city) ]
Button
)
Button
■Operation Method
Press Button Ⓒ in TIME or CALENDAR mode.
①
The city hand moves each time you press Button Ⓒ.
The hour and minute hands move forward quickly from the
current location and display the time or calender (day of week
and date) of the selected city for 10 seconds.
The city hand points to "..." (Other city) only if time data has been
※
received for a city other than the 5 cities. If any of the 5 cities is
the current location, the city hand will skip "..." and move from "L"
to "P" when the Button Ⓒ is pressed.
Ⓒ
Ⓒ
T(Tokyo
When the time or calendar is adjusted manually, the Simplified
World Time display is fixed at "...".
To change the Simplified World Time, perform synchronization
of the time/calendar using time synchronization via Bluetooth
communication before performing the operation. (Refer to P. 11 .)
)
L(London
)
N(New York
Button
Ⓒ
)
19
Page 21

6. HAND POSITION ADJUSTMENT
How to Adjust Hand Position
In the following cases, the hand position data stored in the built-in IC and the positions the hands actually point to do not correspond with each other.
●
Follow the procedure below to adjust the hand position.
1) The hands do not point to the proper positions, being affected by strong shocks, magnetism.
2) The hands do not indicate the time properly after the time synchronization via Bluetooth communication.
3)After Bluetooth communication, the hour and minute hands do not indicate the reception result, "YES" or "NO" properly.
[ TIME mode ]
Button
Ⓐ
Press and hold both
Buttons Ⓐand
at the same time
for more than
10 seconds
Button
Ⓒ
Ⓒ
[City hand position
adjustment ]
Button
Press to
advance
Button
Press to
move back
[ Minute hand position
Ⓐ
Ⓒ
adjustment ]
Button
Press to
advance
Button
Press to
move back
Ⓐ
Ⓒ
[ Hour hand position
adjustment ]
Button
Press to
advance
Button
Press to
move back
Ⓐ
Ⓒ
■Operation Method
Press Button Ⓐ to change the mode to TIME.
①
Press and hold Buttons Ⓐ and Ⓒ simultaneously for more than
②
10 seconds. The hand position adjustment function is activated,
and the hour hand and minute hand move to the 12 o'clock
position and the city hand moves to T (Tokyo) to indicate it is
ready for city hand position adjustment. If any of the hour hand,
minute hand, or city hand is misaligned, adjust the hand position
using the following method.
While Buttons
※
adjustment function, the minute hand setting display of the manual time
setting function appears temporarily. Be sure to keep the button pressed
for more than 10 second until all the hands move toward the 12 o’clock
position. (Refer to “How to Adjust Time Manually (1)” on P. 14.)
Press Button Ⓐ or Ⓒ to set the city hand to T (Tokyo) position.
③
With each press of Button Ⓐ or Ⓒ, the city hand advances or moves
※
back, respectively.
Ⓐ
Press and hold both
Buttons Ⓐand
at the same time
and Ⓒ are kept pressed to activate the hand position
Ⓒ
Set city hand
Button Ⓑor returns automatically in 3 minutes
Button
20
Ⓑ
Set
minute hand
After the city hand position adjustment is completed, press
④
Button Ⓑ. The minute hand moves to indicate that it is ready for
hand position adjustment.
Press Button
⑤
⑥
With each press of Button Ⓐor Ⓒ, the minute hand advances or moves back,
※
respectively. It moves quickly if the respective buttons are kept pressed.
After the minute hand position adjustment is completed, press Button Ⓑ.
Ⓐ
The hour hand moves to indicate that it is ready for hand position adjustment.
Press Button
⑦
⑧
With each press of Button Ⓐor Ⓒ, the hour hand advances or moves back,
※
respectively. It moves quickly if the respective buttons are kept pressed.
After the hour hand position adjustment is completed, press
Button Ⓑ. The hand position adjustment function is deactivated,
and the display returns to the time. If the watch is left untouched
for 3 minutes, the hand position adjustment function is also
deactivated, and the hand position you have set is registered.
Ⓐ
Button
or Ⓒto set the minute hand to the 12 o’clock position.
or Ⓒ to set the hour hand to the 12 o’clock position.
Ⓑ
Set
hour hand
Page 22

7. TO PRESERVE THE QUALITY OF YOUR WATCH
Daily Care
The watch requires good daily care.
●
Wipe away moisture, sweat or dirt with a soft cloth.
・
After soaking the watch in seawater, be sure to wash the watch in
・
clean pure water and wipe it dry carefully.
If your watch is rated as "Non-water resistant" or "water resistant
※
for everyday life," do not wash the watch. Do not pour running
water directly from faucet onto the watch. Put some water into a
bowl first, and them soak the watch in the water to wash it.
"Performance and Type" on P. 21
→
"Water Resistance" on P. 22
→
Performance and Type
The case back shows the caliber No. and performance of
your watch.
Water resistant
performance
Refer to P. 22.
Caliber No.
The number to
identify the type of
your watch
21
※The case back design differs from model to model, and the
case back illustrated above may not be the same as that of
your watch.
Page 23

7. TO PRESERVE THE QUALITY OF YOUR WATCH
Water Resistance
Refer to the table below for the water resistant
performance of your watch before use.
(Refer to P. 21.)
Indication on the Case Back
No indication Non-water resistance
WATER RESISTANT Water resistance for everyday life
WATER RESISTANT
5 BAR
WATER RESISTANT
10 (20) BAR
Water resistance for everyday life at
5 barometric pressures
Water resistance for everyday life at
10 (20) barometric pressures
Water Resistant Performance
Condition of Use
Avoid drops of water or sweat
The watch withstands accidental
contact with water in everyday life.
The watch is suitable for sports such as swimming.
The watch is suitable for diving not using an air cylinder.
WARNING
Not suitable for swimming
22
Page 24

7. TO PRESERVE THE QUALITY OF YOUR WATCH
Band
The band touches the skin directly and becomes dirty with sweat
or dust. Therefore, lack of care may accelerate deterioration of
the band or cause skin irritation or stain on the sleeve edge. The
watch requires a lot of attention for longer use.
Metallic band
●
・ Moisture, sweat or soil will cause rust even on a stainless steel band
if they are left for a long time.
・ Lack of care may cause a yellowish or gold stain on the lower sleeve
edge of shirts.
・
Wipe off moisture, sweat or soil with a soft cloth as soon as possible.
・ To clean the soil around the joint gaps of the band, wipe it out in
water and then brush it off with a soft toothbrush.
(Protect the watch body from water splashes by wrapping it up in
plastic wrap etc.
・
Because some titan bracelets use pins made of stainless steel, which
has outstanding strength, rust may form in the stainless steel parts.
・ If rust advances, pins may poke out or drop out, and the watch case
may fall off the bracelet, or the clasp may not open.
・ If a pin is poking out, personal injury may result. In such a case,
refrain from using the watch and request repair.
Leather band
●
・ A leather band is susceptible to discoloration and deterioration from
moisture, sweat and direct sunlight.
・ Wipe off moisture and sweat as soon as possible by gently blotting
them up with a dry cloth.
・ Do not expose the watch to direct sunlight for a long time.
・ Please take care when wearing a watch with light-colored band, as
dirt is likely to show up.
・ Refrain from wearing a leather band watch other than Aqua Free
bands while bathing, swimming, and when working with water even
if the watch itself is water-resistant enforced for daily use (10- or 20-
BAR water resistant).
)
Silicone band
●
・ As for material characteristics, the band is easily dirtied, and may
be stained and discolored. Wipe off dirt with a wet cloth or cleaning
tissue.
・ Unlike bands of other materials, cracks may result in the band being
cut. Take care not to damage the band with an edged tool.
Polyurethane band
●
・ A polyurethane band is susceptible to discoloration from light, and
may be deteriorated by solvent or atmospheric humidity.
・ Especially a translucent, white, or pale colored band easily adsorbs
other colors, resulting in color smears or discoloration.
・ Wash out dirt in water and clean it off with a dry cloth.
(Protect the watch body from water splashes by wrapping it up in
plastic wrap etc.
・ When the band becomes less flexible, have the band replaced with
a new one. If you continue to use the band as it is, the band may
develop cracks or become brittle over time.
Notes on skin
irritation and
allergy
Notes on the
length of the
band
)
Skin irritation caused by a band has various
reasons such as allergy to metals or leathers, or
skin reactions against friction on dust or the band
itself.
Adjust the band to allow a little
clearance with your wrist to ensure
proper airflow. When wearing the
watch, leave enough room to insert
a finger between the band and your
wrist.
23
Page 25

7. TO PRESERVE THE QUALITY OF YOUR WATCH
Remarks on Battery
1. Notes on the battery
(1) Battery life
This watch keeps operating for approximately 4 years if a new normal
battery is inserted in it.
※ If the time synchronization via the Bluetooth communication is used
more than once a day, however, the watch may run down in less
than 4 years.
(2) Monitor battery
The battery in your watch is a monitor battery which is inserted at the
factory to check the function and performance of the watch. Its actual
life once in your possession may be less than the specified period.
(3) Battery replacement
・For battery replacement, be sure to have the battery replaced with
a new one at the retailer from whom the watch was purchased,
specifying a genuine SEIKO battery.
・If the old battery is left in the watch for a long time, a malfunction
may be caused due to battery leakage, etc. Have it replaced with a
new one as soon as possible.
・Battery replacement is made at cost even if it runs down within the
guarantee period.
・Once the case back is opened for battery replacement or other
purposes, the original water resistant quality designed for the
watch may deteriorate when it is closed. When you have the battery
replaced with a new one, also request the water resistance test
suitable for the water resistant quality of your watch. If your watch
has 10-bar or higher water resistant quality, be sure to have such
test performed on the watch every time the battery is replaced.
Please note that it takes several days to check the water resistant
quality of your watch. When requesting the checking, therefore,
please confirm the period required for it.
・If the watch stops operating soon after the battery is replaced with
a new one, it needs to be overhauled. (Refer to P. 25.)
2. Battery life indicator
The watch is equipped with a battery life indicator that enables you to
know when the battery needs to be replaced.
When the city hand is locked at the 9 o'clock position, the watch may
※
run down in a week or so.
3. Initial setup after replacing battery
After replacing the battery, be sure to perform a system reset operation
(refer to P. 29) and configure the hand position adjustment and time/
calendar settings.
Do not open the case back to take out the
●
battery.
If the battery is removed from the case back
●
WARNING
CAUTION
for any unavoidable reason, put it in a place
beyond the reach of children. If it is swallowed
by a child, consult the doctor immediately.
Never short-circuit, heat or disassemble the
●
battery. Never put it close to a fire. It may
explode, generate an intense heat or catch fire.
The battery inserted in your watch is not
●
rechargeable. Never attempt to recharge it. If it
is recharged accidentally, it may explode.
Use only the battery specified for your watch. If
●
a battery other than specified is inserted in the
watch, it may explode.
When disposing of an old battery, observe the
●
regulations of the local authorities concerned.
24
Page 26

7. TO PRESERVE THE QUALITY OF YOUR WATCH
After-Sales Service
Notes on guarantee and repair
●
Contact the retailer from whom the watch was purchased or SEIKO
・
CUSTOMER SERVICE CENTER for repair or overhaul.
Within the guarantee period, present the certificate of guarantee to
・
receive repair services.
Guarantee coverage is provided in the certificate of guarantee.
・
Read carefully and retain it.
For repair services after the guarantee period has expired, if the
・
functions of the watch can be restored by repair work, we will
undertake repair services upon request and payment.
Replacement parts
●
SEIKO makes it a policy to typically keep a stock of replacement
・
parts for this watch for 7 years. Replacement parts are those which
are essential to maintaining the functional integrity of the watch.
Please note that if original parts are not available, they may be
・
replaced with substitutes whose external appearance may differ
from the originals.
Disassembly and cleaning (overhaul) for checking and
●
adjustment purpose
It is recommended that disassembly and cleaning (overhaul)
for checking and adjustment purpose be performed
periodically approximately once every 3 to 4 years, in order
to maintain optimal performance of the watch for a long time.
The watch is a precision device. It may stop operating or lose time
・
if its parts run low on oil or wear out.
The watch may also stop operating due to battery leakage
・
depending on the condition of use.
Its water resistant quality may be impaired due to entry of
・
perspiration or moisture as the gasket or other parts deteriorate.
If any of the above should occur, please contact the retailer from
whom the watch was purchased for disassembly and cleaning
(overhaul) for checking and adjustment purpose. For replacement
of parts, please specify "SEIKO GENUINE PARTS." When requesting
overhaul, be sure to have the gasket and push pin replaced with new
ones.
Please note that the movement of your watch may be replaced
※
with a new one when it is overhauled.
25
Page 27

8. TROUBLESHOOTING
Troubleshooting (1)
Problem Possible Cause Solution Refer to
The watch has stopped operating. The battery has run down. Immediately request the retailer from
When the city hand is locked at the 9 o'clock
position.
Bluetooth communication will not start when
manual reception is performed.
(The second hand points to "NO.")
Bluetooth communication cannot be
performed.
The battery nears its end.
The application is not running. Start up the dedicated application.
The watch is not registered to the
application.
The airplane mode of the smartphone
is turned on.
The Bluetooth function of the smartphone
is turned off.
The location function of the smartphone
is turned off (for Android smartphone
only).
whom the watch was purchased to
replace the battery with a new one.
After replacing the battery, perform a
system reset and configure the hand
adjustment and time/calendar settings.
If your smartphone runs on iOS, it is
necessary to start up the dedicated
application after the smartphone is
rebooted.
Register the watch to the dedicated
application.
Turn of the in-flight mode of the smartphone,
and then, start up the dedicated application.
For such operation, refer to the instruction
manual, etc. of the smartphone.
Turn on the Bluetooth function of the
smartphone. For such operation, refer to the
instruction manual, etc. of the smartphone.
Turn on the location function of the
smartphone. For such operation, refer to the
instruction manual, etc. of the smartphone.
P. 29 of this
Instruction Manual
P. 3 of Application
Operating Guide
P. 5 of Application
Operating Guide
P. 3 of Application
Operating Guide
P. 4 of Application
Operating Guide
The application is not allowed to access
the location information (for Android
smartphone only).
The watch is used with a new smartphone.
26
Configure the smartphone so that the
dedicated application is allowed to
access the location information.
Uninstall the dedicated application on
the old smartphone, or delete the watch
registered to it.
P. 4 of Application
Operating Guide
P. 7 of Application
Operating Guide
Page 28

8. TROUBLESHOOTING
Troubleshooting (2)
Problem Possible Cause Solution Refer to
Bluetooth communication cannot be
performed.
The automatic reception function will
not work.
A battery saving application is affecting
the operation of the application dedicated
for the watch.
The smartphone and the watch are
placed wide apart from each other.
There is some object between the
smartphone and the watch that interferes
with the Bluetooth communication.
Radio wave interference affecting the
Bluetooth communication has occurred
around the place of use.
The automatic reception function of the
watch is turned off.
Configure applications for saving battery
consumption or improving battery life
to exclude the dedicated application. For
such operation, refer to the instruction
manual, etc. of those applications.
The automatic reception is performed at
a time of day when the previous manual
reception was performed. Place the
smartphone and the watch within 3 m
from each other during that time period.
Place the smartphone and the watch at
a place where there is no obstruction
between them. While in use, do not put
any of them in a metal case or the like.
Perform the Bluetooth communication
at a place sufficiently away from
devices emitting radio wave, such
as electric machine emitting strong
electromagnetic field and information
household appliances having
communication function.
Turn on the automatic reception function
of the watch.
P. 12 of this
Instruction Manual
P. 12 of this
Instruction Manual
Any of the hands will not point to its
proper position.
Ex.)・The second hand does not
exactly point to the reception
result position, "YES" or "NO".
The hands do not indicate
・
month and date properly.
The hands have become misaligned
from the original position due to strong
magnetism, shock or other external
cause.
27
Use the hand position adjustment mode
to check if the hand position needs to
be adjusted. If any of the hands do not
point to the 12 o'clock position exactly,
adjust its hand position.
P. 20 of this
Instruction
Manual
Page 29

8. TROUBLESHOOTING
Troubleshooting (3)
Problem Possible Cause Solution Refer to
The watch does not indicate the local
time properly during travel abroad,
irrespective of whether the time
synchronization is performed via
manual or automatic reception method.
You are in Japan, but the city hand
does not point to Tokyo (T).
The smartphone is not configured to
indicate the local time or time zone
properly.
The time has not been received
from the application at the traveling
destination.
When the time or calendar is adjusted
manually.
The smartphone time zone is not
Japan.
Check the time and time zone
・
indicated by the smartphone.
Configure the smartphone to indicate
・
the proper local time and time zone.
For the operation and time and time
・
zone configuration of the smartphone,
refer to the instruction manual of the
smartphone.
Receive the time from the dedicated
application (manual reception or
automatic reception).
If the time or calender is adjusted
manually, the city hand points to
"...". When the time is received from
the dedicated application (manual
reception or automatic reception), the
city hand points to Tokyo (T).
If you are in Japan, set the smartphone
time zone setting to automatic or set
the smartphone to Japan time and then
receive the time from the dedicated
application again (manual reception or
automatic reception).
P. 12 of this
Instruction Manual
P. 12 of this
Instruction Manual
P. 12 of this
Instruction Manual
Blur on the watch glass persists.
Water has entered inside the watch due
to a deteriorated gasket or for any other
reason.
28
Consult the retailer from whom the watch
was purchased.
Page 30

8. TROUBLESHOOTING
How to Reset Built-In IC (System Reset)
If the watch should function improperly, follow the procedure below to reset the built-in IC (system reset). It will return to normal. After the system
●
reset is performed, the time/calendar returns to its default setting. Be sure to set the time/calendar properly before use.
[ System reset completed ]
[ Any mode ]
Ex.) TIME mode
Button
Button
Button
Ⓐ
Ⓑ
Ⓒ
Press and hold
Buttons Ⓐ, Ⓑand
at the same time
for more than 10 seconds
City hand position adjustment in
hand position adjustment function
Ⓒ
[ Hand position adjustment ]
If Bluetooth
communication
is available
After adjusting the hand
position following the
procedure in "How to
Adjust Hand Position"
on P. 20, return the
display to the time.
If Bluetooth
communication
is not available
Follow the procedure in
“Manual Reception” on
P. 1 2 to set the time/
calendar properly.
Follow the procedure
in “How to Adjust Time
Manually” on P. 1 4
and “How to Adjust
Calendar Manually”
on P. 1 7 to manually
set the time/calendar
properly.
■Operation Method
※After the system reset procedure, the watch will not return to
Press and hold Buttons Ⓐ, Ⓑ, and Ⓒ at the same time for more
①
than 10 seconds in TIME mode or CALENDAR mode. The builtin IC is reset (system reset), and the hour, minute, and city hand
continue moving for a while. Then, the hour hand and minute
hand move to the 12 o'clock position and the city hand moves
to T (Tokyo) to indicate that it is ready for city hand position
adjustment.
Follow the procedure in "How to Adjust Hand Position" on P. 20
②
to set the misaligned hands exactly in position.
After the hand position adjustment of all the hands is completed,
③
press Button Ⓑto return to the time display.
the time display automatically in 3 minutes.
29
※
④
⑤
When the time display resumes, the watch starts indicating the
time from the default setting below:
Time : AM12:00:00
Calendar : January 1st, Sunday, with the number of
years elapsed from leap year "0"
City display : T (Tokyo)
If you have your smartphone at hand, and the time synchronization
with the dedicated application via Bluetooth communication is
available, perform the manual reception to set the time/calendar
properly. (Refer to "Manual Reception" on P. 1 2 .)
If you cannot use your smartphone, and
with the dedicated application via Bluetooth communication is
not available, manually set the time/calendar properly on the
watch alone. (Refer to "How to Adjust Time Manually" on P. 1 4
and "How to Adjust Calendar Manually" on P. 1 7.)
the time synchronization
Page 31

9. SPECIFICATIONS
Specifications
1. Basic functions
Basic watch function (hour, minute and city hands)
・
Perpetual calendar (date and day of week display)
・
Simplified World Time Function (5 world city display)
・
Time synchronization function via Bluetooth communication (automatic/manual reception, and reception result display)
・
2. Frequency of crystal oscillator ....... 32,768 Hz (Hz = Hertz ... Cycles per second)
3. Loss/gain (monthly rate) ................. Less than 15 seconds (when the watch is worn on the wrist at normal temperature range between 5℃ and 35℃)
4. Operational temperature range .....-5
5. Driving system ................................ Step motor, 3 pieces
6. Battery .............................................. Lithium battery, SB-T63(CR1025), 1 piece
7. Battery life ........................................ Approximately 4 years (on condition that the time synchronization via Bluetooth communication is used less than
8. IC (Integrated Circuit) ...................... Oscillator, frequency divider, driving and reception circuit: C-MOS-IC, 2 piece
※The specifications above are subject to change without prior notice for product improvements.
℃~+50℃
once per day)
30
Page 32

ContactInformation:
● Ifyou haveanyquestionabouttheoperation,repairor maintenanceof
SEIKOBluetooth®LinkWatch,pleasecontactthefollowing:
SEIKO CUSTOMER SERVICE CENTER
TEL: 0120-612-911
● Ifyou haveanyquestionabouttheuse of theapplicationorthe
Bluetoothfunctionofthewatch,pleasecontactthefollowing:
APPLICATION OPERATION SUPPORT CENTER
TEL: 047-320-3004
Receptionhours:9:30–17:30(MondaythroughFriday)
ForreceptionhoursduringthesummerandNewYear'sholidays,please
visitourwebsite:
https://www.seikowatches.com/jp-ja/contact
※ Ifyourphoneissetto“numberwithheld,”add“186”totheabovephone
number.
31
 Loading...