

Page 1

User Manual
By Firstech LLC, Version: 1.0
Applicable to the following remote(s);
2W902R-SP 2 Way 5 Button LED Remote
This device complies with Part 15 of the FCC rules. Operation is subject to the following conditions;
(1) This device may not cause harmful interference.
(2) This device may accept any interference received, including interference that may cause undesired operation.
CAUTION: Changes or modifications not expressly approved by the party responsible for compliance could void the
user’s authority to operate this device.
WWW.COMPUSTAR.COM
Page 2

Introduction ................................... ........................... ............................. ........................... ............................3
Warranty Coverage .................................... ........................................................... .......................................3
Quick Reference ...........................................................................................................................................4
Button Lock ............................. ................................ ................................ ....................................................4
Full or Half Paging Mode .......................................................................... ..................................................4
Valet Mode..................................................................................................................................................4
Remote Maintenance – Battery Replacement ....... ............................. .......................................................4
2 Way Remote Button Functions ........... .. ...... .. ... ..... ... ... ..... ... .. ...... .. ... ..... ... ... ..... ... ..... ... .. ...... .. ... ...............5
Function Button Menu ............ ..... ... .. ...... .. ... ..... ... ..... ... ... ..... ... .. ...... .. ...... .. ... ..... ... ... ..... ... .. ..........................6
Remote Option Menu Table ............................. ................................ ................................ ..........................6
Remote LED Functions and Descriptions .................................................................................................6
Alarm LED Notifications ..............................................................................................................................7
1 Way Remote Button Functions ........... .. ...... .. ... ..... ... ... ..... ... .. ...... .. ... ..... ... ... ..... ... ..... ... .. ...... .. ... ...............7
General System Functions ..................................... .......... ........ ........... ........ ........ ........... ........ .......... ........ ..8
Sending Commands ......................................................................... ..........................................................8
Receiving Commands ............................................. .. ... ..... ... ..... ... ..... ... ... ..... ... ..... ... ..... ... .. ..........................8
Active Lock/Arm and Unlock/Disarm ................ ................................................................ ..........................8
Passive Lock/Arm ................................................................................................................ .......................8
Automatic Transmission Remote Start Function ................................................... ............................. .. .....9
Manual Transmission Remote Start Function (Reservation Mode) ........................................................ ..9
Trunk Release ................................ ..................................................................................... ........... ........ . 10
Auxiliary Outputs/Window Roll-Down/Sliding Doors...................................... ...................................... ... 10
Silent Arm/Disarm.................................................................................................................................... 10
Remote Mute .................................................................................................................................. ......... 11
Shock Sensor On/Off ............................................................................................................. .......... ....... 11
Automatic Button Lock ................................................................ ................................ ........................ .... 11
Advanced System Functions ............ ........... ........ ........... ........ .......... ........ ........... ........ ........... ........ ......... 12
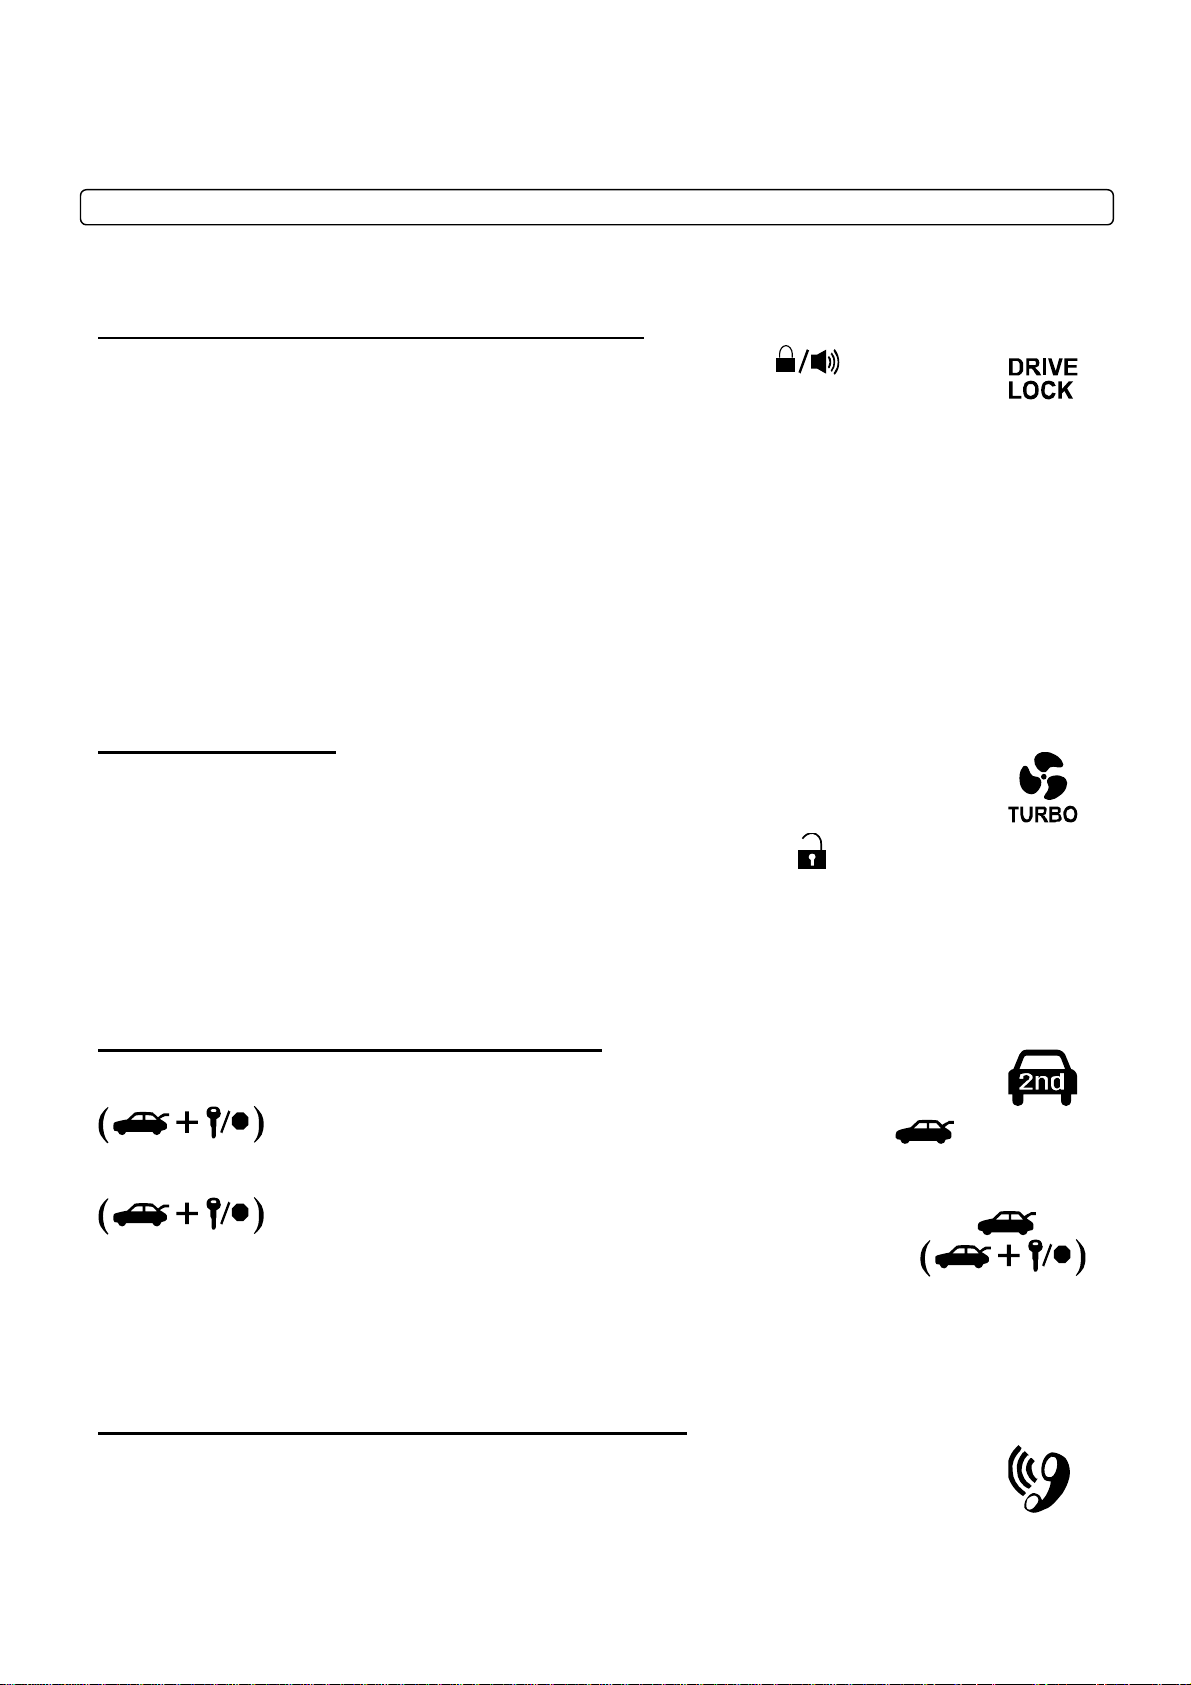
Drive Lock/Ignition Controlled Door Locks ....................... ........... ........ ........... ........ .......... ........ ........ ....... 12
Turbo Timer Mode ....................................... ... .. ...... .. ...... .. ... ..... ... ... ..... ... ..... ... .. ...... .. ... ..... ....................... 12
nd
2
Car Mode (Multiple Vehicle Control) ................................ ..... ... .. ...... .. ...... .. ... ..... ... ..... ... ... ..... ... ......... 12
RPS Touch and RPS (Remote Paging Sensor) .... .. ... ... .. ....................................................................... 12
Secure Valet Switch .... ........................................................................................... .......................... ....... 14
Timer Start Mode ...................................................................................................................... ........... .... 15
Cold/Hot Start Mode ................................................................................. ........................... ........... ........ . 15
Remote Coding / Programming Routine ................................................................................................ 15
Programming 2 Way 5 Button Remotes: ................................................................. ........................... .... 15
Remote Start Error Diagnostic ............................ ..................................................... ............................... 16
Alarm Diagnostic .............................................................................................. ......................................... 16
Limited Lifetime Warranty ........................................................................................................................ 18
2
Page 3
Introduction
Thank you for purchasing a Firstech system for your vehicle. In order to truly enjoy the benefits of this
system, we recommend that you thoroughly review the following manual. Please note that this manual
applies to the 2 Way 5 Button LED Remote (2W902R-SP) Regardless of whether you purchased the
ALARM IT, START IT, or MAX IT system. This manual also supports the 1WG7R-SP that is included in
your new RF Kit. Please note that there are certain features listed in this manual that may not be
available for your system. There may also be features listed in this manual that require additional
installation or programming before they become active. If you have any questions or concerns please
contact the original place of purchase. For further information you may also contact our customer support
center at 888-820-3690.
Warranty Coverage
Caution: The Manufacturer’s warranty will be voided if this product is installed by anyone other than an
Authorized Firstech dealer. For complete warranty details visit www.compustar.com or the last page of
this manual. Firstech remotes carry a 1 year warranty from original date of purchase. CompuStar Pro
remotes carry a 2 year warranty.
Warranty registration can be completed online by visiting www.compustar.com. Please complete the
registration form within 10 days of purchase. We do not include a mail in warranty registration card with
each unit – registration must be done online. To verify that an authorized dealer installed your system,
we highly recommend that you keep a copy of the original proof of purchase, such as the dealer invoice
in a safe place.
3
Page 4
Quick Reference
Button Lock
The 2W902R-SP comes equipped with automatic button lock. This requires you to tap any button to
wake your remote up then tap the button for the function you are trying to activate. Button lock can be
turned off in your remote’s option menu.
Full or Half Paging Mode
The 2W902R-SP is shipped in Half Paging Mode. This means that the remote will only receive 2 Way
LED confirmations for remote start and lock and unlock. It will not receive 2 Way LED confirmations
when the alarm is triggered. To turn this feature on hold the
enter the Remote Programming Menu. Tap the Lock <insert lock button icon> button to turn Full Paging
on. The remote will beep twice and LED flash red. You are now in Full Alarm and Starter Mode.
buttons for 2.5 seconds to
Valet Mode
When servicing or loaning your vehicle to others, the system should be placed in Valet Mode. Valet
Mode prevents the system from remote starting and disables all alarm functions. IMPORTANT: While in
Valet mode the remote will still control power lock and unlock systems. The parking lights will not flash.
The system can be put into valet one of three ways:
1. Turn the vehicle’s key to the ignition “on” position, tap the Function and Trunk buttons
<insert function + trunk button icons> at the same time for a half second. The parking lights
will flash once and/or siren chirp once to confirm the system is in valet mode. Repeat this process to take
the system out of valet mode. The parking lights will flash twice and/or siren chirp once to confirm the
system is out of valet mode. Please note the confirmation chirps from the 2 Way remote will be quieter in
Valet Mode.
2. If you do not have your remote control, you can put the system into valet by turning the ignition key
“on” and then “off” five times within 7 seconds. The parking lights will flash once to confirm the system is
in valet mode. Shortly after the first flash, the parking lights will flash twice. A remote control is required
to take the system out of valet mode.
3. If your system is set up for a secure valet option (optional), you will not be able to put the system into
valet until the proper code has been entered using the secure valet switch. The secure valet switch is the
small button with bright blue LED on the front and if installed is the only way to override the alarm and/or
remote start. Until programmed, the default code is (3, 3).
Removing System Out of Valet:
Tap the<insert function + trunk button icons> for a half second to remove the system out of Valet. On
starter and alarm/starter systems, you can turn the key to the Ignition On position and tap the foot brake
10 times. This will take your system out of Valet Mode. If this does not work you can also reprogram your
remote(s). See Remote Coding/Programming Routine section for details.
Remote Maintenance – Battery Replacement
The only regular maintenance this system requires is remote control battery replacement. No
programming is required when replacing the battery.
4
Page 5
2W902R-SP:
Turn the remote over and unlock the battery cover by sliding the clear tab up. Slide the battery cover off,
revealing the AAA battery. IMPORTANT: Be sure to observe correct polarity when installing the battery.
1WG7R-SP:
Use a quarter or flat head screwdriver to pry the back cover off of the remote. You can insert the quarter
or flat head in the small slot at the bottom of the remote by the keychain loop. Carefully pry off the back
cover using caution that you do not damage the circuit board. Your battery size should be listed on the
battery. Battery size: Two (2) CR2016) Replacements can be purchased from your local Firstech dealer
or an electronics store.
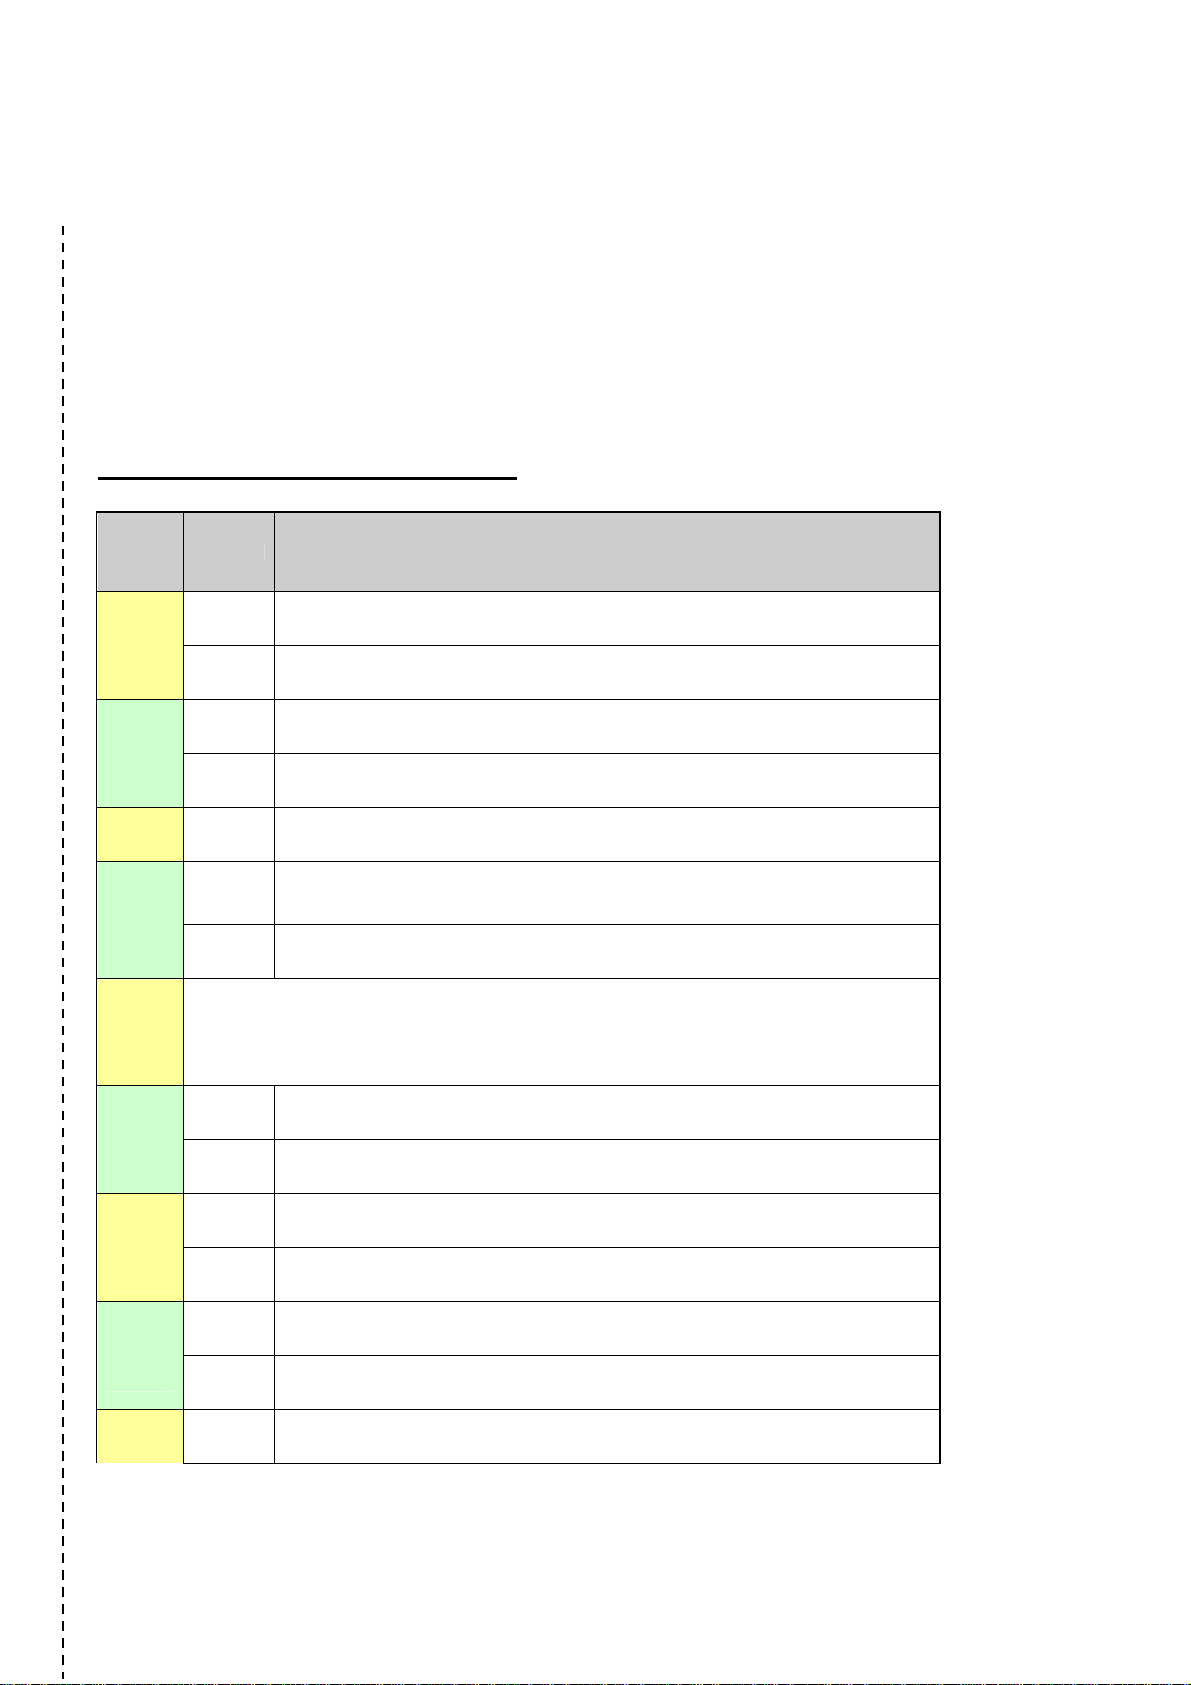
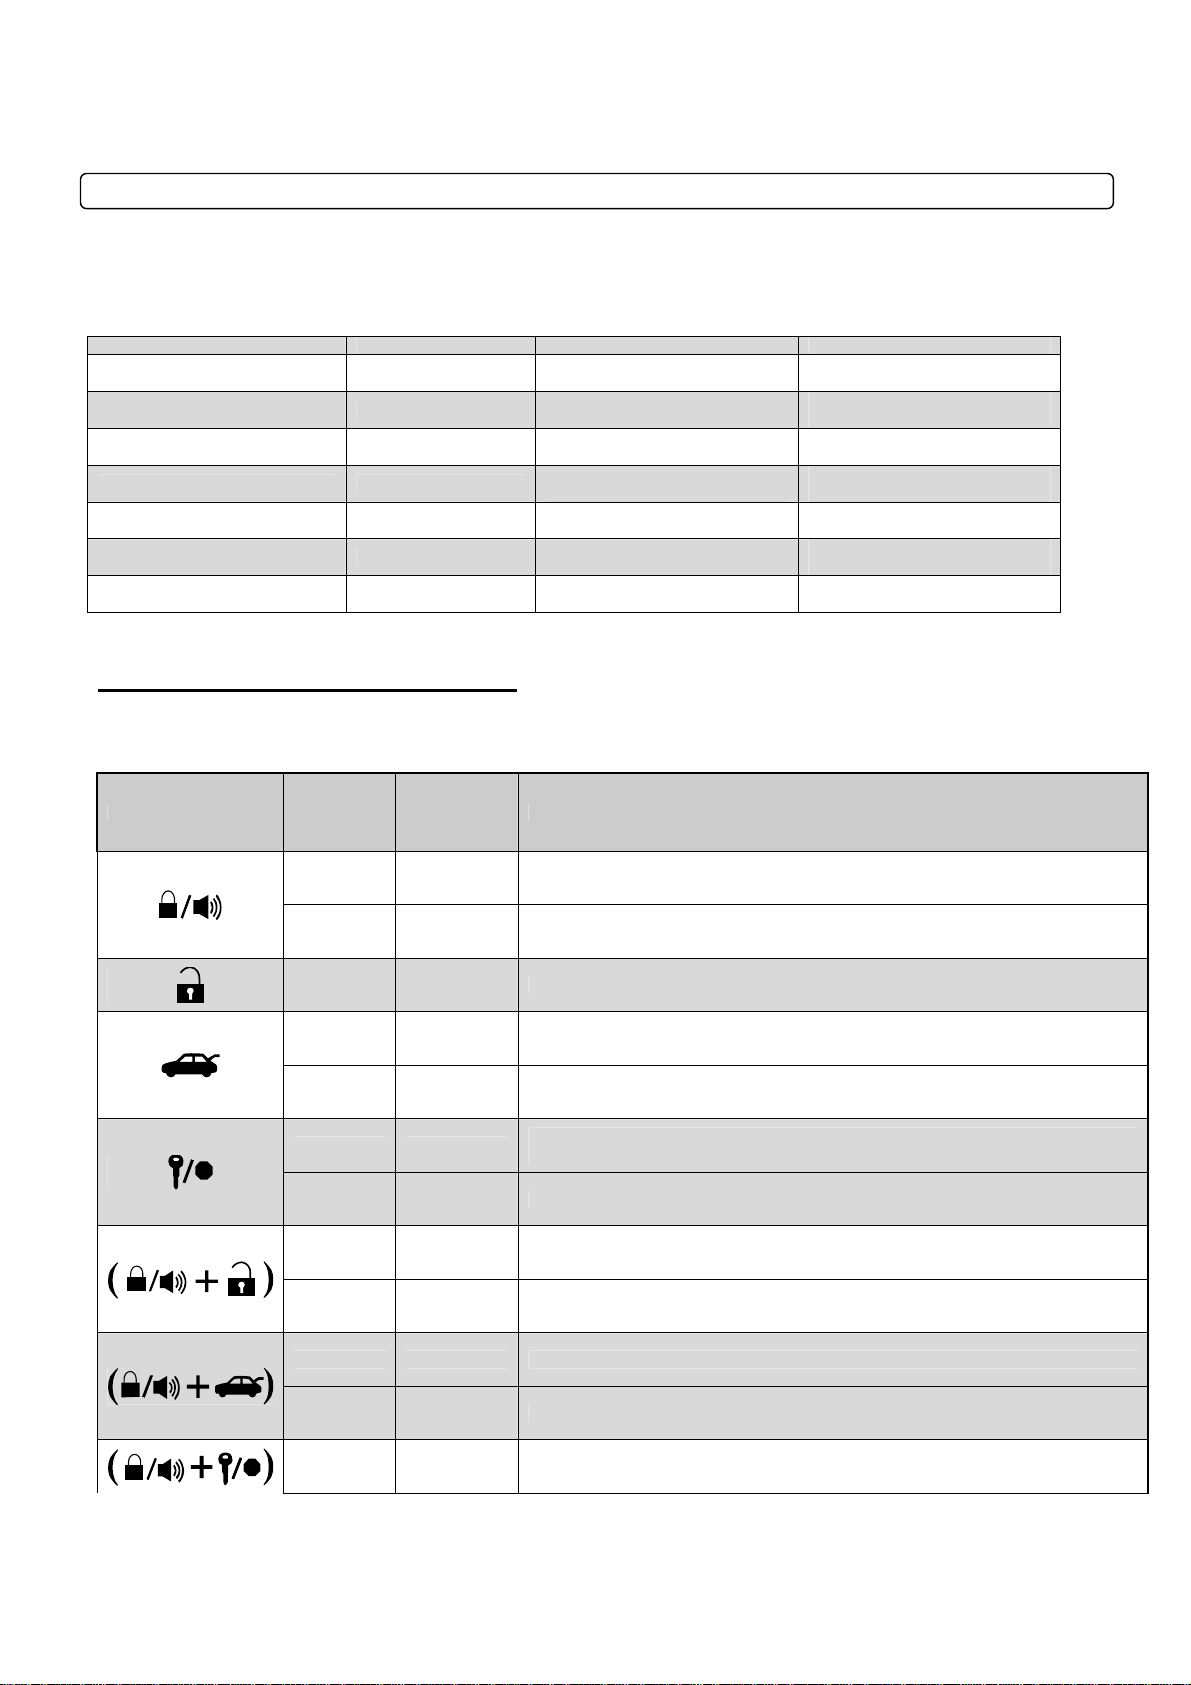
2 Way Remote Button Functions
Button Duration Function / Description
<Insert
Lock
Icon>
<Insert
Unlock
Icon>
<Insert
Trunk
Icon>
<Insert
Key
Icon>
<Insert
Function
Icon>
<Insert
Lock +
Unlock
Icon>
Half
second
4
seconds
Half
second
2.5
seconds
2.5
seconds
Half
second
2.5
seconds
This button activates and deactivates multiple features. See the Function Button Menu table below for
complete details.
Half
second
2.5
seconds
Locks doors and if equipped, arms the alarm.
Panic/vehicle locater (flashes vehicle’s parking lights and sounds siren and horn).
Unlocks doors and if equipped, disarms the alarm.
Run time extender. Resets the run time for Turbo Timer or Remote Start.
Trunk release. Triggers the trunk release output and opens the vehicle’s trunk.
Car Check (updates vehicle status on remote) / Secure Auxiliary
Holding this button will start your vehicle. Repeat and this will shut your vehicle down.
Turns siren chirps on/off (Note: With the siren chirps off, it will still sound in the event the
alarm is triggered).
Turns the shock sensor on/off. (ALARM IT or MAX IT systems only)
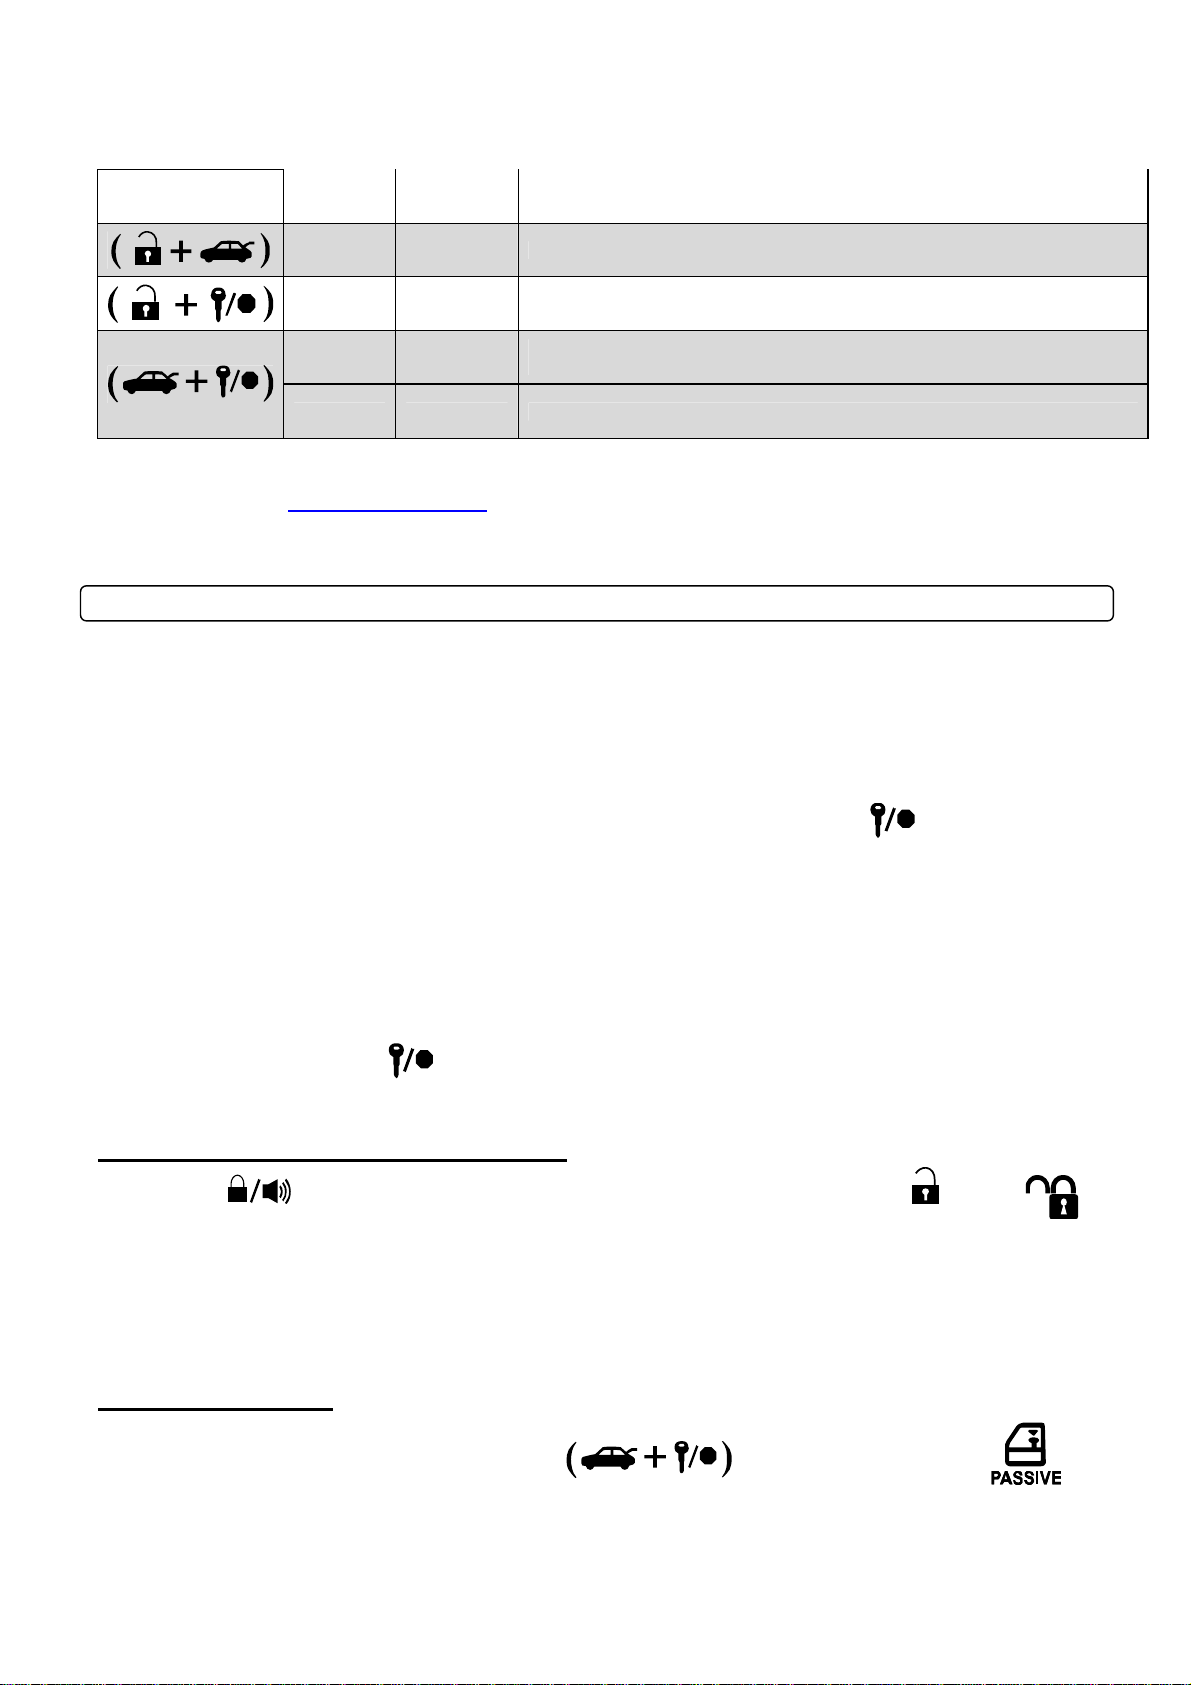
<Insert
Function
and
Trunk
Icon>
<Insert
Function
and Key
Icon>
<Insert
Trunk
Half
second
2.5
seconds
Half
second
2.5
seconds
Half
second
Valet mode (see Valet Mode Section for details)
Option programming menu 1. For use during installation.
Activates timer start mode. Timer start mode has multiple programmable settings: duration
settings, temperature settings and self start settings.
Option programming menu 2. For use during installation.
Activates passive arming (vehicle will arm/lock 30 seconds after the vehicle is disarmed)
5
Page 6
and Key
Icon>
2.5
seconds
Accesses Remote Option Menu. See Remote Option Menu Table for details.
Function Button Menu
Button Duration
<Insert
Function
Icon>
One Tap
<Insert Lock
Icon>
Drive Lock
On/Off
Remote Option Menu Table
Feature
Enter and Exit
Remote Menu
2 Way Paging
Display
Silent
2nd Car Mode
Turns Feature
On or Off
<insert Trunk
+ Key button
icon>
<insert Lock
icon>
<insert Unlock
icon>
<insert Trunk
icon>
Button
Duration
2.5
Seconds
Half
second
Half
second
Half
second
<Insert Unlock Icon>
Turbo Timer On/Off Auxiliary 1 Auxiliary 2
Remote
Chirp(s)
Three On |
Three Off
One-Half
Paging | Two-
Full Paging
One On | Two
Off
One On | Two
Off
<Insert
Trunk
Icon>
Enters and Exits Remote Option Menu. The LED will flash purple.
Determines whether your remote is used for Alarm or Start Only
system. Set it to FULL for ALARM IT and MAX IT features. Set to
HALF for START IT ONLY systems. If on, LED will flash blue.
When turned off, the LED will flash red twice.
Important: The 2W902R-SP is defaulted in HALF for ST ART IT
systems. It must be changed to FULL for alarm systems.
Turns the silent mode on or off. If on, LED will flash blue. When
Puts your remote into 2
vehicle with the same remote as long as it has the same RF Kit
installed. If on, LED will flash blue. When turned off, the LED will
<Insert
Key/Start
Icon>
Function / Description
turned off, the LED will flash red twice.
nd
Car Mode. You can control another
flash red twice.
Automatic Button
Lock
<insert
Key/Start
icon>
Half
second
One On | Two
Off
Locks all buttons on the remote automatically after one minute.
Tap any button then the button(s) you would like to use to send a
command from the remote to your vehicle. If on, LED will flash
blue. When turned off, the LED will flash red twice.
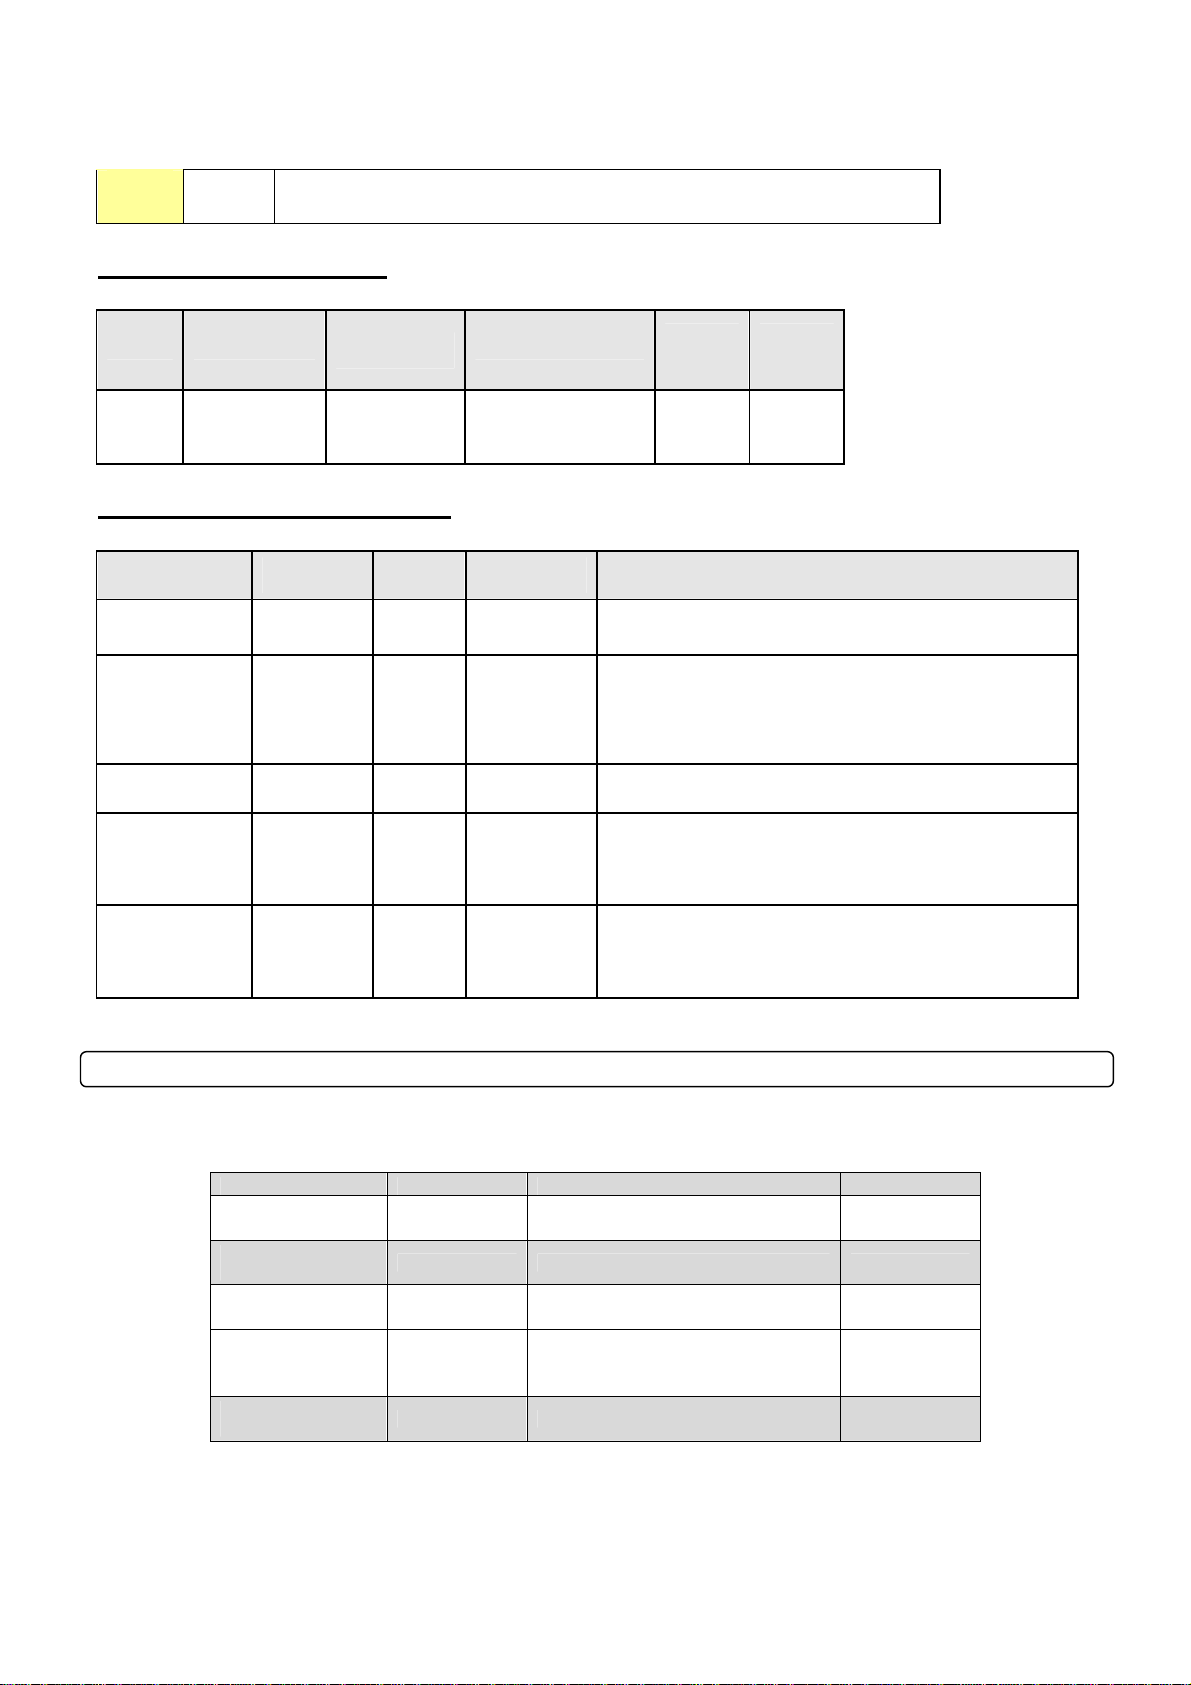
Remote LED Functions and Descriptions
Your remote will communicate to and from your vehicle while in range. The LED will change colors
indicating transmission, confirmation, remote start run time and error confirmatio ns.
Event LED Color LED Duration Chirp(s)
Runtime Remaining:
100 Percent
Runtime Remaining:
66 Percent
Runtime Remaining:
33 Percent
All command
confirmations
All error
confirmations
Blue Once every 5 seconds Six times
Purple Once every 5 seconds N/A
Red Once every 5 seconds N/A
Blue Once or Twice depending on function
Red Three LED flashes Three chirps
Once or Twice
depending on
function
6
Page 7
Alarm LED Notifications
In the event that your alarm has been triggered, your remote will receive notifications based on what
zone has been violated. Please see the following table for details and a short description of each
notification. Please note that these notifications are only available with MAX IT and ALARM IT systems.
Zone LED Color Chirp(s) Description
Door Trigger(s) Purple and Red
Trunk Trigger Purple and Red
Hood Trigger Purple and Red
Ignition On Trigger Purple and Red
DAS Tilt Trigger Purple and Red
Prewarn Shock Sensor Blue and Red 8 Chirps
Full Shock Sensor Purple and Red
`
1 Way Remote Button Functions
<please use 1WG7R-SP icons below>
Button Duration
Additional
Programming
Required
Chirps for 30 seconds or until
button tapped on remote
Chirps for 30 seconds or until
button tapped on remote
Chirps for 30 seconds or until
button tapped on remote
Chirps for 30 seconds or until
button tapped on remote
Chirps for 30 seconds or until
button tapped on remote
Chirps for 30 seconds or until
button tapped on remote
Function / Description
One of more of your door trigger
zones have been violated.
Your trunk trigger zone has been
violated.
Your hood trigger zone has been
violated.
Your alarm is triggered when your
vehicle’s ignition is turned on.
Your alarm is triggered when your
DAS detects tilt motion
Your prewarn shock sensor zone
has been violated.
Your full trigger shock sensor zone
has been violated.
Half second no Locks doors and/or arms alarm.
3.5 seconds no Panic/vehicle locater (flashes vehicl e’s parking lights and sounds siren and horn).
Half second no Unlocks doors and/or disarms alarm.
Half second no
2.5 seconds no Trunk release. Triggers the trunk release output and opens the vehicle’s trunk.
Half second no
2.5 seconds no Activates the remote start. Repeat and remote start will shut off.
Half second no
2.5 seconds no Option programming menu 1 - Installers Only.
Half second no Valet mode (see Valet Mode Section for details)
2.5 seconds no Turns the shock sensor on/off. (Alarm or Alarm/Starter systems only)
Aux 1. Triggers the auxiliary 1 output (most commonly used for rear defrost or window
roll-down).
Aux 2. Triggers the auxiliary 2 output (most commonly used for rear defrost or window
roll-down).
Turns siren chirps on/off (Note: With the siren chirps off, it will still sound in the event the
alarm is triggered).
Half second yes Drive lock. Activates ignition controlled door locks.
7
Page 8
2.5 seconds no Option programming menu 2 - Installers Only.
Half second no Activates passive arming (vehicle will arm/lock 30 seconds after the vehicle is disarmed)
Half second yes
Half second yes
2.5 seconds no Car Check / Secure Auxiliary
Activates timer start mode. Timer start mode has multiple programmable settings:
duration settings, temperature settings and self start settings.
Activates the built in Turbo Timer function. Additional installation is required when using
this feature on automatic transmission vehicle’s.
If you would like additional information on the functionality of your 1 Way companion remote, please visit
the support page at www.compustar.com to download the full user manual.
General System Functions
The remote transmitter functions are predetermined and programmed from the factory. The five button
configuration allows for many functions to be performed through a series of tapping and/or holding
buttons.
Sending Commands
When in range and a command has been sent the remote will beep and unique LED will fla sh blue or red.
For example, to send a remote start command from the pager, hold the Key/Start
button for 2.5
seconds. The remote will beep confirming the command has been sent and that the remote is in range.
Once the vehicle has successfully remote started, the remote will receive a t hree beep and LED
command indicating the vehicle is running.
Receiving Commands
The remote pager will receive commands indicating the status of the vehicle, confirmation of sending
commands and remote start notifications. For example, after sending the lock command, the pager will
receive LED and chirp signals confirming that the vehicle has been successfully locked/armed. To see if
your pager is in range, tap the
button for a half second – if the remote receives an audible and LED
confirmation then it is in range.
Active Lock/Arm and Unlock/Disarm
Tap the Lock button for a half second to lock/arm your vehicle. Tap the Unlock button
to unlock/disarm your vehicle. If equipped this will also activate your starter kill and anti grind
feature. Also you will not be able to start your vehicle with the key until unlock/disarm.
IMPORTANT: If the alarm has been triggered (Siren is sounding, parking lights flashing, and horn
honking), you must wait until the remote pager has been paged before disarming the alarm – the first
button tap will shut off the alarm and the second will unlock/disarm the system.
Passive Lock/Arm
The system can be configured to passively lock and arm the vehicle. Put the system in
passive by tapping the Trunk + Key Start buttons
button for a half second.
The remote will beep once and the LEDs will illuminate to indicate the system is in passive lock and
8
Page 9

arming mode.
While in passive mode, the system will lock and arm the alarm 30 seconds after the last door is closed.
As an indicator that the vehicle is going to passively lock and arm, the remote and siren will chirp once
and the parking lights will flash once at both 10 and 20 seconds prior to passively locking and arming. If
you want the system to passively arm and not passively lock, ask your local Firstech dealer to turn
Option 1-8 to setting II.
Automatic Transmission Remote Start Function
Hold the Key/Start button for 2.5 seconds to remote start an automatic transmission vehicle. If you
are in range and the vehicle is ready to remote start, the remote will beep once and LED flash blue
indicating that the remote start command has been successfully transmitted.
If you are in range and the remote beeps three times, there is a remote start error. Refer to the “remote
start error diagnostic” on the last page of this manual for details.
Upon receiving confirmation that your vehicle is running, the remote LED will flash the and
remote beep to show the run time. The remote start run time can be programmed for 3, 15, 25,
or 45 minutes - ask your local Firstech dealer to adjust Option 2-7 if you would like a run
time other than 15 minutes (default).
IMPORTANT: Your vehicle’s key must be inserted into the ignition and turned to the “on” position prior
to driving your vehicle. If the foot brake is depressed prior to the key being in the “on” position, the
vehicle will shut off.
Manual Transmission Remote Start Function (Reservation Mode)
In order to remote start a manual transmission vehicle, the system must first be set in Reservation Mode.
Reservation Mode must be set each and every time you want to remote start a manual transmission
vehicle. The purpose of Reservation Mode is to leave the transmission in neutral before exiting the
vehicle.
IMPORANT:
The transmission must be left in the neutral position.
The vehicle’s windows must be rolled up.
The vehicle’s door pins must be in working order.
Do not install this remote start on a manual transmission vehicle that has a convertible or
removable top.
Do not set reservation mode or remote start with people in the vehicle.
Activating Reservation Mode
STEP 1: While the vehicle is running, place the transmission in neutral, set the emergency / parking
brake, and remove pressure from the foot brake.
STEP 2: Remove the key from the vehicle’s ignition. The vehicle’s engine should remain running even
after the key has been removed. If the vehicle does not remain running visit your local authorized
Firstech dealer for service.
STEP 3: Exit the vehicle and close the door. The vehicle’s doors will lock/arm and then engine will shut
down. If the vehicle’s engine does not shut off, your door trigger may be functioning improperly. Do not
use the remote start feature and take your vehicle to a local authorized Firstech dealer for service.
9
Page 10
Once the vehicle shuts off your system is in reservation mode and the vehicle is ready to safely remote
start.
IMPORTANT: By default, the system will lock/arm the vehicle upon setting reservation mode. Take care
to not lock your keys inside the vehicle.
Cancelling Reservation Mode
Reservation mode will be cancelled for the following reasons;
You did not activate the parking brake prior to turning off the ignition.
You pressed the foot brake after the key was removed from the ignition.
You released the parking brake after the key was removed from the ignition.
You entered valet mode, opened the vehicle’s door, hood, trunk or set off the alarm.
Reservation Mode Settings
Reservation mode settings can be programmed with Option 1-6. It is recommended that reservation
mode settings are programmed by your local authorized Firstech dealer.
Default 1: Locks doors when Reservation Mode is set.
Option 2: Hold Key/Start button to initiate Reservation Mode
Option 3: Reservation mode sets 10 seconds after the last door is closed, as opposed to immediately.
This option will allow you to access the vehicle’s rear doors, trunk or hatch prior to the system setting
reservation and passively locking/arming.
Option 4: Shuts motor off before locking doors.
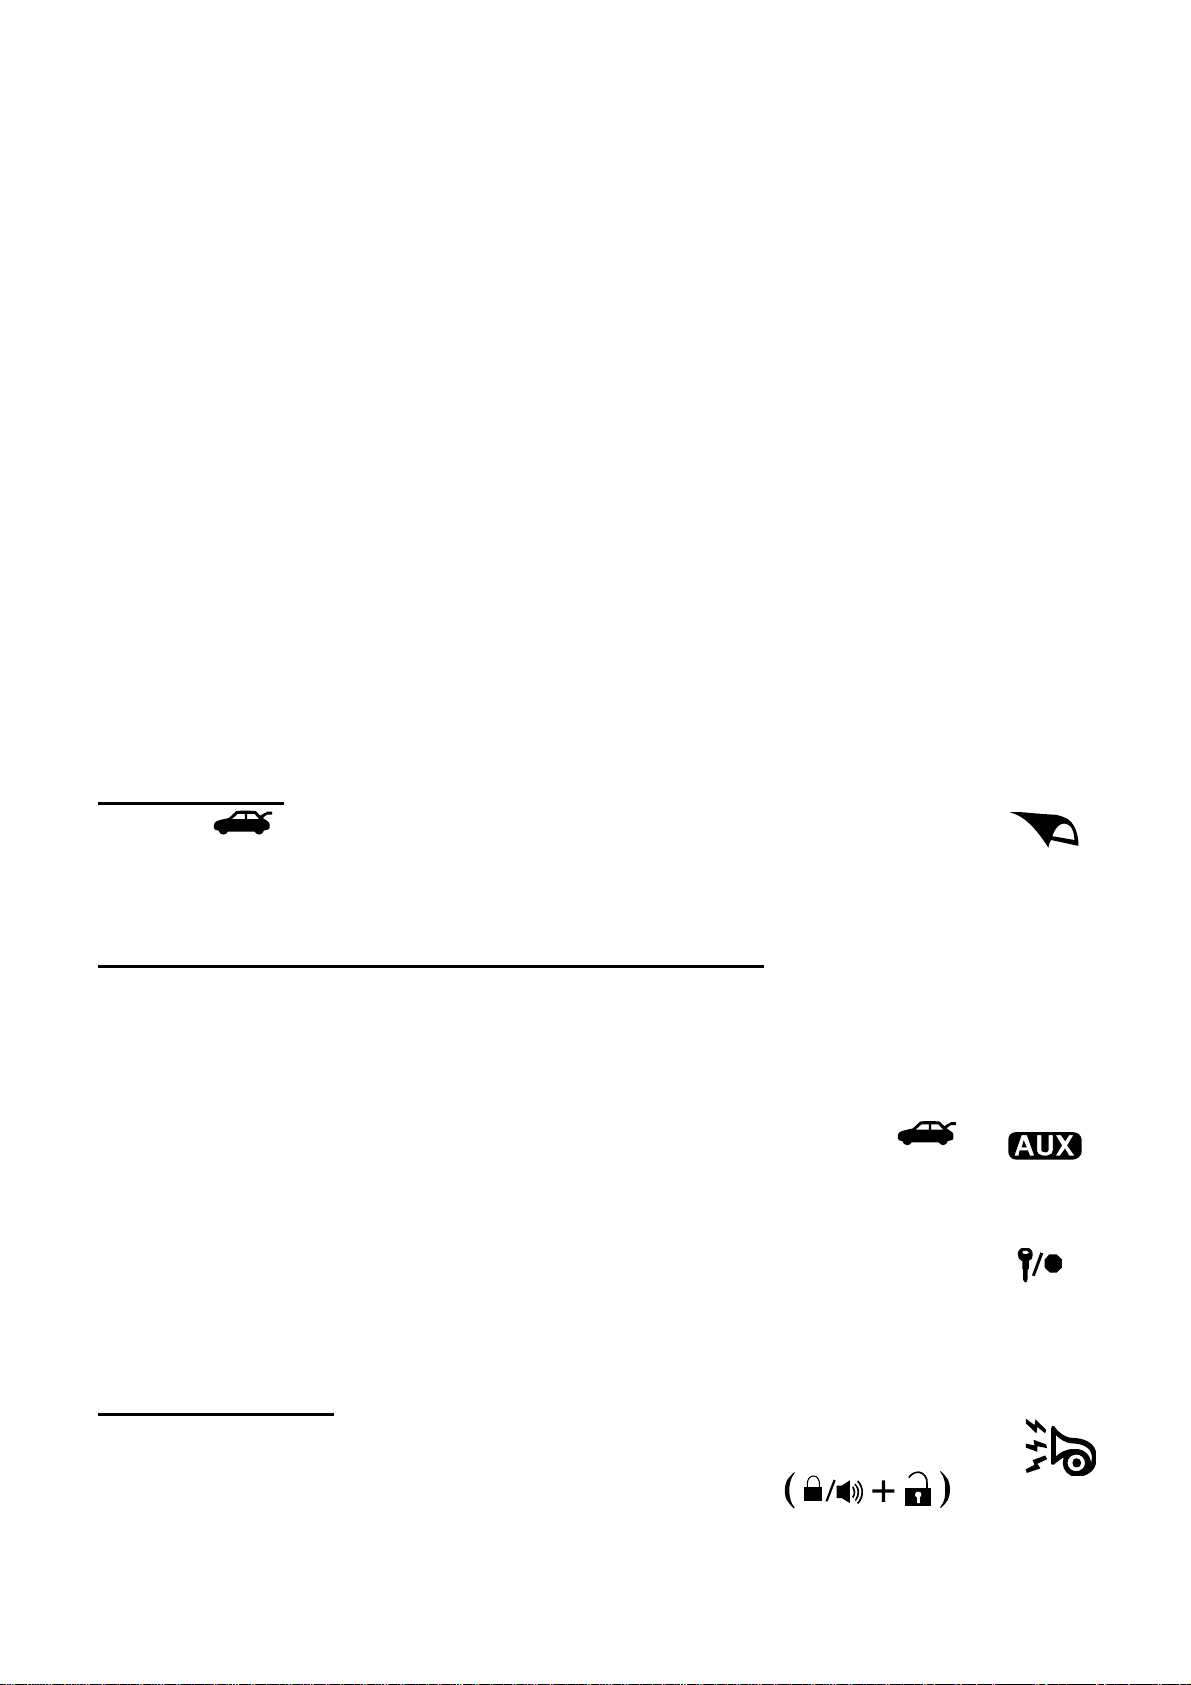
Trunk Release
Hold button for 2.5 seconds to release the trunk or hatch. If you are in range, the
remote will beep twice and the LEDs will flash indicating that the trunk release command has
been successfully transmitted. IMPORTANT: Trunk release is an optional vehicle feature that may
require additional parts and labor.
Auxiliary Outputs/Window Roll-Down/Sliding Doors
Your system is equipped with two additional outputs that can be configured to control windows, open
power sliding doors, open a power sliding moon roof, or even turn on a rear defroster. These outputs can
be configured for pulsed, timed or latched settings. Your authorized Firstech dealer can set these outputs
up accordingly. Using auxiliary outputs to control additional vehicle functions will require additional parts
and can be rather labor extensive.
Tap the Function <insert icon> button for a half second followed by the Trunk button
trigger auxiliary output 1. Tap the Function <insert icon> button for a half second followed by
the Key/Start <insert icon> button to trigger auxiliary output 2. The remote will beep once and parking
lights flash, indicating that the auxiliary output(s) have been triggered.
By default, the system is in secure auxiliary mode, which requires you to tap the Key/Start button
for a half second prior to triggering auxiliary 1 or 2. To turn off secure auxiliary, ask your authorized
Firstech dealer to turn on Option 4-5 to setting II
.
to
Silent Arm/Disarm
Upon lock/arm and unlock/disarm, you can eliminate vehicle’s audible confirmation by muting
the siren. Normally, the siren will chirp once to indicate the system is locked/armed and twice to
indicate the system is unlocked/disarmed. To mute the siren tap buttons
10
Page 11
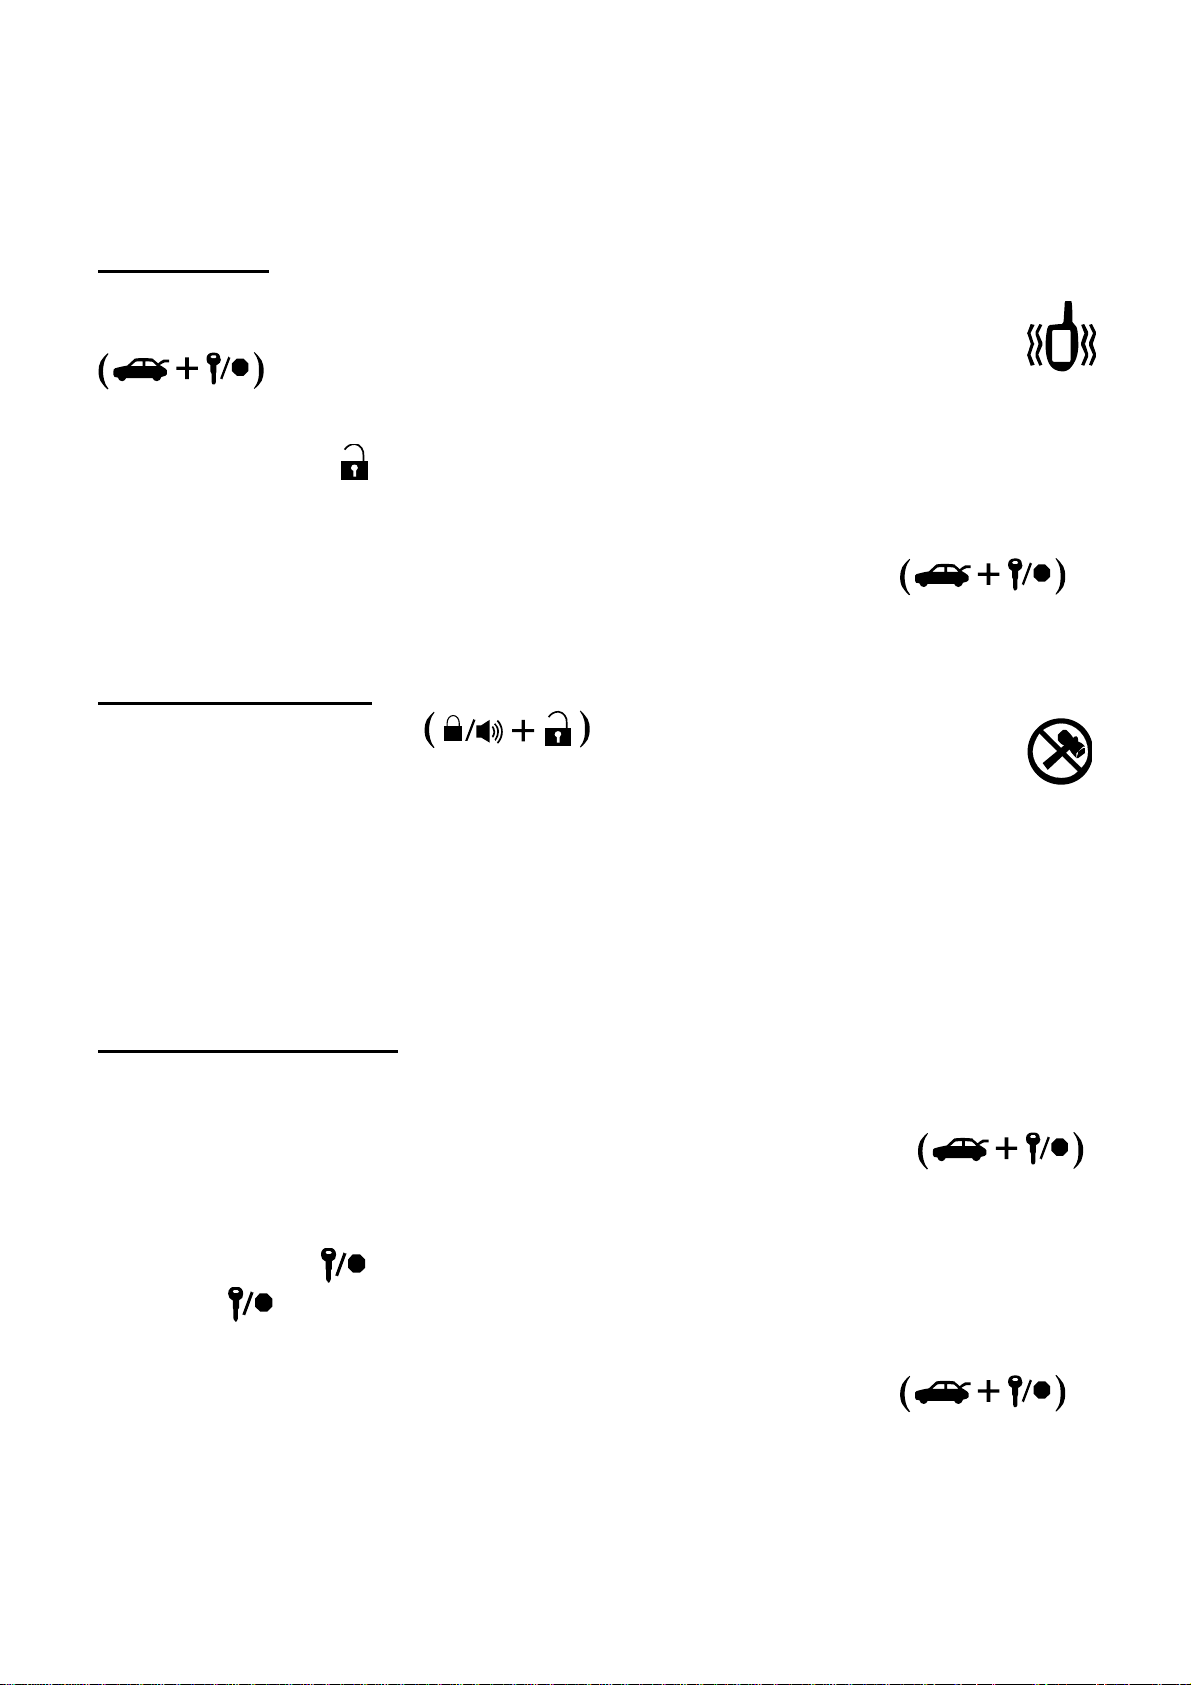
simultaneously for a half second.
IMPORTANT: Even when the siren is muted, it will still go off in the event the alarm is triggered.
Remote Mute
To silent your remote you must turn on Remote Mute on;
STEP 1: Enter remote programming mode by holding the Trunk and Key/Start buttons
simultaneously for 2.5 seconds. The remote will beep 3 times and the LED
will flash purple indicating that you have successfully ente red programming mode.
STEP 2 : Tap the Unlock
Unlock button again to turn Remote Mute off. Two chirps and red LED flashes indicates Remote Mute is
off.
STEP 3: Exit remote programming by holding down the Trunk and Key/Start buttons
simultaneously for 2.5 seconds. The remote will beep indicating that you have successfully exited
programming. Your remote’s LED will still illuminate.
button. The LED will flash blue indicating that silent mode is on. Tap the
Shock Sensor On/Off
Hold the Lock and Unlock buttons simultaneously for 2.5 seconds to turn the
shock sensor on and off. The remote will beep twice and LED flash twice to confirm the shock
sensor is off. The remote will beep once and LED flash once to confirm the shock sensor is on.
IMPORTANT: Turning off the shock sensor also turns off any optional sensors.
Adjusting the shock sensor sensitivity is done at the actual sensor, which is generally mounted
somewhere under the vehicle’s dashboard. The higher the number on the dial means greater sensitivity
to impact. The recommended dial setting for most vehicles is somewhere between 2 & 4. If you are
testing your sensor, please note that the shock sensor does not recognize impact for 30 seconds after
the system has been armed.
Automatic Button Lock
Your remote comes with an automatic button lock feature. This feature automatically locks all four
buttons on your remote after one minute. To unlock just tap any button then tap or hold the button(s) for
the command you would like to send. This feature must be turned on in the Remote Option Menu.
STEP 1: Enter remote programming mode by holding the Trunk and Key/Start buttons
simultaneously for 2.5 seconds. The remote will beep 3 times and the LEDs will flash purple on your
remote indicating that you have successfully entered programming mode.
STEP 2 : Tap the Start
Tap the Start
feature is off.
STEP 3: Exit remote programming by holding down the Trunk and Key/Start buttons
simultaneously for 2.5 seconds. The remote will beep indicating that you have successfully exited
programming.
button again to turn Auto Button Lock off. Two chirps and LED flashes indicates the
button. One chirp and LED flash indicates that Automatic Button Lock is on.
11
Page 12
Advanced System Functions
The following section reviews advanced system functions. Many of these functions require multiple steps
or additional programming by your local authorized Firstech dealer to be active.
Drive Lock/Ignition Controlled Door Locks
Tap the Function button <insert icon> once followed by the Lock button to turn the
Drive Lock on and off. (also known as ignition controlled door locks) The remote will beep
once and the LED flash once to confirm that drive lock mode is activated. The remote will beep twice and
LED flash twice to to confirm drive lock is off.
IMPORTANT: Drive lock mode requires the dealer turn on Option 1-9. Drive lock has two settings;
Default 1: Off
Option 2: Locks the doors when the ignition is on and after the brake is depressed.
Option 3: locks the doors when the RPM’s have reached two times that of idle speed (this setting
requires that a tachometer wire is connected).
With both settings, the doors will unlock when the ignition is turned off. If using this feature on a manual
transmission vehicle, the doors will unlock upon setting the emergency / parking brake.
Turbo Timer Mode
The built in turbo timer keeps the vehicle’s engine running for either 1, 2, or 4 minutes
(programmable from dealer) after the vehicle key has been removed from the ignition. This
feature will keep oil running through the turbo system to allow for appropriate cooling time.
Tap the Function button <insert icon> once followed by the Unlock button
The remote will beep once and LED flash once to confirm that turbo mode is activated. Repeat to turn
turbo timer off. The remote will beep twice and LED flash twice to confirm turbo mode is off.
IMPORTANT: To utilize this feature, the emergency / parking brake wire must be connected to the
Firstech system. Consult your local authorized dealer for installation.
to turn turbo mode on or off.
2nd Car Mode (Multiple Vehicle Control)
This remote has the ability to operate a 2nd vehicle with the same system. Note: When in 2nd
Car Mode that your LED will flash blue when the buttons are tapped. Hold buttons
nd
2
Car Mode on. Your remote will chirp once for on and twice for off. The remote’s LED will illuminate
blue confirming that 2
Button. The remote will beep twice and you must hold the Trunk and Key/Start buttons
to save the Remote Option Menu changes.
IMPORTANT: 2
the same remote kit.
for 2.5 seconds to enter the Remote Option Menu. Tap the Trunk Button to turn
nd
car mode is activated. The remote will remain in 2nd Car Mode until you hold the
buttons for 2.5 seconds, enter the Remote Option Menu and tap the Trunk
nd
car mode requires the remote to be programmed to a 2nd vehicle that is equipped with
RPS Touch and RPS (Remote Paging Sensor)
The RPS is an optional feature. The car call/RPS feature uses a small sensor that is mounted
12
Page 13

on the inside of your windshield.
RPS Touch (Remote Paging Sensor)
The new RPS touch has multiple features including: remote paging, 4 digit pin unlock/disarm, and
arm/lock. All features are operated with a simple touch of the sensor.
Please have your installer program Option 3-16 to Setting 2.
RPS Touch and car call functions do not require programming, however in order to unlock/disarm your
vehicle you must program a 4 digit passcode using the instructions below:
STEP 1:
Choose your RPS Touch 4 digit code. ‘0’ is not available.
STEP 2:
Turn ignition to the ‘ON’ position and leave driver’s door open.
STEP 3:
Hold your finger over the ‘Red Circle’ icon for 2.5 seconds.
STEP 4:
When the siren chirps and LEDs flash in a circular pattern, tap on your first number. (Hold the
number for 2.5 seconds to choose 6 through 10.) After choosing your first number you will get one siren
chirp and LEDs will flash in a circular pattern.
STEP 5:
Repeat Step 4 until all four digits are set. You will get 1 siren chirp and 1 parking light flash.
Repeat Steps 2 - 5 if you get 3 chirps and light flashes. Your RPS Touch is now programmed.
Alarm rearm and lock
To rearm hold your finger on the ‘Red Circle’ for 2.5 seconds.
Alarm disarm and unlock
To disarm hold your finger over the ‘Red Circle’ for 2.5 seconds. Once the LEDs start their circular
pattern, enter your 4 digit code. (Refer to Step 4 above.) Two seconds after entering the 4th digit, your
system will disarm.
2 Way LCD remote paging
To page a 2 Way LCD remote just tap the ‘Red Circle’ twice.
Touch Panel Sensitivity
To change touch sensitivity open the driver’s door, hold the button on the back of the RPS Touch until
the LEDs go out. Release button and tap again. The number of solid LEDs represent sensitivity of touch,
1 being the lowest, 5 the highest.
RPS Touch On or Off
You can turn the RPS Touch off from your remote. Just follow the instructions below:
STEP 1: Enter remote programming mode by holding down the Trunk and Key/Start buttons <insert
icon> simultaneously for 2.5 seconds. The remote will beep once and the LCD will read “REMOTE
MENU” indicating that you have entered programming mode.
STEP 2 : Scroll through the remote options by taping t h e Functi on but t on <inse rt ico n>. Once the LCD
reads “RPS-ON” tap the Lock button <insert icon> to turn this feature on. The LCD will read “RPS-OFF”
13
Page 14

STEP 3: Exit remote programming by holding down the Trunk and Key/Start buttons <insert icon>
simultaneously for 2.5 seconds. The remote will beep indicating that you have successfully exited
programming. The vibration icon will remain illuminated on the LCD indicating the remote is in remote
mute/vibration mode.
RPS (Remote Paging Sensor) Unlock/Disarm
RPS and car call functions do not require programming, however in order to unlock/disarm your vehicle
you must program a 4 digit passcode using the instructions below:
STEP 1: Disarm/unlock the alarm (remote must be programmed first) and choose a 4 digit code. You can
not have zeros.
STEP 2: Turn ignition key to the “on” position and leave the driver’s door open.
STEP 3: Knock on the windshield in front of the RPS a total of 5 times (each time you knock the LED on
the RPS will flash RED). The LED will begin to flash rapidly in BLUE with successful completion of this
step.
STEP 4: Enter the first digit of the desired four digit pass code by knocking on the windshield in front of
the RPS the desired number of times. For example, to enter 3, knock on the sensor 3 times (each time
you knock the LED will flash RED) then wait.
STEP 5: The LED on the RPS will confirm your first number by flashing BLUE slowly. Once the LED
begins to flash rapidly in BLUE, enter your second number by repeating step 4.
STEP 6: Repeat steps 4 & 5 to enter all four numbers.
STEP 7: Turn the ignition OFF - the RPS disarm/unlock passcode is now programmed. Follow steps 3 –
5 to enter your disarm/unlock code.
Alarm rearm and lock
To rearm, knock on your sensor 5 times.
Alarm disarm and unlock
To disarm, knock on your sensor 5 times. Wait for the Blue LEDs to flash rapidly. Follow STEP 4 and 5
above to enter your 4 digit passcode.
2 Way LCD remote paging
To page a 2 Way LCD remote just knock on the RPS twice.
Knock Panel Sensitivity
To change knock sensitivity, disarm the system and adjust the switch on the rear of the RPS. The larger
the circle, the more sensitive the knock sensor is.
Secure Valet Switch
The optional Secure Valet Switch prevents the alarm from being put into valet mode through cycling the
ignition on/off five times. The Secure Valet Switch is more secure than traditional toggle / valet switches
because it requires a two digit code. IMPORTANT: The first two digits of the RPS unlock/disarm pass
code will be the default pass code for the secure valet – you do not need to program them independen tly.
14
Page 15

If you are not using the RPS unlock, following the below procedures to program your secure valet pass
code;
STEP 1: Turn on Option 3-10-III. (Dealer programmed option)
STEP 2: Turn ignition key to the “on” position.
STEP 3: Hold down the valet switch for 1.5 seconds. The LED on the valet switch will begin to flash
rapidly with successful completion of this step.
STEP 4: Enter the first digit of the desired two digit pass code by depressing the switch the number of
times that coordinates with the desired first number. For example, to enter 3, depress the switch 3 times,
then wait.
STEP 5: The LED will confirm the first number by flashing BLUE slowly. Once the LED begins to flash
rapidly, enter your second number by repeating step 4.
STEP 6: Turn the ignition off - the Secure Valet Switch is now programmed. Follow steps 3 – 5 to enter
your Secure Valet code.
Timer Start Mode
Timer start mode is used to cool or warm the vehicle automatically without use of the key or
the remote. While engaged, timer start will activate even while the remote is out of range.
Tap the Function + Key/Start buttons <insert icons> for a half second to activate timer start mode. The
remote will beep once and LED flash once. Repeat the same step to turn off timer start mode. Timer start
mode will be cancelled any time the vehicle is started manually or remotely. To change from the default
setting to optional settings, see your place of purchase.
Cold/Hot Start Mode
Cold/hot start mode works in conjunction with timer start mode (see above) and the temperature sensor.
It allows you to configure your timer start feature to check the vehicle’s temperature prior to starting. All
of these options require programming from your local dealer.
Anti Jacking Mode
Your system has a mode that requires you to keep your remote separate from your key chain. This
feature also requires additional labor. Please consult your installer for more details. The Anti Jacking
mode allows you to safely disable your vehicle once a thief has driven off with your property. If you are
car jacked and still have your remote, you can panic the system by holding the Lock button <insert icon>
down for 4 seconds. The siren will sound for 30 seconds and the vehicle will shut down.
More Optional Sensors
If you purchased an Alarm or Alarm and Remote Start system you have the ability to add optional
sensors from Firstech. You have the ability to protect your investment by adding a battery back up
system to protect main power to your alarm or a tilt sensor to protect expensive rims and tires.
Remote Coding / Programming Routine
IMPORTANT: Every Firstech remote must be coded to the system prior to performing any operations. All
remotes must be coded at the same time.
Programming 2 Way 5 Button Remotes:
15
Page 16
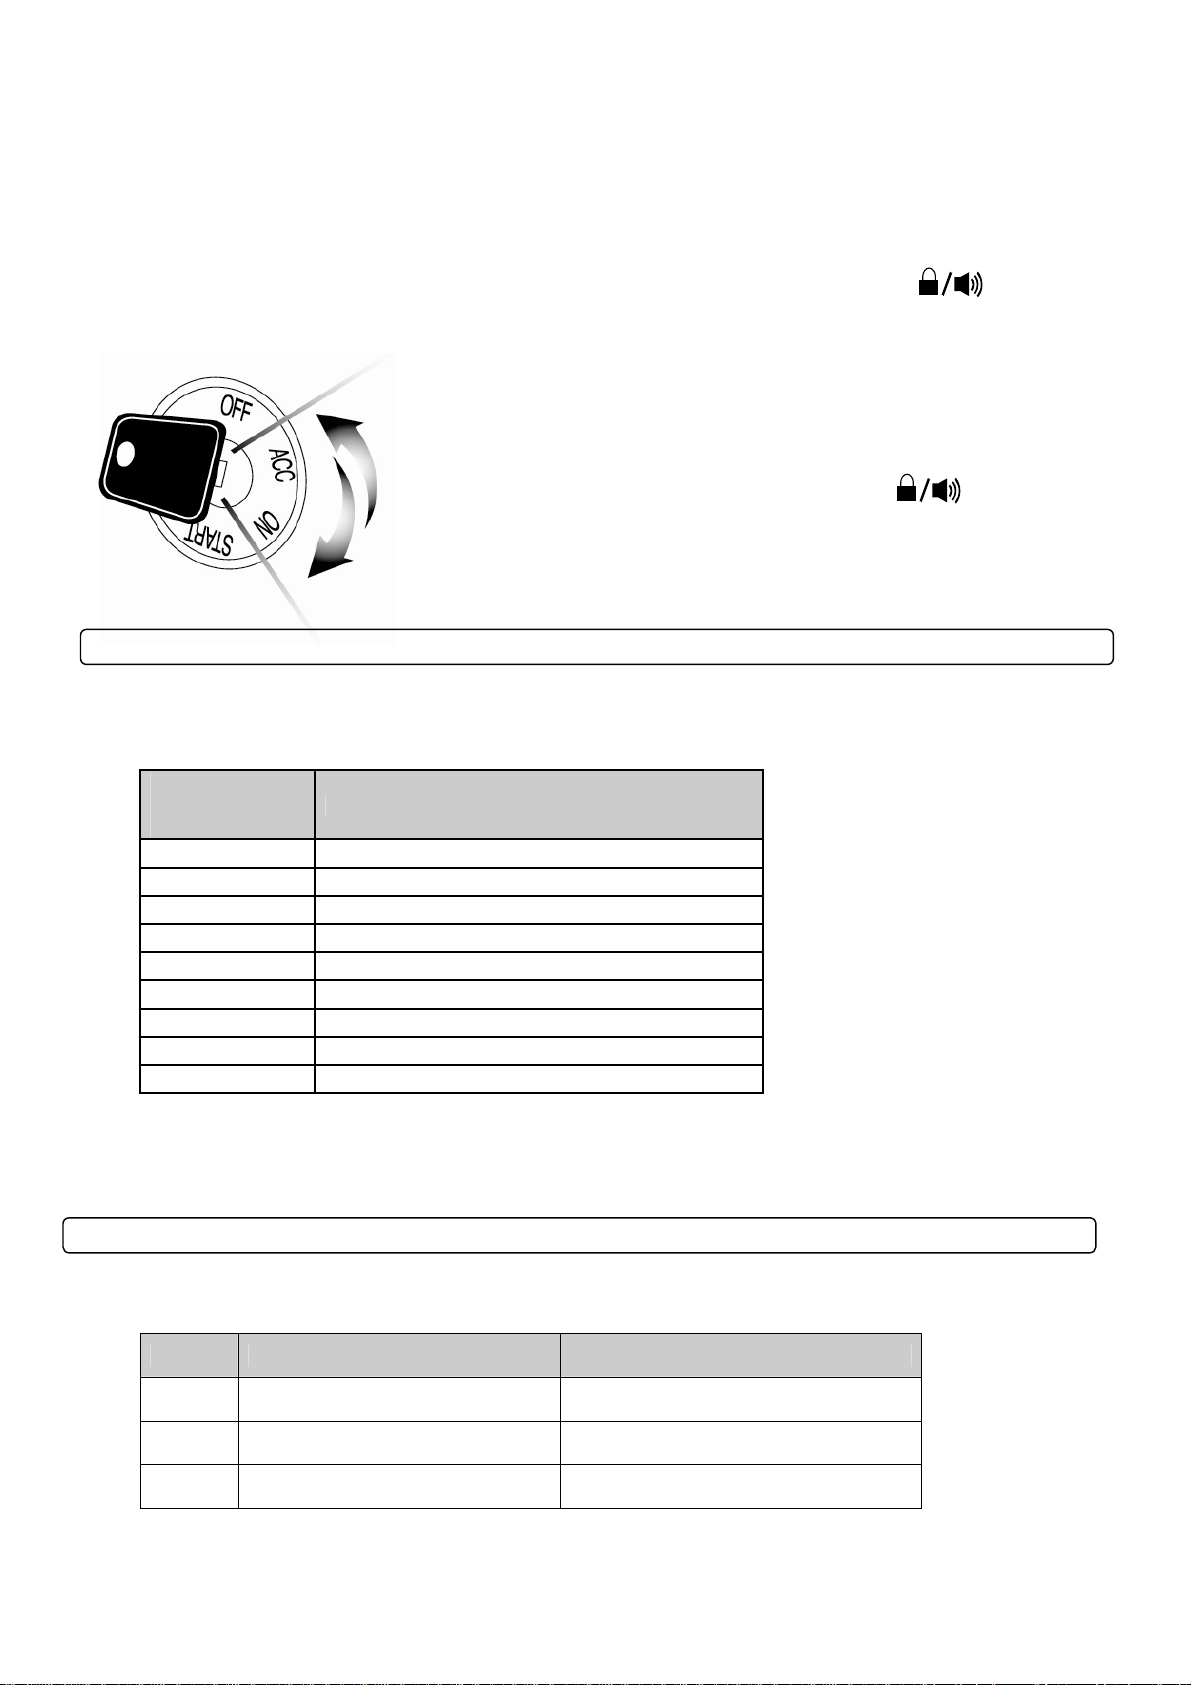
STEP 1: Activate Valet/Programming mode by manually turning the ignition key on and off (between the
Acc & On positions) five times within 7 seconds. The vehicle’s parking lights will flash once with the
successful completion of this step.
STEP 2: Within 2 seconds after cycling the ignition for the 5
th
time, tap the Lock button on 2 way
remotes or the (lock) button on 1 way remotes for a half second. The parking lights will flash once to
confirm the transmitter has been coded.
Exiting Progr amm ing: Programming is a timed sequence. The parking
lights will flash twice signaling the end of programming mode.
Programming Multiple Remotes: After the confirmation flash given in
step 2, code additional remotes by pressing button
on 2 way
remotes or the (lock) button on 1 way remotes. The parking lights will
flash once confirming each additional remote. All systems can
recognize up to three remotes.
Remote Start Error Diagnostic
If the remote start fails to start the vehicle , the p arking lights will flash three times immediately. F ollowing
those three flashes the parking lights will flash again corresponding to the error table.
Number of
Parking Light
Flashes
1 Motor running
2 Key in ignition on position
3 Door open (manual transmission only)
5 Foot brake on
6 Hood open
7 Reservation off (manual transmission only)
8 Tach or voltage sensing failure
9 DAS sensor movement
10 System is in Valet Mode
We recommend that you do not attempt any repairs on your remote starter. Contact your dealer or call us
directly.
Remote Start Error
Alarm Diagnostic
While the alarm is armed, the LED will blink slowly. While the siren is going off, the LED will indicate
which specific zone was triggered.
Priority Situation LED On Duty
1
2 2nd Shock Triggered 3 flash, rest, then repeat
3 Optional Sensor Triggered 4 flash, rest, then repeat
Door/Hood/Trunk/K ey Trigge red
2 flash, rest, then repeat
16
Page 17
4 PANIC 5 flash , rest, then repeat
Upon disarming the alarm after it has been triggered, the amount of siren chirps will indicate the specific
zone.
# of
Chirps
4
Situation
Optional Sensor Triggered
5 2nd Shock Triggered
6 Door/Hood/Trunk/Key Triggered
17
Page 18

Limited Lifetime Warranty
Firstech, LLC Warrants to the original purchaser that this product shall be free of defects in material and
workmanship under normal use and circumstances for the period of time that the original owner of this
product owns the vehicle in which it is installed; except that the remote controller unit for the period of
one year from the date of installation to the original owner of this product. When the original purchaser
returns the product to the retail store where it was purchased or prepaid postal to Firstech, LLC., 21903
68th Avenue South, Kent, WA 98032, USA within the warranty period, and if the product is defective,
Firstech, LLC, will at its option repair or replace such.
TO THE MAXIMUM EXTENT ALLOWED BY LAW, ANY AND ALL WARRANTIES ARE EXCLUDED BY
THE MANUFACTURER AND EACH ENTITY PARTICIPATING IN THE STREAM OF COMMERCE
THEREWITH. THIS EXCLUSION INCLUDES BUT IS NOT LIMITED TO, THE EXCLUSION OF ANY
AND ALL WARRANTY OF MERCHANTAPILITY AND/OR ANY AND ALL WARRANTY OF FITNESS
FOR A PARTICULAR PURPOSE AND/OR ANY AND ALL WARRANTY OF NON-INFRINGEMENT OR
PATENTS, IN THE UNITED STATES OF AMERICA AND/OR ABROAD. NEITHER THE
MANUFACTURER OF ANY ENTITIES CONNECTED THEREWITH SHALL BE RESPONSIBLE OR
LIABLE FOR ANY DAMAGES WHATSOEVER, INCLUDING BUT NOT LIMITED TO, ANY
CONSEQUENT IAL DAMAGES, INCIDENTAL DAMAGES, DAMAGES FOR LOSS OF TIME, LOSS OF
EARNINGS, COMMERCIAL LOSS, LOSS OF ECONOMIC OPPORTUNITY AND THE LIKE.
NOTWITHSTANDING THE ABOVE, MANUFACTURER DOES OFFER A LIMITED WARRANTY TO
REPLACE OR REPAIR THE CONTROL MODULE AS DESCRIBED ABOVE.
Some states do not allow limitations on how long an implied warranty will last or the exclusion or
limitation on how long an implied warranty will last or the exclusion or limitation of incidental or
consequential damages. This warranty gives you specific legal rights, and you may also have other rights,
which vary State to State.
Firstech, LLC. is not RESPONSIBLE OR LIABLE FOR ANY DAMAGES WHATSOEVER, INCLUDING
BUT NOT LIMITED TO, ANY CONSEQUENTIAL DAMAGES, INCIDENTAL DAMAGES, DAMAG ES
FOR LOSS OF TIME, LOSS OF EARNINGS, COMMERCIAL LOSS, LOSS OF ECONOMIC
OPPORTUNITY AND THE LIKE that may or may not resulted from the operation of Compustar,
Compustar Pro, Arctic Start, Vizion, or NuStart. NOT WITH STANDING THE ABOVE, MANUFACTURER
DOES OFFER A LIMITED WARRANTY TO REPLACE OR REPAIR THE CONTROL MODULE AS
DESCRIBED ABOVE.
Your Warranty
The product's warranty is automatically void if the date code or serial number is defaced, missing or
altered. This warranty will not be valid unless you have completed the registration card at
www.compustar.com within 10 days of purchase.
18
Page 19

GUIDE DE L’UTILISATEUR
Par Firstech LLC, Version: 1.0
Applicable aux télécommandes
suivantes
;
Télécommande bidirectionnelle à 5
boutons à DEL
2W902R-SP
Ce dispositif est conforme avec la section 15 des règlements FCC. L’opération est assujettie aux conditions
suivantes :
(1) Ce dispositif ne devrait pas causer des interférences nuisibles.
(2) Ce dispositif devrait accepter les interférences reçues incluant celles qui pourraient occasionner des
opérations indésirables.
Avertissement : Des changements ou modifications non-expressément approuvés par les parties responsables de
cette conformité peuvent annuler l’autorisation d’opérer ce dispositif.
WWW.COMPUSTAR.COM
Page 20

Introduction ................................... ........................... ............................. ........................... ............................3
Garantie ..................................................................................................................................................... ....3
Consultation rapide .............................. ................................ ............................. ................................ ..........4
Blocage des boutons .............................. .. ...... .. ...... .. ... ..... ... ... ..... ... ..... ... .. ...... .. ... ..... ... ..... ..........................4
Mode de téléavertissement complet ou partiel des signaux .....................................................................4
Mode Valet...................................... ................................ ................................ .......................... ..................4
Entretien de la télécommande – Remplacement de la batterie ............ ............................. .......................5
Fonctions des boutons de la télécommande bidirectionnelle ....................................................................5
Menu du bouton Fonction ........................................... ...............................................................................6
Tableau du menu d’options de la télécommande .......................................................... .......................... ..6
Fonctions et description du DEL de la télécommande ....................................... ....................................7
Notifications DEL de l’alarme .....................................................................................................................7
Fonctions des boutons de la télécommande unidirectionnelle ........................................... .......................7
Fonctions générales du système ...............................................................................................................9
Envoyer des commandes ......................................................... ...................................................... ............9
Recevoir des commandes .............................. .. ...... .. ... ..... ... ..... ... ... ..... ... .. ...... .. ...... .. ... ..... ... ... .. ... ...............9
Verrouillage/activation et déverrouillage/désactivation en mode actif ............... ................................ .......9
Verrouillage/activation en mode passif ............................ ..........................................................................9
Fonction de démarrage à distance pour transmission automatique ...................................................... 10
Fonction de démarrage à distance pour transmission manuel (Mode réservé)..................................... 10
Déclenchement du coffre ....... .. ...... .. ...... .. ... ..... ... ..... ... ..... ... ... ..... ... ..... ... .. ...... .. ...... .. ...... .. ... .................... 11
Sorties auxiliaires/Baisser les fenêtres/portières coulissantes ........................................ ........ ........ ....... 11
Activation/désactivation silencieuses .................................. ................................ ............................. ....... 12
Activation/désactivation silencieuses .................................. ................................ ............................. ....... 12
Activer et désactiver le détecteur d’impact ............ ..... ... .. ...... .. ... ..... ... ... ..... ... .. ...... .. ... ..... ... ... ..... .. . ........ . 12
Verrouillage automatique des boutons .................................................................. .......................... ....... 12
Fonctions avancées du système ............................. ........... ............. ........... ............. ........... ............. ....... 13
Verrouillage en conduite/verrouillage des portières contrôlées par l’allumage ...................................... 13
Mode Turbo minuté .......................................... ................................ ....................................................... 13
Mode 2e voiture (contrôle à multiples véhicules) ............... ..... ... ... ..... ... .. ...... .. ... ... ..... ... .. ...... .. ... ..... .. . .... 14
STD tactile et STD (détecteur de téléavertissement) ............................................. ... ..... ... ... ..... ... .. ..... .. 14
STD (Détecteur de téléavertissement) Déverrouillage/Désactivation ................................................... 15
Commutateur de Valet sécuritaire ................................. ............................. ............................................ 16
Mode de démarrage minuté ..................................................... ........................................................... .... 16
Mode de démarrage par temps froid ou chaud .................. ........................................................ ............ 16
Mode Anti-enlèvement ............................................................. ................................ ........................... .... 16
Programmation de la télécommande/Routine de programmation ..................................................... 17
Programmation des télécommandes bidirectionnelles à 5 boutons: ...................................................... 17
Diagnostic d’erreur du démarrage à distance ....................................................................................... 17
Diagnostic d’alarme .................................................................................................................................. 18
Garantie à vie limitée ................................................................................................................................ 19
2
Page 21

Introduction
Merci d’avoir acheté ce système Firstech pour votre véhicule. Pour pouvoir profiter pleinement des
avantages de ce système, nous vous recommandons de lire attentivement le manuel suivant. Veuillez
noter que ce manuel s’applique à la télécommande bidirectionnelle à 5 boutons à DEL (2W902R-SP)
sans tenir compte si vous avez acheté le système ALARM IT, START IT o MAX IT. Ce manuel
s’applique aussi au 1WG7R-SP qui est inclus dans votre nouvelle trousse RF. Veuillez noter qu’il peut y
avoir certaines fonctions qui ne sont pas disponibles pour votre système. Il peut y avoir aussi certaines
fonctions dans ce manuel qui nécessitent une installation ou une programmation supplémentaire avant
d’être actives. Si vous avez des questions ou des commentaires, veuillez contacter votre détaillant
d’origine. Pour plus d’informations, vous pouvez aussi contacter notre centre d’assistance à la clientèle
au 888-820-3690.
Garantie
Attention : La garantie du manufacturier sera annulée si ce produit est installé par quelqu’un qui n’est
pas un représentant autorisé de Firstech. Pour les détails complets sur la garantie, veuillez consulter
www.compustar.com ou la dernière page de ce manuel. Les télécommandes Firstech ont une garantie
d’un (1) an à partir de la date originale d’achat. Les télécommandes Compustar Pro ont une garantie de
deux (2) ans.
Vous pouvez enregistrer la garantie en ligne au www.compustar.com. Veuillez compléter le formulaire
pour vous enregistrer dans les 10 jours suivant la date de votre achat. Nous n’incluons pas une carte
d’enregistrement de la garantie avec chaque unité; l’enregistrement doit être fait en ligne. Pour vérifier
que l’installation a été faite par un représentant autorisé, nous vous recommandons fortement de garder
une copie de la preuve d’achat originale, comme par exemple la facture du vendeur, dans une place
sûre.
3
Page 22

Consultation rapide
Blocage des boutons
La 2W902R-SP est équipée avec la possibilité de bloquer des boutons. Ceci demande que vous
pressiez sur n’importe quel bouton de la télécommande pour la réactiver et ensuite que vous pressiez
sur le bouton de la fonction que vous voulez utiliser. Le blocage des boutons peut être annulé dans le
menu d’options de votre télécommande.
Mode de téléavertissement complet ou partiel des signaux
Le 2W902R-SP est livré en mode téléavertissement partiel des signaux. Ceci signifie que la
télécommande recevra seulement des confirmations DEL bidirectionnelles pour démarrage à distance et
verrouillage et déverrouillage. Elle ne recevra pas des confirmations DEL bidirectionnelles si l’alarme est
déclenchée. Pour activer cette fonction, maintenez pressés pendant 2,5 secondes les boutons
pour entrer dans le menu de programmation de la télécommande. Appuyez sur le
bouton verrouillage
télécommande émettra deux bips et le DEL clignotera en rouge. Vous êtes maintenant en Mode alarme
et démarreur complet.
Mode Valet
Quand vous faîtes l’entretien de votre véhicule ou quand vous le prêtez, vous devriez mettre le système
en mode Valet. Le mode Valet empêche le système de faire le démarrage à distance et désactive toutes
les fonctions de l’alarme.
Le système peut être mis en mode Valet de trois façons:
1. Tournezlacléduvéhiculeàlaposition“on”danslecontact,appuyezsurlesboutonsfonctionetcoffre<insert
function+trunkbuttonicons>enmêmetempspendantunedemiseconde.Lesfeuxdestationnement
clignoterontunefoiset/oulasirèneémettraunbippourconfirmer
procédépourquitterlemodevalet.Lesfeuxdestationnementclignoterontdeuxfoiset/oulasirèneémettraun
bippourconfirmerquevousn’êtesplusenmodevalet.Veuilleznoterquelesbipsdeconfirmationdela
télécommandebidirectionnelleserontmoinsbruyants
2. Si vous n’avez pas votre télécommande, vous pouvez activer le mode Valet en tournant la clé dans
le contact 5 fois entre les positions « ON » et « OFF » à l’intérieur de 7 secondes. Les feux de
stationnement clignoteront une fois pour confirmer que le système est en mode Valet. Peu après le
premier clignotement, les feux de stationnement clignoteront deux fois. Une télécommande est
nécessaire pour enlever le mode Valet.
3. Si votre système a été programmé pour l’option Valet sécuritaire (optionnel), vous ne pourrez pas
mettre le système en mode Valet jusqu’à ce que vous ayez entré le bon code à l’aide du commutateur du
valet sécuritaire. Le commutateur du valet sécuritaire est le petit bouton avec une brillante lumière bleue
LED sur le devant et si installée, est le seul moyen de neutraliser l’alarme et/ou le démarrage à distance.
Jusqu’à sa programmation, le code par défaut est (3, 3).
Sortir le système du mode valet:
Touchez les icônes <insert Function + Trunk button icons> pendant une demi-seconde pour sortir le
système du mode valet. Dans les systèmes de démarrage et de démarrage/alarme, vous pouvez faire
tourner la clé dans le contact à la position « ON » et presser la pédale du frein 10 fois. Ceci sortira votre
pour activer le mode de téléavertissement complet des signaux. La
quelesystèmeestenmodevalet.Répétezce
enmodevalet.
4
Page 23

système du mode valet. Si ceci ne fonctionnait pas, vous pouvez toujours reprogrammer votre (vos)
télécommande(s). Veuillez vous référer à la section Routine de codage/programmation de la
télécommande pour plus de détails.
Entretien de la télécommande – Remplacement de la batterie
Le seul entretien régulier demandé par ce système est le remplacement de la batterie de la
télécommande. Aucune programmation n’est requise au moment du remplacement de la
batterie.
2W902R-SP:
En premier, déclenchez le mécanisme du couvercle de la batterie situé sur l’arrière de la télécommande.
Une fois le mécanisme déclenché, glissez doucement le couvercle pour exposer une batterie AAA.
IMPORTANT: Assurez-vous de respecter la bonne polarité quand vous installez la batterie.
1WG7R-SP:
Utilisez une pièce de 25 sous ou un tournevis plat pour retirer la couverture arrière de la télécommande.
Vous pouvez insérer la pièce de monnaie ou le tournevis dans la petite rainure en bas de la
télécommande près de la boucle porte-clés. Soigneusement retirez la couverture arrière en prenant soin
de ne pas abîmer la carte de circuit. La taille de votre batterie devrait se trouver sur la batterie (Taille de
la batterie: (2) CR2016) Vous pouvez acheter les batteries de rechange chez votre détaillant local
Firstech ou dans un magasin d’électronique.
Fonctions des boutons de la télécommande bidirectionnelle
Bouton
<Insert
Lock
Icon>
<Insert
Unlock
Icon>
<Insert
Trunk
Icon>
<Insert
Key
Icon>
<Insert
Function
Icon>
Durée
demiseconde
4
secondes
demiseconde
2.5
secondes
2.5
secondes
demiseconde
2.5 s
secondes
Ce bouton active et désactive plusieurs fonctions. Référez-vous au tableau du menu du
bouton Fonction ci-dessous pour des détails plus complets.
Fonction / Description
Verrouille les portières et si équipé, active l’alarme
Panique/localisateur de véhicule (fait clignoter les feux de stationnement et sonner
la sirène et le klaxon).
Déverrouille les portières et si équipé, désactive l’alarme.
Extension du temps de marche. Réinitialise le temps de marche pour la minuterie
turbo ou pour le démarrage à distance.
Déverrouillage du coffre. Déclenche la sortie d’ouverture du coffre et ouvre le
coffre du véhicule.
Contrôle de l’auto/Auxiliaire sécurita ir e.
Si vous pressez ce bouton, votre véhicule démarrera. Répétez et le moteur
s’arrêtera.
<Insert
Lock +
demiseconde
Active et désactive les bips de la sirène. (Note: avec les bips de la sirène désactivés, celle-ci
sonnera quand même si l'alarme est déclenchée).
5
Page 24

Unlock
Icon>
<Insert
Function
and
Trunk
Icon>
2.5
secondes
demiseconde
2.5
secondes
Active et désactive le détecteur d’impact. (seulement dans les systèmes ALARM IT
ou MAX IT)
Mode Valet (référez-vous à la section Mode Valet pour plus de détails.
Menu 1 de programmation des options. Pour usage pendant l’installation
<Insert
Function
and Key
Icon>
<Insert
Trunk
and Key
Icon>
demiseconde
2.5
secondes
demiseconde
2.5
secondes
Active le mode de démarrage minuté. Le mode de démarrage minuté a plusieurs réglages
programmables: durée, température et auto démarrage.
Menu 1 de programmation des options. Pour usage pendant l’installation
Met en marche l'activation passive (le véhicule s'activera/se verrouillera 30 secondes après
sa désactivation)
Donne accès au menu d’options de la télécommande. Référez-vous au tableau
Menu d’option de la télécommande pour plus de détails.
Menu du bouton Fonction
Bouton Duration
<Insert
Function
Icon>
une pression
<Insert Lock
Icon>
Verrouillage en
conduite
activé/désactivé
<Insert Unlock Icon>
Minuterie turbo
activée/désactivée
<Insert
Trunk
Icon>
Auxiliaire 1 Auxiliaire
Tableau du menu d’options de la télécommande
Fonction
Entrée et sortie
du menu de la
télécommande
Affichage des
messages
bidireccionnels
Silencieux
Mode 2e auto
Verrouillage
automatique des
boutons
Active et
désactive la
fonction
<insert Trunk
+ Key button
icon>
<insert Lock
icon>
<insert Unlock
icon>
<insert Trunk
icon>
<insert
Key/Start
icon>
Durée
2,5
secondes
demi-
seconde
demi-
seconde
demi-
seconde
demi-
seconde
Bip(s) de la
télécommande
Trois “On” |
Trois “Off”
Un, HALF|
Deux, FULL
Un” On” |
Deux “Off”
Un” On” |
Deux “Off”
Un” On” |
Deux “Off”
Entre et sort du menu des options de la télécommande
Détermine si votre télécommande est utilisée pour un
système d’alar me ou de démarrage seulement. Mettez-la
sur FULL pour les fonctions ALARM IT et MAX IT.
Mettez- la sur HALF pour les systèmes START IT ONLY
Si activé, le DEL clignotera en bleu. Quand désactivé, le DEL
clignotera deux fois en rouge. Important: Le 2W902R-SP est,
par défaut, en PARTIEL pour les systèmes START IT. Il doit
être changé à COMPLET pour les systèmes d’alarme.
Active et désactive le mode silencieux si activé
DEL clignotera en bleu. Quand désactivé, le DEL clignotera deux
fois en rouge.
Place votre télécommande en mode 2e auto. Vous pouvez
contrôler un autre véhicule avec la même télécommande
s’il a le même RF Kit installé
bleu. Quand désactivé, le DEL clignotera deux fois en rouge.
Verrouille tous les boutons sur la télécommande
automatiquement après une minute. Pressez n’importe
quel bouton ou boutons que vous voulez utiliser pour
envoyer une commande de la télécommande à votre
véhicule
le DEL clignotera deux fois en rouge.
. Si activé, le DEL clignotera en bleu. Quand désactivé,
<Insert
Key/Start
Icon>
2
Fonction/Description
. Le
DEL clignotera en pourpre.
.
. Si activé, le
. Si activé, le DEL clignotera en
6
Page 25

Fonctions et description du DEL de la télécommande
Votre télécommande communiquera de votre véhicule et avec votre véhicule pendant qu'elle est à
portée d'émission. Le DEL changera de couleur pour indiquer qu’il y a transmission, confirmation, durée
d’exécution du démarrage à distance et confirmations d’erreur.
Événement DEL Durée du DEL Bip(s)
Roulement restant:
100 Percent
Roulement restant:
66 Percent
Roulement restant:
33 Percent
Confirmation de
toutes les
commandes
Confirmation des
tous les erreurs
Bleu Une fois aux 5 secondes Six fois
Pourpre Une fois aux 5 secondes N/A
Rouge Une fois aux 5 secondes N/A
Bleu Une fois ou deux dépendant de la fonction
Rouge Trois clignotements du DEL Trois bips
Une fois ou deux
dépendant de la
fonction
Notifications DEL de l’alarme
Dans l’éventualité que votre alarme soit déclenchée, votre telecommande recevra des notifications
basées sur la zone qui a été transgressée. Veuillez consulter le tableau suivant pour plus de détails et
une courte description de chaque notification.
.
Zone LED Color Chirp(s) Description
Door Trigger(s)
Trunk Trigger
Hood Trigger
Ignition On Trigger
DAS Tilt Trigger
Prewarn Shock Sensor
Full Shock Sensor
`
Pourpre et rouge
Pourpre et rouge
Pourpre et rouge
Pourpre et rouge
Pourpre et rouge
Bleu et rouge
Pourpre et rouge
Émet des bips pendant 30
secondes ou jusqu’à ce que le
bouton sur la télécommande
soit pressé.
Émet des bips pendant 30
secondes ou jusqu’à ce que le
bouton sur la télécommande
soit pressé.
Émet des bips pendant 30
secondes ou jusqu’à ce que le
bouton sur la télécommande
soit pressé.
Émet des bips pendant 30
secondes ou jusqu’à ce que le
bouton sur la télécommande
soit pressé.
Émet des bips pendant 30
secondes ou jusqu’à ce que le
bouton sur la télécommande
soit pressé.
8 Chirps
Émet des bips pendant 30
secondes ou jusqu’à ce que le
bouton sur la télécommande
soit pressé.
Une ou plusieurs des zones de
déclenchement des portières
ont été transgressées
La zone de votre déclencheur
de votre coffre a été
transgressée
La zone de votre déclencheur
du capot a été transgressée
Votre alarme est déclenchée
quand votre véhicule est
démarré
Votre alarme est déclenchée
quand votre DAS détecte le
mouvement d’i nclinaison.
Votre zone du déclencheur du
détecteur préventif d’impact a
été transgressée
Votre zone du déclencheur
d’impact a été transgressée
Fonctions des boutons de la télécommande unidirectionnelle
7
Page 26

<please use 1WG7R-SP icons below>
Programmatio
Bouton Durée
supplémentair
e requise
n
Fonction / Description
demi-
seconde
3,5
secondes
demi-
seconde
demi-
seconde
2,5
secondes
demi-
seconde
2,5
secondes
demi-
seconde
non Verrouille les portières et /ou active l’alarme.
non
non Déverrouille les portières et/ou désactive l’ alarme.
non
non
non
non Active le démarrage à distance. Répétez et le moteur s’arrêtera.
non
Panique/localisateur du véhicule (fait clignoter les feux de stationnement du véhicule et
fait sonner l’alarme et le klaxon)
Aux. 1. Déclenche la sortie auxiliaire 1 (plus couramment utilisée pour le dégivreur
arrière ou pour baisser les fenêtres.
Déverrouillage du coffre. Déclenche la sortie de déverrouillage du coffre et ouvre le
coffre
Aux. 2. Déclenche la sortie auxiliaire 2 (plus couramment utilisée pour le dégivreur
arrière ou pour baisser les fenêtres.
Active et désactive les bips de la sirène (Note : Avec les bips de la sirène éteints, elle
sonnera quand-même si l’alarme est déclenchée)
2,5
secondes
demi-
seconde
2,5
secondes
demi-
seconde
2,5
secondes
demi-
seconde
demi-
seconde
non Menu 1 d’options de programmation – Installateurs seulement.
non Mode Valet (Référez-vous à la section mode Valet pour plus de détails)
non
oui Verrouillage en conduite. Active les verrous des portières contrôlés par l’allumage.
non Menu 2 d’options de programmation – Installateurs seulement.
non
oui
Active et désactive le détecteur d’impact. (Seulement pour systèmes d’alarme ou
alarme/démarreur)
Active l’activation passive (le véhicule activera/verrouillera 30 secondes après avoir été
désactivé)
8
Page 27

Active la fonction intégrée de la minuterie Turbo. Une installation supplémentaire est
nécessaire quand vous utilisez cette fonction dans un véhicule à transmission
automatique.
demi-
seconde
2,5
secondes
oui
non Contrôle de l’auto/Auxiliaire sécuritaire.
Si vous voulez avoir de l’information supplémentaire à propos de votre télécommande unidirectionnelle,
veuillez visiter la page de soutien www.compustar.com pour télécharger le manuel de l’utilisateur au
complet.
Fonctions générales du système
Les fonctions du transmetteur de la télécommande son prédéterminées et programmées en usine. La
configuration à cinq boutons permet d’utiliser plusieurs fonctions en pressant une série de boutons et/ou
en les tenant pressés.
Envoyer des commandes
Quand vous êtes dans le rayon et une commande a été envoyée, le rétroéclairage du téléavertisseur
s’allumera, la télécommande émettra des bips et l’icône approprié apparaîtra. Par exemple, pour
envoyer une commande de démarrage à distance à partir du téléavertisseur, tenez pressé le bouton
pendant 2,5 secondes. La télécommande émettra un bip pour confirmer que la commande a été
envoyée et que la télécommande est dans le rayon. Une fois que le véhicule a démarré à distance avec
succès, la télécommande recevra une commande en indiquant que le moteur roule.
Recevoir des commandes
Le téléavertisseur recevra des commandes en indiquant le statut du véhicule, la confirmation de l’envoi
des commandes et les notifications d’alarme Par exemple, après avoir envoyé l’ordre de verrouillage, le
téléavertisseur recevra des signaux DEL et des bips pour confirmer que le véhicule a été bien
verrouillé/activé. Pour voir si votre téléavertisseur est en zone de portée, appuyez sur le bouton
pendant une demi-seconde – si la télécommande reçoit une confirmations sonore et DEL, elle est en
zone de portée.
Verrouillage/activation et déverrouillage/désactivation en mode actif
Pressez le bouton pendants demi-second pour verrouiller/activer et pour
déverrouiller/désactiver. Si votre véhicule est verrouillé, pressez le bouton pour déverrouiller.
Si votre véhicule est déverrouillé, pressez le bouton pour verrouiller.
IMPORTANT: Si l’alarme a été déclenchée (la sirène sonne), vous devez attendre au moins 5 secondes
avant de désactiver l’alarme - la première pression sur le fermera l’alarme et la seconde
déverrouillera/désactivera le système.
Verrouillage/activation en mode passif
Le système peut être configuré pour verrouiller et activer passivement le véhicule. Mettez le
système en mode passif en pressant simultanément les boutons
pendant
demi-seconde. La télécommande émettra un bip et DEL s’allumera pour indiquer que le système est en
mode verrouillage passif et activé.
9
Page 28

En mode passif, le système verrouillera et activera l’alarme 30 secondes après que la dernière portière
soit fermée. Pour indiquer que le véhicule se verrouillera et s’activera passivement, la télécommande et
la sirène émettront un bip et les feux de stationnement clignoteront une fois aux 10 secondes et au 20
secondes avant de procéder. Si vous voulez que le système s’active passivement mais qu’il ne verrouille
pas passivement, demandez à votre représentant de mettre l’Option1-8 au réglage II.
Fonction de démarrage à distance pour transmission automatique
Pressez le bouton pendant 2,5 secondes pour démarrer à distance un véhicule à transmission
automatique. Si vous êtes dans le rayon et si le véhicule est prêt à démarrer à distance, les feux de
stationnement clignoteront une fois et/ou la sirène émettra un bip pour indiquer que la commande de
démarrage à distance a été envoyée avec succès.
Si vous êtes dans le rayon et la télécommande émet trois bips, alors il a une erreur du démarrage à
distance. Veuillez vous référer aux diagnostics de démarrage de la télécommande dans la dernière page
du manuel pour avoir des détails.
Après avoir confirmé que votre véhicule est en marche, la DEL fera clignoter l’icône gaz
d’échappement et l’icône de l’horloge commencera à montrer le temps qui reste. Le temps de
roulement du démarrage à distance peut être programmé pour 3, 15, 25 ou 45 minutes demandez à votre représentant local pour ajuster l’option 2-7 si vous préférez un temps
de roulement autre que 15 minutes (par défaut).
IMPORTANT: La clé de votre véhicule doit être insérée dans le contact et dans la position < on > avant
de conduire le véhicule. Si la pédale de frein est pressée avant l’opération ci-décrite, le véhicule
s’arrêtera.
Fonction de démarrage à distance pour transmission manuel (Mode réservé)
Pour démarrer à distance un véhicule manuel, le système doit être en premier en mode RÉSERVÉ. Le
mode réservé doit être sélectionné chaque et toutes les fois que vous voulez démarrer à distance un
véhicule manuel. L’objectif de ce mode est de laisser la transmission au neutre avant de quitter le
véhicule.
IMPORTANT:
La transmission doit être laissée à la position neutre;
Les fenêtres doivent être fermées;
Les déclencheurs des portières doivent fonctionner correctement;
N’installez pas cet appareil dans un véhicule manuel à toit ouvrant ou convertible;
Ne sélectionnez pas le mode manuel ni démarrez pas à distance avec des personnes ou
animaux à l’intérieur du véhicule.
Activation du mode réservé
Étape 1: Pendant que le moteur roule, placez la transmission au neutre, actionnez le frein à main et
relâchez la pédale de frein.
Étape 2: Enlevez la clé du contact. Le moteur devra continuer de rouler malgré que vous ayez enlevé la
clé du contact. Si ce n’est pas le cas, consultez votre représentant autorisé pour service.
Étape 3: Sortez du véhicule et fermez la portière. Le moteur du véhicule devrait s’arrêter à l’intérieur de
10 secondes après avoir fermé la dernière portière. S’il ne s’arrêtait pas, il est probable que le
déclencheur de portières ne fonctionne pas correctement. Dans ce cas, n’utilisez pas le démarrage à
distance et amener votre véhicule pour service chez le représentant autorisé.
10
Page 29

Une fois que le moteur du véhicule est fermé, le système restera en mode réservé et le véhicule sera
prêt pour être démarré à distance en toute sécurité.
IMPORTANT : Par défaut, le système laissera le véhicule verrouillé/activé quand vous le mettez en
mode réservé. Faites attention de ne pas laisser les clés à l’intérieur de la voiture.
Annulation le mode réservé
Le mode réservé sera annulé pour les raisons suivantes:
Vous n’avez pas mis le frein à main avant d’arrêter le contact;
Vous avez pressé la pédale de frein avant que la clé soit retirée du contact;
Vous avez enlevé le frein à main après que la clé ait été enlevée du contact;
Vous êtes entré en mode Valet, ouvert les portières, le capot, le coffre ou vous avez activé
l’alarme.
Options du mode réservé
Les options du mode réservé peuvent être programmées avec les options 1-6. Il est recommandé que
les options de ce mode soient programmées par votre représentant autorisé.
Défaut 1: Verrouille les portières lorsque le mode réservé est sélectionné
Option 2 : Ne verrouille pas les portières quand le mode réservé est sélectionné
Option 3 : Le mode réservé est sélectionné 10 secondes après que la dernière portière soit fermée au
lieu de le faire immédiatement. Cette option vous laissera accéder aux portières arrière du véhicule, au
coffre ou au hayon avant que le système instaure le mode réservé et le verrouillage/activation passif.
Option 4: Ferme le moteur avant de verrouiller les portières.
Déclenchement du coffre
Enfoncez le bouton pendant 2,5 secondes pour déclencher l’ouverture du coffre ou le
haillon. Si vous êtes dans le rayon, la télécommande émettra un bip et l’icône du coffre
s’allumera indiquant que la commande pour ouvrir le coffre a été transmise avec succès. IMPORTANT:
l’ouverture à distance du coffre est en option et peut demander des composantes et du travail
additionnels.
Sorties auxiliaires/Baisser les fenêtres/portières coulissantes
Y Votre système est équipé avec deux sorties additionnelles qui peuvent être configurées
pour contrôler les fenêtres, ouvrir des portières coulissantes à commande électrique, ouvrir un
toit ouvrant à commande électrique ou encore allumer un dégivreur arrière. Ces sorties peuvent être
configurées pour des réglages à impulsion, minutés ou à enclenchement. Votre détaillant autorisé
Firstech peut régler ces sorties en conséquence. L’utilisation des sorties auxiliaires pour contrôler des
fonctions additionnelles du véhicules peut nécessiter des pièces supplémentaires et ceci peut être très
laborieux.
Pressez pendant une demi-seconde le bouton Fonction (insert F pic) suivi du bouton Coffre
déclencher la sortie auxiliaire 1. Pressez pendant une demi-seconde le bouton Fonction (insert F pic)
suivi du bouton Clé/démarrage pour déclencher la sortie auxiliaire 2. La télécommande émettra 1 bip,
les feux de stationnement clignoteront et « AUX TRIGGER 1 or 2 » défilera sur l’écran pour indiquer que
la ou les sortie(s) auxiliaire(s) à/ont été(s) déclenchée(s).
pour
Par défaut, le système est en mode auxiliaire sécuritaire, qui exige que vous pressiez pendant une
demi-seconde le bouton Clé/démarrage
le mode auxiliaire sécuritaire, demandez à votre détaillant autorisé Firstech d’activer l’Option 4-5
au réglage II.
avant de déclencher auxiliaire 1 ou 2. Pour annuler
11
Page 30

Activation/désactivation silencieuses
Au moment de verrouiller/activer et déverrouiller/désactiver, vous pouvez éliminer la
confirmation sonore du véhicule en mettant la sirène en mode silencieux. Normalement, la
sirène émettra un bip pour indiquer que le système est verrouillé/activé est deux bips pour
indiquer que le système est déverrouillé/désactivé. Pour assourdir la sirène, pressez
simultanément pendant demi-seconde les boutons
IMPORTANT : Même si la sirène est mise en mode silencieux, elle sonnera si éventuellement l’alarme
est déclenchée.
.
Activation/désactivation silencieuses
Pour mettre en mode silencieux la télécommande vous devez mettre la fonction muet à « on »
(activée);
Étape 1: Entrez le mode programmation de la télécommande en tenant pressés simultanément
les boutons coffre et clé/démarrage
3 bips et le DEL clignotera en pourpre pour indiquer que vous êtes bien entré en mode programmation.
Étape 2 : Pressez le bouton déverrouillage
silencieux est activé. Pressez le bouton déverrouillage une autre fois pour désactiver le mode silencieux.
Deux bips et des clignotements en rouge du DEL indiqueront que la fonction muet de la télécommande
est désactivée.
Étape 3: Sortez de la programmation de la télécommande en tenant pressés simultanément les boutons
coffre et clé/démarrage
que vous êtes bien sorti de la programmation. Le DEL de votre télécommande s’allumera.
. Le DEL clignotera en bleu pour indiquer que le mode
pendant 2,5 secondes. La télécommande bipera pour indiquer
pendant 2,5 secondes. La télécommande émettra
Activer et désactiver le détecteur d’impact
Tenez pressés les boutons verrouillage et déverrouillage > simultanément
pendant 2,5 secondes pour activer ou désactiver ce détecteur. La télécommande émettra deuz
bips et le DEL clignotera deux fois pour confirmer que le détecteur d’impact est désactivé. La
télécommande émettra un bip et le DEL clignotera une fois pour confirmer que le détecteur d’impact est
activé. IMPORANT: Désactiver ce senseur désactive aussi le détecteur optionnel.
Ajuster la sensibilité du détecteur d’impact est fait à même le détecteur, lequel est généralement installé
quelque part sous le tableau de bord du véhicule. Plus grand est le chiffre figurant dans le cadran, plus
élevée sera la sensibilité à l’impact. La sélection recommandée dans la plupart des véhicules est entre 2
et 4. Si vous êtes en train de tester votre détecteur, veuillez noter que le détecteur d’impacts ne
reconnaît pas d’impact dans les 30 premières secondes après avoir activé le système.
Verrouillage automatique des boutons
Votre télécommande a une fonction de verrouillage automatique des boutons. Cette fonction verrouille
automatiquement tous les quatre boutons sur votre télécommande après une minute. Pour déverrouiller,
simplement pressez sur n’importe quel bouton et ensuite pressez ou soutenez le(s) bouton(s) pour la
commande que vous voulez envoyer. Cette fonction doit être activée dans le menu d’options de la
télécommande.
Étape 1: Entrez le mode programmation de la télécommande en tenant pressés simultanément les
boutons coffre et clé/démarrage
pendant 2,5 secondes. La télécommande émettra 3
12
Page 31

bips et le DEL clignotera en pourpre sur votre télécommande pour indiquer que vous êtes bien entré en
mode programmation.
Étape 2 : Pressez le bouton démarrage
que le verrouillage automatique des boutons est activé. Pressez encore une fois le bouton démarrage
pour désactiver le verrouillage automatique des boutons.
Étape 3: Sortez du mode programmation en soutenant simultanément les boutons déverrouillage et
coffre
pendant 2,5 secondes. La télécommande émettra des bips pour indiquer que
vous êtes sorti correctement du mode programmation.
. Un bip et le clignotement du DEL démarrage indiqueront
Fonctions avancées du système
La section suivante passe en revue les fonctions avancées. Plusieurs d’entre elles demandent des
étapes ou de la programmation additionnelle par votre représentant autorisé Firstech pour être activés
Verrouillage en conduite/verrouillage des portières contrôlées par l’allumage
Tap the Function button <insert icon> once followed by the Lock button to turn the
Drive Lock on and off. (also known as ignition controlled door locks) La télécommande
émettra un bip et le DEL clignotera une fois pour confirmer que le mode verrouillage en conduite est
activé. La télécommande émettra deux bips et le DEL clignotera deux fois pour confirmer que le mode
verrouillage en conduite est désactivé.
IMPORTANT: Le verrouillage en conduite demande que le représentant active l’option 1-9. Le
verrouillage en conduite a deux possibles sélections :
Défaut 1: Off (désactivé)
Option 2 : Verrouille les portières quand le moteur est en marche et après avoir opprimé la pédale de
frein.
Option 3 : Verrouille les portières lorsque le RPM a atteint deux fois la vitesse de rotation au ralenti
(cette sélection exige qu’un fil tachymètre soit connecté)
Dans les deux options, les portières seront déverrouillées quand le contact est éteint. Si vous utilisez
cette fonction dans une voiture à transmission manuelle, les portières seront déverrouillées quand vous
mettez le frein à main.
Mode Turbo minuté
La minuterie du turbo intégré maintient le moteur en roulement pendant 1, 2 ou 4 minutes
(programmable par le représentant avec l’option 2-2) après que la clé ait été retirée du
contact. Cette option maintiendra l’huile en train d’alimenter le turbo pour permettre un temps
de refroidissement.
La télécommande émettra un bip et le DEL clignotera une fois pour confirmer que le mode turbo est
activé. Répétez pour désactiver la minuterie turbo. La télécommande émettra deux bips et le DEL
clignotera deux fois pour confirmer que le mode turbo est désactivé.
IMPORTANT: Pour utiliser cette fonction, le fil du frein d’urgence/stationnement devra être connecté au
système Firstech. Consultez votre détaillant local autorisé pour l’installation.
13
Page 32

Mode 2e voiture (contrôle à multiples véhicules)
Cette télécommande peut opérer un 2
êtes en mode 2
ème
véhicule, le DEL clignotera en bleu quand vous pressez les boutons.
ème
véhicule avec le même système. Note: Quand vous
Maintenez pressés les boutons
d’options de la télécommande. Pressez le bouton coffre
télécommande émettra un bip pour indiquer qu’il est activé et deux pour désactivé. Le DEL de la
télécommande s’allumera en bleu pour confirmer que le mode 2
restera en mode 2
ème
véhicule jusqu’à ce que vous mainteniez pressés les boutons
pendant 2,5 secondes pour entrer le menu
pour activer le mode 2
ème
auto est activé. La télécommande
ème
auto. Votre
pendant 2,5 secondes, entrez le menu d’options de la télécommande et pressez le bouton coffre
La télécommande émettra deux bips et vous devez tenir pressés les boutons coffre et clé/démarrage
pour sauvegarder les changements dans le menu d’options de la télécommande.
Important : le mode deuxième véhicule requiert que la télécommande soit programmée pour un 2
ème
véhicule qui sera équipé avec le même système.
STD tactile et STD (détecteur de téléavertissement)
Le STD est une fonction optionnelle. La fonction appel de l’auto /STD utilise un petit
détecteur monté à l’intérieur de votre pare-brise.
STD TACTILE (DÉTECTEUR DE TÉLÉAVERTISSEMENT)
Le nouveau STD tactile a plusieurs fonctions incluant : appel à distance, un NIP à 4 chiffres pour
déverrouiller/désactiver et pour activer/verrouiller. Toutes les fonctions sont opérées par le simple
toucher du détecteur.
Veuillez demander à votre installateur de programmer l’option 3-16 au réglage 2.
Le STD tactile et les fonctions d’appel de l’auto ne nécessitent pas de programmation additionnelle
cependant, afin de déverrouiller/désactiver votre véhicule, vous devez programmer un mot de passe à
quatre chiffres en utilisant les instructions ci-dessous :
Étape 1 : Choisissez votre code de quatre chiffres STD tactile; 0 n’est pas disponible
Étape 2 : Mettez le contact à la position ON et laissez la portière du conducteur ouverte
Étape 3 : Pressez votre doigt sur l’icône « Red Circle » (cercle rouge) pour 2,5 secondes.
Étape 4 : Quand la sirène sonne et le DEL clignote d’une forme circulaire, veuillez entrer le premier
numéro (tenez-le pressionné pendant 2,5 secondes pour choisir de 6 jusqu’à 10). Après avoir choisi
votre premier numéro, la sirène sonnera une fois et le DEL clignotera de forme circulaire.
Étape 5
une fois et les feux de stationnement clignoteront une fois. Répétez les étapes 2 à 5 si vous obtenez 3
bips de sirène et les feux de stationnement clignotent. Votre STD est maintenant programmé.
Réactivation de l’alarme et verrouillage
Pour réactiver appuyez votre doigt sur « Red Circle » pour 2,5 secondes.
Désactivation de l’alarme et déverrouillage
: Répétez l’étape 4 jusqu’à ce que les quatre chiffres aient été sélectionnés. la sirène sonnera
.
14
Page 33

Pour désactiver appuyez votre doigt sur le « Red Circle » pour 2,5 secondes. Une fois que le DEL
commencera son mouvement circulaire, entrez votre code à 4 chiffres (référez-vous à l’étape 4 cidessus). Deux secondes après avoir entré le 4
ème
chiffre le système devra se désarmer.
Appel à une télécommande bidirectionnelle à ACL.
Pour appeler un ACL bidirectionnelle, pressez sur le « Red Circle » deux fois.
Sensibilité de l’écran tactile
Pour changer la sensibilité, ouvrez la portière du conducteur, tenez pressé le bouton à l’arrière du STD
tactile jusqu’à ce que le LED s’éteigne. Relâchez le bouton et pressez-le encore une fois. Le nombre
de DEL fixes indiquera la sensibilité tactile, 1 signifie la moindre et 5 la plus élevé.
STD (Détecteur de téléavertissement) Déverrouillage/Désactivation
Le STD et les fonctions d’appel de l’auto ne nécessitent pas de programmation cependant, afin de
déverrouiller/désactiver votre véhicule, vous devez programmer un mot de passe à quatre chiffres en
utilisant les instructions ci-dessous :
Étape 1 : Désactivez/Déverrouillez l’alarme (la télécommande doit être programmée d’abord) et
choisissez votre code de quatre chiffres; 0 n’est pas disponible
Étape 2 : Mettez le contact à la position ON et laissez la portière du conducteur ouverte
Étape 3 : Cognez sur le pare-brise devant le STD un total de 5 fois (chaque fois que vous cognez, le
LED sur le STD clignotera en ROUGE). Le STD commencera à clignoter rapidement en BLEU lorsque
cette étape sera complétée avec succès.
Étape 4 : Entrez le premier chiffre du mot de passe désiré en cognant sur le pare-brise devant le STD le
nombre de fois correspondant. Par exemple, pour entrer un 3, cognez le détecteur 3 fois (à chaque fois
que vous cognez, le DEL clignotera ROUGE), alors attendez.
Étape 5 : Le DEL sur le STD confirmera votre premier chiffre en clignotant en BLEU lentement. Une fois
que le DEL commence à clignoter rapidement en BLEU, entrez votre deuxième chiffre de la même
façon, c’est-à-dire, en répétant l’étape 4.
Étape 6 : Veuillez répéter les étapes 4 et 5 pour tous les chiffres.
Étape 7 : Mettez le contact du moteur à OFF – Le code du STD pour la désactivation/déverrouillage est
maintenant programmé. Veuillez suivre les étapes 3 à 5 pour entrer votre code de
désactivation/déverrouillage.
Verrouillage et réactivation de l’alarme.
Pour réactiver, veuillez cogner 5 fois sur le détecteur.
Désactivation et déverrouillage de l’alarme
Pour désactiver, veuillez cogner 5 fois sur le détecteur. Attendez à ce que le DEL bleu clignote
rapidement. Suivez les étapes 4 et 5 ci-dessus pour entrer votre code à 4 chiffres.
Appel à une télécommande bidirectionnelle à ACL
Pour appeler une télécommande bidirectionnelle à ACL, veuillez cogner sur le STD deux fois.
Sensibilité de l’écran tactile
15
Page 34

Pour changer la sensibilité du coup, désactivez le système et ajuster le commutateur à l’arrière du STD.
Plus grand est le cercle, plus sensible sera le détecteur aux coups.
Commutateur de Valet sécuritaire
Le commutateur optionnel de Valet sécuritaire empêche que l’alarme soit mise en mode Valet quand
vous tournez la clé dans le contact 5 fois entre les positions ON et OFF.
Le commutateur optionnel de Valet est plus sûr que le commutateur de Valet traditionnel parce qu’il
demande un code de deux chiffres.
IMPORTANT : Les deux premiers chiffres du code de déverrouillage/désactivation du STD seront le
code par défaut du valet sécuritaire – vous n’avez donc pas à les programmer séparément. Si vous
n’utilisez pas le déverrouillage STD, suivez les directives ci-dessous pour programmer le code de votre
Valet sécuritaire :
Étape 1 : Activez l’option 3-10-III (option programmée par le détaillant)
Étape 2 : Mettez la clé de contact à la position On.
Étape 3 : Maintenez pressé le commutateur pendant 1,5 secondes. Le DEL sur le commutateur du
Valet commencera à clignoter rapidement quand l’étape aura été complétée avec succès.
Étape 4 : Entrez le premier chiffre du code à deux chiffres désiré en pressant le commutateur le nombre
de fois selon le chiffre choisi. Par exemple, pour entrer le numéro 3, pressez trois fois sur le
commutateur et attendez.
Étape 5 : Le DEL confirmera le premier chiffre en clignotant en BLEU lentement. Lorsque le
clignotement du LED se fait plus rapide, entrez votre deuxième chiffre en répétant l’étape 4.
Étape 6 : Mettez le contact à Off – Le Valet sécuritaire est maintenant programmé. Suivez les étapes 3
à 5 pour entrer votre code du Valet sécuritaire.
Mode de démarrage minuté
Le mode de démarrage minuté est utilisé pour refroidir ou réchauffer le véhicule
automatiquement sans utiliser la clé ni la télécommande. Quand ce mode est activé, il
s’allumera même si la télécommande est hors de la zone de portée. Pressez les boutons fonction +
clé/démarrage <insert icons> pendant une demi-seconde pour activer le mode de démarrage minuté. La
télécommande émettra un bip et le DEL clignotera une fois. Répétez la même opération afin de le
désactiver. Le mode de démarrage minuté sera annulé à chaque fois que le véhicule est démarré
manuellement ou à distance. Pour changer la programmation par défaut à une programmation
optionnelle contacter votre détaillant.
Mode de démarrage par temps froid ou chaud
Le mode de démarrage par temps froid ou chaud fonctionne conjointement avec le mode de démarrage
minuté (voir ci-dessus) et le détecteur de température. Cela vous permettra de configurer votre fonction
de démarreur minuté pour vérifier la température du véhicule avant de commencer. Toutes ces options
nécessitent une programmation par votre détaillant local.
Mode Anti-enlèvement
Votre système a un mode qui demande que votre porte-clés et votre télécommandé soient à des
endroits séparés. Cette fonction requiert aussi un travail additionnel, veuillez consulter votre installateur
pour plus de détails. Le mode Anti-enlèvement vous permet de mettre hors service votre véhicule quand
16
Page 35

il a été volé. Si vous êtes enlevé-e avec l’auto et que vous avez encore votre télécommande, vous
pouvez actionnez la Panique en pressant sur le bouton Verrouillage (Lock button picture) pendant 4
secondes. La sirène sonnera pendant 30 secondes et le véhicule s’arrêtera.
AUTRES DÉTECTEURS OPTIONNELS
Si vous avez acheté un système d’alarme ou d’alarme et démarreur à distance, vous allez pouvoir
rajouter des détecteurs optionnels fournis par Firstech. Protégez votre investissement en faisant l’ajout
d’une batterie de secours pour protéger l’alimentation principale vers l’alarme et le capteur d’inclinaison
pour préserver les coûteux pneus ou jantes.
Programmation de la télécommande/Routine de programmation
IMPORTANT : Toutes les télécommandes de Firstech doivent être programmées avant de faire
n’importe quelle opération. Toutes les télécommandes devraient être programmées en même temps
Programmation des télécommandes bidirectionnelles à 5 boutons:
Étape 1: Activez le mode Valet/programmation en tournant manuellement la clé sur le contact, entre les
positions Acc et On, cinq fois à l’intérieur de 7 secondes. Les lumières de stationnement clignoteront une
fois quand l’opération sera réussie.
Étape 2: à l’intérieur de deux secondes après avoir tourné la clé (on/off) pour la 5e fois, pressez le
bouton
télécommandes unidirectionnelles, dans les deux cas pendant 0,5 seconde. Les feux de stationnement
clignoteront une fois, indiquant que l’opération a été complétée avec succès.
trois télécommandes.
sur les télécommandes bidirectionnelles ou le bouton de verrouillage sur les
Fin de la programmation: la programmation est une opération
minutée. Les feux de stationnement clignoteront deux fois pour
indiquer la fin du processus de programmation.
Programmation de multiples télécommandes : Après la confirmation
lumineuse obtenue à l’étape 2, vous pouvez programmer d’autres
télécommandes en pressant sur le bouton (I) ou
télécommandes bidirectionnelles OU le bouton de verrouillage sur
les télécommandes unidirectionnelles. Les feux de stationnement
clignoteront une fois, confirmant ainsi chaque télécommande
additionnelle. Tous les systèmes peuvent reconnaître un maximum de
sur les
Diagnostic d’erreur du démarrage à distance
Si la télécommande ne réussit pas à démarrer le véhicule, les lumières de stationnement clignoteront 3
fois immédiatement. Suite à cela, les mêmes lumières clignoteront cette fois vous permettant
d’interpréter l’erreur selon le tableau ci-dessous.
No. de
clignotements
de feux de
stationnement
1 Le moteur tourne
Erreur de démarrage à distance
17
Page 36

2 La clé est en position de contact
Portière ouverte (transmission manuelle
3
seulement)
5 Pédale de frein actionnée
6 Capot ouvert
Mode réservé désactivé (transmission
7
manuelle uniquement)
Détection de Tachymètre ou voltage
8
défectueuse
9 Détection de DAS
10
Le système est en mode valet
Nous recommandons que vous n’essayiez pas de réparer votre appareil. Veuillez contacter votre
représentant ou appelez-nous directement.
Diagnostic d’alarme
Quand l’alarme est activée le DEL clignotera lentement. Quand la sirène est déclenchée, le DEL
indiquera la zone qui a été déclenchée.
Priorité Situation DEL en service
1
2
3
4
Déclenchement de
portière/capot/coffre/clé
Déclenchement de 2
ème
Impact 3 clignotement, repos, répétez
Déclenchement de détecteur
optionnel
PANIQUE 5 clignotement, repos, répétez
2 clignotement, repos, répétez
4 clignotement, repos, répétez
Dès de la désactivation de l’alarme après son déclenchement, le nombre de bips de la sirène vous
indiquera la zone spécifique.
Nombe
de bips
4
5
Situation
Déclenchement de détecteur
de l’option
Déclenchement de 2
ème
impact
6
Déclenchement de
portière/capot/coffre/clé
18
Page 37

Garantie à vie limitée
Firstech, LLC garantit à vie à l’acheteur original que le produit sera libre de tout défaut de fabrication et
main d’œuvre dans des circonstances d’utilisation normale, c’est-à-dire, pendant toute la période où ce
même propriétaire conserve le véhicule dans lequel le système a été installé, à l’exception de la
télécommande, elle-même, qui est garantie au propriétaire original de l’auto pour une période d’un an à
partir de l’installation. Si l’acheteur original retourne le produit au magasin où il a été acheté ou le poste
prépayé à
produit s’avère défectueux, Firstech LCC aura l’option de le réparer ou de le remplacer.
DANS LA MESURE PERMISE PAR LA LOI, TOUTES AUTRES GARANTIES SONT EXCLUES PAR LE
FABRICANT ET EN OUTRE, CHACUN DES PARTICIPANTS CONCERNÉS DANS LE COMMERCE
DE CE PRODUIT. CETTE EXCLUSION INCLUT, MAIS N’EST PAS LIMITÉE PAR TOUTES
GARANTIES DE COMMERCE NI AUCUNE AUTRE GARANTIE D’ADÉQUATION POUR UN OBJECTIF
EN PARTICULIER NI TOUTE AUTRE GARANTIE DE NON-TRANSGRESSION OU BREVET DANS
LES ÉTATS UNIS D’AMÉRIQUE NI À L’EXTÉRIEUR DE CE PAYS. NI LE FABRI CANT NI AUCUNE
DES ENTITÉS RELIÉES AU PRODUIT SERA TENUE RESPONSABLE OU ÊTRE PASSIBLE DE
POURSUITE POUR TOUT DOMMAGE INCLUS MAIS NON LIMITÉ, DES DOMMAGES INDIRECTS,
DES DOMMAGES ACCESSOIRES, DES DOMMAGES CAUSANT DES ARRÊTS DE TRAVAIL,
PERTES DE PROFITS, PERTES COMMERCIALES, OPPORTUNITÉS COMMERCIALES ET
SEMBLABLES. MALGRÉ CE QUI EST MENTIONNÉ CI-DESSUS, LE FABRICANT OFFRE UNE
GARANTIE LIMITÉE POUR REMPLACER OU RÉPARER LE MODULE DE CONTRÔLE COMME
DÉCRIT PRÉCÉDEMMENT.
Quelques états ou provinces ne permettront pas de limitations dans la durée de la garantie implicite ou
l’exclusion ou la limitation de la durée d’une garantie implicite ou la limitation ou l’exclusion en ce qui a
trait aux dommages accessoires ou indirects. Cette garantie vous confère des droits légaux spécifiques
et vous pouvez avoir aussi d’autres droits qui varient d’état en état.
Firstech LCC n’est pas RESPONSABLE NI NE POURRA ÊTRE PASSIBLE DE POURSUITE POUR
TOUT DOMMAGE INCLUS, MAIS NON LIMITÉ DE DOMMAGES INDIRECTS, DES DOMMAGES
ACCESSOIRES, DES DOMMAGES POUR ARRÊT DE TRAVAIL, PERTES DE PROFITS, PERTES
COMMERCIALES ET SEMBLABLES qui pourraient en résulter de l’opération de Compustar, Compustar
Pro, Arctic Start, Vizion, or NuStart. MALGRÉ CE QUI EST MENTIONNÉ ICI, LE FABRICANT OFFRE
UNE GARANTIE POUR REMPLACER OU RÉPARER LE MODULE DE CONTRÔLE COMME DÉCRIT
PRÉCÉDEMMENT.
La validité de votre garantie
La garantie du produit sera automatiquement invalide si le code de la date ou le numéro de série ont été
barbouillés, manquants ou altérés. De plus, cette garantie ne sera pas valide si vous ne complétez pas
la carte d’enregistrement au www.compustar.com dans les 10 jours après l’achat.
Firstech, LLC., 21903 68th Avenue South – Kent, WA 98032, USA pendant la période de garantie et si le
19
Page 38

Manual de Usuario
Por Firstech LLC, Version: 1.0
Aplicable a los remoto(s siguientes);
2W902R-SP 2 Vías, Remotos de 5 Botones
LED
Este dispositivo está sujeto a la sección 15 de las reglas de FCC. El funcionamiento está sujeto a las
condiciones siguientes;
(1) este dispositivo no puede causar interferencia dañosa.
(2) este dispositivo puede aceptar cualquier interferencia recibida, incluso interferencia que pueda causar mal
funcionamiento en el equipo.
CAUTELA: Cambios o modificaciones no expresamente aprobados por la parte responsable del cumplimiento de la
norma, pueden anular la autorización del usuario para operar este dispositivo.
WWW.COMPUSTAR.COM
Page 39

Introduction ................................... ........................... ............................. ........................... ............................3
Garantía ..................................................................................................................................................... ....3
Consulta rápida .............................................................................................................................. ..............4
Bloqueo de los botones ............................................ ..................................................................................4
Button Lock ............................. ................................ ..................... 오류! 책갈피가 정의되어 있지 않습니다.
Modo de aviso a distancia completo o parcial
..........................................................................................4
Modo Valet...................................... ................................ ................................ .......................... ..................4
Mantenimiento a Remoto - Reemplazo de la Batería .................................. .. ... ..... ... ... ..... ... .. ...... .. ... ..... . .5
Menú del botón Función ......................................................................... ....................................................6
Cuadro del menú de opciones del control remoto .............................................. ....................................6
Descripción y funciones del LED del control remoto ........................................... ........ ...... ........ ..... .......6
Alarm LED Notifications ..............................................................................................................................7
Funciones de Botones del Control Remoto 1 Via ............................................... .......................................7
Funciones Generales del Sistema ................. ........................................ ..................................... ...............8
Cerrar/Armar Activo y Abrir/De sarmar .......................................................................................................9
El sistema puede configurarse para cerrar con llave pasivamente y armar el vehículo. .........................9
Destrabado del maletero .................................................................................................................. ....... 11
Salidas auxiliares/Bajar los cristales/Puertas corredizas ...................................... ............................... .. 11
Opción 4-5 en la selección II. ............................. ................................ .................................................... 11
Armado/Desarmado Silencioso........................................................ ... ..... ... ..... ... ... ..... ... .. ...... .. .... .. ........ . 11
Modo silencioso del control remoto .................................... ... ..... ... ..... ... .. ...... .. ...... .. ... ..... ... ..... ............... 12
Sensor de Golpes Encender/Apagar ...................................................................................................... 12
Trabado automático de los botones ............................ ........... ........ .......... ........ ........... ........ ........... ........ . 12
Funciones avanzadas del sistema .......................................................................................................... 13
Cierre automático/seguros de las puertas controlados por el encendido .......................................... .... 13
Modo temporizador turbo ....................................................................................... .......................... ....... 13
Modo 2
o
vehículo (control de varios vehículos .................................................... ............................. .... 14
RPS táctil y RPS (sensor de aviso a distancia) ............................................................... ....................... 14
RPS (Sensor de Paginación Remoto) Abrir/Desarmar ......................... ............................. .................... 15
Conmutador de Valet seguro ................................................... ................................ ........................... .... 16
Arranque Temporizado ........................................... ........ .......... ........ ........... ........ ........... ........ .......... ....... 16
Codificando Control Remoto / Rutina de Programación ......................................... ................... ......... 17
Programando Remoto de 2 Vías con 5 Botones: ....................................... ............................................ 17
Diagnostico de Errores, Arranque Motor Remoto ......................... ................................................ ....... 17
Alarm Diagnostic .............................................................................................. ......................................... 18
Garantía de por Vida Limitada ................................................................................................................. 19
2
Page 40

Introduction
Le agradecemos por haber comprado un sistema Firstech para su vehículo. Para disfrutar
completamente de todos los beneficios de su sistema le recomendamos que lea cuidadosamente el
siguiente manual. Por favor, note que este manual se aplica al control remoto bidireccional a LED a 5
botones (2W902R-SP) sin considerar si Ud. compró el sistema ALARM IT, START IT o MAX IT. Este
manual también se aplica al 1WG7R-SP que viene incluido en su nuevo kit RF. Note que puede haber
algunas funciones que no estén disponibles para su sistema. Puede haber también otras funciones en
este manual que necesiten una instalación o programación adicional antes de ser activadas. Si Ud.
tuviera preguntas o comentarios, contacte a su vendedor.
Para más información puede también contactarnos directamente a nuestro centro de servicio a la
clientela al 888-820-3690.
Garantía
Advertencia: La garantía del fabricante será anulada si este producto es instalado por alguien que no
sea un representante autorizado de Firstech. Para obtener detalles completos sobre la garantía,
consulte www.compustar.com o la última página de este manual. Los controles remotos de Firstech
tienen una garantía de un (1) año a partir de la fecha original de compra. Los controles remotos
compustar Pro tienen una garantía de dos (2) años.
Ud. puede registrar la garantía en línea en www.compustar.com. Por favor complete el formulario para
registrarse dentro de los 10 días que siguen a su compra. No incluimos una tarjeta de registro para la
garantía con cada unidad ya que debe registrarse en línea. Para verificar que la instalación ha sido
hecha por un representante autorizado, le recomendamos que guarde una copia de una prueba de la
compra, como por ejemplo la factura del vendedor en un lugar seguro.
3
Page 41

Consulta rápida
Bloqueo de los botones
El 2W902R-SP permite bloquear los botones. Esto exige que Ud. apriete cualquier botón del control
remoto para reactivarlo y después debe apretar el botón de la función que Ud. desea utilizar. El bloqueo
de los botones puede ser anulado en el menú de opciones de su control remoto..
Modo de aviso a distancia completo o parcial
El 2W902R-SP se entrega en modo de aviso a distancia parcial. Esto quiere decir que el control remoto
sólo recibirá confirmaciones LED bidireccionales para el arranque a distancia y el cierre y apertura. No
recibirá confirmaciones LED bidireccionales si la alarma se dispara. Para activar esta función mantenga
presionados los botones
control remoto. Presione el botón de cierre
emitirá dos pitidos y el LED parpadeará en rojo. Ud. estará entonces en modo completo de alarma y arrancador.
durante 2,5 segundos para entrar en el menú de programación del
para activar el aviso a distancia completo. El control remoto
Modo Valet
Al llevar su auto al taller o prestar su vehículo a otros, usted debe poner el sistema e n Modo Valet. El
Modo Valet previene el sistema del arranque remoto y desactiva todas las funciones de la alarma.
IMPORTANTE: Mientras en Modo Valet, el remoto todavía controlará seguros eléctricos abrir/cerrar. Las
luces de aparcamiento (cuartos) no encenderán.
El sistema puede ponerse en Modo Valet en una de tres maneras:
1. Gire la llave del vehículo a la posición “on” en el contacto, presione los botones función y
maletero <insert function + trunk button icons> simultáneamente durante medio segundo. Las
luces de posición parpadearán una vez y/o la sirena emitirá un pitido para confirmar que el sistema está
en modo valet. Repita el proceso para sacar el sistema del modo valet. Las luces de posición
parpadearán dos veces y/o la sirena emitirá un pitido para confirmar que el sistema ha salido del modo
valet. Tenga en cuenta que los pitidos de confirmación del control remoto bidireccional sonarán a más
bajo volumen en modo valet.
Si usted no tiene su control remoto, usted puede poner el sistema en valet, girando la llave de ignición a
la posición "ON" y después "OFF", cinco veces dentro de 7 segundos. Las luces de aparcamiento
(cuartos) encenderán una vez para confirmar que está en modo valet. Brevemente, después del primer
destello, las luces del aparcamiento (cuartos) encenderán dos veces. Un control remoto se necesita
para sacar el sistema de modo valet. IMPORTANTE: Si su sistema está programado para una opción de
valet seguro, usted no podrá poner el sistema en valet hasta que el código apropiado sea ingresado al
interruptor del valet seguro.
3. Si su sistema está programado para la opción de modo valet seguro (opcional), usted no podrá poner
el sistema en modo valet, hasta que el código apropiado se ha ingresado al interruptor del modo valet
seguro. El interruptor de modo valet seguro, es el botón pequeño con LED luminoso azul en el frente y si
es instalado, es la única manera de anular la alarma y/o la salida de arranque remota. Hasta ser
programado, el código predefinido es (3, 3).
Sacar el sistema del modo valet:
Toque el ícono <insert Lock + Trunk icons> durante medio segundo para sacar el sistema del modo
valet. En los sistemas de arranque y de alarma/arranque Ud. puede hacer girar la llave a la posición
“On” y apretar el pedal de freno 10 veces. Esto sacará el sistema del modo valet. Si esto no funcionara,
4
Page 42

Ud. puede también reprogramar su(s) control(es) remoto(s). Refiérase a la sección rutina de
codificación/programación para obtener más detalles.
Mantenimiento a Remoto - Reemplazo de la Batería
Cuando la batería de su control remoto bidireccional esté descargada, Ud. no recibirá más
confirmaciones bidireccionales en las áreas donde normalmente son recibidas. Su control
remoto sólo enviará órdenes a su vehículo.
2W902R-SP:
Primero, abra la cerradura de la tapa de la batería localizada en la parte trasera del remoto. Una vez
abierta, suavemente deslice la tapa de la batería para exponer la batería. todos los remotos de 2 vías
Firstech, requieren de una bat erí a AAA . IMPORTANTE: Esté seguro observar la polaridad correcta al
instalar la batería.
1WG7R-SP:
Primero, quite el pequeño tornillo tipo Phillips localizado en la parte trasera del remoto. Una vez retirado
el tornillo, suavemente separe las tapas del remoto, cuidando no tocar el circuito impreso. Las baterías
del remoto de 1 vía, difieren entre otros modelos. El tamaño de su batería debe estar impreso sobre la
batería. Reemplazos pueden ser adquiridos a su distribuidor de Firstech o a una tienda de electrónica.
Funciones de Botones del Control Remoto 2 Vías
Boton Duración Función
<Insert
Lock
Icon>
<Insert
Unlock
Icon>
<Insert
Trunk
Icon>
<Insert
Key
Icon>
<Insert
Function
Icon>
<Insert
Lock +
Unlock
Icon>
<Insert
Function
medio
segundo
4
segundos
medio
segundo
2.5
segundos
2.5
segundos
medio
segundo
2.5
segundos
Este botón activa y desactiva varias funciones. Vea el cuadro más abajo del menú del botón
Función para tener más detalles.
medio
segundo
2.5
segundos
medio
segundo
Traba las puertas y/o activa la alarma.
Pánico/localizador de vehículo (hace titilar las luces de estacionamiento del vehículo y sonar
la sirena y la bocina).
Destraba las puertas y/o desactiva la alarma).
Extensión del tiempo de encendido del motor. Reinicia el tiempo de encendido
para el temporizador turbo o para el arranque a distancia.
Destrabado del maletero. Activa la salida de apertura del maletero del vehículo y
lo abre.
Control del auto (actualiza el estatus del vehículo en el control remoto)/Auxiliar
seguro
Si Ud. presiona este botón su vehículo arrancará. Repita y el motor se parará.
Activa y desactiva los pitidos de la sirena. (Nota: si los pitidos de la sirena están
desactivados la sirena sonará en el caso en que la alarma sea disparada)
Activa y desactiva el sensor de impactos (únicamente en los sistemas ALARM IT
o MAX IT)
Modo Valet (vea la sección Modo Valet para obtener más detalles).
5
Page 43

and
Trunk
Icon>
<Insert
Function
and Key
Icon>
<Insert
Trunk
and Key
Icon>
2.5
segundos
medio
segundo
2.5
segundos
medio
segundo
2.5
segundos
Menú 1 de programación de las opciones. Para ser utilizado durante la
instalación.
Activates timer start mode. Timer start mode has multiple programmable settings: duration
settings, temperature settings and self start settings.
Menú 2 de programación de las opciones. Para ser utilizado durante la
instalación.
Activa la activación pasiva (el vehículo se activará/trabará 30 segundos después de ser
desactivado)
Da acceso al menú de opciones del control remoto (reloj, arranque programado
reservado, modo vibración, STD activo/desactivo, etc.) Vea el cuadro Menú de
opciones del control remoto para obtener más detalles.
Menú del botón Función
Botón Duración
<Insert
Function
Icon>
Apretar una
vez
<Insert Lock
Icon>
Activa y
desactiva el
cierre
automático de
las puertas
<Insert Unlock Icon>
Activa y desactiva el
temporizador turbo
<Insert
Trunk
Icon>
Auxiliar 1 Auxiliar 2
<Insert
Key/Start
Icon>
Cuadro del menú de opciones del control remoto
Función
Entrada y salida
del menú del
control remoto
Lectura de
mensajes
bidireccionales
Silencioso
Modo 2o auto
Trabado
automático de
los botones
Activa y
desactiva la
función
<insert Trunk
+ Key button
icon>
<insert Lock
icon>
<insert Unlock
icon>
<insert Trunk
icon>
<insert
Key/Start
icon>
Duración
2.5
segundos
medio
segundo
medio
segundo
medio
segundo
medio
segundo
Pitidos del
control remoto
Tres “On” |
Tres “Off”
Uno, HALF|
Dos, FULL
Uno” On” |
Dos “Off”
Uno” On” |
Dos “Off”
Uno” On” |
Dos “Off”
Función/Descripción
Entra y sale del menú de opciones del control remoto.
LED parpadeará en color púrpura.
Determina si su control remoto se utiliza para un sistema
de alarma o de arranque solamente. Póngalo en FULL
para las funciones ALARM IT y MAX IT. Póngalo en
HALF para los sistemas START IT ONLY.
LED parpadeará en color azul. Cuando se desactiva, el LED
parpadeará dos veces en color rojo.
Importante: El 2W902R-SP está, de forma predeterminada, en
PARCIAL para los sistemas START IT. Debe cambiarse a
COMPLETO para los sistemas de alarma.
Activa y desactiva el modo silencioso.
parpadeará en color azul. Cuando se desactiva, el LED
parpadeará dos veces en color rojo.
Pone su control remoto en modo 2
controlar otro vehículo con el mismo control remoto si éste
tiene el mismo RF Kit instalado.
parpadeará en color azul. Cuando se desactiva, el LED
parpadeará dos veces en color rojo.
Traba todos los botones del control remoto
automáticamente después de un minuto. Presione
cualquier botón y enseguida el botón o los botones que
quiera utilizar para enviar una orden del control remoto a
su vehículo.
Cuando se desactiva, el LED parpadeará dos veces en color rojo.
Si activado, el DEL parpadeará en color azul.
Si activado, el
Si activado, el DEL
o
auto. Ud. puede
Si activado, el DEL
El
Descripción y funciones del LED del control remoto
6
Page 44

Su control remoto se comunicará a partir del vehículo y con el vehículo mientras esté en la zona de
alcance. El LED cambiará de color para indicar transmisión, confirmación, tiempo de encendido del
arranque a distancia y confirmaciones de error.
Evento LED Duración del LED Bip(s)
Encendido restante:
100 %
Encendido restante:
66 %
Encendido restante:
33 %
Confirmación de
todas lar órdenes
Confirmación de
todos los errores
Azul Una vez cada 5 segundos Seis veces
Púrpura
Rojo Una vez cada 5 segundos N/A
Azul Una vez o dos dependiendo de la función
Rojo Tres parpadeos del LED Tres bips
Una vez cada 5 segundos N/A
Una vez o dos
dependiendo de
la función
Alarm LED Notifications
En el caso en que su alarma se dispare, su remoto recibirá notificaciones basadas en la zona
transgredida. Consulte el cuadro siguiente para más detalles y una corta descripción de cada
notificación. Note que estas notificaciones están disponibles solamente con los sistemas MAX IT y
ALARM IT.
Zona
Door Trigger(s)
Trunk Trigger
Hood Trigger
Ignition On Trigger
DAS Tilt Trigger
Prewarn Shock Sensor Az u l y rojo 8 Bips
Full Shock Sensor
Color de la LED
púrpura y rojo
púrpura y rojo
púrpura y rojo
púrpura y rojo
púrpura y rojo
púrpura y rojo
Pita y vibra durante 30
segundos o hasta que el botón
del control remoto sea
Pita y vibra durante 30
segundos o hasta que el botón
del control remoto sea
Pita y vibra durante 30
segundos o hasta que el botón
del control remoto sea
Pita y vibra durante 30
segundos o hasta que el botón
del control remoto sea
Pita y vibra durante 30
segundos o hasta que el botón
del control remoto sea
Pita y vibra durante 30
segundos o hasta que el botón
del control remoto sea
Bip(s)
apretado.
apretado
apretado
apretado
apretado
apretado
Descripción
Una o más zonas de su
activador de puertas han sido
maletero ha sido interrumpida.
Su zona del activador del capó
Su alarma se dispara cuando
se enciende el contacto de su
Su alarma se disparará
cuando su DAS detecte un
movimiento de inclinación.
La zona de preaviso de su sensor
activador del sensor de impacto ha
interrupidas.
Su zona del activador del
ha sido interrumpida.
vehículo.
de impacto ha sido invadida.
La zona de protección del
sido invadida.
Funciones de Botones del Control Remoto 1 Via
<please use 1WG7R-SP icons below>
7
Page 45

Boton Duración
Programación
Adicional
Función / Descripción
medio
segundo
3.5
Segundos
medio
segundo
medio
segundo
2.5
Segundos
medio
segundo
2.5
Segundos
medio
segundo
2.5
Segundos
medio
segundo
2.5
Segundos
no Cierra puertas y/o arma alarma.
no
no Abre puertas y/o desarma alarma.
no
no Abrir cajuela. Acciona la salida liberadora de cajuela y abre la cajuela del vehículo.
no
no Activa la salida arranque remoto. Repita y la salida arranque remoto cesará.
no
no Opciones programables menú 1 – Sólo instaladores.
no Modo valet (vea Sección del Modo Valet para detalles)
no
Pánico/localizador de vehiculo (destella las luces de aparcamiento (cuartos) activa
sirena y claxon).
Aux. 1. Acciona la salida auxiliar 1 (comúnmente utilizada para defroster
(desempañante) o bajar ventana eléctrica.
Aux. 2. Acciona la salida auxiliar 2 (comúnmente utilizada para defroster trasero
(desempañante) o bajar ventana eléctrica.
Activa/Desactiva chirrido sirena (Nota: Con los chirridos desactivados, de todos modos
sonará la alarma al activarse algún sensor).
Activa/Desactiva sensor de golpes. (Sistemas de Alarma ó sistemas de
Alarma/Arrancador solamente)
medio
segundo
2.5
Segundos
medio
segundo
medio
segundo
medio
segundo
2.5
Segundos
Si Conducir cerrar. Activación de controlador de seguros eléctricos con ignición.
no Opciones programables menú 2 – Solo Instaladores.
no
Si
Si
no Revisión de Automóvil / Auxiliar Seguro
Activa armado pasivo (vehículo arma/cierra 30 seg. después de que el vehículo sea
desarmado)
Activa modo temporizador de la salida de arranque remoto. El modo temporizado de
arranque tiene opciones programables: duración, temperatura y arranque automático.
Activa el Temporizador Turbo integrado. Instalación adicional se requiere al utilizar este
rasgo en vehículos de la transmisión automático.
Si desea obtener más información sobre su control remoto unidireccional, visite la página de asistencia
www.compustar.com para bajar el manual del usuario completo.
Funciones Generales del Sistema
Las funciones del transmisor fueron predeterminadas y se han programado en la fábrica. La
configuración de 4 botones permite la realización de varias funciones a ser realizadas a través de una
serie de toques, presiones y/o múltiples presiones en los botones.
Enviando Comandos
8
Page 46

Cuando en rango, y una orden sea enviada, la pantalla del remoto iluminará, el remoto emitirá una señal
sonora y el icono apropiado se desplegará. Por ejemplo, para enviar un orden de arranque remoto del
control remoto, sujete botón
una señal sonora para confirmar que la orden fue enviada y que el remoto está en rango.
Recibiendo Comandos
El remoto recibirá órdenes que indican el estado del vehículo, confirmación de envío de órdenes y
notificaciones de alarma. Por ejemplo, después de enviar la orden de cierre, el control remoto recibirá
señales LED y pitidos para confirmar que el vehículo se cerró y se activó correctamente. Para saber si
su control remoto está en la zona de alcance, presione el botón
remoto recibe una confirmación sonora y del LED quiere decir que está en la zona de alcance.
durante 2.5 segundos. LED del remoto iluminará y el remoto emitirá
durante medio segundo – si el control
Cerrar/Armar Activo y Abrir/Desarmar
Presione el botón durante medio segundo para cerrar/armar y abrir/desarmar. Si su
vehículo está cerrado con llave, presione el botón
presione el botón
y la función anti-desgarre de engranaje. Usted no podrá encender su vehículo con la llave hasta
abrir/desarmar.
IMPORTANTE: Si la alarma se ha activado (la sirena sonando), usted debe esperar hasta que el remoto
de pantalla sea compaginado antes de desarmar la alarma - la primera palmadita al botón silenciará la
alarma y el segundo abrir/desarmar el sistema.
para cerrar con llave. Si está equipado, esto también activará su corta-marcha
para abrir; si su vehículo está abierto,
Cerrar/Armar Pasivo
El sistema puede configurarse para cerrar con llave pasivamente y armar el vehículo.
Ponga el sistema en pasivo presionando botones simultáneamente
durante medio segundo. El remoto emitirá una señal sonora una vez y el LED iluminará para indicar que
el sistema está en cierre pasivo y modo armado.
Mientras en modo pasivo, el sistema cerrará con llave y armará la alarma 30 segundos después del
cierre de la última puerta. Como un indicador que el vehículo va cerrar con llave pasivamente y armar,
el remoto y la sirena chirriará una vez y las luces de aparcamiento (cuartos) encenderán una vez a los
10 y 20 segundos, antes de cerrar con llave pasivamente y armar. Si usted quiere que el sistema arme
pasivamente y no cierre pasivamente, pida a su distribuidor de Firstech que modifique Opción 1-8, a
posición II.
Función de Arranque Remoto en Transmisión Automática
Presione el botón durante 2.5 segundos para encender a control remoto un vehículo de
transmisión automática. Si usted está en rango y si el vehículo está listo para arranque de motor, el
remoto emitirá una señal sonora una vez y LED se iluminará para indicar que la orden de arranque
remoto fue transmitida con éxito.
Si usted está en rango y el remoto pita tres veces, hay un error de arranque de motor. Refiérase a la
sección "diagnóstico de error, arranque de motor" situada en la última página de este manual para
detalles.
9
Page 47

En el momento de recibir la confirmación de que el vehículo está funcionando, el LED titilará y
el control remoto emitirá un bip para mostrar el tiempo de encendido. El tiempo de duración
de encendido puede programarse para 3, 15, 25, o 45 minutos - pida a su distribuidor de
Firstech que ajuste Opción 2-7, si usted necesita un tiempo de encendido diferente a 15
minutos (valor programado de fábrica).
IMPORTANTE: La llave de su vehículo debe insertarse en la ignición y debe girarse a la posición de
"ON" antes de manejar su vehículo. Si el pedal del freno de pie es presionado antes de girar la llave, en
la ignición, en la posición de “ON”, el vehículo se apagará.
Función de Arranque Remoto en Transmisión Manual (Modo Reservación)
Para encender un vehículo de transmisión manual a control remoto, el sistema debe ponerse primero en
Modo Reservación. El Modo Reservación debe ponerse cada vez que usted quiera encender su
vehículo de transmisión manual a control remoto. El propósito de Modo Reservación, es dejar la
transmisión en neutral, antes de salir del vehículo.
IMPORTANTE:
La transmisión debe quedar en la posición neutral.
Las ventanas del vehículo deben estar arriba (cerradas).
Los interruptores de las puertas del vehículo deben estar funcionando.
No instale este arrancador remoto en un vehículo de transmisión manual que tenga un toldo
convertible o trasladable.
No active modo de reservación ó arranque remoto con personas dentro del vehículo.
Activando Modo Reservación
PASO 1: Mientras el vehículo está encendido, ponga la transmisión en neutral, ponga el freno/palanca
de emergencia, y quite presión sobre el pedal del freno de pie.
PASO 2: Retire la llave del cilindro de ignición del vehículo. El motor del vehículo debe permanecer
encendido, aun después de retirar la llave. Si el vehículo no sigue encendido, acuda con su distribuidor
Firstech autorizado para el servicio.
PASO 3: Salga del vehículo y cierre la puerta. El motor del vehículo debe apagarse 10 segundos
después de cerrar la última puerta. Si el motor del vehículo no se apaga, el interruptor de la puerta
puede estar funcionando inadecuadamente. No utilice el arrancador de motor y lleve su vehículo a un
distribuidor Firstech autorizado para el servicio.
Una vez que el vehículo se apague, el sistema está en modo reservación, entonces es seguro encender
el vehículo a control remoto.
IMPORTANTE: Por estándar, el sistema cierra/arma el vehiculo al activar modo reservación. Tenga
cuidado no dejar sus llaves dentro del vehículo.
Cancelando Modo Reservación
Modo reservación será cancelado por las siguientes razones;
Usted no activó el freno de emergencia antes de apagar la ignición.
Usted presionó el pedal del freno de pie, después de que la llave fue alejada de la ignición.
Usted soltó el freno de emergencia, después de que la llave fue alejada de la ignición.
Usted entró a modo valet, abrió la puerta del vehículo, cofre, cajuela o accionó la alarma.
Opciones para Modo Reservación
Las opciones pueden programarse con Opción 1-6. Se recomienda que las opciones de modo
reservación sean programadas por su distribuidor autorizado Firstech.
10
Page 48

Predefinido 1: Cierra puertas con llave cuando modo reservación está fijo.
Opción 2: No cierra puertas con llave cuando modo reservación está fijo.
Opción 3: Modo reservación se activa 10 segundos después del cierre de la última puerta, opuesto a
inmediatamente. Esta opción le permitirá acceder a las puertas traseras del vehículo, cajuela o cofre
antes de que el sistema active reservación y pasivamente cierre/arme.
Opción 4: Apaga el motor antes de cerrar los seguros de las puertas.
Destrabado del maletero
Mantenga presionado durante 2,5 segundos el botón del maletero
maletero o la tercera o quinta puerta del vehículo. Si Ud. está en la zona de alcance, el control remoto
emitirá dos pitidos para indicar que la orden de destrabado del maletero fue enviada correctamente.
Importante: el destrabado del maletero es una función opcional que podría necesitar piezas y trabajo
extras.
para destrabar el
Salidas auxiliares/Bajar los cristales/Puertas corredizas
Su sistema está equipado con dos salidas adicionales que pueden ser configuradas para controlar los
cristales, abrir las puertas corredizas eléctricas, abrir una ventana de techo eléctrica o también prender
el desempañador trasero. Estas salidas pueden ser configuradas para los ajustes a impulso,
programados o a enganche. Su representante autorizado de Firstech puede ajustar estas salidas en
consecuencia. La utilización de las salidas auxiliares para controlar funciones adicionales del vehículo
puede necesitar piezas adicionales y esto puede ser muy laborioso.
Mantenga presionado durante medio segundo el botón Función (F pic) seguido del botón
Maletero
botón Función (F pic) seguido del botón Llave/Arranque para activar la salida auxiliar 2. El
control remoto emitirá 1 pitido, las luces de posición parpadearán para indicar que la o las
salida(s) auxiliar(es) ha(n) sido activada(s).
El sistema ha sido predefinido para estar en modo auxiliar seguro, que exige que Ud. mantenga
presionado durante medio segundo el botón Llave/Arranque (key pic) antes de activar auxiliar 1 o 2.
Para anular el modo auxiliar seguro, pida a su representante autorizado de Firstech que active la
Opción 4-5 en la selección II.
Tap the Function <insert icon> button for a half second followed by the Trunk button
trigger auxiliary output 1. Tap the Function <insert icon> button for a half second followed by
the Key/Start <insert icon> button to trigger auxiliary output 2. The remote will beep once and parking
lights flash, indicating that the auxiliary output(s) have been triggered.
By default, the system is in secure auxiliary mode, which requires you to tap the Key/Start button
for a half second prior to triggering auxiliary 1 or 2. To turn off secure auxiliary, ask your authorized
Firstech dealer to turn on Option 4-5 to setting II.
para activar la salida auxiliar 1. Mantenga presionado durante medio segundo el
to
Armado/Desarmado Silencioso
En cuanto cierre/arme y abra/desarme, usted puede eliminar la confirmación audible del
vehículo, silenciando la sirena. Normalmente, la sirena chirriará una vez para indicar que el
sistema está cerrado/armado y dos veces para indicar que el sistema está abierto/desarmado.
11
Page 49

Para silenciar a la sirena, presione botones simultáneamente durante medio segundo.
IMPORTANTE: Incluso cuando la sirena es silenciosa, se disparará en el momento que la alarma se
active.
Modo silencioso del control remoto
Para silenciar el control remoto Ud. debe poner la función silenciar en “on”;
PASO 1: Entre el modo de programación del control remoto manteniendo presionados
simultáneamente los botones maletero y llave/arranque
El control remoto emitirá tres pitidos y el LED parpadeará en color púrpura para indicar que Ud. ha
entrado correctamente en el modo programación.
PASO 2 : Presione el botón abrir
silencioso está activado. Presione nuevamente el botón abrir para desactivar el modo silencioso. Dos
pitidos y parpadeos de color rojo del LED le indicarán que el modo silencioso ha sido desactivado.
PASO 3: Salga del modo programación del control remoto sosteniendo simultáneamente los botones
maletero y llave/arranque
para indicar que Ud. ha salido correctamente del modo programación. El LED de su control remoto se
encenderá.
. El LED parpadeará en color azul para indicar que el modo
durante 2,5 segundos. El control remoto emitirá pitidos
durante 2,5 segundos.
Sensor de Golpes Encender/Apagar
Mantenga presionados los botones de cierre y de apertura. simultáneamente
durante 2.5 segundos para encender y apagar el sensor de golpes. El control remoto emitirá
dos pitidos y el LED parpadeará dos veces para confirmar que el sensor de impacto está
desactivado. El control remoto emitirá un pitido y el LED parpadeará una vez para confirmar que el
sensor de impacto está activado. IMPORTANTE: Apagando el sensor de golpes, lo mismo sucede con
el sensor opcional.
Ajustar la sensibilidad del sensor de golpes se hace físicamente en el sensor, que por lo general está
montado en alguna parte, bajo el tablero del vehículo. Conforme el número mas alto en el disco,
significa mayor sensibilidad en el impacto. El ajuste recomendado en el disco para la mayoría de los
vehículos está entre 2 y 4. Si usted está probando su sensor, por favor note que el sensor de golpes no
reconoce ningún impacto hasta el término de 30 segundos, después de armado el sistema.
Trabado automático de los botones
Su control remoto viene con una función de trabado automático de los botones. Esta función traba
automáticamente los cuatro botones en su control remoto después de un minuto. Para destrabar sólo
debe presionar cualquier botón y enseguida presionar o sostener el botón o los botones para la orden
que desee enviar. Esta función debe ser activada en el menú de opciones del control remoto.
PASO 1: Entre en el modo programación manteniendo presionados simultáneamente los botones
maletero y llave/arranque
el LED parpadeará en color púrpura en su control remoto para indicar que Ud. ha entrado correctamente
en modo programación.
durante 2,5 segundos. El control remoto emitirá 3 pitidos y
12
Page 50

PASO 2: Presione el botón de arranque . Un pitido y el parpadeo del LED de arranque le indicarán
que el trabado automático de los botones ha sido activado. Presione el botón de arranque nuevamente
para desactivar trabado automático de los botones.
PASO 3: Salga de la programación del control remoto sosteniendo simultáneamente los botones Abrir y
Maletero
ha salido correctamente de la programación.
durante 2,5 segundos. El control remoto emitirá pitidos para indicar que Ud.
Funciones avanzadas del sistema
La siguiente sección describe las funciones avanzadas del sistema. Muchas de estas funciones
requieren múltiples etapas o una programación adicional de la parte de su representante autorizado de
Firstech para ser activadas.
Cierre automático/seguros de las puertas controlados por el encendido
Apriete el botón de función (F picture) una vez, seguido del botón de cierre para
activar o desactivar el cierre automático (conocido también como seguros de las puertas
controlados por el encendido). El control remoto emitirá un pitido y el LED parpadeará una vez para
confirmar que el modo de cierre automático ha sido activado. El control remoto emitirá dos pitidos y el
LED parpadeará dos veces para confirmar que el cierre automático está desactivado.
IMPORTANTE: Drive Lock (conduce cierra) requiere que el distribuidor encienda Opción 1-9. Drive Lock
(conduce cierra) tiene dos opciones;
Estándar 1: Fuera de servicio
Opción 2: Cierra los seguros eléctricos cuando la ignición está encendida y después de presionar el
pedal del freno.
Opción 3: Cierra los seguros eléctricos cuando las RPM han alcanzado dos veces las revoluciones
mínimas (este modo requiere que el cable del tacómetro sea conectado).
Con ambas opciones, los seguros eléctricos abrirán cuando la ignición sea apagada. Si utiliza esta
función en un vehículo de transmisión manual, los seguros eléctricos abrirán al poner el freno/palanca
de emergencia.
Modo temporizador turbo
El temporizador turbo integrado mantiene el motor en marcha durante 1, 2 o 4 minutes
(programado por el representante) después de haber retirado la llave del contacto. Esta
función permitirá al aceite circular en el sistema turbo. permitiendo un tiempo de enfriamiento
adecuado. Apriete el botón de función (insert F picture) una vez seguido del botón de apertura
activar o desactivar el modo turbo. El control remoto emitirá un pitido y el LED parpadeará una vez para
confirmar que el modo turbo ha sido activado. Repita para desactivar el temporizador turbo. El control
remoto emitirá dos pitidos y el LED parpadeará dos veces para confirmar que el modo turbo ha sido
desactivado.
Importante : el modo segundo vehículo requiere que el control remoto sea programado para un 2
vehículo que estará equipado con el mismo sistema.
13
para
o
Page 51

Modo 2o vehículo (control de varios vehículos
Este control remoto permite operar un 2o vehículo con el mismo sistema. Nota: Cuando esté
en modo 2
o
vehículo, su LED parpadeará en color azul cuando se presionen los botones.
Mantenga presionados los botones
menú de opciones del control remoto. Presione el botón de cajuela
vehículo. Su control remoto emitirá un pitido para indicar que está activado y dos para desactivado. El
LED del control remoto se encenderá en azul para confirmar que el modo 2
El control remoto se quedará en modo 2
o
vehículo hasta que Ud. mantenga presionados los botones
durante 2,5 segundos para entrar en el
para activar el modo 2o
o
vehículo ha sido activado.
durante 2,5 segundos, entre al menú de opciones del control remoto y presione el
botón de cajuela
botones maletero y llave/arranque
. El control remoto emitirá dos pitidos y Ud. deberá mantener presionados los
para guardar los cambios en el menú de opciones
del control remoto.
Importante : el modo segundo vehículo requiere que el control remoto sea programado para un 2
o
vehículo que estará equipado con el mismo sistema.
RPS táctil y RPS (sensor de aviso a distancia)
El RPS es una función opcional. La función aviso a distancia RPS utiliza un pequeño sensor
montado sobre el interior del parabrisas.
RPS TÁCTIL (SENSOR DE AVISO A DISTANCIA)
El nuevo RPS táctil tiene varias funciones, incluyendo: aviso a distancia, un PIN (número de
identificación personal) de 4 cifras para abrir/desactivar y para activar/cerrar. Todas las funciones son
operadas tocando simplemente el sensor.
Pida a su instalador que programe la opción 3-16 al ajuste 2.
El RPS táctil y las funciones de llamada del auto no necesitan una programación adicional, sin embargo,
afín de abrir/desactivar su vehículo, Ud. debe programar un código de 4 cifras utilizando las
instrucciones más abajo :
Etapa 1 : Elija su código de cuatro cifras para el RPS táctil, el 0 no se encuentra disponible.
Etapa 2 : Ponga el contacto en la posición ON y deje la puerta del conductor abierta
Etapa 3 : Presione con su dedo el icono « Red Circle » (círculo rojo) durante 2,5 segundos.
Etapa 4 : Cuando la sirena suene y la LED parpadee en forma circular, entre el primer número (téngalo
presionado durante 2,5 segundos para elegir de 6 a 10). Después de haber elegido su primer número, la
sirena sonará una vez y la LED parpadeará de manera circular.
Etapa 5
vez y las luces de posición parpadearán una vez. Repita las etapas 2 a 5 si obtuviera 3 pitidos de la
sirena y si las luces de posición parpadean. Su RPS ya está programado.
Touch 4 digit code. ‘0’ is not available.
Reactivación de la alarma y cierre
Para reactivar apoye su dedo sobre « Red Circle » durante 2,5 segundos.
: Repita la etapa 4 hasta que las cuatro cifras hayan sido seleccionadas. La sirena sonará una
STEP 1:
Choose your RPS
14
Page 52

Desactivación de la alarma y apertura
Para desactivar apoye su dedo sobre « Red Circle » durante 2,5 segundos. Una vez que la
LED comience su movimiento circular, entre el código de 4 cifras (vea la etapa 4 explicada más
arriba). Dos segundos después de haber entrado la 4ª cifra el sistema debería desarmarse.
Llamada a un control remoto bidireccional de LCD
Para llamar a una LCD bidireccional, presione « Red Circle » dos veces.
Sensibilidad de la pantalla táctil
Para cambiar la sensibilidad, abra la puerta del conductor, mantenga presionado el botón detrás del
RPS táctil hasta que la DEL se apague. Suelte el botón y presiónelo otra vez. La cantidad de LEDs fijas
indicará la sensibilidad táctil, 1 significa la menor y 5 la mayor.
RPS (Sensor de Paginación Remoto) Abrir/Desarmar
El RPS es una función opcional. Funciones RPS básicas y funciones de llamada del automóvil no
requieren programación, sin embargo para que el sensor abra/desarme el vehículo, usted debe realizar
los siguientes procedimientos;
Etapa 1: Desarma/abre la alarma (remoto debe programarse primero) y escoja un código de 4 dígitos.
No puede contener ceros.
Etapa 2: Gire la llave en el cilindro de la ignición a la posición “ON” y abra la puerta del chofer.
Etapa 3: Aplique un total de 5 toquidos al parabrisas frente al RPS (cada vez que usted toque, el LED
en el RPS encenderá ROJO). El LED empezará a destellar rápidamente en AZUL con la realización
exitosa de este paso.
Etapa 4: Ingrese el primer digito del código de 4 dígitos deseado, por medio de golpeteos en el
parabrisas frente al RPS, el número deseado de veces. Por ejemplo, para ingresar el 3, golpeé en el
sensor 3 veces (cada vez que usted golpea, el LED encenderá ROJO) y espere.
Etapa 5: El LED en el RPS confirmará su primer número encendiendo AZUL lentamente. Una vez que el
LED empiece a destellar rápidamente en AZUL, entre el segundo número repitiendo paso 4.
Etapa 6: Repita pasos 4 & 5 para ingresar los cuatro números.
Etapa 7: Apague la ignición – la función RPS desarmar/abrir quedó programada. Siga pasos 3 - 5 para
ingresar su código desarmar/abrir.
Cierre y reactivación de la alarma
Para reactivar, golpee 5 veces sobre el sensor.
Desactivación y apertura de la alarma
Para desactivar, golpee 5 veces sobre el sensor. Espere a que el LED parpadee en azul rápidamente.
Siga las etapas 4 y 5 explicadas más arriba para entrar su código de 4 cifras.
Llamada a un control remoto bidireccional de LCD
Para llamar a un control remoto bidireccional de LCD, golpee sobre el RPS dos veces.
Sensibilidad de la pantalla táctil
15
Page 53

Para cambiar la sensibilidad del golpe, desactive el sistema y ajuste el conmutador detrás del RPS.
Cuanto más grande es el círculo, más sensible será el sensor a los golpes.
Conmutador de Valet seguro
El conmutador opcional de Valet seguro impide que la alarma sea puesta en modo Valet cuando Ud.
hace girar la llave en el contacto 5 veces entre las posiciones ON y OFF.
El conmutador opcional de Valet es más seguro que el conmutador Valet tradicional porque exige un
código de dos cifras.
IMPORTANTE: Las dos primeras cifras del código de apertura/desactivación del RPS serán el código
predefinido del valet seguro – Ud. no necesita programarlo separadamente. Si no utiliza la apertura
RPS, siga las instrucciones más abajo para programar el código de su Valet seguro:
Etapa 1 : Active la opción 3-10-III (opción programada por el representante)
Etapa 2 : Ponga la llave de contacto en la posición On.
Etapa 3 : Mantenga presionado el conmutador durante 1,5 segundos La LED del conmutador Valet
comenzará a parpadear rápidamente cuando la etapa haya sido correctamente completada.
Etapa 4 : Entre la primera cifra del código de 2 cifras deseado presionando el conmutador la cantidad de
veces según la cifra elegida. Por ejemplo, para entrar el número 3, presione tres veces el conmutador y
espere
Etapa 5 : La LED confirmará la primera cifra parpadeando en AZUL lentamente. Cuando el parpadeo
de la LED se vuelva más rápido, entre el segundo número repitiendo la etapa 4.
Etapa 6 : Ponga el contacto en Off – El Valet seguro ya está programado. Siga las etapas 3 a 5 para
entrar su código del Valet seguro.
Arranque Temporizado
Consulte a su vendedor para activar esta función. El modo de arranque programado se
utiliza para enfriar o calentar el vehículo automáticamente sin utilizar la llave ni el control
remoto. Cuando esté activado, el arranque programado se activará aunque el control remoto esté fuera
de la zona de alcance. Presione los botones función + llave/arranque <insert icons> durante medio
segundo para activar el modo de arranque programado. El control remoto emitirá un pitido y el LED
parpadeará una vez. Repita el mismo paso para apagar el modo de arranque temporizado. El modo de
arranque con minutero será anulado en el momento de arrancar el vehículo manualmente o a distancia.
Para cambiar de los ajustes de fábrica a los ajustes opcionales, contacte a su vendedor.
Modo Arranque Frió/Caliente
Modo frío/caliente, funciona en conjunto con el modo arranque temporizado (vea arriba) y el sensor de
temperatura. Le permite configurar su función de arranque temporizado para que verifique la
temperatura antes de encender el vehículo. Todas estas opciones requieren de programación de su
distribuidor. Las siguientes temperaturas están sujetas a cambio.
Modo Antisecuestro
Su sistema tiene un modo que exige que Ud. lleve el llavero separado del control remoto. Esta función
requiere también un trabajo extra. Consulte a su instalador para obtener más detalles. El modo
antisecuestro le permite dejar el vehículo inutilizable cuando ha sido robado. Si ha sido secuestrado/a
con el auto y que Ud. tiene todavía su control remoto, Ud. puede accionar el Pánico apretando el botón
Cierre (
) durante 4 segundos. La sirena sonará durante 30 segundos y el vehículo se parará.
16
Page 54

Sensores Opcionales
Si usted adquirió una Alarma o Alarma con Sistema de Arranque Remoto, usted tiene la posibilidad de
agregar sensores adicionales de Firstech, LLC. Usted tiene la posibilidad de proteger su inversión
agregando un sistema de batería de respaldo para la fuente principal de su alarma o un sensor de
inclinación para proteger rines costosos y neumáticos.
Codificando Control Remoto / Rutina de Programación
IMPORTANTE: Cada Control Remoto Firstech debe codificarse al sistema antes de realizar cualquier
operación. Todos los control remoto, deben codificarse al mismo tiempo.
Programando Remoto de 2 Vías con 5 Botones:
PASO 1: Active modo Valet/Programación girando la llave del cilindro de ignición “ON” y “OFF” (entre
Acc y posición ON, “Apagar y Prender”) cinco veces antes del término de 7 segundos. Las luces del
aparcamiento (cuartos) encenderán una sola vez indicando paso exitoso.
PASO 2: Dentro de un periodo de 2 segundos, después del transcurso del ciclo de la ignición, en el 5to
intento, presione el botón
durante medio segundo. Las luces de aparcamiento (cuartos) encenderán una vez para confirmar que
el transmisor ha sido codificado.
en remoto de 2 Vías, o el botón (cerrar) en remoto de 1 Vía una vez
Para Salir de Programación: Programación es un suceso
cronometrado. Las luces de aparcamiento (cuartos) encenderán dos
veces al término de modo programación.
Programando Varios Remotos: Después del destello de confirmación
en el paso 2, codifique remotos adicionales presionando el botón
en remoto de 2 Vías o el botón (cerrar) en remoto de 1 Vía.
Las luces de aparcamiento (cuartos) encenderán una vez confirmando
cada remoto adicional. Todos los sistemas, pueden reconocer hasta
tres remotos.
Diagnostico de Errores, Arranque Motor Remoto
Si el arrancador de motor no enciende el vehículo, las luces de aparcamiento (cuartos) encenderán tres
veces inmediatamente. Siguiendo estos tres destellos, las luces de aparcamiento (cuartos) encenderán
varias veces correspondiendo al número de error, descrito en la tabla inferior.
Número
Destellos de la
Luz de
Aparcamiento
1 Motor encendido
2 Llave en posicion de “ON”
3 Puerta abierta (solo transmission manual)
5 Pedal del freno presionado
Error de Arranque de Motor
17
Page 55

6 Cofre Abierto
Modo reservación apagado (solo transmisión
manual)
7
8 Tach o sensor de voltaje con falla
9 Sensor de movimiento DAS
10 El sistema está en modo valet
Nosotros recomendamos que usted no intente ninguna reparación en su arrancador de motor remoto.
Avise a su distribuidor o llámenos directamente.
Diagnóstico de la alarma
Cuando la alarma está activa la LED parpadeará lentamente. Cuando la sirena suena, la LED indicará que la zona
fue transgredida.
Prioridad
1
2
3
4
Transgresión de
puerta/capó/maletero/llave
Transgresión del 2o impacto 3 parpadeos, reposo, repita
Transgresión del sensor
opcional
PÁNICO 5 parpadeos, reposo, repita
Situación LED de servicio
2 parpadeos, reposo, repita
4 parpadeos, reposo, repita
Una vez que la alarma haya sido desactivada después que ha sonado, el número de pitidos de la sirena
le indicará la zona específica.
Nombre
de bips
4
Situación
Transgresión del sensor de opción
5
6
Transgresión de 2o impacto
Transgresión de
puerta/capó/maletero/llave
18
Page 56

Garantía de por Vida Limitada
Firstech, LLC Garantiza al comprador original, que este producto estará libre de defectos en material y
fabricación, bajo uso normal y circunstancias normales por el periodo de tiempo que el dueño original de
este producto posee el vehículo en el que se instala; El control remoto tiene garantía por un periodo de
un año a partir de la fecha de instalación, al dueño original de este producto. Cuando el comprador
original devuelva el producto a la auto-boutique (minorista) donde fue comprado o enviado con flete prepagado a Firstech, LLC., 21903 68th South, Kent, WA 98032, EE.UU. dentro del periodo de la garantía,
y si el producto es defectuoso, Firstech, LLC, a su criterio reparará o reemplazará el equipo.
A LA EXTENSIÓN MÁXIMA PERMITIDA POR LEY, CUALQUIERA Y TODAS LAS GARANTÍAS SON
EXCLUIDAS POR EL FABRICANTE Y CADA ENTIDAD QUE PARTICIP A EN EL P ROCESO DEL
COMERCIO. ESTA EXCLUSIÓN INCLUYE PERO NO SE LIMITA A, LA EXCLUSIÓN DE
CUALQUIERA Y TODAS LAS GARANTÍAS MERCANTILES Y/O CUALQUIERA Y TODAS LAS
GARANTÍAS DE APTITUD PARA UN PROPÓSITO PARTICULAR Y/O CUALQUIERA Y TODAS LAS
GARANTÍAS DE NO-INFRINGIR LAS PATENTES O, EN LOS ESTADOS UNI DOS DE AMÉRICA Y/O
EN EL EXTRANJERO. EL FABRICANTE, NI CUALQUIER OTRA ENTIDAD SERÁ RESPONSABLE ,
U OBLIGADO POR CUALQUIER DAÑO O PERJUICIOS , INCLUYENDO PE RO NO LIMITANDO A,
CUALQUIER DAÑO Y PERJUI CIOS CONSIGUIENTES, DA ÑOS Y PERJUICIOS INCIDE NTALES,
DAÑOS Y PERJUICIOS POR LA PÉRDIDA DE TIEMPO, LA PÉRDI DA DE GANANCIAS, PÉRDIDA
COMERCIAL, LA PÉRDIDA DE OPORTUNIDAD ECONÓMICA Y SIMILARES. A PESAR DE LO
ANTERIOR, EL FABRICANTE OFRECE UNA GARANTÍA LIMITADA PARA EL REEMPLAZO O
REPARACIÓN DEL MÓDULO DE CONTROL (CEREBRO) COMO DESCRITO ANTERIORMENTE.
Algunos estados no permiten limitaciones en la duración de una garantía implícita o la exclusión o
limitación, en cuánto tiempo una garantía implícita durará o la exclusión o limitación de daños y
perjuicios incidentales o consiguientes. Esta garantía le da derechos legales específicos, y usted
también puede tener otros derechos que varían de Estado en Estado.
Firstech, LLC. No es OBLIGADO o RESPONSABLE POR CUALQUIER DAÑO Y PERJUICIO ,
INCLUYENDO PERO NO LIMITADO A, CUALQUIER DAÑO Y PERJUICIO CONSIGUIENTE, DAÑOS Y
PERJUICIOS INCIDENTALES, DAÑOS Y PERJUICIOS POR LA PÉRDIDA DE TIEMPO, LA PÉRDIDA
DE GANANCIAS, PÉRDIDA COMERCIAL, LA PÉRDIDA DE OPORTUNIDAD ECONÓMICA Y
SIMILARES que puedan ser resultado ó no, del funcionamiento de Compustar, Compustar Pro, Arctic
Start, Vizion, o NuStart. Sin embargo, el FABRICANTE OFRECE UNA GARANTÍA LIMITADA PARA
REEMPLAZAR ó REPARAR EL MÓDULO DE CONTROL (CEREBRO) COMO DESCRITO
ANTERIORMENTE.
Su Garantía
La garantía del producto es automáticamente nula, si el código de la fecha o el número de serie es
borrado, perdido o alterado. Esta garantía no es válida, a menos que usted complete la tarjeta de
registro y la envié a www.compustar.com dentro de los primeros 10 días de la compra.
19
 Loading...