

Page 1

39
Page 2
• Diplomats can be attached to your armies like other characters. Simply move
them to the same location as an army. This makes it slightly safer for them
to travel. They can be removed from the army by clicking on the
Characters tab, selecting the diplomat and then right-clicking a spot on
the game map.
■ The Diplomacy Scroll
You’ll see the Diplomacy Scroll every time you
send a diplomat to negotiate with another faction.
You’ll also see it when a rival’s diplomat comes to you
with an offer of friendship (or even to threaten you).
Diplomacy Scroll summarizes your current
relationship with another faction, including earlier treaties, and allows you to make
new deals. The center panel is the treaty that’s being proposed. Build up a treaty
by selecting items from the two lists:
•
Left-click on offer and demand items in the lists to add them to the
treaty. These include land, cash and information.
• Left-click on an item already in the treaty to remove it.
• The offers and demands do not have to be balanced, but treaties that are
unbalanced will be rejected more often than ones with some give-and-take.
When you’re happy with terms, click on the
treaty text. The other party will respond. He’ll do one of three things:
The
Offer button below the
refuse outright, accept immediately or make a counter-offer.
If you’re offering money, territory or map information and not asking for
anything in return, these can be a gift. Offers to attack other factions
can also be a gift.
• It’s quite possible that your proposed treaty was interesting, but not quite
what the opposition wanted. In this case, they’ll make a counter-offer
to you.
• Once a counter-offer treaty is on the table, you can accept it or make your
own proposals in response as a counter-offer. Again, you can change
the treaty by clicking on either offers or demands and on the treaty itself
(delete items).
• It’s quite possible for negotiations to go through several rounds of offer and
counter-offer before a deal is reached. Be mindful, though, that not
everyone’s patience is endless and one man’s haggling is another man’s
waste of time!
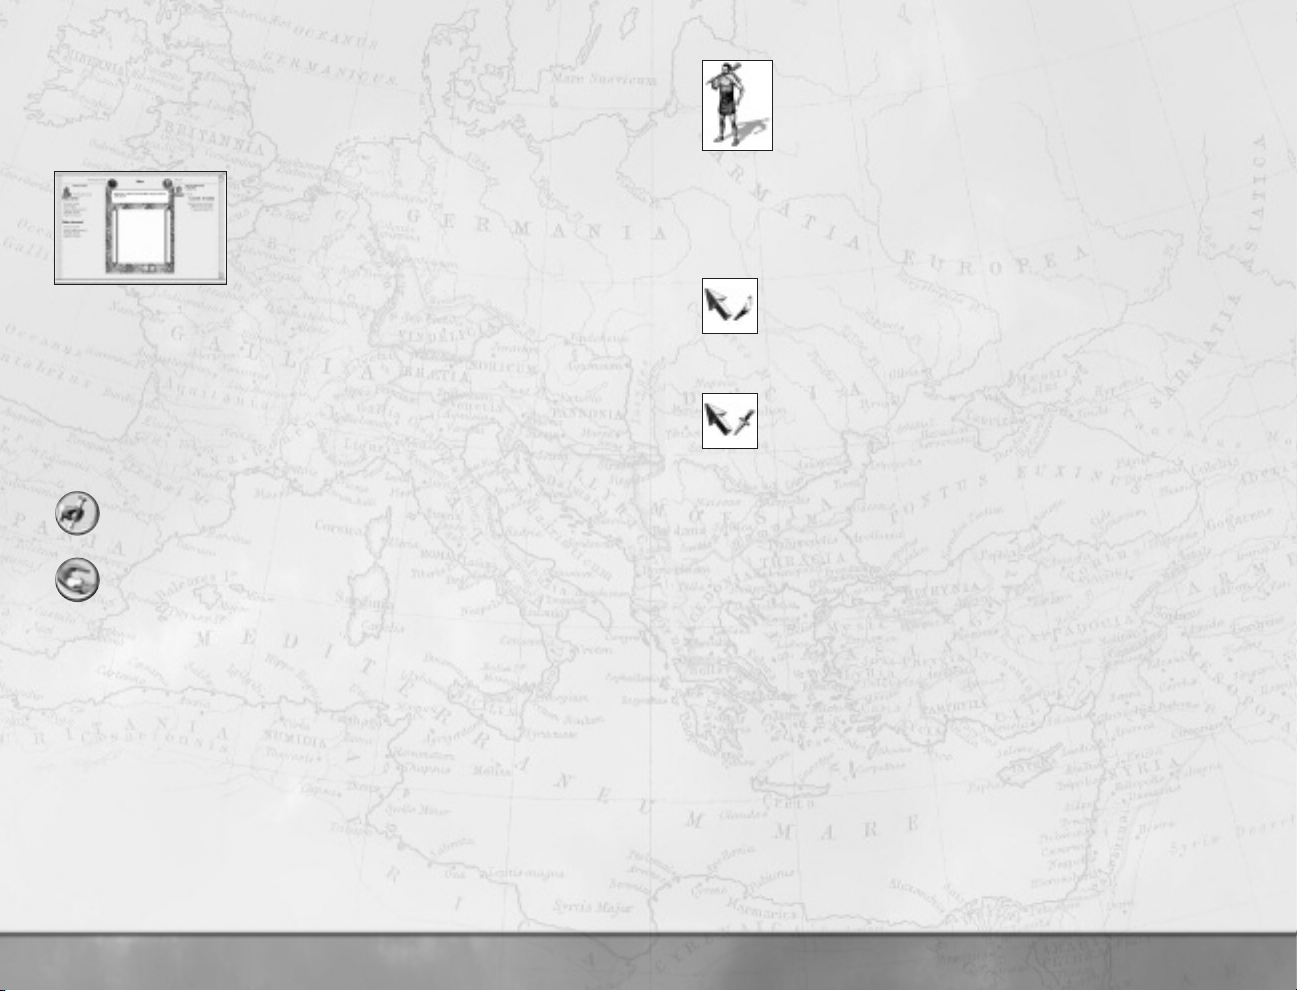
How to Use Assassins
Assassins are trained in settlements that have a forum, agora or bazaar
or larger trading structure. Assassins can assassinate characters or
sabotage buildings.
• Move an assassin onto an enemy army, settlement or agent to attempt a
mission. An assassin can only attempt one mission per turn. It doesn’t matter
when during the turn the mission occurs.
• An
assassination can be carried out on any character at the location. You’ll
be presented with a target list including a chance of success for each “hit.”
Sabotage missions can only be carried out in settlements. You’ll be given
the choice of an assassination (if there’s a character in the settlement) or
sabotage. Again, you’ll be presented with a target list on the
Mission Target
Unrecognized buildings in a settlement appear as “?” which can be sabotaged.
Use the tabs to move between the assassination and sabotage targets.
Scroll, including a chance of success for the mission.
Select
Left-click on the target and then click on the assassination or sabotage
buttons. You can always cancel the mission by clicking on the “X” button.
• There are no guarantees that an assassin will succeed. Assassins who fail might
get killed in the process.
How to Auto-Manage Settlements
Settlements in Rome: Total War can be left to run themselves if you prefer to
concentrate on the military side of the game.
If a settlement doesn’t have a governor it’ll be auto-managed. Moving the last
character out of a settlement turns auto-management on.
When you conquer a settlement, you’re given the option of auto-managing it. The
conquering general can be the governor, but the settlement can still be left to look
after itself.
■ The Settlement Scroll
In the set policies section of the scroll, click on the Auto-manage check box to
toggle auto-management on and off.
When it’s on, you’ll have the chance to pick a build policy for the settlement. This
gives the administrators some basic guidance on where they should concentrate their
spending. The policies are all straightforward:
• Balanced—Results in a well-rounded settlement.
Financial—Trade and income-producing buildings are favored.
•
40
41
Page 3
• Military—Buildings that train or upgrade troops are constructed.
Defensive—Walls are given priority.
•
Cultural—Temples, amphitheaters, arenas, academies and other buildings
•
that make people feel happy are favored.
The amount of money invested in new buildings is determined by the overall AI
spending policy
Overviews scroll can be accessed by left-clicking on your Faction icon in the lowerright corner of the control panel.
When auto-management is off, you’ll be given the choice to alter the tax rate in
the settlement.
, which is set on the Faction tab of the Overviews scroll. The
How Not to Go Broke
Simply put: have more income than expenditure. Running out of money is a sure
way of losing the game. Without money, no new buildings can be constructed, no
new troops recruited and existing forces cannot be paid.
■ Low-Level Tax Management
Each settlement with a governor can have its own tax rate, varying from very
high
to low. This is changed in the set policies section of the
Settlement Scroll.
Left-click on the arrows on either side of the tax rate to change it.
•
• As you change the tax rate, you’ll see the settlement’s income, public order
and population growth change. In general, the lower the taxes, the happier
the people are likely to be!
Click on the
to see the contribution that taxes make to the overall state of
the settlement.
Click on the
in the Control Panel) to see a financial projection for the current turn.
The End of Turn Report Scroll gives you the details of the last turn’s
actual spending.
These two reports allow you to review the current state of your treasury. You can
also make sure your AI assistants aren’t spending money too quickly by altering
the AI Spend Policy on the Faction tab of the Overviews scroll.
Show Settlement Details button if you want
Financial tab on the Faction Overview (click on the faction symbol
How to Manage Your Faction
Clicking on the faction symbol in the lower right-hand corner of the Control Panel
brings up the Faction Overview.
■ The Faction Overviews Scroll
This scroll is the key to understanding all the political, diplomatic and financial
details of your faction. Click on any of the tabs across the top of the scroll to bring
up the Senate details, Diplomacy details, Financial details and/or Faction overiew.
The Faction overview allows you to set global auto-management options for your
entire faction. These are the underlying defaults for any settlement that’s being
auto-managed:
• Click the
auto-management to do everything for you. If not you can:
• Click Enable Auto Train Units if you want the game to produce the best
available military forces.
• Click Enable Auto Construct Buildings if you want the game to
manage the building policy in settlements.
• The AI Spend Policy Slider lets you set the relative balance between
building up your cash reserves and immediate spending.
Three buttons in the lower left-hand corner bring up more information about
your faction:
Automate All Production tick box if you want
Faction Rankings—A summary graph that shows you how well each
faction is doing compared to the others.
Family Tree—A convenient summary of your faction’s available senior
personnel: your generals, their wives and their children.
Click here to bring up the
greater detail shortly.
Senate Officials Scroll. This is discussed in
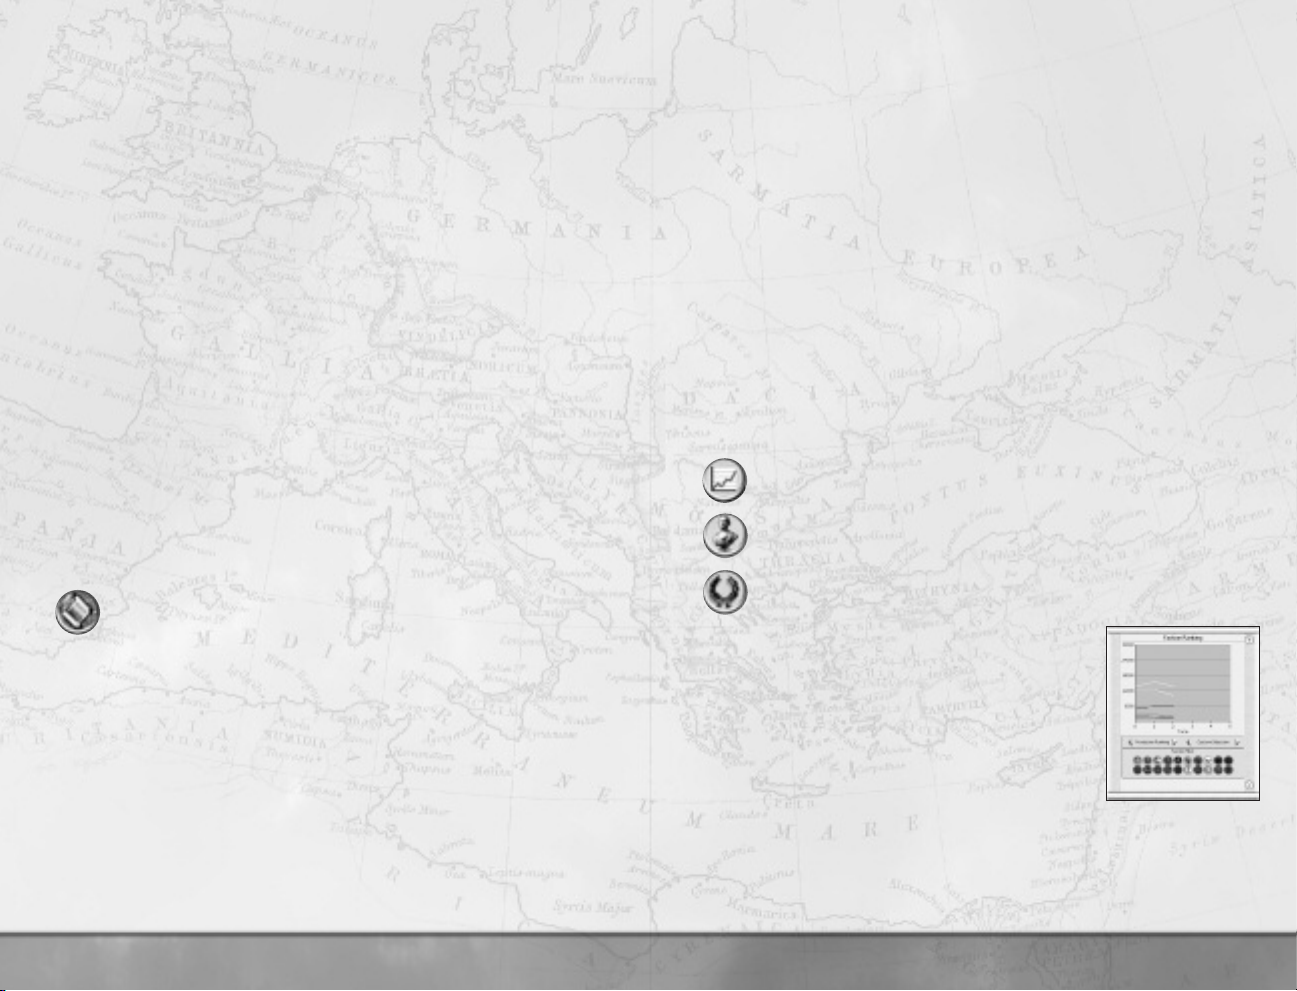
■ Faction Ranking Scroll
This scroll gives you a way of seeing your progress in the
game and comparing your strength with that of your rivals
in several different ways. The graph shows your faction’s
power over time as an
the proportion of the world’s “power” that you control.
• The ranking choice allows you to choose an aspect
of your faction’s power: production, territorial,
financial, population and overall.
• The faction choice lets you choose which collection of factions you wish to
compare: your own, all factions, the top five, neighboring factions or a
custom selection.
absolute value; it doesn’t show
42
43
Page 4
• You can click on the faction symbols to toggle the graph lines on and off for
any particular faction(s). This can be very useful when reviewing your
progress in a war.
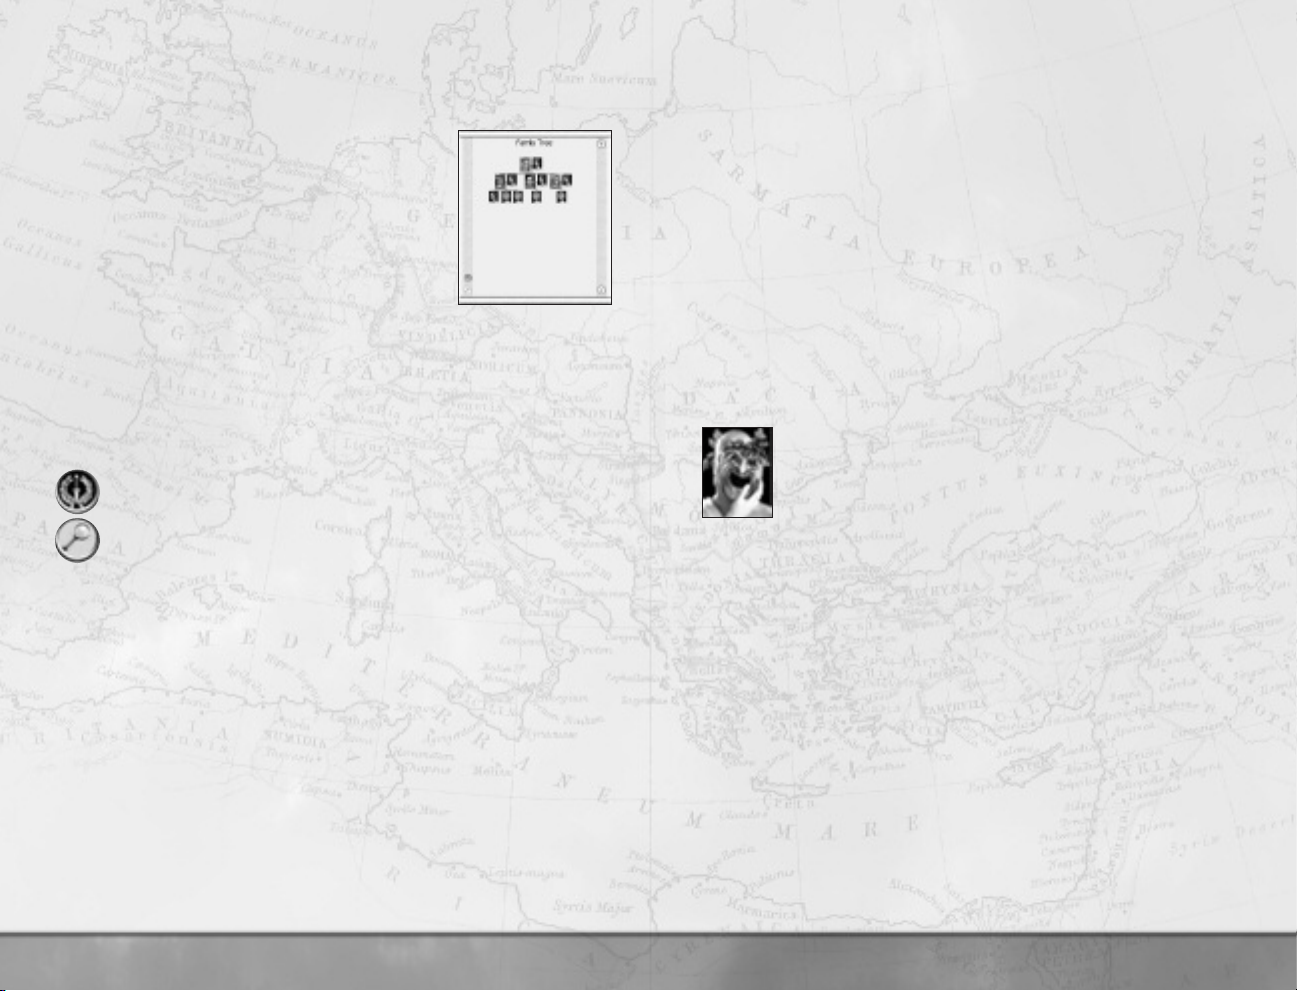
■ Family Tree Scroll
The family tree scroll shows all the important characters in
your faction—the men who can be generals and governors.
It also allows you to decide who’ll be the faction
leader’s heir.
• Portraits in color are living characters. Characters
shown in gray are dead.
• The most important characters are the faction
leader
and the faction heir; their status is
marked on their portraits.
• All the larger portraits are generals and governors in your faction. Move the
cursor over a portrait to see the character’s name and abilities. The smaller
portraits are sisters, wives and children.
Left-click on any large portrait, and two buttons in the lower left of the screen
become available.
Set Faction Heir button allows you to designate the heir to your
The
faction leader.
The Show Me button displays the character’s location on the current
campaign map.
■ New Members of the Family
In the normal course of events, sons and daughters will be born to various
members of the family. As sons come of age, they ’ll become available for use as
generals and governors. All new characters (including adopted sons and those who
marry into the ruling family) always appear in the faction capital. Daughters
become available for marriage when they come of age.
Adoptions and Marriages
Unmarried sons in your family will find wives and, hopefully, start producing a new
generation of leaders without you having to worry about it.
From time to time—when there’s an eligible woman in the family—a suitable
husband will appear. If you accept him for marriage into your family, he’s adopted,
too, and treated like any other male family member.
Attributes
All family characters have three attributes that affect their performance in the
game. These are
measured on a scale of 0 (poor) to 10 (almost divinely inspired):
command, management and influence, and they’re
• Command is the ability the character has to lead and inspire men in battle.
High command has a positive effect on the morale and fighting quality of
soldiers. A low command rating has some effect, and is definitely better than no
command rating at all.
• Management is the ability of the character to run a settlement and conduct
the business of government.
• Influence is the ability of the character to sway others by argument and the
force of personality. This has an effect on public order when a character with
influence is a governor.
Other characters in the game also have attributes:
Admirals have command ratings, but only for sea battles.
•
Diplomats have influence, and this affects their chances of successfully
•
negotiating with another faction.
• Spies and assassins have subterfuge ratings. Subterfuge is a measure of
sneakiness, double-dealing and underhandedness.
Retinues: Ancillary Characters
Retinues are made up from ancillary characters. These are the
assistants, aides, secretaries, mistresses, fixers, lackeys, drinking buddies
and assorted hangers-on that always seem to be found with great men.
included a few famous historical characters as ancillaries—if you can find them, maybe
they’ll help your cause!
Ancillaries usually give bonuses and penalties to a character in the same way as
character traits. Unlike traits, ancillaries can usually be moved between characters, but
some combinations are not allowed.
• The two characters must be part of the same army or in the same settlement.
•
• Drag and drop the ancillary you want to move from the scroll onto the unit card
■ Character Traits: Vices and Virtues
Over time, characters pick up a variety of personality quirks and traits. Some of these
are good and some are bad, but if a man is worthy, he’ll develop a good character.
A man who runs from battle or is left to rot in a provincial backwater may develop a
nasty personality! It’s probably a good idea to have a look at your characters every
once in a while to make sure they don’t have a taste for the good life (at your
expense), or turn into blood-soaked loonies!
Ancillaries are added to a retinue as a result of game events. We’ve also
Right-click on the unit card in the review panel that represents the general
with the ancillary.
of the receiving character in the Review Panel.
44
45
Page 5

How to Deal with the Senate
In Rome: Total War, the Roman empire is represented by four factions (you
cannot play the Senate). They are all on the same “side” when it comes to dealing
with non-Romans, but one faction will eventually take control of the whole empire.
At the start, the Senate and other Roman factions are not hostile. You don’t need
to worry about being stabbed in the back by another Roman faction. At some
point, it’ll become inevitable that you’ll have to march on Rome and stake your
claim to be imperator (emperor) of the Roman world. The other Roman factions will
be working toward the same goal. It’s therefore likely a civil war will break out. An
attack on Rome will only succeed if you have a strong military force and your
faction is popular with the Senate and People of Rome.
■ Senate Missions
At the start of each turn, event messages appear on the left-hand side of the
screen. Among these can be messages from the Senate requesting you perform a
mission of some kind.
These missions are intended to further the interests of Rome, not just your faction.
While what’s good for Rome is often the same as what’s good for you, it may not
always be the case. The Senate also sets a time limit for these missions.
As you carry out Senate missions and your faction becomes stronger, the tasks the
Senate asks you to perform will become more challenging—and the rewards for
carrying out the wishes of the Senate grow!
■ The Senate Overview
This summarizes all Roman politics in one place. Click on the tabs to review policy,
missions or the floor (your popularity).
The Senate policy section of this scroll gives you information on the senate’s
attitude toward all non-Roman factions in the game. Left-click on a faction symbol
to see what the Senate thinks of a faction.
The Senate missions section of the scroll gives you a list of outstanding
missions that you may want to complete. It’s entirely your decision whether these
missions are carried out or not. Factions that carry out missions will be well
regarded by the Senate.
Click on a mission to select it, and then click on this button to center the
campaign map on the target for an outstanding mission.
Senate floor shows your popularity with the senate and with the
The
plebs or plebeians—the ordinary Romans in the street.
• Your popularity with the Senate rises if you carry out Senate missions and if
you conquer foreign territory to add to the glory of Rome! The Senate also
takes into account your military might and the threat you represent to them.
• Your popularity with the plebs rises as you conquer new lands for Rome (for
your own faction, in fact). The plebeians love a winner!
■ The Senate Officials Scroll
This is a list of all the characters in the game that have been honored with
positions of responsibility by the Senate. Only Romans can hold senate offices.
Each of the offices grants benefits to the holder while he has the office. Each office
also gives benefits to former holders—the honor of being trusted by the senate
stays with a man forever.
Senate offices are divided among the Senate itself and the three Roman factions
according to the popularity of each faction on the senate floor.
A single character can hold only one office at a time. He may be given more than
one office during his life, and gain the benefits of being an ex-office holder for each
one, as well as the benefit of his current office.
Left-click on a character in the list to center the campaign game map on
•
his position in the world.
• Right-click on a character to bring up his details so you can examine his
traits and retinue.
How to Get Help
In many places you’ll see a “?” button. Click on it to get help. If the advisor is
already on-screen and highlighted, you’ll have to read the current advice or dismiss
the advisor to see the help information. Victoria is pretty clever, but she can only
tell you one thing at a time!
How to Change Game Options During Play
Pressing ESC when no scroll is visible brings up the Game Options menu.
game, audio and video options, use the sliders and check boxes to
• For
alter the settings to suit your personal preferences.
• Load Game and Save Game allow you to save your position and reload
it later (or even undo some terrible calamity by stepping back to an earlier
game date, not that you’d ever cheat like this, oh no).
46
47
Page 6

BATTLES
This part of the manual concerns itself exclusively with the battle side of play and
how to get the most out of commanding your troops. The two halves of the game
are linked on many levels. The campaign game determines where a battle takes
place and the units present; results in the battle game affect the campaign.
Generals can earn traits as a result of their behavior in battle. Cities can be won
and lost, and a brilliant victory in the field can mean the conquest of new lands!
The Battle Deployment Scroll
When you have an army selected on the campaign map, right-click on a non-allied
army or settlement to attack. This brings up the Battle Deployment Scroll:
• The strength comparison bar in the center of the
scroll gives you the overall battle odds. Move
the cursor over the crossed swords to see the
exact odds.
• Reinforcements are also listed (and taken into
account in the odds calculation). These are drawn
from armies that are adjacent to the site of the
battle or siege.
Click here to take control of your units on the battlefield. What happens
after you click this button is what’s covered in this part of the manual!
You can have the game work out the battle result. Autoresolving a
battle is speedy, but casualties may be heavy and you can’t protect
valuable generals.
Click here to cancel the battle. When you do this, your army will withdraw
some distance to a safe location.
Attackers and Defenders
In every campaign battle, there’s an attacking army and a defending army. During
sieges, the besieging army is usually the attacker. The only exception to this is
when the defenders sally out or a relief force attacks the besiegers. In this case,
the besieging army is the defender. Attacking and defending armies use different
victory conditions and deployment rules.
■ Victory
Generally, in a field battle you need to drive the enemy from the battlefield to win.
You can press the
• Victory may require killing many enemy troops, although a crisis of morale
(the death of a general) will make the enemy flee the battle.
ESC key and select Exit Battle at any time to end a battle.
• As an attacker, there may be a time limit. If you haven’t defeated the enemy
before the timer expires, you lose the battle.
• As a defender, the timer works in your favor. Remain on the field until time
runs out and the attacker is automatically defeated.
• During a siege assault, victory is determined by control of the central square
or plaza in the settlement. The attackers must take this plaza before the
timer expires.
• During a battle, you can press F1 to see information about the battle,
including the victory conditions.
How to Deploy Your Troops
At the start of the battle, you may be given a chance to deploy your troops.
attacker, your army always deploys on a section of the battlefield
• As an
that matches the line of its approach on the campaign map. March onto a
battlefield from the north, and that’s where your forces will deploy.
• As a defender, you’ll deploy in a complementary area of the battlefield.
Reinforcements always appear on the edge of the battlefield that matches
•
their position on the campaign map. It can be very worthwhile to position
armies on the campaign map on the flanks or in the rear of an enemy before
you attack.
■ Reading the Ground
When a battle begins, you’ll see a camera flyby of the battlefield to give you an idea
of how the land lies. The deployment areas for your troops and the enemy will be
shown outlined in the faction colors.
■ The General’s Speech Before Battle
Your general will give a rousing speech to his men. It’s worth listening to the speech
because the general may include one or two useful hints about the state of the
battlefield, the enemy and any tactical ruses that might work.
■ Waiting Before a Battle
If you’re the attacker, you can wait before starting the battle. If the weather isn’t
right, just click the Wait button. There’s a chance the weather won’t change, but
you can’t postpone a fight forever waiting for the perfect day:
• Battles fought in bad weather—rain, snow, sandstorms and so forth—will be
more tiring for your troops and for the enemy.
• Wet weather is likely to have a negative impact on bow-armed units (bows
and bowstrings do not like damp conditions).
• Mist, fog and sandstorms can make it difficult to find the enemy.
48
49
Page 7

defender, you have to fight with the weather your attacker has decided is
As the
good enough—for his purposes!
An ambush gives you no chance of choosing the weather for the battle.
■ Changing Your Deployment
The game places your units on the field in a sensible formation, but it may not be
exactly what you want. Click on Start Deployment to rearrange your battle lines:
• You are never forced to change deployment.
• You cannot re-deploy your army if you’re ambushed—and your army will be
in a marching column, not drawn up for battle!
• Units must be positioned within the boundaries of your deployment zone.
This is the area on the map bordered by your faction color.
•
Left-click on a unit or its card in the Control Panel, and then right-
click
on the ground you want it to occupy.
• You can select multiple units for deployment.
■ CTRL and left-click on the units (on the battlefield) or unit cards
(in the Control Panel) you want to select.
■ CTRL and double-click on a unit card (in the Control Panel) to
select all units of the same type in your army.
■ Left-click and drag on the battlefield to create a box around the
units you want. All units within the box will be selected.
• Deploy multiple units by right-clicking on the ground you want them to
occupy. You can right-click and drag the units out into a line.
When you’re happy with your deployments, click on Start Battle.
■ Battle Advice
As soon as the battle begins, your military advisor appears with an opinion about
enemy tactics for the upcoming fight. You’ll find this information useful in
formulating your own plans.
How to Use the Battlefield Control Panel
The battlefield control panel is divided into three main sections:
• On the left are the mini-map, game speed controls and army strength
ratio bar.
• In the center are the unit cards, each of which represents one of your units
on the battlefield.
• On the right are the controls for individual units, groups of units and the
army as a whole.
■ The View Onto the Battlefield
All your units on the battlefield carry a banner in your faction color and symbol for
easy identification.
• Click on the large banner to select the unit—this can be quite useful in the
middle of tense hand-to-hand fighting.
• Some units also carry smaller flags showing your faction color and symbol.
These show a combination of a unit’s experience and upgrades to weaponry
and armor. The more small flags a unit carries, the more fearsome it will be
in combat!
• General’s bodyguard units carry square banners that are quite different
from other units. It’s always possible to see at a glance where a general can
be found.
• Any captain leading an army is similarly shown by the square banner
carried by his unit. However, because he’s a captain and not a general, he
won’t be personally leading a bodyguard unit and could be part of any kind
of unit, even humble peasants!
• Terrain has exactly the effects you would expect in real life: units can hide in
wooded terrain, marching through river fords slows your troops, marching in
snow makes men tired and so on.
• Out-of-bounds on the map is marked by a red line that’s visible when the
camera is close to the battlefield’s edge. Units cannot be ordered beyond
this line, but they will go there when routing or withdrawing.
■ The Mini-Map
The mini-map gives you a view directly down onto the battlefield. Terrain on the
battlefield is taken from the campaign map location. You’ll see distant mountains,
the sea and even volcanoes beyond the battlefield.
• The mini-map is always oriented with north at the top.
• The arrowheads in faction colors show the position and facing of units on
the battlefield.
• Selected units are always highlighted on the mini-map.
• The two blue lines show the current view onto the battlefield.
• The shadowed area at the edge of the mini-map is out of bounds during a
battle. Units may only enter this part of the map if they’re withdrawing
from battle or running away like frightened bunnies (or “routing,” to use the
technical term).
You can zoom in and out of the mini-map using these buttons
to change the map scale.
50
51
Page 8

The other data and controls in this section of the panel are:
The
hourglass shows how much time remains before the battle ends. If
you speed up play, the timer speeds up, too.
• Just above the game speed controls, the kill bar shows the relative success
or failure of your army in disposing of the enemy.
Click on one of these four buttons to pause or play the game at
normal, twice and three times speed. You can also press the P key to
pause and un-pause the game. Orders can be issued to units while the
game is paused.
■ The Review Panel
Each of the cards in this section represents one unit on the battlefield. When a card
is highlighted, all men in the unit on the battlefield are highlighted with a green
chevron at their feet.
The number is the current number of men in the unit. This number turns
red as the unit takes casualties. The artwork shows the unit type—in this
case, a unit of Hastati.
Large portrait unit cards are generals and their bodyguards. A gold star on
the unit card identifies the commanding general. Other generals have a
silver star.
Units that have gained experience and/or improved weapons or armor have
chevrons, swords and/or shield markers. Here, the chevrons show the
experience, while the sword shows these Triarii carry improved weaponry.
All units armed with missiles have a bar that shows their current
ammunition status. This bar always starts full, and as the unit fires
missiles, the bar empties.
Artillery units have an ammunition bar, just like other missile units. The
number on the card is the
requires a minimum number of men as crew.
Units can be grouped together during battle. By clicking on the
tab, all units in a group can be selected and controlled as one.
Unit cards can have action icons superimposed to show what the unit
is currently doing.
number of men and each artillery piece
Army and Unit Controls
In the left section of the control panel are the controls for individual units and
groups of units. As with any part of the game, tool tips are displayed when you
move the cursor over relevant items:
Clicking on the portrait of your commanding general immediately moves
the camera to a position behind the generals’ unit. A banner is displayed
here when the army is under the command of a captain.
Click here to
can also press the backspace key.
Click here to group the selected units. This button is grayed out unless
multiple units have been selected.
This button replaces the linking button when a group is selected. Click
here to toggle computer control for the group, and the game will
independently issue orders to the units once you’ve given the group some
orders.
Click here to make the selected unit(s)
order. The units will retreat into the out-of-bounds area. A unit given
withdrawal orders can be recalled until the point it leaves play.
Click here to toggle the unit formation from tight to loose. This alters the
spacing between men within the selected unit(s).
Click here to toggle skirmish mode on and off. A unit set to skirmish will
seek to keep a safe distance between itself and the enemy (usually the
range of its missile weapons). If a unit cannot skirmish, this button is
grayed out.
Click here to toggle the
selected missile-armed units will fire at nearby targets without further
orders. When a unit without missiles is selected, this button is grayed out
and unavailable.
stop the orders being carried out by the selected unit(s). You
withdraw from battle in good
fire at will button. When fire at will is on,
These buttons are reserved for a variety of
special abilities, depending on the type of unit
currently selected.
52
53
Page 9

Click here to set the selected unit(s) to guard mode. When guard mode is
toggled on, the unit(s) holds position and formation at all costs, and lets
the enemy come to them. A unit on guard will not pursue fleeing enemies.
This can be useful for holding an important location (such as a gateway).
Click here when a unit is selected to toggle the unit’s speed
between walking and running. A unit that runs tires more
quickly than one that marches.
When a group of units is selected, click here to bring up the
formations
Formations
buttons. See How to Use Groups and Group
for more information on these and how they work.
group
How to Control the Battlefield Camera
The default for the battlefield camera in Rome: Total War is an RTS-style
camera, which can be controlled by the mouse or keyboard controls. (There’s also
a second mode that will be discussed in a moment):
• Moving the cursor to the edge of the screen alters the camera view. The
cursor changes shape to show that the view can be altered.
Moving the cursor to the top or bottom (i.e., the bottom of
the control panel) of the screen makes the camera track
forward and backward. The angle of view does not change.
Moving the cursor to the right and left edge of the screen
makes the camera pan (spin on its vertical axis) without
changing its position or height.
Moving the cursor to the right and left edges of the control
panel
makes the camera track (strafe) left and right
without changing the viewing angle.
• The mouse wheel (if your mouse has one) alters the camera height.
The camera automatically pans (tilts) downward as its height is raised
above the battlefield.
• The / and * keys (slash/divide and asterisk/multiply) on the numeric keypad
also alter the camera height in the same fashion.
• The – and + keys (minus and plus) on the numeric keypad alter the camera
tilt without altering its height.
• Clicking the center (third) button on the mouse zooms the camera viewpoint
to look at the unit nearest the cursor while the button is held down. (On
some mice, the mouse wheel acts as the center button).
• The cursor arrow keys on the keyboard track the camera view left, right,
forward and back without changing the viewing angle. Left-click on the
ground and hold down the left or right arrow keys to pan the camera rapidly.
• The numeric keypad also changes the camera view. Check the key settings
by pressing F1 during battle for the camera controls.
Double left-click on a unit card to make the camera move to a position
directly behind that unit. Pressing the End key with a unit selected also
has the same affect.
• Click on the general’s portrait in the control panel to move the camera to a
position directly behind the general’s bodyguard unit. Click on the faction
banner to move to a point directly behind the captain’s unit if no general is
present.
• The blue lines on the mini-map showing the visible area of the battlefield
change as the camera position alters.
• The camera view can be changed when the game is paused.
Press
Esc and go to game options to change camera mode. This will be familiar to
players of earlier Total War titles. Virtually all camera controls are the same,
with one important exception:
• The up and down cursor arrow keys on the keyboard track the camera
view forward and back without changing the viewing angle.
• The left and right cursor arrow keys on the keyboard pan the camera
(spin on its vertical axis) without changing its position.
• The mouse wheel adjusts height but does not change camera angle.
How to Move and Attack
Moving and attacking with units in Rome: Total War use the same basic
controls: left-click to select, right-click on the battlefield for a destination or
target. To issue a move order:
• Left-click on a unit on the battlefield or a unit card in the control
panel to select the unit.
Right-click on the battlefield location where you want the unit to move.
The unit will march to this spot.
• Double right-click on a battlefield location if you want the unit to
run to its destination.
• Animated green movement arrows confirm the move order.
54
55
Page 10

If a unit cannot move to a given location for any reason, the cursor changes.
The terrain may be impassable or the location out of bounds, for example.
• You can review all movement orders by holding down the spacebar.
Chevrons show all unit destinations as long as the spacebar is held.
To issue an attack order:
Left-click on a unit on the battlefield or a unit card in the Control Panel
•
to select the unit.
Right-click on the enemy unit you want to attack and the unit marches
into combat. The cursor will look like this when the unit’s primary attack is
in hand-to-hand combat.
• Double right-click on an enemy unit if you want your unit to charge
into the attack. Again be careful—charging from too far away will tire your
men before the fight has begun.
This cursor is displayed when a unit’s primary attack is with javelins or
throwing spears and if the unit has ammunition remaining.
This cursor is displayed when a unit’s primary attack is with bows
or other missiles (such as sling bullets) and if the unit has
ammunition left.
• For all missile units:
■ Right-click on an enemy unit you want to attack.
■ If the arrow on the cursor is red, your unit will march forward until in
range and then throw its spears.
■ If the arrow on the cursor is green, your unit is already in range and
will begin its missile attack immediately.
• Double right-clicking when a missile-armed unit is selected causes the
unit to run forward until within attack range.
• Animated
Some units can attack in more than one way. For example, many javelin-armed
troops also carry swords (or knives for use in self-defense). You can order a unit to
attack with a secondary weapon:
red movement arrows confirm the attack order.
Click on the
to cancel a movement or attack order at any time.
stop button on the control panel or press the backspace key
• Hold down the Alt key and right-click on an enemy unit to order a
secondary attack by a unit.
• If the cursor shows a sword, double right-click to order the unit to run
and then charge home into melee.
Secondary attacks can be useful with many of the Roman Legionary units, as this
forces them to fight hand-to-hand. Most Legionary units follow Roman tactics of
throwing a volley of pila (special heavy javelins) and then attacking hand-to-hand with
swords. This is why their primary attack is usually shown as a spear. They
automatically charge home as the enemy attempts to recover from the missile attack.
Changing Unit Formation
It’s possible to change the frontage and depth of a unit. The frontage is the number
of men who can fight at the same time. The depth shows the ranks who can be fed
into the meat grinder as casualties are taken:
• Select a unit by left-clicking.
Right-click and drag to change the unit frontage. During this process, the
cursor changes and the layout of the unit is shown with chevrons on the
ground. The large arrow shows the facing of the unit.
Changing Unit Facing
All units have a facing. All attacks are carried out to the front of a unit, and units
can be vulnerable when attacked in the flanks (sides) or from behind. It’s possible to
alter a unit’s facing—to meet an oncoming threat, perhaps—without having it move.
• Select the unit by left-clicking on it on the battlefield or its unit card in the
Control Panel.
• Use the < and > keys (the same keys as comma and period on many
keyboards) to rotate the unit’s facing without changing its position.
• The new layout of the unit is shown with chevrons on the ground. The large
arrow shows the unit facing.
When multiple units are selected (see
changing unit facing creates a battle line and then rotates it.
How to Use More Than One Unit),
Waypoints
When a unit is issued a movement order, it normally marches straight toward its
destination. However, units are sensible and watch for barriers such as walls and
rivers and follow a route that takes them over a river crossing (a ford or bridge), or
through a gap in the walls.
It’s possible to issue detailed marching orders to a selected unit and set up waypoints
for it to follow to its final destination:
56
57
Page 11

To set a waypoint for a unit, hold down the
the spot you want as a waypoint. Repeat this process to add another
waypoint to the unit’s marching route.
• No more than a dozen waypoints for a route are advisable.
• You can remind yourself of waypoints later. With the unit selected, hold
down the shift key to show the waypoints that have been set.
• Holding down the
destination and facing of the unit.
spacebar (without the shift key) still shows the final
shift key and right-click on
Unit Activity
Move the cursor over any unit on the battlefield or unit card and a tool tip
appears, giving you details of the unit’s status.
The unit cards in the Control Panel also give you a way of monitoring what your
units are doing. Each unit card can have a symbol as a notification of what’s
happening to the unit. It’s quite possible for more than one of these symbols to apply
at any one time. If this is the case, the symbols that apply are displayed in turn:
A single arrowhead at the top of the card shows the unit is moving at a
steady march toward its ordered destination.
A double arrowhead at the top of the card shows that the unit is moving
toward its ordered destination at a
has yet to make contact.
Crossed swords show the unit is in
A bow and arrow symbol shows that the unit is firing missiles.
(This symbol is used even if the unit is actually throwing spears or firing
sling bullets).
Arrows show the unit is under fire. It may be worth moving the unit out
of range or ordering it to attack its tormentors!
This symbol shows that the unit is currently hiding and may not be
spotted by enemy forces. Most units can hide in woods (allowing them
to spring tactical ambushes), but there are some types of soldiers who
can hide almost anywhere!
The white flag symbol shows the unit has suffered a morale crisis and is
now routing, that is, running from the enemy. The unit banner also
changes to white on the battlefield. It may be possible for a general to rally
troops who are routing.
If a unit is surrounded and unable to rout, the fight to the death icon will
be displayed on the unit card.
run or is charging an enemy unit and
hand-to-hand combat.
These symbols only appear on unit cards during sieges.
See How to Assault a Settlement or Fort.
Orders for Artillery Units
Artillery units work in exactly the same fashion as other units. However,
artillery pieces are heavy, and even with large crews it can take time to
execute an order. Don’t expect artillerymen to dash or charge anywhere!
• Remember that the number on the unit card is not the number of artillery
pieces, but the number of crewmen. As crewmen are killed, the number of
pieces that can fire (and rate of fire) drops.
• Just like other missile units, the bar shows the ammunition supply for the
unit. When this is gone, the unit can no longer fire.
When attacked by missiles or in hand-to-hand combat, crews may abandon
their pieces. This cursor appears when the selected unit has abandoned its
weapons. If the crew can move back to their pieces and resume firing, the
hand symbol appears when the cursor is moved over an artillery piece.
Right-clicking orders the crew to resume working their weapons.
How To Use More Than One Unit
It’s possible to issue orders to multiple units at the same time. The units will move
to the same location or attack the same target. There are various ways of selecting
more than one unit to receive orders:
Hold down the Ctrl key and left-click on more than one unit on
the battlefield.
• Left-click and drag on the battlefield away from a unit, creating a
highlighted box. All the units within the box will be selected.
• Hold down the Ctrl key and left-click on more than one unit card in the
Control Panel.
• Hold down the Ctrl key and double left-click on a unit card in the
Control Panel. All units of the same type will be selected.
• A combination of the above methods also works. For instance, selecting
some units on the battlefield and some through the Control Panel.
• Holding down the
unit card will toggle the selection, allowing you to remove a unit from a
collection before issuing orders.
Once multiple units are selected, orders are issued in the usual fashion:
Right-click on a destination for a march order.
•
Double right-click on a destination for a run order.
•
Ctrl key and left-clicking on a selected unit or its
58
59
 Loading...