

Page 1
Installing Sega Dreamcast GD-ROM
Installing Sega Dreamcast GD-ROM
Tools used in this guide
Phillips #2 Screwdriver
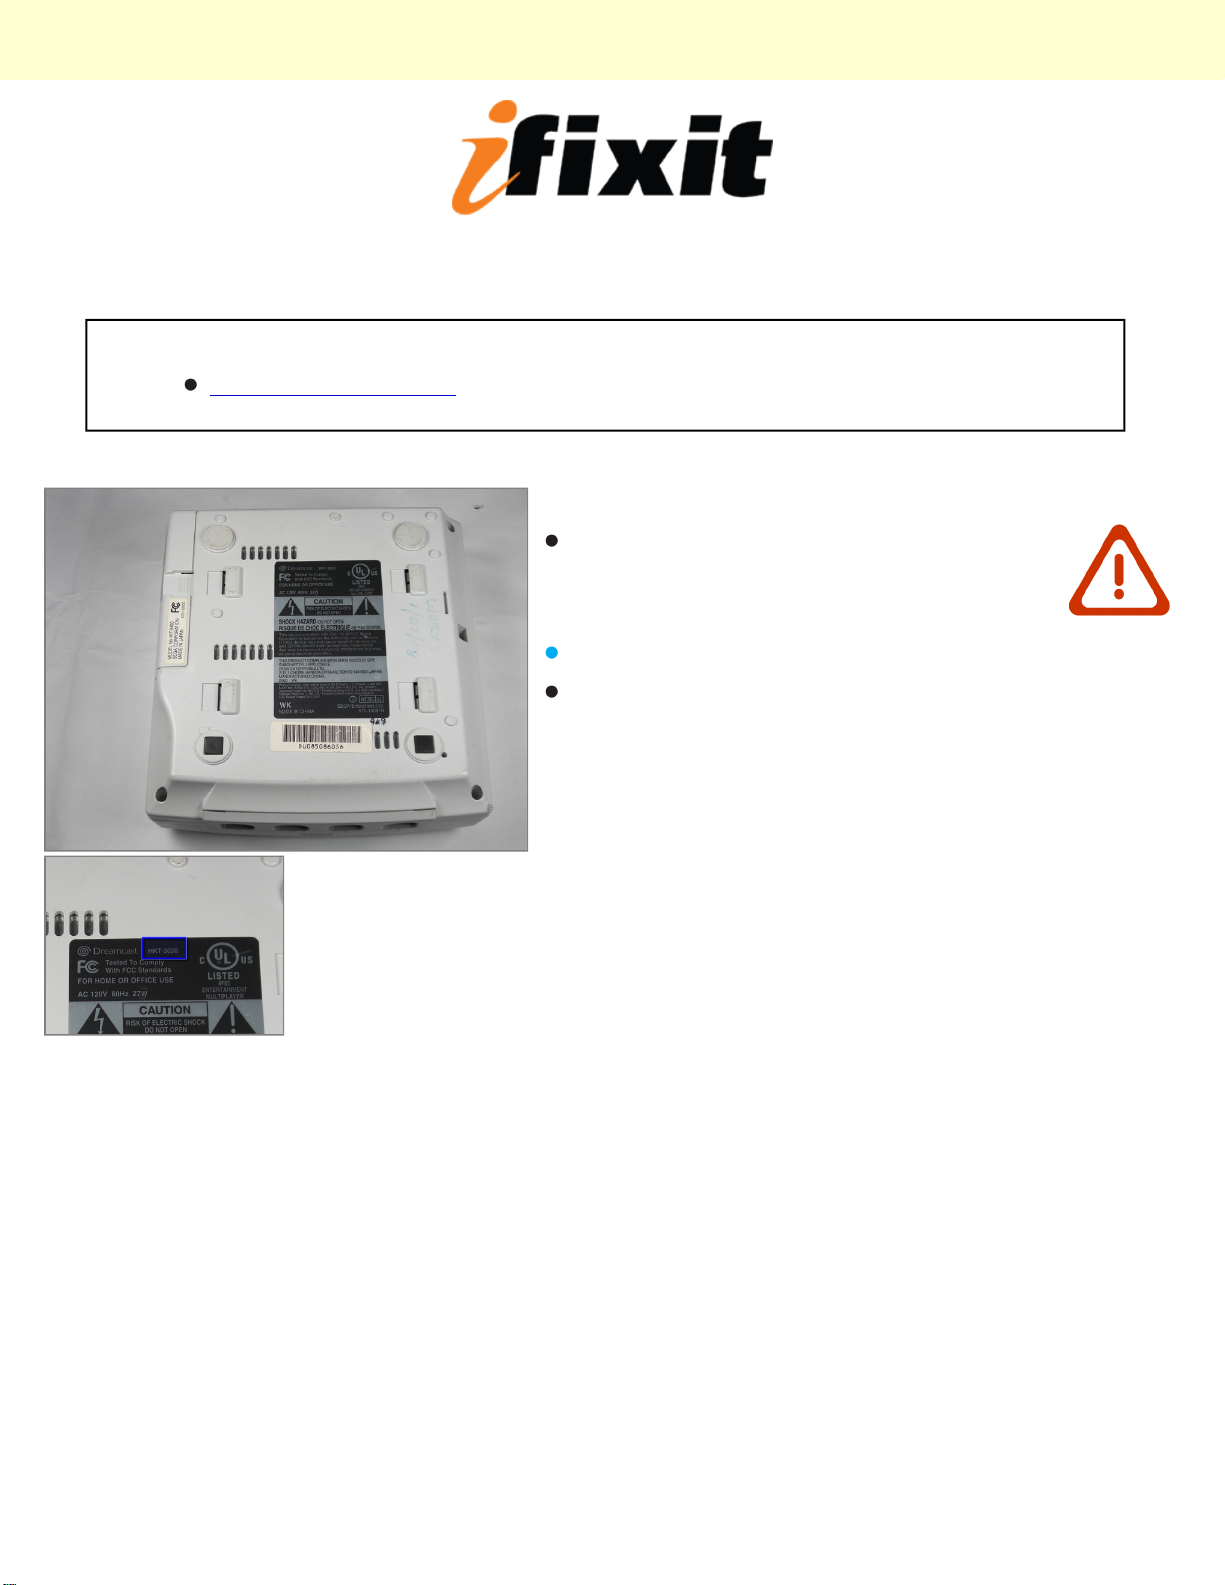
Step 1 - repair Expansion bay
Verify that the console is disconnected from
the AC outlet before you begin.
Flip the console over on its back.
Take note of your model number, in case
replacement parts are needed.
© 2010 iFixit — CC BY-NC-SA www.iFixit.com Page 1 of 5
Page 2
Installing Sega Dreamcast GD-ROM
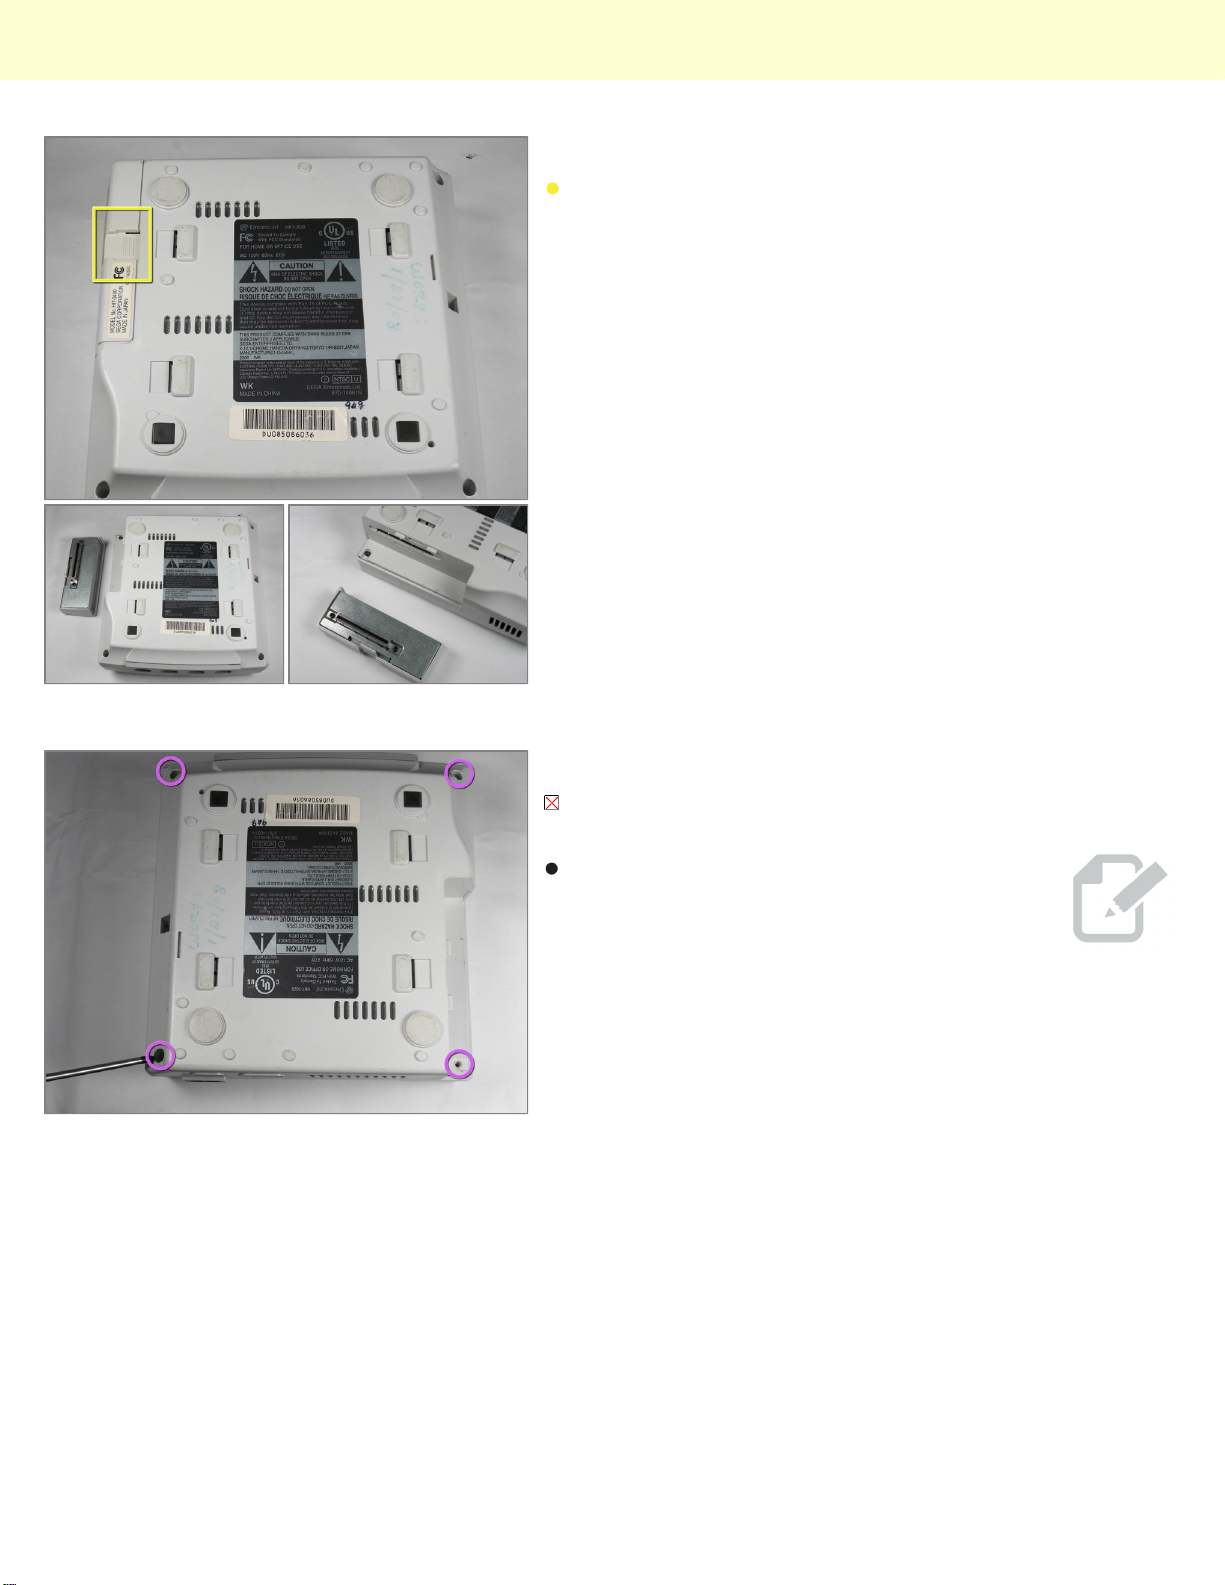
Step 2
Remove the expansion bay by applying pressure to
the small clip on the expansion bay while prying it away
from the console.
Step 3 - repair Top Cover
Locate and remove all four black 12mm Phillips #02
screws from the underside of the console.
The fourth screw is hidden under the
expansion bay if it has not already been
removed.
© 2010 iFixit — CC BY-NC-SA www.iFixit.com Page 2 of 5
Page 3
Installing Sega Dreamcast GD-ROM
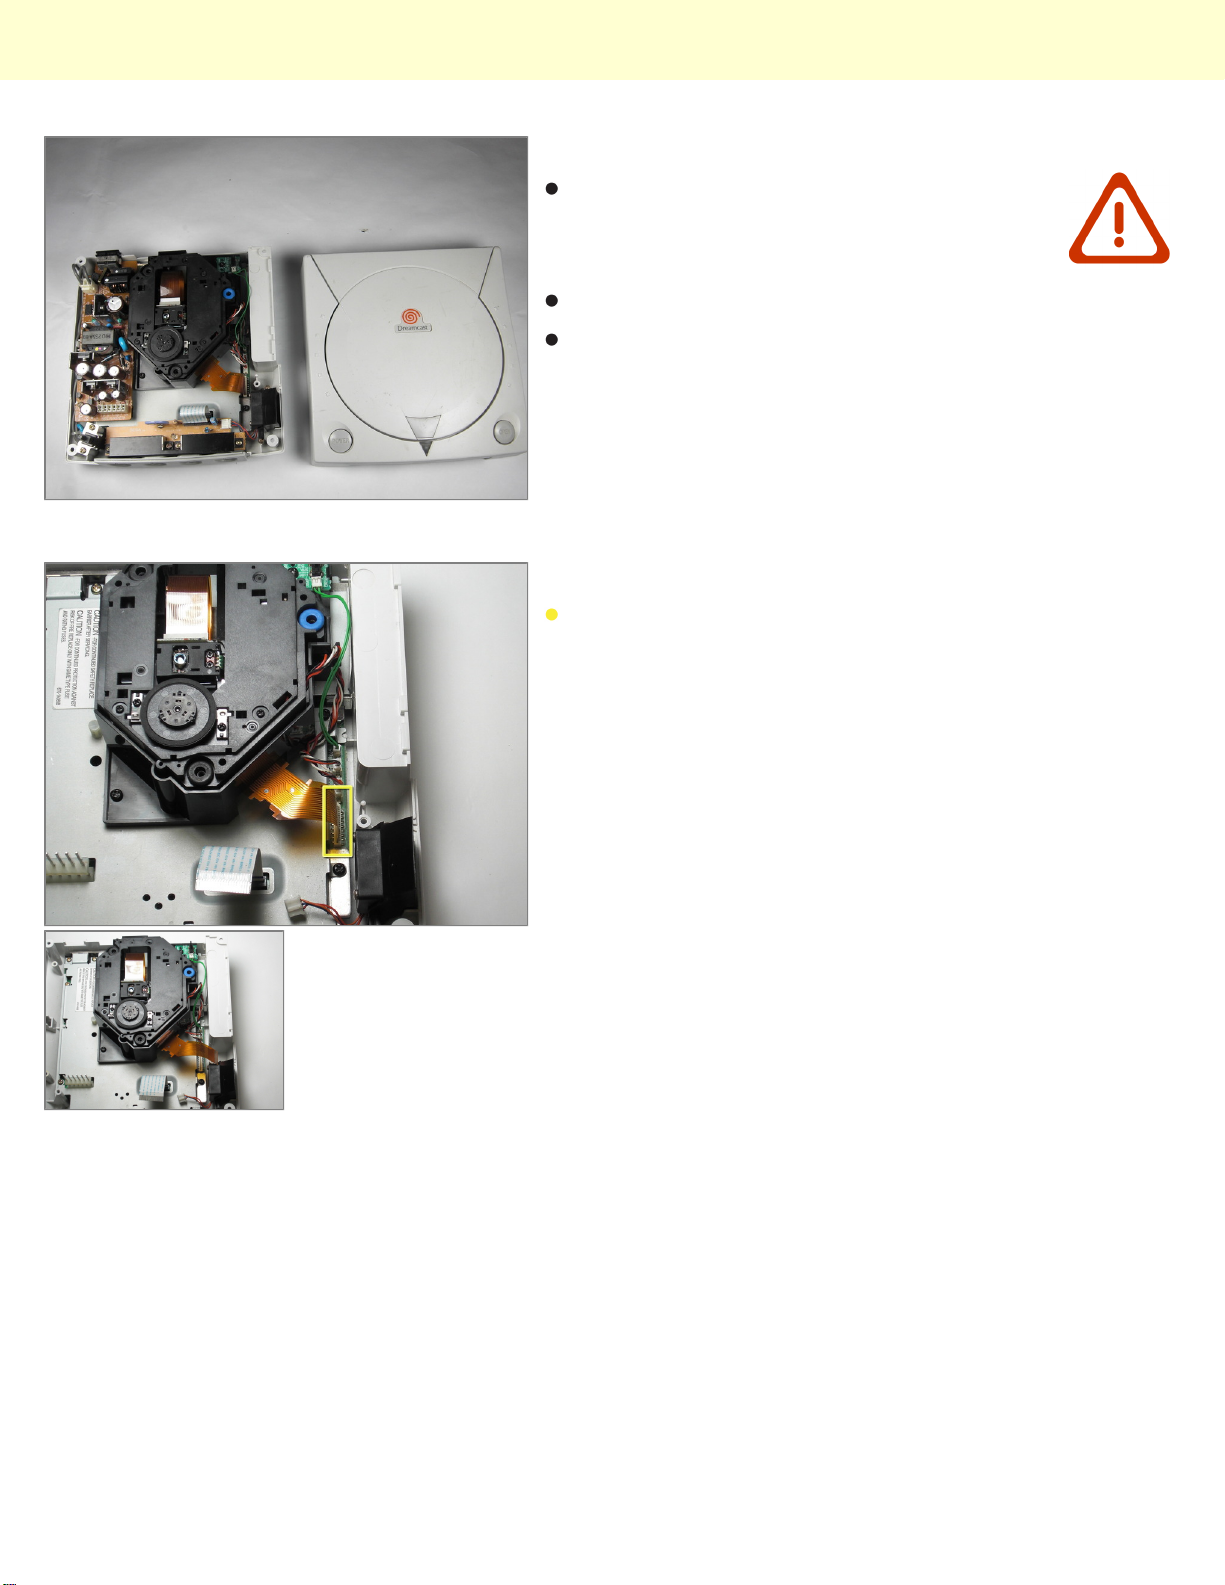
Step 4
Be careful that the internal components do
not topple out.
Flip the console topside up.
Remove the top cover of the chassis by gently lifting
the upper portion of the console.
Step 5 - GD-ROM
Detach the orange cable by giving it a gentle pull
while wiggling the cable back and forth until it loosens
from the logic board.
© 2010 iFixit — CC BY-NC-SA www.iFixit.com Page 3 of 5
Page 4
Installing Sega Dreamcast GD-ROM
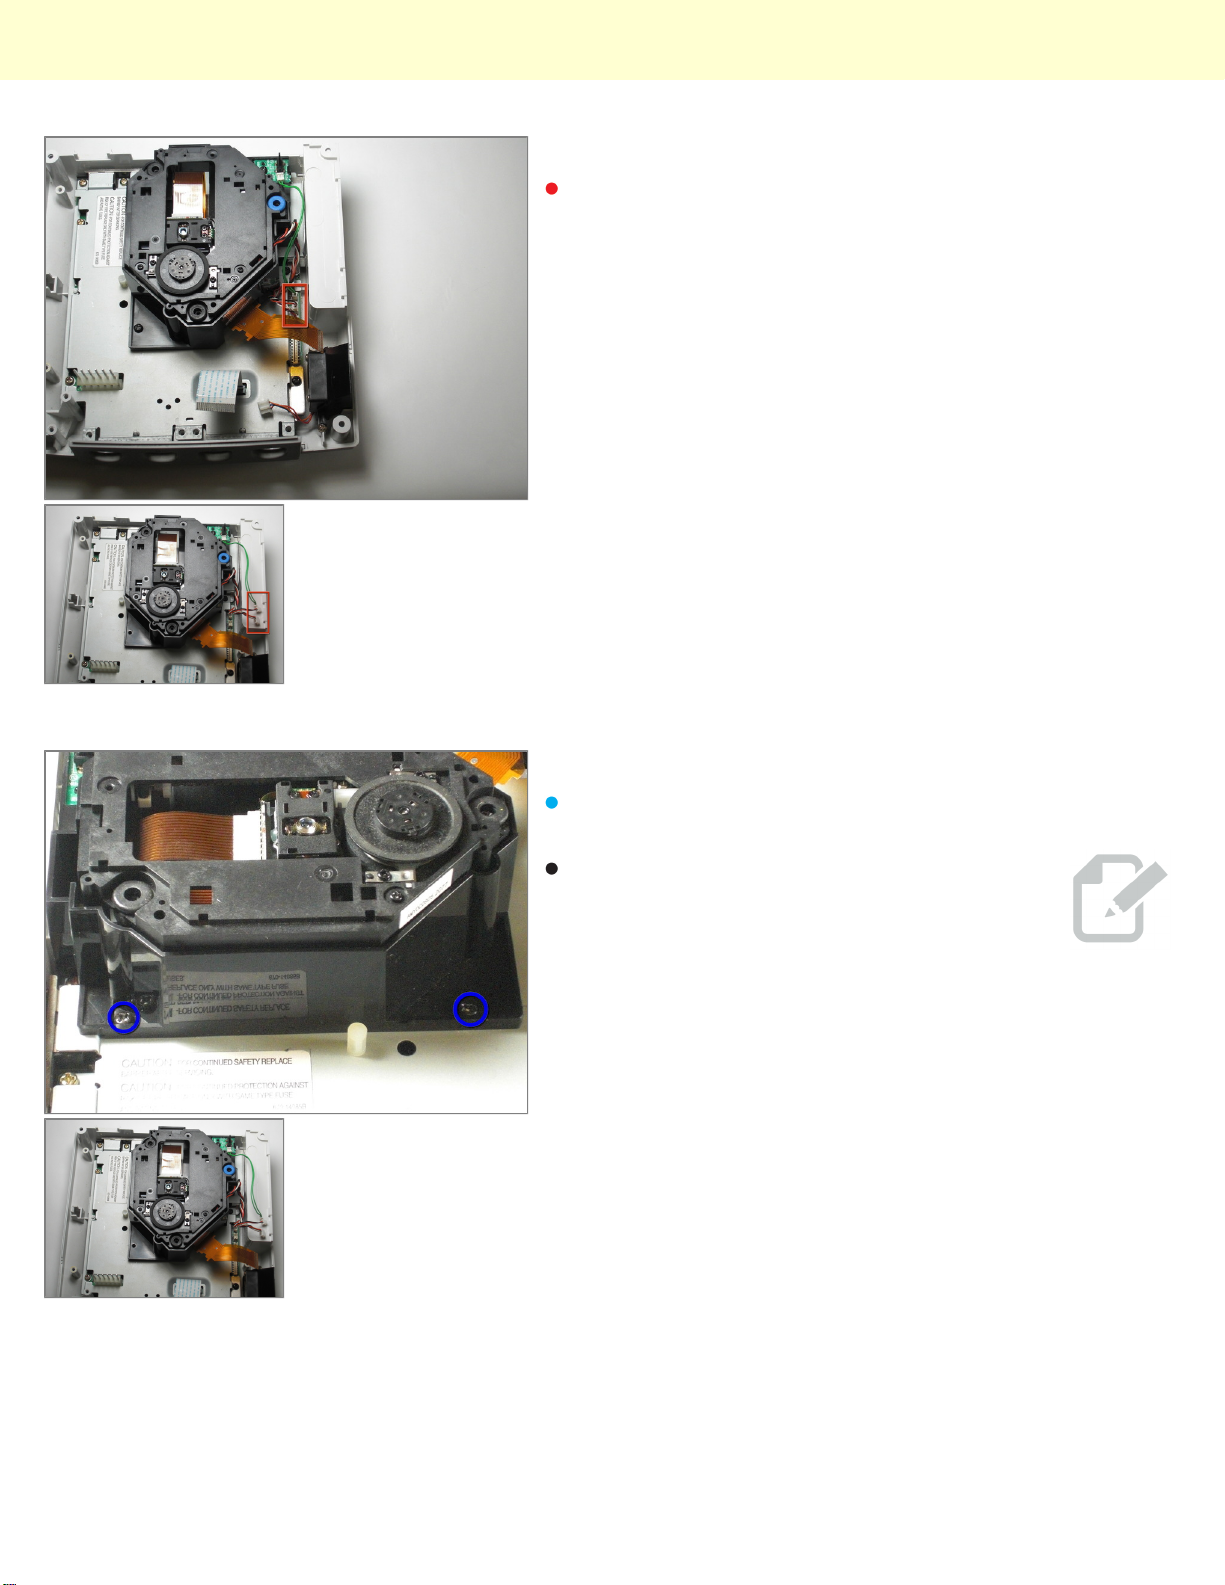
Step 6
Detach the cables by gently pulling the three GD-ROM
cables to remove them from the logic board.
Step 7
Remove the two black 12mm Philips #02 screws
located on the left side of the GD-ROM bracket.
The console is rotated 90 degrees counterclockwise in the first photo. The second
photo depicts the normal position.
© 2010 iFixit — CC BY-NC-SA www.iFixit.com Page 4 of 5
Page 5
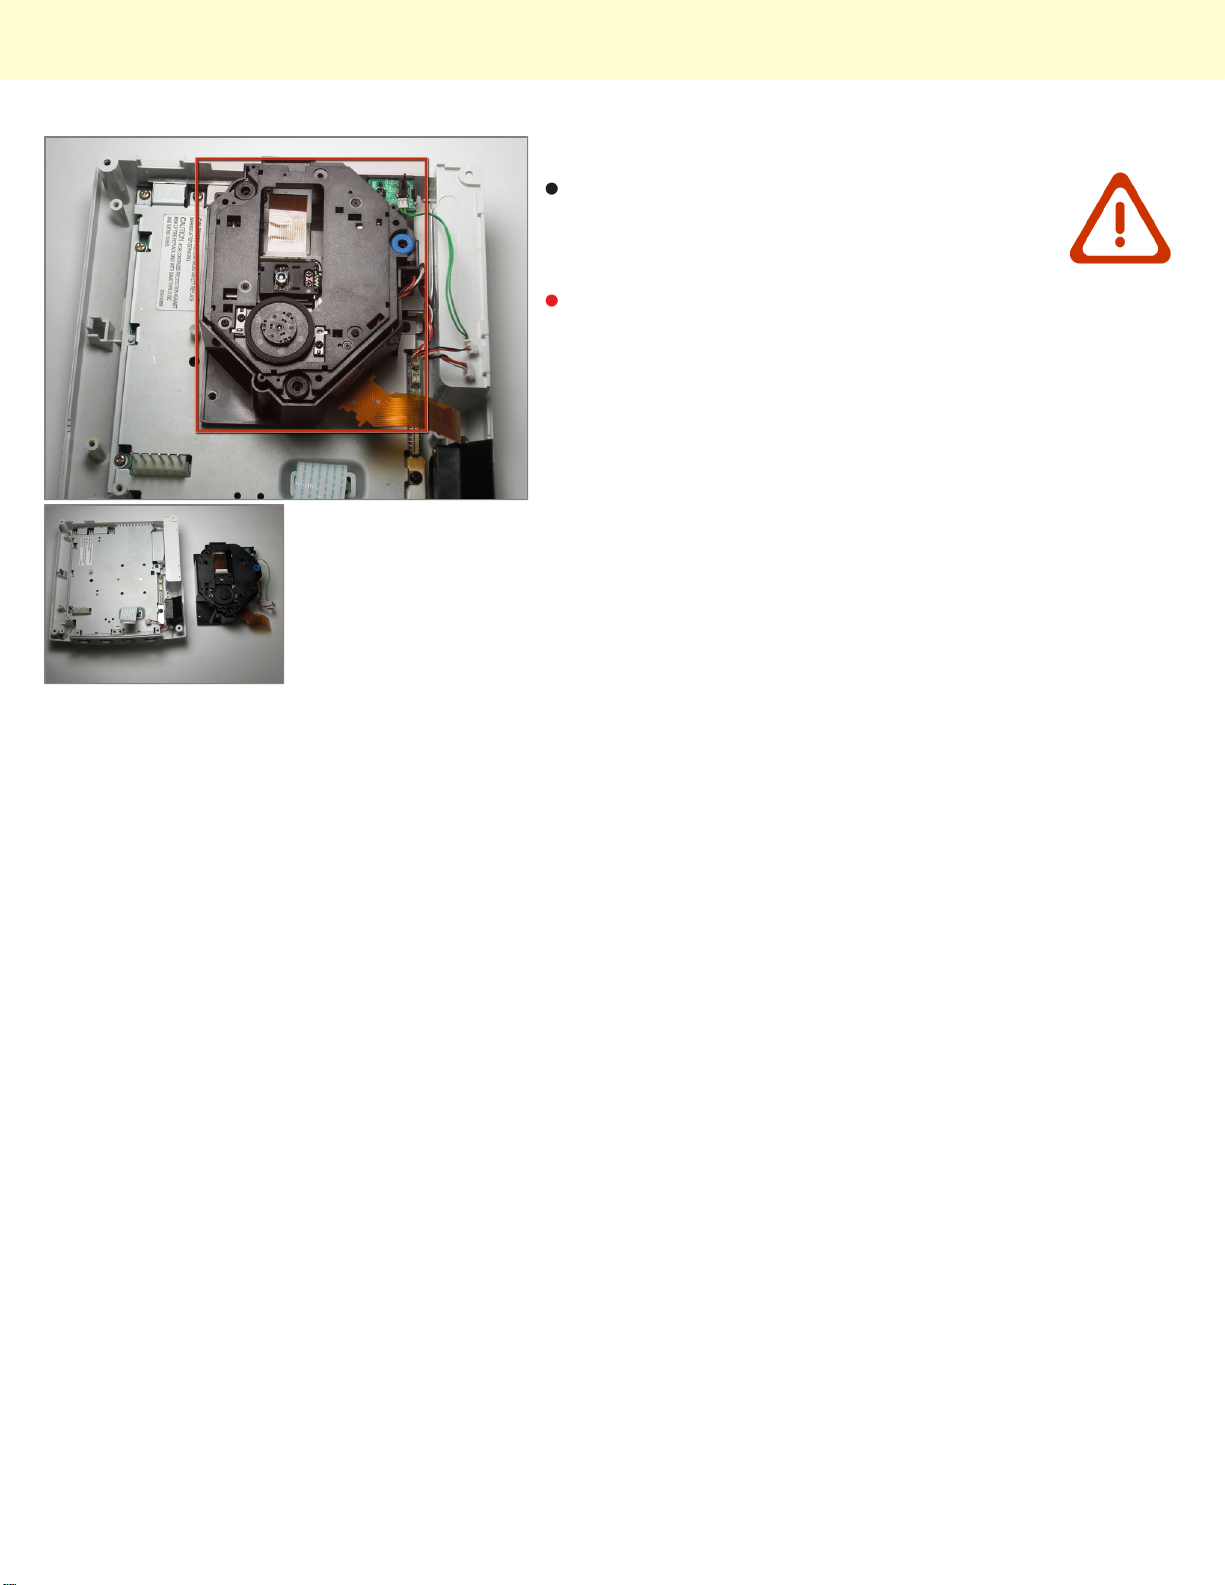
Installing Sega Dreamcast GD-ROM
Step 8
When lifting the GD-ROM, be careful that
the top half of the casing does not detached
from its base.
Remove the GD-ROM by gently lifting it from its base.
© 2010 iFixit — CC BY-NC-SA www.iFixit.com Page 5 of 5
 Loading...