

Page 1
Installing Sega CD CD Tray
Installing Sega CD CD Tray
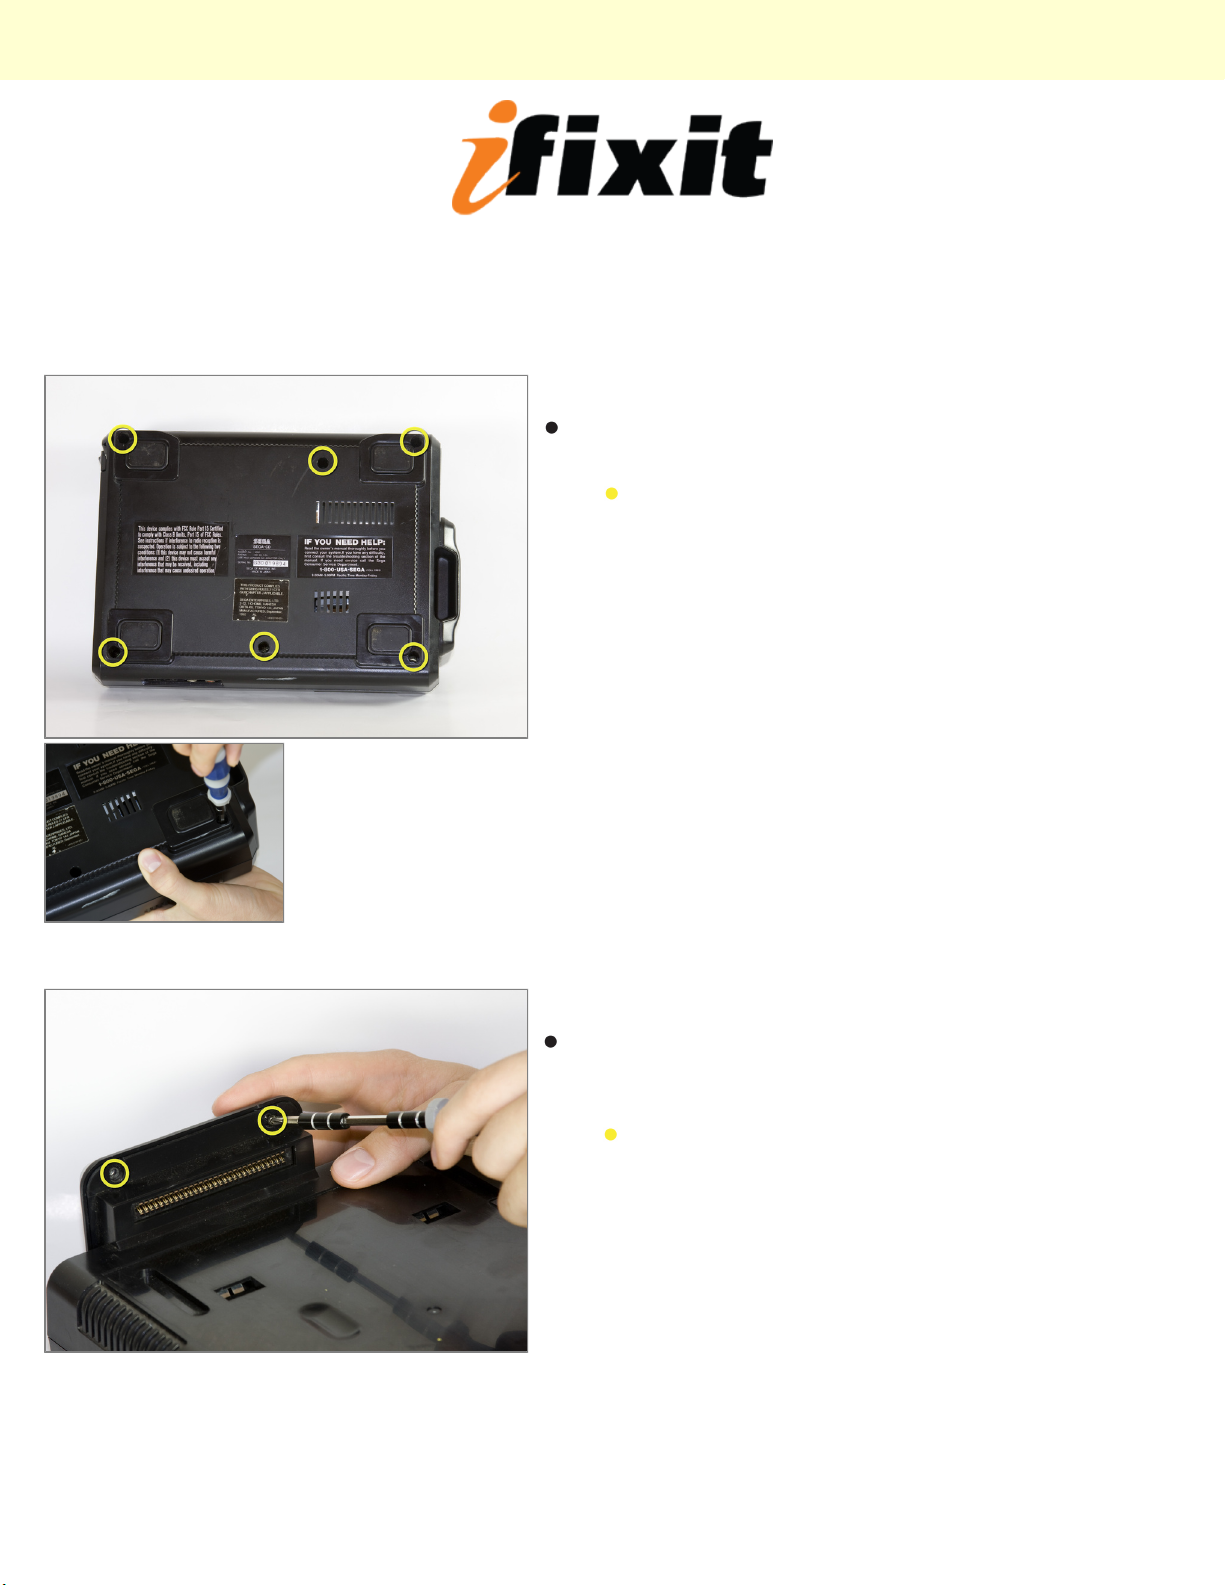
Step 1 - disassembly Plastic Housing
Remove the six screws on the underside of the console
using a medium phillips screwdriver
1/2 inch bronze screws (6)
Step 2
Remove the 2 screws on the side of the console that
attach the Genesis adapter to the rest of the unit using
a medium phillips screwdriver.
© 2010 iFixit — CC BY-NC-SA www.iFixit.com Page 1 of 6
3/8 inch black screws (2)
Page 2
Installing Sega CD CD Tray
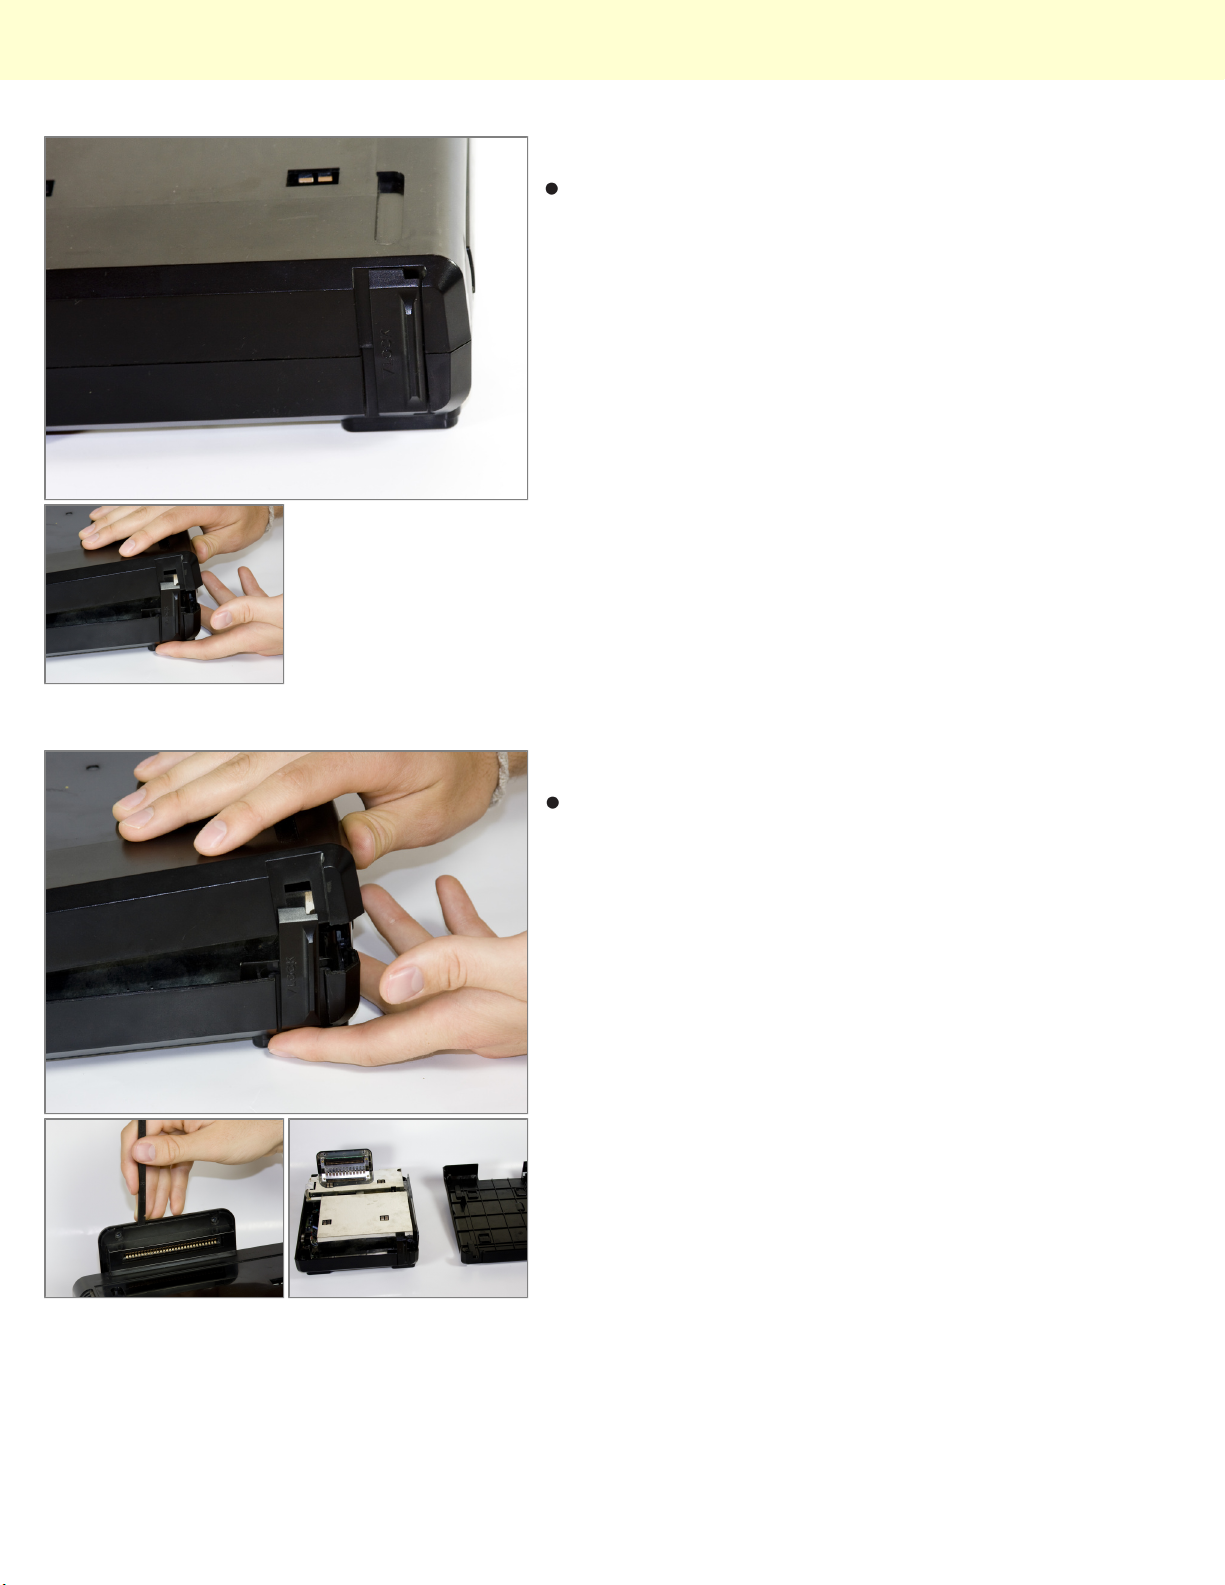
Step 3
Ensure the lock on the left of the case is in the unlock
position (slide left as shown) before removing the case.
Step 4
Remove case by lifting up left side, then using the
prying tool, pry the cover out of the genesis attachment
and lift upward.
© 2010 iFixit — CC BY-NC-SA www.iFixit.com Page 2 of 6
Page 3
Installing Sega CD CD Tray
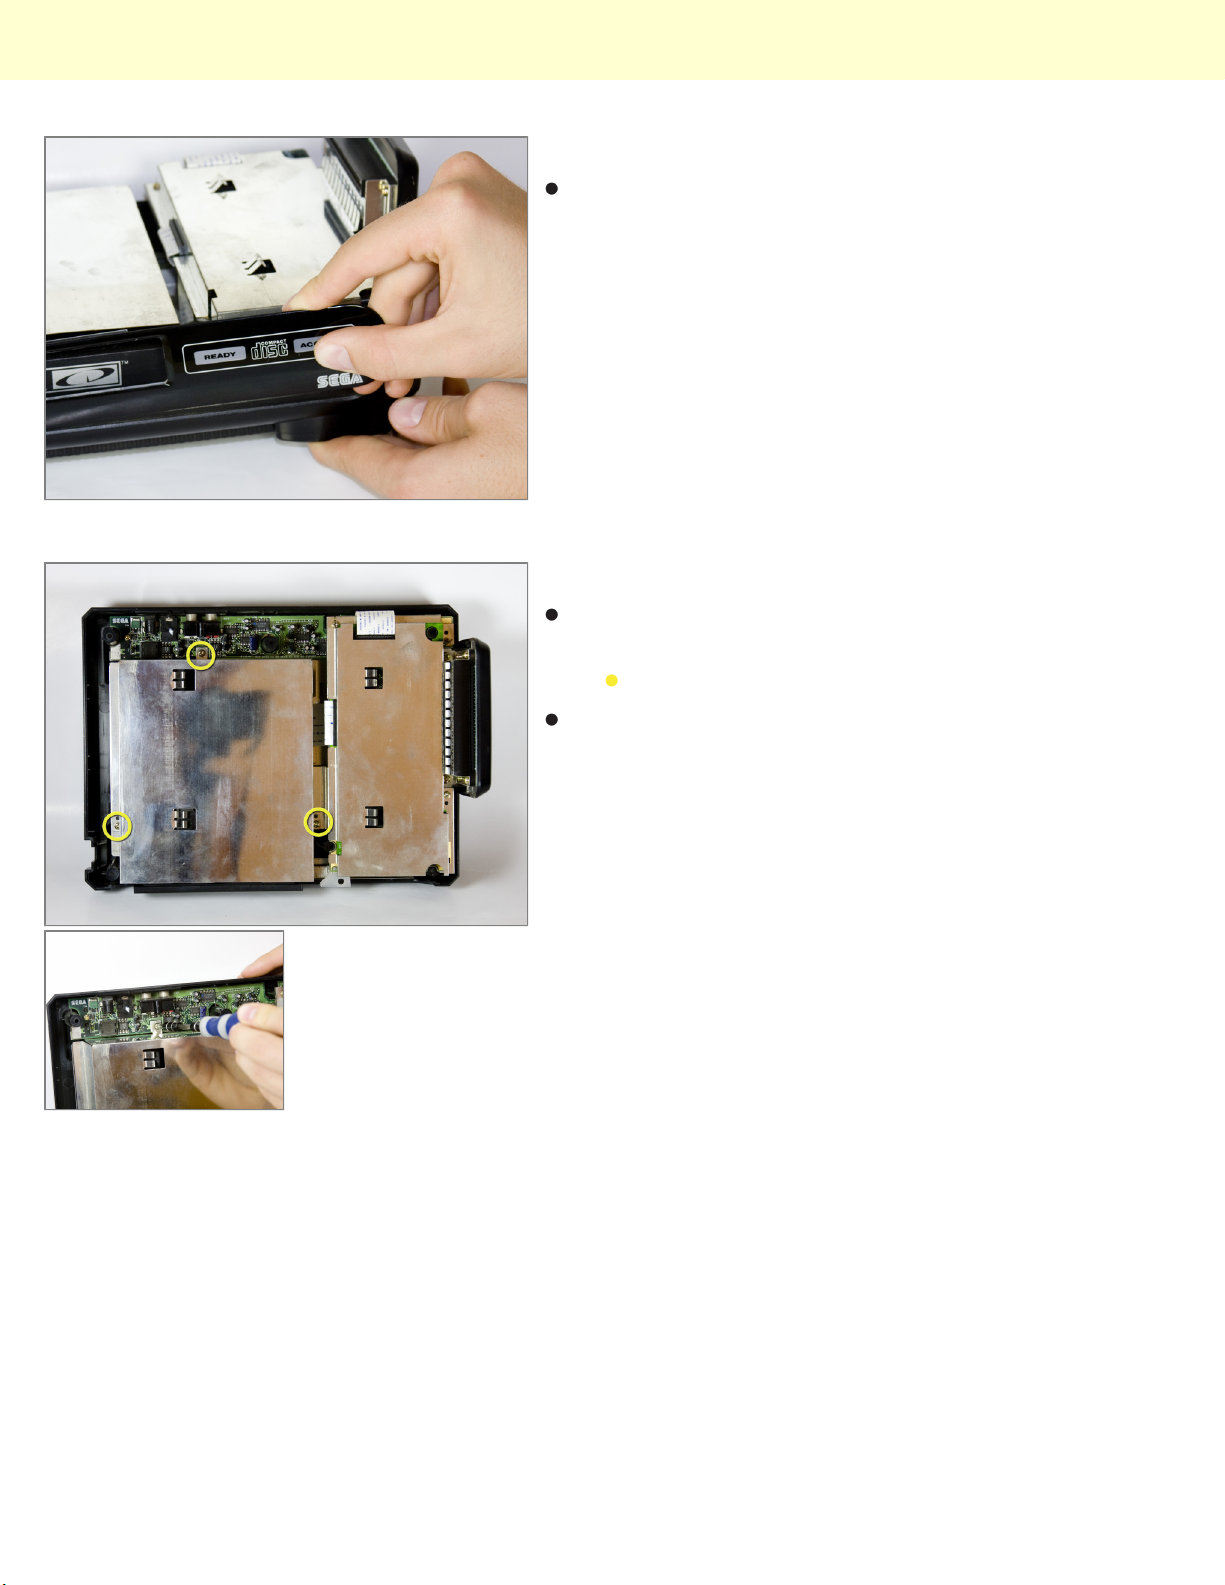
Step 5
Finally remove the faceplate on the front by sliding it
up, then pulling it out.
Step 6 - CD Tray
Remove large metal plate by unscrewing the three
screws using a medium phillips screwdriver.
Carefully lift the metal plate to remove
1/2 inch bronze screws (3)
© 2010 iFixit — CC BY-NC-SA www.iFixit.com Page 3 of 6
Page 4
Installing Sega CD CD Tray
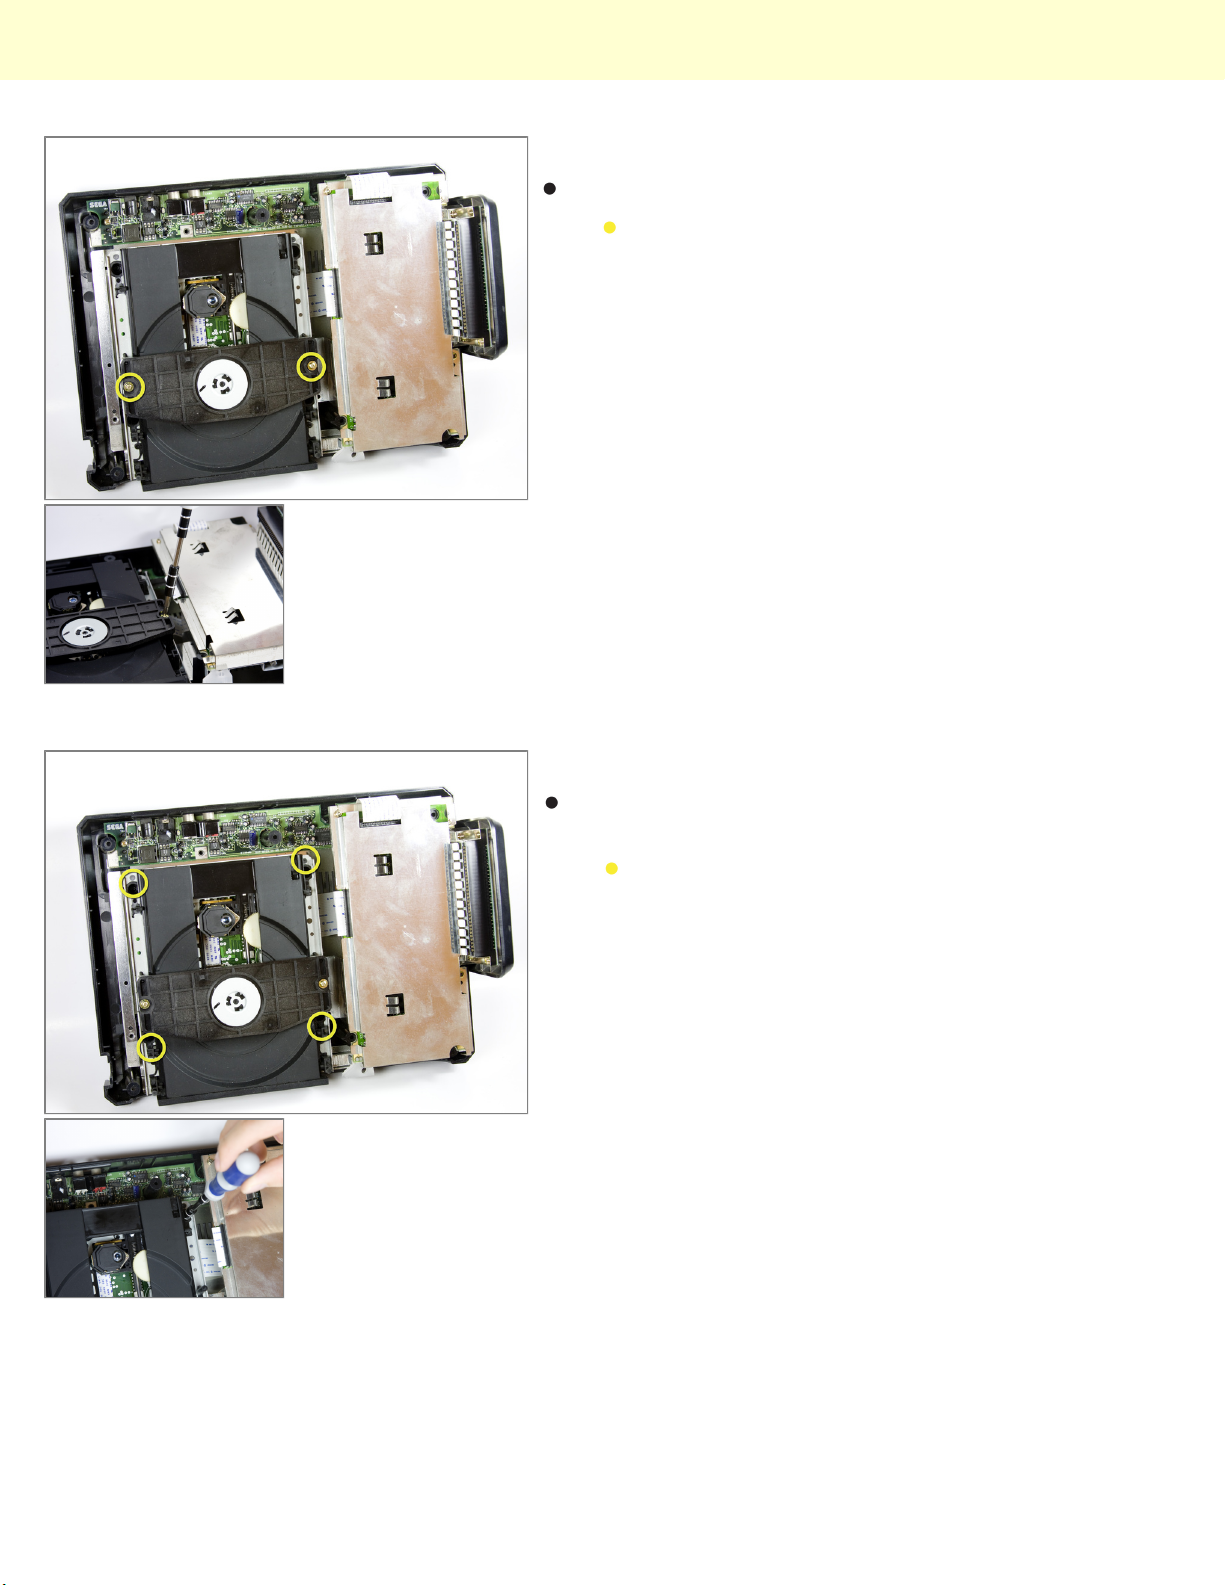
Step 7
Remove the two screws from the plastic bar.
3/8 inch bronze screws (2)
Step 8
Remove the 4 screws to remove CD tray using a
medium phillips screwdriver
3/8 inch black screws (4)
© 2010 iFixit — CC BY-NC-SA www.iFixit.com Page 4 of 6
Page 5
Installing Sega CD CD Tray
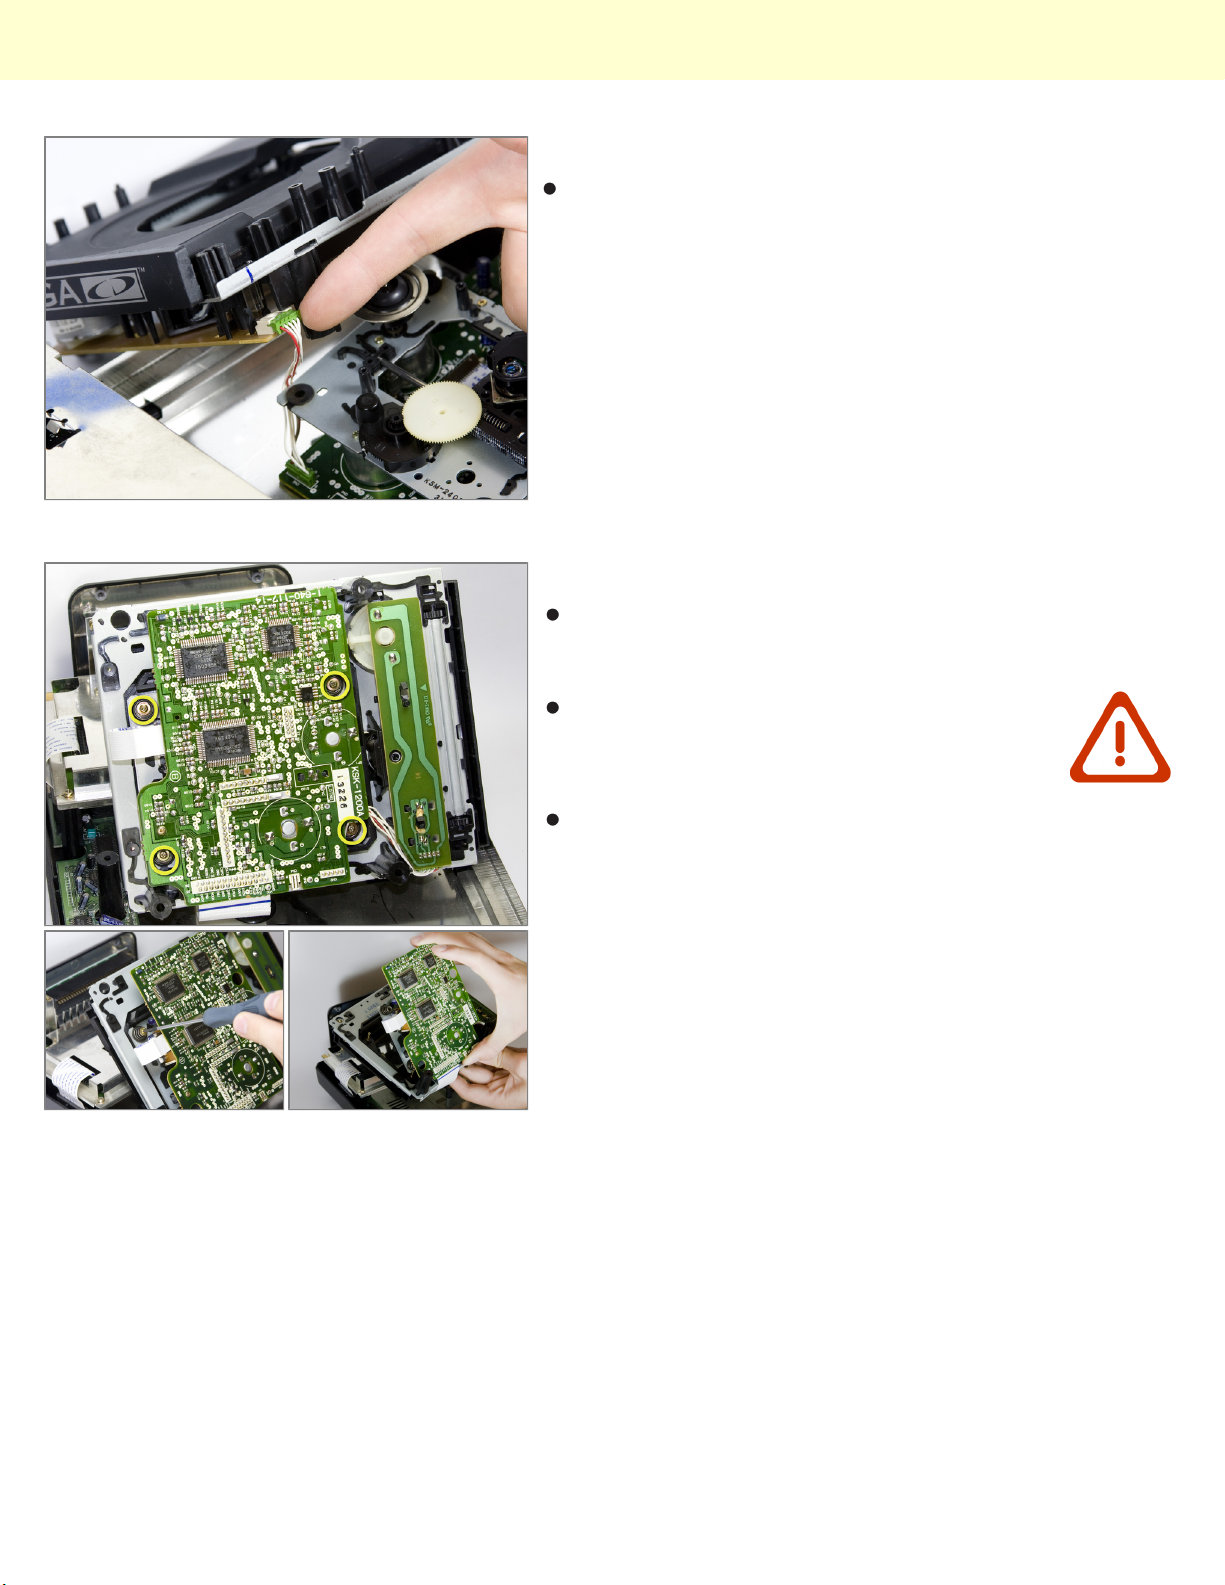
Step 9
Carefully unplug wire connection to optical reader
Step 10
Remove the 4 screws on the underside of the CD tray
that attach it to the circuit board using a small phillips
screwdriver.
Caution: Be careful with that the 4 springs
below the circuit board don't get lost as they
are held in place by the screws
Carefully remove CD tray from circuit board
© 2010 iFixit — CC BY-NC-SA www.iFixit.com Page 5 of 6
Page 6

Installing Sega CD CD Tray
To reassemble your device, follow these instructions in reverse order.
This document was last generated on Dec 15, 2010.
© 2010 iFixit — CC BY-NC-SA www.iFixit.com Page 6 of 6
 Loading...