


61N Camera
User Manual
Date: 2016-10-05
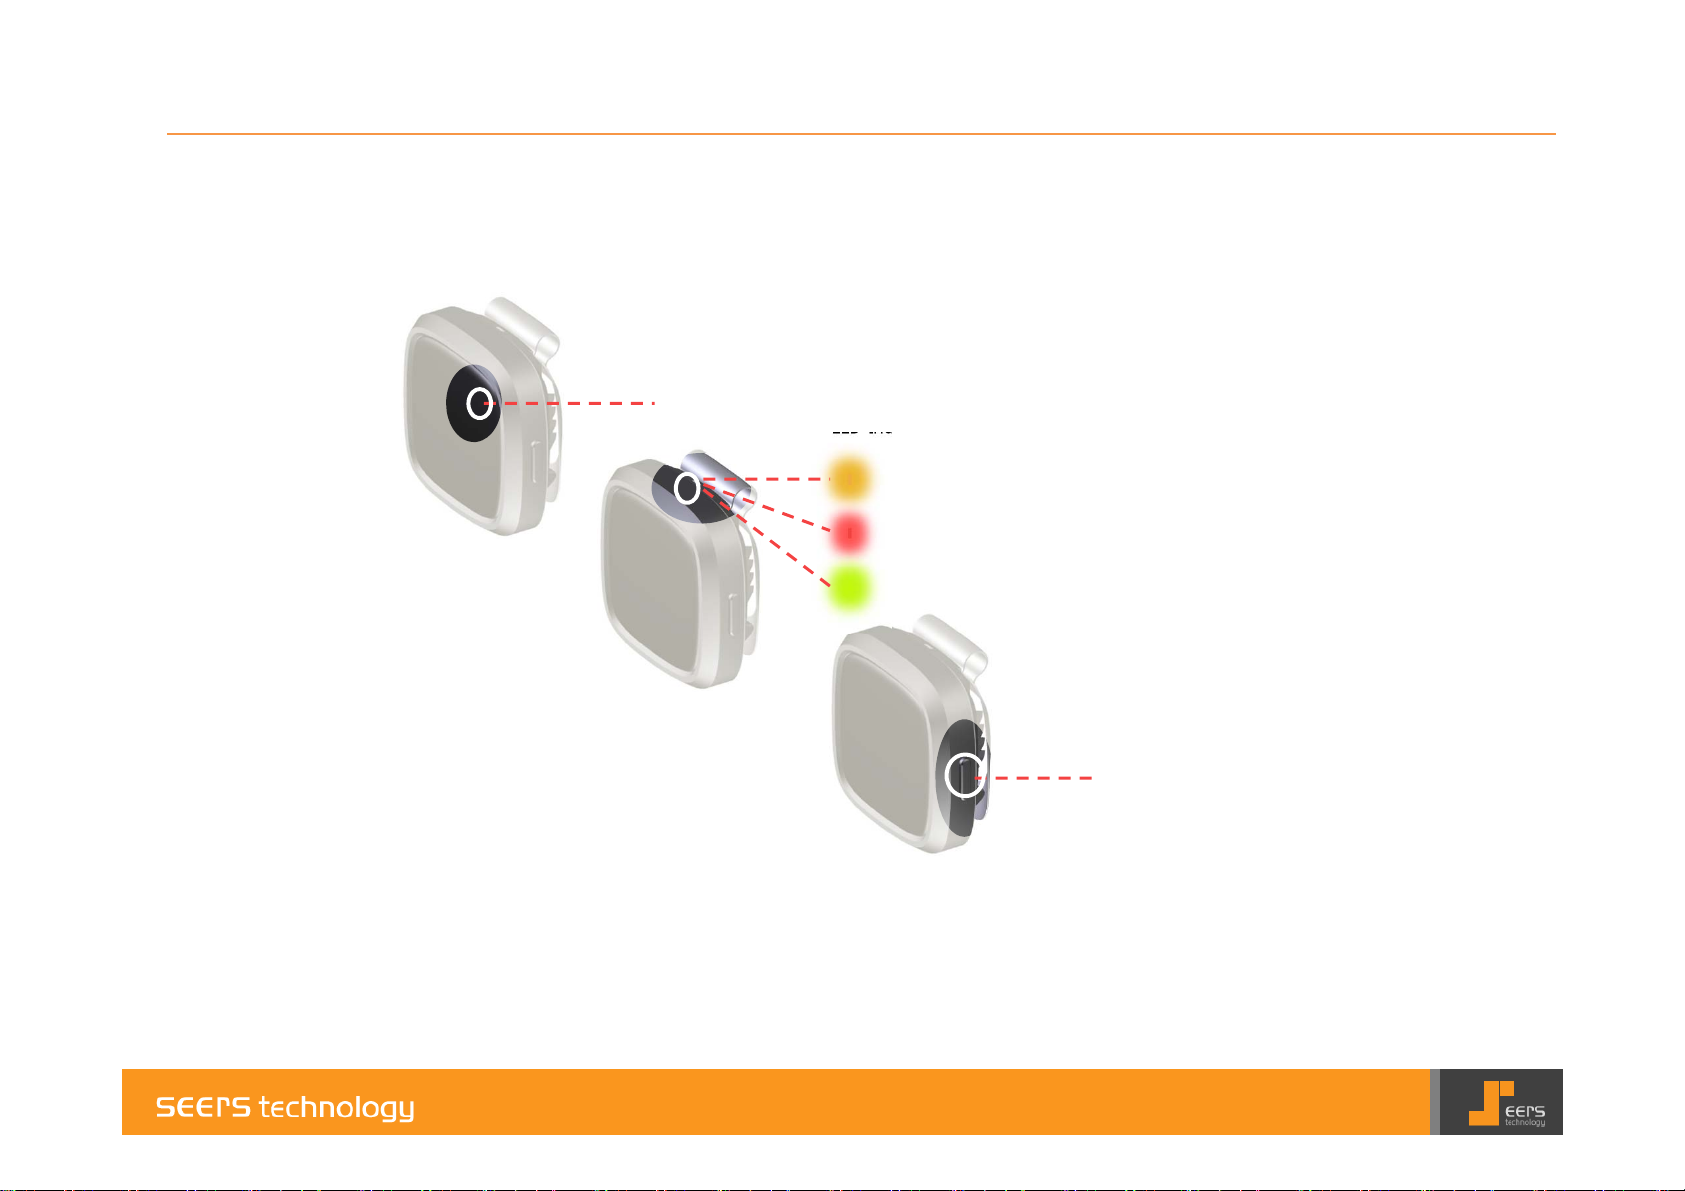
Name of the parts
Camera Lense
LED Indicator
Orange LED : System booting
Manual shoot(double tap on front side)
Red LED : Charging
Green LED : Full charge(LED Off if cable detached)
Power On/Off Button
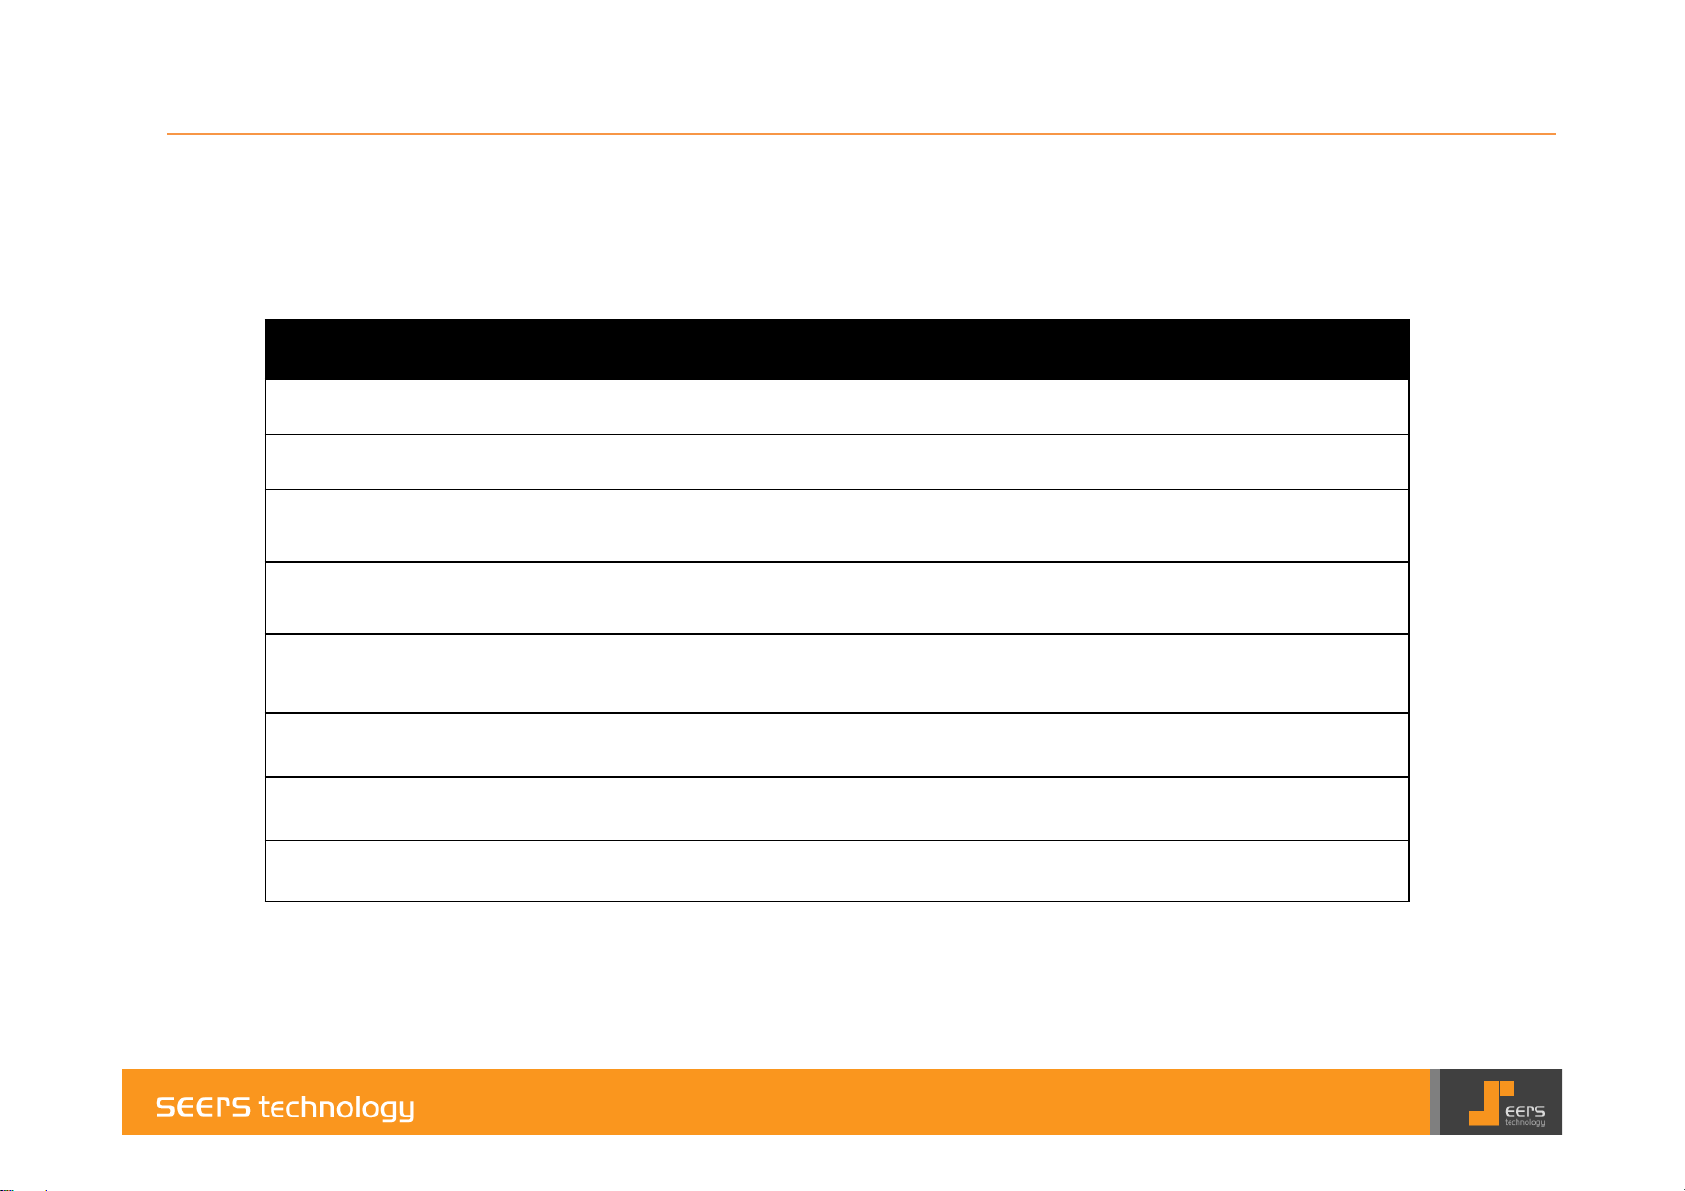
Functions and Control
Function Control Confirm Note
Charging USB cable charge USB cable connect to Device, and Power source
Power On Push a button about 2 sec.
Auto shooting None(Auto) Auto shooting each 1 min.
Manual shooting Double tap on front side Orange LED On about 2 sec, LED Off
Video Recording Short push a button twice
Check your
Photo & Video
Reset Push a button about 8 sec.
Power Off Push a button about 2 sec. Green LED On, blink twice, LED Off
APP for Phone
USB connect to PC
Red LED Orange LED Green LED On -> Off
Push button twice for 1 sec, Orange LED bling
for 3 min.
Devices with USB cable connect to PC, read USB
memories, check photo and video.
Green LED On, blink twice, revive Power on
operation
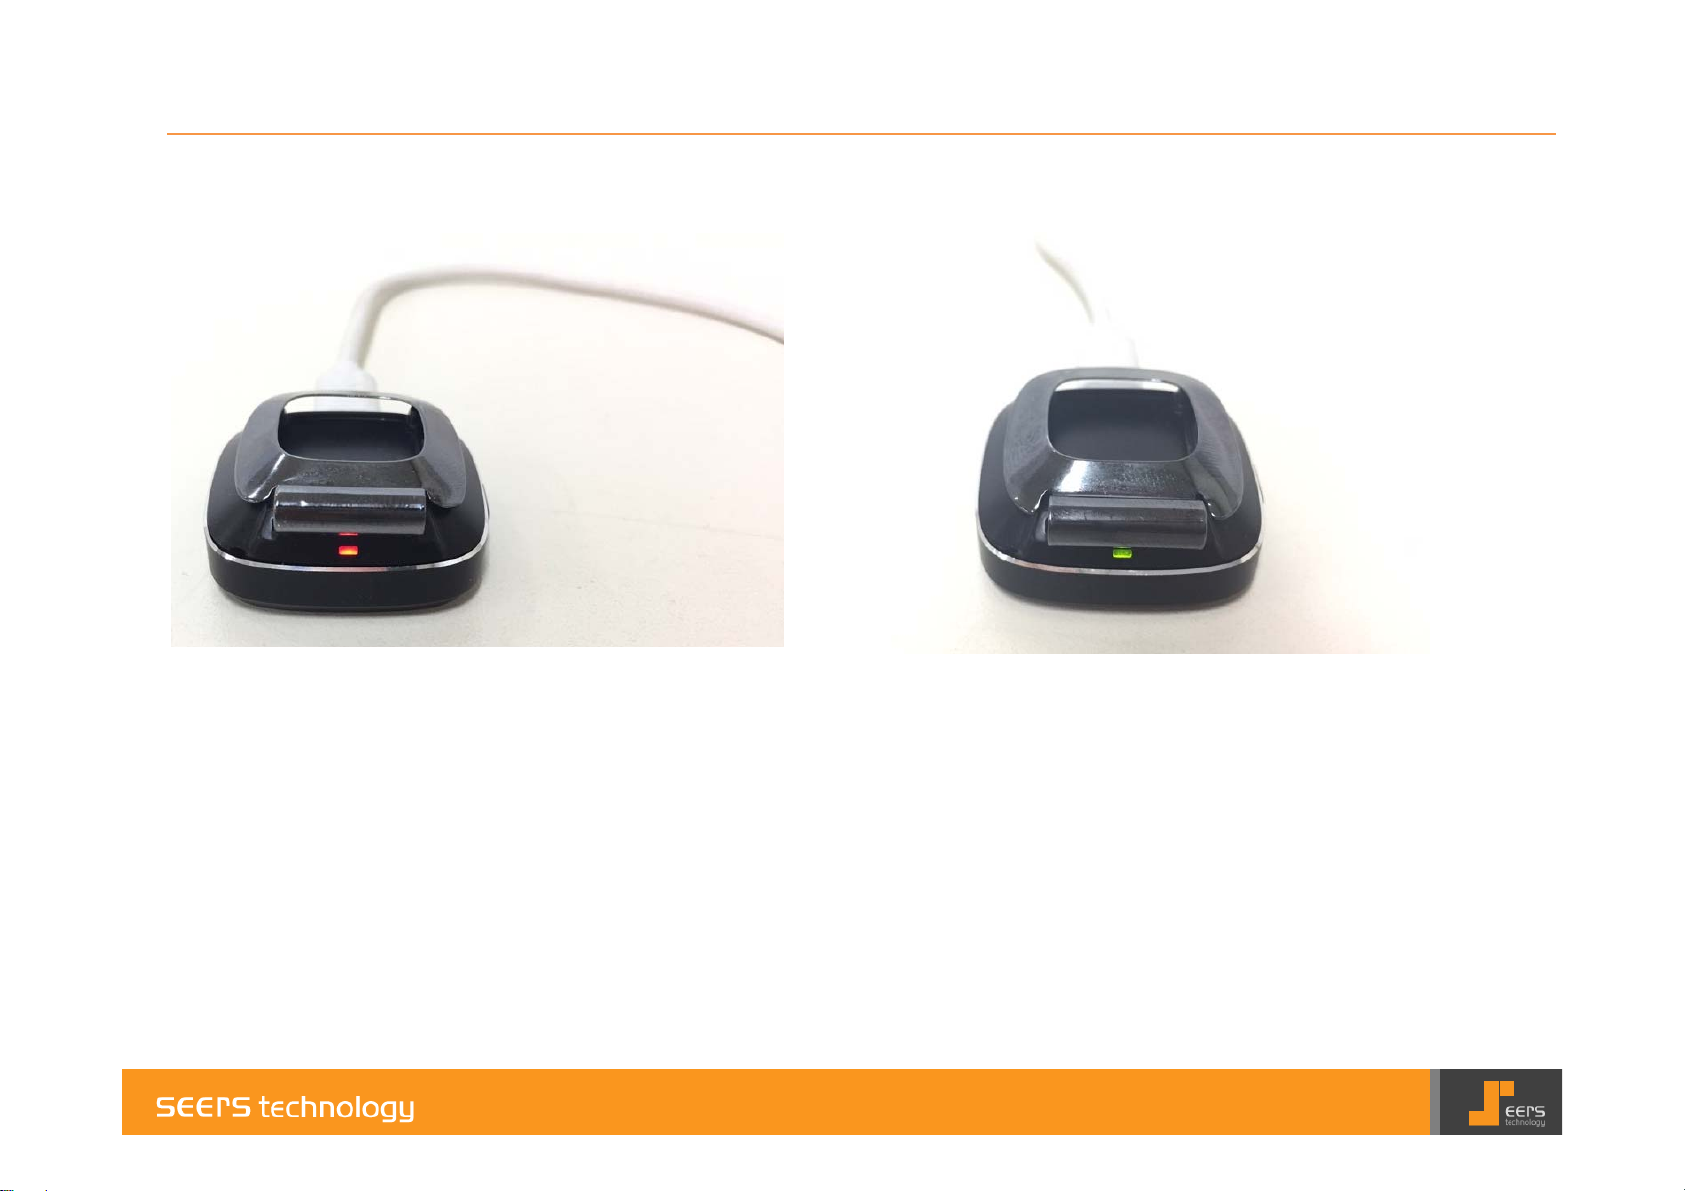
Charging the Battery
Connect Micro USB cable to 61N.
Red LED light will come one and start
charging.
When charging is complete Green LED
light will come on.
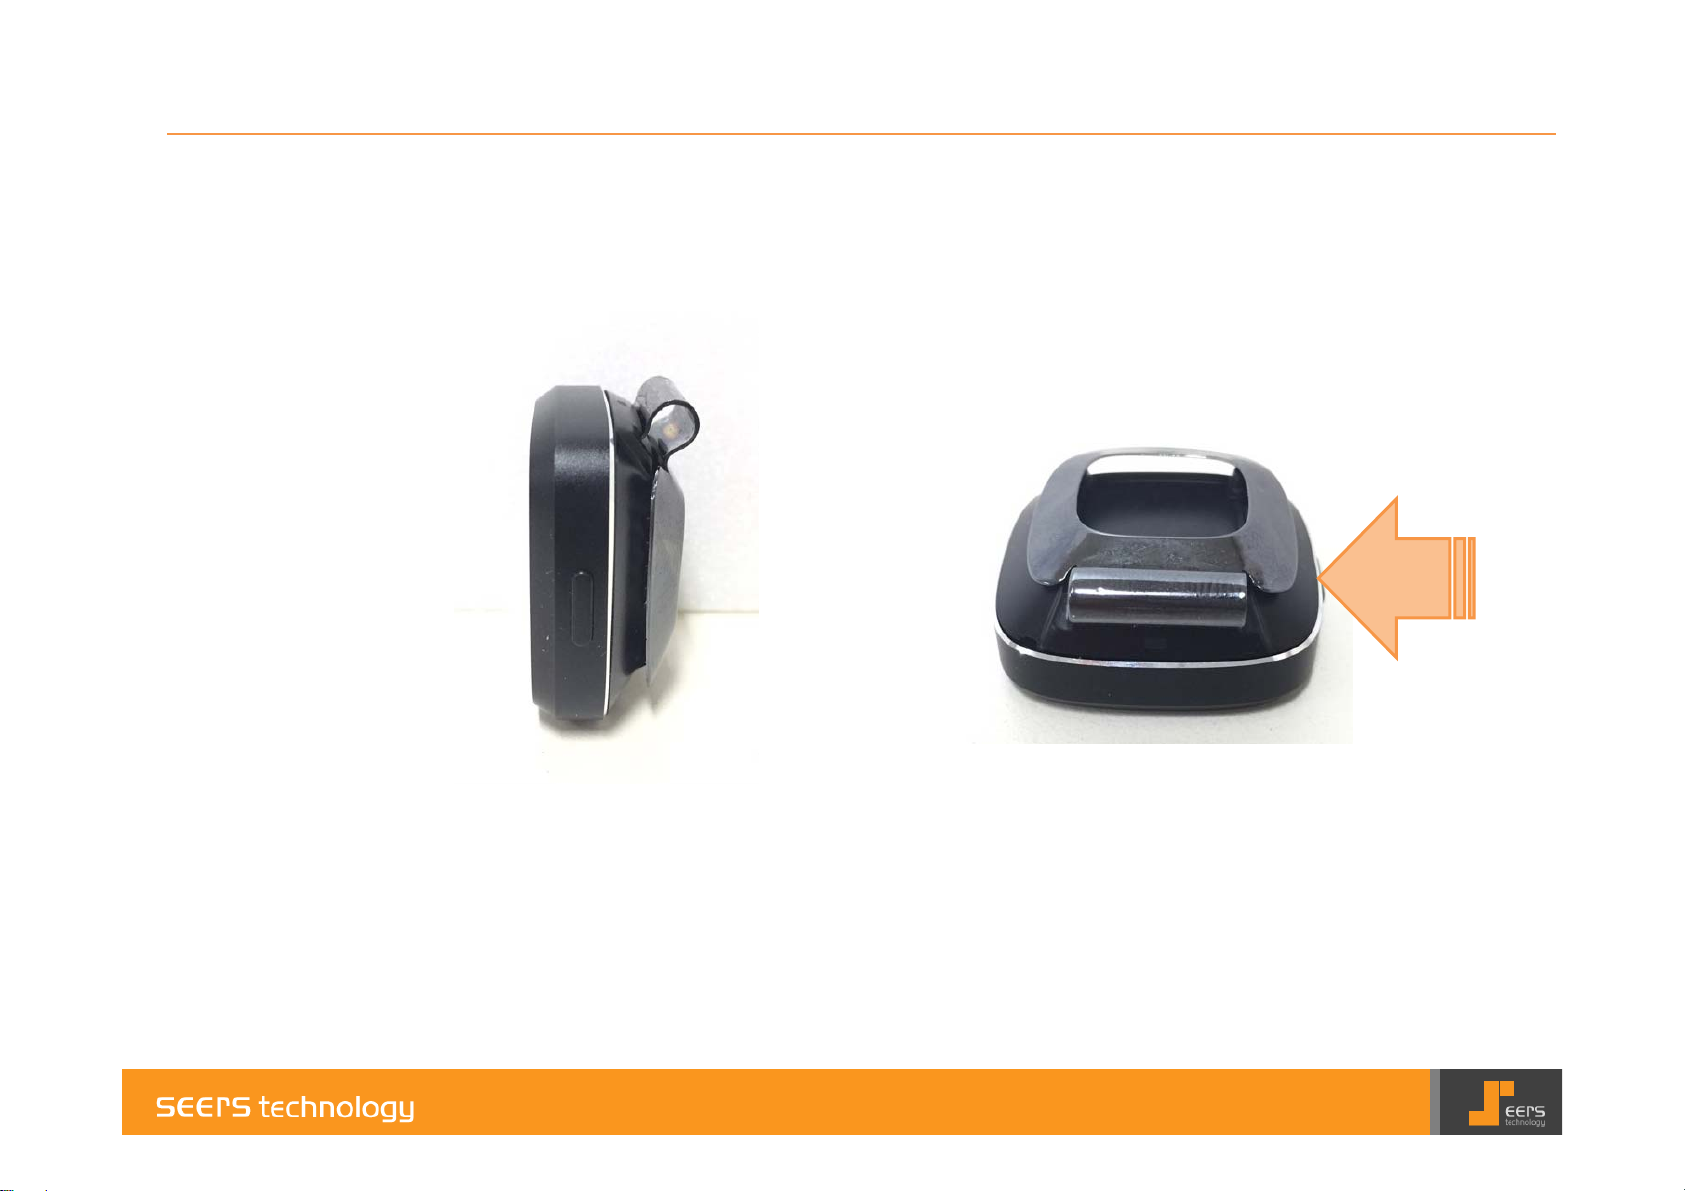
Power On
Push and hold the
button for 2 seconds

Power On
Red LED : System On
Yellow LED : System Booting
Green LED On ->Off : System Booting
Complete,

Auto Shooting
Green LED Off : After System Booting Complete,
Auto shoot Interval time 1 min.(default)

Manual Shooting
ⅹ2
Double tap on front side
Start taking picture when the Yellow LED
light comes on.
Yellow LED will go off after the taking the
picture.

Manual Recording
Shortly push the button twice
(0.5 seconds interval).
When the Yellow LED light starts to
blink, start recording.
Yellow LED will go off after finish
recording.

Check Your Photo & Video
Connect 61N to the cable;
connect the cable to PC USB port.
After the PC recognizes the USB
memory, check the saved pictures
and recordings.

Device Reset
Push and hold the
button for 8 seconds

Device Reset
Green LED : System Off
Red LED : System On
Yellow LED : System Rebooting
Green LED On ->Off : System Booting
Complete

Power Off
Push and hold the button for 2 seconds.
Green LED light will come on and blink
twice and then switch off

FCC Statements
• NOTE: THE GRANTEE IS NOT RESPONSIBLE FOR ANY CHANGES OR MODIFICATIONS NOT EXPRESSLY APPROVED BY
THE PARTY RESPONSIBLE FOR COMPLIANCE. SUCH MODIFICATIONS COULD VOID THE USER’S AUTHORITY TO
OPERATE THE EQUIPMENT.
NOTE: This equipment has been tested and found to comply with the limits for a Class B digital device, pursuant to part 15 of the
FCC Rules. These limits are designed to provide reasonable protection against harmful interference in a residential
installation. This equipment generates uses and can radiate radio frequency energy and, if not installed and used in accordance
with the instructions, may cause harmful interference to radio communications. However, there is no guarantee that interference
will not occur in a particular installation. If this equipment does cause harmful interference to radio or television reception, which
can be determined by turning the equipment off and on, the user is encouraged to try to correct the interference by one or more of
the following measures:
• - Reorient or relocate the receiving antenna.
• - Increase the separation between the equipment and receiver.
• -Connect the equipment into an outlet on a circuit different from that to which the receiver is connected.
• -Consult the dealer or an experienced radio/TV technician for help.
 Loading...