

Page 1
SD-ODS5.25-1
TM
INDOOR/OUTDOOR
SPEAKER
www.symphonicdesigns.net www.nacebrands.com
Page 2
Introduction
Thank you for buying Symphonic Designs Indoor/Outdoor Speakers. Please read and have a thorough understanding
Of the entire manual before installing and use. Keep the manual for future reference.
Symphonic Designs made every effort to provide accurate and detailed instruction for this product’s
assembly and installation. Symphonic Designs assumes no liability for any issues arising from these
instructions. These brackets, all their parts and accessories must be used only for the purpose they
have been constructed. Symphonic Designs and it’s retailers are not directly or indirectly responsible
for any damage to persons and/or properties derived from the use of this product in an unsafe or
different way for which it has been designed and constructed. Several parts of this product are small
pieces of hardware, therefore extreme care should be taken to keep them away from children.
Read these instructions carefully before using the product
1. When the speakers are installed on a wall, check that the wall structure is solid and that the speaker is firmly attached.
2. Do not install the speakers in soft wall material due to the screws not properly anchoring which can cause the speakers come loose
and possible fall of the wall
3. Do not use nails, adhesives or other unauthorized materials. Vibrations may cause the to fall.
4. Do not place the speakers on any unstable supports.
5. Do not damage the woofer and tweeter. Damage will result in distorted sound.
6. Do not attempt to clean the speakers with chemical solvents as this may damage the paint surface. Clean with a dry cloth only.
It is the users responsibility to place or install safely.
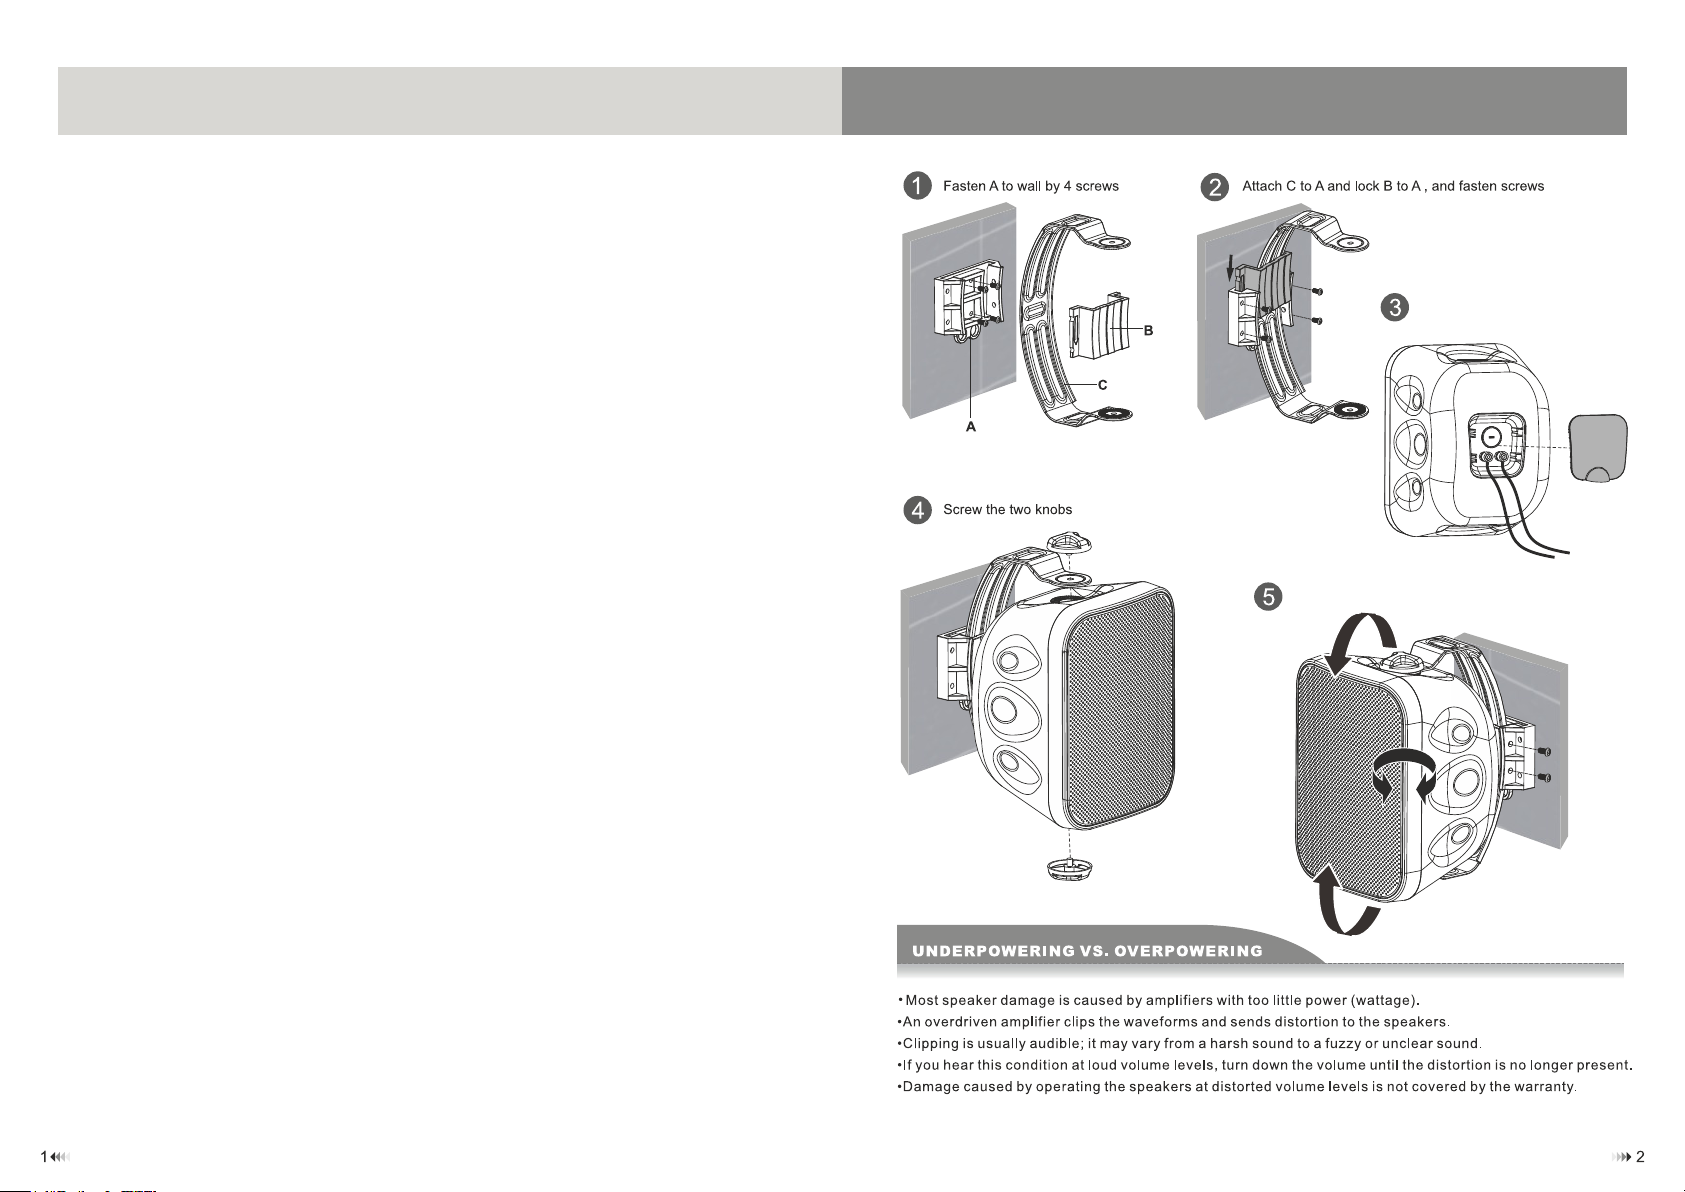
Connect wires and replace
waterproof cover
Fasten the screws after vertical and horizontal
adjustments.
1. Use the mounting bracket as a template.
2. Use appropriate hardware and tools (not included) to properly mount the brackets.
3. Attach the speakers to the bracket using the screws and washers.
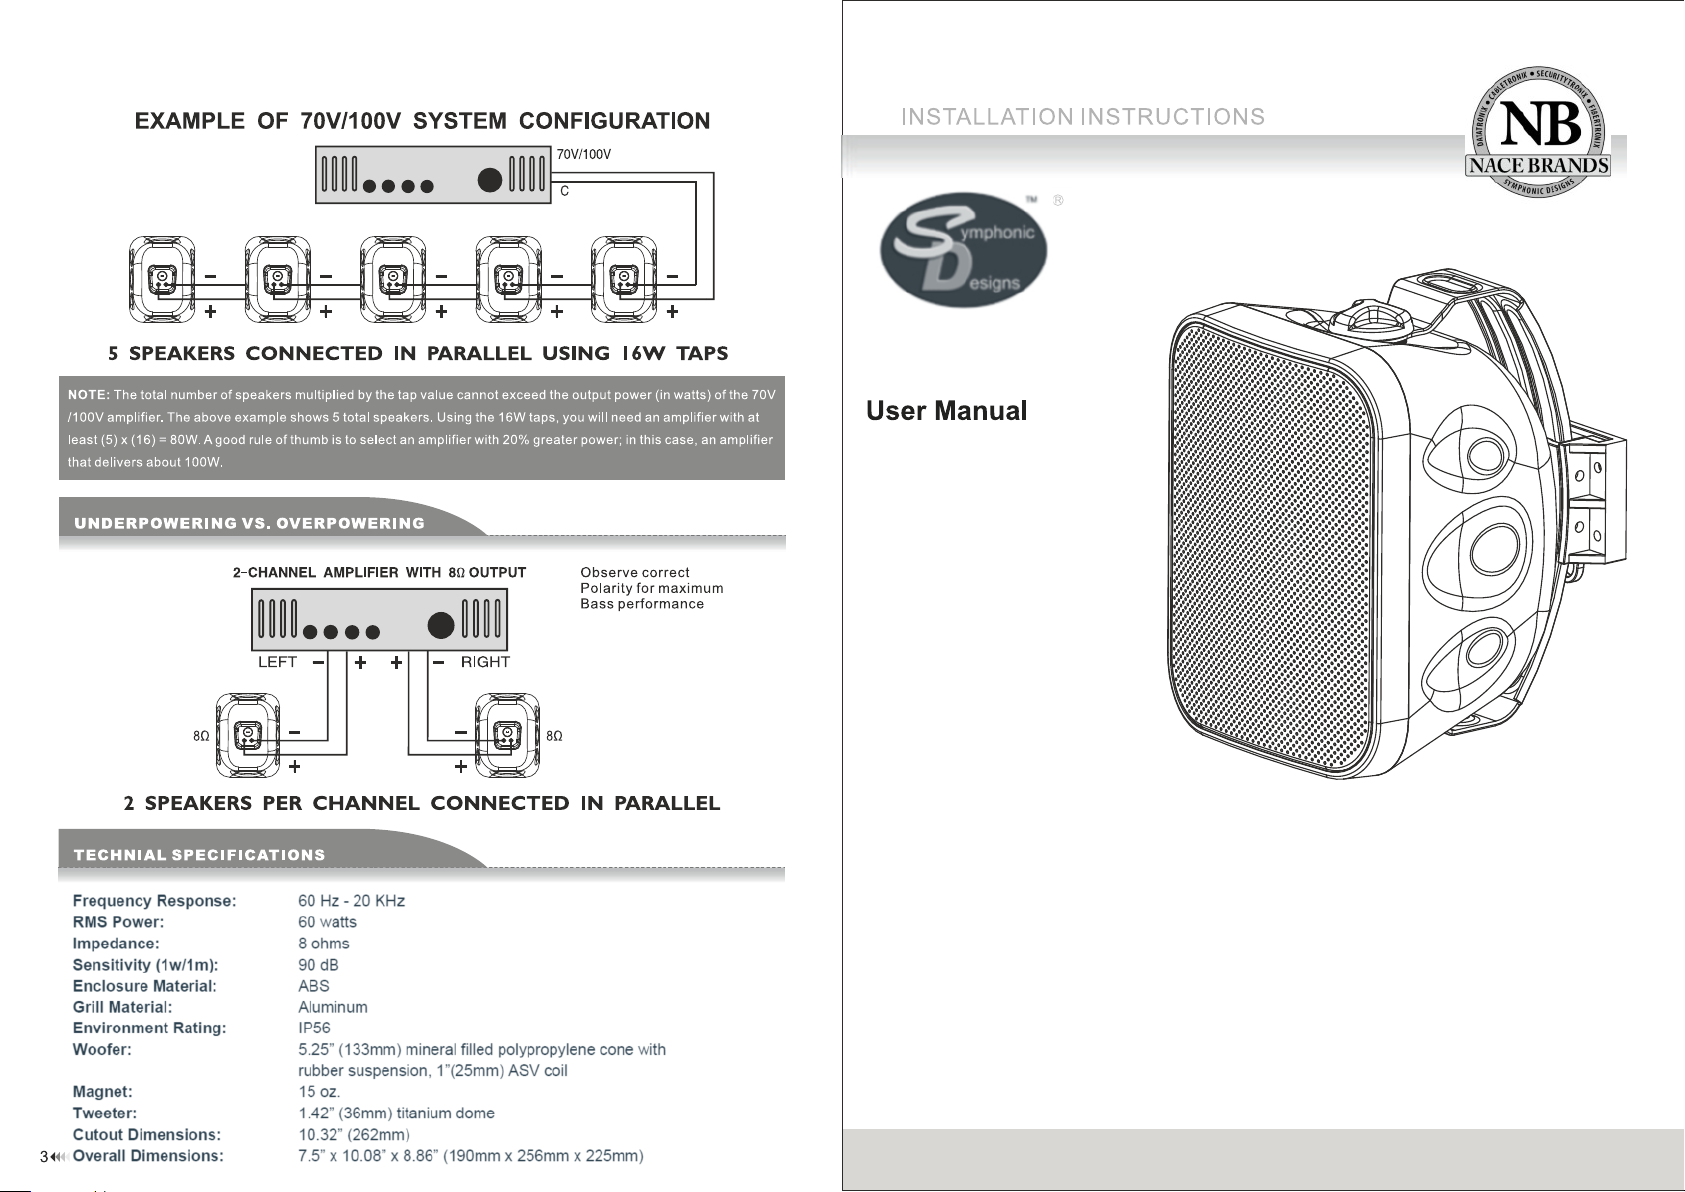
Connection
Connect a wire on the back of the speaker and run to the output connector of the amplifier. The speaker wire is polarized
with one side positive (+) and on the other negative (-) Connect the positive (+) side of the amplifier and speakers connector
to the same wire. Connect the negative side (-) of the speaker and amplifier together with the same wire. Check each
speaker to make sure it is not (+,-) cross polarized. If the polarity of the speakers is reversed, the sound quality will be poor.
 Loading...