

Page 1
INSTALLATION MANUAL
CT-LCD-101/B/S/W
Extending Wall Mount
for 10” to 30” LCD Television
1
Page 2
PACKAGE CONTENTS
This package contains:
One CT-LCD-101 Wall Mount
VESA® 75mm x 75mm plate (attached to the wall mount)
VESA® 100mm x 100mm plate
Installation accessories
Installation Manual
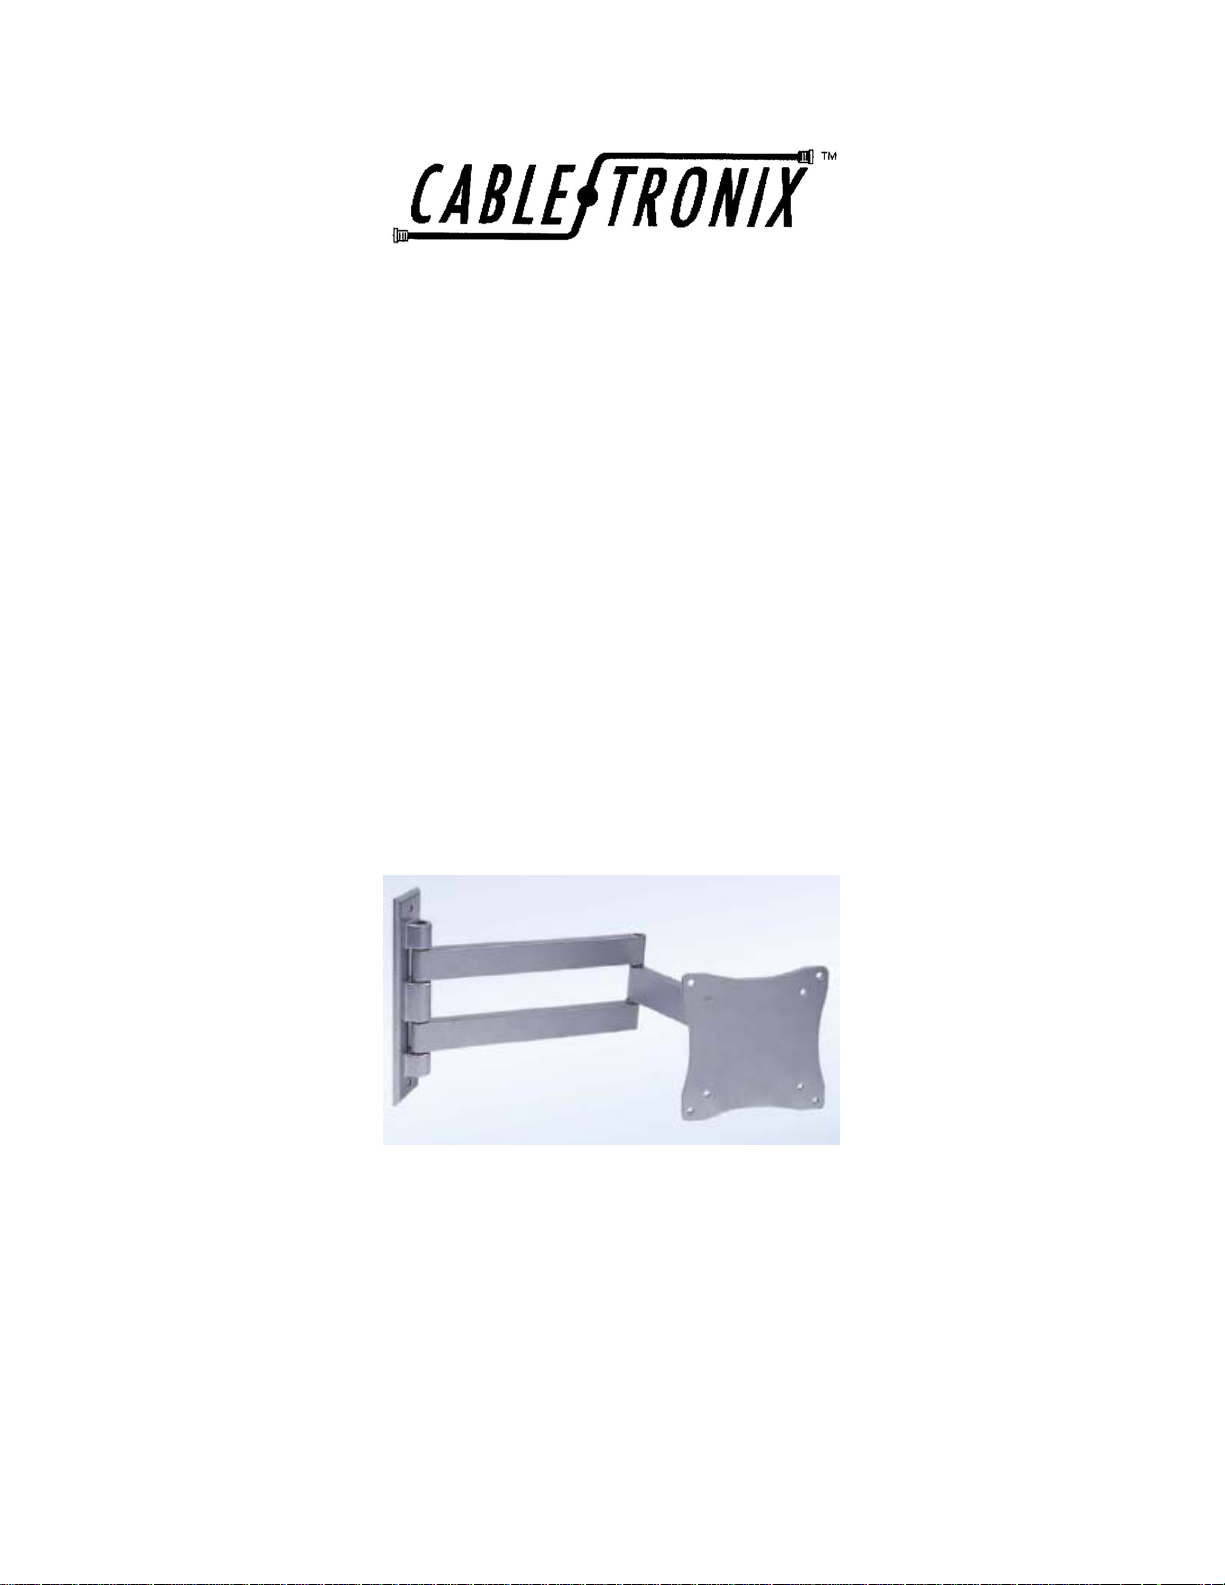
PRODUCT DESCRIPTION
The CT-LCD-101 is an extending, articulating arm wall mount designed to support 10” to 30” LCD
televisions with a maximum weight of 33 lbs. The LCD-101 comes i n three finishes: CT-LCD-101-B
(black), CT-LCD-101-S (sliver), and CT-LCD-101-W (white). The CT-LCD-101 is made of
aluminum, swivels left and right up to 180 degrees, and can be tilted up or down up to 70 degrees.
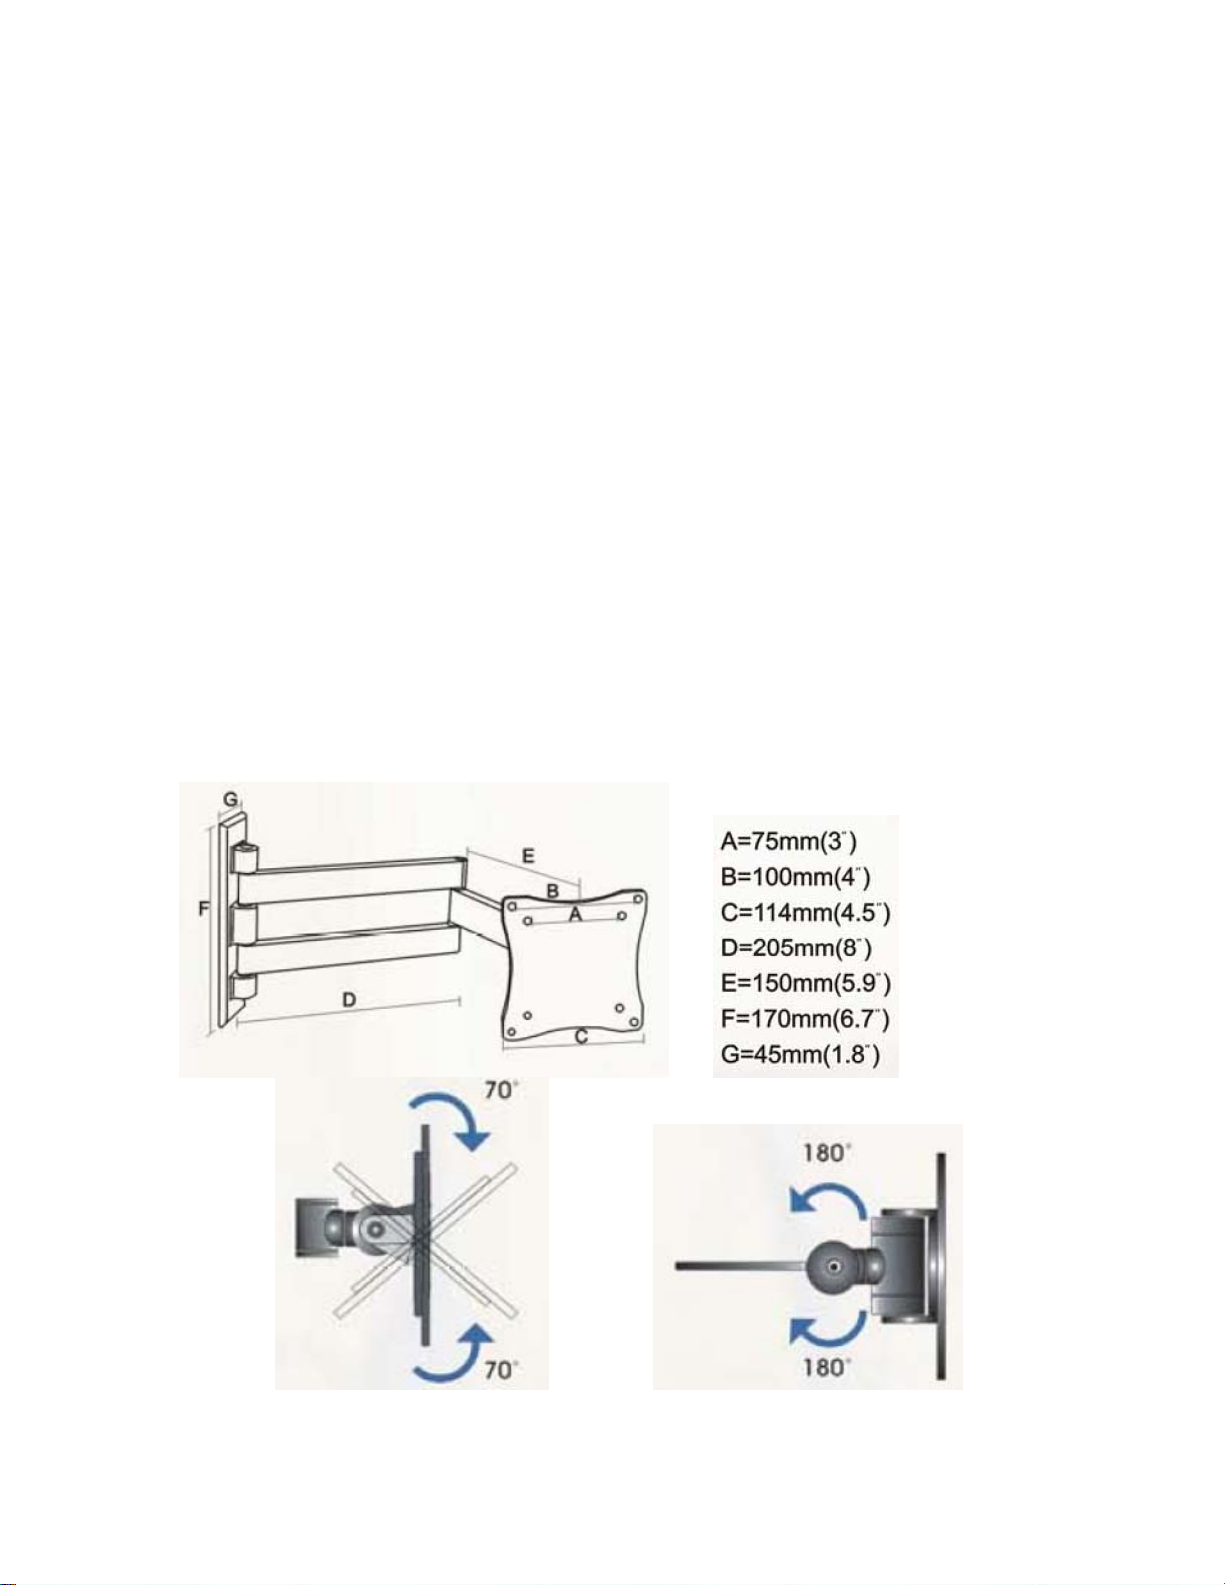
SPECIFICATIONS
The diagram below represents dimensions and articulating range of the CT-LCD-101.
2
Page 3

INSTALLATION
A
NOTE TO INSTALLER
Warning: The installer of this product must verify that
the mounting surface will safely support the combined
weight of all attached equipment and hardware. This
product must be mounted on wall studs or concrete
for a secure, stable, and reliable mounting. North
merican Cable Equipment, Inc. will not be held liable
for the improper use or installation of this product.
1. UNPACKING and HANDLING
Each unit is shipped with all necessary mounting hardware.
Ensure that all accessories are removed from the container before discarding packing material
2. MECHANICAL INSPECTION
Inspect the product for shipping damage. Make sure the equipment is clean and damag e free.
If equipment appears to be damaged or defective please contact us at 1-610-429-1511 for
assistance.
3. INSTALLATION
a. Predetermine the best possible viewing location for the monitor.
b. Attach the LCD wall plate to studs in the wall using with the appropriate hardware. The
wall plate MUST be attached to the studs. Lag screws have been included for wood
stud installation.
c. For VESA® 75mm pattern installation set aside the 100mm plate and the #10-24 acorn
nuts. Attach the 75mm plate to the LCD with screws appropriate for your monitor/TV.
M4 x 12mm x .7P have been provided.
d. For VESA® 100mm pattern installation attach the 100mm plate to the 75mm plate with
four #10-24 acorn nuts. Attach the 100mm plate to the LCD monitor/TV with screws
appropriate to your monitor. M4 x 12mm x.7P have been provided.
e. Wrap loose cords using cable ties. However, be sure to provide suf f icient slack f or the
full movement of arms.
f. For assistance contact Cabletronix sales engineers at 1-610 -429-1511.
3
 Loading...