

Page 1
Securitron Magnalock Corp. www.securitron.com ASSA ABLOY, the global leader
2X
2X
6X
2X
Tel 800.624.5625 techsupport@securitron.com
in door opening solutions
SOLAR WIND KIT MODEL SWK
INSTALLATION INSTRUCTIONS
INTRODUCTION
The Solar Wind Kit is an accessory bracket kit designed to provide a stronger more stable
mounting configuration for PV array panels that are mounted to poles in areas exposed to high
winds. This manual provides the information required to successfully install an SWK to a pole
mounted 10 or 20 Watt PV array panel included with a Securitron solar product.
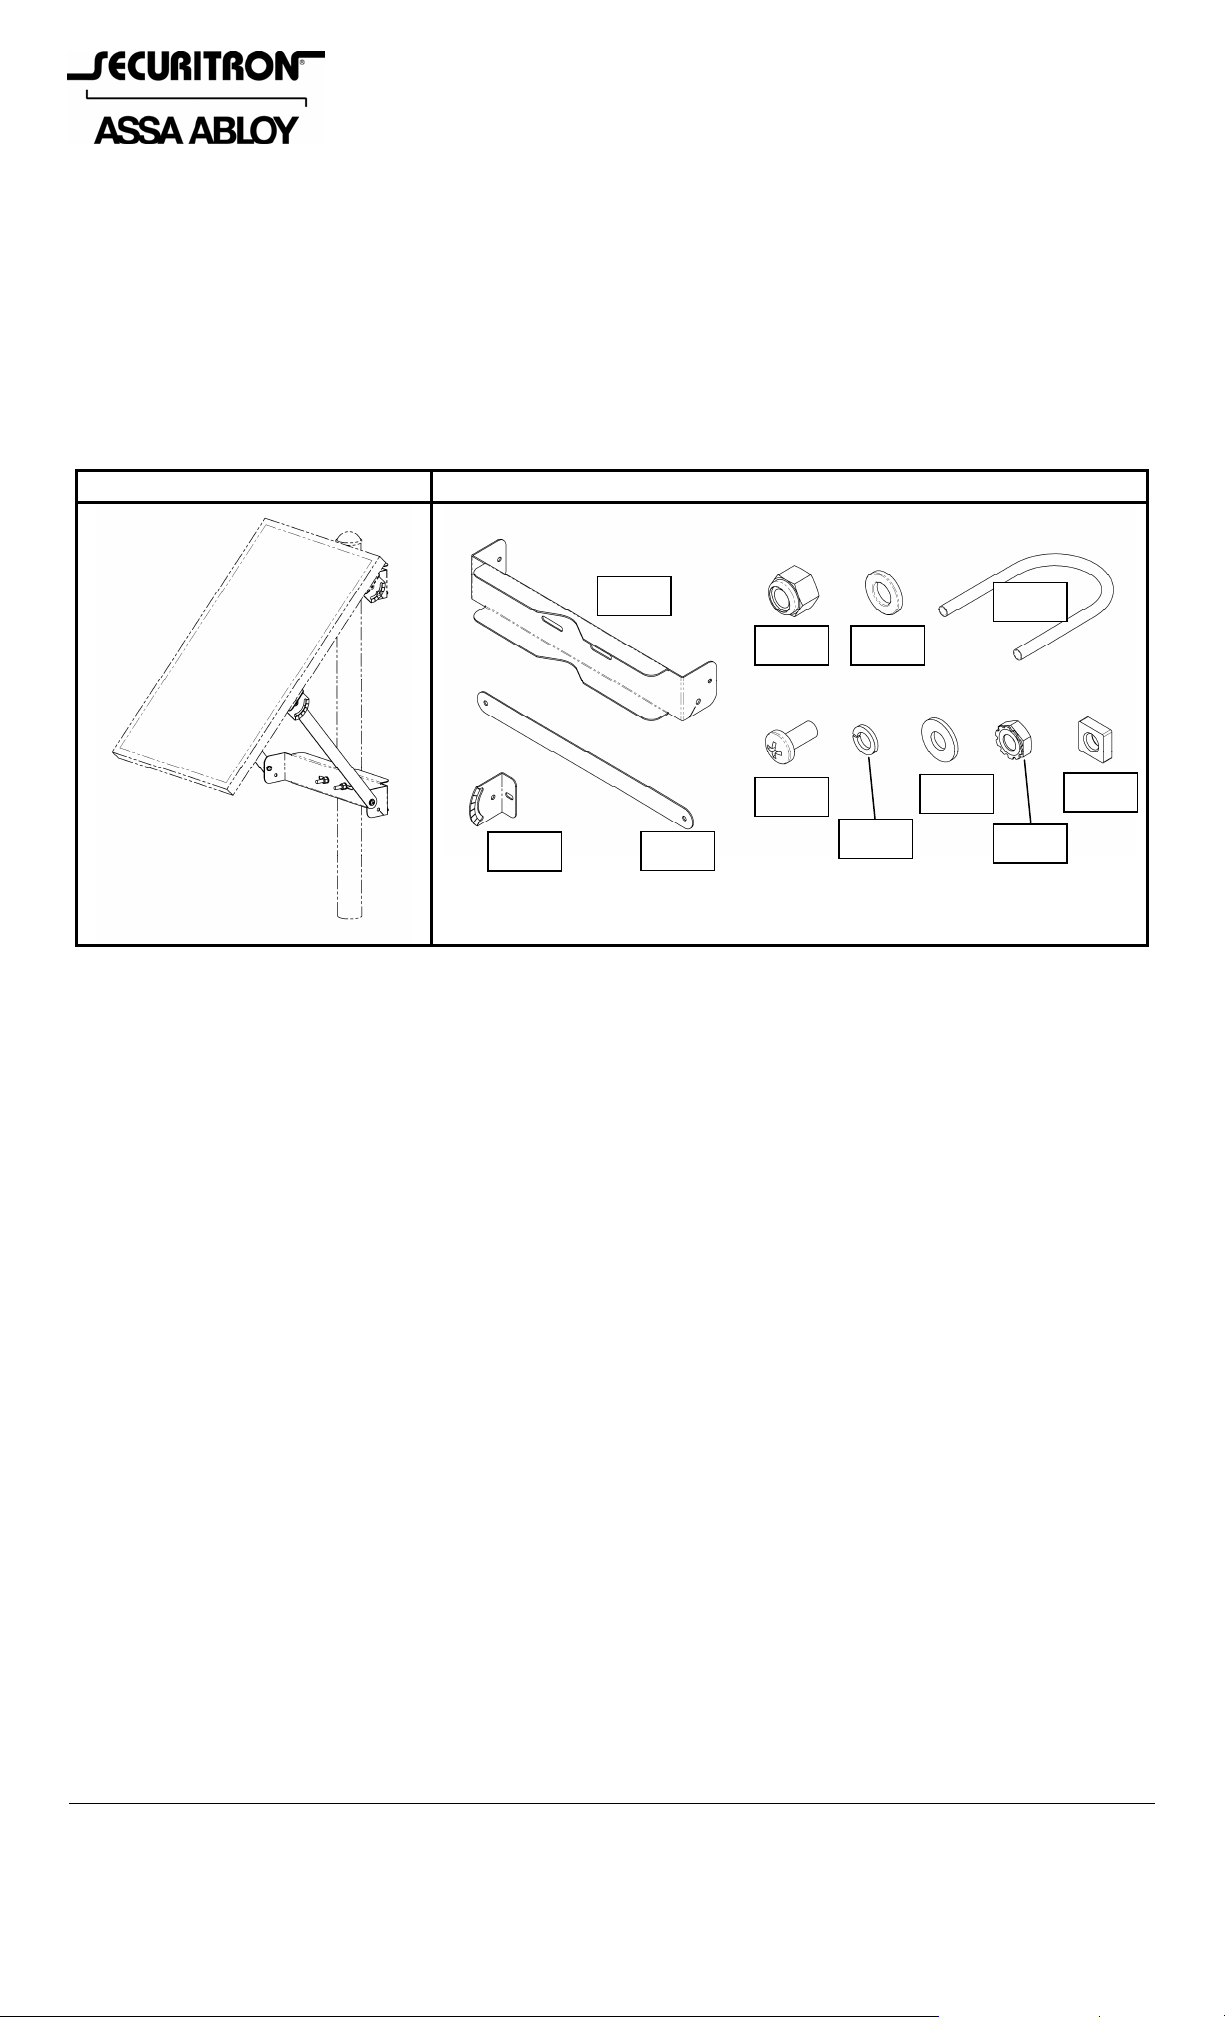
DESCRIPTION
Function: Included in Kit:
2X
1X
2X
6X
2X
1X
4X
RECOMMENDED TOOLS
Wrenches: 3/8” and 7/16” (or adjustable) Phillips Screwdriver: #2
INSTALLATION INSTRUCTIONS
This kit was designed specifically to provide additional support for a pole mounted PV array
panel provided with a Securitron solar product. Please see the solar product installation and
operating instruction manual for the initial installation of the PV array panel and for properly
adjusting the panel to the correct direction and tilt angle.
Note: To ease the installation process the swivel mount brackets already installed to the PV
array panel may need to be repositioned and secured toward the to p portion of the panel.
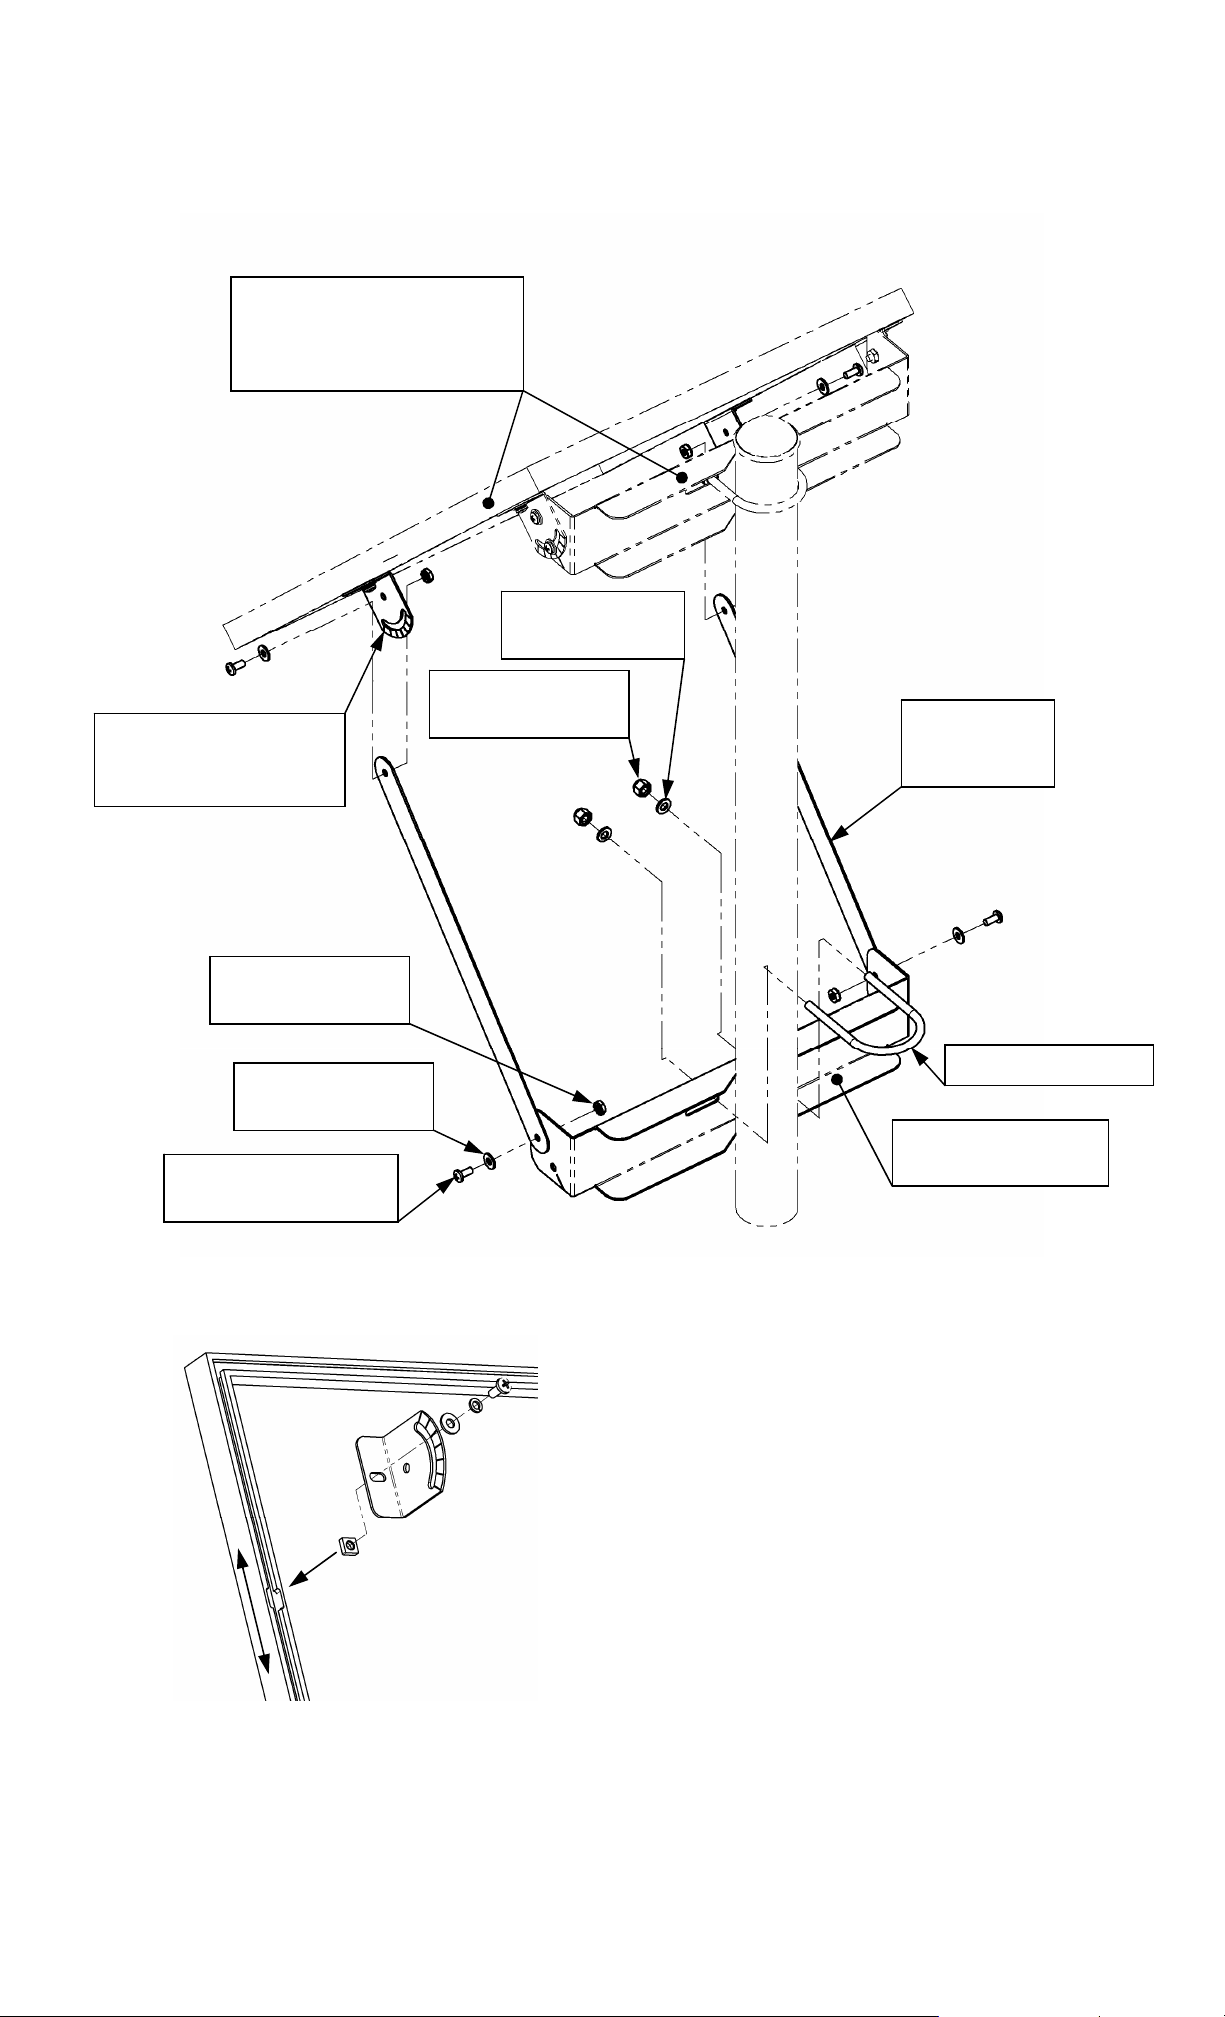
Use Figure 1 and the following step-by-step instructions to install the kit:
Using the square nuts, flat washers, split lock wa shers and 10-32 screws, install the two
(2) swivel brackets included with the kit into the side slots toward the lower portion of the
panel as shown in Figure 2.
Loosely assemble the two (2) support arms to the ends of the cross member using the
provided K-lock nuts, flat washers and 10-32 screws.
Loosely assemble the cross member to the pole using the U-bolt, 1/4” flat washers and
the 1/4-20 lock nuts provided with the kit.
Attach the loose ends of the two panel support arms to the previously installed swivel
brackets using the provided K-lock nuts, flat washers and 10-32 screws.
Verify and if necessary adjust the PV arr ay panel to the correct tilt angle. (See th e solar
product installation and operating manual for guidance).
Ensure that all the components of the kit are properly positioned to support the desire d
panel orientation then tighten all hardware to secure the assembly.
© Copyright, 2011, all rights reserved PN# 500-22930
Page 1 Rev. B, 08/11
Page 2
SOLAR WIND KIT INSTALLATION
The following exploded illustration Figure 1 shows the included hardware required to properly
install a SWK to a PV array panel mounted to a vertical pole. (20 Watt PV array panel shown).
(REFERENCE) EXISTING
PV ARRAY PANEL
MOUNTED TO POLE
- NOT INCLUDED
2X 1/4 PLAIN
FLAT WASHER
2X 1/4-20 HEX
2X PANEL MOUNTING
LOCK NUT
SWIVEL BRACKET
(SEE FIGURE 2)
2X PANEL
SUPPORT
ARM
4X 10-32 HEX
K-LOCK NUT
1/4-20 U-BOLT
6X #10 PLAIN
FLAT WASHER
PANEL MOUNTING
6X 10-32 X 7/16
CROSS MEMBER
LONG PPH SCREW
Figure 1
1. Insert the square nuts into the cutouts
at each side of the panel and slide in
slot to initial position.
2. Assemble swivel brackets with the
included hardware to the nuts.
3. Tighten screws securely when brackets
are adjusted to the desired position.
Figure 2
PN# 500-22930
Page 2 Rev. B, 08/11
 Loading...