

Page 1
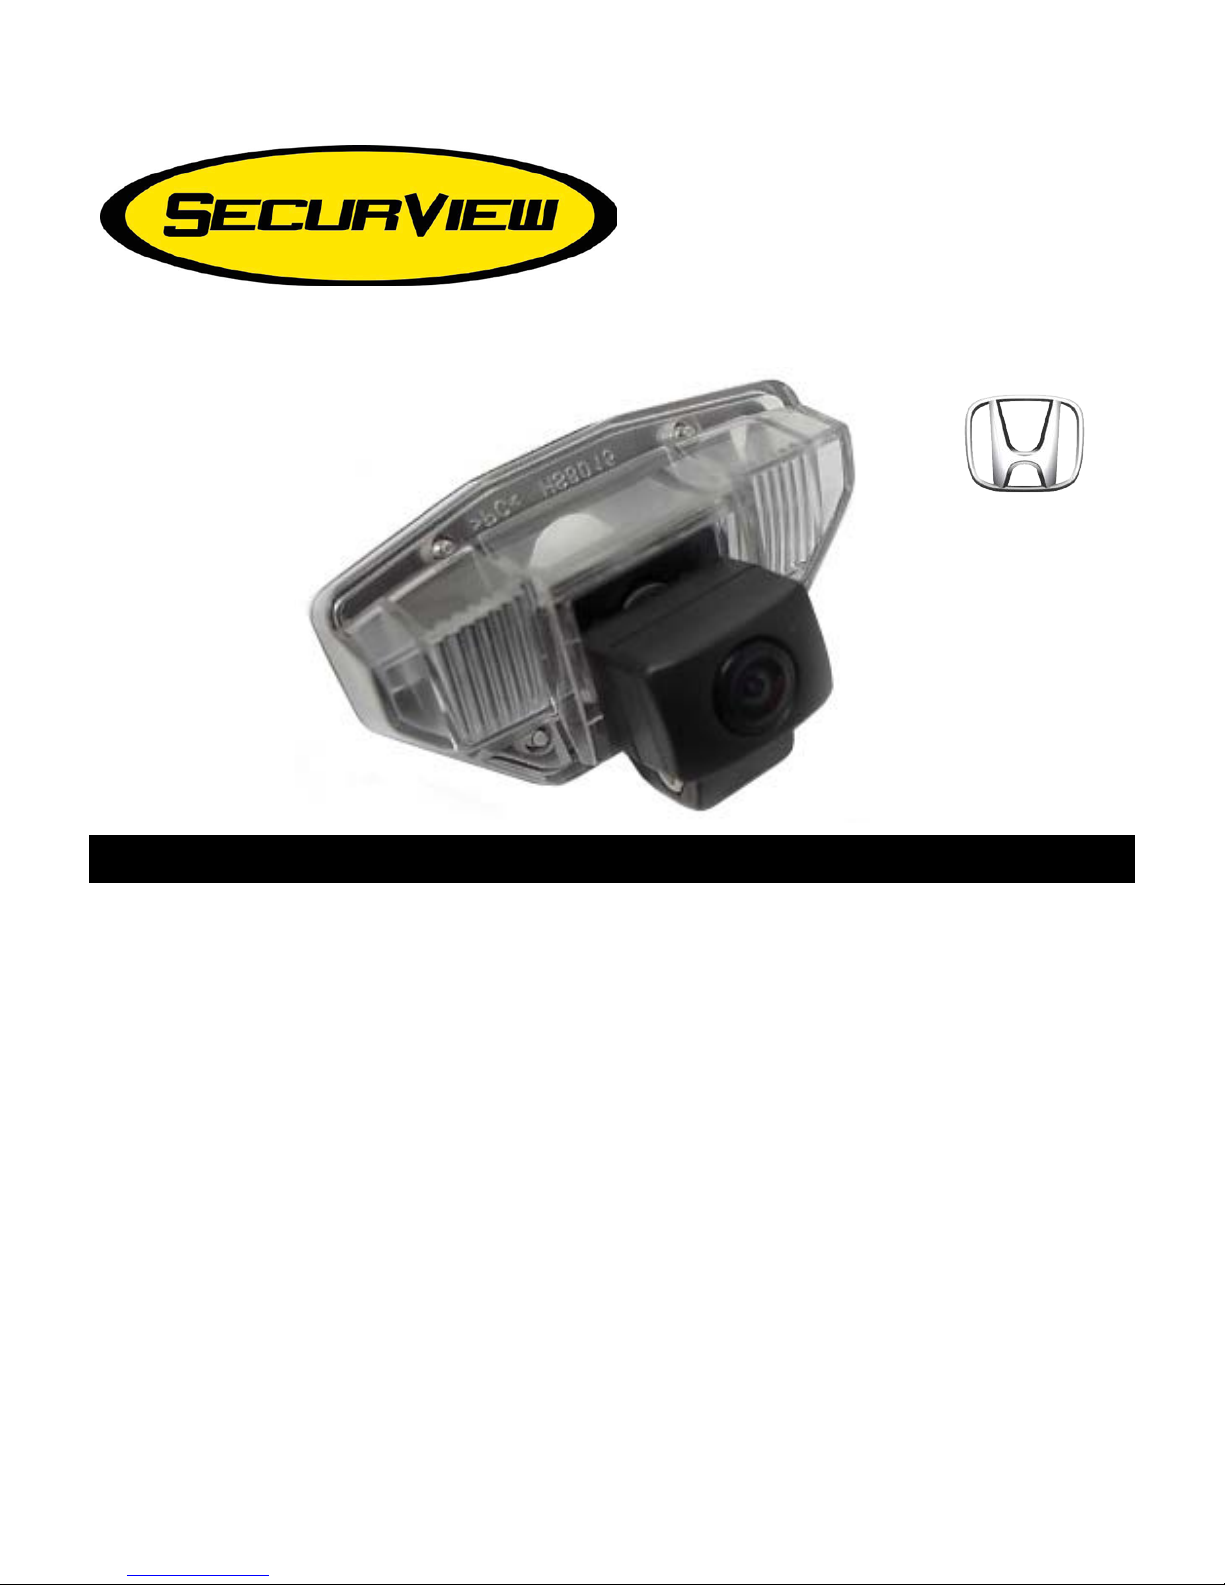
VS-186
Angle
OEM
Camera
Wide-
Adjustable
INSTALLATION INSTRUCT IONS:
The VS-186 is a special designed OEM camera with a custom mounting bracket that allows it to
be easily adjusted for a better viewing angle. It is designed to be custom mounted on the license
plate bezel for the Honda CRV & Honda Odyssey 2008-2011 vehicles with minimal installatio n
time and with no special tools required for the job. Once installed, the camera looks completely
factory and is easy to keep out of sight.
FEATURES:
• Replaces the license plate illumination lamp when mounted
• The 120° ultra wide-angle
• Mounting bracket can be easily adjusted for better viewing angle
• Parking assist lines to help the driver accurately judge distance behind the vehicle
• Constructed of high-grade plastic
• Reverse image
• The OEM cam easily connects with other SecurView products such as any of the LCD
monitors. It can also be integrated with your existing OEM or aftermarket LCD/TFT
displays.
• The Securview™ VS-186 is designed specifically for the Honda CRV and Odyssey
vehicles and may not work well on other vehicles. Please check the vehicle before
installing to make sure the camera can be properly placed
Page 2
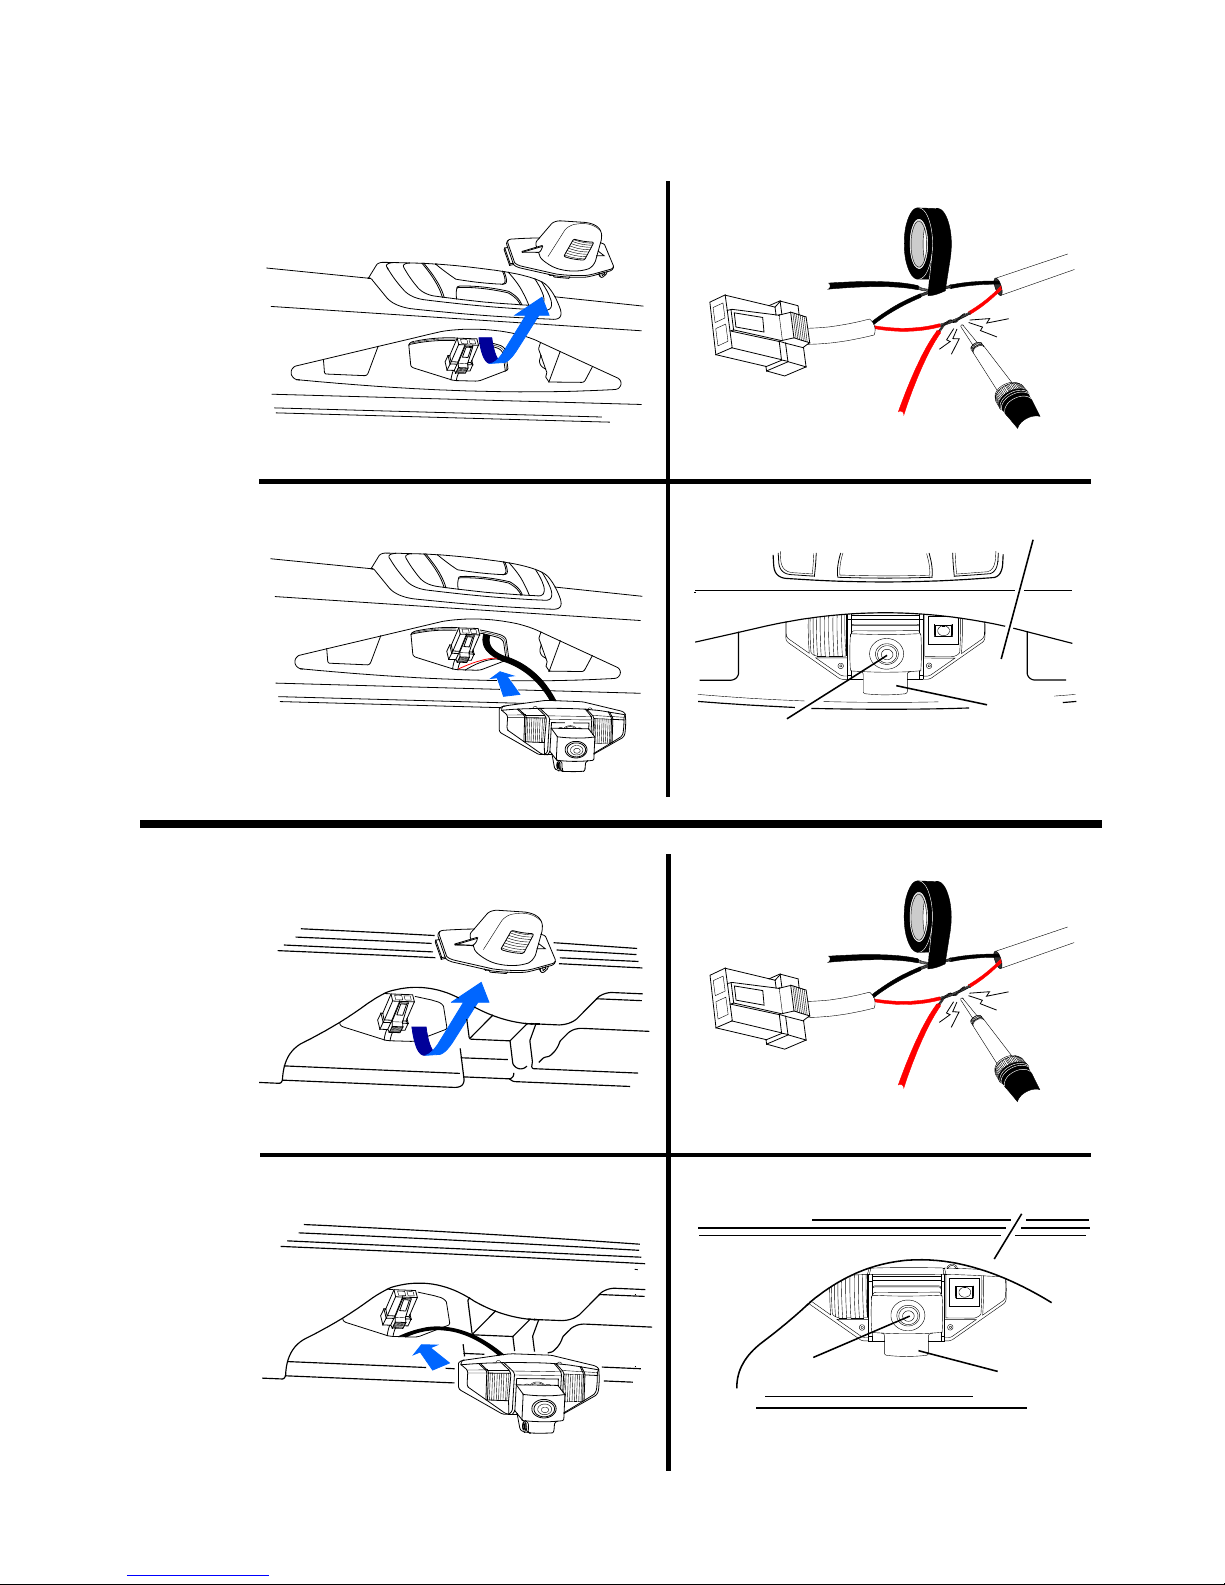
STEP 1
STEP 2
STEP 3
STEP 4
Snap the VS-186 camera into place
Camera Lens
Remove factory license plate lamp
Connect the camera lamp illumination wires
Route the wiring harness
into the vehicle
Adjustable
Bracket
Mounting Surface
STEP 1
STEP 2
STEP 3
STEP 4
Snap the VS-185 camera into place
Camera Lens
Remove factory license plate lamp
Connect the camera lamp illumination wires
Route the wiring
Adjustable
Bracket
License Plate
Bezel
harness into the vehicle
HONDA
HONDA
MOUNTING:
CRV
INSTALLATION
ODYSSEY
Page 3
MOUNTING (Continued):
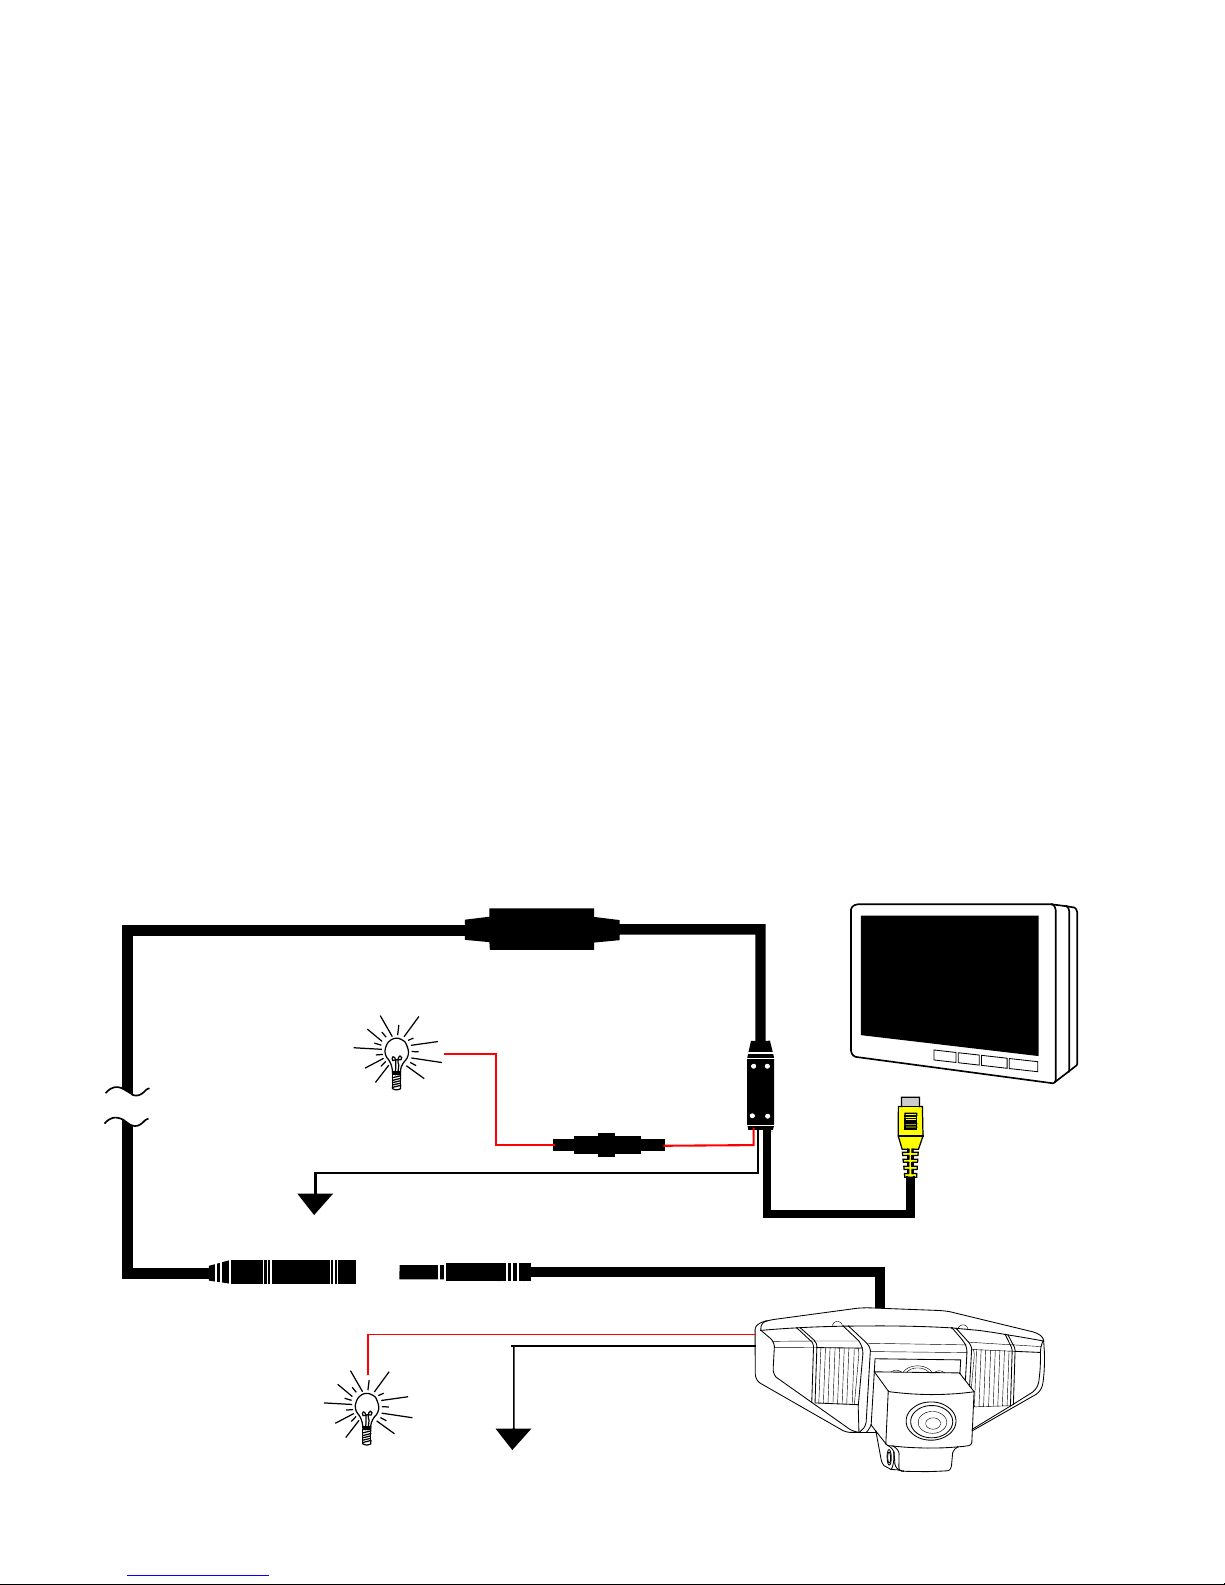
Connect to +12V
Reverse Light
MONITOR
Ground
RED WIRE
BLACK WIRE
YELLOW: RCA Video Plug
Connect to Monitor
VS-186
Ground
RED WIRE
BLACK WIRE
Connect to +12V
License Plate
Illumination Wire
1. Unclip and remove the factory license plate illumination lamp using a screw driver or panel
removing tool (STEP 1). Be cautious not to scratch the paint on the body surface.
2. Connect the license plate lamp illumination wires of the VS-186 to the factory license plate
illumination lamp harness that was connected to the factory lamp (STEP 2)
3. Route the wiring harness into the vehicle (STEP 3). There may be an existing factory rubber
grommet that you can use to run the wiring into the trunk area. If you have to drill a hole,
make sure to double check behind the drilling location before drilling. Once the hole is drilled
and the wiring is run into the vehicle, seal the edges of the hole with silicon or caulking to
prevent moisture damage.
4. Snap the camera securely into place in the mounting location (STEP 4).
NOTE: The interior panels of the rear cargo hatch will need to be removed in order to route the
camera cable into the car. This will also make it easier to remove the license plate lamp.
WIRING:
1. Carefully choose a hidden out-of-sight location for drilling the cable hole. Some vehicles may
have an existing hidden rubber grommet or plug available to avoid having to drill into the body.
Be sure to double-check for any wiring or obstructions behind the surface where you are going to
drill the cable hole. Seal the hole using silicon or caulking to prevent moisture damage.
2. Choose a convenient place to run the camera cable up the left, right or center of the vehicle. As
a rule of thumb, try to avoid main factory harness looms that may contain high levels or RF noise
or interference.
3. You can connect the camera power at the rear of the vehicle behind the reverse lights. You may
also connect power inside the vehicle under the dash or in the trunk. The Red power wire goes to
Reverse Light +12V, and the Black wire to Ground.
4. The other pair of Red and Black wires is for license plate illumination. Connec t the Red wire to
the +12 volt license plate illumination wire in the f actor y light harness, and connect the Black wire
to the Ground wire in the license plate illumination harness
5. Run the Yellow RCA video cable to the monitor’s video input or reverse camera input
.
Page 4

CAMERA:
SPECIFICATIONS:
1. The color CMOS camera is maintenance-free, waterproof (IP-68) and vibration resistant.
2. This camera is designed to work well in day time or night time conditions.
3. The camera is completely electronic. There are NO manual adjustments for focus, etc.
TECH SUPPORT: (800) 998-6880
1/4 Inch Color CMOS Sensor Video Output: 1.0 V P-P composite (75 Ohm load)
Dimension (In.): CRV - 2"(L) × 2⅝"(W) × 1⅝"(D) Supply Voltage: +12VDC
Odyssey - 2"(L) × 2⅝"(W) × 1⅝"(D) Power Consumption: 70mA
Weight: 5 Oz. Shutter: 1/50 s – 1/100000s
Pixels: 640 (H) x 480 (V) White Balance: Automatic
Resolution: > 250,000 pixels Gamma Correction: 0.45
420 TV lines S/N Ratio: More than 48dB
Minimum Illumination: 1 LUX / F 1.2 Operating Temp: -22° to 176° F (-30° to 80° C)
Lens Type: Wide Angle Gain Control: Automatic
Horizontal Angle: 120°
DISCLAIMER:
Under no circumstances shall the manufacturer or distributor of the Securview™ be held liable for
consequential or incidental damages sustained in connection with the use of the Securview™ Rear
Vision System. The Securview™ is designed as a safety enhancement device and is in no way intended
as a replacement for rear-view mirrors, side-view mirrors or physically checking the surroundings when
backing a vehicle. Always check surroundings for safety when backing! Objects on the monitor are
closer than they appear. For the best fit, modification of the vehicle license may or may not be
necessary. It is the sole responsibility of the vehicle owner to check and verify any and all State or
Federal Motor vehicle codes with regards to modifications of vehicle license plates. The m anuf acturer of
the Securview™ assumes no liability or responsibility whatsoever with regards modifications of the
license plate.
www.crimestopper.com
[email protected]
Phone (800) 998-6880
FAX (805) 581-9500
© 2011 Crimestopper Security Products
5-5-2011
 Loading...