

SecureData BackupDrive User Manual
USER MANUAL

Contents
BackupDrive Overview 3
Safety Information 3
BackupDrive Features 4
Connecting and Disconnecting 4
Connecting to a Computer 4
Disconnecting from Your Computer 5
Managing the Drive 5
Deleting all Files 5
Reformatting the BackupDrive 5
Technical Support 11
Contact Information 11
Troubleshooting 11
Determining Software Version Numbers 11
Warranty and RMA information 13
2 of 14

Rev. 20190204A
BackupDrive Overview
Thank you for purchasing the BackupDrive Model (‘Drive’ hereafter), an easy to use USB
3.0 portable, external data storage drive.
The Drive requires no software drivers nor updates and works on all computer and
embedded systems that support standard USB protocol.
The Drive can be configured with optional software for protected (encrypted) cloud
backup and real-time antivirus scanning (Windows and Mac only), making it perfect for
personal use and business use.
Your drive may already have a cloud backup feature and a built-in Antivirus feature
installed. For more information, please contact Support at SecureData™. Also, see
Determining Software Version Numbers on page 11.
REQUIREMENTS
• The Drive must be connected to a computer for use. It works on Windows, Mac,
Android, Linux, or Chrome operating systems, or any embedded systems
supporting USB 2.0 port, minimum.
WHAT’S INCLUDED?
• 1 BackupDrive • 1 Quick Start Guide • 1 USB 3.0 cable
Safety Information
This icon indicates important information regarding the safety of the product and
your data (Cautions). Please be mindful of these messages. Contact support if you have
questions.
PRECAUTIONS
Do not expose the Drive to water or moisture.
Reformatting the Drive will delete all stored data.
To Contents 3 of 14
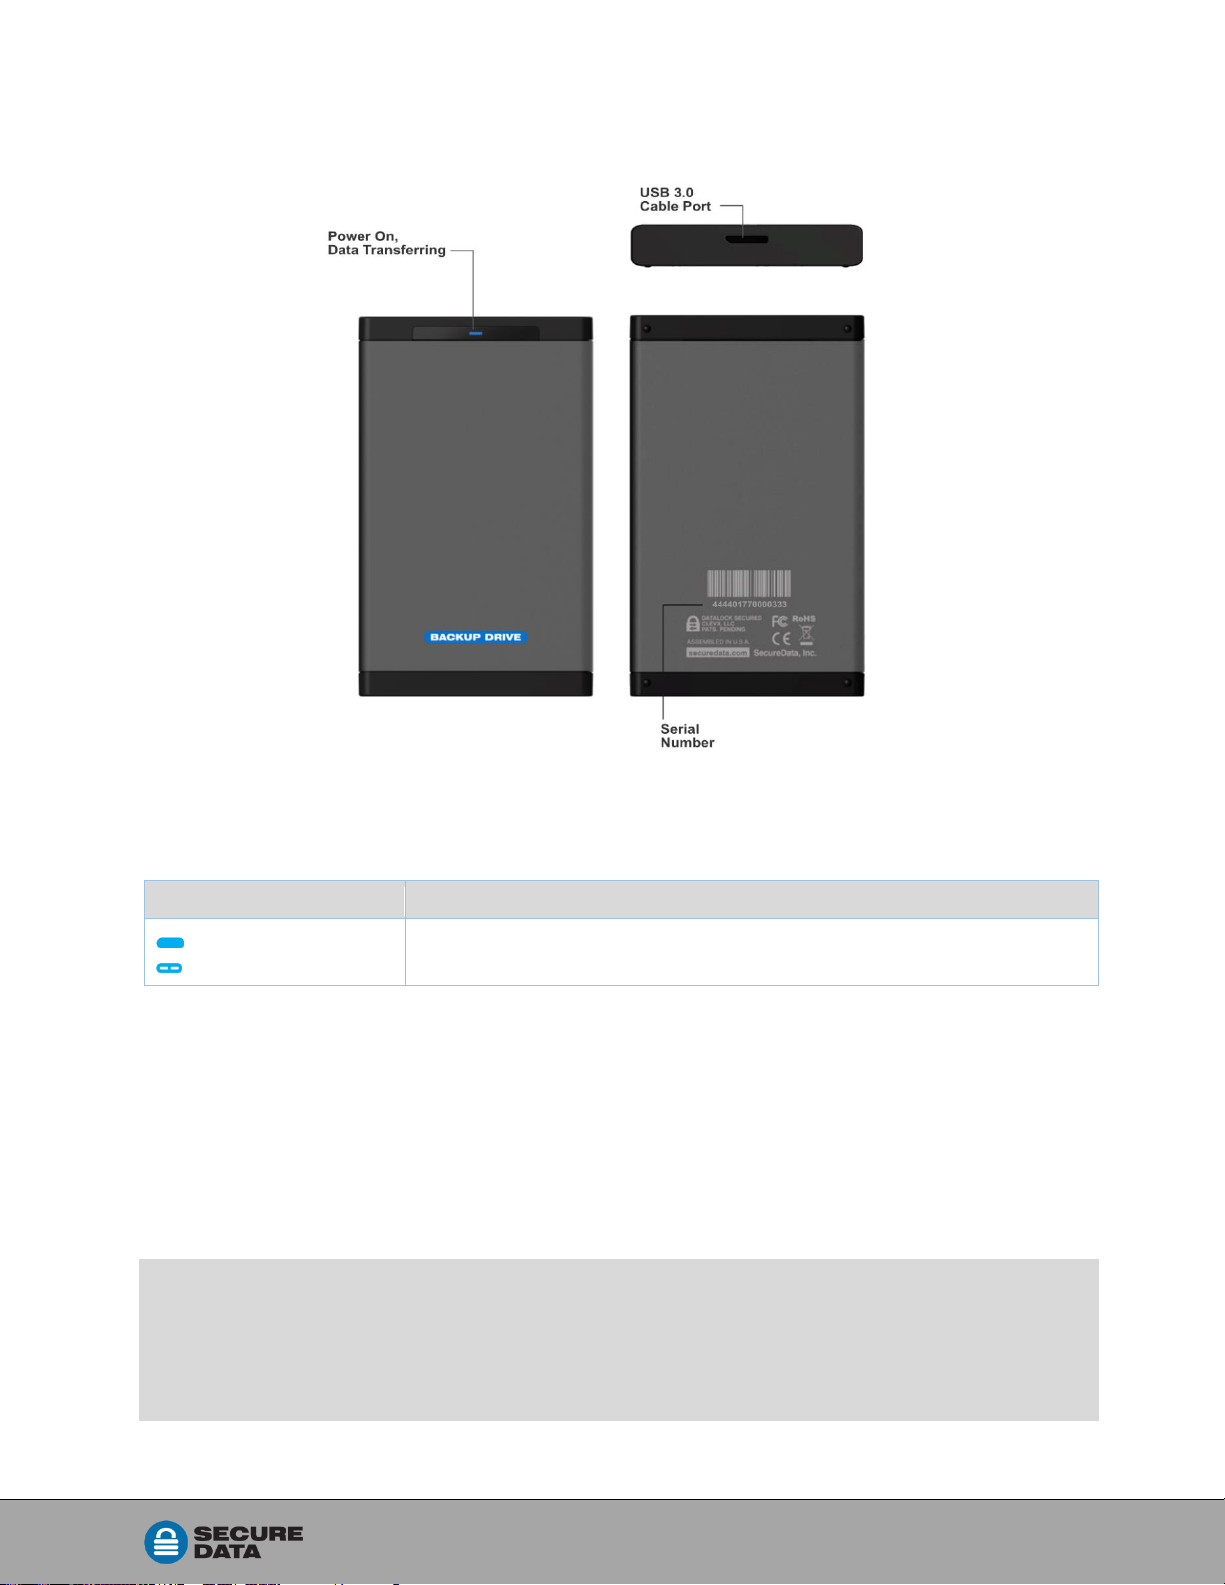
BackupDrive Features
LED
Meaning
Blue solid
Blue blinking
Drive is powered and when blinking it is transferring data.
Rev. 20190204A
Figure 1: The BackupDrive Layout. Thickness varies by drive capacity.
LED INTERPRETATIONS
The LED on the BackupDrive is represented here by colored icons.
Connecting and Disconnecting
Connecting to a Computer
Connect the Drive to your computer with the USB cable supplied. On Windows
computers, a new drive letter will appear in the File Explorer.
NOTE: The Drive is formatted NTFS from the factory; good for Windows computers.
Mac USERS: If you have a computer made by Apple Inc., then you need to format the
drive for your computer before the drive can be used. Follow the procedure
Formatting for Mac OS on page 8.
To Contents 4 of 14

Rev. 20190204A
Disconnecting from Your Computer
Generally, you can just unplug the USB cable whenever the blue LED is not blinking.
However, some computer systems may require you to click the Safely Remove
Hardware/Eject icon within your operating system prior to unplugging the drive cable.
Wait for the blue LED to stop blinking before disconnect from the computer.
Managing the Drive
The following headings discuss important, though less common, actions for managing
your Drive. Except where noted, all procedures assume your Drive is connected to a
computer.
Deleting all Files
You can delete all data stored on the Drive in two ways:
• Using File Explorer (Windows) or Finder (Mac) as usual
• Reformatting the drive.
For reformatting, refer to Reformatting the BackupDrive below.
Reformatting the BackupDrive
CAUTION: Formatting the drive will delete all data permanently.
Note that if it was backed up to the cloud with the USBtoCloud option, your
data can be restored via download.
FOR A WINDOWS OS
When Drive is Blank or you want to change the operating system:
To format (or “initialize”) your BackupDrive when it is blank or is set up for a different
operating system, do the following:
Admin permissions on the PC is required for this procedure.
1. Connect the Drive to your computer with the USB cable.
2. Open File Explorer.
3. Right-click This PC > Left-click Manage.
4. In the Computer Management dialog’s left column, click Storage > Disk
Management and wait for it to populate.
NOTE: When the drive is blank and needs initializing, no drive letter displays.
To Contents 5 of 14
 Loading...