

Sears
OWNERS MANUAL
MODEL NO. 315 18111
CAUTION: Read Rules for Safe Operation and Instructions Carefully
WARNING:
Operating this tool in reverse when hammering will damage the tool.
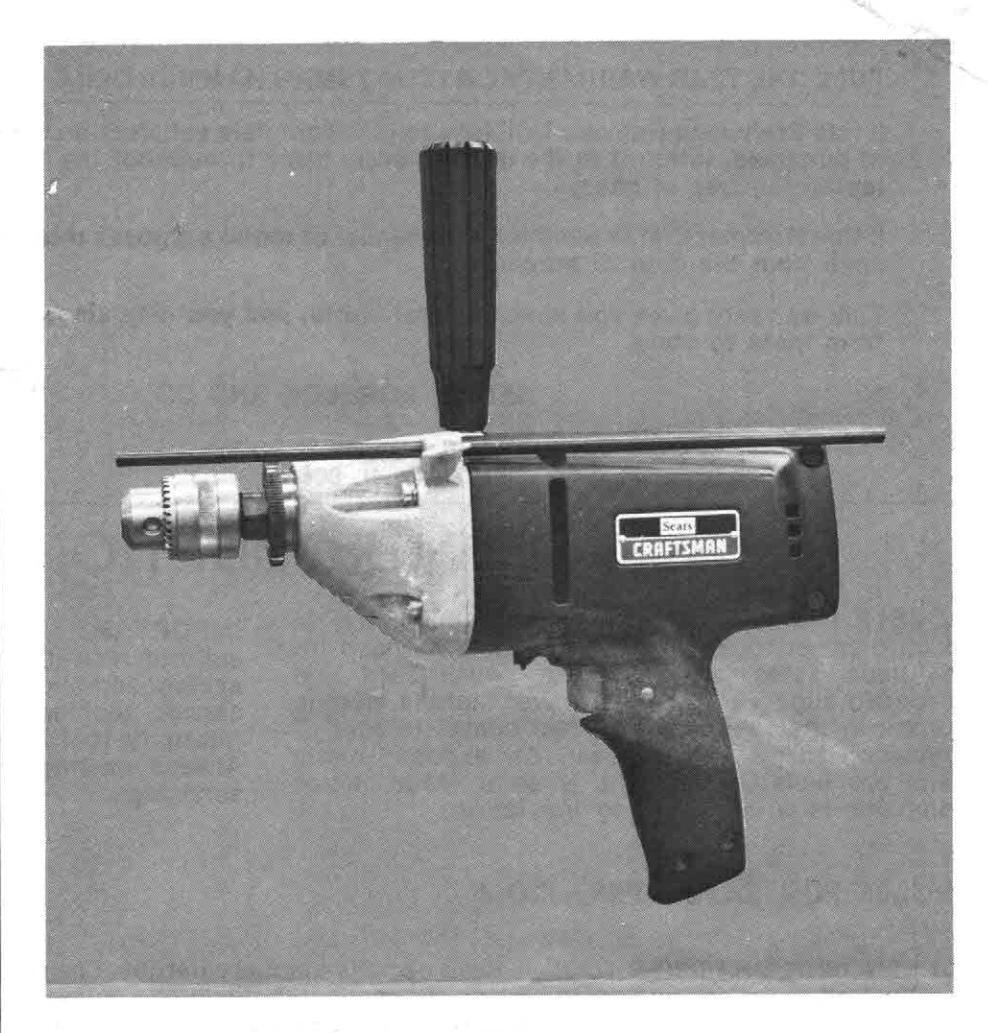
CRAFTSMAN ® 3/8 INCH HAMMER DRILL DOUBLE INSULATED REVERSIBLE-VARIABLE SPEED
Introduction Operation Maintenance Repair Parts

Designed exclusively for and sold only by SEARS, ROEBUCK AND CO., Chicago, IL 60684 U.S.A. and SIMPSONS-SEARS LIMITED, Toronto, Canada
FULL ONE YEAR WARRANTY ON CRAFTSMAN HAMMER DRILL
If this Craftsman Hammer Drill fails to give complete satisfaction within one year from the date of purchase, return it to the nearest Sears store throughout the United States and Sears will replace it, free of charge.
If this Hammer Drill is used for commercial or rental purposes this warranty applies for only 90 days from the date of purchase.
This warranty gives you specific legal rights, and you may also have other rights which vary from state to state.
SEARS, ROEBUCK AND CO. BSC 41 - 3 SEARS TOWER CHICAGO, IL 60684
INTRODUCTION
DOUBLE INSULATION is a concept in safety, in electric power tools, which eliminates the need for the usual three wire grounded power cord and grounded supply system. Wherever there is electric current in the tool there are two complete sets of insulation to protect the user. All exposed metal parts are isolated from the internal metal motor components with protecting insulation.
IMPORTANT —Servicing of a tool with double insulation requires extreme care and knowledge of the system and should be performed only by a qualified service technician. For service we suggest you return the tool to your nearest Sears Store for repair. Always use original factory replacement parts when servicing.
RULES FOR SAFE OPERATION
- 1. KNOW YOUR POWER TOOL Read owner's manual carefully. Learn its applications and limitations as well as the specific potential hazards peculiar to this tool.
- GROUND ALL TOOLS UNLESS DOUBLE-INSULATED. If tool is equipped with three-prong plug, it should be plugged into a three-hole electrical receptacle. If adapter is used to accommodate two-prong receptacle, the adapter wire must be attached to a known ground. (Usually the screw securing receptacle cover plate). Never remove third prong.
- 3. KEEP GUARDS IN PLACE and in working order.
- 4. KEEP WORK AREA CLEAN. Cluttered areas and benches invite accidents.
- 5. AVOID DANGEROUS ENVIRONMENT. Don't use power tool in damp or wet locations or expose to rain. Keep work area well lit.
- 6. KEEP CHILDREN AWAY. All visitors should be kept safe distance from work area.
- 7. STORE IDLE TOOLS. When not in use, tools should be stored in dry, high or locked-up place-
- 8 DON'T FORCE TOOL. It will do the job better and safer at the rate for which it was designed.
- 9. USE RIGHT TOOL. Don't force small tool or attachment to do the job of a heavy duty tool.
- 10. WEAR PROPER APPAREL. No loose clothing or jewelry to get caught in moving parts. Rubber gloves and footwear are recommended when working outdoors.
- 11. USE SAFETY GLASSES with most tools. Also face or dust mask if cutting operation is dusty.
- 12. DON'T ABUSE CORD. Never carry tool by cord or yank it to disconnect from receptacle. Keep cord from heat, oil and sharp edges.
- 13. SECURE WORK. Use clamps or a vise to hold work. It's safer than using your hand and it frees both hands to operate tool.
- 14. DON'T OVERREACH. Keep proper footing and balance at all times.
- 15. MAINTAIN TOOLS WITH CARE. Keep tools sharp at all times, and clean for best and safest performance. Follow instructions for lubricating and changing accessories.
- DISCONNECT TOOLS when not in use, before servicing; when changing attachments, blades, bits, cutters, etc.
- 17. REMOVE ADJUSTING KEYS AND WRENCHES. Form habit of checking to see that keys and adjusting wrenches are removed from tool before turning it on.
- 18. AVOID ACCIDENTAL STARTING. Don't carry plugged-in tools with finger on switch. Be sure switch is off when plugging in.
- 19. OUTDOOR USE EXTENSION CORDS. When tool is used outdoors, use only extension cords suitable for use outdoors and so marked.
- 20. DRILLING INTO ELECTRICAL WIRING IN WALLS CAN CAUSE DRILL BIT AND CHUCK TO BECOME LIVE. Do not touch the chuck when drilling into a wall; grasp only the handle(s) provided on the tool.
SWITCH
Your hammer drill is equipped with a variable speed switch which allows control of drilling speeds. Increased trigger pressure delivers higher speeds and torque. The variable speed feature is especially convenient for starting holes, driving screws, mixing paint, drilling in ceramics, and other applications where minimum speed and power is required.
The "lock-on" feature of the switch is convenient for continuous drilling in soft woods, when using drill with a drill stand, or when using drill to buff or polish.
An auxiliary handle is provided and must be used for safe control of drill when using large drill bits. To attach auxiliary handle, simply screw handle into threaded hole in top of drill.
OPERATION
Disconnect tool from power supply.
To adjust for type of drilling, grip the knurled ring on front of drill firmly as shown in Fig. 1. Pull the ring firmly towards the chuck and rotate ring to align the indicator mark with "hammer" or "drill."
- WARNING -
This hammer drill is not designed for reverse hammering. Operating the tool in reverse when hammering will damage the tool.
Insert drill bit into chuck and tighten securely using the chuck key provided. Do not use a wrench to tighten or loosen the chuck.
Depress and release the switch trigger to be sure the tool is in the "off" position before connecting it to the power supply.
WOOD DRILLING
Choose carbon-steel or high speed steel bits for wood drilling. Check for correct drilling mode (direct or hammer). Adjust the knurled collar until the indicator mark is aligned with the "Drill" mark on the tool. See Figure 1. This position is for direct (normal) drilling action.
Begin drilling at a very low speed to prevent the bit
Your hammer drill is reversible. The direction of chuck rotation is controlled by a lever located above the switch trigger. A spring loaded lever holds the lever to the right for normal drilling and prevents accidental reversal of the tool when in hammer mode. For reverse rotation push lever to the left and hold while pulling switch trigger. The design of the switch will not permit changing direction of rotation while the tool is running.
Avoid running the tool at low speeds for extended periods of time. At lower speeds under constant usage, the unit may become overheated. If this occurs, operate the tool without load and at full speed to cool it more quickly.
Adjust the indicator mark to hammer mode when drilling in brick, concrete, etc., and use carbidetipped bits. For direct (normal) drilling, adjust the indicator mark to the word "drill." This position should be selected when drilling with twist drills, hole saws, etc.
Small pieces of material to be drilled should be held in a vise or with clamps to keep it from turning as the drill bit rotates.
Hold the tool firmly and place the bit at the point to be drilled. Start the hammer drill at low speed to prevent the drill bit from slipping off center. After the hole has been started, increase the drilling speed. Lower speeds are ideal for drilling ceramics, mixing paints, etc. Medium speeds are for drilling ferrous metals, plastics and laminates. Higher speeds produce best results when drilling wood and non-ferrous metals. Do not lock the switch "on" for jobs where the drill may need to be stopped suddenly.
from slipping off the starting point. Increase the speed as the drill bit bites into the material.
When drilling through holes, place a block of wood behind the workpiece to prevent ragged or splintered edges on the back side of the hole. Do not lock the trigger "On" for jobs where the tool may need to be stopped suddenly.

METAL DRILLING
High-speed bits can be used for wood or steel. Adjust the drilling mode to direct drilling. Start the hole in steel at a low speed as described for wood drilling. Maintain a speed and pressure which allows cutting without overheating the bit. Applying too much pressure will:
Overheat the drill Wear the bearings Bend or burn bits Produce off-center or irregular shaped holes
Make drilling large holes in metal easier by drilling with a smaller bit first; then use the larger one. Lubricate the bit with oil to improve drilling action and increase bit life.
If the bit becomes jammed in workpiece or if the motor stalls, stop the tool immediately. Remove the bit from the workpiece and determine the reason for jamming before continuing.
USING DEPTH GAUGE
A depth gauge is packed with your hammer drill to assist you in controlling the depth of drilled holes. Install the rod and thumb screw as shown in Figure 2. Adjust the rod so that the drill bit extends beyond the end of the rod to the required drilling depth. When the end of the rod reaches the surface of the material being drilled, the desired hole depth has been reached.
MASONRY DRILLING
When drilling holes in brick, tile, concrete, etc., use a carbide-tipped masonry bit. Adjust drilling mode to "Hammer." Apply only light pressure and medium speed for best results in brick. Greater pressure is required for hard material such as concrete.
When drilling tile, practice on a scrap piece to determine the best speed and pressure.

CHUCK REMOVAL
Disconnect the drill from power supply before any service operation.
The chuck must be removed in order to use some accessories. To remove:
- 1. Close the chuck jaws. Insert chuck key into chuck and tap sharply with a mallet in a clockwise direction as shown in Fig. 3.
- Open the chuck jaws and remove the chuck screw by turning it in clockwise direction. See Fig. 4.
- Insert the chuck key in chuck and tap sharply in counterclockwise direction to loosen it on spindle. It can now be unscrewed by hand. See Fig. 5.
The chuck may become loose on spindle and develop a wobble. To tighten it, follow these steps:
- 1. Open the chuck jaws.
- 2. Insert chuck key in chuck and tap with a mallet in clockwise direction.
- 3. Tighten the chuck screw.

MAINTENANCE
WHEN SERVICING USE ONLY IDENTICAL REPLACEMENT PARTS

BRUSH REPLACEMENT
Disconnect the drill from power supply before servicing.
- Remove brush caps (A) and washers (B) as shown in Fig. 6. The washers are designed to fit tightly in the brush holders to prevent twisting of brush springs when replacing brush caps.
- 2. Remove brush assemblies (C).
- 3. Reassemble making sure that the curvature of the brush matches the curvature of the motor and that the brush moves freely in the brush holder.
LUBRICATION — All of the bearings in this tool are lubricated with a sufficient amount of high grade lubricant for the life of the unit under normal operating conditions, therefore, no further lubrication is required.
GENERAL
Only the parts shown on parts list, page seven, are intended to be repaired or replaced by the customer. All other parts represent an important part of the double insulation system and should be serviced only by a qualified service technician.
Avoid using solvents when cleaning plastic parts. Most plastics are susceptible to various types of commercial solvents and may be damaged by their use. Use clean cloths to remove dirt, carbon dust, etc.
EXTENSION CORDS
The use of any extension cord will cause some loss of power. To keep the loss to a minimum and to prevent tool overheating, use minimum 16 A.W.G. wire size for extension cord lengths from 25 to 100
When electric tools are used on fiberglass boats, sports cars, etc., it has been found that they are subject to accelerated wear and possible premature failure, as the fiberglass chips and grindings are highly abrasive to bearings, brushes, commutator, etc. Consequently it is not recommended that this tool be used for continuous production work on any fiberglass material. During any use on fiberglass it is extremely important that the tool is cleaned frequently by blowing with an air jet.
feet. When tool is used outdoors, use only extension cords suitable for outdoor use and so marked. Extension cords are available at Sears Catalog Order or Retail Stores.
THE FOLLOWING RECOMMENDED ACCESSORIES WERE AVAILABLE AT THE TIME THIS MANUAL WAS
| High Speed Bits (For wood or metal) | %" Max. | Hole Square ( 9 2596) |
|---|---|---|
| Masonry Bits | ½"Max. | Bench Stand ( 9 25911) |
| Wood Boring Bits | 1¼" Max. | Angle Drill Head ( 9 26271) |
| Hole Saws | 2½" Max. | Rotary Cutters for Wood, Plastic |
| Sanding-Polishing Kit | 5" Dia. | Sander-Polisher-Buffer ( 9 26272) |
| Cord Lock (9 2595) |
CAUTION: The use of attachments or accessories not listed above might be hazardous.

The operation of any Power Tool can result in foreign objects being thrown into the eyes, which can result in severe eye damage. Always wear safety glasses or eye shields before commencing power tool operation. We recommend Wide Vision Safety Mask for use over spectacles or standard safety glasses, available at Sears Retail or Catalog Stores.

"A"-The assembly shown represents an important part of the Double Insulated System. To avoid the possibility of alteration or damage to the System, service should be performed by your nearest Sears Electric Motor Shop/Specialty Repair Center. Contact vour Ball Bearing (Hoover 6001ZVC3E) **STD315515 . Chuck Key (Cat. No. 9 2058) Chuck (Cat. No. 9 2975) CRAFTSMAN 36 INCH HAMMER DRILL- MODEL NUMBER 315.18111 stationary Ratchet Instruction Sheet Screw (Special) Spring Washer Chuck Spindle Data Plate . Deg The Model Number will be found on a plate attached to the Housing Cover. Always mention the Model Number in all correspondence regarding your 3% INCH HAMMER DRILL or when ordering repair parts. Description Washer Vasher Nasher pindle pacer Kev SEE BACK PAGE FOR PARTS ORDERING INSTRUCTIONS 2-620263-843 -706239-802 -706239-830 -706239-833 2-620332-01 -617398-01 2-611404-06 -623262-00 2-617515-01 2-607987-05 -617400-03 -617404-01 3-617402-03 1-617359-01 2-611405-01 1-611402-02 Part No. PARTS LIST Yex ŝ 2 53 24 52 56 27 28 30 31 and 24) 00 Sear Housing (Includes Key Nos. 8 **Available From Div. 98-Source 980.00. Bearing Plate (Includes Kev Nos. R-3 18) Screw (#10-24 × 13⁄4 Fil. Hd.) nearest Catalog Order or Retail Store. iet Sleeve (Includes Key No. Torrington Angular Toothed Clutch . -humb Screw (1/4-20) Brush with Sprina Depth Gauge Rod Thrust Bearina Needle Bearing Sleeve Bearing Description Drive Screws .ogo Plate . Brush Cap Washer Washer Handle -706239-832 1-706382-813 NOTE: 1-614008-01 1-610784-02 1-795247-06 2-611026-01 3-607877-07 2-606403-01 1-607338-01 -617399-01 1-886165-00 -617505-01 3-617367-05 -617401-01 -621431-07 2-617366-03 2-617242-05 Part No. Kev ŝ 0 E 2 E 4 5 91 17
Page 7
| - 1 | |
|---|---|
| Sears | CRAFTSMAN® |
|
OWNERS
MANUAL |
3/8 INCH
HAMMER DRILL DOUBLE INSULATED REVERSIBLE-VARIABLE SPEED |
| SERVICE |
Now that you have purchased your Hammer Drill,
should a need ever exist for repair parts or service, simply contact any Sears Service Center and most Sears, Roebuck and Co. or Simpsons-Sears Limited stores. Be sure to provide all pertinent facts when you call or visit. |
|
MODEL NO.
315.18111 |
The model number of your Hammer Drill will be found
on the plate attached to the side of the motor housing. |
|
HOW TO ORDER
REPAIR PARTS |
|
| 5. |
All parts listed may be ordered from any Sears Service
Center and most Sears stores. If the parts you need are not stocked locally, your order will be electronically transmitted to a Sears Repair Parts Distribution Center for handling. |


 Loading...