

Sears LXU 304.44700000,LXI 304.44700000 Owner's Manual
Owner's Manual
13" COLOR
TV/VCR COMBINATION
Model No: 304.44700000
CAUTION:
Before using this product,
read this manual and follow
all its Safety Rules and
Operating Instructions.
• Safety
• Operation
• Maintenance
• Troubleshooting
Sears, Roebuck and Co., Hoffman Estates, IL 60179 USA
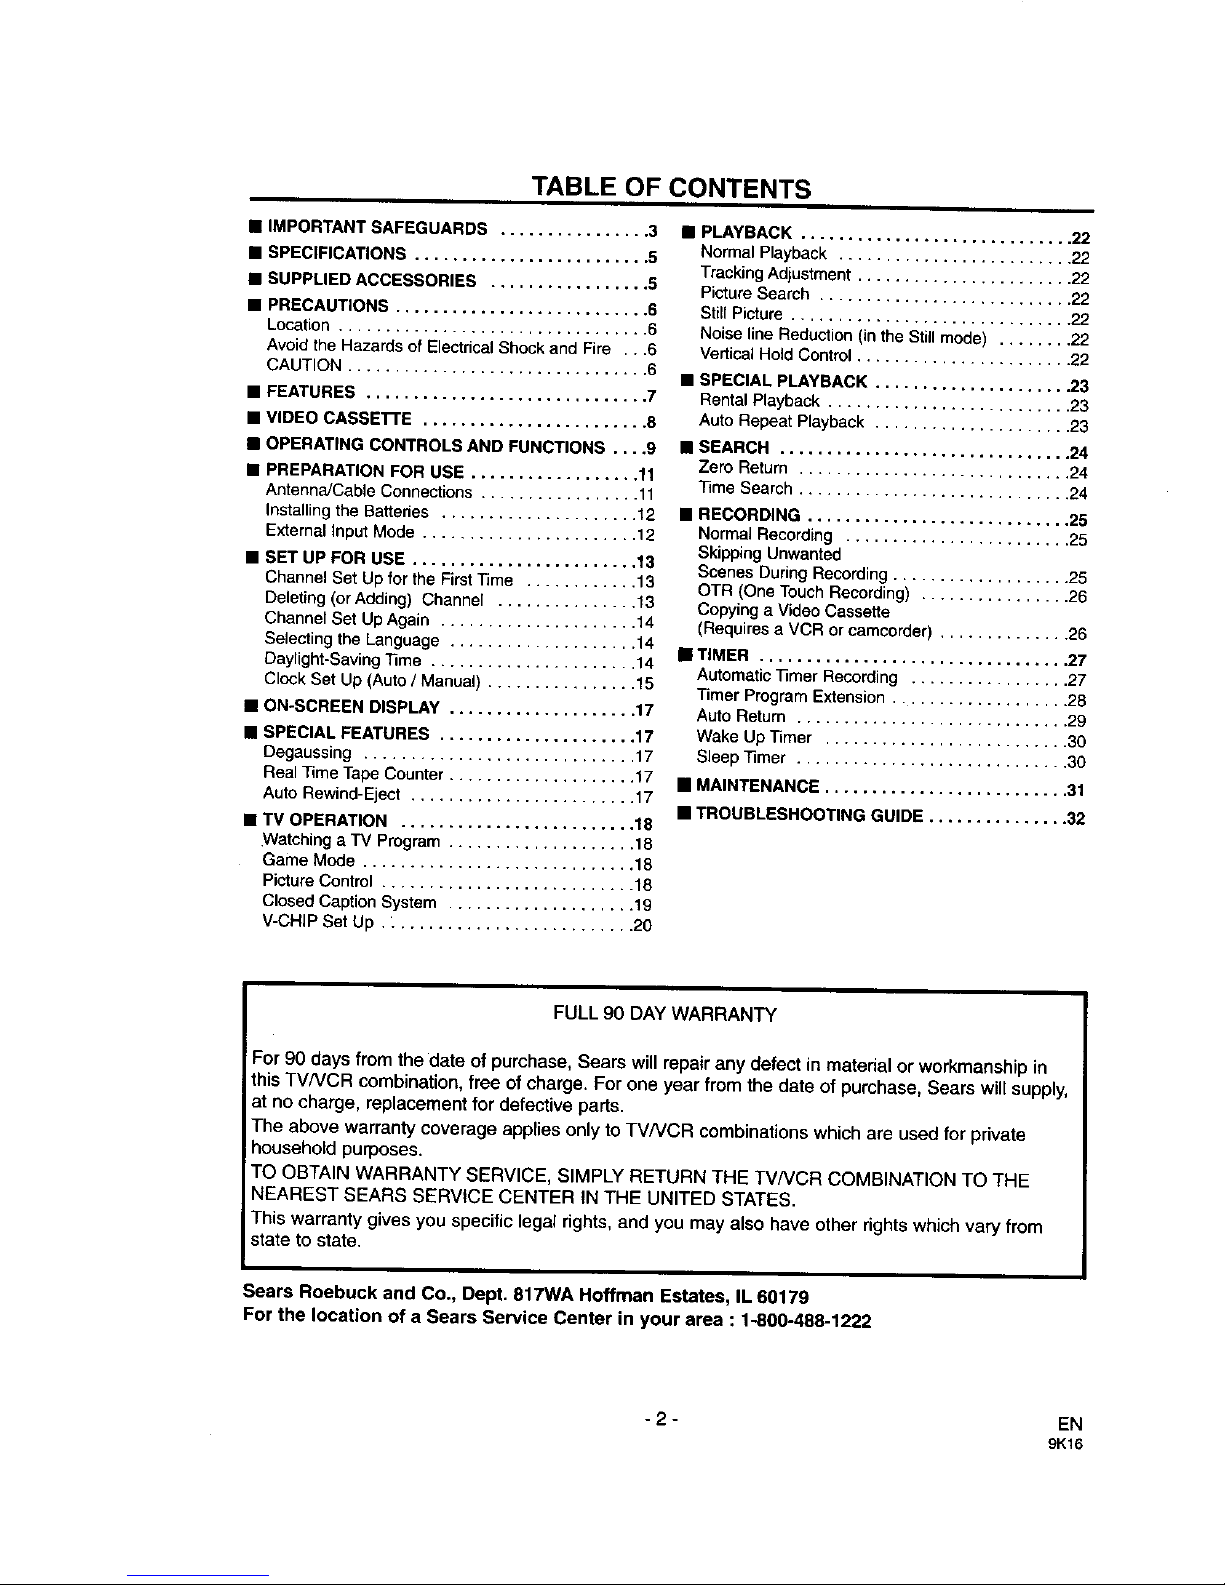
TABLE OF CONTENTS
• IMPORTANT SAFEGUARDS ................ 3
• SPECIFICATIONS ......................... 5
• SUPPLIED ACCESSORIES ................. 5
• PRECAUTIONS ........................... 6
Location ................................. 6
Avoid the Hazards of Electricat Shock and Fire ...6
CAUTION ................................ 6
• FEATURES .............................. 7
• VIDEO CASSE'R'E ........................ 8
• OPERATING CONTROLS AND FUNCTIONS .... 9
• PREPARATION FOR USE .................. 11
Antenna/Cable Connections ................. 11
Installing the Batteries ..................... 12
External Input Mode ....................... 12
• SET UP FOR USE ........................ 13
Channel Set Up for the First Time ............ 13
Deleting (or Adding) Channel ............... 13
Channel Set Up Again ..................... 14
Selecting the Language .................... 14
Daylight-Saving Time ...................... 14
Clock Set Up (Auto / Manual) ................ 15
• ON-SCREEN DISPLAY .................... 17
• SPECIAL FEATURES ..................... 17
Degaussing ............................. 17
Real Time Tape Counter .................... 17
Auto Rewind-Eject ........................ 17
• TV OPERATION ......................... 18
Watching a TV Program .................... 18
Game Mode ............................. 18
Picture Control ........................... 18
Closed Caption System .................... 19
V-CHIP Set Up. L......................... 20
• PLAYBACK ............................. 22
Normal Playback ......................... 22
Tracking Adjustment ....................... 22
Picture Search ........................... 22
Stil( Picture .............................. 22
Noise line Reduction (in the Still mode) ........ 22
Vertical Hold Control ....................... 22
• SPECIAL PLAYBACK ..................... 23
Rental Playback .......................... 23
Auto Repeat Playback ..................... 23
• SEARCH ............................... 24
Zero Return ............................. 24
Time Search ............................. 24
• RECORDING ............................ 25
Normal Recording ........................ 25
Skipping Unwanted
Scenes During Recording ................... 25
OTR (One Touch Recording) ................ 26
Copying a Video Cassette
(Requires a VCR or camcerder) .............. 26
• TIMER ................................. 27
Automatic ]3mer Recording ................. 27
Timer Program Extension ................... 2B
Auto Return ............................. 29
Wake Up Timer .......................... 30
Sleep "timer ............................. 30
• MAINTENANCE .......................... 31
• TROUBLESHOOTING GUIDE ............... 32
FULL 90 DAYWARRANTY
For 90 days from the date of purchase, Sears will repair any defect in material or workmanship in
this TVNCR combination, free of charge. For one year from the date of purchase, Sears will supply,
at no charge, replacement for defective parts.
The above warranty coverage applies only to TV/VCR combinations which are used for private
household purposes.
TO OBTAIN WARRANTY SERVICE, SIMPLY RETURN THE TVNCR COMBINATION TO THE
NEAREST SEARS SERVICE CENTER IN THE UNITED STATES.
This warranty gives you specific legal rights, and you may also have other rights which vary from
state to state.
Sears Roebuck and Co., Dept. 817WA Hoffman Estates, IL 60179
For the location of a Sears Service Center in your area : 1-800-488-1222
- 2 - EN
9K16
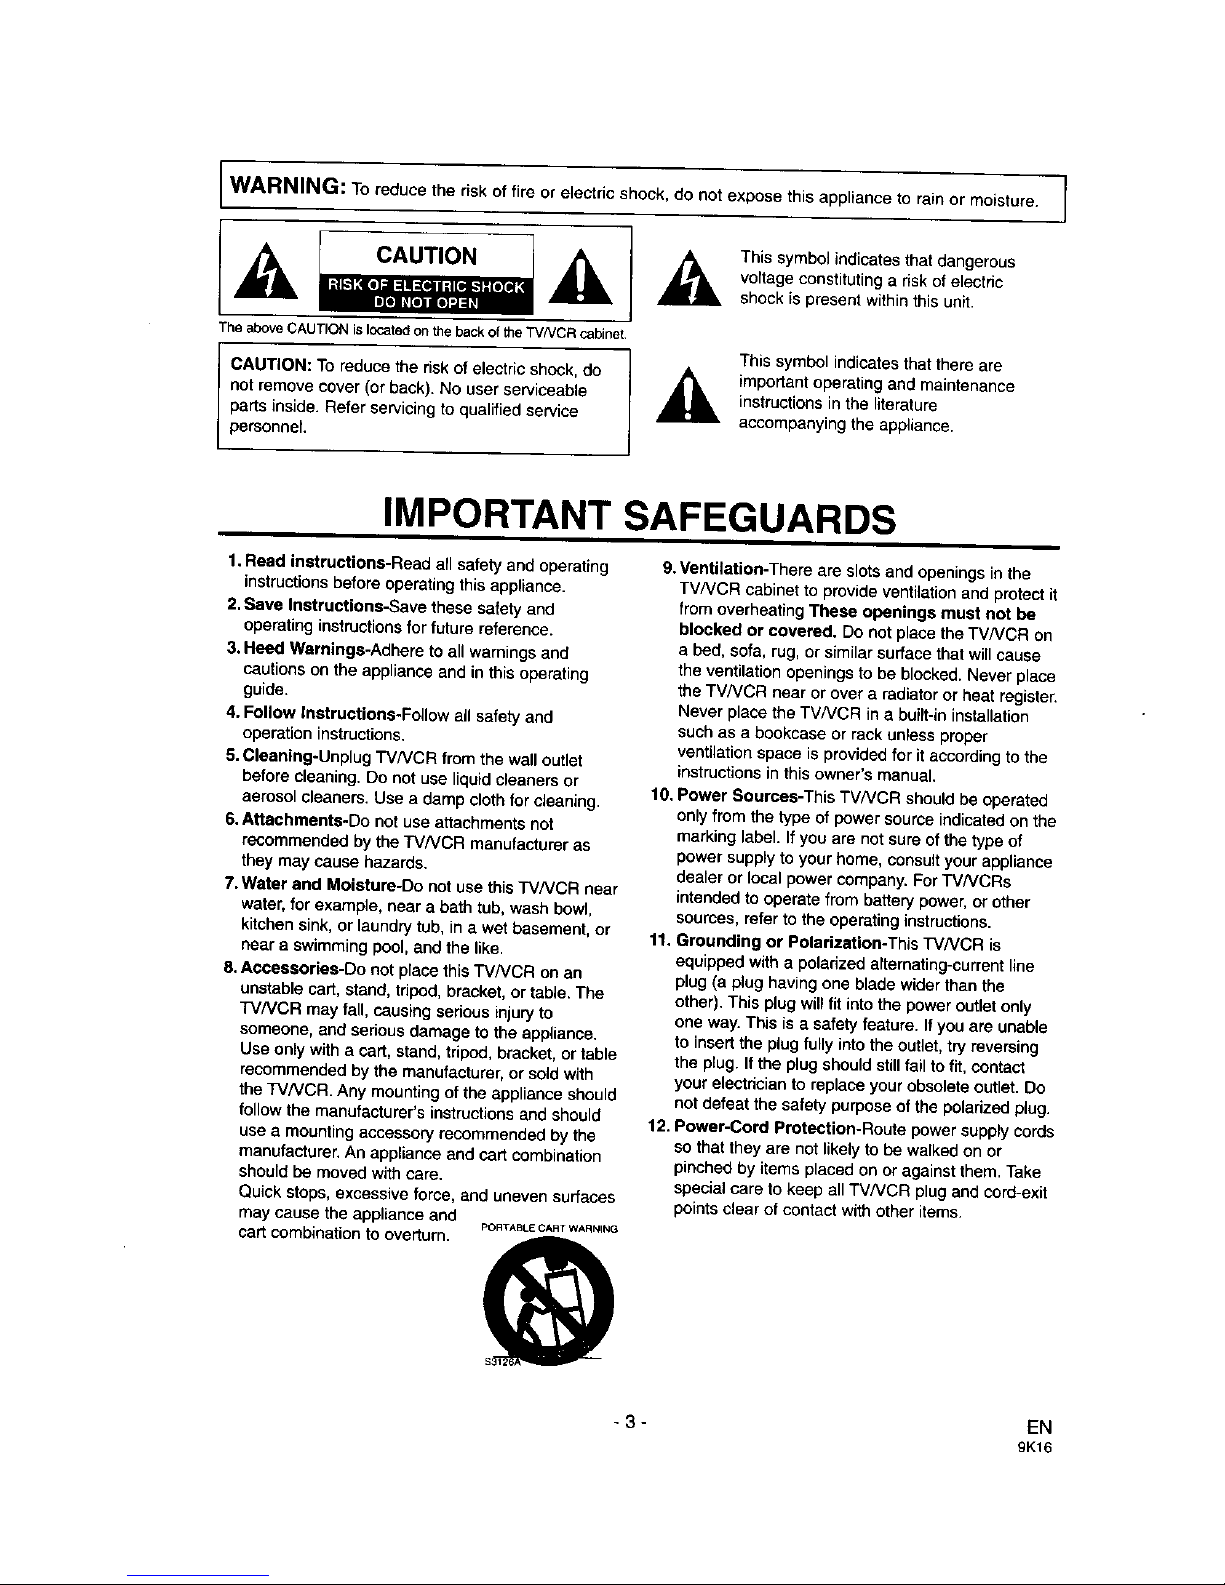
WARNING: To reduce the risk of fire or electric shock, do not expose this appliance to rain or moisture. ]
The above CAUTION is located on the back of the TVNCR cabinet
CAUTION: To reducethe riskof electricshock, do
notremove cover (or back). No user serviceable
parts inside. Refer servicing to qualified service
perSOnneL
I
This symbol indicates that dangerous
voltage constituting a risk of electric
shock is present within this unit.
This symbol indicates that there are
importantoperatingand maintenance
instructions in the literature
accompanying the appliance.
IMPORTANT SAFEGUARDS
1.Read instructions-Read all safety and operating
instructionsbefore operatingthisappliance.
2.Save Instructions-Save these sa{etyand
operatinginstructionsfor future reference.
3. Heed Warnings-Adhere to all warningsand
cautions onthe applianceand inthisoperating
guide.
4. Follow Instructions-Follow allsafety and
operationinstructions.
5.Cleaning*Unplug "I'VNCR from the walloutlet
beforecleaning.Do notuse liquidcleanersor
aerosolcleaners. Use a damp clothfor cleaning.
6.Attachments-Do not use attachmentsnot
recommendedby theTV/VCR manufactureras
they maycause hazards.
7. Water and Moisture-Do not use thisTVNCR near
water,for example, near a bathtub,wash bowl,
kitchensink,orlaundry tub, in a wet basement, or
near a swimmingpool,and the like.
8.Accessories-Do not place thisTVNCR on an
unstable cart, stand, tripod,bracket,or table. The
TVNCR may tall, causing seriousinjury to
someone, and seriousdamage to the appliance.
Use onlywith a cart,stand,tripod,bracket, or table
recommended by the manufacturer, or sold with
the TVNCR. Any mounting of the appliance should
follow the manufacturer's instructions and should
use a mounting accessory recommended by the
manufacturer. An appliance and cart combination
shouldbe moved with care.
Quick stops, excessive force, and uneven surfaces
may cause the appliance and PORTABLECARTWARNING
cartcombination to overturn.
9.Ventilation-There are slots and openings in the
TVNCR cabinet to provide ventilation and protect it
from overheating These openings must not be
blocked or covered. Do not place the TVNCR on
a bed, sofa, rug, or similar surface that will cause
the ventilation openings to be blocked. Never place
the TV/VCR nearor over a radiator or heat register.
Never place the TVNCR in a built-in installation
such as a bookcase or rack unless prober
ventilation space is provided for it according to the
instructions in this owner's manual.
10, Power Sources-This TVNCR should be _erated
onlyfromthe type of powersourceindicatedon the
marking tabet.If youare not sure of thetype of
power supplyto your home, consult your appliance
dealer or local power company. For TVNCRs
intended to operate from battery power, or other
sources, referto the operating instructions.
11. Grounding or Polarization-This TVNCR is
equippedwitha poladzed alternating-currentline
plug(a plug having one blade widerthan the
other).Thisplugwillfit intothepower outletonly
one way. Thisis a safety feature. Ifyou are unable
to insertthe plug fully into the outlet,try reversing
the plug. It the plug should stillfail tofit, contact
your electrician to replace your obsolete outlet. Do
notdefeat the safety purpose of the polarized plug.
12. Power-Cord Protection-Route power supply cords
so that they are not likely tobe waSkedon or
pinched by items placed on or against them. Take
spedtal care to keep artTVNCR plug and cord-exit
points clear of contact with other items.
-3- EN
9K16
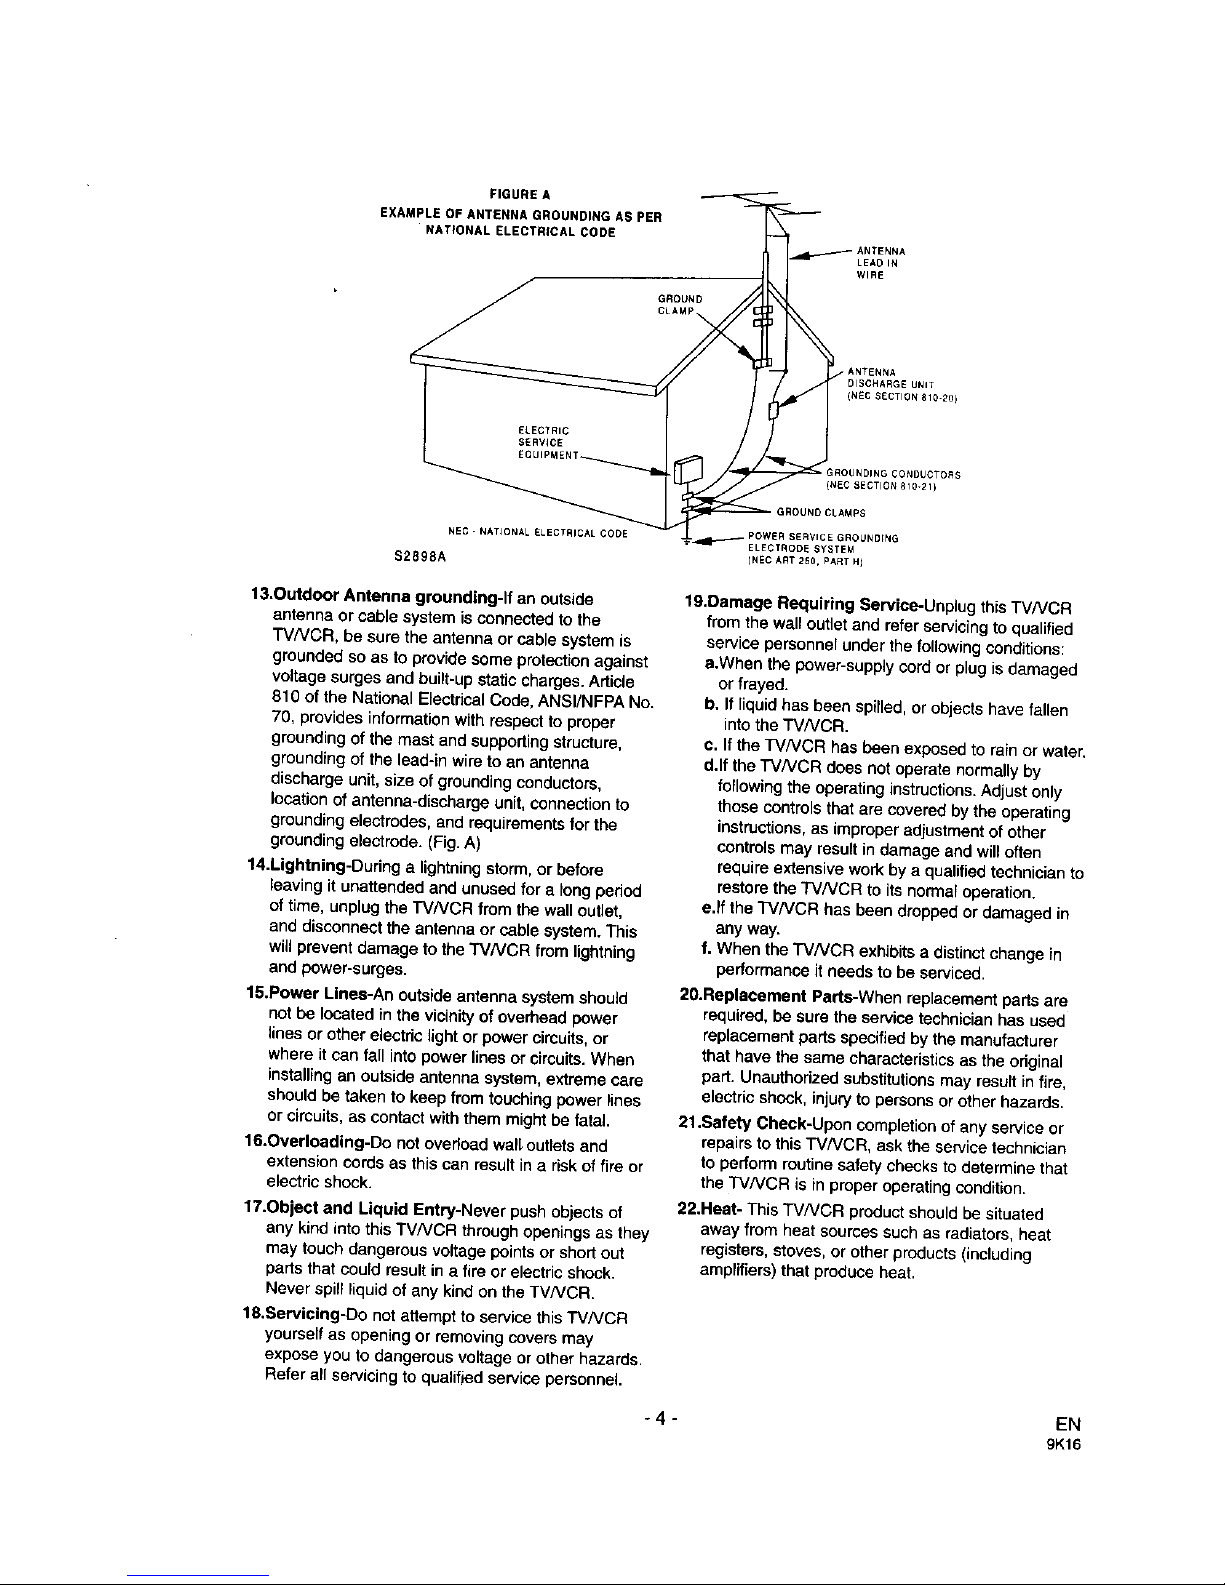
FIGURE A
EXAMPLE OF ANTENNA GROUNDING AS PER
NATIONAL ELECTRICAL CODE
GROUND
CLAMp
WIRE
NEC-NAT]ONALELECTRIGALCODE
$2898A
13,Outdoor Antenna grounding-If an outside
antennaor cablesystemis connectedto the
TVNCR, be sure the antennaor cablesystem is
groundedsoas toprovidesomeprotectionagainst
v_tage surges and built-up static charges. Arflcle
810 of the National Electrical Code, ANSI/NFPA No,
70, provides information with respect to proper
grounding of the mast and supportingstructure,
grounding of the lead-in wire to an antenna
discharge unit, size ofgrounding conductors,
location of antenna-discharge unit, connection to
groundingetectredes,and requirementsfor the
groundingelectrode.(Fig. A)
14.Lightning-Dudng a lightningstorm,or before
leaving it unattendedand unused for a lang pedod
of time, unplug the TVNCR from the wall outlet,
and disconnect the antenna or cable system. This
will prevent damage to the TVNCR from lightning
and power-surges.
15.Power Lines-An outside antenna systemshould
notbe locatedinthe vicinityofoverheadpower
lines or other electric light or power circuits,or
where it can fall into power lines or circuits.When
installing an outside antenna system, extreme care
should be taken to keep from touching power lines
or circuits, as contact with them might be fatal
16.Overloading-Do not overload walt,outiets and
extensioncords as thiscan resultina riskoffire or
electricshock.
17.Object and Uquid Entry-Never push objects of
any kind into this TV/VCR through openings as they
may touch dangerous voltage points or short out
parts that could result in a fire or electric shock.
Never spill liquid of any kind on the TVNCR.
IB.Servtc|nglDO not attempt to service this TVNCR
yourself as opening or removing covers may
expose you to dangerous voltage or other hazards.
Refer all servicing to qualified service personnel
-4-
ELECTRODE SYSTEM
[N_C ART 250, PART H)
19.Damage Requiring Service-Unplug this TVNCR
fromthe wall outlet and referservicingto qualified
servicepersonnelunder the following conditions:
a.When the power-supplycord orplugis damaged
orfrayed.
b. If liquidhas beenspilled, orobjectshave fallen
into the"r'v'NCR.
c. If theTVNCR has been exposedtorainor water.
d.lf the TVNCR does not operatenormallyby
following the operatinginstructions.Adjustonly
those controlsthatare coveredbytheoperating
instructions,asimproper adjustment of other
controls may result in damage and will often
require extensive work by a qualified technician to
restore the TV/VCR to its normal operation.
eJf the TV/VCR has been dropped or damaged in
any way.
f. When the TVNCR exhibits a distinct change in
performanceit needs to be sewicad.
20.Replacement Parts-Whenreplacementpartsare
required,besurethe servicetechnicianhas used
replacement partsspecifiedbythe manufacturer
thathave the same characteristicsas the odginal
part. Unauthorizedsubstitutionsmay result in fire,
electric shock, injury to persons or other hazards.
21.Safety Check-Upon completion of any serviceor
repairsto this TVNCR, ask the service technician
to perform routine safety checksto determine that
the "_/NCR is in proper operating condition.
22.Heat- This TVNCR product should be situated
away from heat sources such as radiators, heat
re_isters, stoves,or other products (including
amplifiers) that produce heat.
EN
9K16
The serial number of this product is found on the back of the unit, Record the serial number and other
vital information here and retain this book as a permanent record of your purchase to aid identification
in case of theft,
Date of Purchase
Store Address
Store Phone Number
Model Number
Serial Number
SPECIFICATIONS
GENERAL SPECIFICATIONS
CRT : 13 inch in-line gun, 90" deflection tube
Television system : NTSC-M
Closed caption system : §15.119/FCC
Video Heads : Rotarytwo-head
Tape width: 1/2 inch
Tape speed
SP : 33.40mm/sec.
LP : 16.67mm/sec.
SLP : 11.12mm/sec.
Tuner channel
TV VHF Low : #2~#6
TV VHF High : #7-#13
TV UHF : #14-#69
CATV
VHF : 5A
MID band : A5-A1, A~I
SUPER band : J~W
HYPER band : W+1~W+84
Terminals
Antenna input : VHF/UHF 75 ohms
unbalanced
Video input : RCA connector × 1
Audio input : RCA connector × 1
Earphone : 1/8" monaural (3.5 ram)
ELECTRICAL SPECIFICATIONS
Video input level : 0.5-2.0Vp-p
Audio input level : -15dBs
Video SIN ratio: More than46dB
Audio S/N ratio : More than 43dB
OTHER SPECIFICATIONS
Power requirement:
Power consumption:
Dimensions :
Weigh! :
AC 120V/6OHz
65W
H:15-3/4" (400ram)
W:15-3/16" (386mm)
D:14-13/16" (377mm)
24.3 Ibs (11.0kg)
• Designs end specifications are subject to
change without notice and without our legal
obligation.
_As an ENERGY STAR®
Partner, Sears has
_teTmined that this product meets
the ENERGYSTAR@ guidelines for
energy efficiency. ENERGY STARe is
a U.S. registered mark.
SUPPLIED ACCESSORIES
• RemoteControl - Part No. NO107UD
• Dipole Antenna
• Matching Adapter
• Two(2) AA Battedes
• To order a replacement Remote Control, call 1-800-366-7278.
-5- EN
9K16
PRECAUTIONS
For safe operation and satisfactory performance
of your TV/VCR, keep the following in mind when
selecting a place for its installation:
• Shield it from direct sunlight and keep it away
from sources of intense heat.
• Avoid dusty or humid places.
• For proper heat dissipation, avoid places with
insufficient ventilation. Do not block the
ventilation holes at the top and bottom of the
unit. Do not place the unit on a carpet because
this will block the ventilation holes.
• install unit in a horizontal position.
• Avoid locations subject to strong vibration.
• Do not place the TVNCR near strong magnetic
fields.
• Avoid moving TV/VCR to locations where
temperature differences are extreme.
• Do not handle the power cord with wet hands.
• Do not pull on the power cord when
disconnecting it from an AC wall outlet. Grasp it
by the plug.
• If, by accident, water is spilled on your unit,
unplug the power cord immediately and take
the unit to Sears Service Center for servicing.
• Do not put your fingers or objects into the
TVNCR cassette holder.
• Do not place anything directly on top of the unit.
Moisture condensation may occur inside the unit
when it is moved from a cold place to a warm
place, or after heating a cold room or under
conditions of high humidity. If a tape is played in a
TV/VCR which has moisture, it may damage the
tape and TV/VCR. Therefore when you suspect
that condensation has occurred inside the unit,
turn the POWER button ON and allow at least 2
hours for the unit to dry out.
IMPORTANT COPYRIGHT INFORMATION
Unauthorizedrecordingor useof broadcast
televisionprogramming,videotape,film or
othercopyrightedmaterial may violate
applicablecopyrightlaws. Sears assumesno
responsibilityfor unauthorizedduplication, use,
orotheracts whichinfringeuponthe rightsof
copyrightowners.
FCC WARNING
This equipment may generate or use radio
frequency energy. Changes or modifications to
this equipment may cause harmful interference
unless the modifications are expressly
approved in the instruction manual, Do not
operate this equipment if an unauthorized
change or modification is made.
This equipment has been tested and found to
comply with the limits for a Class B digital
device, pursuant to Part 15 of the FCC Rules.
These limits are designed to provide
reasonable protection against harmful
interference in a residential installation. This
equipment generates, uses, and can radiate
radio frequency energy and, if not instaned and
used in accordance with the instructions, may
cause harmful interference to radio
communications.
However, there is no guarantee that
interference will not occur in a particular
installation. If this equipment does cause
harmful interference to radio or television
reception, which can be determined by turning
the equipment off and on, the user is
encouraged to try to correct the interference by
one or more of the following measures:
1) Reorient or relocate the receiving antenna.
2) Increase the separation between the
equipment and receiver.
3) Connect the equipment into an outlet on a
circuit different from that to which the
receiver is connected.
4) Consult the dealer or an experienced
radio/TV technician for help.
A NOTE ABOUT RECYCLING
This product's packaging materials are recyclable and can be reused. Please dispose of any
materials in accordance with your local recycling regulations.
Batteries should never be thrown away or incinerated but disposed of in accordance with your local
regulations concerning chemical wastes.
- 6 - EN
9K16
FEATURES
• Infrared remote control
• Bilingual on-screen menu display selectable
in English or Spanish
• Real time counter-
This shows the elapsed recording or playback
time in hours, minutes, and seconds.
The "-" indication will appear when the tape is
rewound further than the tape counter position
"0:00:00".
• 181 channel capability PLL frequency
synthesizer tuner with direct station call-
A converter may be necessary to view
scrambled cable channels.
• Auto Clock Setting-
Allows you to set the clock function from a PBS
broadcast station.
• Closed caption system-
You may view specially labeled (¢c) "IV
programs, movies, news, prerecorded tapes,
etc. with either a dialogue caption or text display
added to the program.
• Game mode-
Automatically sets external input mode and
altows TVNCR display to be suitable for use
with TV games.
• Auto power on and off system-
Automatically turns on the TVNCR when you
insert the cassette, turns off after auto-rewind,
and ejects when the beginning of the tape is
reached.
• Auto rewind when the end of a tape Is
reached-
This function doesn't occur when using timer
recording.
• Three different playback tape speeds :
SP/LP/SLP
• Two different recording tape speeds :
SP/SLP
• 2 Step picture search operation-
You can view a video program at high speed or
super high speed in either a forward or reverse
direction in LP and SLP mode. High speed onty
in SP mode.
•Zero Return-
The tape returnsto counterof0:00:00 by
rewindingorfast-forwarding.
•Still-
"Freeze" the pictureat any time,for close
viewingof a particularscene.Only tapes
recorded in SLP mode will show a fairly clear
picture.
• Digital Auto Tracking (DTR)-.-
Automaticallyadjuststhetrackingforeach tape
you play,
• Rental play mode-
Improves playbackpicture quality fromworn
tapes, suchas rental tapes.
• Auto repeat-
Allows you to repeat a tape indefinitely without
pressing the PLAY button.
• Time eearch-
Let you set theTV/VCR to advance thetape by
entering the desired playback time you want to
skip.
•OTR (One Touch Recording)-
Instanttimedrecordingfrom 30 to 480 minutes
is possibleat the pushof the REC/OTR button.
• 1 Year, 8 events (including Daily and Weekly
Timer Recording)-
The built-in timer allows you to recordupto 8
programs at different times on different channels
up to 1 year in advance. The Daily timer allows
recordings to be made of daily broadcasts, and
the Weekly timer allows recording to be made
once a week up to the end of the tape.
• Auto return-
After timer recording is finished, the TV/VCR
can return to the beginning of the recording.
• Wake up/Sleap timer-
Allows youto have the TV/VCR automatically
turnon or offat a desiredtime.
• Timer Program Extension-
Allows youto shiftthetimeschedulefor
automatic timer recording.
• V-CHIP-
Enables parentstopreventtheirchildren from
watchinginappropriatematerial onTV.
-7- EN
9K16
VIDEO CASSE'I-rE
This TV/VCR will operate with any cassette that has the _ mark. For best resu}ts,we recommend
the use of high-quality tapes. Do not use poor quality or damaged tapes.
PRECAUTIONS
• Avoidmoisture.Moisture condensation may
occur insidethe unitwhenitis moved from a
coldplaceto a warmplace, orafter heatinga
cold roomorunder conditionsof high humidity.
Ifa tape is playedin aTVNCR whichhas
moisture,it may damage the tapeand TVNCR.
Thereforewhen you suspect that condensation
has occurred inside the unit, turn the POWER
button ON and allow at _east2 hours for the unit
to dry out.
• Avoid extreme heat, high humidity and
magnetic fields.
• Do not tamperwith the cassettemechanism.
• Do not touch the tape with your fingers.
TAPE SPEEDS
You may chooseto recordat twodifferenttape
speeds:
• SP-Standard Play
• SLP- Super Long Play
The table belowshowsthe maximum
recording/playbacktimeusing T60, T120 orT160
tapes in each mode.
Tape Speed Recording/Playback Time
_pe of
tape T60 T120 T160
SP mode 1 hour 2 hours 2-2/3 hours
SLP mode 3 hours 6hours 8 hours
NOTE: You canplay back a tape recordedin LP
(Long Play) mode.
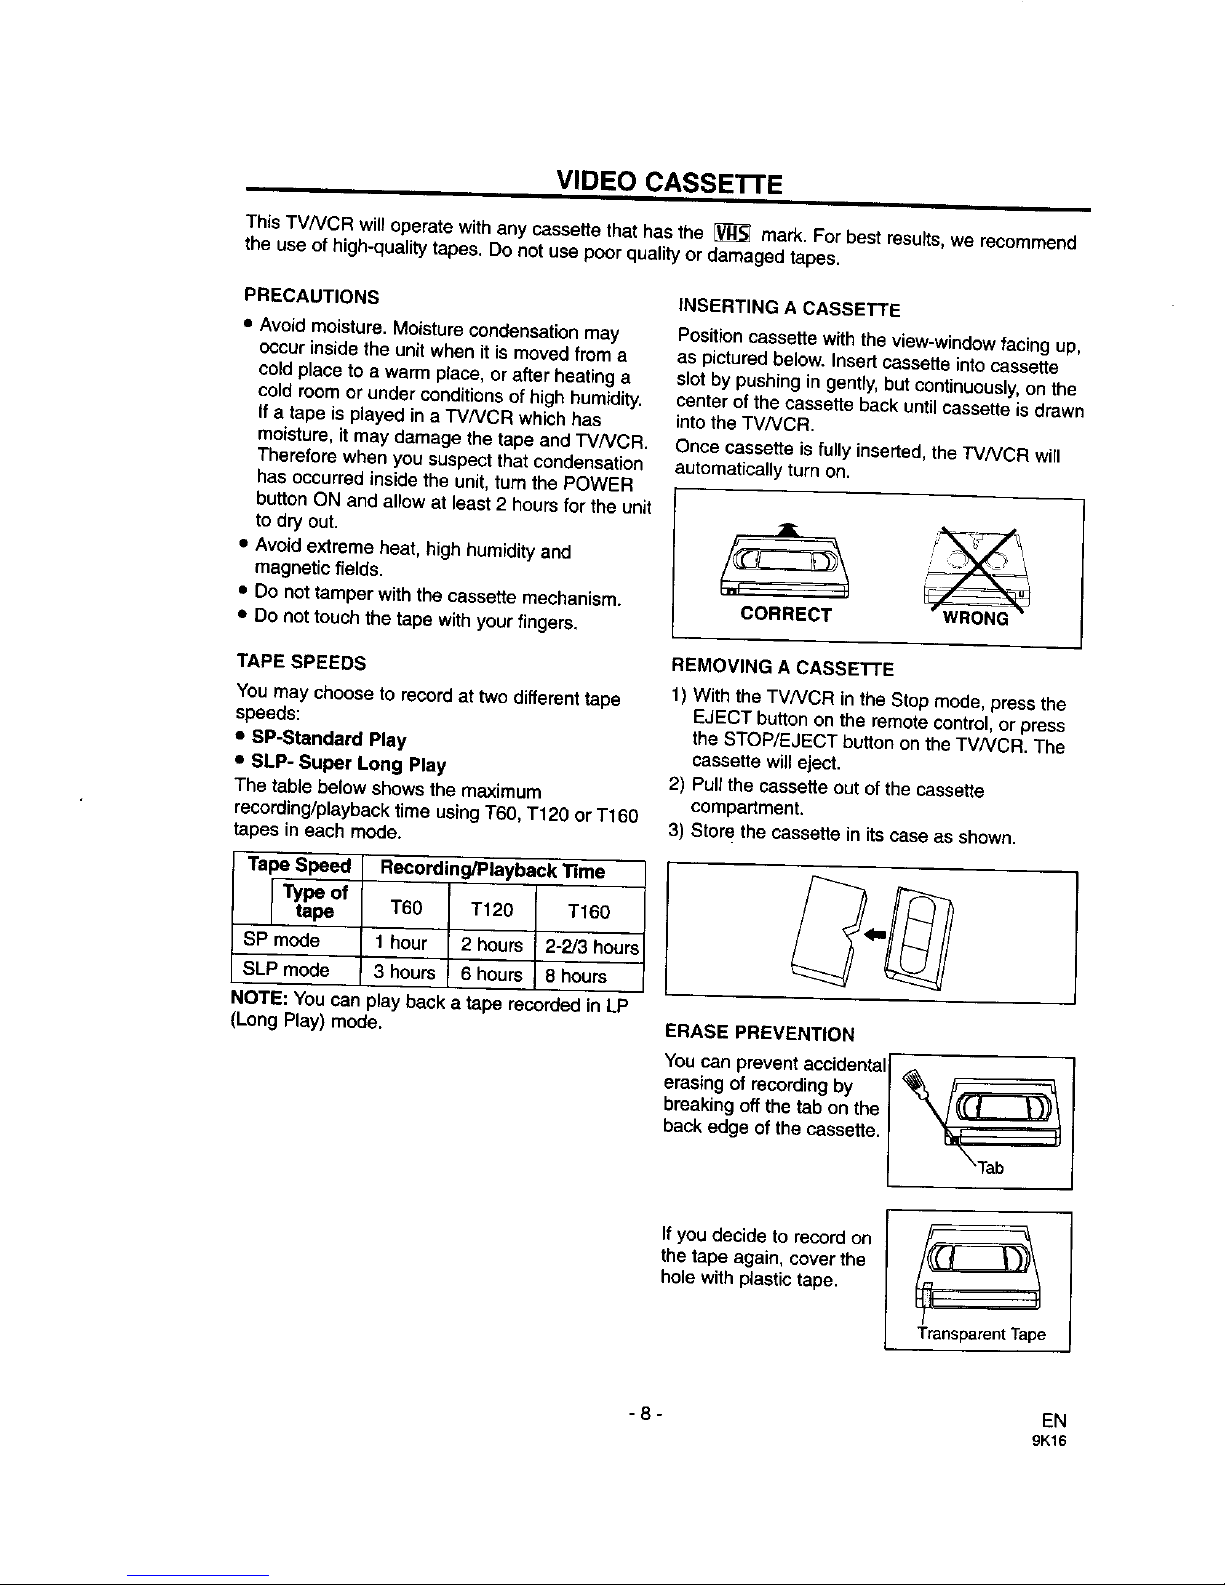
INSERTING A CASSETTE
Position cassette with the view-window facing up,
as pictured below. Insert cassette into cassette
slot by pushing in gently, but continuously, on the
center of the cassette back until cassette is drawn
into the TV/VCR.
Once cassette is fully inserted, the TV/VCR will
automatically turn on.
CORRECT
REMOVING A CASSETTE
1) WiththeTVNCR in the Stopmode, pressthe
EJECT buttonon the remotecontrol,or press
the STOP/EJECT button onthe TVNCR. The
cassettewilt eject.
2) Pullthe cassette out ofthe cassette
compartment.
3) Storethe cassetteinitscase as shown.
ERASE PREVENTION
You can preventaccidentalI
erasingofrecordingby I "_ _
breakingoff thetab on the
back edge of thecassette,
If you decide to record on
the tape again, cover the
hole with plastic tape.
Transparent Tape
-8- EN
9K16
OPERATING CONTROLS AND FUNCTIONS
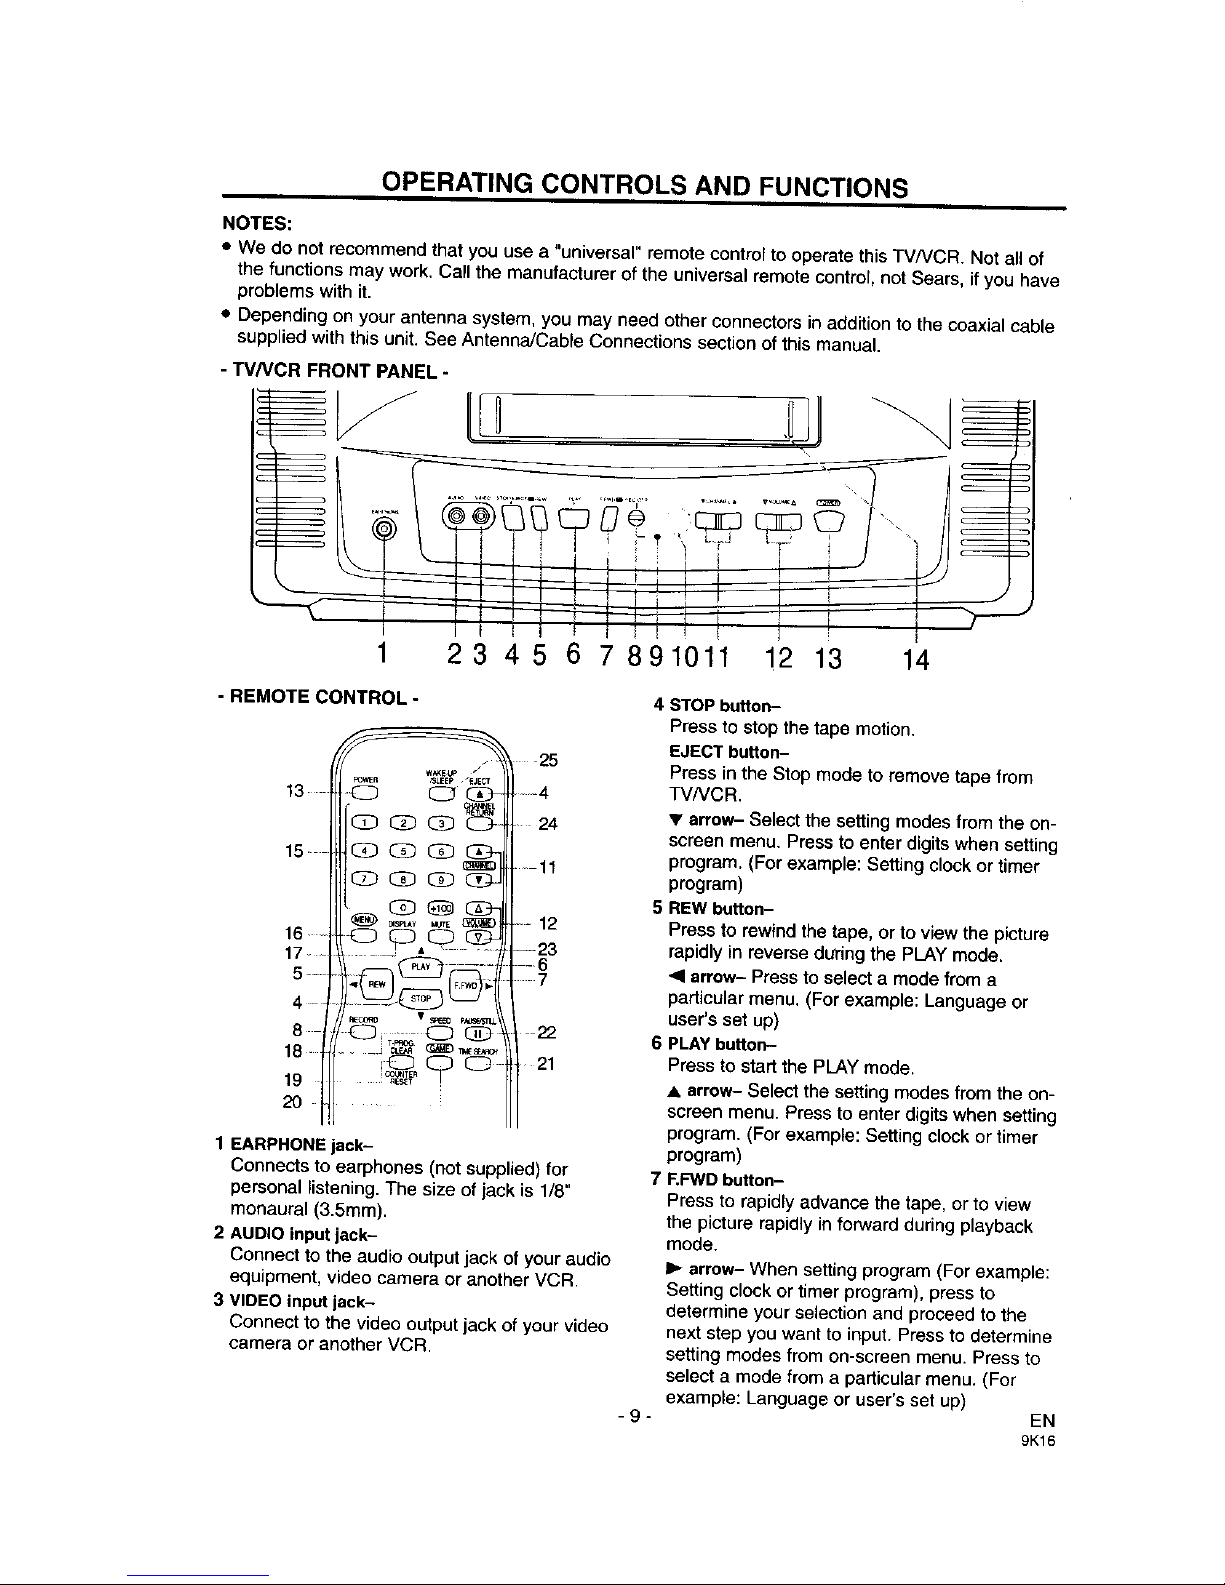
NOTES:
• We do not recommend that you use a "universal" remote control to operate this TVNCR. Not all of
the functions may work. Call the manufacturer of the universal remote control, not Sears, if you have
problems with it.
• Depending on your antenna system, you may need other connectors in addition to the coaxial cable
supplied with this unit. See Antenna/Cable Connections section of this manual.
- TVNCR FRONT PANEL-
_ LI I t I t f I _ ' i I I " I J , li_
, i !i lt!liit i i i ,
1 23 4 5 6 7 891011 12 13 14
-REMOTE CONTROL-
7
1 EARPHONE jack-
Connects to earphones (not supptied) for
personal listening. The size of jack is 1/8"
monaural (3.5ram).
2 AUDIO input jack-
Connect to the audio output jack of your audio
equipment, video camera or another VCR.
3 VIDEO input iack-
Connect to the video output jack of your video
camera or another VCR.
-9-
4 STOP button-
Press to stop the tape motion.
EJECT button-
Press in the Stop mode to remove tape from
TVNCR.
• arrow- Select the setting modes from the on-
screen menu. Press to enter digits when setting
program. (For example: Setting clock or timer
program)
5 REW button-
Press to rewind the tape, or to view the picture
rapidly in reverse during the PLAY mode,
"el arrow- Press to select a mode from a
particular menu, (For example: Language or
user's set up)
6 PLAY button-
Press to start the PLAY mode.
• arrow- Select the setting modes from the on-
screen menu. Press to enter digits when setting
program. (For example: Setting clock or timer
program)
7 F.FWD button-
Press to rapidly advance the tape, or to view
the picture rapidly in forward during playback
mode.
I_ arrow- When setting program (For example:
Setting clock or timer program), press to
determine your selection and proceed to the
next step you want to input. Press to determine
setting modes from on-screen menu. Press to
select a mode from a particular menu. (For
example: Language or user's set up)
EN
9K16

8 REC button-
Press for manual recording.
OTR button- Activates One Touch Recording.
(Only on the TVNCR)
9 RECORD Indicator-
Flashes during recording.
Lights up in the Stand-by mode for Timer
Recording.
10 Remote Sensor Window-
Receives the infrared signals from the remote
control.
11 CHANNEL •/• buttons-
Press to select the desired channels for
viewing or recording.
TRACKING function- Press to minimize video
'noise' (lines or dots on screen) dudng
playback mode.
12 VOLUME A / _ buttons-
Adjust the volume level.
13 POWER button-
Press to turn TVNCR on and off. Press to
activate timer recording.
14 Cassette slot-
Insert the cassette here.
15 Number buttons-
Press to select desired channels for viewing or
recording. To select channels from 1 to 9, first
press the 0 button and then 1 to 9.
+100 button- When selecting cable channels
which are higher than 99, press this _tton
first, then press the last two digits. (To select
channel 125, first press the "+100" button then
press "2" and "5").
16 MENU button-
Press to display the main menu on the "iV
screen.
17 DISPLAY button-
Display the counter or the current channel
number and current time on the TV screen.
18 SPEED button-
Press to choose the desired recording speed:
SP/SLP.
19 T-PROG. CLEAR button-
Press to cancel a timer program setting.
(See page 29,)
COUNTER RESET button- Press to reset
counter to 0:00;00.
20 GAME button-
Sets the game mode and external input mode
at the same time.
21 TIME SEARCH button-
Press to activate Time Search mode.
22 PAUSE/STILL button-
Press to temporarily stop the tape during the
recording or to view a still picture dudng
playback.
23 MUTE button-
Mutes the sound. Press it again to resume
sound.
24 CHANNEL RETURN button-
Press tO go back to the previously viewed
channel. For example, pressing this button
once will change channel display from 3
(present channel) to 10 (previously viewed
channel), and pressing it a second time will
return from 10 to 3.
25 WAKE UP/SLEEP button-
Sets the Wake up or Sleep Timer.
26 Power cord--
Connect to a standard AC outlet (120V/60Hz).
27 ANT. terminal-
Connect to an antenna or cable system.
- REAR VIEW -
26
27
- 10- EN
9K16
PREPARATION FOR USE
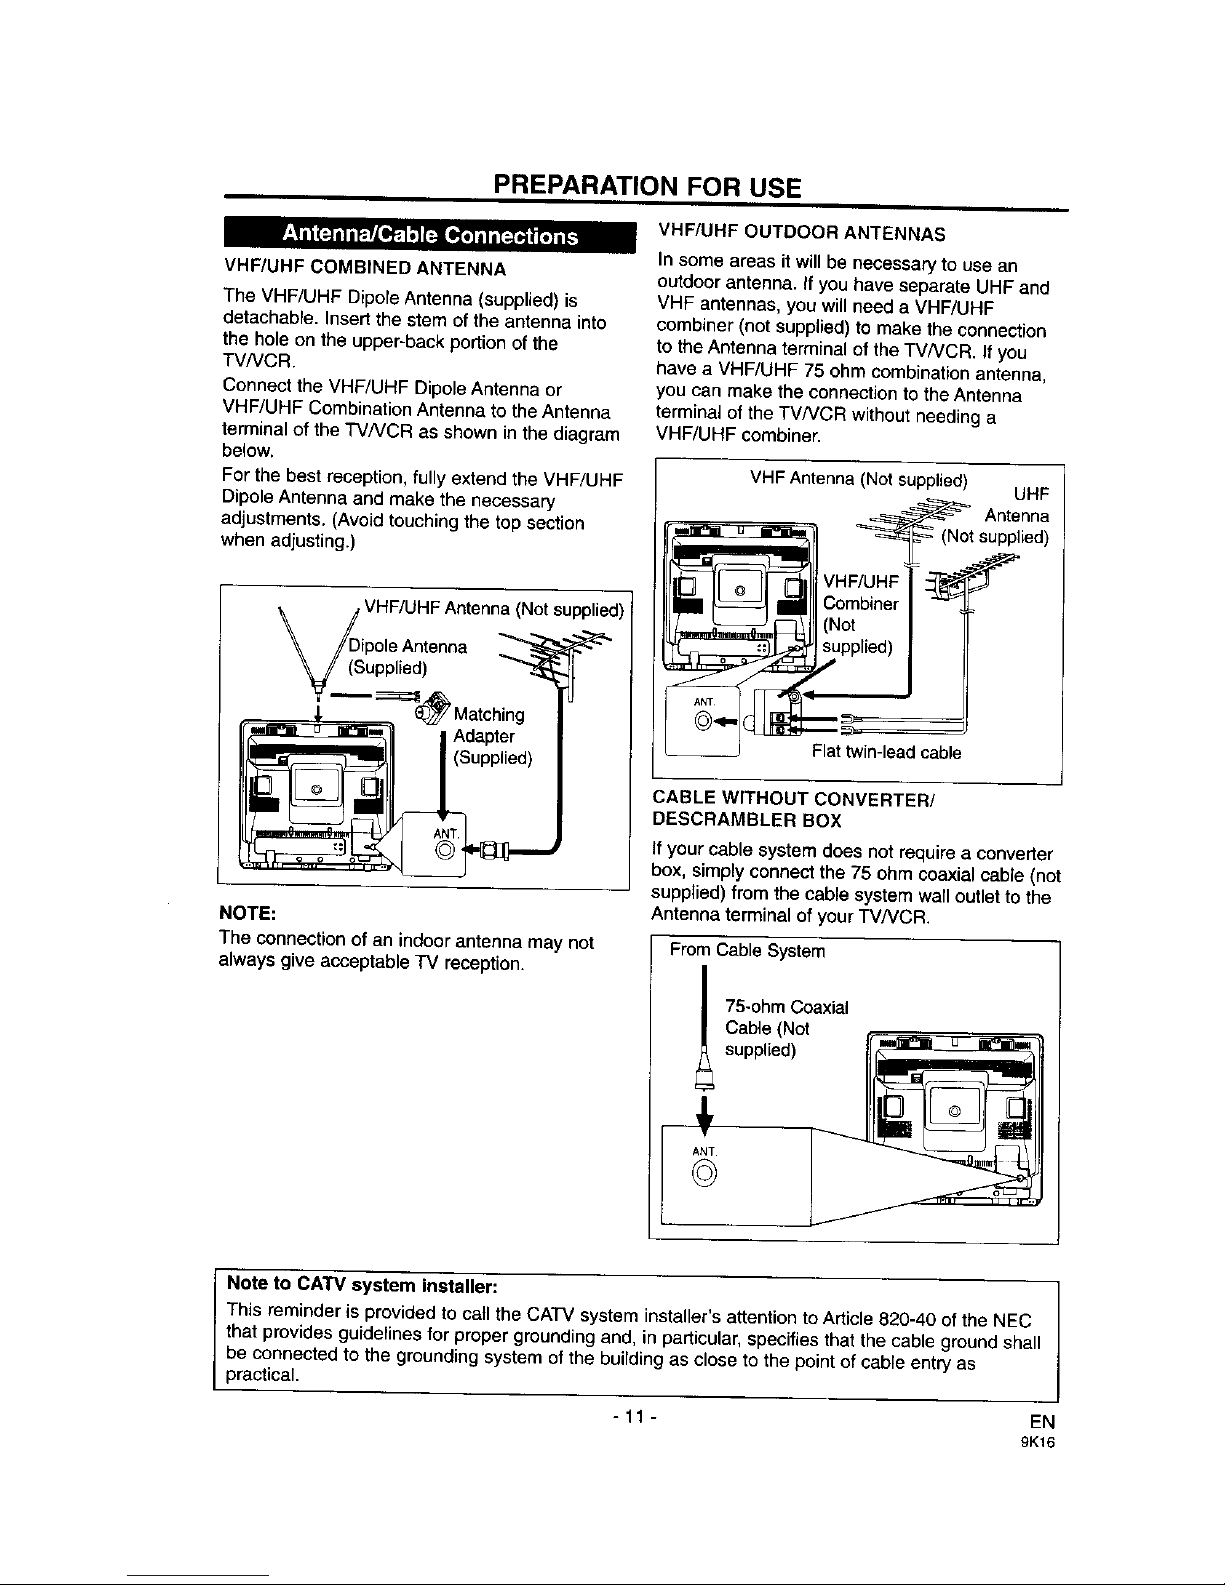
VHF/UHF COMBINED ANTENNA
The VHF/UHF Dipole Antenna (supplied) is
detachable. Insert the stem of the antenna into
the hole on the upper-back portion of the
TVNCR.
Connect the VHF/UHF Dipole Antenna or
VHF/UHF Combination Antenna to the Antenna
terminal of the TV/VCR as shown in the diagram
below.
For the best reception, fully extend the VHF/UHF
Dipole Antenna and make the necessary
adjustments. (Avoid touching the top section
when adjusting.)
VHF/UHF OUTDOOR ANTENNAS
In some areas it will be necessary to use an
outdoor antenna. 11you have separate UHF and
VHF antennas, you will need a VHF/UHF
combiner (not supplied) to make the connection
to the Antenna terminal of the TV/VCR. If you
have a VHF/UHF 75 ohm combination antenna,
you can make the connection to the Antenna
terminal of the TV/VCR without needing a
VHF/UHF combiner.
VHF Antenna (Not supplied) UHF
Antenna
supplied)
VHF/UHF Antenna (Not supplied)
ipole Antenna
upplied) _t
_, _ Matching I
_l Adapter I
t
4T.
NOTE:
The connection of an indoor antenna may not
always give acceptable "IV reception.
FLattw{n-leadcable
CABLE WITHOUT CONVERTER/
DESCRAMBLER BOX
if your cable systemdoes not requirea converter
box, simplyconnectthe75 ohmcoaxialcable(not
supplied)from the cablesystemwall outlettothe
Antenna terminalof yourTV/VCR.
From Cable System
ANT
©
75-ohm Coaxial
Cab{e (Not
supplied)
Note to CATV system installer:
This reminder is provided to call the CATV system installer's attention to Article 820-40 of the NEC
that provides guiderines for proper grounding and, in particular, specifies that the cable ground shall
be connected to the grounding system of the building as ctose to the point of cable entry as
practical.
- 11 - EN
9K16
 Loading...