

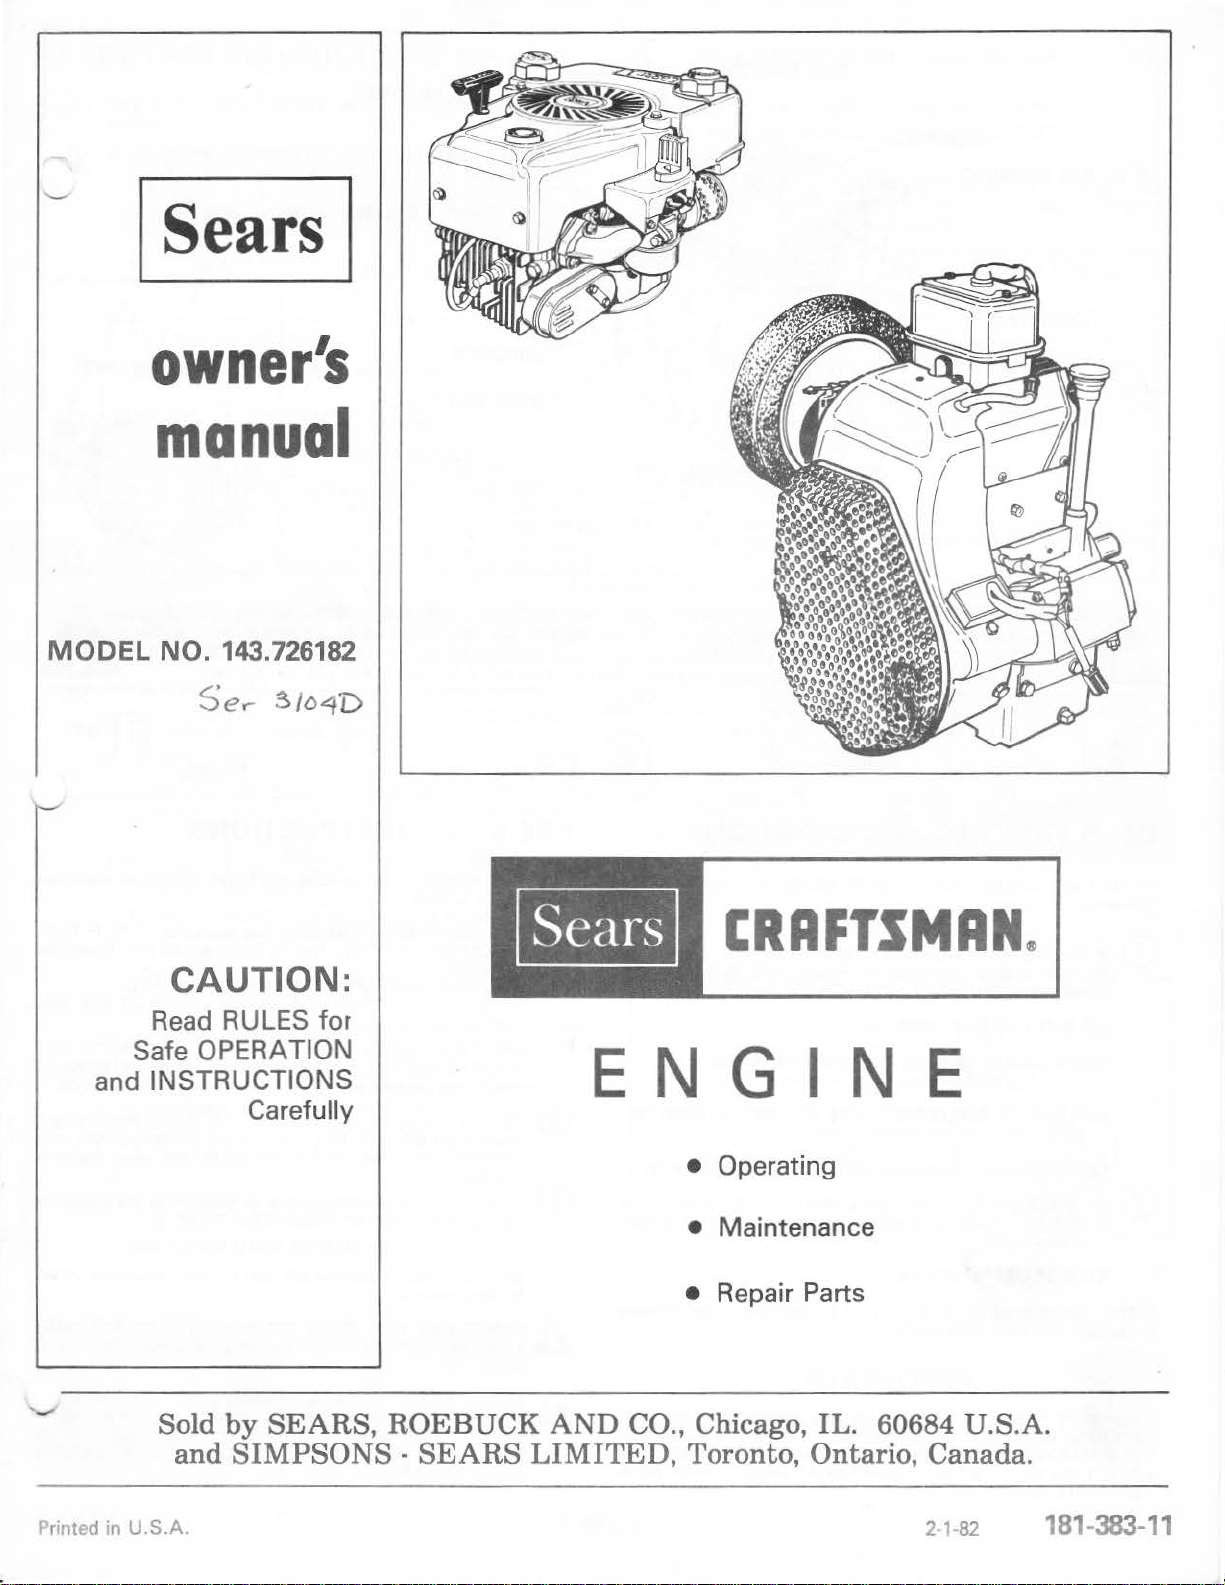
Sears Craftsman 143.726182 Owner's Manual
Sears
owner's
manual
MODEL
NO.
Se
143.726182
.-
CAUTION:
Read
Safe
and INSTRUCTIONS
RULES for
OPERATION
Carefully
~/D4D
CRAFTSMAN
ENGINE
• Operating
• Maintenance
~
Sold
Printed in
U.S.A.
by
SEARS,
and
SIMPSONS -SEARS
ROEBUCK
AND
LIMITED,
CO., Chicago, IL. 60684 U.S.A.
• Repair Parts
Toronto, Ontario,
Canada
2-1-82
.
181
-383-
11
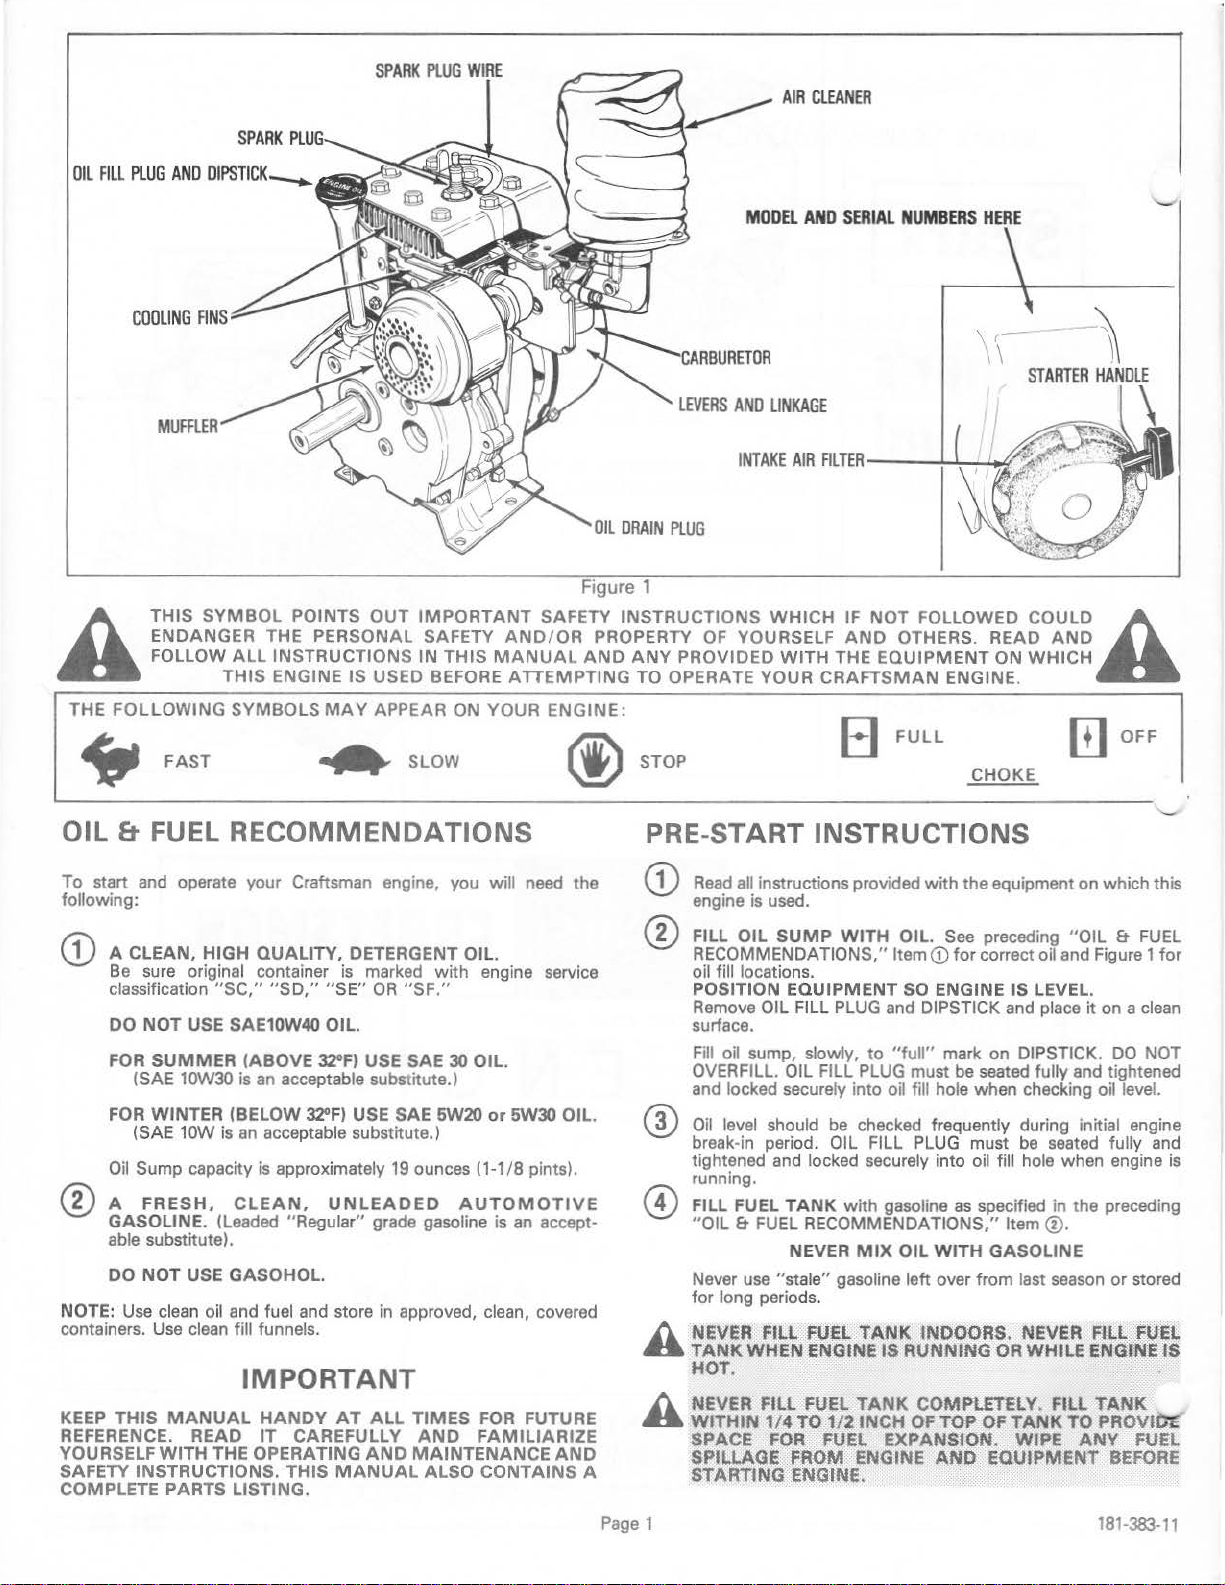
OIL
FILL
PLUG
AND
DIPSTICK--
CO
OLING
FIN
S
MUFFLER
SYMBOL
THIS
ENDANGER THE PERSONAL SAFETY
A
THE FOLLOWING SYMBOLS
~
FOLLOW
FAST
ALL
INSTRUCTIONS IN THIS
THIS
ENGINE IS USED BEFORE ATTEMPTING TO OPERATE YOUR
POINTS
MAY
.....
SPARK
PLUG
Figure 1
OUT
IMPORTANT
APPEAR ON YOUR ENGINE:
SLOW
SAFETY INSTRUCTIONS
AND/OR
MANUAL
PROPERTY
AND
@STOP
ANY
MODEL
LEVERS
AND
OF
YOURSELF
PROVIDED
AIR
CLEANER
AND
LINKAGE
WHICH
WITH
THE EQUIPMENT ON
CRAFTSMAN
SERIAL
NUMBERS
HERE
\\-
IF NOT FOLLOWED
AND
OTHERS. READ
ENGINE.
...
FULL
1
1
CHOKE
-)
STARTER
COULDA
WHICH
HANDLE
AND
m
OFF
OIL & FUEL RECOMMENDATIONS
To start and operate your Craftsman engine,
following:
A CLEAN, HIGH QUALITY, DETERGENT OIL.
Be
sure original container is marked with engine service
classification
DO NOT USE SAE10W40 OIL.
FOR
SUMMER
ISAE 10W30
FOR WINTER (BELOW
(SAE 10W
Oil
Sump capacity
A
®
NOTE:
containers.
FRESH,
GASOLINE. (Leaded "Regular" grade gasoline is
able substitute).
DO NOT USE GASOHOL.
Use
Use
"SC,"
"SO,"
"SE"
OR
(ABOVE
is
an
is
an
CLEAN,
clean oil and fuel and store in approved, clean, covered
clean fill funnels.
J20F)
acceptable substitute.)
acceptable substitute.)
is
approximately
USE SAE
J20Fl
USE SAE 5W20
UNLEADED
you
will
"SF."
30
OIL.
or
5W30 OIL.
19
ounces (1-1/8 pints).
AUTOMOTIVE
an
IMPORTANT
KEEP
THIS
REFERENCE.
YOURSELF
SAFETY INSTRUCTIONS. THIS
COMPLETE PARTS LISTING.
MANUAL
READ
WITH
HANDY
IT
THE OPERATING
AT
CAREFULLY
MANUAL
ALL
TIMES
AND
AND
MAINTENANCE
ALSO CONTAINS A
FOR
FAMILIARIZE
need
the
accept-
FUTURE
AND
PRE-START INSTRUCTIONS
G)
Read
all
instructions provided with the equipment on which this
SUMP
WITH OIL.
CD
OIL
FILL
PLUG
and DIPSTICK and place it on a clean
oil sump, slowly, to
level
should
FUEL
use
WHEN ENGINE IS RUNNING
1/4
be
OIL
TANK
RECOMMENDATIONS,"
NEVER
"stale" gasoline left over from last
FUEl
TO 1/2 INCH
FOR
FUEL
ENGINE.
"full"
PLUG
must
oil fill hole when checking oil level.
checked frequently during initial engine
FILL
PLUG
with gasoline
MIX
OIL
TANK
TANK
fNDOORS. NEVER FILL
COMPL£T£LY. FILL
OF
EXPANSION. WIPE
Page
engine is used.
FILL OIL
®
RECOMMENDATIONS," Item
oil fill locations.
POSITION EQUIPMENT SO ENGINE IS LEVEL.
Remove
surface.
Fill
OVERFILL. OIL FILL
and locked securely into
Oil
break-in period.
tightened and locked securely into
running.
FILL FUEL
"OIL &
Never
for long periods.
~
NEVER FlU. FUEL
..
TANK
HOT.
~
NEVER FILL
..
WITHJN
SPACE
SPILLAGE FROM ENGINE
STARTING
1
See
preceding "OIL &
for
correct oil and Figure 1 for
mark on DIPSTICK.
be
seated fully and tightened
must
be
oil fill hole when engine is
as
specified in the preceding
WITH
TOP
OF
AND
EQUIPMENT
seated fully and
Item(!).
GASOLINE
season
OR
WHILE ENGINE
TANK TO PROVIOE
ANY
FUEL
DO
NOT
or
stored
FUEL
TANK
FUEL
BEFORE
181-383-11
JS
PRE-START INSTRUCTIONS tcontinuedl
CHECK
®
engine:
A.
"
B.
C.
D.
THE
FOLLOWING before attempting to start your
BE;WRE
.
¢(QTCHIS
{fOLLOW
STRUCTIONS.} THIS
SWITCHES
Be
sure SPARK
(see
Be
sure
RUN
Be
sure
EOUIPMENT
.s,
BELtS
EOUif:iM£Nt ·
IN
SAfE
Figure
any ignition switch on engine
or START position.
FUEL
PLUG
1)
FILL
CAP air vent is open.
~:iS.
.iN:
:Ne·
}
CHAINS,
SHOULD
STARTING POSITION.
WIRE is attached to SPARK PLUG.
urt~AL
··
ere
MANUFACTURER'S IN·
PLACE.
i
:,
blS!NGAGEO
ANV
or
equipment
G~AR
SAFETY
STARTING INSTRUCTIONS
WITH
is
in ON,
WARM
®
running).
NOTE - Warm engine may start without choking.
A. Move remote control on equipment to
,
B.
ENGINE START (Engine still warm from recent
FAST.
START
1.
2.
3.
ENGINE
Grasp
STARTER
out, slowly, until it
sion. Let rope rewind slowly.
Pull rope with a rapid continuous full
rewind
back against starter.
Repeat
If engine falters, move equipment control
engine runs smoothly and then
NOTE: If
of
ENGINE
SLOWLY. Don't let
preceding Instructions 1 and 2 until engine starts.
engine fails to start after a reasonable number
starting attempts, follow preceding "
START" instructions.
HANDLE
pulls harder due to engine compres-
(see
Figure
STARTER
to
arm
FAST.
2)
stroke. Let rope
HANDLE
to
and pull rope
snap
CHOKE
CD
untill
COLD
h NEVER. RUN ENGlNE
..
POOf\tYVEN'f'ILATED
TAINS
DEADLY GAS. . ..
h KEEP
..
AWAY
EQUIPMENT.
h
WARNING
..
BY
AREAs.
G)
COLD ENGINE START (Engine has not
A. Move remote control on equipment to
B.
CARBON
HANDS,
FROM
AREAS
ment manufacturers instructions).
START
1.
Grasp
out, slowly, until
sion. Let rope rewind slowly.
2.
Pull rope with a rapid continuous full arm stroke. Let rope
rewind
back against starter.
3.
Repeat
and when engine starts, move equipment control to
FAST position.
If engine falters, move equipment control
engine runs smoothly and then
NOTE: If
control to
2 until engine starts.
If
engine fires, but fails to start again, repeat preceding In-
structions
FEET,
ANY
- TEMPERATURE
MAY
ENGINE
STARTER
SLOWLY. Don't let
preceding Instructions 1 and 2 until engine fires
engine fires, but fails to start, move equipment
FAST and repeat preceding Instructions 1 and
1,
2 and 3 until engine starts.
lNDOORS
AREAS. ENGINE EXHAUST CON-
MONOXIDE,
HAIR
..
AND
PARTS
OF
1SOOF
(see
MOV!NG
EXCEED
HANDLE
it
pulls harder due to engine compres-
OR
IN
ENCLOSED,
AN
ODORl.ESS
LOOSE CLOTHING
ON
.ENGINE
MUFFlER
(OO'Cl.
Figure
STARTER
to
FAST.
AND
AVOID
.
been
run recently).
CHOKE
2)
and pull rope
HANDLE snap
to
CHOKE
(see
AND
AND
NEAR-
THESE
equip-
untill
TO STOP ENGINE
Move remote control
G)
on engine to
facturer's instructions) .
AFTER
®
h
A.
..
h B. TURN
..
ENGINE IS STOPPED:
DISCONNECT SPARK PLUG WIRE FROM
PLUG
AND
SPARK PLUG. . ·
''
THIS
UNAUTHORIZED STARTING OF ENGINE
EQUIPMENTfS
IGNITION
OFF" POSITION
WILL
h C. NEVER STORE ENGINE WJTH FUEL IN
..
DOORS OR
ENCLOSURES, WHERE
OPEN FLAME,
FURNACE, WATER HEATER. CLOTHES DRYeR, ETC.
on
STOP
PLACE
equipment or any ignition stop switch
or
OFF
position
IT
WHERE
SWITCH KEY
AND
REDUCE
NOT
IN
SPARK
REMOVE KEY FROM SWITCH.
IN
USE.
ENClOSED, POORLY VENTILATED
~UEL
OR
(see
equipment manu-
IT
CAN
If
SO
THE
POSSIBILITY
fUMES
PILOT LIGHT
MAY
NOT
EQUIPPED. TO
SPARK
CONTACT
OF
WHILE
TANK
REACH
AS
IN~
AN
ONA
Page2
Figure 2
181-383-11
MAINTENANCE
G)
CHECK
POSITION
Check
ment is used. Always
Figure
dirt, grass clippings, etc. Add oil
ENGINE
LEVEL
DIPSTICK.
START INSTRUCTIONS"
CHANGE
®
every twenty-five
operated
DRAIN
PLUG
DRAIN
and
Replace OIL DRAIN
with new
preceding
Replace OIL FILL
®and@
1).
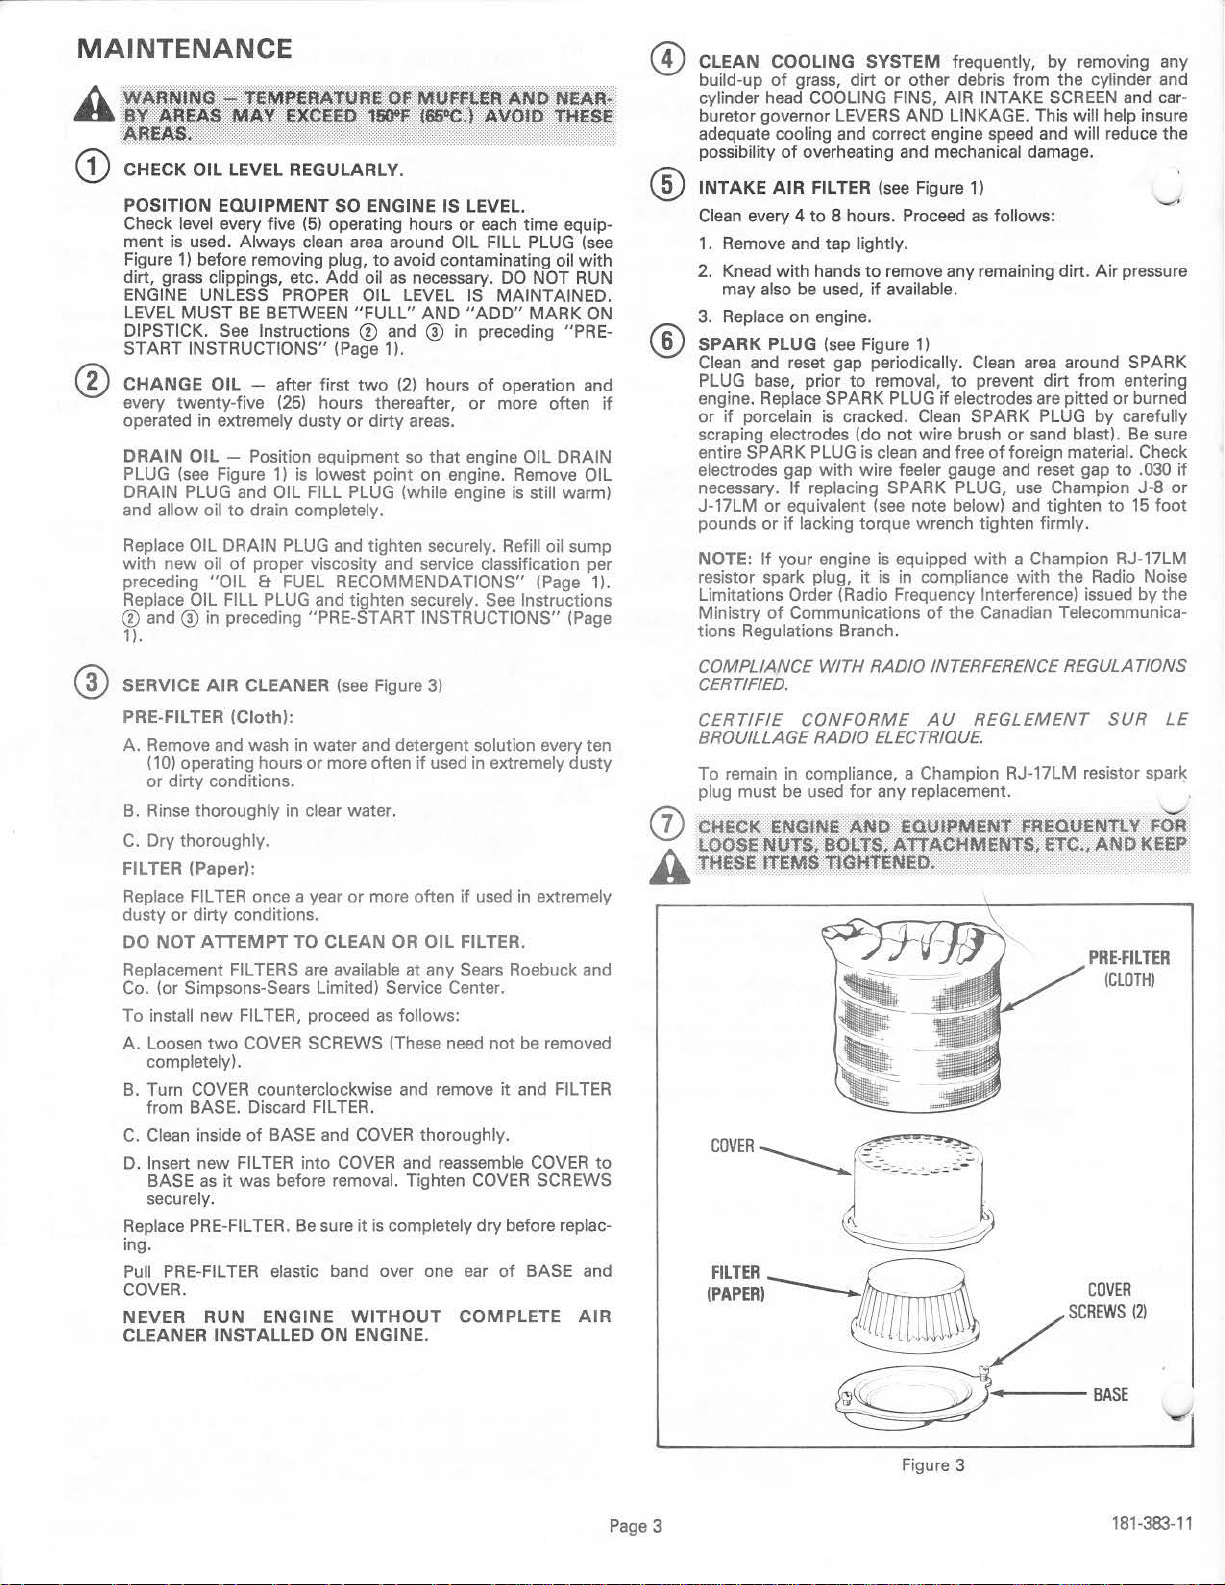
® SERVICE
PRE-FILTER (Cloth):
A. Remove and wash in water and detergent solution every ten
B.
C.
FILTER (Paper):
Replace
dusty or dirty conditions.
DO NOT
Replacement FILTERS
Co. (or Simpsons-Sears Limited) Service Center.
To
A. Loosen
B. Turn
C.
D.
Replace
ing.
Pull
COVER.
NEVER
CLEANER INSTALLED ON ENGINE.
OIL
LEVEL REGULARLY.
EQUIPMENT
level every five
1)
before removing plug,
UNLESS
MUST
BE
BETWEEN
See
Instructions ® and ® in preceding "PRE-
OIL
- after first
in
extremely dusty
OIL - Position equipment
(see
Figure 1 l is lowest point on engine. Remove OIL
PLUG
allow oil
(
10)
or dirty conditions.
Rinse
Dry thoroughly.
install new FILTER, proceed
completely).
from BASE. Discard
Clean
In
sert new
BASE
securely.
PRE-FILTER
and OIL FILL PLUG (while engine
to
drain completely.
oil
of
proper viscosity and service classification per
"OIL & FUEL
PLUG
in preceding "PRE-START INSTRUCTIONS" (Page
AIR
CLEANER
operating hours
thoroughly in clear water.
FILTER
once a
ATTEMPT
two
COVER
COVER
PRE
counterclockwise and remove it and
inside
of
BASE and
FILTER
as
it was before removal. Tighten
-FI
LTER. Be
elastic band over one
RUN
ENGINE
SO ENGINE IS LEVEL.
(5)
operating hours or each time equip-
clean
area
around OIL FILL
to
avoid contaminating oil
as
PROPER
(P
age
(25)
hours thereafter,
or
PLUG
and tighten securely. Refill oil sump
RECOMMENDATIONS"
and tighten securely.
(see
or
more often if used in extremely dusty
year
or
TO CLEAN
are
available at any
SCREWS (These need not be removed
FILTER
into
COVER
sure it
WITHOUT
necessary.
OIL
LEVEL
"FULL"
1).
two
(2)
dirty
so
Figure
more often if used in extremely
OR
as
follows:
.
COVER
and reassemble
is
completely dry before replac-
IS MAINTAINED.
AND
"ADD"
hours
of
or
areas.
that engine OIL DRAIN
3)
OIL
FILTER.
Sears
thoroughly.
COVER
ear
COMPLETE
DO
operation and
more often
See
of
PLUG
(see
with
NOT
RUN
MARK
ON
is
still warm)
(Page
Instructions
Roebuck and
COVER
BASE and
1).
FILTER
to
SCREWS
AIR
if
CLEAN COOLING SYSTEM frequently, by removing any
build-up
cylinder head
buretor governor
adequate
possibility
INTAKE
®
Clean
1.
2.
3. Replace on engine.
SPARK
®
Clean
PLUG
engine. Replace
or
scraping electrodes (do not wire brush
entire
electrodes gap with wire feeler gauge and reset gap
necessary. If replacing SPARK PLUG,
J-17LM or equivalent
pounds
NOTE:
resistor spark
Limitations
Ministry
tions Regulations Branch.
COMPLIANCE WITH RADIO INTERFERENCE REGULATIONS
CERTIFIED.
CERTIFIE
BROUILLAGE RADIO ELECTRIQUE.
To remain in compliance, a Champion RJ-17LM resistor
plug must be used for any replacement. .
(j)
oo~c;t<
J.:Oc:)~e
A
THESE
(PAPER)-------
of
grass, dirt or other debr
COOLING
cooling and correct engine speed and will reduce the
of
overheating and mechanical damage.
AIR
FILTER
every 4
Remove and tap lightly.
Knead with hands
may
if porcelain is cracked.
SPARK PLUG
to
8 hours.
also be used,
PLUG
and reset gap periodically.
base,
or
If
(see
prior
SPARK PLUG
if lacking torque wrench tighten firmly.
your engine is equipped
plug, it
Order (Radio Frequency Interference) issued
of
Communications
CONFORME
ENQit!l~
NU.T~t BQLTSiATfAP.ftMEf!T~~
lTgM~
FILTER
"f*QHT:E~HUik
FINS, AIR INTAKE
LEVERS
AND LINKAGE. This will help insure
(see
Figure 1)
Proceed
to
remove any remaining dirt.
if
available.
Figure
1)
to
removal,
Clean
is
clean and free
(see
note below)
is
in compliance with the
of
AU
A.NP.
EO.Ol~MEN1:
~
-
.i i I
JJ
is
from the cylinder and
SCREEN
as
follows:
Clean
area
to
pre
if electrodes are pitted or burned
vent dirt from entering
SPARK PLUG by carefully
of
with
the Canadian Telecommunica-
REGLEMENT
.,
).
.·······.··············<•·······················. . •.
.·
/SCREWS
around SPARK
or
sand blast).
foreign material. Check
use
Champion J-8
and
tighten
a Champion RJ-17LM
'
~eo~~Nn.v
~'fC.~•
and car-
Air
pressure
Be
sure
to
.030
to
Radio
SUR
or
15
foot
Noise
by
the
LE
spar~
FOA
AND
t(E~f
· . '
...•..
PRE-FILTER
(CLOTH)
CO
VER
I~
if
Page
~
BASE
~
Figure 3
3
181-383-11
 Loading...