

Sears Cleanmore 175.8575180 Owner's Manual
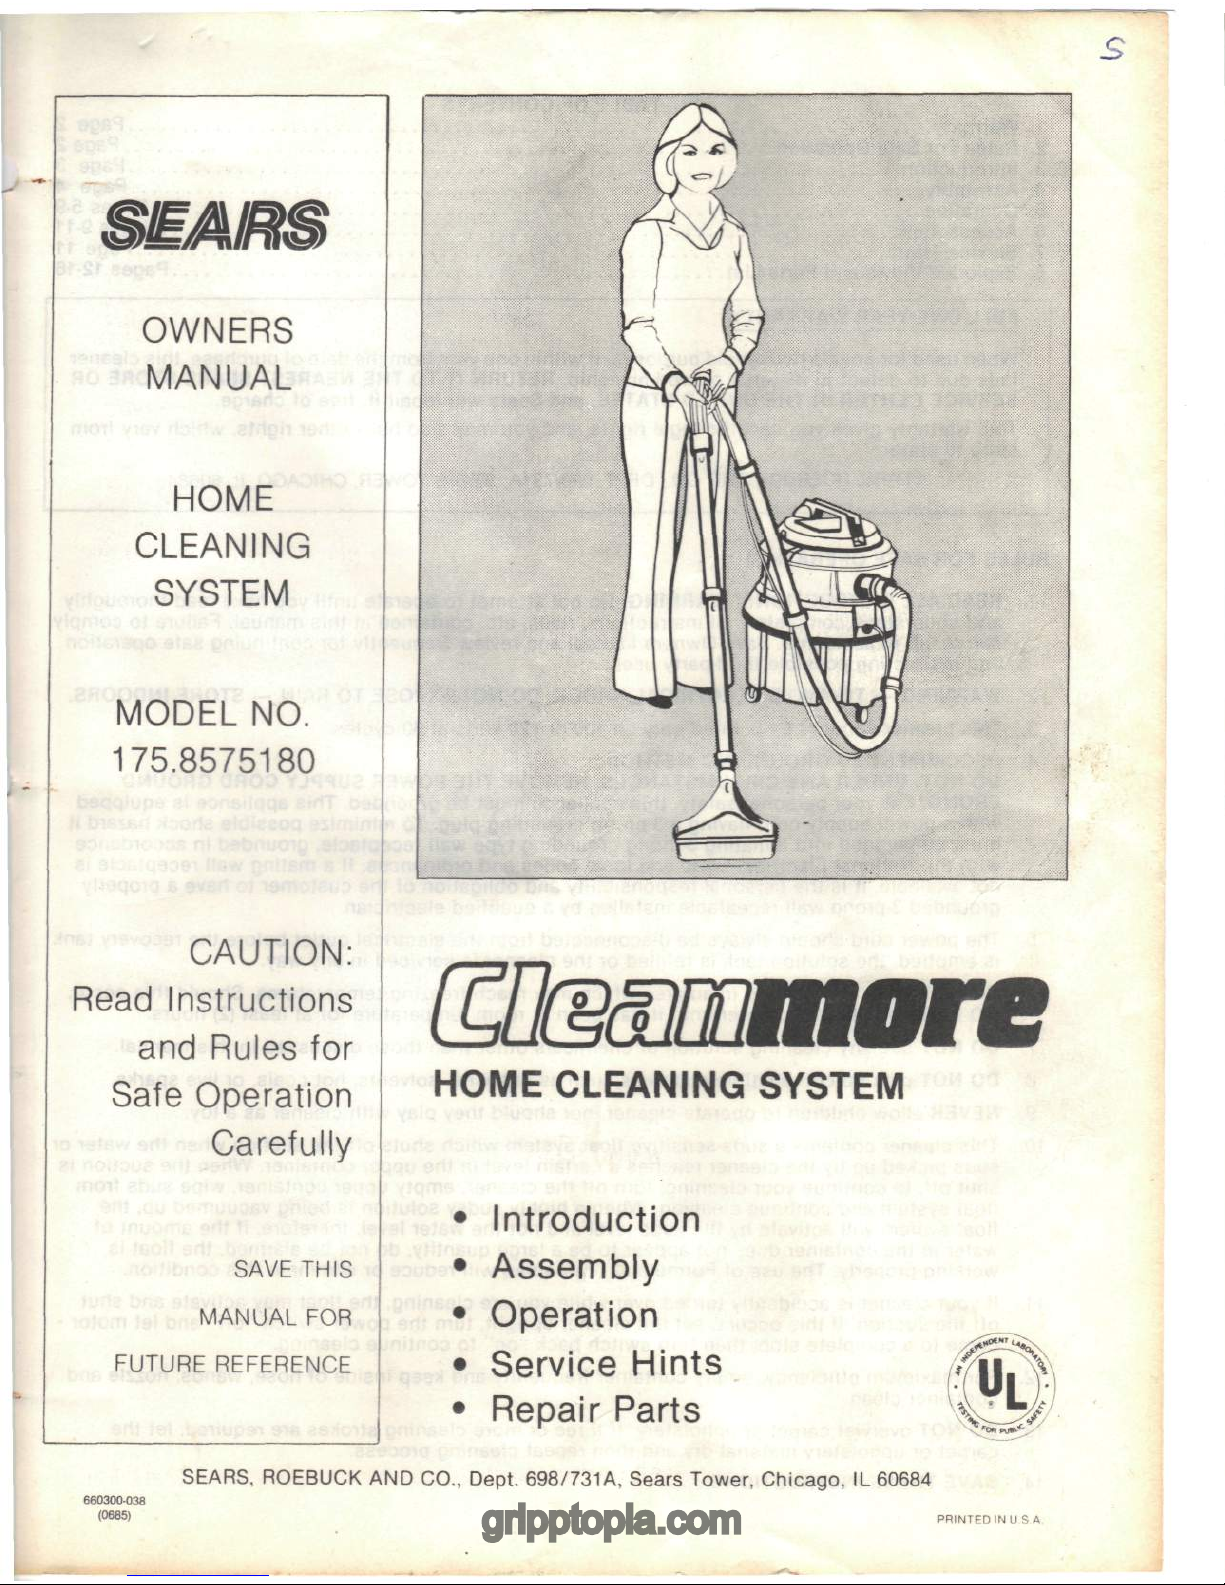
OWNERS
MANUAL
HOME
CLEANING
SYSTEM
MODEL
NO.
175.8575180
CAUTION:
Read Instructions
and
Rules
for
Safe
Operation
Carefully
SAVE
THIS
MANUAL
FOR
FUTURE
REFERENCE
HOME
CLEANING SYSTEM
•
Introduction
•
Assembly
•
Operation
•
Service Hints
•
Repair Parts
SEARS,
ROEBUCK
AND
CO.,
Dept.
698/731A,
Sears
Tower,
Chicago,
IL
60684
660300-038
(0685)
PRINTED
IN
U.S.A.
PDFaid.Com
#1 Pdf Solutions
TABLE
OF
CONTENTS
1.
Warranty Page
2
2.
Rules
For
Safe Operation Page
2
3.
Introduction
Page
3
4.
Assembly Page
4
5.
Operation
Pages
5-9
6.
Accessories Pages
9-11
7.
Service
Hints
Page
11
8.
Exploded Views
and
Parts
List
Pages 12-16
FULL
ONE
YEAR
WARRANTY
When used
for
private household purposes,
if
within
one
year from
the
date
of
purchase, this cleaner
fails
due to
defect
in
material
or
workmanship, RETURN
IT TO THE
NEAREST
SEARS
STORE
OR
SERVICE
CENTER
IN THE
UNITED
STATES,
and
Sears
will
repair
it,
free
of
charge.
This warranty gives
you
specific legal rights,
and you may
also have other rights, which vary from
state
to
state.
SEARS,
ROEBUCK
AND
CO.,
DEPT.
698/731
A,
SEARS
TOWER,
CHICAGO,
IL
60684
RULES
FOR
SAFE
OPERATION
1.
READ
ALL
INSTRUCTIONS. WARNING:
Do not
attempt
to
operate
until
you
have read thoroughly
and
understand completely
all
instructions, rules, etc. contained
in
this
manual. Failure
to
comply
can
result
in
accidents. Save Owners Manual
and
review frequently
for
continuing
safe operation
and
instructing possible third-party user.
2.
WARNING
- TO
AVOID
ELECTRICAL
SHOCK,
DO
NOT
EXPOSE
TO
RAIN - STORE
INDOORS.
3.
This cleaner
should
be
operated only
on 100 or 120
volts
at 60
cycles.
4.
RECOMMENDED GROUNDING METHOD.
DO
NOT, UNDER
ANY
CIRCUMSTANCES, REMOVE
THE
POWER
SUPPLY
CORD GROUND
PRONG.
For
your personal
safety,
this appliance must
be
grounded. This appliance
is
equipped
with a power supply cord having a 3-prong grounding plug.
To
minimize possible shock hazard
it
must
be
plugged into a mating 3-prong grounding type wall receptacle, grounded
in
accordance
with
the
National Electrical Code
and
local codes
and
ordinances.
If a
mating wall receptacle
is
not
available,
it is the
personal responsibility
and
obligation
of the
customer
to
have a properly
grounded
3-prong wall receptacle installed
by a
qualified electrician.
5.
The
power cord
should
always
be
disconnected from
the
electrical outlet before
the
recovery tank
is
emptied,
the
solution tank
is
refilled
or the
cleaner
is
serviced
in any
way.
6.
DO NOT
store this cleaner
in an
area which
may
reach freezing temperatures. Should this occur.
DO NOT
operate this cleaner until
it has
been
at
room temperature
for at
least
(2)
hours.
7.
DO NOT use any
cleaning solution
or
chemicals other than those discussed
in
this manual.
8.
DO NOT
pick
up
combustible materials such
as
gasoline,
solvents,
hot
coals,
or
live sparks.
9.
NEVER
allow children
to
operate
cleaner,
nor
should they play with cleaner
as a
toy.
10.
This cleaner contains a suds-sensitive float system which shuts
off the
suction when
the
water
or
suds picked
up by the
cleaner reaches a certain
level
in the
upper container. When
the
suction
is
shut off,
to
continue your cleaning, turn
off the
cleaner, empty upper
container,
wipe suds from
float
system
and
continue cleaning. When a highly sudsy solution
is
being vacuumed
up, the
float
system will activate
by the
suds level
and not the
water level; therefore,
if the
amount
of
water
in the
container does
not
appear
to be a
large quantity,
do not be
alarmed,
the
float
is
working
properly.
The use of
Formula
#2
(defoamer) will reduce
or
eliminate this
condition.
11.
If
your cleaner
is
accidently turned over
while
you are
cleaning,
the
float
may
activate
and
shut
off
the
suction.
If
this
occurs,
set the
cleaner
upright,
turn
the
power switch "off"
and let
motor
come
to a
complete stop: then turn switch back "on"
to
continue cleaning.
12.
For
maximum
efficiency,
empty container
frequently
and
keep inside
of
hose, wands, nozzle
and
container
clean.
13.
DO NOT
overwet
carpet
or
upholstery.
If
three
or
more cleaning strokes
are
required,
let the
carpet
or
upholstery material
dry and
then repeat cleaning process.
14
SAVE
THESE INSTRUCTIONS.
Page
2
_
INTRODUCTION
Your
New
Cleanmore Home Cleaning System
is a
deluxe
high
performance cleaner, designed
for
today's
cleaning requirements.
With proper care
and
maintenance,
it
should provide
you
with
years
of
service.
It is
important that
you
read
this manual
to
fully understand
the
cleaner's capabilities
as
well
as
providing
you
with
the
essentials
regarding maintenance
and
safety. A complete list
of
operating parts
and
features
are
shown below
in
Figure
1.
See
Figure
1.
-
RECOVERY
TANK
POWER HEAD
2
SPEED PUMP
SWITCH
RECOVERY
TANK
SOLUTION
TANK
ANGLED WAND
STAINLESS
STEEL
WANDS
VACUUM HOSE
SOLUTION TUBING
FLOOR NOZZLE
Figure
1
Page3
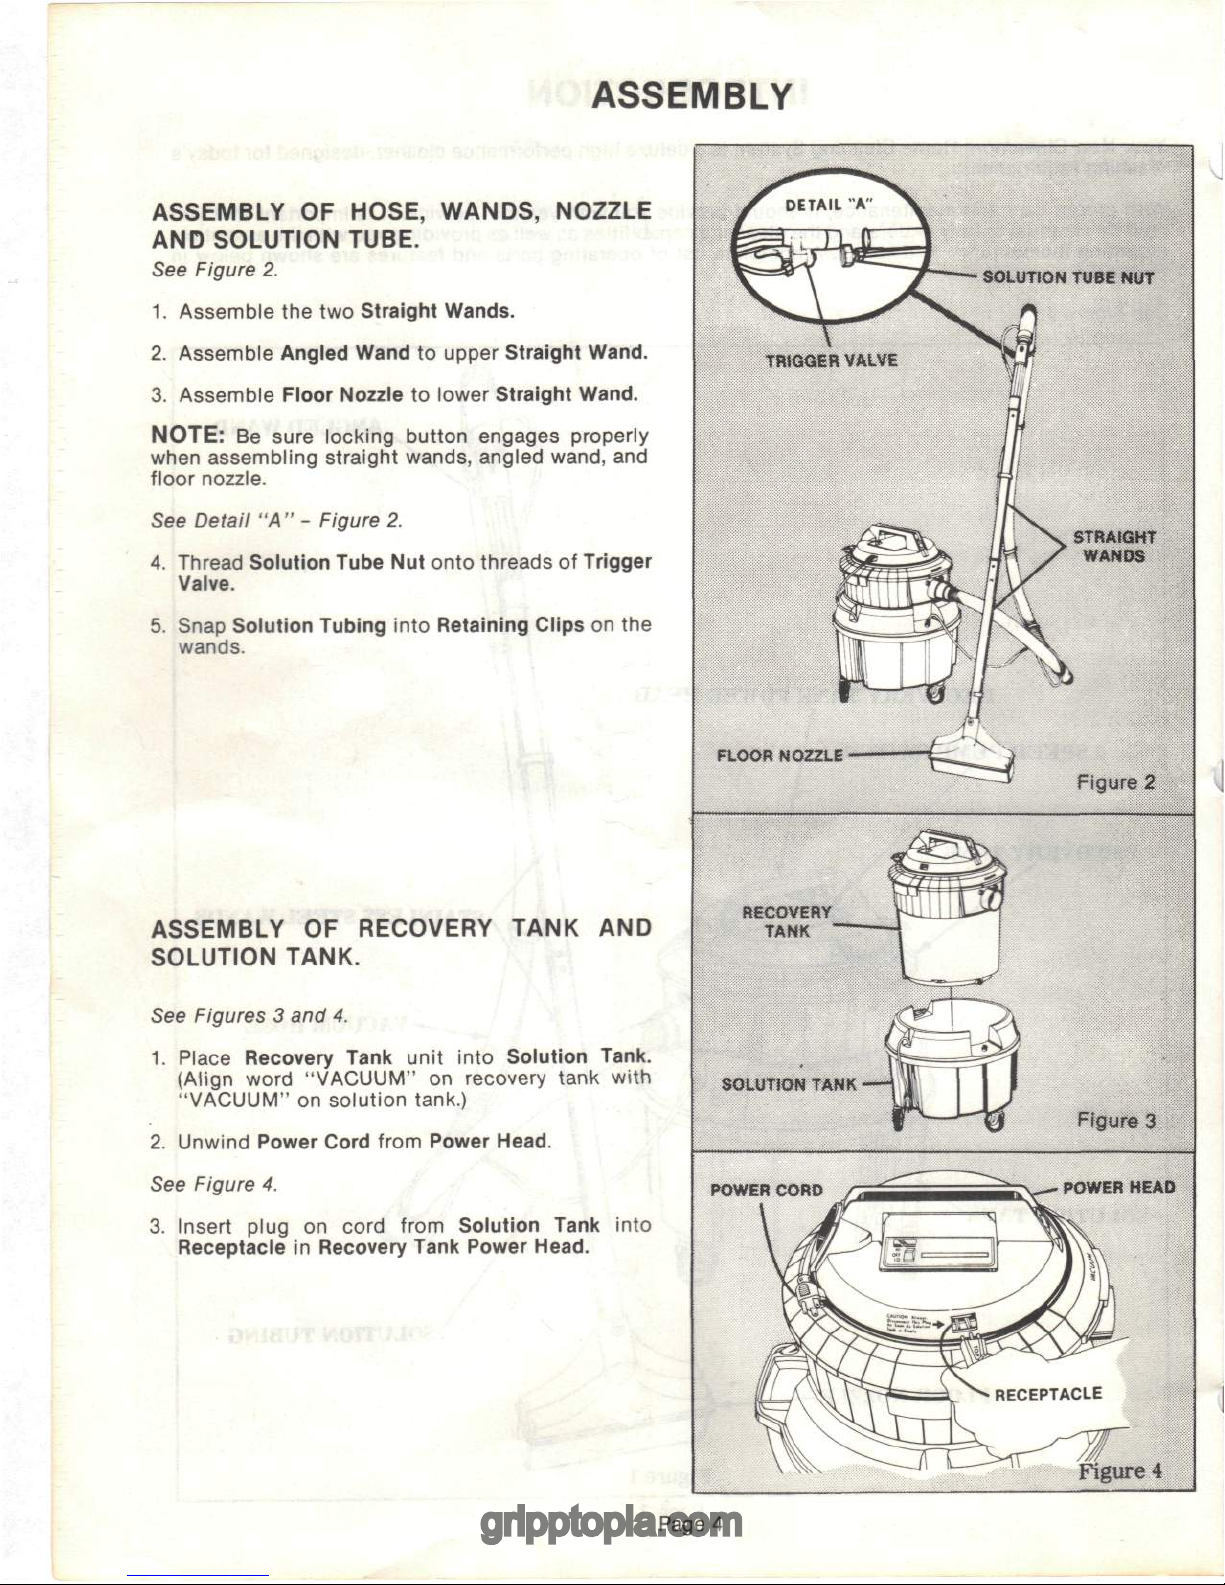
ASSEMBLY
ASSEMBLY
OF
HOSE, WANDS, NOZZLE
AND
SOLUTION TUBE.
See
Figure
2.
1.
Assemble
the two
Straight Wands.
2.
Assemble Angled Wand
to
upper Straight Wand.
3.
Assemble Floor Nozzle
to
lower Straight Wand.
NOTE:
Be
sure locking button engages properly
when
assembling straight wands, angled wand,
and
floor nozzle.
See
Detail
"A" -
Figure
2.
4.
Thread Solution Tube
Nut
onto threads
of
Trigger
Valve.
5.
Snap
Solution
Tubing into Retaining Clips
on the
wands.
ASSEMBLY
OF
RECOVERY TANK
AND
SOLUTION TANK.
See
Figures
3 and 4.
1.
Place
Recovery
Tank
unit into Solution
Tank.
(Align
word "VACUUM"
on
recovery tank with
"VACUUM"
on
solution tank.)
2.
Unwind
Power
Cord from
Power
Head.
See
Figure
4.
3.
Insert plug
on
cord from Solution
Tank
into
Receptacle
in
Recovery
Tank
Power
Head.
SOLUTION
TUBE
NUT
STRAIGHT
WANDS
FLOOR
NOZZLE
Figure
2
RECOVERY
TANK
SOLUTION
TANK
POWER
CORD
POWER
HEAD
Figure
4
Page
4
OPERATION
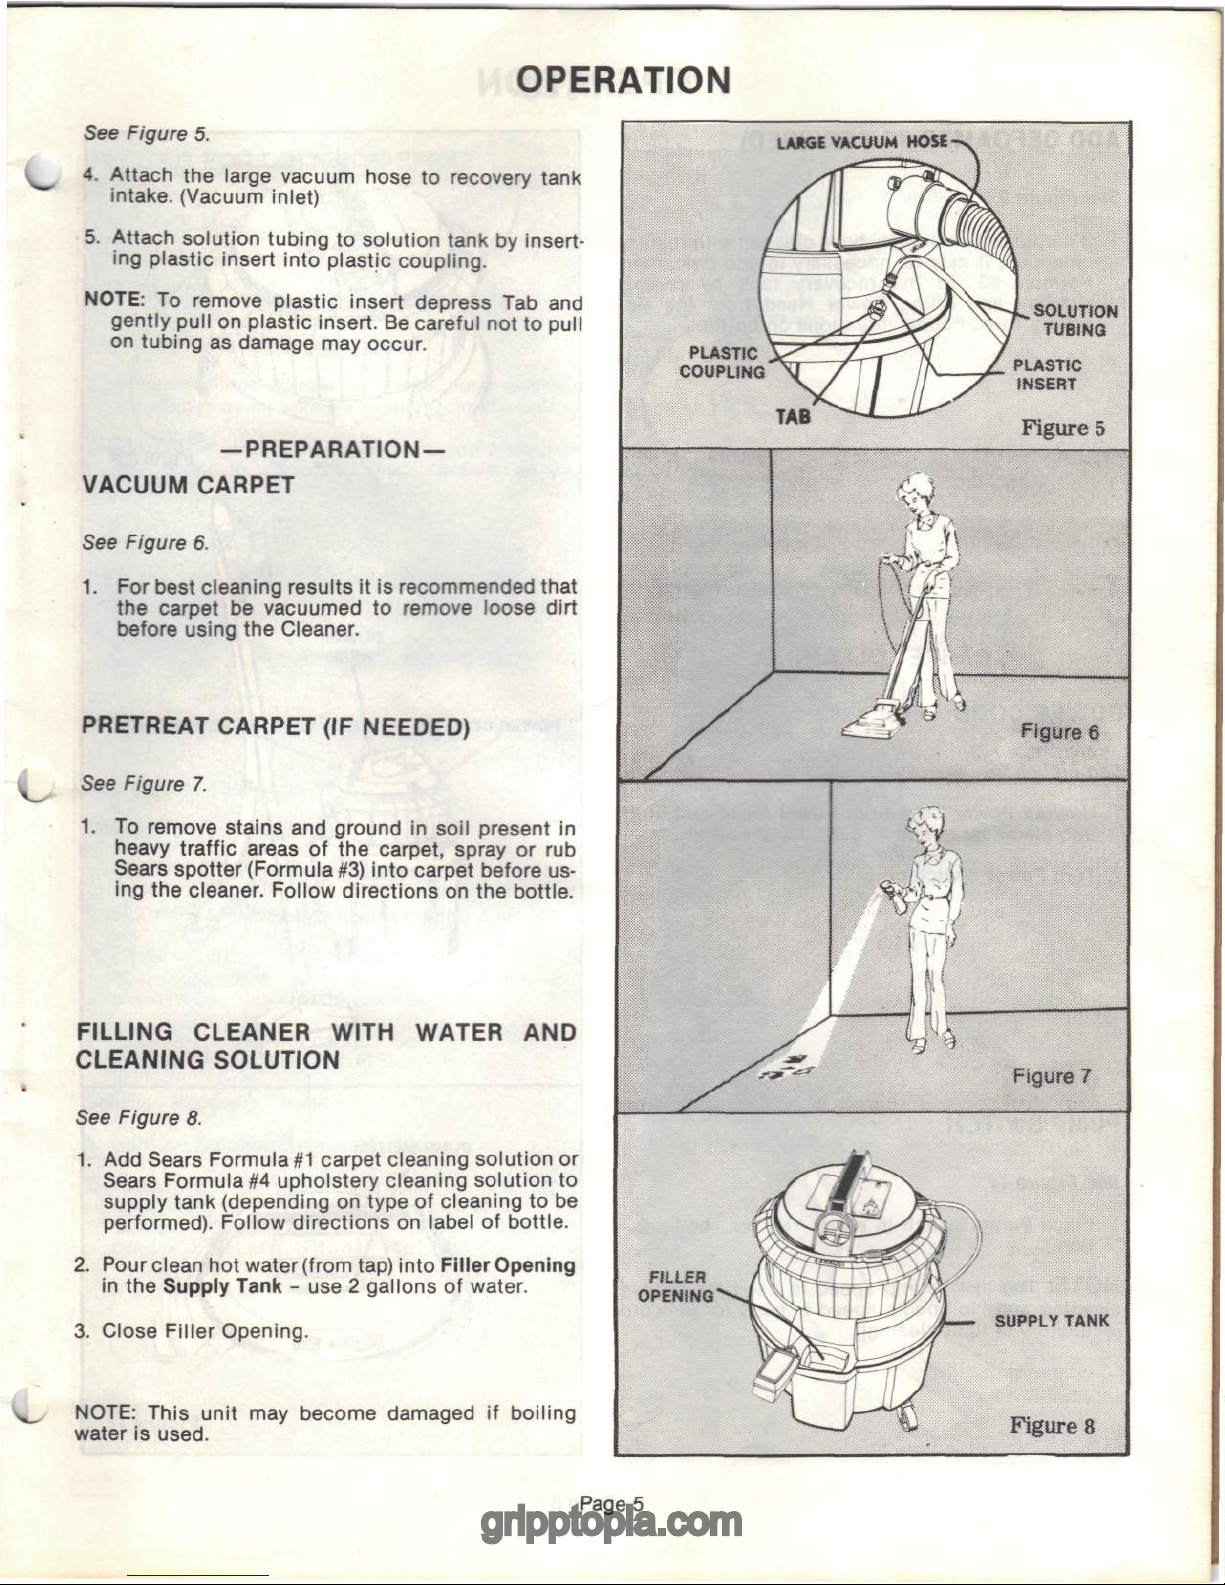
See
Figure
5.
4.
Attach
the
large vacuum hose
to
recovery tank
intake.
(Vacuum inlet)
5.
Attach solution tubing
to
solution tank
by
insert-
ing
plastic insert into plastic coupling.
NOTE:
To
remove plastic insert depress
Tab and
gently
pull
on
plastic insert.
Be
careful
not to
pull
on
tubing
as
damage
may
occur.
—
PREPARATION-
VACUUM
CARPET
See
Figure
6.
1.
For
best cleaning results
it is
recommended that
the
carpet
be
vacuumed
to
remove loose
dirt
before
using
the
Cleaner.
PRETREAT
CARPET
(IF
NEEDED)
See
Figure
7.
1.
To
remove
stains
and
ground
in
soil
present
in
heavy
traffic areas
of the
carpet, spray
or rub
Sears
spotter (Formula
#3)
into carpet before
us-
ing the
cleaner. Follow directions
on the
bottle.
FILLING CLEANER WITH
WATER
AND
CLEANING SOLUTION
See
Figure
8.
1.
Add
Sears
Formula
#1
carpet cleaning solution
or
Sears Formula
#4
upholstery cleaning solution
to
supply tank (depending
on
type
of
cleaning
to be
performed).
Follow directions
on
label
of
bottle.
2.
Pour clean
hot
water (from tap) into Filler Opening
in
the
Supply Tank
- use 2
gallons
of
water.
3.
Close Filler Opening.
NOTE:
This unit
may
become damaged
if
boiling
water
is
used.
LARGE
VACUUM
HOSE
PLASTIC
COUPLING
TAB
SOLUTION
TUBiNG
PLASTIC
INSERT
Figures
Figure
7
FILLER
OPENING
SUPPLY
TANK
Figures
Page
5

OPERATION
ADD
DEFOAMER
(IF
REQUIRED)
See
Figure
9.
1.
If
carpet
has
previously been cleaned with regular
shampoo,
it may be
necessary
to add
defoamer,
Formula
#2,
to
the
recovery tank
by
raising
Latches
and
lifting
Power
Head from
the
Re-
covery
Tank.
Follow directions
on
bottle.
CARPET
CLEANING
POWER
CORD
See
Figure
10.
1.
Unwrap
Power
Cord
from
Power
Head
and
plug
into electrical outlet.
2.
Turn Power Switch
on.
PUMP SWITCH
See
Figure
11.
1.
Place Pump Switch
in
either "Hi"
or
"Lo"
posi-
tion.
NOTE:
The
"Hi" pump speed
is
used
for
normal
cleaning
and
"lo" pump speed
is
used
for
delicate
upholstery
or
light
cleaning.
LATCH
POWER
CORD
POWER
HEAD
WTCH-
Figure
9
PUMP
SWITCH
POWER
Figure
10
Figure
11
Page
6
OPERATION
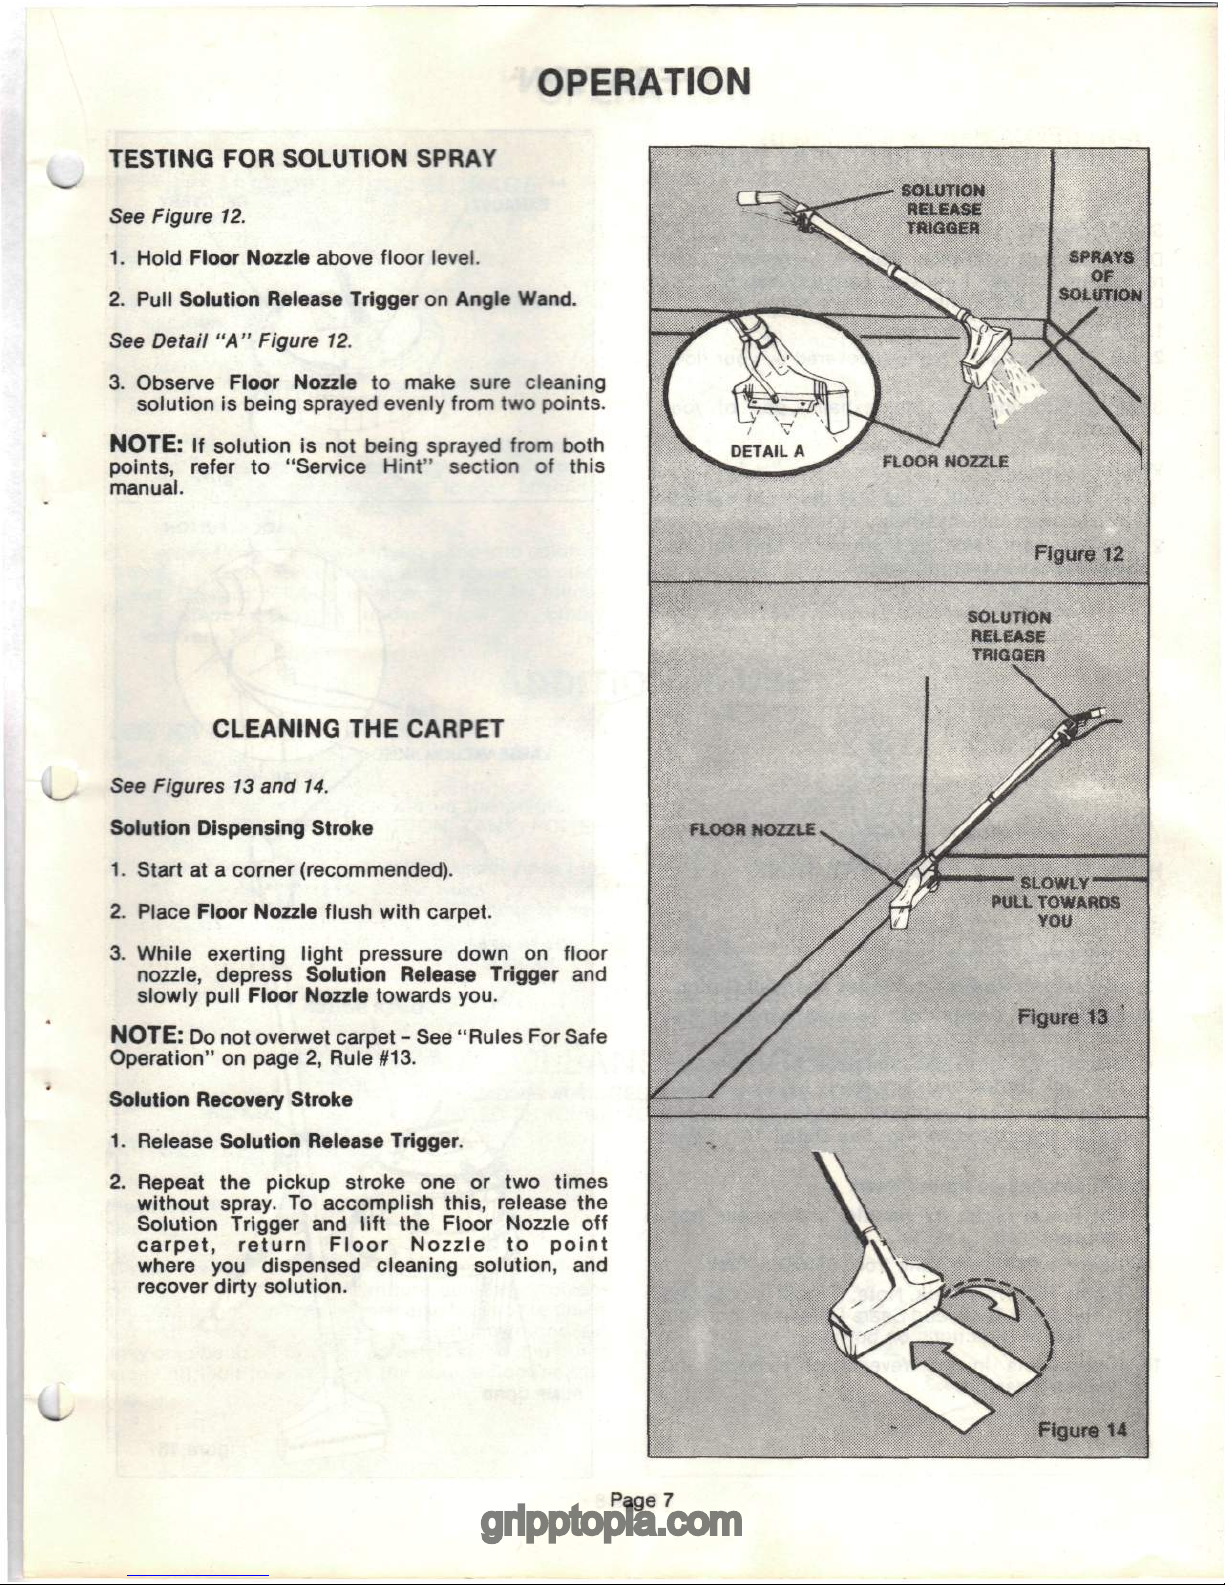
j
TESTING
FOR
SOLUTION
SPRAY
See
Figure
12.
1.
Hold
Floor Nozzle above floor
level.
2.
Pull Solution Release Trigger
on
Angle Wand.
See
Detail
"A"
Figure
12.
3.
Observe Floor Nozzle
to
make sure cleaning
solution
is
being sprayed evenly from
two
points.
NOTE:
If
solution
is not
being sprayed from both
points,
refer
to
"Service
Hint"
section
of
this
manual.
CLEANING
THE
CARPET
See
Figures
13
and 14.
Solution Dispensing Stroke
1.
Start
at a
corner (recommended).
2.
Place Floor Nozzle flush
with
carpet.
3.
While exerting
light
pressure down
on
floor
nozzle, depress Solution Release Trigger
and
slowly
pull
Floor Nozzle towards you.
NOTE:
Do not
overwet
carpet
- See
"Rules
For
Safe
Operation"
on
page
2,
Rule #13.
Solution
Recovery
Stroke
1.
Release Solution Release Trigger.
2.
Repeat
the
pickup
stroke
one or two
times
without
spray.
To
accomplish
this,
release
the
Solution
Trigger
and
lift
the
Floor
Nozzle
off
carpet,
return
Floor
Nozzle
to
point
where
you
dispensed
cleaning
solution,
and
recover
dirty
solution.
.
REIEASE
TRIQQIR
FLOOR
NOZZtf
Page
7
 Loading...