

Sears 917.253010 Owner's Manual
Sears
MODEL NO.
917.253010
CAUTION:
Read Rules for
Safe Operation
and Instructions
Carefully
Owners manual
PLOW
• Assembly
• Operating
• Maintenance
• Repair Parts
SEARS, ROEBUCK AND CO. U.S.A.
SIMPSONS-SEARS LIMTED, CANADA
SETTING UP INSTRUCTIONS
Setting Up and Operating Instructions should be studied very closely before beginning to assemble your Plow. When
R.H. (Right Hand), and L.H. (Left Hand), are used, it should be understood to mean from a position behind and facing the
Plow (or direction of travel).
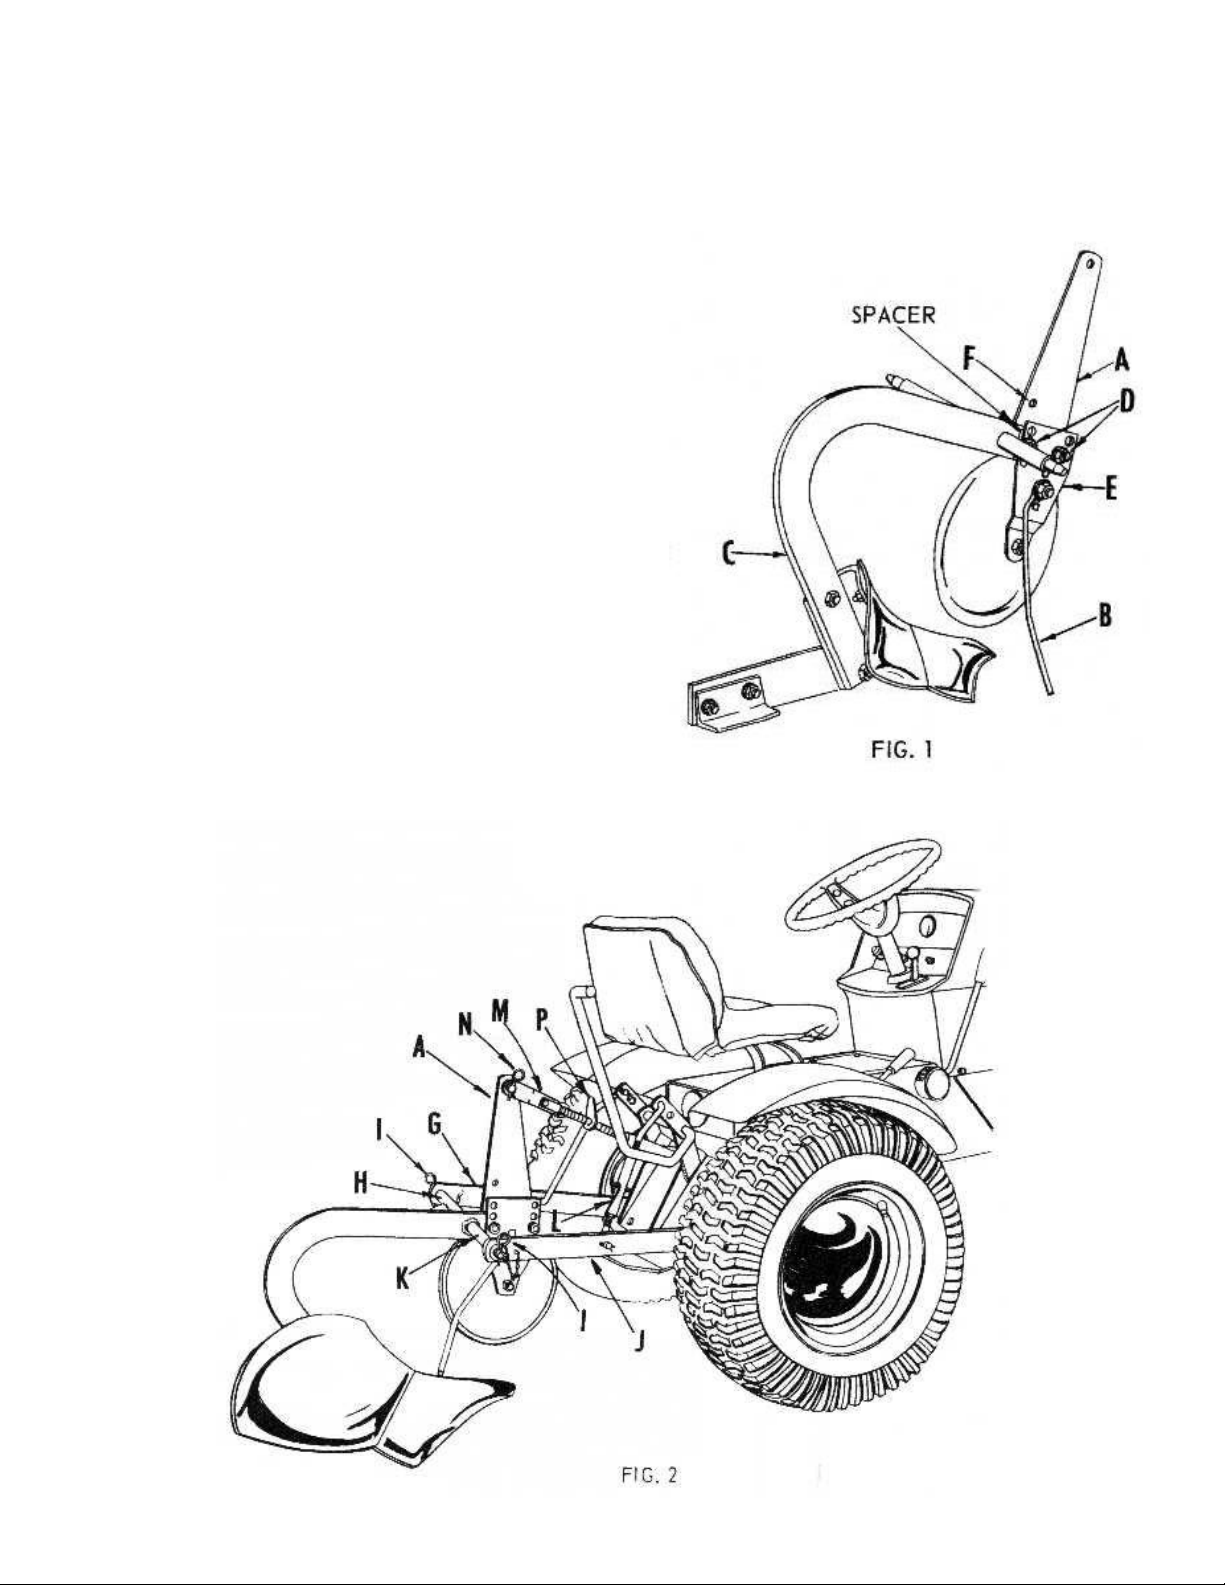
A letter in parentheses in the following instructions
refer to an arrow in Fig. 1.
1. Cut all wires holding Plow to wood pallet in bottom
of carton. Also, cut wires holding hitch bracket
(A), and weed rod (B), to plow beam (C). Remove
Plow from carton.
2. Remove nuts and bolts (D), from beam ©, and
coulter bracket (E), refer to Fig. 1.
3. Assemble hitch bracket (A), to beam (C), as
shown in Fig. 1, with bolts (D), removed in step 2.
NOTE: Extra hole (F), in hitch bracket will be
toward rear of Plow.
4. Assemble coulter bracket (E) with coulter to beam
using center holes as shown in Fig. 1. NOTE: Be
sure spacer is replaced on rear bolt between
beam and coulter bracket. Secure with lock
washers and hex nuts. Tighten nuts securely.
Refer to page 4 for coulter adjustment for other
than normal soil conditions.
5. Attach weed rod (B), to center hole in coulter
bracket (E). Position flat washer between nut and
weed rod.
INSTRUCTIONS FOR ASSEMBLING PLOW TO TRACTOR
NOTE: See Three Point Hitch Owners Manual for assembling Three Point Hitch to tractor.
A letter in parentheses in the following instructions refer to an arrow in Fig. 2, page 2.
6. Back tractor into position to attach plow. Slip L.H. hitch bar and bushings (G), over L.H. plow beam hitch bar (H), and
secure with retainer spring (I).
7. Slip R.H. hitch bar and bushings (J), over R.H. plow beam hitch bar (K), and secure with retainer spring (I). NOTE:
R.H. hitch bar and bushings (J), is adjustable. Rotate turnbuckle (L), so that R.H. hitch bar and bushings slide over
R.H. plow beam hitch bar easily and beam is level.
8. Assemble clevis (M), to Plow hitch bracket (A), as shown. Secure with clevis pin and retainer spring (N).
9. Grease the hub of the coulter by means of the grease fitting. CAUTION: Care should be taken to avoid excessive
pressure when greasing so as not to force hub cap off the hub.
OPERATING INSTRUCTIONS
INSTRUCTIONS BEFORE OPERATING
All varnish must be completely removed from the plow bottom before starting to plow. We suggest a good grade of
varnish remover. We also suggest that this manual be studied carefully before operating your plow. Much though must
be given to the time of year to plow and to the ground conditions. This ground may be plowed either in the spring or fall or
both.
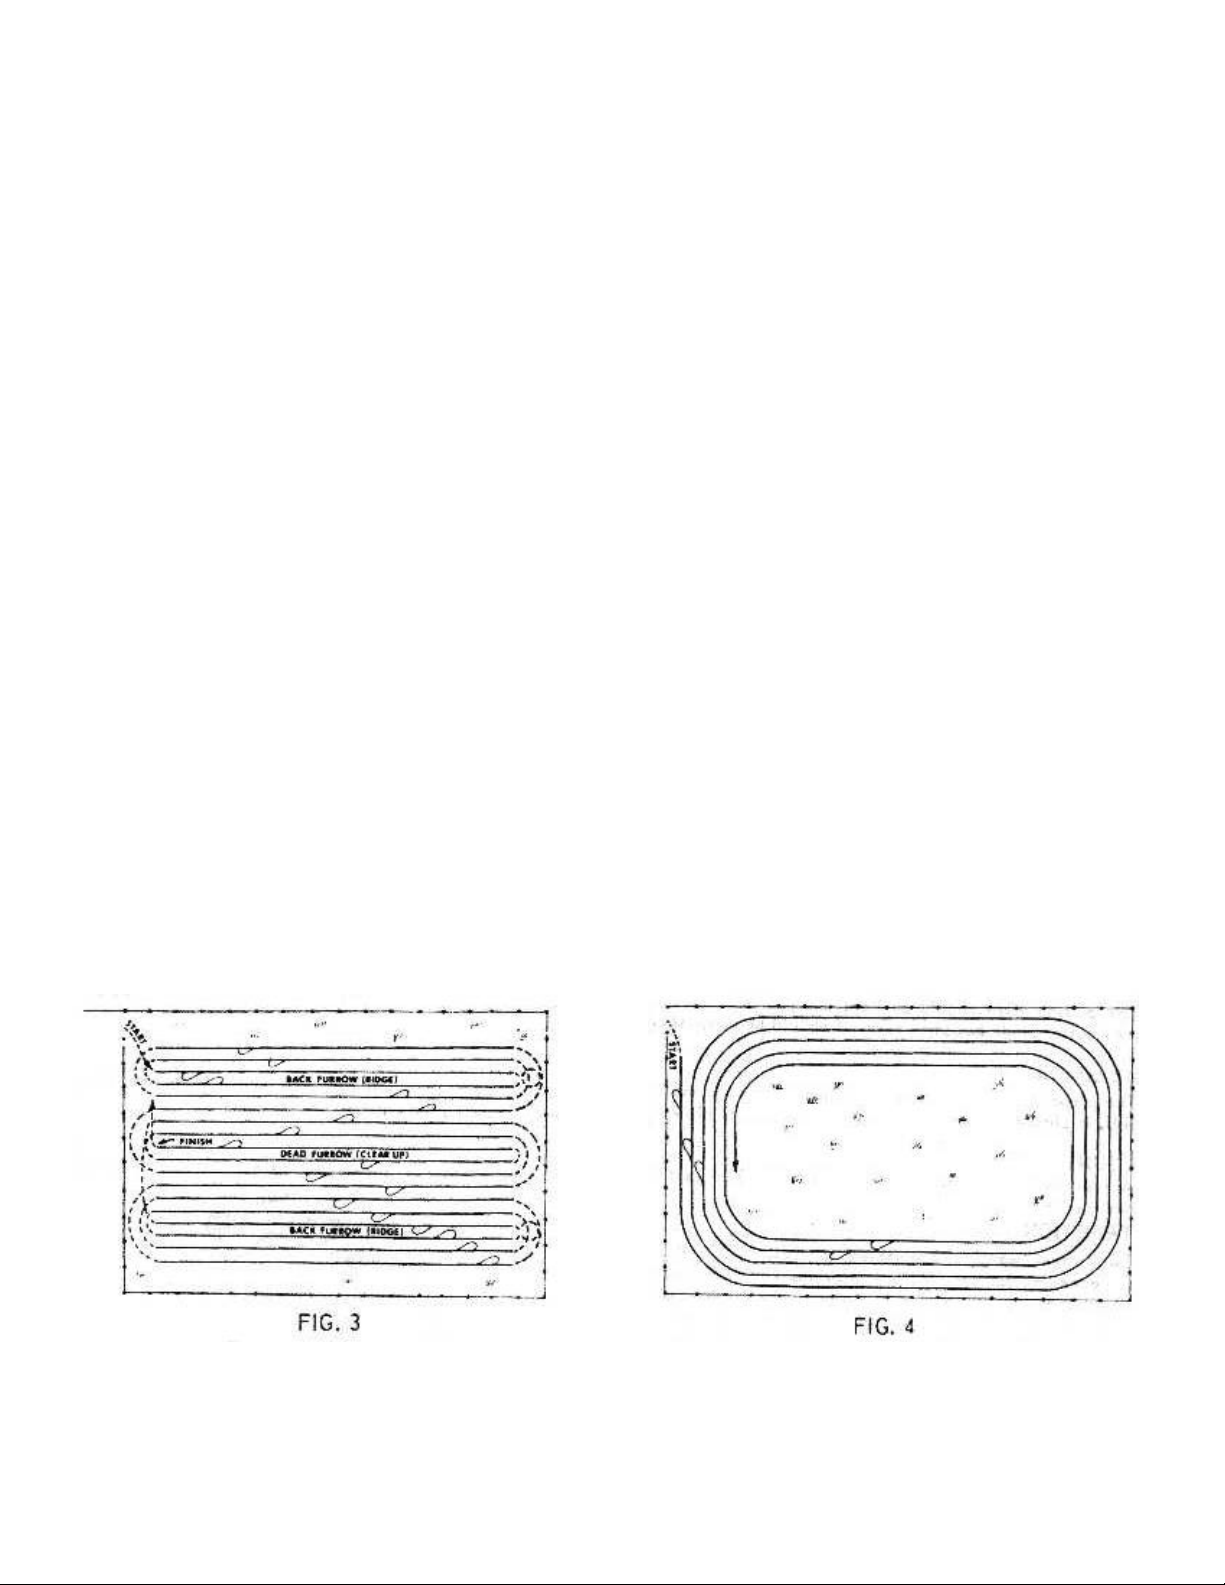
There are several ways of opening a field or garden to plow. Perhaps the most practical method is to lay out a land and
plow out in straight furrows as shown in Fig. 3. The plow will be raised at each end of the plot being plowed and returned
to the ground after turning and crossing the end of the plowed ground or land. The ends or headlands will be plowed last.
A good practice is to leave the same space on each side of the first furrow plowed, if the plot is not too big, so as to cause
excessive idle time while traveling across the end. If the plot is too big, additional lands should be plowed out. Another
method is to plow round and round the field without taking the plow from the ground as shown in Fig. 4. This system has
the advantage of greater speed and minimum of idle travel. This method may be used in a large plot of ground, but is not
practical in small plots since the corners remain unplowed.
Most plowmen like to throw soil toward the fence one year and toward the land the next. This can easily by accomplished
by either of the two general methods of plowing described i.e. When the method of plowing around the field is used, this
can be alternated by starting at the fence and turning to the left one year and beginning at the center and plowing around
to the right the next.
 Loading...