

Sears 560.21170250 Owner's Manual
ISears
OWNERS
MANUAL
MODEL NO.
560.21170250
KNOW YOUR UNIT.
Read this booklet so you
will be able to enjoy all
the features in your tape
player.
SEARS
MINI
Stereo Cassette
Player/Recorder
with AM/FM/FM
Stereo Radio
Sears, Roebuck and Co., Sears Tower, Chicago, IL. 60684 U.S.A.
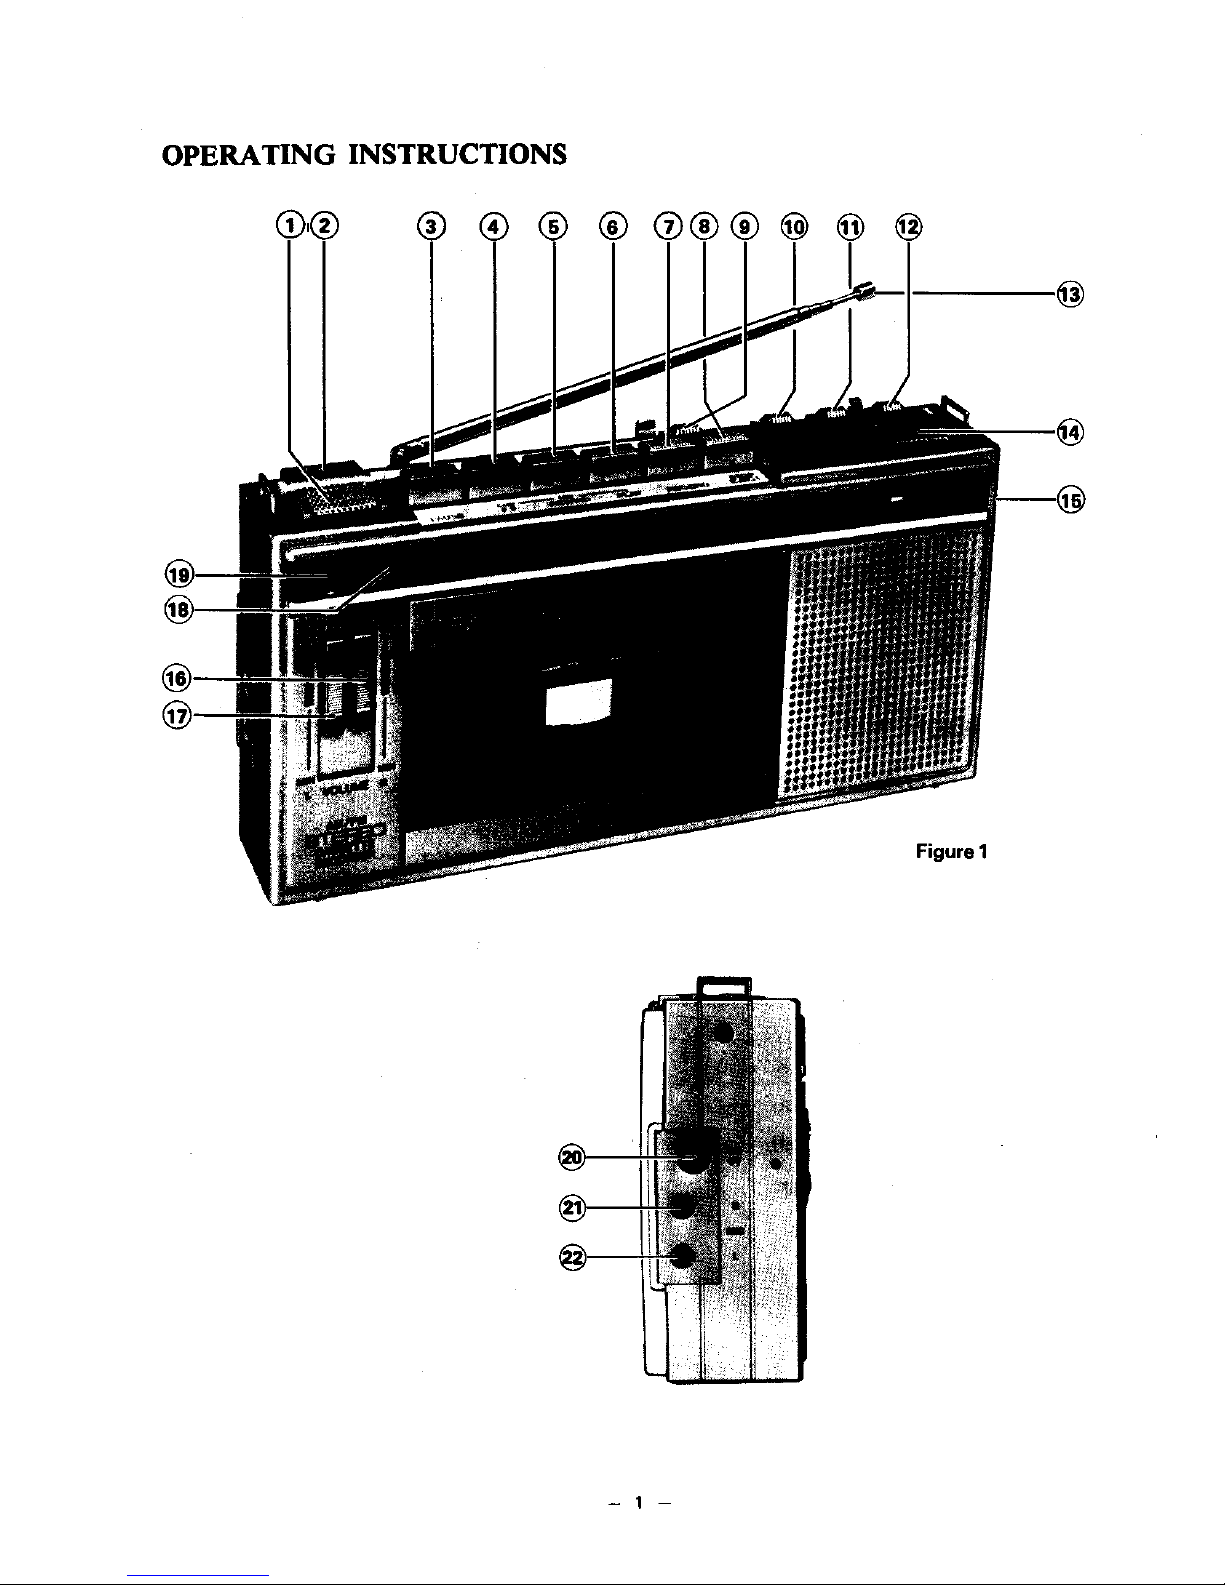
OPERATING INSTRUCTIONS
Q,® ® ®® ®@®®@@ @
.@
@
Figure 1
CONTROLS See Figure 1.
1. CONDENSER MICROPHONE- Built in microphone for the right channel.
2. HEADPHONES JACK - Accepts stereo headphones for private listening.
3. PAUSE BUTTON - Temporarily stops the tape motion.
4. FF (Cue) BUTTON - Advances the tape at a fast speed.
5. REWIND (Rev) BUTTON - Rewinds the tape at a fast speed.
6. PLAY BUTTON - Places the recorder in the playback mode.
7. RECORD BUTTON - Places the recorder in the record mode.
8. STOP/EJ ECT BUTTON - Stops the tape and opens the cassette door.
9. TAPE (RADIO OFF)-RADIO SWITCH - Selects the tape or Radio operation.
10. TONE (LOW/HIGH) SWITCH - Adjusts tonal balance.
11. MONO/STEREO SWITCH - Selects mono or Stereo mode.
12. AM/FM SWITCH - Selects AM or FM mode.
13. TELESCOPIC ANTENNA -- Picks up FM Signals.
14. CONDENSER MICROPHONE - Built in microphone for the left channel.
J. TUNING KNOB - Tunes in desired AM or FM station.
16. VOLUME CONTROL - Adjusts sound level for the right channel.
17. VOLUME CONTROL - Adjusts sound level for the left channel.
18. FM STEREO INDICATOR - Indicates a FM stereo program is being recevied.
19. BATTERY INDICATOR - Indicates the battery condition.
20. DC 6V JACK - Accepts DC 6V adaptor.
21. MIC JACK - Accepts external microphone for the right channel.
22. MIC JACK - Accepts external microphone for the left channel.
2
PREPARATION FOR USE
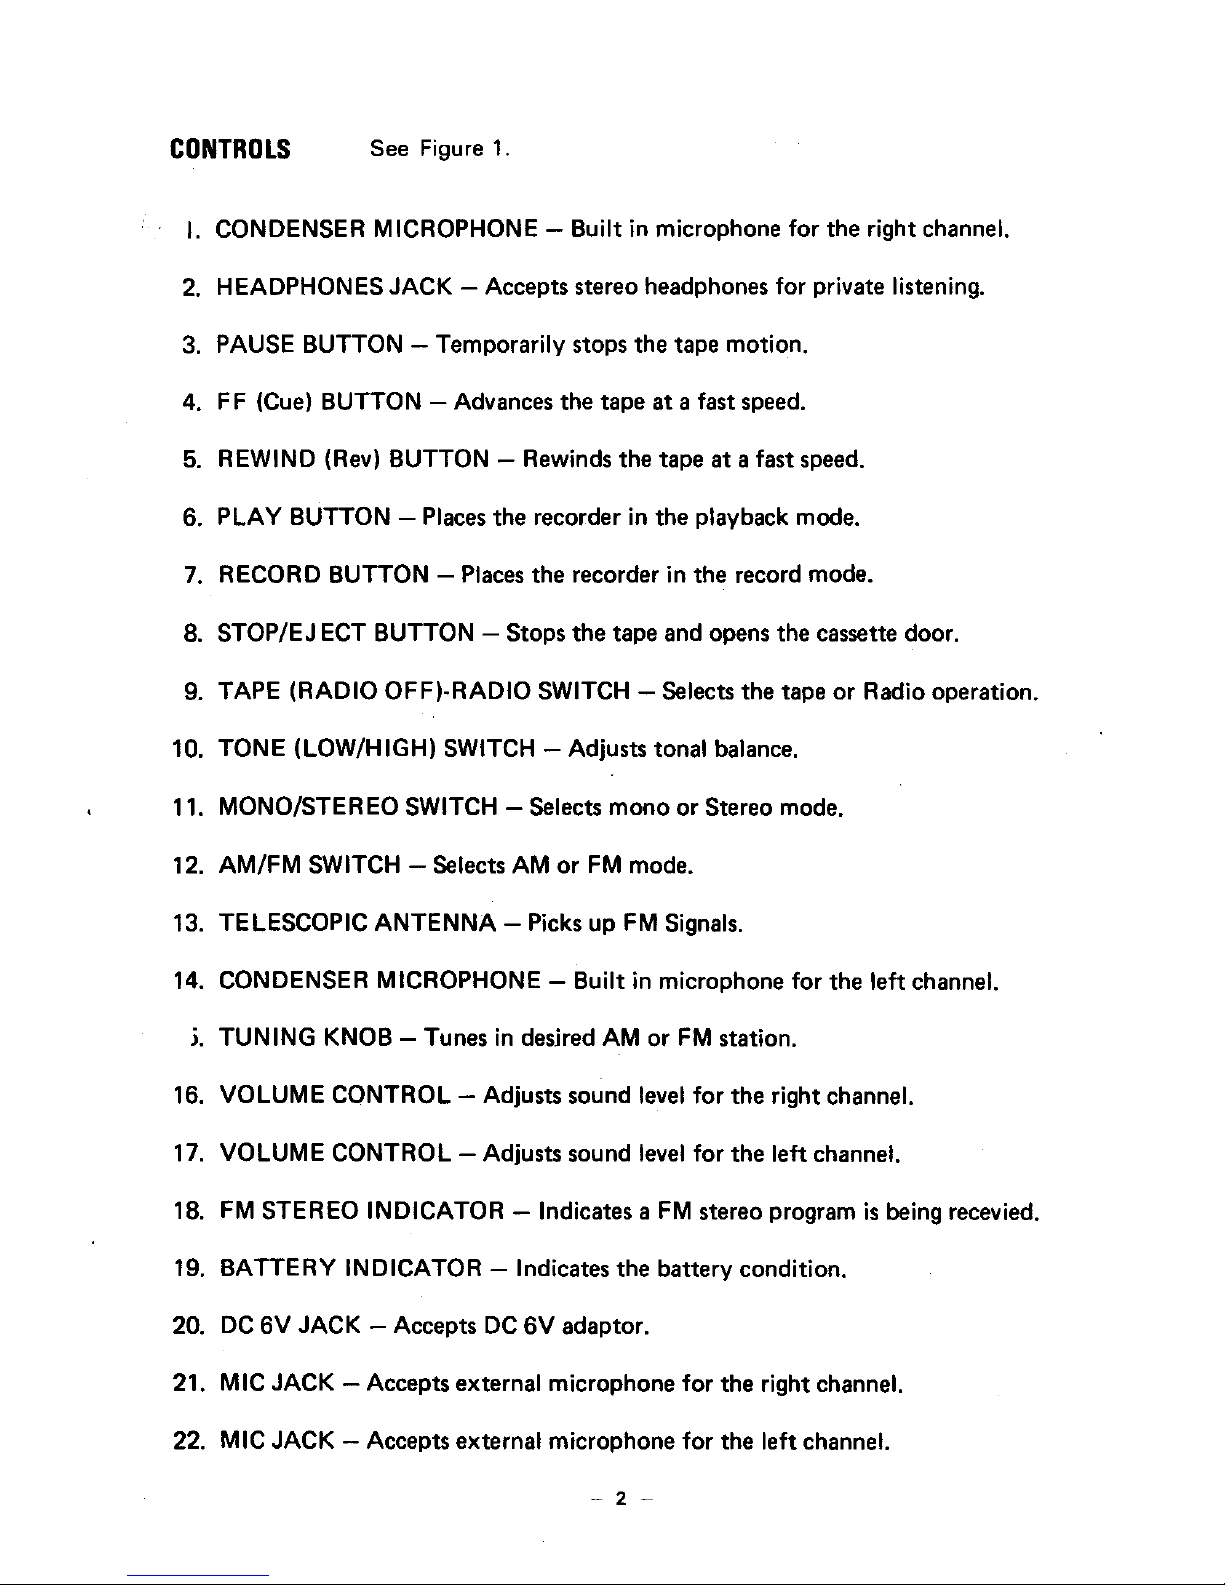
INSERTING THE BATTERIES
\
, Slide TAPE(RADIO OFF) - RADIO switch(_)
to the TAPE(RADIO OFF) position, and open
the battery compartment lid by pushing in the
notched area of the lid and sliding it in the
direction of the arrow.
See Figure 2.
:igure 2
, Insert four "AA" size (1.5-volt) alkaline bat-
teries (not included) into the compartment
making sure they are inserted in the proper
direction as illustrated in the battery conpart-
ment as well as in Fig. 3. When installing the
batteries, place the ribbon straight on the bot-
tom of the compartment, then place the bat-
teries over it with the end of the ribbon com-
ing out over the batteries. This enables you to
remove the batteries by just pulling the end of
the ribbon out.
IMPORTANT: Improper battery installation
may damage the set.
Figure 3
3. Close the battery compartment lid by placing it over the compartment and slid-
ing it in the reversed direction of the arrow until the catch snaps in its locked
postio n.
4. To check if the batteries are fresh and installed properly, follow the steps below:
a. Press the PLAY button (_The BATTERY indicator 1_ should light.
b. Pressthe STOP/EJECT button (_) after the above check is completed.
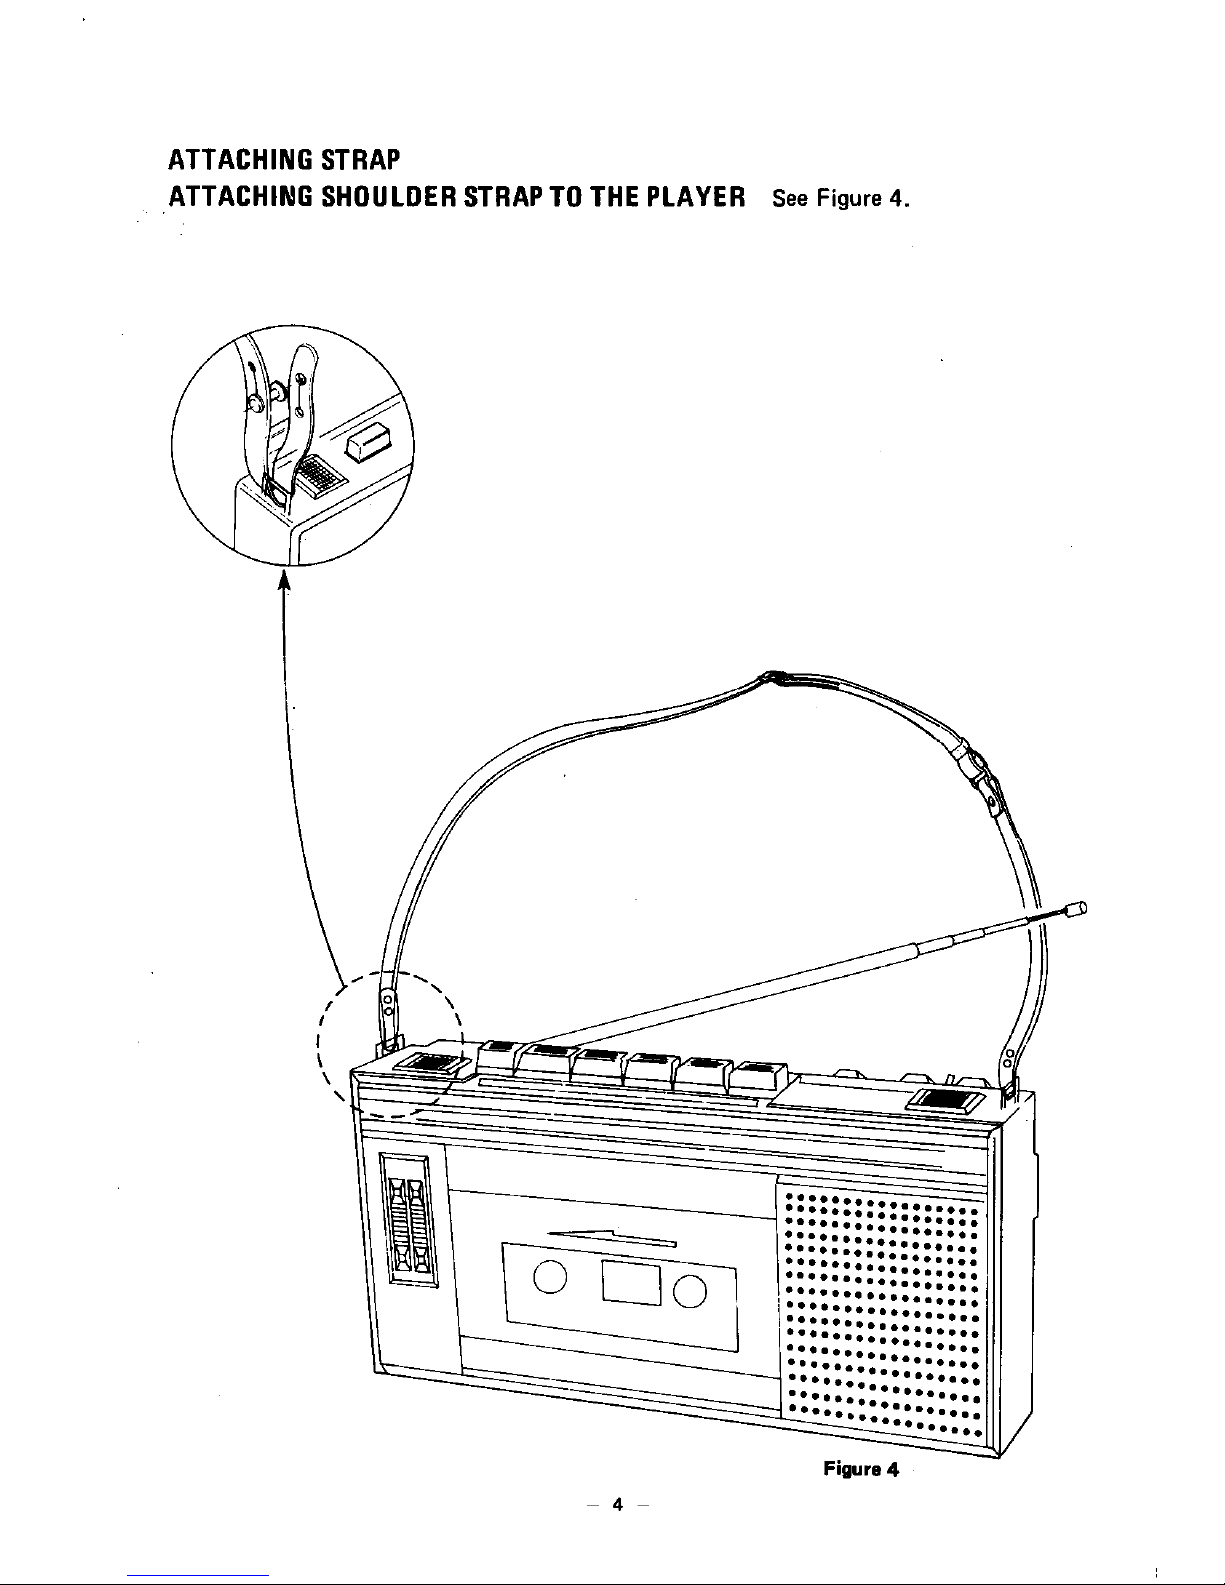
ATTACHING STRAP
ATTACHING SHOULDER STRAPTO THE PLAYER SeeFigure4.
!
I
!
\
\
\
Figure 4
- 4 -
 Loading...