USER’S MANUAL
Before using the TV please read this manual thoroughly,,
and retain it for future reference.
40LE45S
English
Federal Communications Commission Statement
..............................................................................
........................................................................
.....................................................................................
............................ ...................................................
............................................................................
............................................................................
..............................................................................
...................................................................................
...................................................................................
..........................................................................................
...................................................................................
............................................................................
....................................................................................................
.............................................................
............................................................................................
........................................................................................
..............................................................................................
...................................................................
......................................................................................
.................................................................
...................................................................
............................................................................
......................................................................................................
.................................................................................................
...................................................................................
....................................................................................
...............................................................................................................
.................................................................................................
......................................................................................................
...............................................................................................................
............................................................................................
...............................................................................................
Wall-mounting Bracket Installation
.................................................................................................
..............................................................
.................................2
3
5
5
5
5
6
6
6
7
8
8
8
8
8
9
9
9
10
11
11
12
13
13
13
16
16
17
18
20
20
20
21
22
24
1
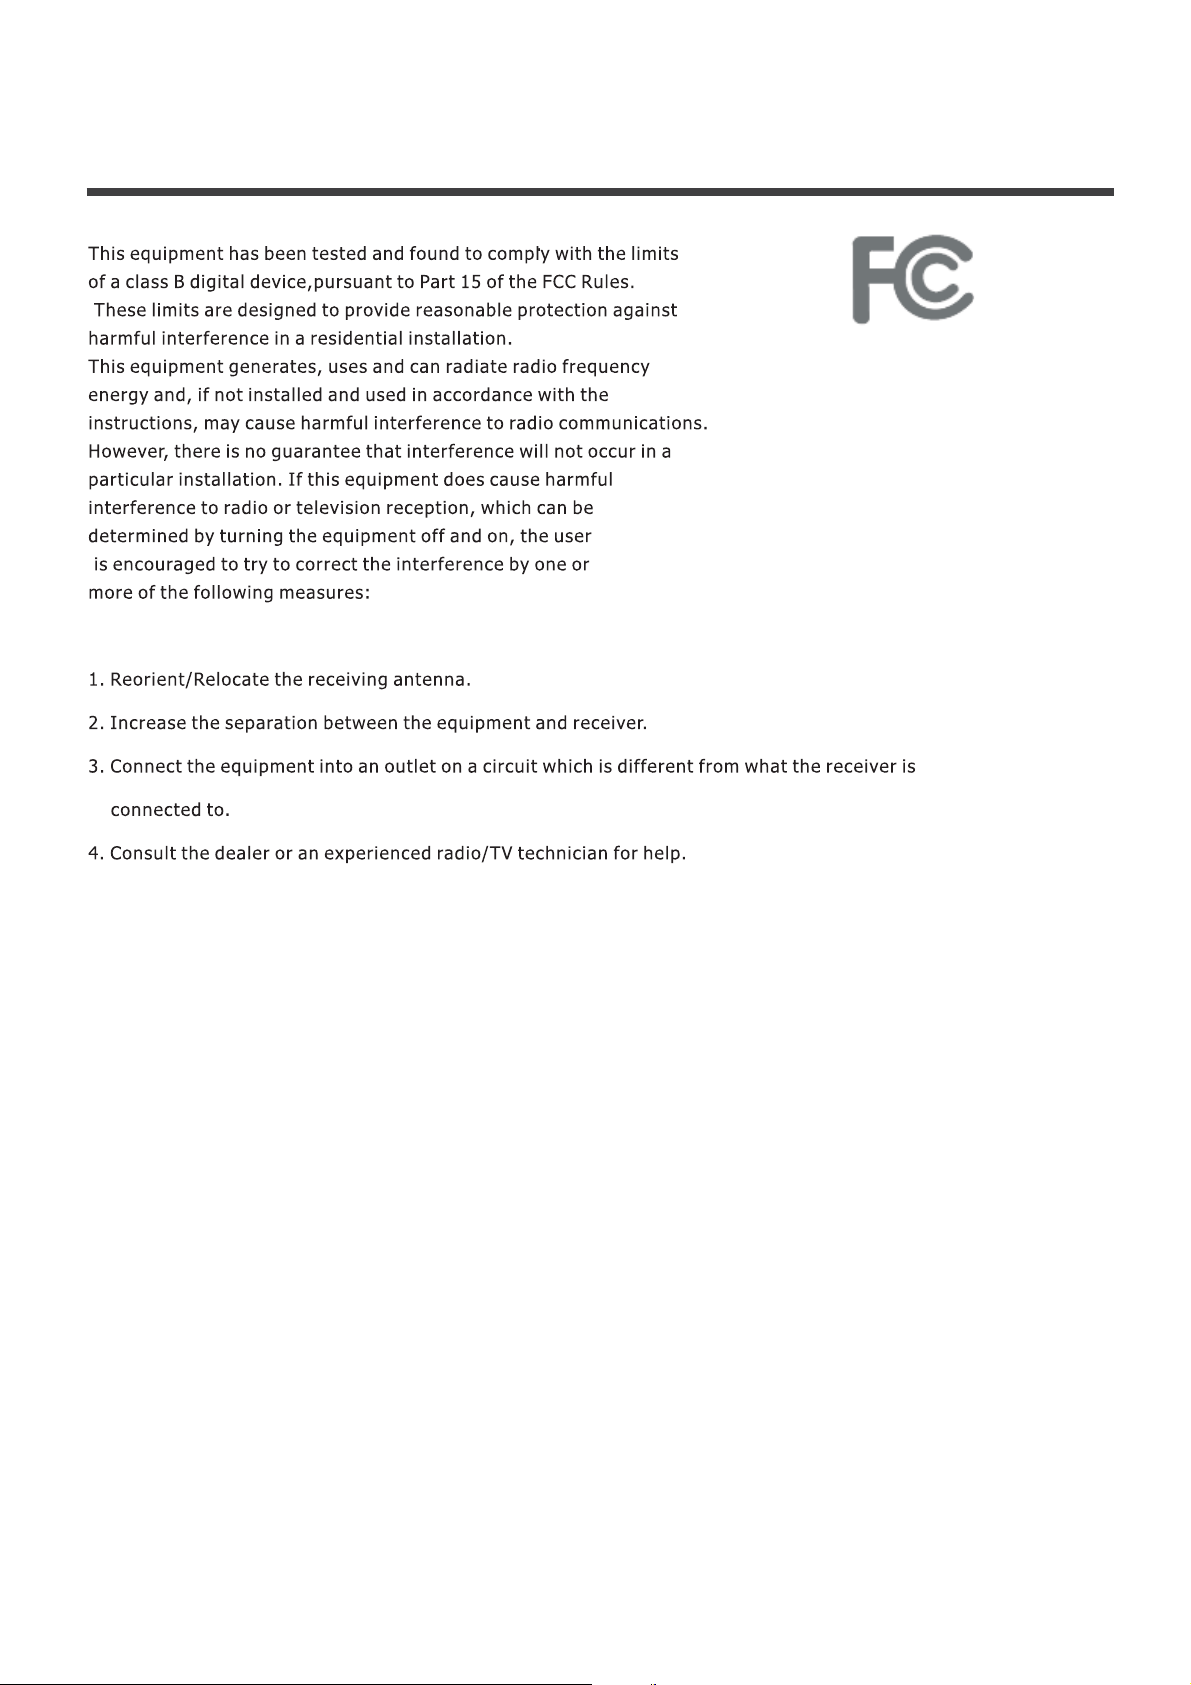
Federal Communications Commission Statement
2
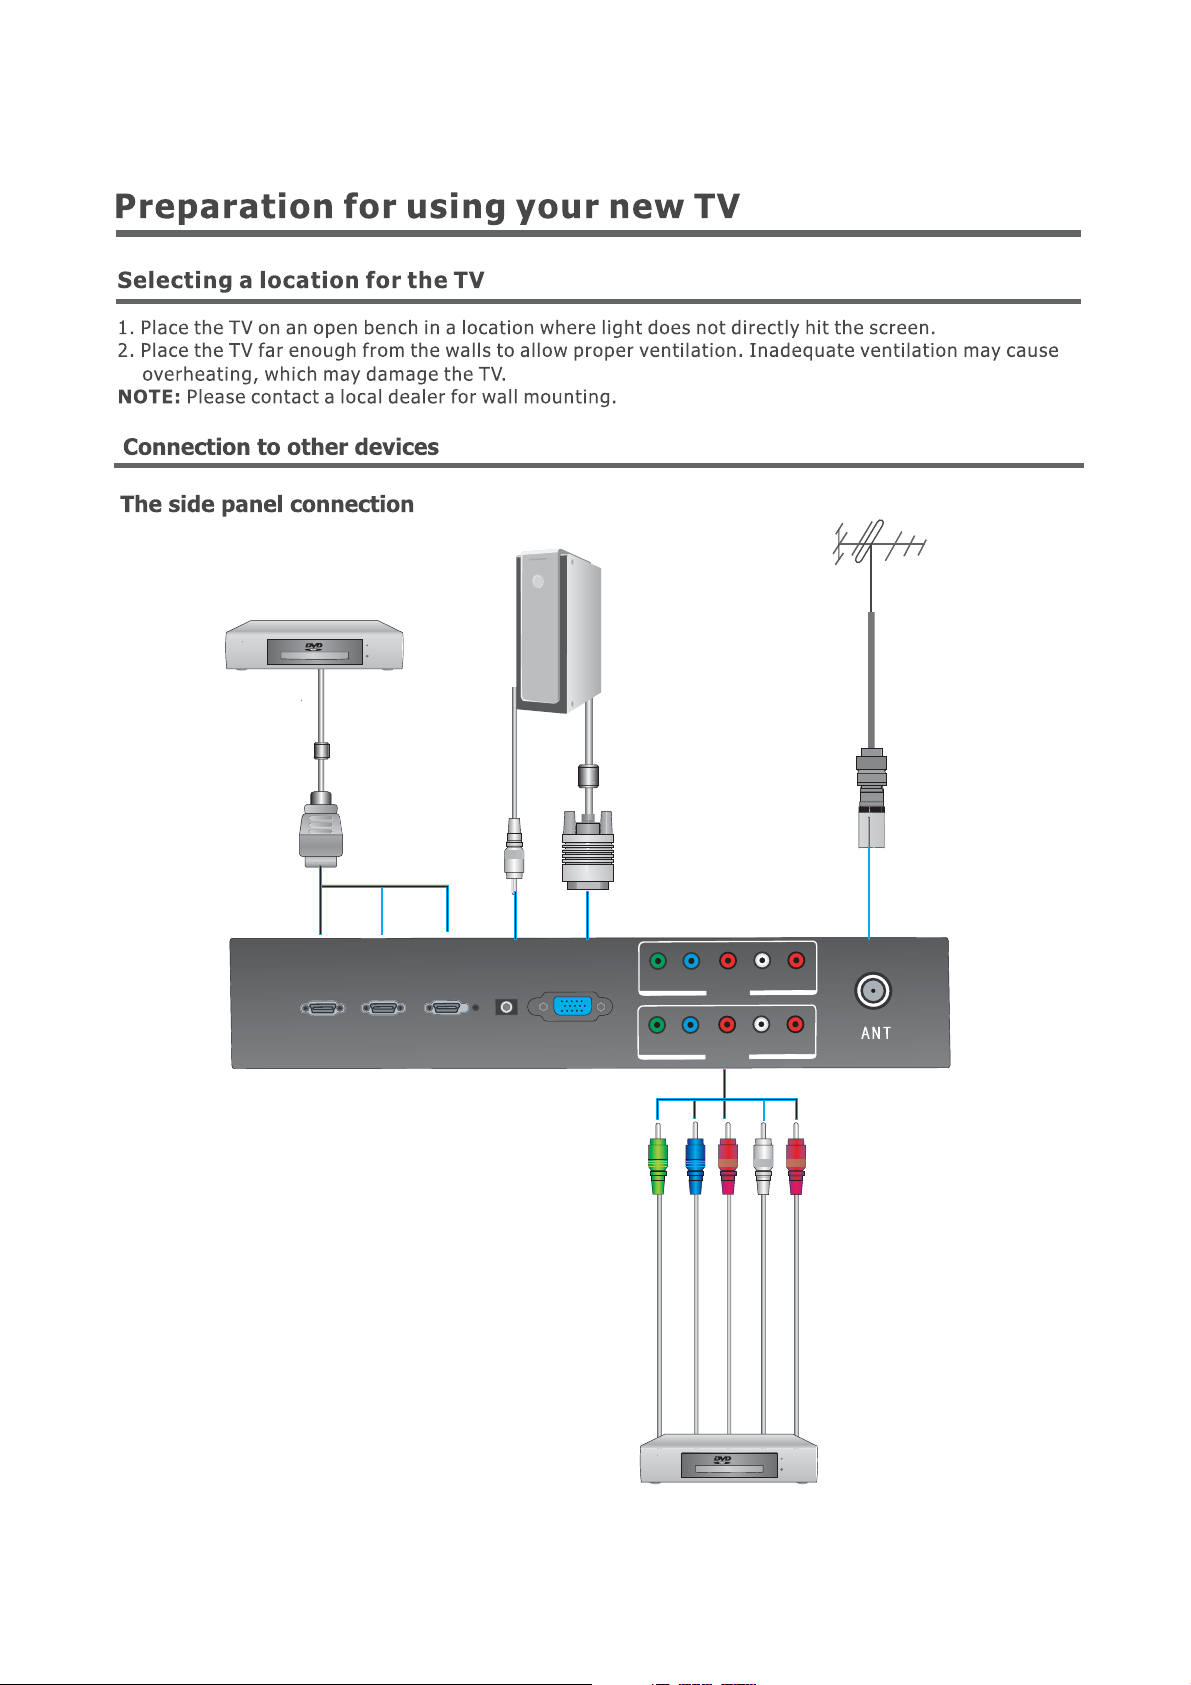
The equipment with HDMI output jack
( such as DVD players, set-top boxes, etc.).
OR
Computer
HDMI3
HDMI2 HDMI1
VGA AUDIO IN
VGA
BR
YP P L R
COMP1
BR
YP P L R
COMP2
Green
Blue
Red
B
/
/
Y
B
R
PC
PC
DVD With Component jacks
6
White
Audio L
Red
Audio R
VIDEO L R
OPTICAL
AUDIO L R
OUT
Yellow
Red
Audio L
Audio R
AUDIO AMPLIFIER
S-VIDEO
Av1
VIDEO L R
AV2
White
S-VIDEO
Audio L
Red
Audio R
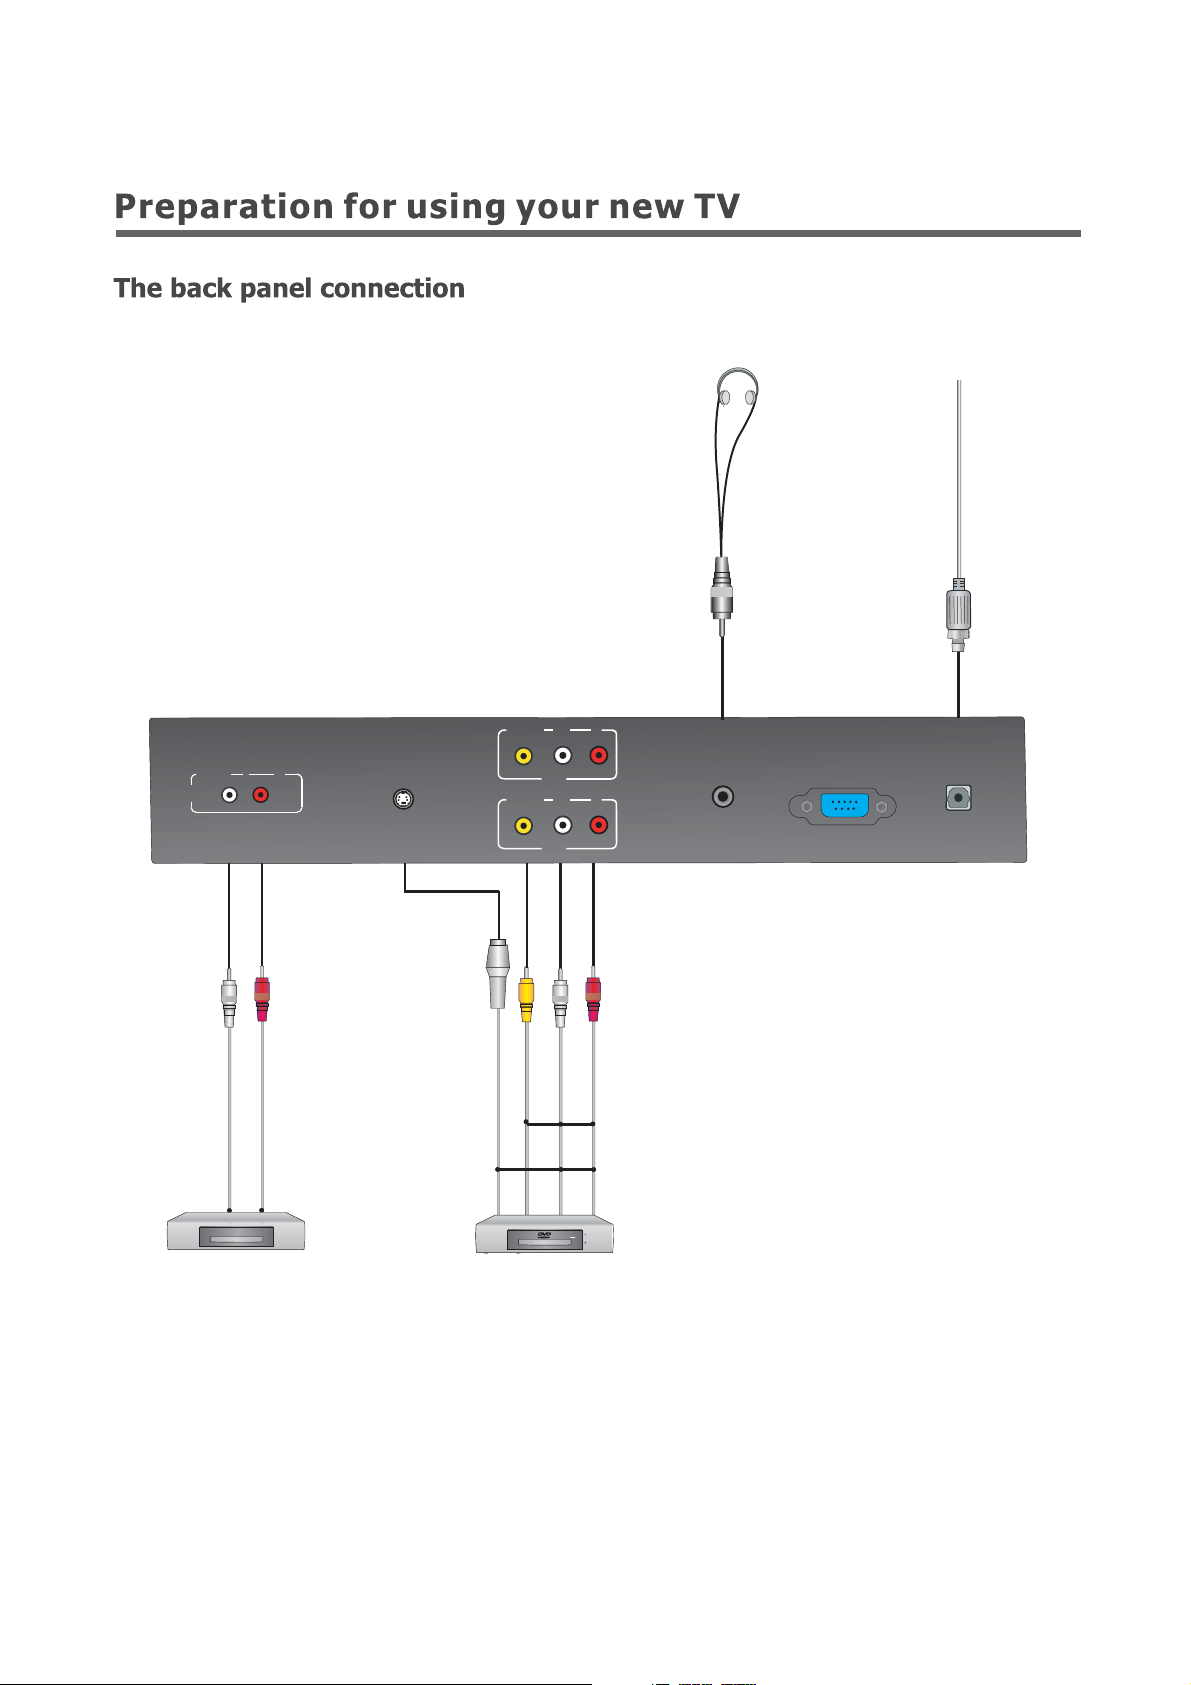
The equipment with AV or S-Video output function
( such as VCD, DVD, set-top boxes, etc.).
HEADPHONE
R 232S
OPTICAL
7

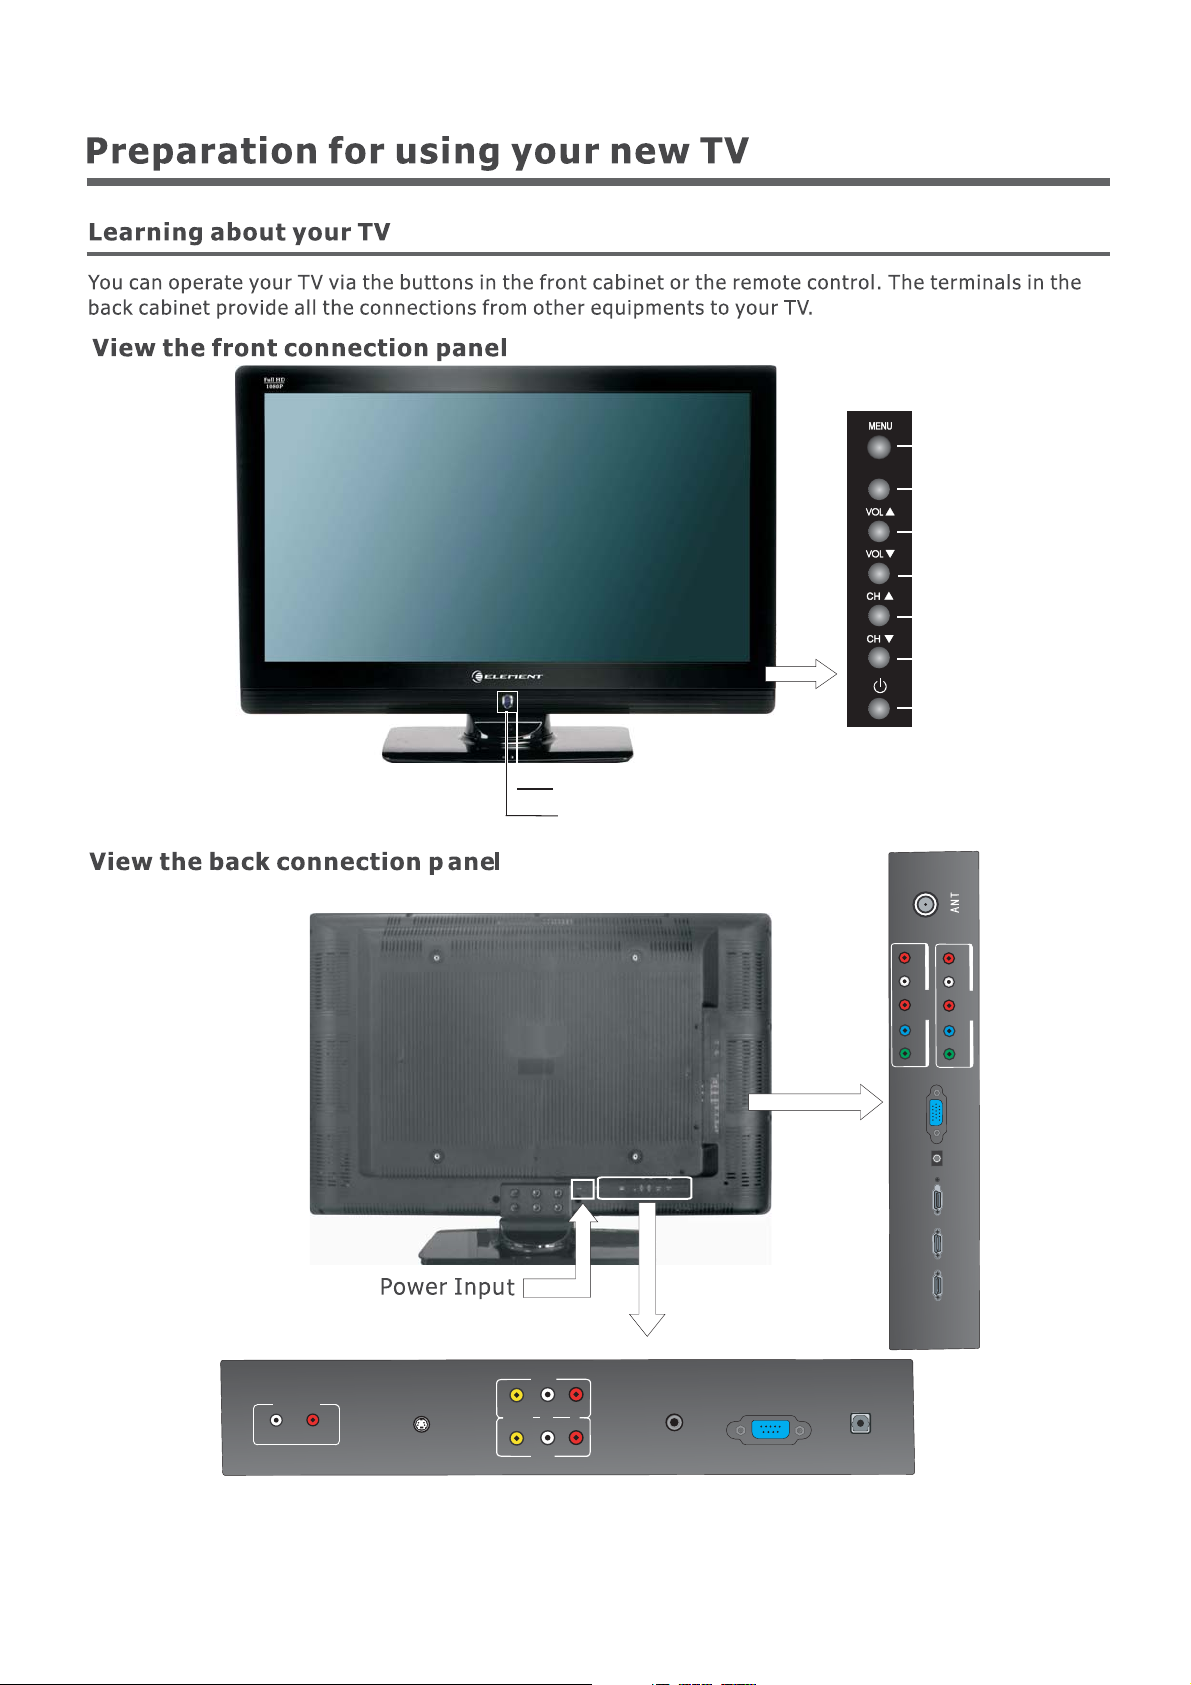
Power indicator
Power ON/OFF
Mute: Mute the sound
PICTURE: Select the picture mode
Select TV channels
Select digital channels
OSD menu Up arrow
OSD menu Left arrow
OSD menu Down arrow
MUTE
1
4
7
PICTUREPICTURE
2
5
8
0
ENTER
SOUND
SOUND
3
6
9
LASTLAST
INPUT
ASPECT
GUIDE
DISPLAY
EXIT
MENU
INPUT: Switch among TV, Video, S-Video,
Component,HDMI and VGA
ASPECT: Select Screen Mode
SOUND: Select the sound mode
GUIDE: ATSC tuners feature the Electronic
Program Guide (EPG) function
DISPLAY: Display current Status
information
EXIT: On Screen Display (OSD) menu exit
MENU: Call up the main menu
LAST:Return to previous channel
ENTER: Confirm selected function or
return to the previous menu
OSD menu Right arrow
VOL+: Volume up
VOL-: Volume down
CCD: Closed caption decoder function
MTS/SAP: Multi-channel television
sound selection
VOL+
CCD
VOL-
MTS SAP/MTS SAP
/
12
CH-CH-
SLEEP
CH+CH+
TIME
CH+: Channel up
CH-: Channel down
TIME: Display the current time
SLEEP: Set the sleep timer
Electronic Program Guide (EPG) function:
After pressing the "GUIDE" button in the
digital TV channel option, the 4 same color
buttons will appear with explanations in the
OSD. Follow the steps illustrated in the OSD.

Normal
The original 4:3 aspect ratio (1.33:1 signal)
is preserved, so black bars are added to the
left and right of the image. Standard TV
broadcasts are displayed with a 4:3 aspect ratio.
Wide
When watching a standard broadcast or full-frame
movieinthismode,thedisplayimageisstretched
proportionately to fill the TV screen.
When watching a widescreen (1.78:1 signal)
programormovie,thedisplayimagefillstheTV
screen.
Zoom
Stretches the 4:3 aspect ratio image vertically
andhorizontallytofillthescreenat1:1.78
aspect ratio.
Cinema
Stretches the 4:3 aspect ratio image vertically
andhorizontallytofillthescreenat1:2.35
aspect ratio.
14

Video
Picture Mode User
Brightness 50
Contrast
Saturation
HUE
Sharpness 6
Color Temperature Cool
Advanced Video
Select Adjust BackMENU
50
50
0
Audio Mode Standard
Balance 0
Balance
Bass 50
Surround Sound Off
Treble 50
Equalizer
Sound Surround On
Auto Volume Control Off
Setup
SPDIF Type PCM
Parental
Audio
SPDIF Type PCM
Auto Volume Control On
Select Adjust Back
Audio
ENTER
Enter
Select
MENU
EXIT
0
Exit
16

Surround Sound
Setup
OSD Language English
OSD Language English
Screen Mode Wide
DPMS
Time Setup
Caption
Reset Default
Screen Mode Normal
DPMS ON
Time Setup
On
Caption
Reset Default
Sutup
Select
Enter
ENTER OK MENU Exit
ENTER
Select
17

TV
Tuner Mode Antenna
Channel Scan
Channel Skip
MTS Stereo
Audio Language English
TV
Select ENTER OK MENU Exit
ENTER
Enter
Select
EXIT
Exit
20

Wall-mounting Bracket Installation
1. Drill four holes according to the illustrated dimension and insert expanding
bolts(4pcs of M8, bolt hole diameter-8mm, length -70mm) into the holes.
220mm or 320mm
65mm
2.Mount two fixture disks onto the wall-mounting bracket using bolts. Fix the
wall-mounting bracket to the expanding bolts.
3.Lay the TV on a plane table which could bear enough weight, and cover the
surface of the table with soft cloth to avoid damage to LCD panel. Remove the
fourboltsfixingthestandandremovethestandfromTV.
22

4.FixtworoundpegstobackcoverofTVwithbolts.Thenattachtwoplain
washers to the back cover as shown in the illustration. Insert cover board as the
arrow shows.
Round Peg
Plain washers
5.Meet the mounting holes of the back panel with the fixture disks in the brackets
andfixtheTVtothewall-mountingbracket.BecautiousoftheTVfromfalling.
Round Peg
Plain washers
Insert cover board
TV Front view
NOTE:
Wall mount bracket is not included with TV and mounting of wall
mount bracket to wall may vary depending on brand and size of
bracket. Customer should consult bracket mounting instructions
that came with wall mount for specific information on how to
mount bracket to wall.
23

40LE45S
40 inches
HDMI mode
,1080P/60Hz
1920 1080
230W
VideoX2
S-VideoX1
ComponentX2
HDMIX3
AV Audio X 2
Component Audio X 2
VGAAudio Input X 1
AV Audio X 1
Optical Audio out x 1
Headphone audio out x 1
Length: 39.1 inches
Width: 12.2 inches
Height: 28.3 inches
55.1 lbs
, Warranty Registration card
24


 Loading...