

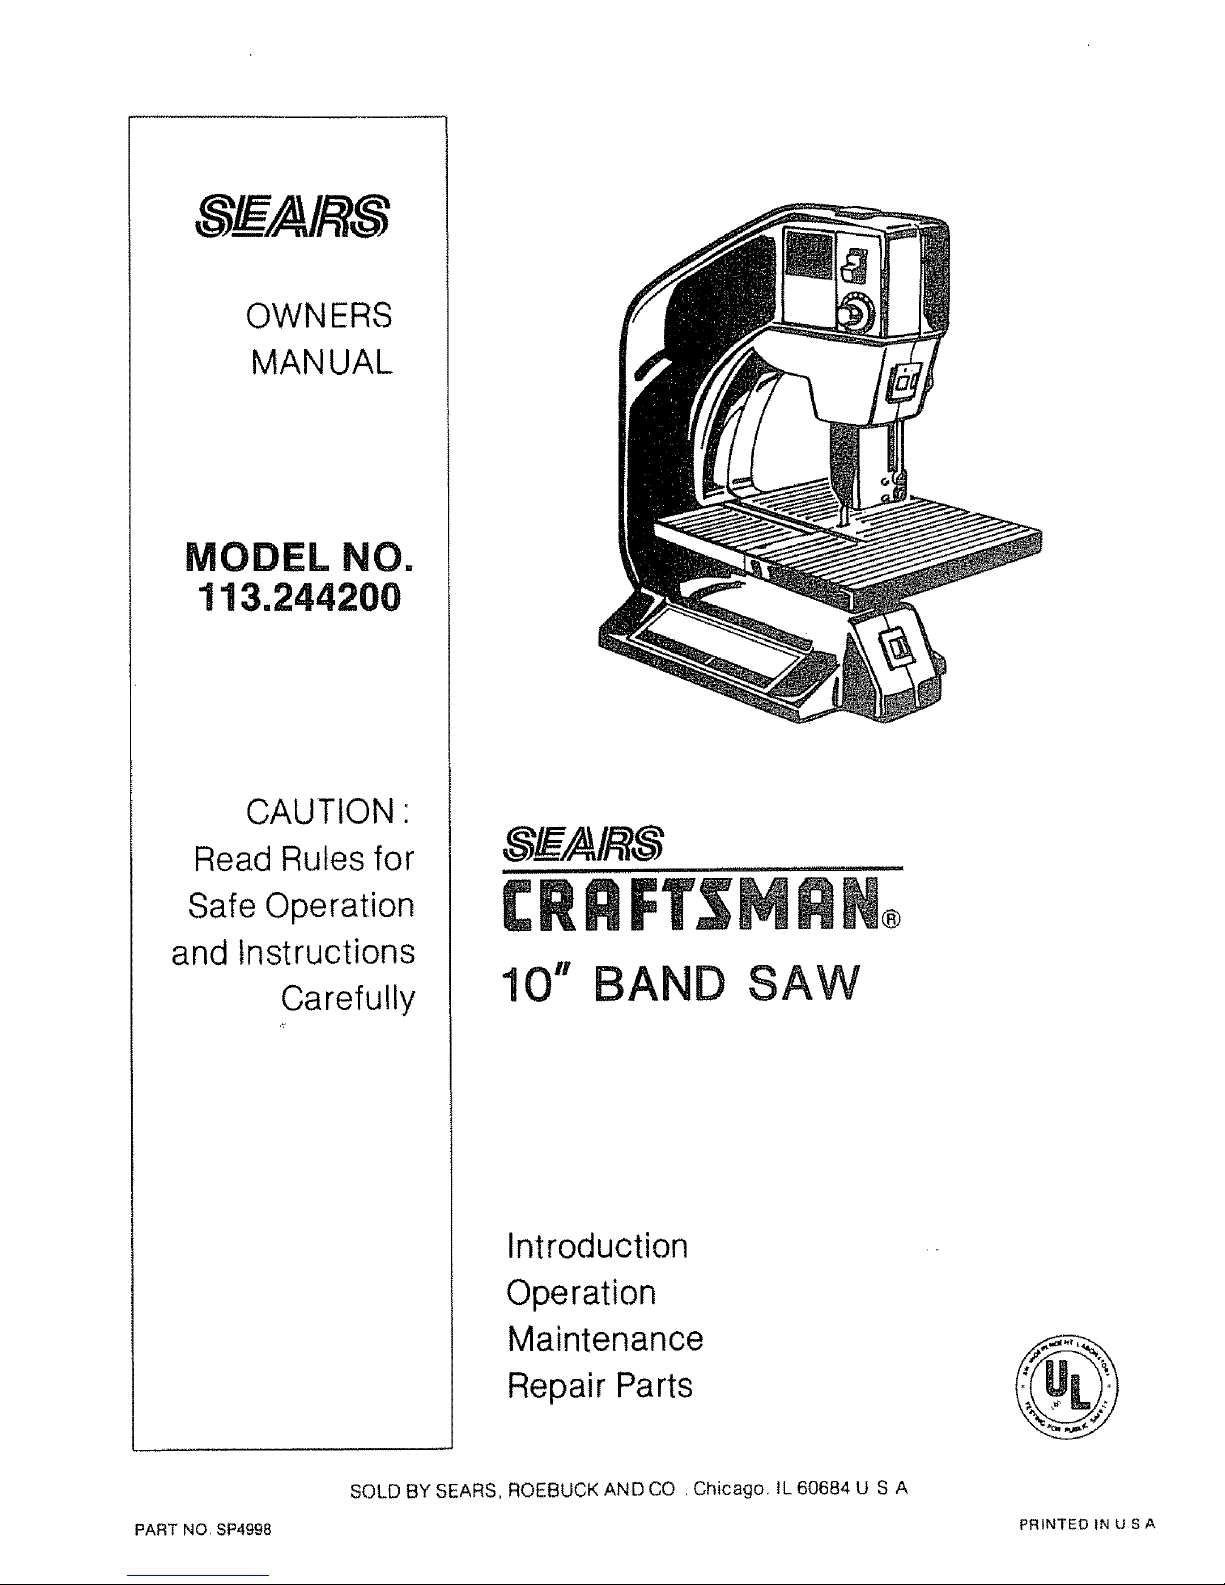
Sears 113.244200 Owner's Manual
OWNERS
MANUAL
MODEL NO.
113.244200
CAUTION"
Read Rules for
Safe Operation
and Instructions
Carefully
,___/A/_8
10" BAND SAW
Introduction
Operation
Maintenance
Repair Parts
i,i
®
SOLD BY SEARS, ROEBUCK AND CO , Chicago, IL 60684 U S A
PART NO, SP4998 PRINTED IN U S A
f
FULL ONE YEAR WARRANTY ON CRAFTSMAN 10" BAND SAW
tf this CRAFTSMAN 10" BAND SAW fails due to a defect in material or workmanship within one year from date of
purchase, Sears will repair it free of charge, This warranty applies only while this product is in use in the United States.
WARRANTY SERVICE IS AVAILABLE BY SIMPLY RETURNING THE TOOL TO THE NEAREST SEARS STORE
OR SERVICE CENTER THOUGHOUT THE UNITED STATES.
This warranty gives you specific legal rights and you may also have other rights which vary from state to state.
SEARS, ROEBUCK AND CO., DEPT, 698/731A SEARS TOWER, CHICAGO, IL 60684
"READ ALL INSTRUCTIONS" Failure to follow the SAFETY RULES listed L___-
BE LOW, and other basic safety precautions, may result in serious personal injury,
J
GENERAL SAFETY RULES
1, KEEP WORK AREAS CLEAN. Cluttered areas and
benches invite accidents,,
2. AVOID DANGEROUS ENVIRONMENT. Don't use
power tools in damp or wet locations. Keep work area
well lit+ Do not expose power tools to rain+ Do not
use tool in presence of flammable liquids or gases.
3, KEEP CHILDREN AWAY. Do not let visitors contact
tool or extension cord. All visitors should be kept
away from work area.
4. STORE IDLE TOOLS. When not in use, tools should
be stored in dry, high or locked up place-out of the
reach of children,
5+DON'T FORCE TOOL. It will do the job better and
safer at the rate for which it was designed
6. USE THE RIGHT TOOL. Don't force small toot or
attachment to do the job of a heavy-duty tool+ Don't
use tool for purpose not intended-for example; don't
use circular saw for cutting tree limbs or logs.
7. DRESS PROPERLY° Do not wear loose clothing or
jewelry. They can be caught in moving parts° Rubber
gloves and non-skid footwear are recommended when
working outdoors, Wear protective hair covering to
contain long hair.
8_USE SAFETY GLASSES+Also face or dust mask if
cutting operation is dusty.
9, DON'T ABUSE CORD. Never carry tool by cord or
yank it to disconnect from receptacle, Keep cord
from heat, oit, and sharp edges,
10. SECURE WORK. Use clamps or a vise to hold work,
It's safer than using your hand and it frees both hands
to operate tool+
11°DON'T OVERREACH+ Keep proper footing and
balance at all times,,
12. MAINTAIN TOOLS WITH CARE. Keep tools sharp
and clean for better and safer performance+ Follow
instructions for lubricating and changing accessories,,
Inspect tool cords periodically and if damaged, have
repaired by authorized service faciIity+ Inspect exten+
sion cords periodically and replace if damaged. Keep
handles dry, clean and free from oil and greaser
13, DISCONNECT TOOLS. When not in use; before
servicing; when changing blades, bits, cutters, etc+
14. REMOVE ADJUSTING KEYS AND WRENCHES.
Form habit of checking to see that keys and adjusting
wrenches are removed from toot before turning it on
15. AVOID ACCIDENTAL STARTING, Don't carry
plugged in tool with finger on switch. Be sure switch
is OFF when plugged in,
16, OUTDOOR USE EXTENSION CORDS, When tool is
used outdoors, use only extension cords suitable for
use outdoors and marked with suffix W+A (for UL),
or W (for CSA)o
17,
18+
AVOID GASEOUS AREAS, Do not operate portable
electric tools in gaseous or explosive atmospheres.
Motors in these tools normally spark, and the sparks
might ignite fumes.
DO NOT ALTER OR MISUSE TOOL These tools
are precision built. Any alteration or modification
not specified is misuse and may result in a dangerous
condition,
19, GUARD AGAINST ELECTRIC SHOCK, Prevent
body contact with grounded surfaces. For example;
pipes, radiators, ranges, refrigerator enclosures+,
20. STAY ALERT. Watch what you are doing. Use
common sense Do not operate tool when you are
tired.
21+
22+
CHECK DAMAGED PARTS. Before further use of
the too!, a guard or other part that is damaged should
be carefully checked to determine that it wit1 operate
property and perform its intended function+ Check
for alignment of moving parts, binding of moving
parts, breakage of parts, mounting, and any other
conditions that may affect its operation+ A guard or
other part that is damaged should be properly re+
paired or replaced, Have defective switches replaced°
Do not use tool if switch does not turn it on or off.
E_efore connecting the tool to a
power source (receptacle, outlet,
etc.) be sure the voltage supplied is the same as that
specified on the nameplate of the tool, A power
source with voltage greater than that specified for the
tool can result in SERIOUS INJURY to the user-as
well as damage to the tool If in doubt, DO NOT
PLUG IN THE TOOL. Using a power source with
voltage Iess than the nameplate rating is harmfu+ to
the motor.
\--- {"SAVE THESE INSTRUCTIONS"} ...."1"
r BAND SAW SAFETY RULES
@
For your own safety, do not attempt
to operate your band saw until it is
completely assembled and installed according to the
instructions . _ _ and until you read and understand
the following:
• GENERAL SAFETY INSTRUCTIONS..SeePage2
• BAND SAW SAFETY RULES ............ See Page3
@ GETTING TO KNOW YOUR BAND SAW See Page6
® OPERATIONS ......................... SeePage 9
® ADJUSTMENTS ................. See Pages 12 & 13
• MAINTENANCE ................. See Page t0
STABILITY OF SAW
• YOUR BAND SAW MUST BE BOLTED SECURELY
TO A STAND OR WORK BENCH In addition, if
there is any tendency for the band saw to tip over or
move during certain operations such ascutting long
heavy boards, bolt your band saw stand or work_
bench to the floor
LOCATION
• This band saw is intended for indoor use only..
0
@
@
@
0
0
When cutting a large piece of material, make sure
it is supported at table height.
Hold the work firmly against the table
Do not feed the material too fast while cutting. Only
feed the material fast enough so that the blade win
cut, Keep fingers away from the blade.
Use caution when cutting off material which is irreg-
ular in cross section which could pinch the blade
before the cut is completed. A piece of molding for
example must lay flat on the table and not be
permitted to rock while being cut
Use caution when cutting off round material such
as dowel rods, or tubing. They have a tendency to
roll while being cut causing the blade to "bite",
Always use a "V" block, or clamp round material to a
miter gauge.
When backing up the workpiece, the blade may bind
in the cut ....... this is usually caused by sawdust
clogging up the cut or because the blade comes out
of the guides. If this happens:
Turn off the band saw.., remove plug from power
source outlet , _remove cover from band saw, Insert
a screwdriver or wedge in the cut . _ . rotate the
wheels by hand while backing up the workpiece.
PROTECTION: EYES, HANDS,
FACE, EARS AND BODY
e Wear safety goggles and a face shiefd if operation is
dusty_ Wear ear plugs or muffs during extended
periods of operation. Do not wear gloves.. _rott tong
steeves above the elbow.
O Do not cut pieces of material too small to hold by
hand.
O Avoid awkward hand positions where a sudden slip
could cause a hand to move into the blade.
e Never turn your band saw "ON" before clearing the
table of all Obiects (tools, scraps of wood, etc.)
except for the workpiece and related feed or support
devices for the operation planned,
e Make sure the blade runs downward toward the table.
Always adjust tracking wheel correctly so that the
blade does not run off the wheels°
O
O
o
Never leave the band saw work area with the power
on, before the machine has come to acomplete stop,
or without removing and storing the switch key.
Never operate band saw with cover removed_
Do not perform layout, assembly, or setup work on
the table while the cutting toof is rotating.
Turn saw "off" and remove plug from power supply
outlet before installing or removing an accessory or
attachment.
Should any part of this band saw be missing, bent,
or fail in any way, or any electrical component fail to
perform properly, shut off power switch and remove
plug from power supply outlet_ Replace damaged,
missing, and/or failed parts before resuming opera-
tion.
THINK SAFETY
o Safety is a combination of operator common sense
and alertness whenever the band saw is in operation,
O Always adjust blade tension correctly.
O ALWAYS adjust the upper blade guide and blade
guard to just clear the workpiece to protect the
operator, to keep blade breakage to a minimum, and
to provide maximum support for blade°
O
Do not alfow familiarity (gained
from frequent use of your band
saw) to become commonplace. Always remember
that a careless fraction of a second is sufficient to
inflict severe injury.
J
Page 3
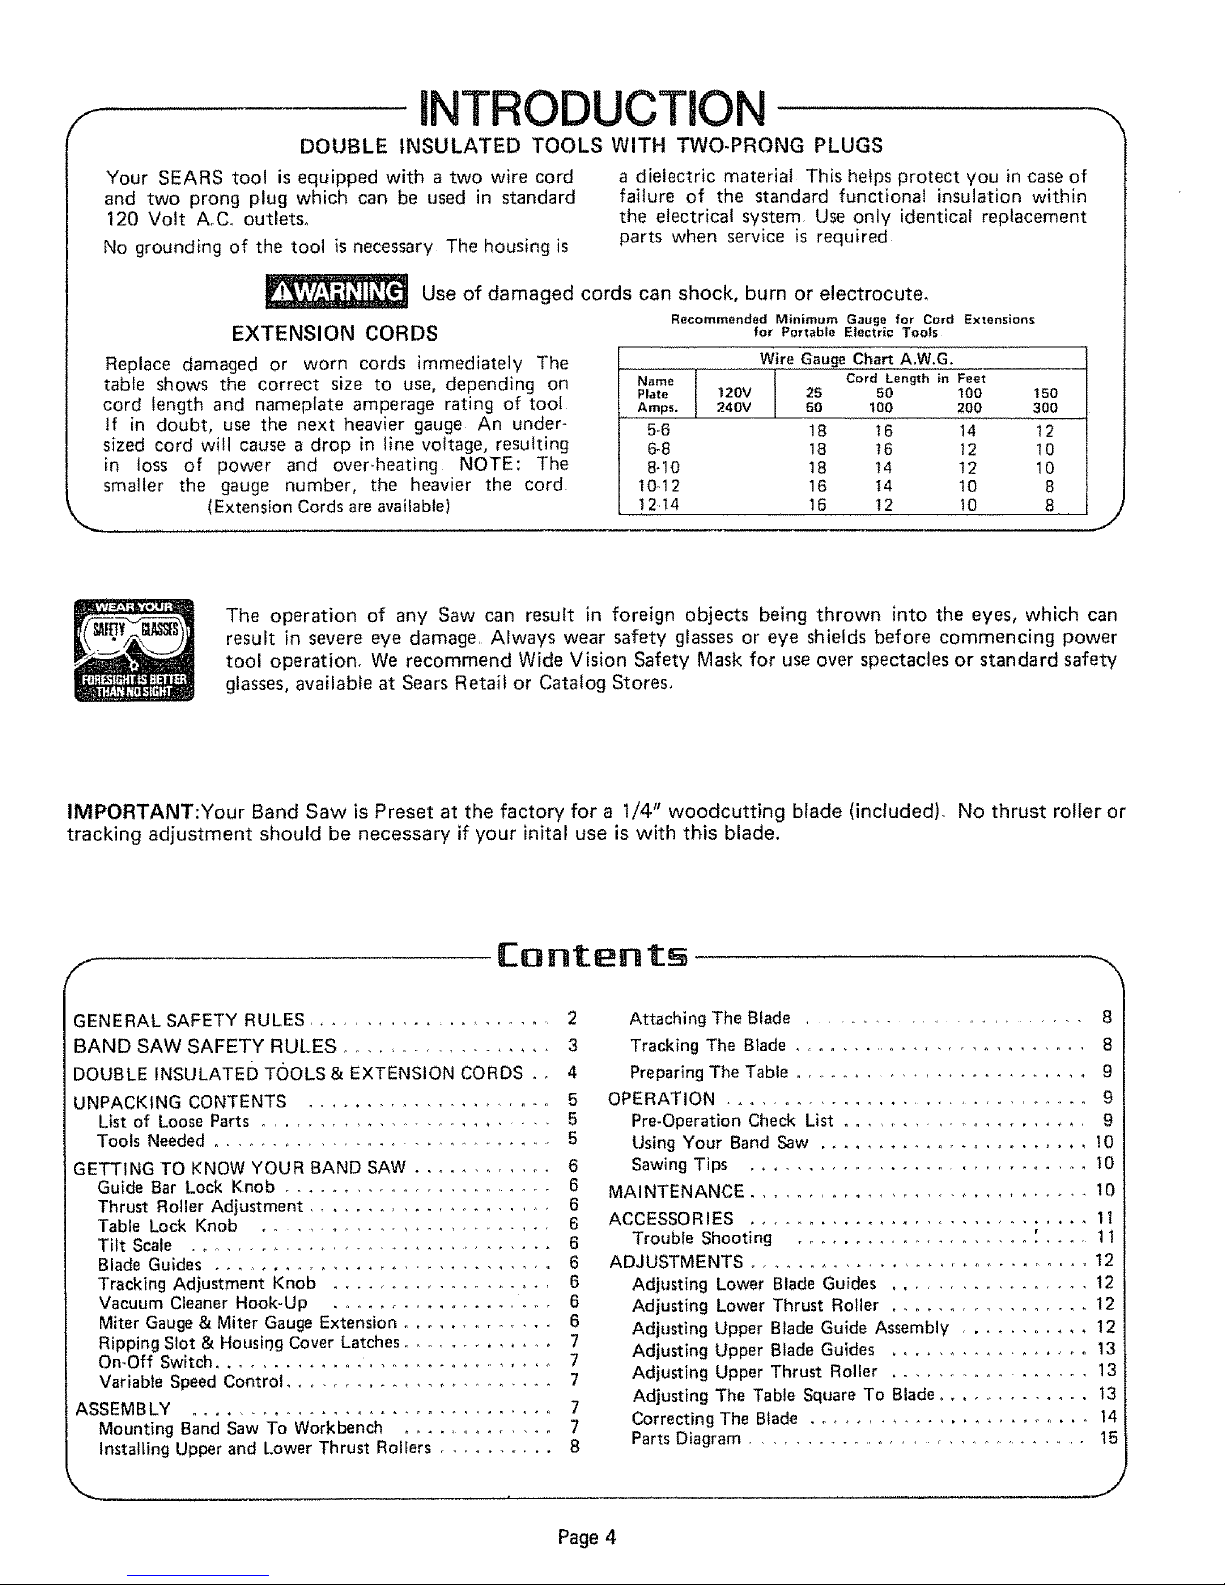
iNTRODUCTiON
DOUBLE INSULATED TOOLS WITH TWO-PRONG PLUGS
Your SEARS tool is equipped with a two wire cord
and two prong plug which can be used in standard
120 Volt A,C, outletso
No grounding of the tool is necessary The housing is
a dielectric material This helps protect you in case of
failure of the standard functional insulation within
the electrical system Use only identical replacement
parts when service is required
Use of damaged
EXTENSION CORDS
Replace damaged or worn cords immediately The
table shows the correct size to use, depending on
cord Iength and nameplate amperage rating of tool
tf in doubt, use the next heavier gauge An under-
sized cord will cause a drop in tine voltage, resulting
in loss of power and over-heating NOTE: The
smaller the gauge number, the heavier the cord
(Extension Cords are available)
cords can shock, burn or electrocute,
Recommended Minimum Gauge for Cord Extensions
for Portable Electric Toots
Wire Gauge Chart A.W.G.
Name Cord Length in Feet
Plate 12OV I 2s so 10o t5o
,,, Amps. 240V 50 100 200 300
5.6 18 t6 14 t2
6-8 18 !6 12 10
8-10 18 t4 t2 10
10.12 16 t4 10 8
12.14 16 12 10 8
J
The operation of any Saw can result in foreign objects being thrown into the eyes, which can
result in severe eye damage, Always wear safety glasses or eye shields before commencing power
tool operation, We recommend Wide Vision Safety Mask for use over spectacles or standard safety
glasses, available at Sears Retail or Catalog Stores,
IMPORTANT:Your Band Saw is Preset at the factory for a 1/4" woodcutting blade (included), No thrust rolfer or
tracking adjustment should be necessary if your inital use is with this blade.
GENERAL SAFETY RULES ..................... 2
BAND SAW SAFETY RULES ................... 3
DOUBLE INSULATED TOOLS& EXTENSION CORDS . , 4
UNPACKING CONTENTS ...................... 5
List of Loose Parts .......................... 5
Tools Needed ............................. 5
GETTING TO KNOW YOUR BAND SAW ............ 6
Guide Bar Lock Knob ......................... 6
Thrust Roller Adjustment .................... 6
Table Lock Knob ........................ 6
TiltScale ............................... 6
Blade Guides ............................. 6
Tracking Adjustment Knob ................... 6
Vacuum Cteaner Hook-Up .................... 6
Miter Gauge & Miter Gauge Extension ............. 6
Ripping Slot & Housk)g Cover Latches ............ 7
On-Off Switch .............................. 7
Variable Speed Control ....................... 7
ASSEMBLY ............................... 7
Mounting Band Saw To Workbench ............. 7
Installing Upper and Lower Thrust Rollers .......... 8
Attaching The Bfade ....................... 8
Tracking The Blade ........................... 8
Preparing The Table ......................... 9
OPERATION ................................ 9
Pre.Operation Check List ..................... 9
Using Your Band Saw ....................... 10
Sawing Tips ................................ 10
MAINTENANCE .............................. 10
ACCESSORIES ............................. 11
Trouble Shooting .................... [ ..... 1 1
ADJUSTMENTS .............................. 12
Adjusting Lower Blade Guides ................. 12
Adjusting Lower Thrust Roller ................. 12
Adjusting Upper Blade Guide Assembly ........... 12
Adjusting Upper Blade Guides ................. 13
Adjusting Upper Thrust Roller ................. 13
Adjusting The Table Square To Blade .............. 13
Correcting The Blade ........................ 14
Parts Diagram .................. .............. 15
_J
Page 4
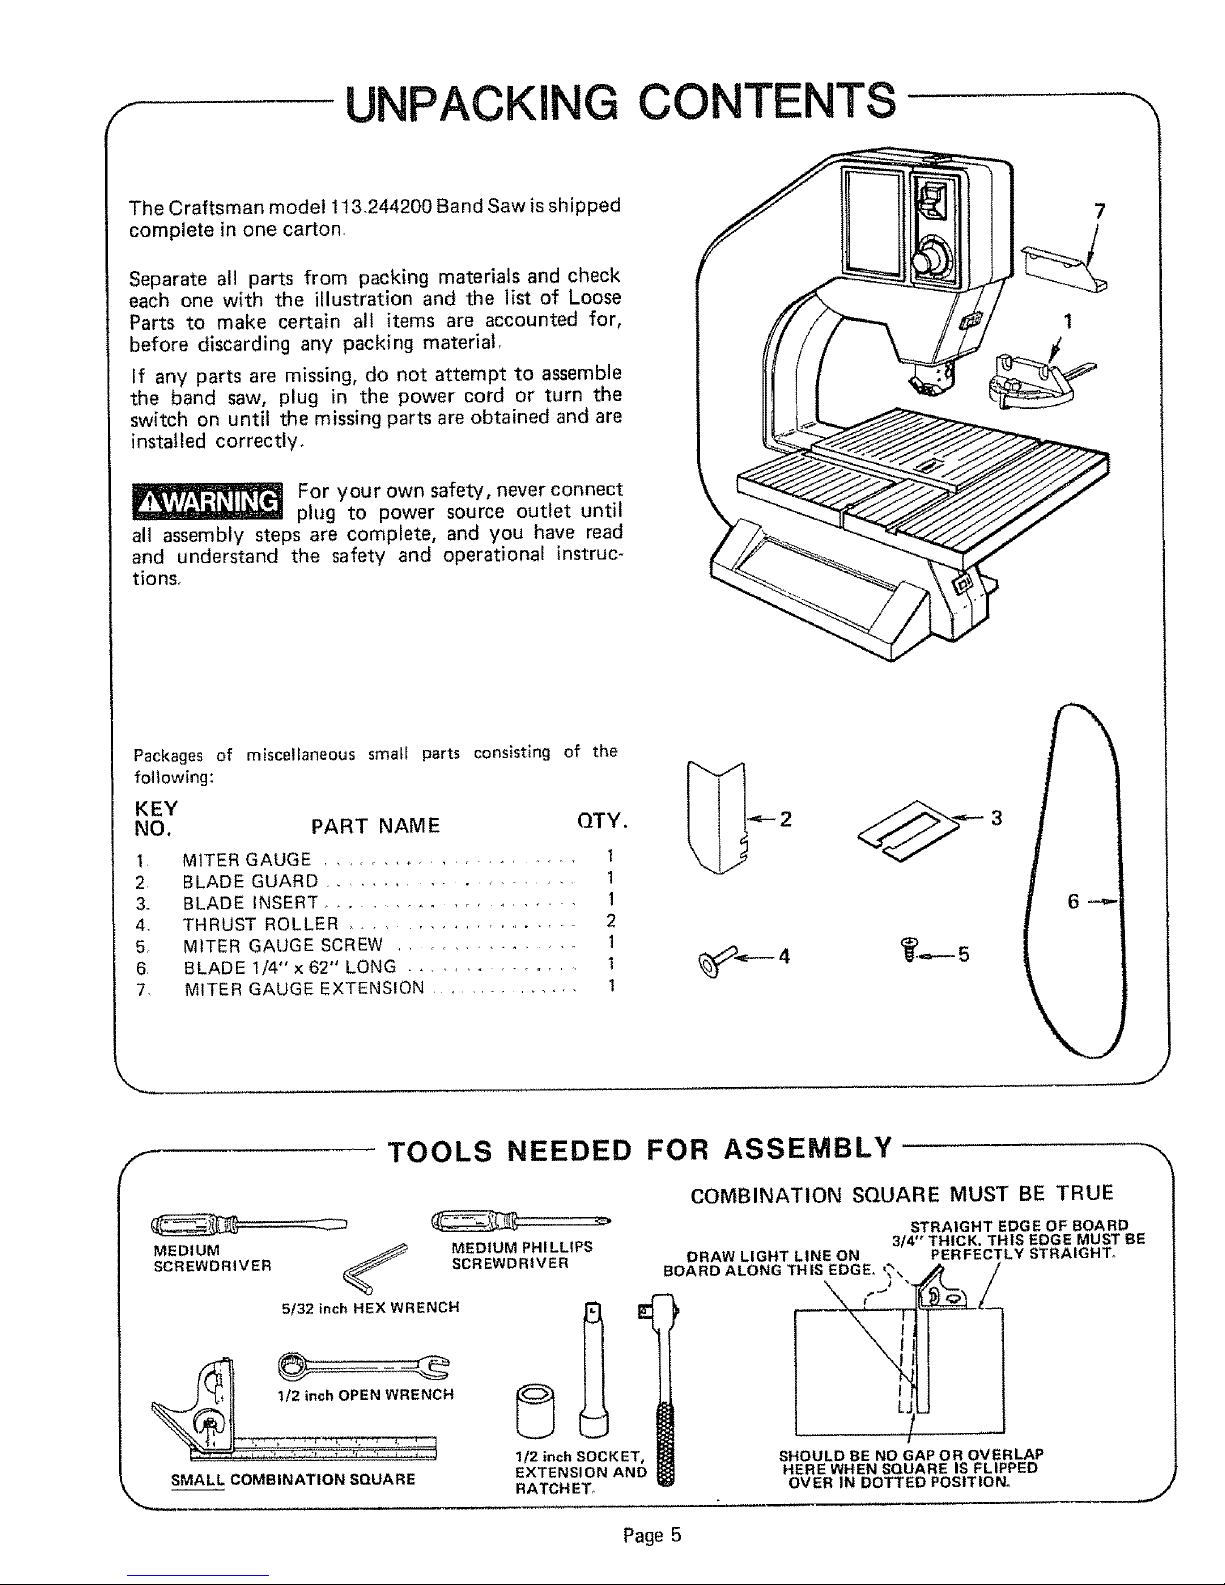
F UNPACKING CONTENTS
The Craftsman model 113,244200 Band Saw is shipped
complete in one carton,
Separate all parts from packing materials and check
each one with the illustration and the list of Loose
Parts to make certain all items are accounted for,
before discarding any packing material,
If any parts are missing, do not attempt to assemble
the band saw, plug in the power cord or turn the
switch on until the missing parts are obtained and are
installed correctly,
For your own safety, never connect
plug to power source outlet until
all assembly steps are comptete, and you have read
and understand the safety and operational instruc-
tionsr
7
Packages of miscelfaneous small parts consisting of the
following:
KEY
NO, PART NAME QTY.
1 MITER GAUGE .......... , .......... I
2 8LADE GUARD ................... 1
& BLADE INSERT ..................... 1
4. THRUST ROLLER .................... 2
5, MITER GAUGE SCREW .............. 1
6 BLADE 1/4" x 62" LONG ............... 1
7. MITER GAUGE EXTENSION .............. I
3
f
TOOLS NEEDED FOR ASSEMBLY
MEDIUM
SCREWDRIVER SCREWDRIVER
5132 inch HEX WRENCH
MEDIUM PHILLIPS
1/2 inch SOCKET,
EXTENSI ON AND
RATCHET_
COMBINATION SQUARE MUST BE TRUE
STRAIGHT EDGE OF BOARD
314" THICK. THIS EDGE MUST BE
DRAW LIGHT LINE ON PERFECTLY STRAIGHT.
BOARD ALONG THIS EDGE_?,,._, _t/_
I
L.
I
SHOULD BE NO GAPOR OVERLAP
HERE WHEN SQUARE IS FLIPPED
OVER IN DOTTED POSITION.
t2 inch OPEN WRENCH
SMALL COMBINATION SQUARE
J
Page 5
 Loading...