

Sears 113.169240,Craftsman 113.169240 Owner's Manual
r
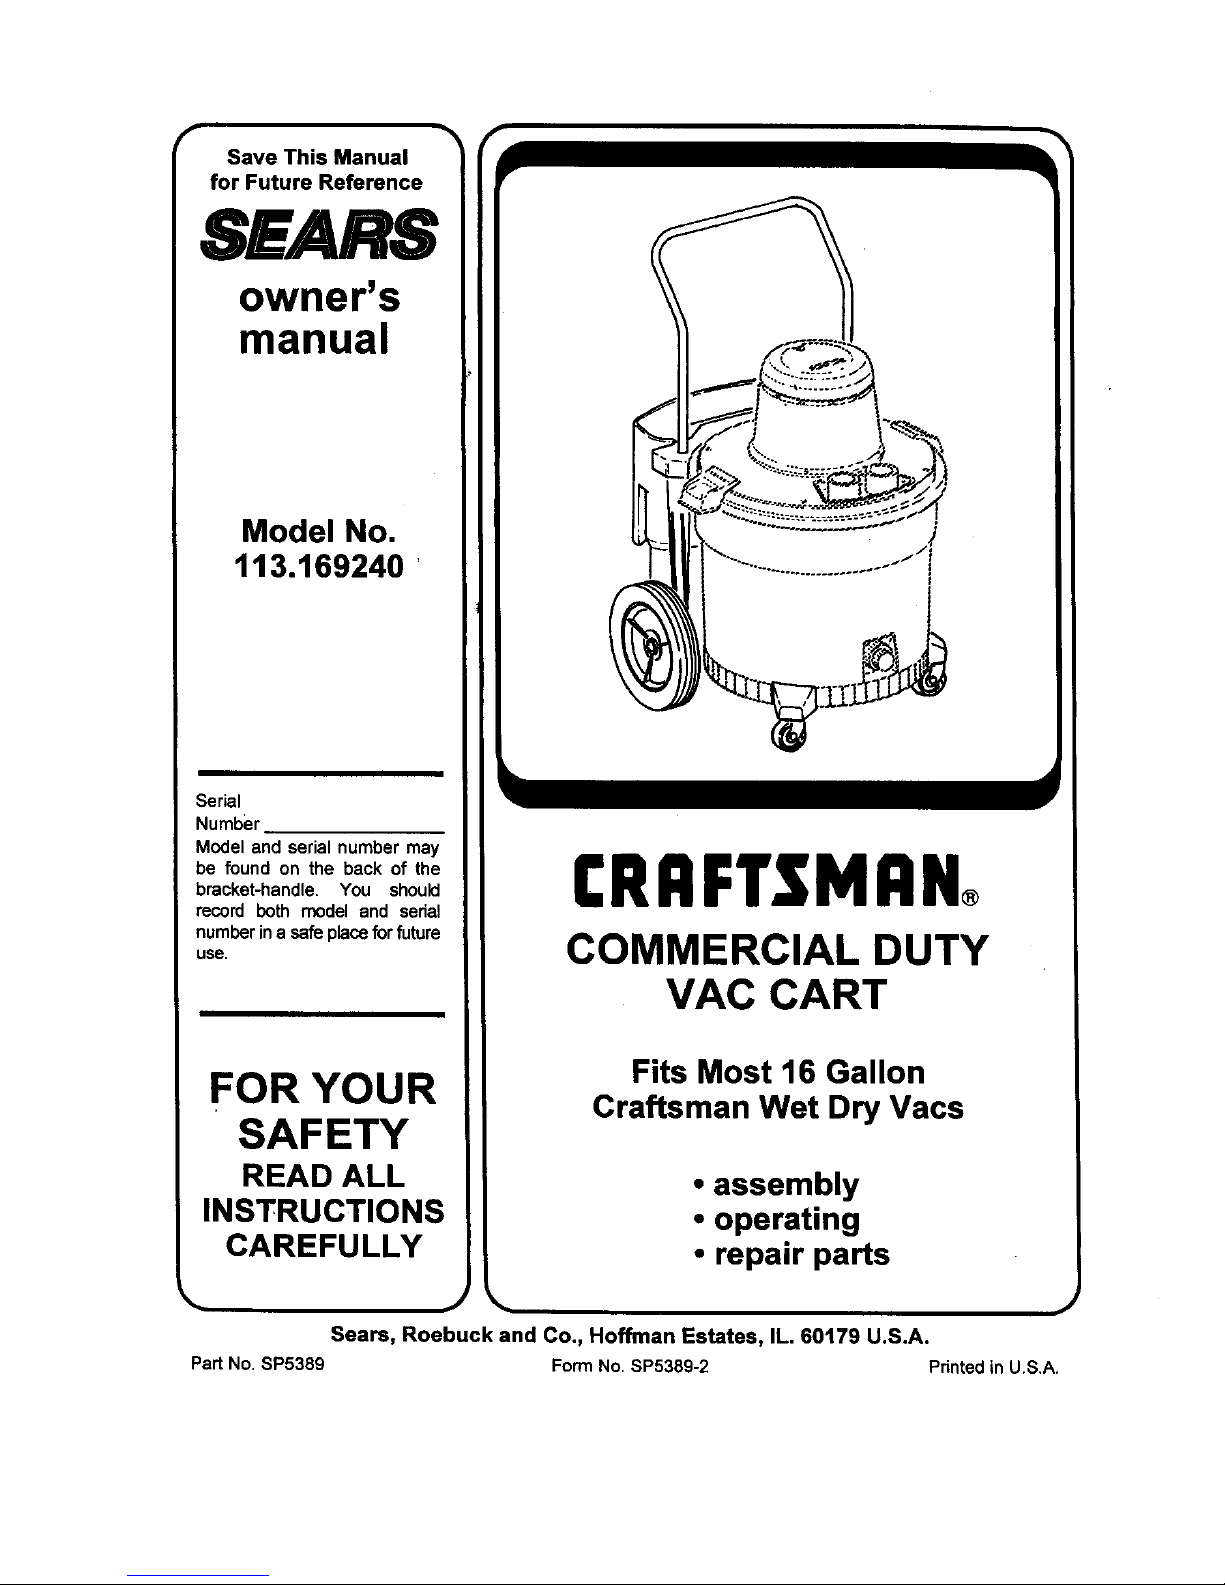
Save This Manual
for Future Reference
SEARS
owner's
manual
Model No.
113.169240 '
Serial
Number
Model and serial number may
be found on the back of the
bracket-handle. You should
record both model and serial
numberina sere placeforfuture
use.
FOR YOUR
SAFETY
READ ALL
INSTRUCTIONS
CAREFULLY
I:RRFTSMRN
COMMERCIAL DUTY
VAC CART
Fits Most 16 Gallon
Craftsman Wet Dry Vacs
• assembly
• operating
• repair parts
• _,. •
Seam, Roebuck and Co., Hoffman Estates, IL. 60179 U.S.A.
PartNo. SP5389 FormNo. SP5389-2 Printedin U.S,A.
Introduction
Thiscart isdesigned especiallyfor use with Craftsman16
gallonWetJDryVacs only. Forbest results,be sureto fol-
lowthese instructions.
Table of Contents
Section Page
Introduction.................................................................. 2
Tableof Contents ........................................................ 2
Unpackingand Checking Contents ............................. 2
Listof Loose Parts .................................................... 2
Assembly..................................................................... 3
Section Page
Tool Required ............................................................ 3
Maintenance ................................................................. 6
Castersand Wheels .................................................. 6
Frame and Handles ................................................... 6
Repair Parts ................................................................. 8
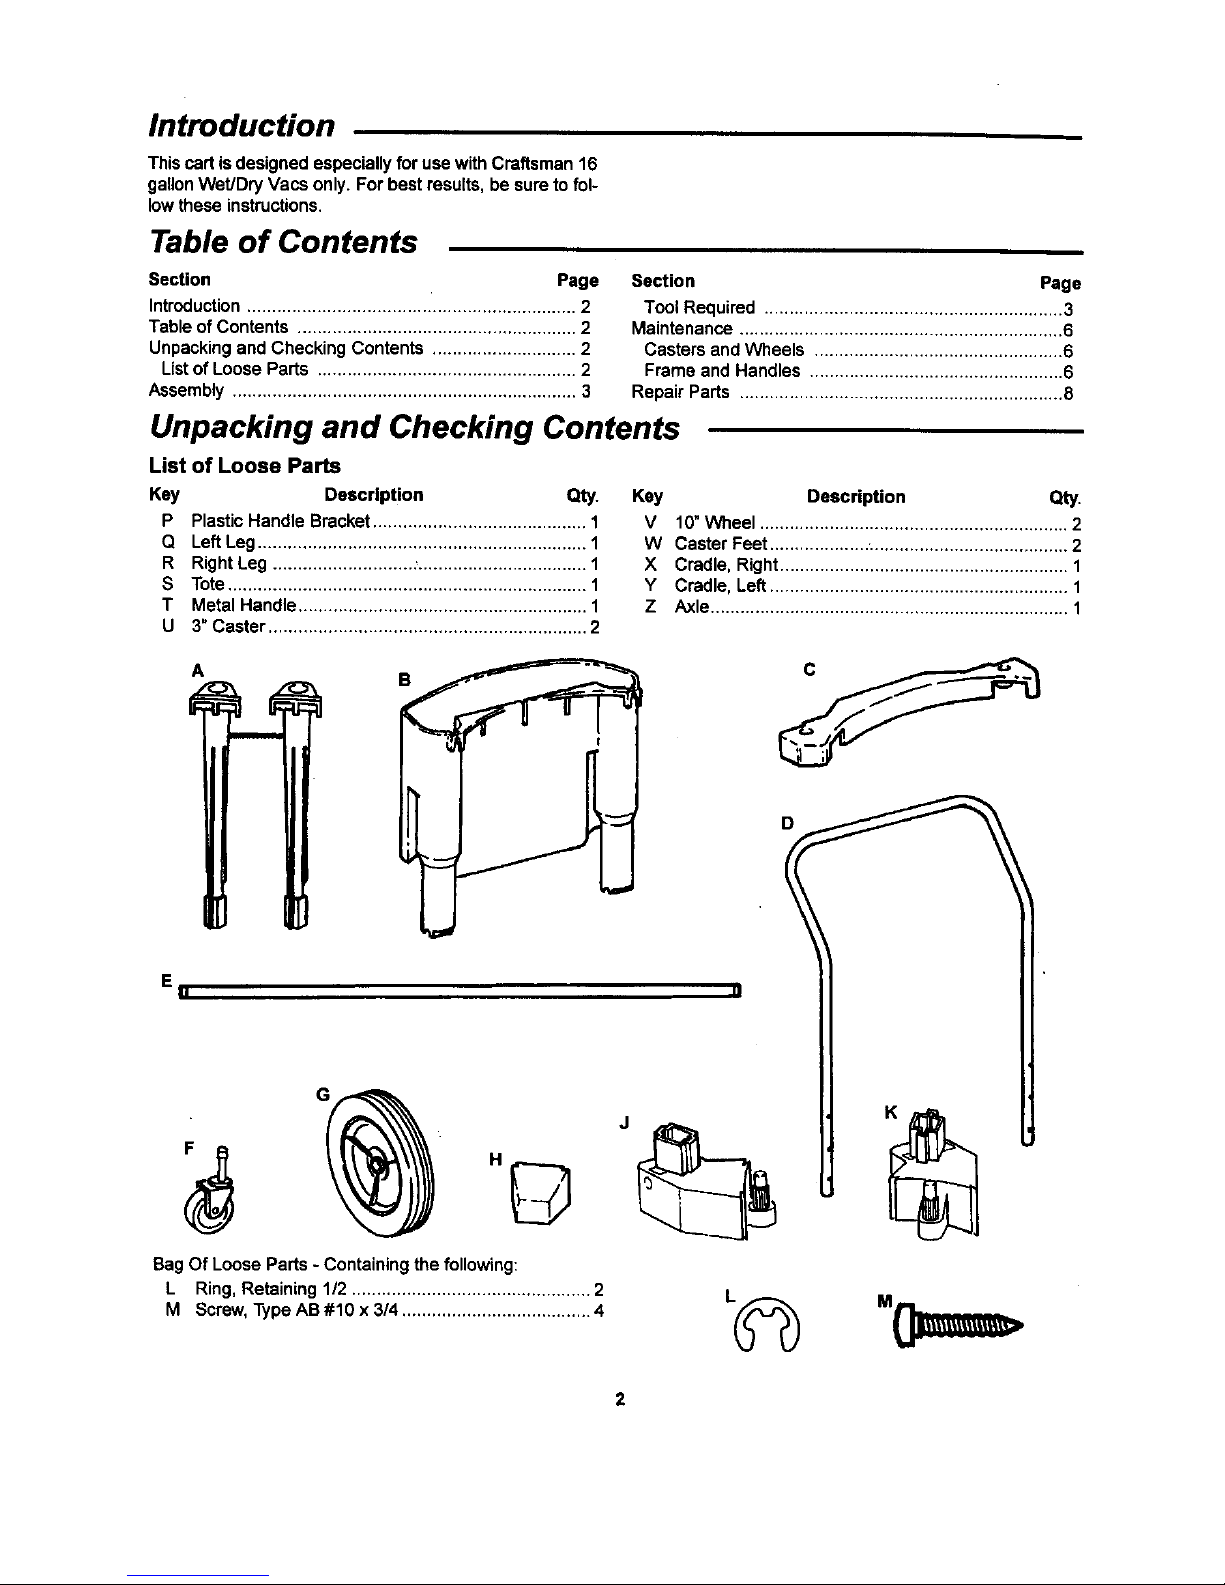
Unpacking and Checking Contents
List of Loose Parts
Key DncrlpUon Qty.
P PlasticHandle Bracket........................................... 1
Q LeftLeg.................................................................. 1
R RightLeg ............................ :.................................. 1
S Tote........................................................................ 1
T Metal Handle.......................................................... 1
U 3" Caster ................................................................ 2
Key Description Qty.
V 10"Wheel .............................................................. 2
W Caster Feet .................... ,....................................... 2
X Cradle, Right.......................................................... 1
Y Cradle, Left............................................................ 1
Z Axle........................................................................ 1
A
B
D
E
u
G
Bag Of LooseParts - Containingthe following:
L Ring, Retaining 1/2 ................................................ 2
M Screw,Type AB#10 x 3/4 ...................................... 4
"(]===,
2
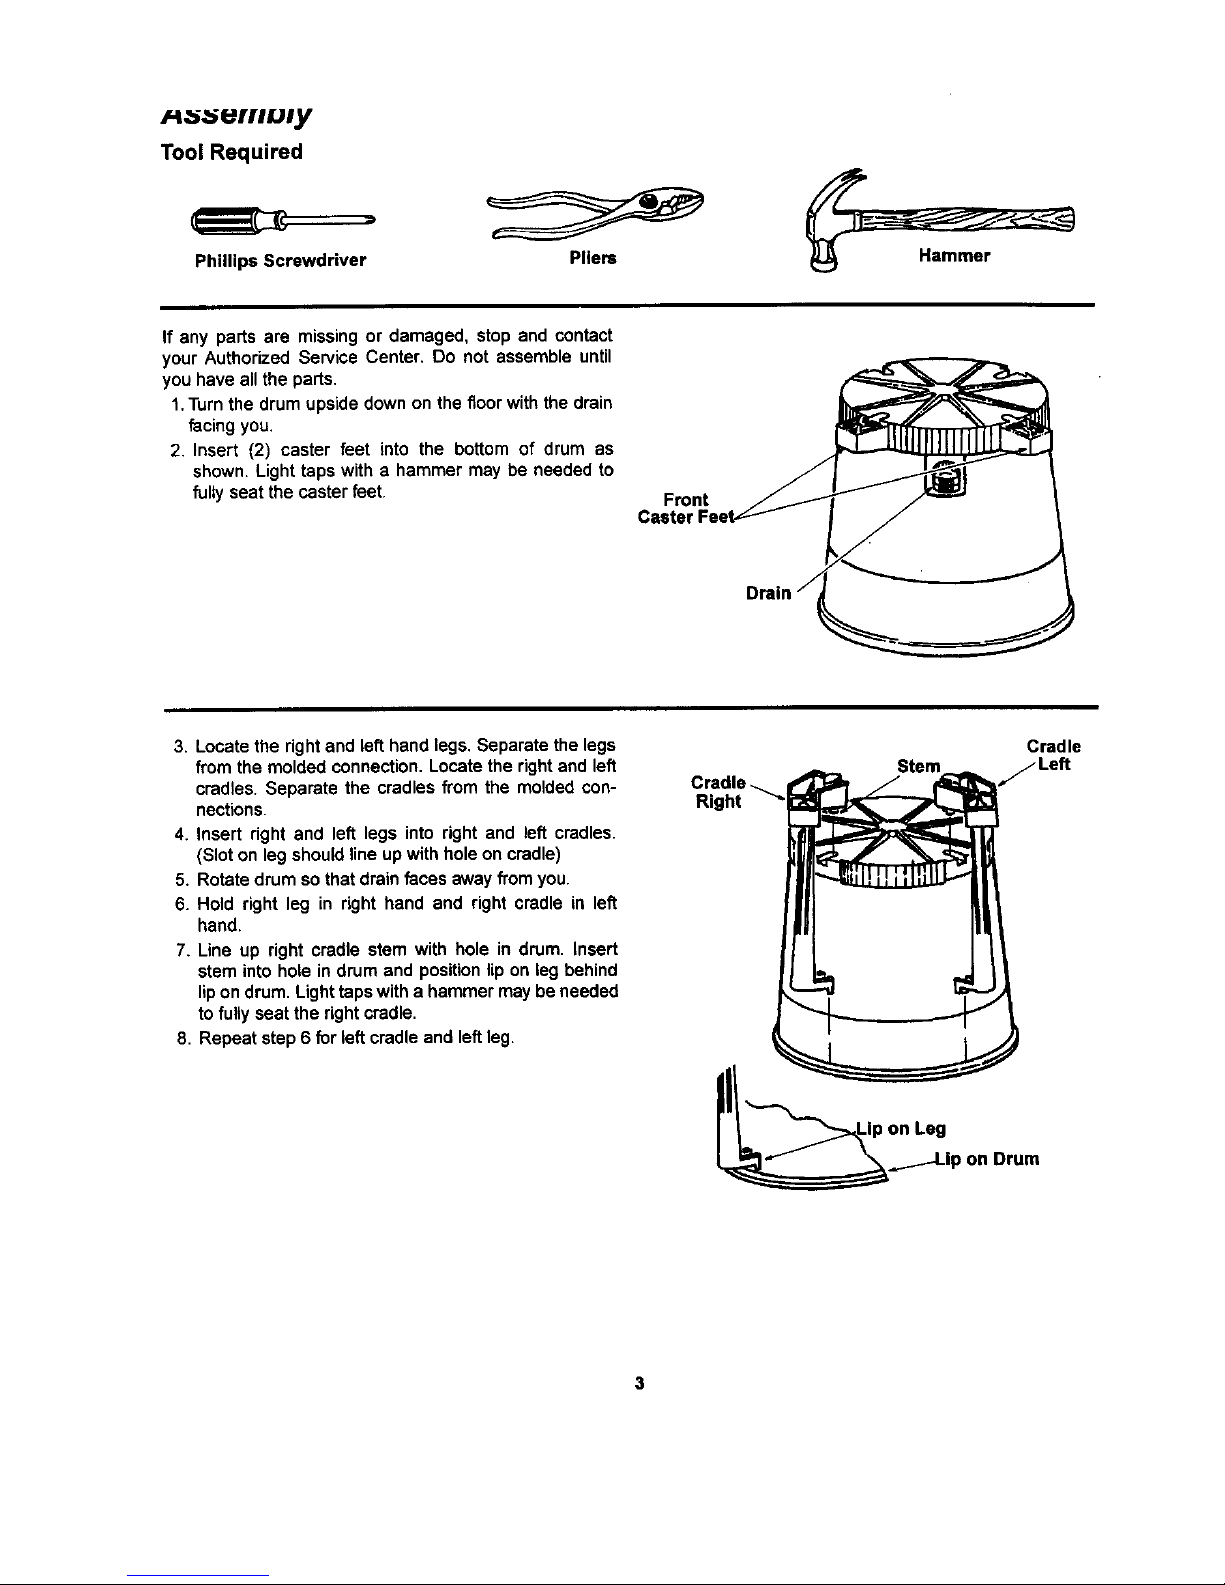
Phillips Screwdriver
Pliers
If any parts are missingor damaged, stop and contact
your Authorized Service Center, Do not assemble until
you have all the parts.
1.Turnthe drumupside down on the floorwiththe drain
facing you.
2. Insert (2) caster feet into the bottom of drum as
shown. Lighttaps with a hammer may be needed to
fullyseat the casterfeet.
Front
Caster
3. Locate the rightand lefthand legs.Separate the legs
from the molded connection.Locate the rightand left
cradles. Separate the cradles from the moldedcon-
nections.
4. Insert right and left legs into right and left cradles.
(Slot on legshouldline up with holeon cradle)
5. Rotate drum so that drain faces away from you.
6. Hold right leg in right hand and right cradle in left
hand.
7. Line up right cradle stem with hole in drum. insert
stem intohole in drum and positionlip on leg behind
lipon drum. Lighttaps with a hammer maybe needed
to fully seat the rightcradle.
8. Repeat step 6 for leftcradle and leftleg.
Stem
Cradle ._
Right _"
Cradle
S Left
on Drum
 Loading...