

Page 1
instructions for
IMPORTANT: PLEASE READ THESE INSTRUCTIONS CAREFULLY. NOTE THE SAFE OPERATIONAL REQUIREMENTS, WARNINGS & CAUTIONS. USE
THE PRODUCT CORRECTLY AND WITH CARE FOR THE PURPOSE FOR WHICH IT IS INTENDED. FAILURE TO DO SO MAY CAUSE DAMAGE AND/OR
PERSONAL INJURY AND WILL INVALIDATE THE WARRANTY. KEEP THESE INSTRUCTIONS SAFE FOR FUTURE USE.
rear main oil seal remover/installer land rover 2.25
model no: vse3038
thank you for purchasing a sealey product. manufactured to a high standard, this product will, if used according to these
instructions, and properly maintained, give you years of trouble free performance.
refer to
instructions
Wear eye
protection
Wear protective
gloves
Wear safety
footwear
Wear protective
clothing
1. safety
WarninG! ensure Health and safety, local authority and general workshop practice regulations are adhered to when using tool.
9 maintain tools in good and clean condition for best and safest performance.
9 ensure that a vehicle which has been jacked up is adequately supported with axle stands.
9 Wear approved eye protection. A full range of personal safety equipment is available from your sealey stockist.
9 Wear suitable clothing to avoid snagging. do not wear jewellery and tie back long hair.
9 Account for all tools, locking bolts, pins and parts being used and do not leave them in or near the engine.
8 do not use tools if damaged.
imPortant: these instructions are provided as a guide only. Always refer to the vehicle manufacturers service instructions, or a
proprietary manual, to establish the current procedure and data.
2. introduction
crankshaft rear seal remover/installer. time saving tool, supplied with pin punch and self tapping screws to easily remove the old seal. unique
design ensures the new seal is pushed in squarely and correctly. Fits all petrol and diesel 2.25 engines with ve bearing crankshaft.
3. sPecification
model no .................................................................Vse3038
Applications ..............................land rover series iii (80-85)
............................................land rover defender 90 (83-85)
..........................................land rover defender 110 (83-85)
4. oPeration
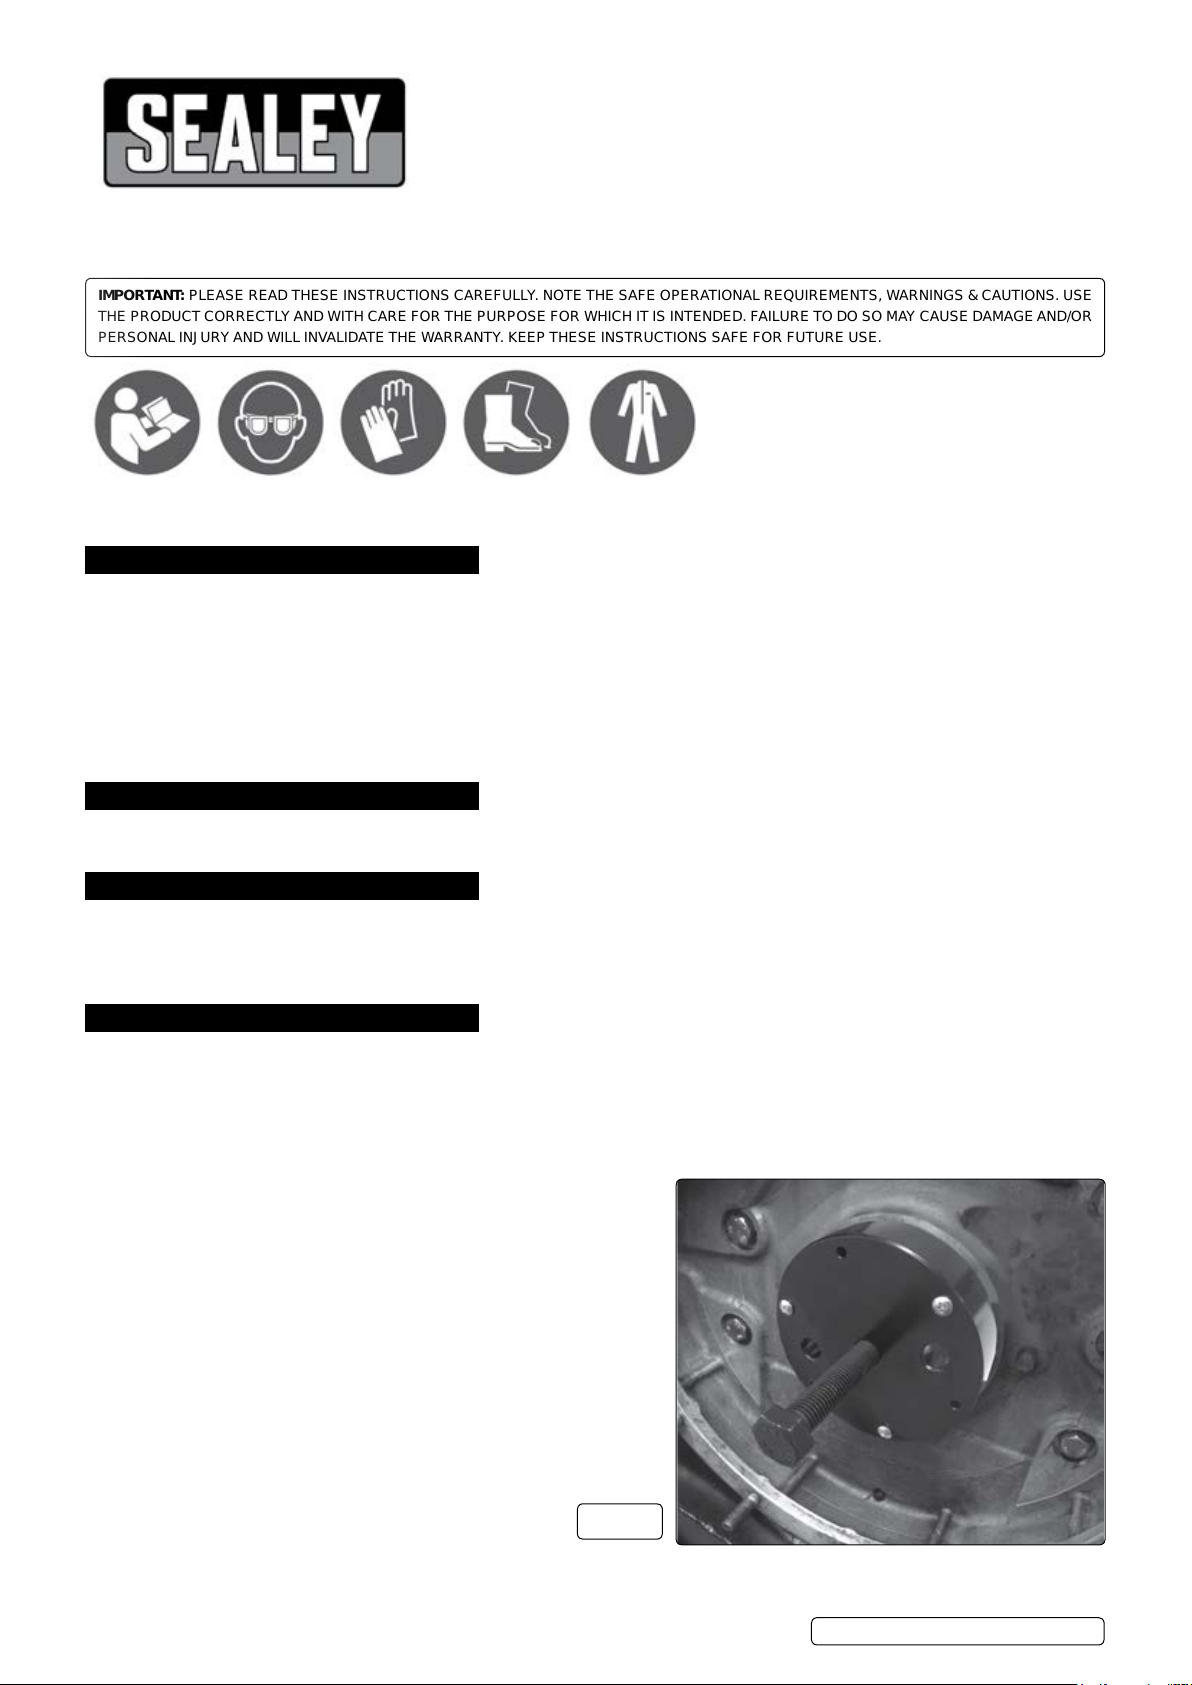
4.1. Removing the rear crankshaft oil seal. g.1.
4.1.1. Ensure the central forcing screw is tted but does not protrude past the inner face of the body of the VSE3038.
4.1.2. Align the tool on the crankshaft and secure it using the ywheel xing bolts, hand-tighten only.
4.1.3. using the punch provided, via the holes in the outer perimeter of the tool, strike the punch with a hammer enough to puncture the
seal to provide a pilot hole for the self-tapping screws. Three evenly spaced holes is normally sufcient.
4.1.4. fit a self-tapping screw into each of the pilot holes and tighten them one and a half turns.
note: do not over tighten as this may cause the screws to break.
4.1.5. tighten the central forcing screw hand-tight only and remove
the ywheel xing bolts used to secure the VSE3038 to the
crankshaft.
4.1.6. tighten the central forcing screw to remove the oil seal from its
housing.
4.1.7. remove the self-tapping screws and discard the oil seal.
g.1
© Jack sealey limited
Original Language Version
Vse3038 | issue 1 19/01/17
Page 2
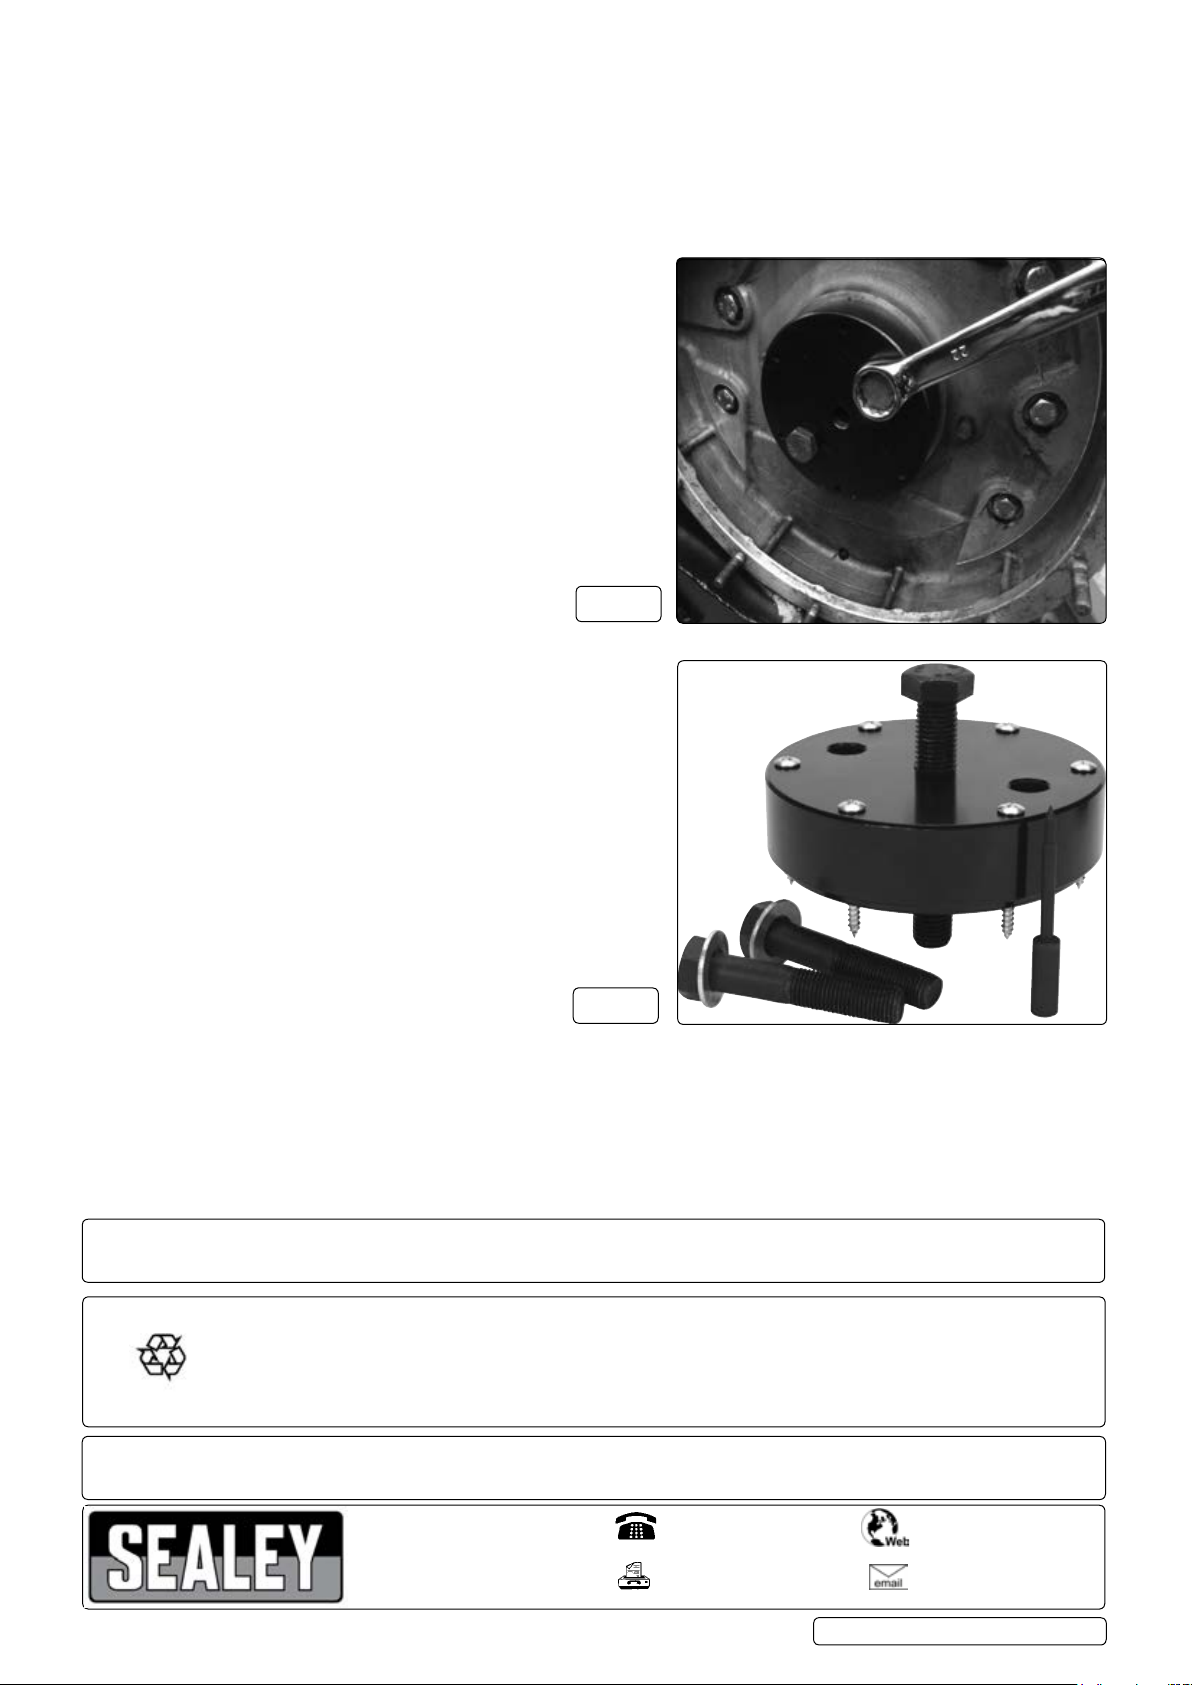
4.2. Retting the rear crankshaft oil seal. g.2.
4.2.1. fit the new oil seal over the end of the crankshaft.
note: the central forcing screw is not required for installation.
4.2.2. Place the VSE3038 against the seal, using the two bolts provided, secure the tool to the crankshaft boss and hand-tighten the xing
bolts.
4.2.3. using a suitable wrench, lightly and evenly tighten the two bolts to push the new seal into the housing until the machined lip of the
Vse3038 comes into contact with the housing, the lip is provided to ensure the new seal is correctly positioned.
note: Always ensure the central forcing screw and bolts are sufciently
lubricated before use.
g.2
g.3
Parts support is available for this product. to obtain a parts listing and/or diagram,
please log on to www.sealey.co.uk, email sales@sealey.co.uk or telephone 01284 757500.
environmental Protection
recycle unwanted materials instead of disposing of them as waste. All tools, accessories and packaging should be
sorted, taken to a recycling centre and disposed of in a manner which is compatible with the environment.
When the product becomes completely unserviceable and requires disposal, drain off any fluids (if applicable)
into approved containers and dispose of the product and the fluids according to local regulations.
NOTE: It is our policy to continually improve products and as such we reserve the right to alter data, specications and component parts without prior notice.
imPortant: no liability is accepted for incorrect use of this product.
Warranty: Guarantee is 12 months from purchase date, proof of which will be required for any claim.
sole uK distributor, sealey Group.
Kempson Way, suffolk Business Park,
Bury st. edmunds, suffolk.
iP32 7Ar
01284 757500
01284 703534
www.sealey.co.uk
sales@sealey.co.uk
© Jack sealey limited
Original Language Version
Vse3038 | issue 1 19/01/17
 Loading...