

Sealey SMS2008 Quick Start Manual
DRILL BIT SHARPENER- BENCH MOUNTING 80W
IMPORTANT: PLEASE READ THESE INSTRUCTIONS CAREFULLY. NOTE THE SAFE OPERATIONAL REQUIREMENTS, WARNINGS & CAUTIONS. USE
THE PRODUCT CORRECTLY AND WITH CARE FOR THE PURPOSE FOR WHICH IT IS INTENDED. FAILURE TO DO SO MAY CAUSE DAMAGE AND/OR
PERSONAL INJURY AND WILL INVALIDATE THE WARRANTY. KEEP THESE INSTRUCTIONS SAFE FOR FUTURE USE.
MODEL NO: SMS2008
Thank you for purchasing a Sealey product. Manufactured to a high standard, this product will, if used according to these
instructions, and properly maintained, give you years of trouble free performance.
Refer to
instructions
Wear eye
protection
Wear protective
gloves
Wear ear
protection
1. SAFETY
1.1. ELECTRICAL SAFETY
WARNING! It is the user’s responsibility to check the following:
Check all electrical equipment and appliances to ensure that they are safe before using. Inspect power supply leads, plugs and
all electrical connections for wear and damage. Sealey recommend that an RCD (Residual Current Device) is used with all electrical
products. You may obtain an RCD by contacting your local Sealey stockist.
If used in the course of business duties, it must be maintained in a safe condition and routinely PAT (Portable Appliance Test) tested.
Electrical safety information, it is important that the following information is read and understood.
9 Ensure that the insulation on all cables and on the appliance is safe before connecting it to the power supply.
9 regularly inspect power supply cables and plugs for wear or damage and check all connections to ensure that they are secure.
9 Ensure that the voltage rating on the appliance suits the power supply to be used and that the plug is tted with the correct fuse - see
fuse rating in these instructions.
8 DO NOT pull or carry the appliance by the power cable.
8 DO NOT pull the plug from the socket by the cable.
8 DO NOT use worn or damaged cables, plugs or connectors. Ensure that any faulty item is repaired or replaced immediately by a
qualied electrician.
9 This product is tted with a BS1363/A 13 Amp 3 pin plug.
If the cable or plug is damaged during use, switch off the electricity supply and remove from use.
Ensure that repairs are carried out by a qualied electrician.
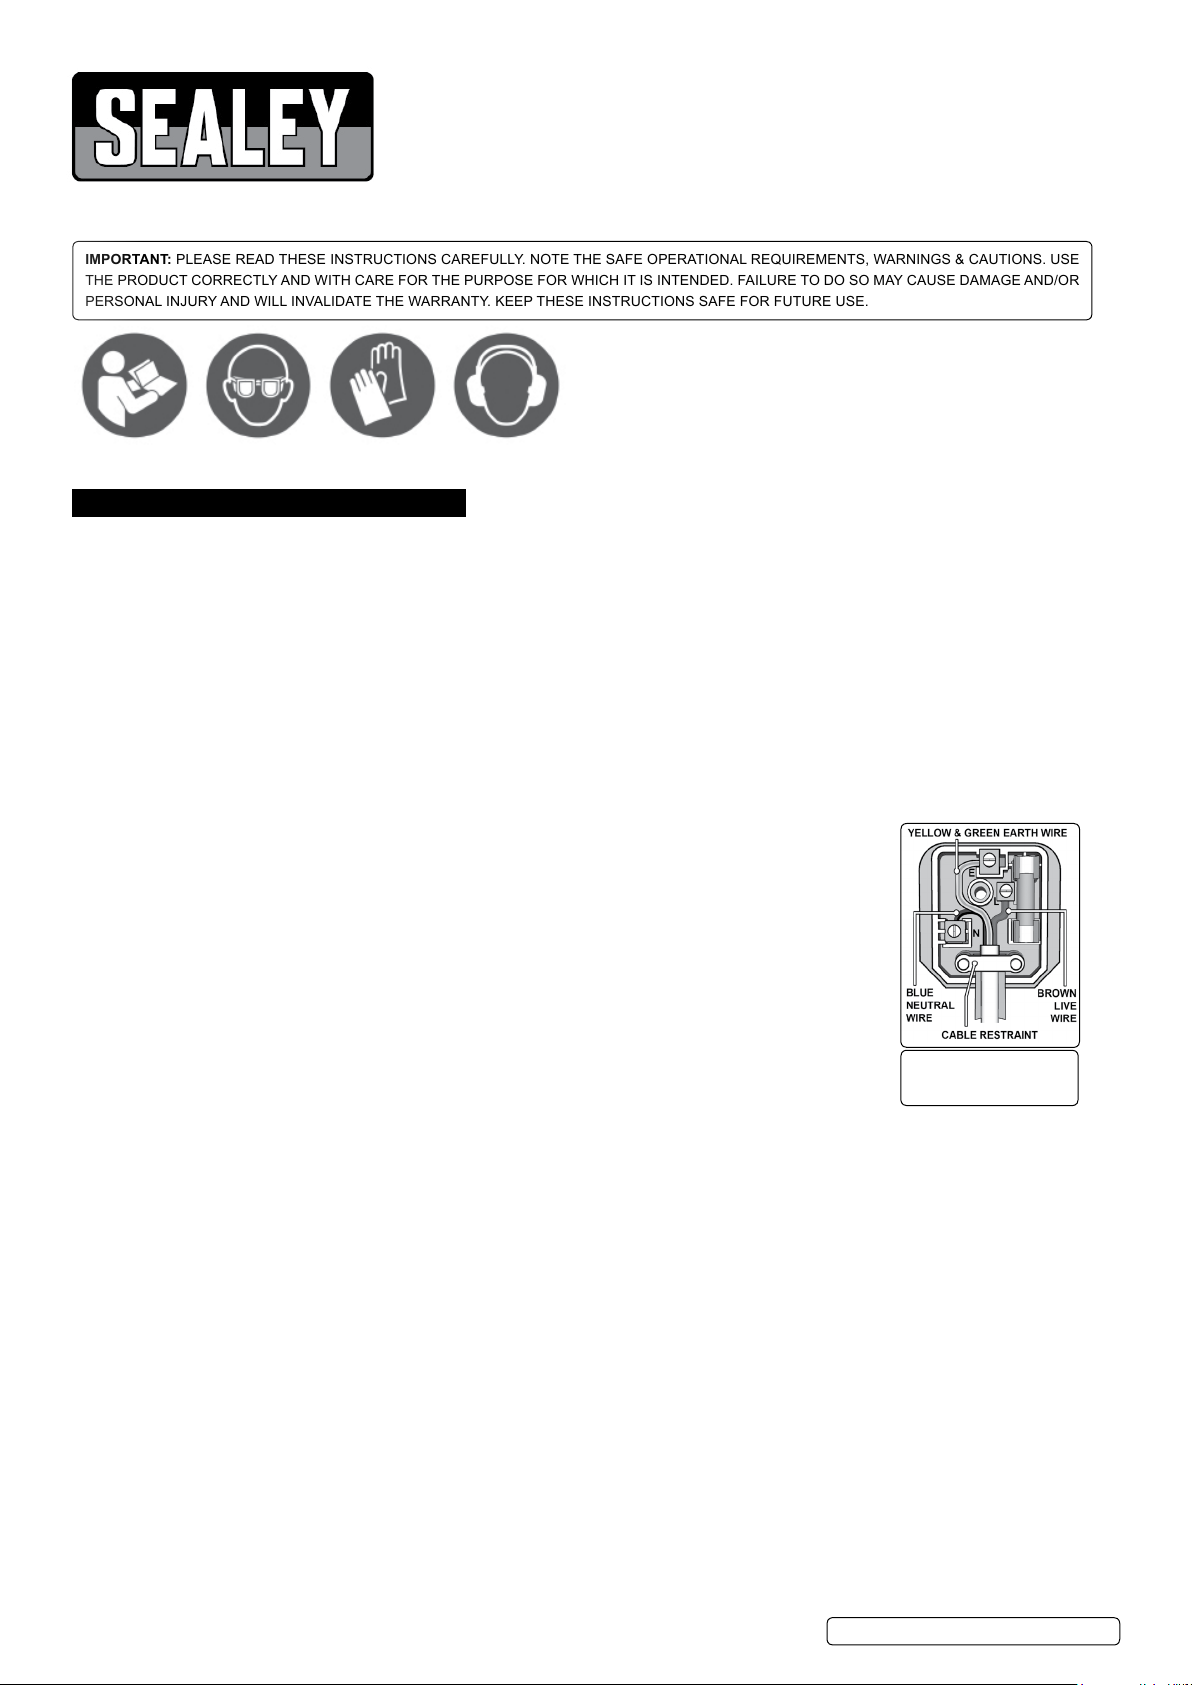
Replace a damaged plug with a BS1363/A 13 Amp 3 pin plug. If in doubt contact a qualied electrician.
a) Connect the GREEN/YELLOW earth wire to the earth terminal ‘E’.
b) Connect the BROWN live wire to the live terminal ‘L’.
c) Connect the BLUE neutral wire to the neutral terminal ‘N’.
Ensure that the cable outer sheath extends inside the cable restraint and that the restraint is tight.
Sealey recommend that repairs are carried out by a qualied electrician.
1.2. GENERAL SAFETY
9 Disconnect the sharpener from the mains power before changing accessories, servicing or performing
any maintenance.
9 Maintain sharpener and stone in good condition. Check moving parts and alignment. If necessary use
authorised service agent.
9 Replace or repair damaged parts. Use genuine parts only. Unapproved parts may be dangerous and will invalidate the warranty.
9 The grinding wheel or stone must only be changed by persons holding an appropriate grinding wheel certificate.
9 Wear approved safety goggles, ear defenders and safety gloves.
9 Remove ill fitting clothing. Remove ties, watches, rings, and other loose jewellery, and contain long hair.
9 Use sharpener in a suitable work area, keep area clean, tidy and free from unrelated materials, and ensure adequate lighting.
9 Maintain correct balance and footing. DO NOT over-reach and ensure the floor is not slippery. Wear non slip shoes.
9 Keep non essential persons away from the working area.
8 DO NOT operate the sharpener if any parts are missing or the sharpener is damaged.
8 DO NOT use the sharpener for a task it was not designed to perform.
8 DO NOT operate sharpener where there are flammable liquids or gasses.
8 DO NOT get the sharpener wet or use in damp or wet locations.
8 DO NOT switch the sharpener on whilst the stone is in contact with the workpiece.
8 DO NOT touch the workpiece immediately after sharpening as it will be very hot.
8 DO NOT try to cool the sharpening wheel with water or other lubricants.
8 DO NOT touch the sharpening disc whilst operating, or whilst plugged into the mains power.
8 DO NOT leave the sharpener running unattended.
8 DO NOT operate the sharpener when you are tired or under the influence of alcohol, drugs or intoxicating medication.
8 DO NOT attach modules if the wheel is still moving and DO NOT use without a module in place.
9 Use for a maximum of 15 minutes continuous use.
9 When not in use switch sharpener off, remove plug from power supply.
Recommended fuse rating
5 Amp
© Jack Sealey Limited
Original Language Version
SMS2008 Issue:5 (2) 11/02/19
2. INTRODUCTION
Fast, simple and effective way to sharpen your drill bits. Gives a perfect
angle/sharpened head to make drilling with your bit easier. Suitable for up to
118° HSS Titanium, Cobalt, Carbon Steel and Split Point bits in
range Ø3-13mm.
3. SPECIFICATION
Model No: ............................................................... SMS2008
Motor Power: ......................................................... 80W-230V
Free Speed: ............................................................. 4200rpm
Minimum Drill Diameter: .............................................. Ø3mm
Maximum Drill Diameter: ........................................... Ø13mm
Weight ......................................................................... 2.73kg
4. OPERATION
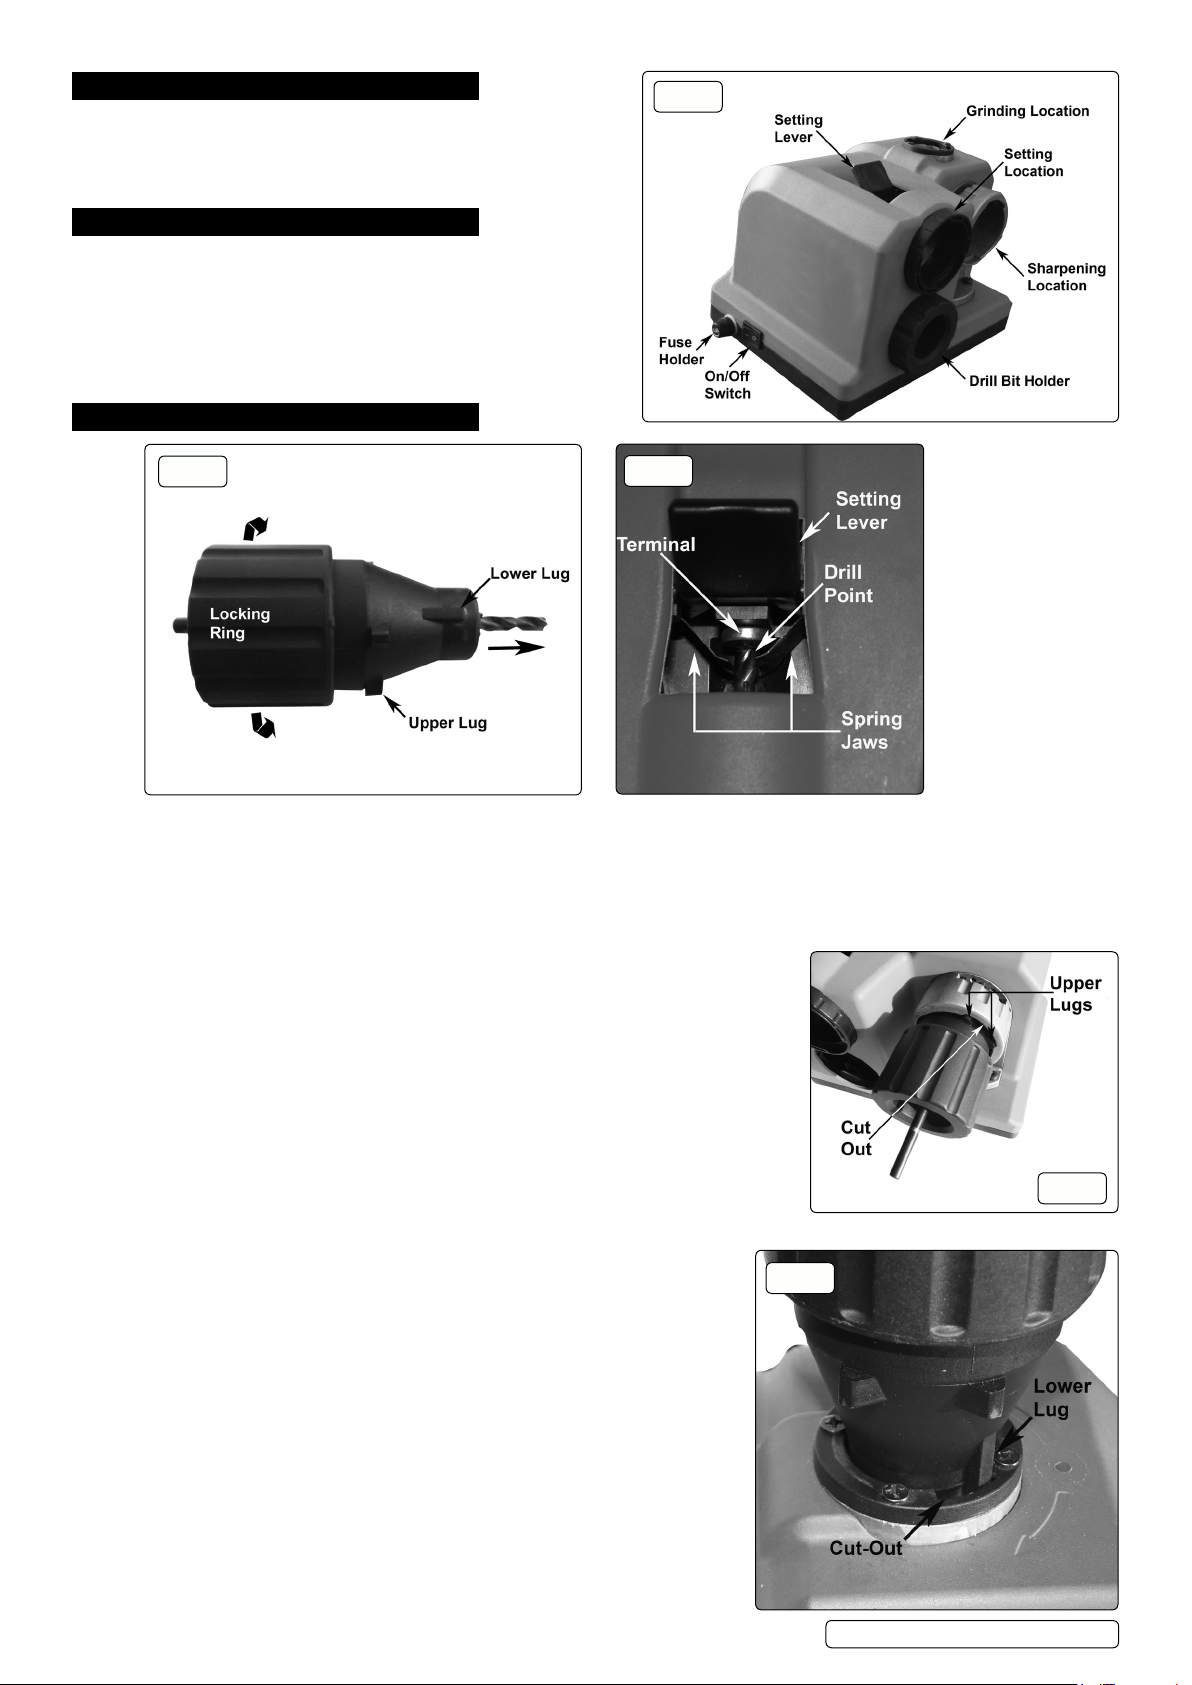
g.1
g.2
4.1. SETTING
4.1.1. Remove the drill bit holder from its location.
4.1.2. Loosen the locking ring (g.2) and insert the drill bit; tighten the locking ring lightly.
4.1.3. Lock the drill bit holder into the Setting Location whilst holding the setting lever (which controls the spring jaws) open, allowing the drill
bit to be pushed back by the terminal (see g.3). Ensure that the drill bit is inserted with the cutting edge of a ute vertically aligned, as
in g.2.
4.1.4. Tighten the locking ring fully before removing the drill bit holder from the Setting Location.
4.2. SHARPENING
4.2.1. The settings achieved in section 4.1. are transferred to the sharpener by moving the
drill bit holder, complete with drill bit, to the Sharpening Location.
4.2.2. Switch the machine on by means of the on/off switch.
4.2.3. Insert the drill bit holder into the Sharpening Location ensuring that the upper lugs on
the holder body are engaged with the cut-outs in the collar (g.4).
4.2.4. Sharpen the drill bit by rocking the collar back and forth until the sound from the wheel
diminishes.
4.2.5. Remove the drill bit holder, rotate through 180° and repeat step 4.2.4.
4.2.6. If an arrow head point has not been achieved, turn the drill bit through 90° in the holder
and repeat from 4.1.2.
4.3. GRINDING
4.3.1. Switch the machine on.
4.3.2. Insert the drill bit holder into the Grinding Location, ensuring that the lower lugs
engage in the cut-outs (see g.5).
4.3.3. Work the drill bit holder back and forth until the grinding sound diminishes.
4.3.4. Remove the drill bit holder and re-insert having turned through 180°.
4.3.5. Repeat step 4.3.3. When complete, the drill bit will be sharpened and ready for use.
g.3
g.4
g.5
© Jack Sealey Limited
Original Language Version
SMS2008 Issue:5 (2) 11/02/19
 Loading...