

Page 1
INSTRUCTIONS FOR:
Masking PaPer DisPenser
MODEL NO: Mk64
Thank you for purchasing a Sealey Product. Manufactured to a high standard this product will, if used according to these instructions and properly
maintained, give you years of trouble free performance.
IMPORTANT: PLease reaD THese insTrUCTiOns CareFULLY. nOTe THe saFe OPeraTiOnaL reQUireMenTs, Warnings anD CaUTiOns.
Use THis PrODUCT COrreCTLY anD WiTH Care FOr THe PUrPOse FOr WHiCH iT is inTenDeD. FaiLUre TO DO sO MaY CaUse DaMage
anD/Or PersOnaL inJUrY anD WiLL inVaLiDaTe THe WarranTY. PLease keeP insTrUCTiOns saFe FOr FUTUre Use.
1. saFeTY insTrUCTiOns
Ensure the dispenser is on a flat, level floor before loading or
using the dispenser as a step-up working platform.
Be aware that the serrated paper cutting blade is sharp - handle
with extreme care.
DO nOT use the dispenser for any purpose other than that for
which it was designed.
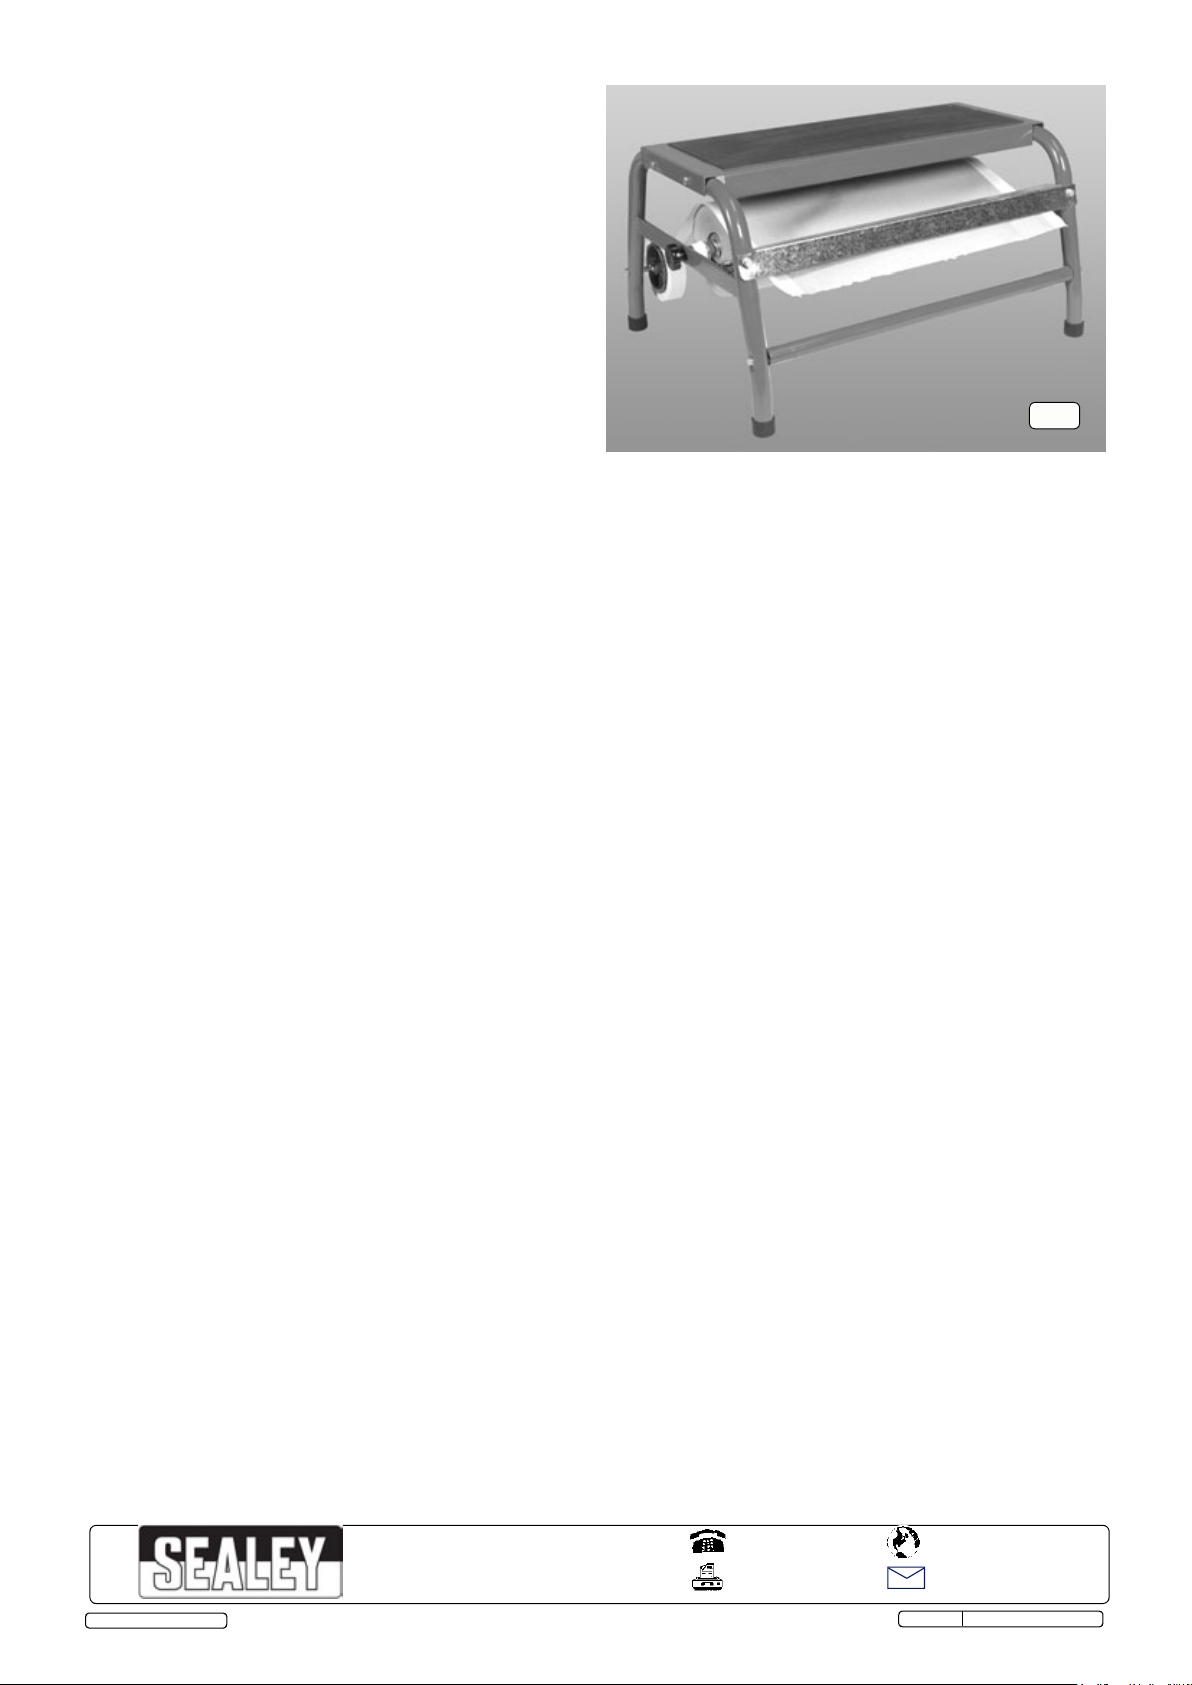
2. inTrODUCTiOn
• Features a step-up working platform.
• Automatically applies adhesive tape to edges of masking paper.
• Single roll dispenser accepts rolls up to 450mm.
• Model No. MK64
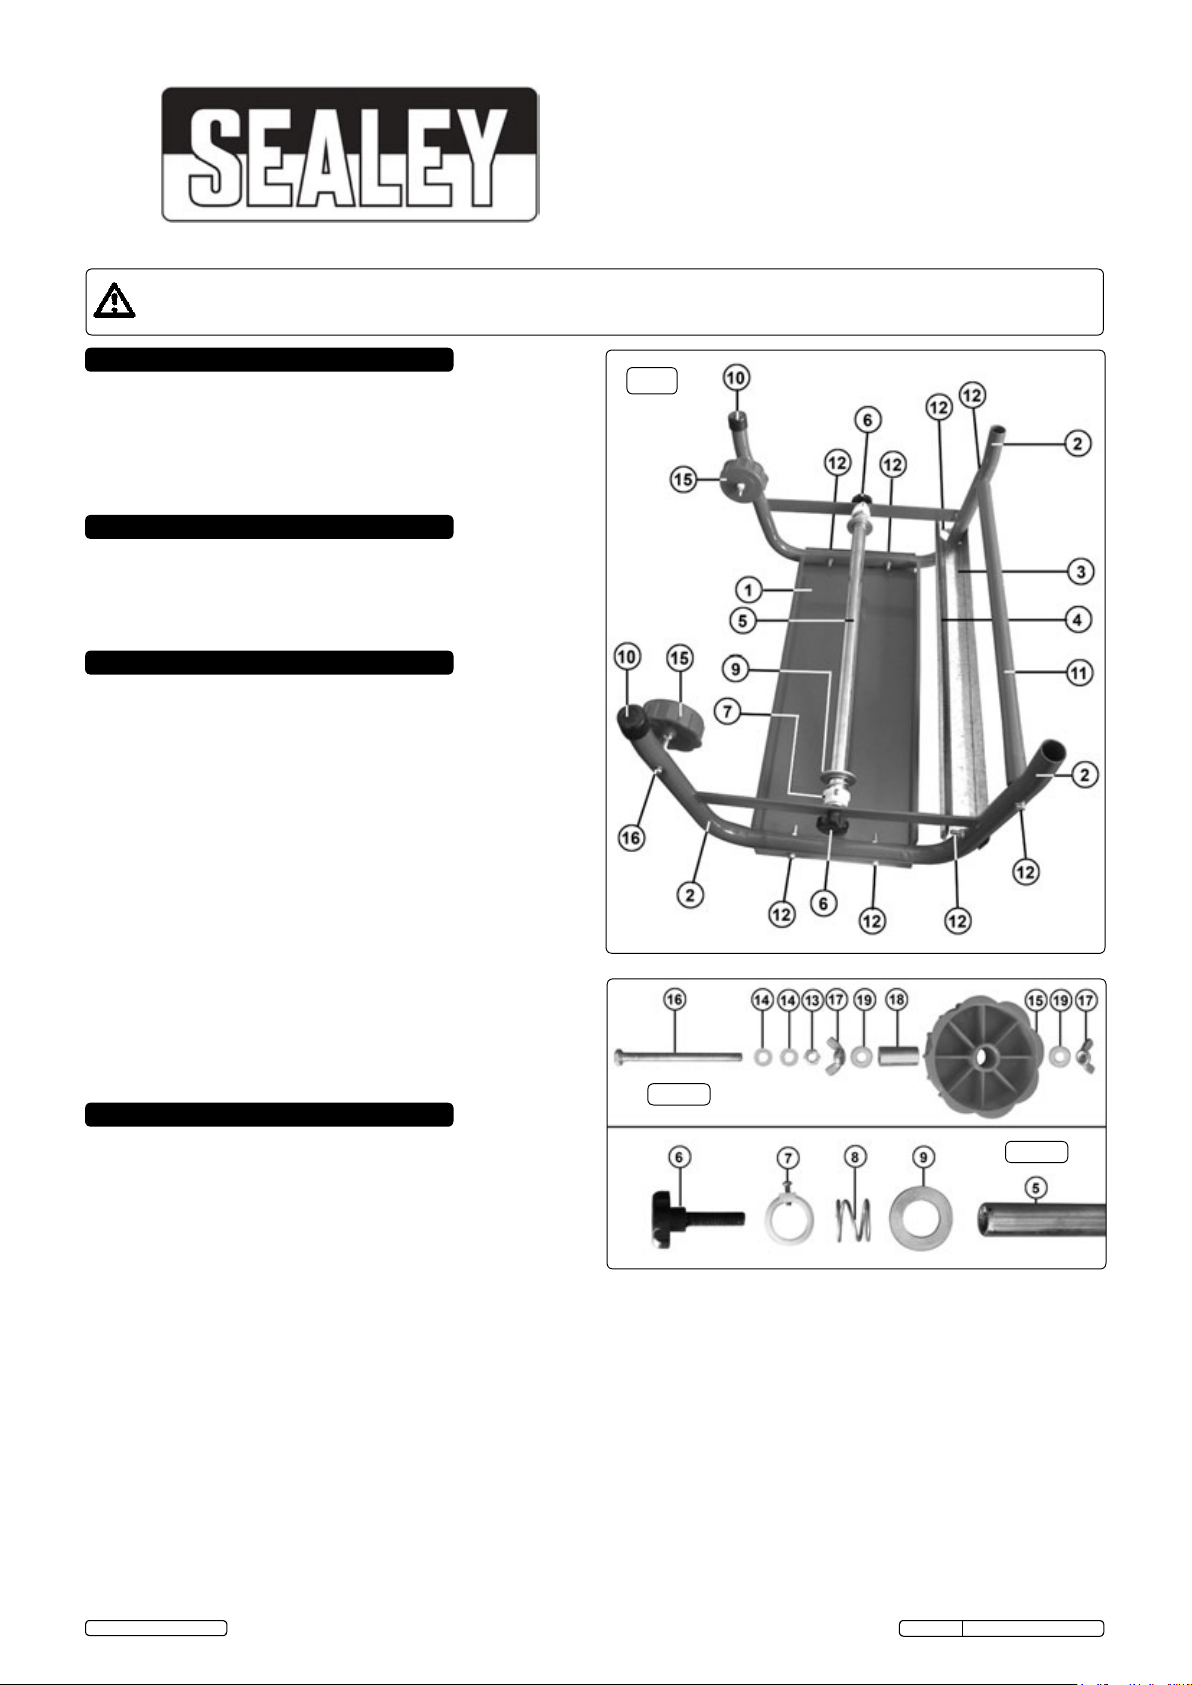
3. COnTenTs
ParT .............DesCriPTiOn .............................................nO OFF
1 .................Top Platform .......................................................1
2 .................End Frames ........................................................2
3 .................Cutting Bar .........................................................1
4 .................Paper Spring ......................................................1
5 .................Paper mounting tube ..........................................1
6 .................Threaded Fixing Knobs ......................................2
7 .................Nylon Stops ........................................................2
8 .................Springs ...............................................................2
9 .................Large washer (Ext.Ø44mm) ...............................2
10 ................Rubber Feet .......................................................4
11 ................Cross Brace Tube ..............................................1
12 ................Frame Fixing Bolts (M6 x 40mm) .......................8
13 ................Frame Fixing Nuts (M6) ....................................6
14 ................Frame Fixing Washers (M6, ext.Ø12mm) .........18
15 ................Masking Tape Reels ...........................................2
16 ................Reel Fixing Bolts (M6 x 80mm) ..........................2
17 ................Butterfly Nuts (M6) .............................................4
18 ................Tubular Sleeves .................................................2
19 ................Sleeve washers (M6, ext.Ø14mm) .....................4
4. asseMBLY & Use
4.1. Lay the Top Platform (1) onto a protected surface with the
rubber pad, face downwards.
4.2. Place an end frame (2) upside down, at one end of the
platform and align the holes in the frame with the holes in the
upturned platform edge. Drop a washer (14) onto each of two
M6 x 40mm bolts (12) and insert the bolts through the aligned
holes from the outside of the top platform. Slide another
washer (14) over the end of each bolt, followed by an M6 nut
(13) and do the nut up, hand tight only at this stage.
4.3. Fix the second end frame (2) to the other end of the platform in
the same way, ensuring that the holes in each frame for
mounting the cutting bar (3) are both on the same side of the
platform.
4.4. If not already in place, attach the paper spring (4) to the
non-serrated edge of the cutting bar (3) as indicated in fig.1.
Attach the cutting bar (3) to the end frames using two bolts (12),
four washers (14) and two nuts (13).
4.5. Now attach the cross brace tube (11) to the same side of the end
frames, directly above the cutting bar, as shown in fig.1. Drop a
washer (14) onto each of two M6 x 40mm bolts (12) and insert
the bolts through the end frames and screw them fully into the
threaded inserts in the ends of the cross brace tube.
4.6. Now fully tighten all of the fixings so that the structure
becomes rigid. Push the rubber feet (10) onto the end frames.
© Jack Sealey Limited
Original Language Version
g.1
g.2a
g.2b
4.7. To mount the masking tape reels (see fig.2a), firstly insert the
two reel fixing bolts (16) through the end frames as shown in
fig.1. Use a wash er (14) on either side of the frame tube and
firmly fix both bolts using an M6 nut (13).
4.8. Screw a butterfly nut (17), the wrong way round, onto each bolt
and wind it down close to the frame. Slide a washer (19) onto
each bolt, followed by a tubular sleeve (18). Slide a plastic reel
(15) onto each sleeve with the open side of the moulding facing
outwards. Retain the assembly by using another washer (19)
and a butterfly nut (17) on each side.
4.9. To mount a roll of paper, first insert the paper mounting tube (5)
through the centre of the paper roll. Slide a large washer (9) onto
each end of the tube followed by a spring (8) and a nylon stop
(7). Adjust the position of these components on the tube to get
the paper roll centralised and the nylon stops locked down with
the springs exerting pressure on the paper roll.
MK64 Issue No:2(L) 09/01/14
Page 2
4.10. Position the paper roll assembly into the frame and pass a
threaded knob (6) through the end frame cross bar and screw it
into each end of the paper tube (5), ensuring that the paper will
come forwards off the top of the roll when the frame is the right
way up. See fig.3.
4.11. Feed the end of the paper between the paper spring and
the inner edge of the cutting bar as shown in fig.3. Make sure that
your hands do not come into contact with the serrated cutting edge.
4.12. Push a reel of masking tape onto each tape reel ensuring that the
tape is coming off the top of the reel towards the paper. Using the
two butterfly nuts adjust the side to side position of each tape reel
so that it appears to half overlap the paper roll when seen directly
from behind.
4.13. Draw the tape from each reel in turn and stick it half on and half
off the edge of the paper . Pull out the paper until its edges are
fully taped.
4.14. If the tape is not feeding correctly onto the edge of the paper
make further adjustments to the position of the tape reels using
the butterfly nuts.
4.15. Adjust the tension on the two threaded knobs (6) so that the
paper comes easily off the roll but does not overun.
4.16. The Masking Paper Dispenser is now ready for use.
g.3
NOTE: It is our policy to continually improve products and as such we reserve the right to alter data, specifications and component parts without prior notice.
iMPOrTanT: No liability is accepted for incorrect use of this product.
WarranTY: Guarantee is 12 months from purchase date, proof of which will be required for any claim.
inFOrMaTiOn: For a copy of our latest catalogue and promotions call us on 01284 757525 and leave your full name and address, including postcode.
© Jack Sealey Limited
Sole UK Distributor, Sealey Group,
Kempson Way, Suffolk Business
Park, Bury St. Edmunds, Suffolk,
IP32 7AR
Original Language Version
01284 757500
01284 703534
www.sealey.co.uk
Web
sales@sealey.co.uk
email
MK64 Issue No:2(L) 09/01/14
 Loading...