

Seagate STT320000A,Travan 40GB Online User's Manual
Click here
to continue
40GB
Online User Guide
TT
TT
T
rr
rr
r
avanavan
avanavan
avan


About this manual
This manual describes how to install and operate your new Seagate Travan 40GB tape drive.
The manual also contains information on
troubleshooting and technical support for your
new drive.
Note. Wherever a page number is referenced in
this online manual, you can click on the
page number to jump to that page. You
can return to the original page by clicking
the back button
in your viewer soft-
ware.

About your Travan tape drive
The Seagate Travan 40GB can store up to 40
Gbytes on a single Travan 40 cartridge, and
features a data transfer rate of up to 240
Mbytes per minute.
Note. These values are based on 2:1 data
compression. Uncompressed values are
one half as high. Capacities, backup
speeds and transfer rates will vary with
file type and system configuration.
This drive also includes Seagate FastSense(TM)
technology for optimizing drive and host data
transfer rates.
The Seagate Travan 40GB can read and write
Travan 40 cartridges. It can read but
not
write
Travan 20 or NS20 (TR-5) cartridges.
Note. This drive cannot use TR-1, TR-2, TR-3,
TR-4, or QIC-80 cartridges.

This chapter describes how to install the
Seagate Travan 40GB ATAPI tape drive in your
computer.
What you will need
• You will need a standard flat-bladed screwdriver
and a Phillips screwdriver to install the tape
drive in your computer.
• This tape drive must be attached to a second-
ary IDE port. If your computer has two IDE
ports, and the secondary port is not being
used, you may need to obtain a 40-pin IDE
interface cable for your tape drive. See page
8 for details.
If your computer has only a single IDE port,
you will need to obtain a new ATAPI host
adapter that provides a secondary IDE port for
the tape drive. You will also need a second
40-pin IDE interface cable for your tape drive.
See page 9 for details.

Important precautions
To protect your computer and drive from electrostatic damage, follow these guidelines:
• Before you open your computer or remove the
drive from its antistatic bag, ground yourself
by touching the metal chassis of your computer or some other grounded object. For
optimal protection, use an electrostatic
grounding strap.
Note. To be properly grounded, your computer
must be plugged into a grounded electrical outlet.
• Do not touch any printed circuit boards or
electronic chips on your drive or in your
computer.

Installation Procedure
Follow the steps below to install the Travan
40GB drive in your computer
Note. We recommend that you install your
backup software
before
you install your
tape drive. For more information, see the
instructions that came with the backup
software.
1. Decide where to attach the tape drive.
Before you install your tape drive, you should
determine how many IDE ports your computer
has. You may find this information in the manual
for your computer. You can also look inside your
computer and compare your system with the
illustrations on pages 8 and 9.
If your computer has two IDE ports, continue to
page 8. If your computer has only one IDE port,
see page 9.
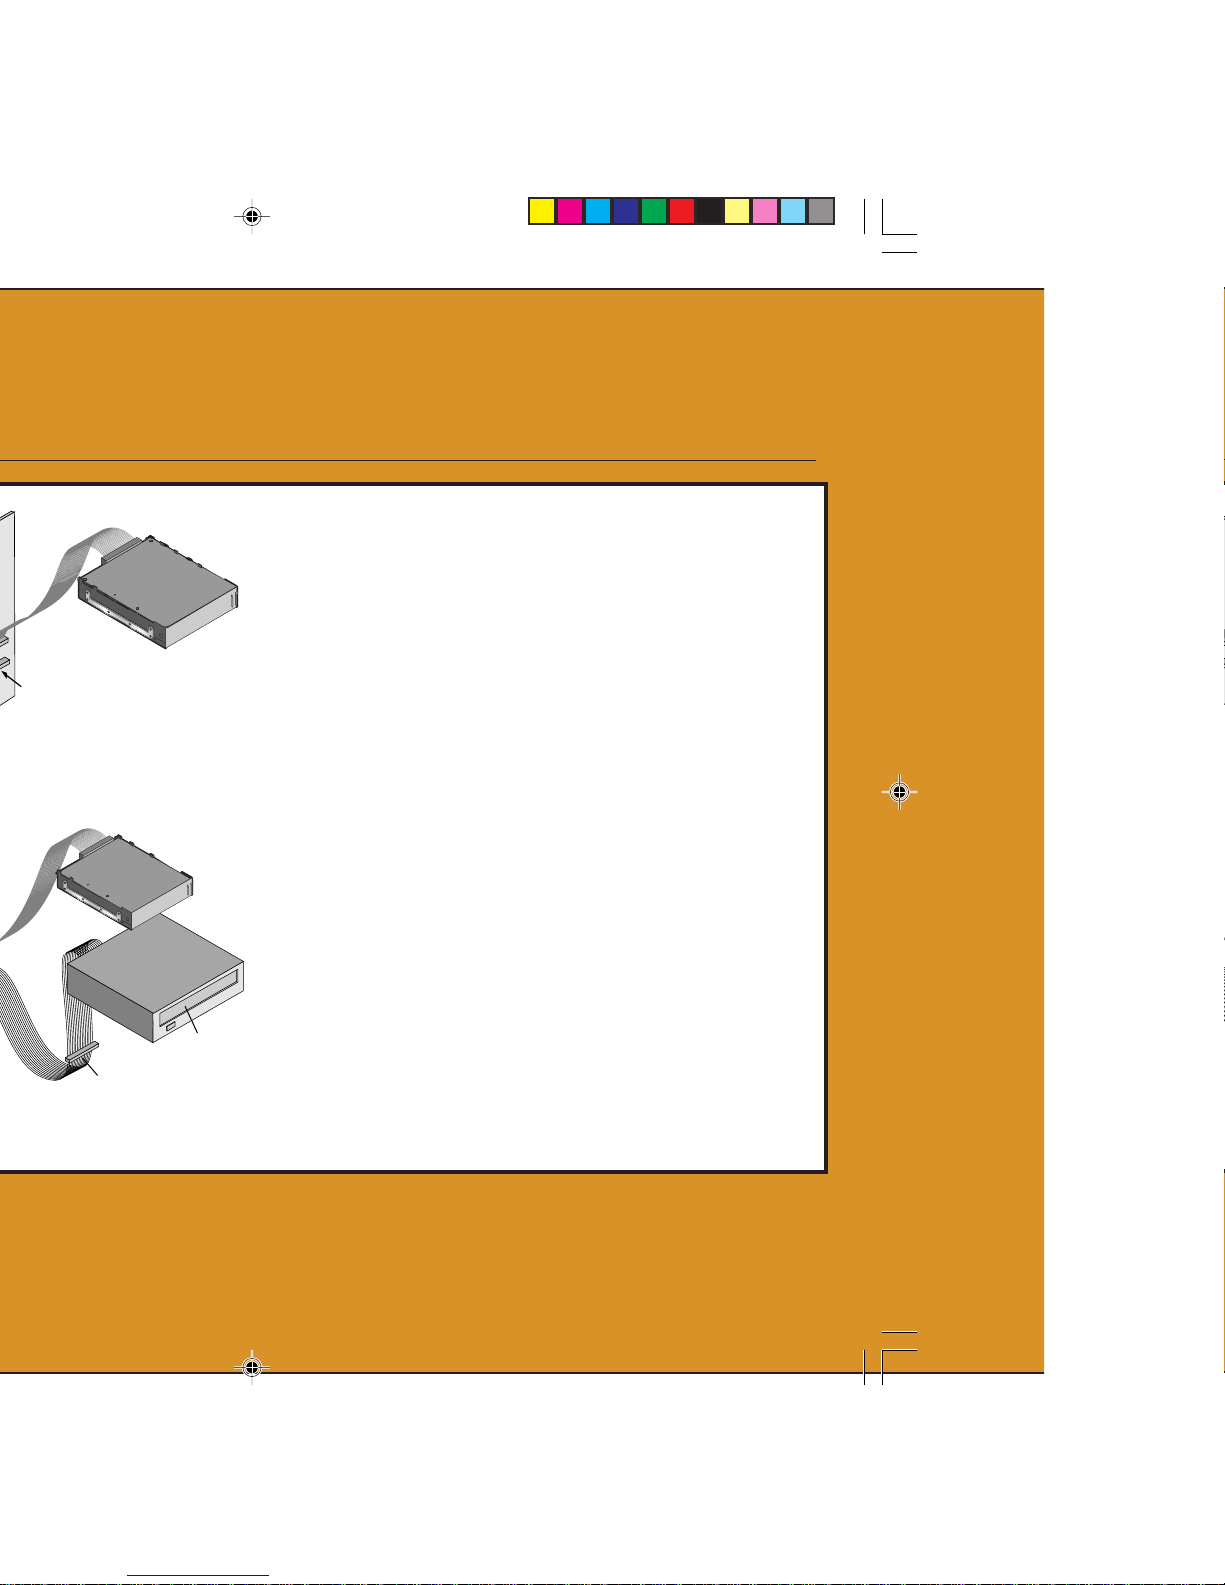
If your computer has two IDE ports:
Most modern computers have two IDE ports.
Each port can support up to two devices (on a
single IDE cable). A hard disk is usually attached to the
primary
IDE port, as shown in
Figure 1. However, the Travan 40 should not be
attached to an IDE port that is being used by a
hard disc or a sound card. Thus, you must use
the secondary IDE port for your tape drive.
If no devices or cables are attached to the
secondary IDE port (as shown in Figure 1), you
will need to obtain a second IDE cable for your
tape drive.
If a CD-ROM or other compatible device is
attached to the secondary IDE port (as shown in
Figure 2) you can install the tape drive on the
same cable as the CD-ROM.
Continue to page 10 for instructions on setting
the master-slave jumpers.
Hard
Disc
Hard
Disc
Attach tape drive and cable here
(tape drive must be configured
as "Master")
CD-ROM
configured as "Master"
Attach tape drive here
configured as "Slave"
CD-ROM
CD-ROM
Hard
Disc
Hard
Disc
 Loading...