

Page 1

Seagate NAS OS 4 User Manual
Seagate Technology LLC. All rights re serve d. Seagate, Seagate Technology, the 2014 ©
Wave logo, and FreeAgent are trademarks or registered trade marks of Seagate
Technology LLC, or one of its affiliates. All other trademarks or registe re d trademarks
are the property of their respective owners. When referring to hard drive capacity,
one gigabyte, or GB, e quals one billion bytes and one terabyte , or TB, equals one
thousand billion bytes when referring to hard drive capacity. In addition, some of the
listed capacity is used for formatting and other functions, and thus will not be available
for data storage. Quantitative usage examples for various applications are for
illustrative purposes. Actual quantities will vary based on various factors including file
siz e , file format, features, and application software. Seagate reserves the right to
.change, without notice, product offerings or specifications
Seagate Technology LLC
S. De Anza Boulevard 10200
Cupertino, CA 95014 U.S.A
اﻹﻧﺘﺮﻧﺖ اﻹﻧﺘﺮﻧﺖ ﻋﻠﻰ ﻋﻠﻰ ﻣﺤﺪث ﻣﺤﺪث إﺻﺪار إﺻﺪار إﻟﻰ إﻟﻰ ﻟﻠﻮﺻﻮل ﻟﻠﻮﺻﻮل ﻫﻨﺎ ﻫﻨﺎ اﻧﻘﺮ اﻧﻘﺮ
اﻟﺒﺤﺚ. وإﻣﻜﺎﻧﻴﺎت اﻟﺘﻨﻘﻞ ﺑﺴﻬﻮﻟﺔ وﺗﺘﻤﺘﻊ ﻟﻠﺘﻮﺳﻴﻊ اﻟﻘﺎﺑﻠﺔ اﻟﺘﻮﺿﻴﺤﻴﺔ واﻟﺮﺳﻮم اﻟﻤﺤﺘﻮﻳﺎت أﺣﺪث أﻳﻀًﺎ ﺳﺘﺠﺪ اﻟﻤﺴﺘﻨﺪ. ﻟﻬﺬا
: اﻟﻄﺮاز
Page 2

Contents
Contents2
Regulatory Compliance13
Trademarks13
Licenses and Free Software13
Precautions15
Data15
Disk capacity15
Seagate NAS OS 416
Introduction16
New feature: App-based management16
Content for this manual16
Minimum system requirements16
Client OS:16
Web browsers:17
Network:17
NAS OS 4.2 New Features18
Features added for NAS OS 418
Apps18
Sdrive: remote access19
Network discovery19
Volume encryption19
Internet protocol version 6 (IPv6)19
Jumbo frames19
Network and cloud backup20
Cloud sync20
Web distributed authoring and versioning (WebDAV)20
Distributed file system namespaces (DFS-N)20
Simple network management protocol (SNMP)21
Network recycle bin (NRB)21
iSCSI logical unit number (LUN) export/import/clone21
Expand existing volumes beyond 16TB21
Network uninterruptible power supply (UPS)21
Export/Import NAS OS 4 settings22
Secure shell (SSH)22
Process monitoring22
Page 3

Search22
Event log22
LED Behavior and Device Buttons24
LEDs24
Rackmount Seagate NAS24
Seagate NAS and Seagate NAS Pro24
Buttons25
Power button25
Power button: short push25
Power button: long push (select models)25
Identification buttons: front and rear (select models)25
Mute button (select models)26
Mute button: short push26
Mute button: long push26
NAS OS Setup27
First use: Enclosure with disks27
Next steps28
First Use: Empty enclosure28
Choose compatible hard drives29
Install Seagate NAS OS29
Next steps30
First Use: Update from NAS OS 3 to NAS OS 431
NAS OS 3 and volume encryption31
Seagate Network Assistant31
Install Seagate Network Assistant32
Launch Seagate Network Assistant32
Windows:32
Mac:32
Find your Seagate NAS's address information33
Access NAS OS with Seagate Network Assistant33
Mount shares34
Quick access34
Mount35
Authenticate private shares35
Auto-mount35
Shares: Access and Transfer Files37
About shares37
Page 4

Access shares37
Windows38
Mac38
Creating Shortcuts to Shares38
Create shortcuts using Seagate Network Assistant38
Create shortcuts using the operating system: Windows 738
Windows 8 and 1039
Create shortcuts using the operating system: Mac40
Mount40
Mount at boot40
Backup: Seagate NAS and PC/Mac40
Back up your NAS40
Back up your computers41
Media Server41
UPnP/DLNA41
Re-index the media server41
iTunes42
Share music with iOS 9 devices43
FTP43
Local FTP access44
Public Access Folders (non-password protected)44
Private Access Folders (password protected)44
Remote FTP access44
SFTP45
NFS45
Wake on LAN (WOL)45
NAS OS Login and Navigation47
Log in to NAS OS47
Seagate Network Assistant47
Internet browser47
First login47
Login48
Recover a Lost Password49
Launch NAS OS using Sdrive49
NAS OS Navigation50
Login: administrator and user51
Administrator51
Page 5

User51
Device Manager52
Launch Device Manager52
Device Manager navigation52
Toggle to another app53
Shares54
Shares, Users, and Groups54
Sample setup: Shares, Users, and Groups54
Public and private shares55
Existing shares55
Add share56
Add remote share: distributed file system namespaces (DFS-N)57
Add remote share57
Adding remote shares on offsite networks58
Share tabs58
Managing remote shares/volumes58
Accessing remote shares/volumes58
Revise share settings60
Users/Groups: change access rights60
Private and public: change the share’s network status61
Services: change the services for a specific share61
Delete62
Users62
Shares, Users, and Groups62
Sample setup: Shares, Users, and Groups62
Existing users63
Add a user64
User: access to shares and rights64
Revise user settings65
Groups/Shares: change groups and access rights65
Delete a user66
Change NAS OS management rights: administrator and user66
Set storage quotas66
Importing users from an active directory67
Managing users imported from an active directory67
Groups67
Shares, Users, and Groups67
Page 6

Sample setup: Shares, Users, and Groups68
Existing groups68
Add a group69
Revise group settings69
Users/Shares: change user membership to the group and access rights to shares70
Delete a user71
Importing groups from an active directory71
Managing groups imported from an active directory71
Settings71
General71
Time72
Workgroup/Domain72
Connect to an Active Directory72
Synchronize Users/Groups73
Leave the domain73
NAS OS73
Services74
Status colors74
Service options: start/stop, share access, advanced parameters74
Start/Stop a service75
Share access: services for a specific share75
Services summary76
File services76
Application services76
SSH Access77
Printer server77
Network77
Connections tab77
IPv6 mode77
Connections table77
LAN Edit menu78
LAN Edit menu: Edit78
LAN Edit menu: Define as primary79
LAN Edit menu: Disable/Enable79
Port aggregation and linking LAN ports79
Port aggregation: Bridge the data on your NAS OS device between two networks80
Port aggregation: Enhance your NAS’s performance with load balance80
Page 7

Port aggregation: Failover protection using fault tolerance81
Port aggregation: LAN failover for load balancing versus fault tolerance81
Proxy tab81
Remote access tab82
Port forwarding tab82
Power83
NAS power management83
Power conservation83
Power saving mode83
Wake the NAS from power saving mode85
UPS management85
Single NAS: Direct connection85
Multiple NAS devices A: A NAS OS device is the network UPS server86
Multiple NAS devices B: The UPS is the network UPS server87
Security88
Auto Block88
Certificate89
DDOS89
Services on LAN Ports89
Monitoring90
System tab90
Upper pane: General health, temperature, and fans90
Upper middle pane: Casing (select NAS OS devices only)91
Middle pane: Resources91
Lower pane: Process92
Temperature and fan warnings92
Drive tab93
Notifications94
Notifications tab94
Email notifications94
Recent activity95
SNMP tab96
Storage96
NAS OS volume and RAID management96
Enhanced data protection: NAS OS SimplyRAID96
Standard disk configuration: Manual RAID96
Storage overview97
Page 8

Manage97
Internal and External volumes98
Volume settings98
RAID102
Get help choosing your RAID103
Tooltip: star ratings for RAID103
RAID comparisons104
RAID levels104
NAS OS SimplyRAID104
JBOD (Just a Bunch of Disks)105
RAID 0105
RAID 1106
RAID 5106
RAID 6107
RAID 10108
RAID 1+Spare(s), RAID 5+Spare(s), RAID 6+Spare, and RAID 10+Spare108
New network volume wizard109
New network volume wizard steps110
Quick setup111
Custom111
Adding a spare111
Build a RAID volume:111
Custom+Spare112
Single-disk volume113
SimplyRAID113
RAID 1 or JBOD113
Multiple volumes114
Create the first volume (RAID 5):114
Create the second volume (SimplyRAID):114
Synchronizing times115
Single-disk and unprotected volumes: Expansion115
Removing healthy hard drives from an unprotected volume115
Volume expansion116
SimplyRAID116
RAID 1116
JBOD117
Protected volumes: Expansion and hard drive replacement117
Page 9

Removing healthy hard drives from a protected volume117
Hard drive expansion and replacement118
Expand a volume's storage capacity: add hard drives to the enclosure118
SimplyRAID118
Custom RAID: RAID 1, RAID 5, and RAID 6119
Repair a failed hard drive or expand storage capacity119
Hot-swapping120
Hard drive replacement and expansion120
SimplyRAID120
Custom: RAID 1, RAID 5, and RAID 6121
No replacement disk: reset the volume's RAID122
Advanced Storage: Direct-Attached Storage and iSCSI123
NAS ports and direct-attached storage123
Direct-attached storage (DAS)123
Connect123
DAS share123
Disconnect123
Ingest or back up DAS content124
Multimedia indexing124
USB printer124
iSCSI124
Setting up an iSCSI target125
SimplyiSCSI125
Create LUN126
New LUN126
Import LUN126
Exporting a LUN126
Importing a LUN127
Create a Target127
iSCSI initiator: Example127
iSNS: Internet Storage Name Service131
Enable iSNS server and enter its IP address:132
iSNS: iSCSI initiator132
App Manager135
Overview135
How to Install Apps135
Maintenance136
Page 10

Advanced136
Backup Manager138
Backup138
Restore139
Sync139
Network Backup disk139
Backup, Sync, and Restore examples139
Back up to a USB storage device (DAS)139
Back up to a Seagate network storage device on the local network140
Back up to a network storage device outside the local network (offsite)140
Back up to a cloud service (offsite)140
Restore140
Create a backup140
Back up using USB storage141
Back up using network storage141
Backups with network storage141
Enable Network Backup server142
Network Backup server settings142
Backups with third-party network storage143
Backups to network storage devices143
Local network143
Remote network143
Advanced parameters for backups to network storage devices144
Back up using cloud storage144
Advanced parameters for backups to cloud storage144
Sync folders145
Create a sync:145
Restore a backup145
Backup and sync job options and start/stop145
Options145
Starting/stopping jobs146
Download Manager147
Enable the download machine147
Create a download job147
Download settings148
Filebrowser150
Upload files150
Page 11

Share files150
Viewing or listening to files151
Manage content151
Create a Folder151
Ingest from an external drive151
Remote Access152
Sdrive152
Sdrive and Seagate Access152
Sdrive: PC/Mac152
How do I get started?153
Create a Seagate Access account in NAS OS153
Download and install Sdrive155
Connect to your Seagate NAS155
Sdrive volume156
Mac: missing Sdrive volume158
Sdrive application158
Windows: move the Sdrive application icon to the system tray159
Sdrive features160
Accept an invitation160
Change your Seagate Access password163
Manage your Seagate NAS devices (administrator)163
MyNAS163
Set up MyNAS remote access163
Failed connection164
Router164
Using MyNAS remote access165
Getting Help166
Software updates166
The NAS's automatic update does not seem to be working.166
Q: Does your NAS OS device have access to the Internet? Do you use a proxy server to
access the Internet?166
Troubleshooting topics166
Troubleshooting the network connection166
Shares do not appear on the network.166
A user does not have access to NAS OS or shares.167
I cannot access my account. I enter my login and password and receive an error
message.167
Page 12

I've noticed a delay in accessing the shares.167
Troubleshooting the multimedia server168
I cannot see the media files stored on the NAS OS device.168
iTunes168
UPnP/DLNA-Compatible Game Consoles and Set Top Boxes168
Troubleshooting expansion devices168
I connected a USB hard drive to the enclosure, but it does not appear on the Storage
page.168
I can't copy a file from a share to the DAS connected to my NAS.168
Hard drive noise and VGA monitor169
I think that the hard drive is making unusual noises.169
The VGA monitor that I connected to the NAS appears to be receiving a signal but the
screen is black (applies to select NAS).169
Troubleshooting the active directory (AD)169
NAS OS169
Active directory170
Maximum Elements by Feature and NAS170
NAS OS Rescue and Repair171
Rackmount NAS171
Prepare for a rescue and repair171
VGA monitor171
Seagate Network Assistant172
Rescue and repair steps172
Step 1: Update the USB key172
Step 2: Back up and power off the NAS OS device172
Step 3: Connect the USB key and boot the NAS173
Step 4: Launch the NAS OS Installer173
Desktop NAS173
Prepare for a rescue and repair173
Back up the NAS device173
Recovery button173
MAC address173
Perform a rescue173
Page 13

Regulatory Compliance
Trademarks
Apple, Mac, Time Machine, and Macintosh are registered trade marks of Apple Computer, Inc. Microsoft,
Windows XP, Windows Vista, Windows 7, and Windows 8 are re gistered trade marks of Microsoft Corporation.
.Other trade marks mentioned in this manual are the property of their re spective owners
Licenses and Free Software
Your Seagate product ships with copyrighted software that are licensed under the GPL, AFL, Apache, Apple,
BSD, GNU LGPL, MIT, OpenLDAP, OpenSSL, PHP, Python, and Creative Common. It also includes fre e software,
/ the source code for which can be downloaded from the Seagate website : www.seagate.com/support
:krb5
Copyright, OpenVision Technologies, Inc., 1996, All Rights Reserved
.Copyright © 1985-2006 by the Massachusetts Institute of Technology
.Copyright 2000 by Ze ro-Knowledge Systems, Inc
.Copyright © 2001, Dr Brian Gladman, Worcester, UK. All rights reserved
.Copyright © 2004 Sun Microsyste ms, Inc
:bzip2
.Copyright © 1996-2006 Julian R Seward. All rights reserved
:berkeleydb
.Copyright © 1990, 1993, 1994, 1995 The Regents of the University of California. All rights re served
.Copyright © 1990-2003 Slee pycat Software. All rights re served
.Copyright © 1995, 1996 The Preside nt and Fellows of Harvard University. All rights reserved
:libnatpmp
Copyright © 2007-2008, Thomas BERNARD
:python-flup
.Copyright © 2005, 2006 Allan Saddi All rights re serve d
:net-s nmp
.Copyright © 1990, 1991, 1992 by Carnegie Mellon University. All rights reserved
:lighttpd
.Copyright © 2004, Jan Kneschke, incremental. All rights reserved
:python-transmissionrpc
Copyright © 2008-2010 Erik Svensson
:libfreetype2
Copyright 1996-2002, 2006 by David Turner, Robert Wilhelm, and We rner Lemberg
:cyrus -sas l
.Copyright © 1998-2003 Carnegie Mellon University. All rights reserved
:openssl
.Copyright © 1995-1998 Eric Young. All rights re serve d
13 Se agate NAS OS 4
10/18/16
Page 14

.Copyright © 1998-2008 The OpenSSL Project. All rights re serve d
:miniupnpc
Copyright © 2005-2011, Thomas BERNARD
:python-werkzeug
.Copyright © 2011 by the Werkze ug Team, see AUTHORS for more details
:openldap
.Copyright 1999-2003 The OpenLDAP Foundation, Redwood City, California, USA. All Rights Reserved
:uefis hell
Copyright © 2004, Intel Corporation
:python-simplejs on
Copyright © 2006 Bob Ippolito
:libevent
Copyright 2003 Michael A. Davis
Copyright © 2007 Niels Provos
Copyright © 1998 Todd C. Miller
.Copyright © 2007 Sun Microsyste ms. All rights reserved
Copyright © 2005 Nick Mathewson
Copyright © 2000 Artur Grabowski
Copyright © 2006 Maxim Yegorushkin
Copyright © 2000 Dug Song
:ajaxplorer
Copyright 2007-2011 Charles du Je u
:php
.Copyright © 1999 - 2006 The PHP Group. All rights reserved
:python-webpy
.Copyright © 2004-2007, CherryPy Team All rights re served
:python-pydispatch
.Copyright © 2001-2006, Patrick K. O'Brien and Contributors. All rights re serve d
.” This list of licenses can evolve over time and can be found on the user interface under the heading “Credits
14 Se agate NAS OS 4
10/18/16
Page 15

Precauons
Data
Any loss, corruption or de struction of data while using a Seagate drive or Se agate drive syste m or Seagate
network storage is the sole responsibility of the user, and under no circumstance s will Seagate be held liable for
the recovery or re storation of this data. To he lp prevent the loss of your data, Seagate highly recommends that
you keep TWO copies of your data; one copy on your e xte rnal hard disk, for instance, and a second copy either
on your inte rnal hard disk, another external hard disk or some other form of removable storage me dia. If you
.would like more information on backup, refer to our website
Disk capacity
1TB (Terabyte ) = 1,000GB. 1GB = 1000MB. 1MB = 1,000,000 Byte s. Total acce ssible capacity varie s depending
(. upon operating environment (typically up to 10% less per TB
15 Se agate NAS OS 4
10/18/16
Page 16

Seagate NAS OS 4
Introduction
Congratulations on your purchase of Seagate Business Storage featuring Seagate NAS OS. Designed to satisfy
the data sharing and backup needs of small, medium, and branch offices, Seagate NAS OS is an intuitive
interface acce ssible to a wide range of administrators. Additionally, NAS OS offers a rich set of collaborative
.and data protection tools to help manage your content
New feature: App-based management
Among the many features added to NAS OS 4.2, e xperie nced administrators will notice a new look to the
interface as well as a critical update to NAS management: apps. Core NAS OS 3 fe atures have be en divided into
:default apps for NAS OS 4.2
Backup Manager: Formerly the Backup setting for NAS OS 3. Launch Backup Manager to create and manage
.backup jobs
Device Manager: Formerly the NAS OS 3 interface. Launch Device Manager to change the settings, add
.users, create shares, and much more
Download Manager: Formerly the Download se tting for NAS OS 3. Launch Download Manager to create and
.manage download jobs
Filebrowser: Formerly the File Browser se tting for NAS OS 3 and NAS OS 4. The new Filebrowser is a web-
.based file viewer. Launch it to view and share files stored on your NAS de vice
.The administrator can add new apps to the Seagate NAS device using the all-new App Manager
.See NAS OS 4.2 New Features for further information on fe atures adde d to NAS OS 4
Content for this manual
This manual will guide you through the process of configuring NAS OS on your Se agate NAS and assist you in
troubleshooting any issues that might arise. If you encounter problems, check Getting Help and the Seagate
support page. Note that most problems can be resolved by re setting the product to factory conditions (se e
(. NAS OS Rescue and Repair
Minimum system requirements
:Client OS
16 Se agate NAS OS 4
10/18/16
Page 17
(Windows 10 (32-bit/64-bit
(Windows 8 (32-bit/64-bit
(Windows 7 (32-bit/64-bit
Windows Serve r 2012
Windows Serve r 2008 R2
Windows Serve r 2008
Mac OS 10.6 and later
Linux 2.6 and later
:Web browsers
Internet Explorer™ 7.0 or higher
Firefox™ 3.0 or higher
Safari™ 3.0 or higher
Chrome 2.0 or higher
:Network
Computer with an Ethernet network adapter
(Ethernet switch or route r 10/100/1000 (Mb/s
:Important info
External force s such as network activity, hardware, distance, and setup can affect your NAS’s
.pe rformance
.For optimal performance, use Gigabit Ethernet equipment
17 Se agate NAS OS 4
10/18/16
Page 18

NAS OS 4.2 New Features
NAS OS 4.2 has new features for enhanced data access, sharing and se curity. Review the list be low to learn
.more
Filebrowser app for NAS OS
.Browse files anywhere: Use the Filebrowser app to access your files via a web browser
.Easy USB ingest: Copy files stored on USB device s with Filebrowser ingest
.Share using web links: Share files and folde rs via se cure web links in the Filebrowser
Backup Manager
Support for more cloud services: Back up files stored on your Seagate network storage to new cloud
.services, including OneDrive and Baidu
.Restore from the cloud: Restore backups saved to your cloud storage
Back up your cloud storage: Back up files and folders stored on your cloud storage to your Se agate network
.storage
Security in Device Manager
.Ne w Security tab: Manage DDOS filtering, Block and White lists, and SSL certificate upload
iSCSI Targets and LUNs
.iSCSI enhancements: Use the new iSCSI setup to create multiple targets and LUNs or, a SimplyiSCSI volume
NAS OS Web Board
.Ne w look: Check out NAS OS’s new, modern inte rface
Features added for NAS OS 4
.Below is a list of the new features available when updating from NAS OS 3 to NAS 4
Apps
The Home page for NAS OS 4 pre sents apps from Seagate and third party de velopers. The administrator can
.add new apps to a Se agate NAS OS device using the App Manager
:Core NAS OS 3 fe atures have been divided into de fault apps for NAS OS 4
Backup Manager: Formerly the Backup setting for NAS OS 3. Launch Backup Manager to create and manage
.backup jobs
Device Manager: Formerly the NAS OS 3 interface. Launch Device Manager to change the settings, add
18 Se agate NAS OS 4
10/18/16
Page 19

.users, create shares, and much more
Download Manager: Formerly the Download se tting for NAS OS 3. Launch Download Manager to create and
.manage download jobs
File Browser: Formerly the File Browser se tting for NAS OS 3. File Browse r is a web-base d file viewer.
.Launch it to view files stored on your NAS de vice. File Browse r requires Java
Sdrive: remote access
Sdrive gives users remote access to data stored on their NAS OS 4 devices. The Sdrive se rvice is available on
:your NAS OS 4 network storage with separate apps available for
:Desktop
Windows® 7 and higher
Mac® OS 10.7 and higher
:Mobile
iOS® 6.1.2 and higher
Android® 4.0 and higher
Upon launching the de sktop app for the first time , users can create a Seagate Access account and link it to any
.Seagate NAS OS 4 device
Network discovery
Configuring new NAS OS 4 devices is now easier using a web-based network discovery tool. Once the new NAS
OS 4 device is connecte d to the network, the administrator can launch a browser and enter the URL:
.http://discover.se agate.com
Volume encryption
Protect new and existing volume s from unauthorized acce ss using NAS OS 4 e ncryption. The administrator can
choose the level of encryption: a password or a file key to unlock the volume . The file key is store d on a USB key
.or thumb drive
To prevent access to a volume ’s shares across a network, the administrator can lock an encrypted volume.
Further, data is safe in case the hard drives are moved to a different enclosure. The e ncrypted volumes will
prompt the user for the password or file key when first using the hard drives in the foreign enclosure. This can
.become important if hard drive s are stolen or move d without permission
(Internet protocol version 6 (IPv6
.Administrators now have the option to add IPv6 addresses to NAS OS 4 de vices
Jumbo frames
19 Se agate NAS OS 4
10/18/16
Page 20

A frame is a packet of data that carries hardware ide ntifiers for network device s such as a source serve r, a
de stination NAS, and a router. The route r uses frame data to facilitate communication between compute rs
and network devices. Also known as an Ethernet frame, a frame’s size is generally limited to 1500 bytes. Such a
.limitation in frame size can have a negative impact upon network de vices
Most modern Gigabit Ethernet routers and switches support jumbo frames, which are frame s larger than 1500
bytes. Enabling jumbo frame s on your router can improve performance among de vices on the network,
.including your NAS OS 4 network storage
Network and cloud backup
In addition to NAS OS and rsync-compatible se rvers, administrators now have the option to choose backup
:destination se rvers that use the following protocols
FTP
SMB
(Web Distributed Authoring and Versioning (WebDav
NFS
.NAS OS 4 also supports backup to cloud storage such as AmazonS3, Box and more
Cloud sync
.NAS OS 4 supports sync to Google Drive and Dropbox
(Web distributed authoring and versioning (WebDAV
WebDAV is a standard for collaborative workflows and data sharing. You can give re mote servers acce ss to
.shares by enabling the WebDAV se rvice on your NAS OS 4 de vice
(Distributed le system namespaces (DFS-N
During the course of a day, a use r may access multiple files store d on many shares connected to your local
network (local are a network or, LAN). To find all the share s and volumes spread about the network, a user can
.hunt through a long list of NAS de vices and servers
NAS OS 4 DFS-N allows administrators to add compatible shares to a single NAS OS 4 device . Accessing shares
on a single device simplifies data management for the administrator and the use r. Similar to creating a new
share , the administrator adds remote shares to the Seagate NAS OS 4 de vice. The share s can come from any
.NAS OS de vice or se rver on the LAN
.NAS OS 4 DFS-N supports NAS OS shares and SMB volumes
20 Se agate NAS OS 4
10/18/16
Page 21

(Simple network management protocol (SNMP
NAS OS 4 supports SNMP, a standard Internet protocol for managing network de vices such as printers, routers,
servers, and compute rs. Enable the SNMP agent in Notifications to give an SNMP serve r access your NAS OS 4
de vice. Additionally, the administrator has the option to turn on SNMP traps so that the NAS OS 4 device
.contacts the SNMP serve r
.Administrators have the option to choose SNMP v1/v2 or v3
(Network recycle bin (NRB
Deleting data on a share permanently removes all associated files. By enabling the NRB service, de leted files
will be moved to the share’s recycle bin. This can be very helpful if a user accidentally removes data that a co-
worker is using on a project. The data is easily recovered from the recycle bin rather than desperate ly
.searching through the last NAS backup
.NRB is compatible with shares that use the SMB protocol, which is also a service
iSCSI logical unit number (LUN) export/import/clone
A logical unit number (LUN) is addressable data on an iSCSI target. Some versions of iSCSI manageme nt support
multiple LUNs on a single target. While NAS OS gives the administrator the ability to create one or more iSCSI
.targets on a volume , each iSCSI target supports only one LUN
However, NAS OS 4 gives administrators additional options to help create and manage iSCSI targets. Rather
than creating new targets each time iSCSI is required, the administrator can export the LUN from an existing
.target and import the LUN’s data. Additionally, NAS OS 4 includes the option to clone an existing target
Expand existing volumes beyond 16TB
NAS OS 3 prevented users from expanding an existing volume beyond 16TB. For example, a 14TB volume could
.not accept an additional 3TB for expansion. This limitation has been removed for NAS OS 4
(Network uninterruptible power supply (UPS
Previous versions of NAS OS support connecting an uninterruptible power supply (UPS) to a NAS OS device via
the power and USB connections. UPS management is performed on the USB connection. If the working
environment e xperiences a loss of power, the UPS allows the NAS to save data before automatically shutting
.down
NAS OS 4 give s the administrator greater flexibility in power management with network UPS. A single UPS can
now be used as a backup power solution for multiple NAS OS 4 device s. For example, the first NAS is connected
to the UPS via power and USB. This is the maste r NAS to the UPS and it acts as the UPS se rver on the network.
21 Se agate NAS OS 4
10/18/16
Page 22

.NAS devices on the network access the UPS serve r and add their power connections to the UPS
. NAS OS 4 also supports connection to select UPS devices that have an Ethernet port and are SNMP compliant
Export/Import NAS OS 4 settings
:NAS se ttings include the following
Shares
Users
Groups
Service s
Network
Power
Monitoring
Notifications
NAS OS 4 settings can be exporte d from one NAS OS 4 de vice and importe d into another NAS OS 4 device .
:Exporting settings is also a great tool for
.Backup: Essential metadata is kept safe in case a NAS fails
.Cloning: Use the same settings on additional NAS OS devices
(Secure shell (SSH
Administrators with advanced networking skills can log in to NAS OS 4 using se cure shell (SSH), an e ncrypted
protocol used for communication betwee n device s. Using a command-line inte rface, the administrator can
automate data management and backups as well as re view the NAS’s se ttings. The administrator also has the
.right to access data stored on the NAS via SSH
Process monitoring
:The Monitoring page now features a list of processes with the following data
.Application: The application using the proce ss
(Status : The process state (e .g. running, slee ping, disk sleeping
.CPU Usage: The percent of the CPU being used for the proce ss
.Memory: The amount of RAM being used for the process
Search
NAS OS 4 has a magnifying glass icon on the top right of the interface . Click on the magnifying glass to enable an
.e mpty field and e nter a search term. Results are limited to NAS OS
Event log
22 Se agate NAS OS 4
10/18/16
Page 23

A be ll icon on the top right of the interface provide s instant access to NAS events. Click on the be ll icon to se e
.re cent activity
23 Se agate NAS OS 4
10/18/16
Page 24
LED Behavior and Device Buons
:NAS OS manages your device's
Status LEDS
Hard drive LEDs
Buttons
LEDs
Rackmount Seagate NAS
ColorState
Blinking blueStartup; shutdown;
activity
Blinking red
and blue
RAID synchroniz ation;
software update
Blinking redWarning
Solid redError
Solid purpleUpdating hardware
Blinking
purple
Communication has bee n
lost
Seagate NAS and Seagate NAS Pro
ColorState
Solid whiteReady
Blinking whiteStartup; shutdown; activity
Alternating red and whiteRAID synchroniz ation; software update
Blinking redWarning or notice
Solid redError
The status and hard drive LEDs work together to provide up-to-date de tails on your NAS device's health. For
24 Se agate NAS OS 4
10/18/16
Page 25

:specific information on the meaning of the LED indications, see the use r manual for your device
Seagate Business Storage 8-Bay Rackmount NAS
Seagate Business Storage 4-Bay Rackmount NAS
Seagate NAS Pro
Seagate NAS
Buttons
All Seagate NAS have a power button on the face of the device. Certain models also have identification and
.mute buttons. Check the user manual for your Seagate NAS to locate the buttons
:NAS OS manages the buttons via push types
.Short push: A de pression upon the button for one second or less
.Long push: A de pression upon the button for four se conds or more
Power button
The power button turns your NAS on when it is powered off. It can also help you power down the NAS without
.the need to launch NAS OS. Always make ce rtain that no one is accessing the NAS before turning it off
Power button: short push
A short push is no longer than two se conds. When the product is powered on, a short push of the power button
:will
.Turn the NAS off
Place it into deep sleep mode if the option has be en configured in NAS OS. See Power for details on deep
.slee p mode
(Power button: long push (select models
A long push is longer than four seconds. Applying a long push will cut the power from the NAS, forcing it to shut
. down immediately. A long push is not recomme nded since it can re sult in data loss
(Identication buttons: front and rear (select models
.Only use a short push on the identification buttons
Pushing the identification button will cause the ide ntification LEDs in the front and rear of the device to flash
ambe r and the alarm to sound. The flashing LEDs allows you to ide ntify the NAS among a group of racked
de vices. There is another ide ntification button on the re ar of the device that can also be pushed to turn on the
ide ntification LEDs and sound the alarm. Both buttons work in tandem, allowing you to turn the visual and audio
ide ntifications on and off. For example, you can use the identification button on the front of the de vice to turn
25 Se agate NAS OS 4
10/18/16
Page 26

.them on and then turn them off via the re ar identification button
.A third ide ntification option is available in NAS OS Monitoring
(Mute button (select models
An audible alarm will sound when some one pushes an ide ntification button or chooses the option in the NAS OS
administration tool. It will also sound if the unit se nses a problem with the hardware , such as a faulty power
.supply unit or elevate d temperatures
Mute button: short push
A short push will turn off an existing audio alarm. When it is pushed, its LED will turn amber, indicating that the
.alarm has been muted
Mute button: long push
:Apply a long push on the mute button to
.Turn off an existing audio alarm off
.Pre vent the system from sounding an audio alarm
Following a long push, the mute LED will turn amber, indicating the audible alarm is off. Even if a problem is found
in the hardware, the alarm will remain muted. Examples of hardware problems include, but are not limited to,
.high temperatures, a faulty power supply unit, and fan failure
The mute button can be pushed if the alarm is not ringing, guarante e ing that it will remain off. To turn the
.audible alarm back on, apply another long push
26 Se agate NAS OS 4
10/18/16
Page 27

NAS OS Setup
Once your Seagate NAS has been configured per the instructions of the included quick start guide , the NAS OS
Setup Wizard will guide you through the remainde r of the installation. The NAS’s administrator must complete
the setup wizard since a password will be cre ated to access the NAS OS management fe atures. The time to
complete the setup wizard varies based upon your NAS. Choose the option be low that matches your Seagate
:NAS
.Enclosure with disks: If you purchased an enclosure with disks, go to First Use: Enclosures with Disks
Enclosure without disks: If you purchased an enclosure that did not include disks, go to First Use: Empty
.Enclosure
First use: Enclosure with disks
Before connecting to NAS OS, configure the Seagate NAS on your network. For instructions, review your NAS's
.user manual and quick start guide
:Conside r the following before installing Seagate NAS OS
.The NAS OS device's administrator should complete the installation steps
NAS OS checks for software update s during the installation. An error message informs you if it cannot check
for update s due to a missing Internet connection. You have the option to search for updates afte r the
.installation
.Power on the de vice. The device is ready to be accessed once the status LED turns solid .1
From a PC/Mac connected to the same network as your NAS, launch an Internet browse r and type .2
http://discover.seagate.com
.Follow the on-screen instructions .3
Enclosure without disks : If you purchased an e mpty enclosure, go to First use: Empty e nclosure for
.instructions on how to set up Seagate NAS OS
27 Se agate NAS OS 4
10/18/16
Page 28
:During the setup, you can
.Cre ate or change the name of the device
(. Create or change the administrator login (the de fault is admin
.Cre ate a Seagate Access account for remote access
.Configure or change the RAID leve l
.Adjust the time zone
.Make certain to note your login and password for future use
Next steps
Simplify NAS acces s : Seagate re commends that you install the software utility Seagate Network Assistant
be fore moving forward with the device configuration. Seagate Network Assistant give s you instant
information on your Seagate NAS, such as firmware version, IP address, and MAC address. It will also
.provide quick access to shares and NAS OS. Se e Seagate Network Assistant for instructions
Configure your NAS: For details on how to configure and use your Seagate NAS, go to Share s: Access and
.Transfe r Files and Device Manager
Install Sdrive for local and remote acces s : Sdrive gives you e asy acce ss to shares and NAS OS on local and
.offsite networks. For more information, se e Remote Access
First Use: Empty enclosure
Before connecting to NAS OS, configure the Seagate NAS on your network. For instructions, review your NAS's
.user manual and quick start guide
28 Se agate NAS OS 4
10/18/16
Page 29
Choose compatible hard drives
Seagate NAS are compatible with most SATA I, SATA II, and SATA III hard drives. Olde r hard drive s that are not
constructed for NAS can experience reduced performance or failure. If you have any questions regarding hard
.drive compatibility, contact Seagate customer support
Seagate hard drives are specially prepared for use with your Seagate NAS. Choose the link below to view hard
:drives that are optimiz e d for your Seagate NAS
Seagate 8-bay Rackmount NAS
Seagate 4-bay Rackmount NAS
Seagate NAS Pro
Seagate NAS
Install Seagate NAS OS
:Conside r the following before installing Seagate NAS OS
.The NAS OS device's administrator should complete the installation steps
Make certain to boot the NAS be fore inserting new hard drives. Since the boot order for the NAS starts
with the hard drives, you can encounter a problem if it dete cts an earlier version of NAS OS or another
.operating system
.Insert the hard drives once the diskless enclosure is powered on and the status LED is blinking
The NAS checks for software updates during the installation. An error message informs you if it cannot
check for updates due to a missing connection to the Internet. You have the option to search for updates
.afte r the installation
The instructions for hardware installation are available on the quick start guide and user manual for your
.Seagate NAS. Make ce rtain to follow the instructions before continuing with the steps below
Enclosure with disks: If you purchased an enclosure with disks, go to First Use: Enclosures with
.Disks for instructions on how to set up Seagate NAS OS
Important info: The Seagate NAS OS installer must format the hard drive s inse rted into the NAS.
Data s tored on the hard drives will be deleted. Make certain to back up data on the hard drives
.before installing them in the Seagate NAS enclosure
29 Se agate NAS OS 4
10/18/16
Page 30
.Power on your Se agate NAS device . The device is ready to be accesse d once the status LED turns solid .1
From a PC/Mac connected to the same network as your NAS, launch an Internet browse r and type .2
http://discover.seagate.com
Follow the on-screen instructions. The se tup formats the drives and installs NAS OS. During the installation, .3
:you can
.Cre ate or change the name of the device
(. Create or change the administrator login (the de fault is admin
.Cre ate a Seagate Access account for remote access
.Configure or change the RAID leve l
.Adjust the time zone
Make certain to note your login and password for future use . Upon completion, you are prompte d to restart the
.NAS
Next steps
Simplify NAS acces s : Seagate re commends that you install the software utility Seagate Network Assistant
be fore moving forward with the device configuration. Seagate Network Assistant give s you instant
information on your Seagate NAS, such as firmware version, IP address, and MAC address. It will also
.provide quick access to shares and NAS OS. Se e Seagate Network Assistant for instructions
Configure your NAS: For details on how to configure and use your Seagate NAS, go to Share s: Access and
Note on USB keys : If your Seagate NAS requires a USB key to boot to the NAS OS installer, you
must remove the USB key before rebooting the device. The NAS will use the USB key as the boot disk
.if it is not removed
Upon reboot, the status LED turns on and begins to blink. The device is ready to be accessed once
.the status LED has turned solid and the welcome page appears on the NAS Setup Wizard
30 Se agate NAS OS 4
10/18/16
Page 31

.Transfe r Files and Device Manager
Install Sdrive for local and remote acces s : Sdrive gives you e asy acce ss to shares and NAS OS on local and
.offsite networks. For more information, se e Remote Access
First Use: Update from NAS OS 3 to NAS OS 4
Your NAS OS 3 device alerts you when an update is available to NAS OS 4 or higher. You can update your
Seagate NAS de vice by following the prompts to download and install NAS OS 4. The last step for the NAS OS
.update is rebooting the NAS OS device
NAS OS 3 and volume encryption
The first time you log into NAS OS 4, a pop-up window appears with important information regarding support for
volume e ncryption. Since NAS OS 3 does not re cognize volume encryption and other new features, you can
.lose important data when attempting to restore a NAS OS 4 de vice with NAS OS 3
.For further information, go to: Seagate NAS OS Installer
You can find software downloads and instructions on how to update the USB rescue key from the NAS OS 3
.installer to the NAS OS 4 installer
Seagate Network Assistant
Install Seagate Network Assistant on one or more computers connecte d to the same network as your NAS OS
de vice. It is a software utility that helps you detect and access NAS OS devices on the network. Seagate
:Network Assistant give s you instant information on the NAS OS de vice's
IP address
Version of software/firmware
(MAC address (hardware ID numbe r
:Seagate Network Assistant can also help you
Launch NAS OS
Mount one or more shares
Auto-mount one or more shares
Important info on Seagate Network As sis tant and NAS LAN Ports: Se agate Network Assistant will
always provide information on LAN 1, even if you have connected the NAS to your network using
.LAN 2
31 Se agate NAS OS 4
10/18/16
Page 32

Install Seagate Network Assistant
To avoid NAS detection conflicts, make certain that you are running the latest version of Seagate Network
.Assistant
:Download the Se agate Network Assistant installer for your operating system .1
Windows
Mac
.Follow the wizard to complete the installation .2
Launch Seagate Network Assistant
:Windows
Select Seagate Network Assistant in Start > All Programs/Programs. The application icon will appear in the .1
.taskbar
.Right-click on the icon in the taskbar .2
:Mac
Select Seagate Network Assistant at Go > Applications > Seagate Network Ass istant. The application icon .1
Note on LaCie NAS OS devices: Seagate Network Assistant re cognizes LaCie NAS device s running
.LaCie NAS OS 2.0 or higher
32 Se agate NAS OS 4
10/18/16
Page 33

.will appear in the menu bar
.Select the icon in the menu bar .2
Find your Seagate NAS's address information
.Launch Seagate Network Assistant .1
Windows users: Right-click on the Seagate Network Assistant icon and choose Open Seagate Network .2
As s istant. Mac users: Choose the Seagate Network Assistant icon in the menu bar to select Open Seagate
.Network As sis tant
If you have multiple NAS OS devices, select the NAS you wish to access from the list on the left-hand .3
.column
.Choose the Configuration tab .4
:Review the device 's .5
IP address
Version of software/firmware
(MAC address (hardware ID numbe r
Access NAS OS with Seagate Network Assistant
.Launch Seagate Network Assistant .1
:Choose your device .2
.Windows: Right-click on the Seagate Network Assistant icon in the taskbar to select your Seagate NAS
.Mac: Choose the Seagate Network Assistant icon in the menu bar to select your Seagate NAS
.Se lect Web access to the NAS OS .3
33 Se agate NAS OS 4
10/18/16
Page 34

.The NAS OS login page will launch in an Inte rnet browser .4
Mount shares
.Seagate Network Assistant gives you many options to access your Seagate NAS's public and private shares
Quick access
.Launch Seagate Network Assistant .1
:Choose your device .2
Windows: From the taskbar, right-click on the Seagate Network Assistant icon and move the cursor to
.your Se agate NAS. Available shares will be listed
Mac: From the menu bar, select the Seagate Network Assistant icon and move the cursor to your
.Seagate NAS. Available share s will be listed
.Choose the share you want to access .3
The share will open in an Explorer window (Windows) or a Finder window (Mac). Public shares are available .4
. to eve ryone on the network. Private shares will prompt a user for a username and password
.Administrator: Use the cre dentials created during the initial setup or NAS OS login
(. User: Type the login and password prepare d by the administrator (see Users
Transfer files normally betwee n your compute r and the share. Mac users: If the share does not open in a .5
[. Finde r window, navigate in the Finder to SHARED > [machine name] > [s hare name
.Note on Quick Acces s to shares : Private shares require a valid use rname and password
34 Se agate NAS OS 4
10/18/16
Page 35

Mount
.Launch Seagate Network Assistant .1
Right-click on the icon in the taskbar (Windows) or choose the icon in the menu bar (Mac) and se lect Open .2
.Seagate Network Assis tant
If you have multiple NAS OS devices, select the NAS you wish to access from the list on the left-hand .3
.column
.Choose the Volume tab .4
Double-click the share you wish to access. The share will open in an Explorer window (Windows) or a Finde r .5
.window (Mac). Transfer files normally from your computer to the share
Authenticate private shares
.Launch Seagate Network Assistant .1
Right-click on the icon in the taskbar (Windows) or choose the icon in the menu bar (Mac) and se lect Open .2
.Seagate Network Assis tant
If you have multiple NAS OS devices, select the NAS you wish to access from the list on the left-hand .3
.column
.Choose the Volumes tab .4
.Se lect Authentication .5
.In the pop-up window, choose Registered User and e nte r your Username and Password. Select OK .6
All available shares will appear in the list of volumes. If you do not se e your volume , confirm that you have .7
.access to it (see Shares). Only the NAS administrator can se t acce ss rights to shares
.Select Mount as drive (Windows) or Mount (Mac) to open the share .8
(. The share will be available in an Explorer window (Windows) or a Finde r window (Mac .9
Auto-mount
.Launch Seagate Network Assistant .1
Right-click on the icon in the taskbar (Windows) or choose the icon in the menu bar (Mac) and se lect Open .2
.Seagate Network Ass is tant
If you have multiple NAS OS devices, select the NAS you wish to access from the list on the left-hand .3
.column
.Choose the Volumes tab .4
If the shares you wish to auto-mount is private , choose Authentication to ente r your cre dentials. In the .5
.pop-up window, choose Registered User and enter the Username and Password for the share
.Choose OK. All available share s will appear in the list of volumes .6
Select the checkbox for Auto to open the share . The share will now mount e ach time you boot the .7
Technical note: Mac users: If the share doe s not open in a Finder window, navigate in the Finder to
[. SHARED > [machine name] > [share name
.Note on mounting shares: Private shares re quire a valid username and password
35 Se agate NAS OS 4
10/18/16
Page 36

.computer. To cancel auto-mount, uncheck the box for Auto
Windows: The share will mount in Computer/My Computer automatically when the computer dete cts it on .8
the network. Mac users: The share icon will appear in your Finder automatically when the computer detects
.it on the network
36 Se agate NAS OS 4
10/18/16
Page 37

Shares: Access and Transfer Files
About shares
A share is a network volume that you can configure to store and share data. Your Se agate NAS has two shares
by de fault: admin and Public. Following the initial login, the share admin changes to the name used by the
.administrator
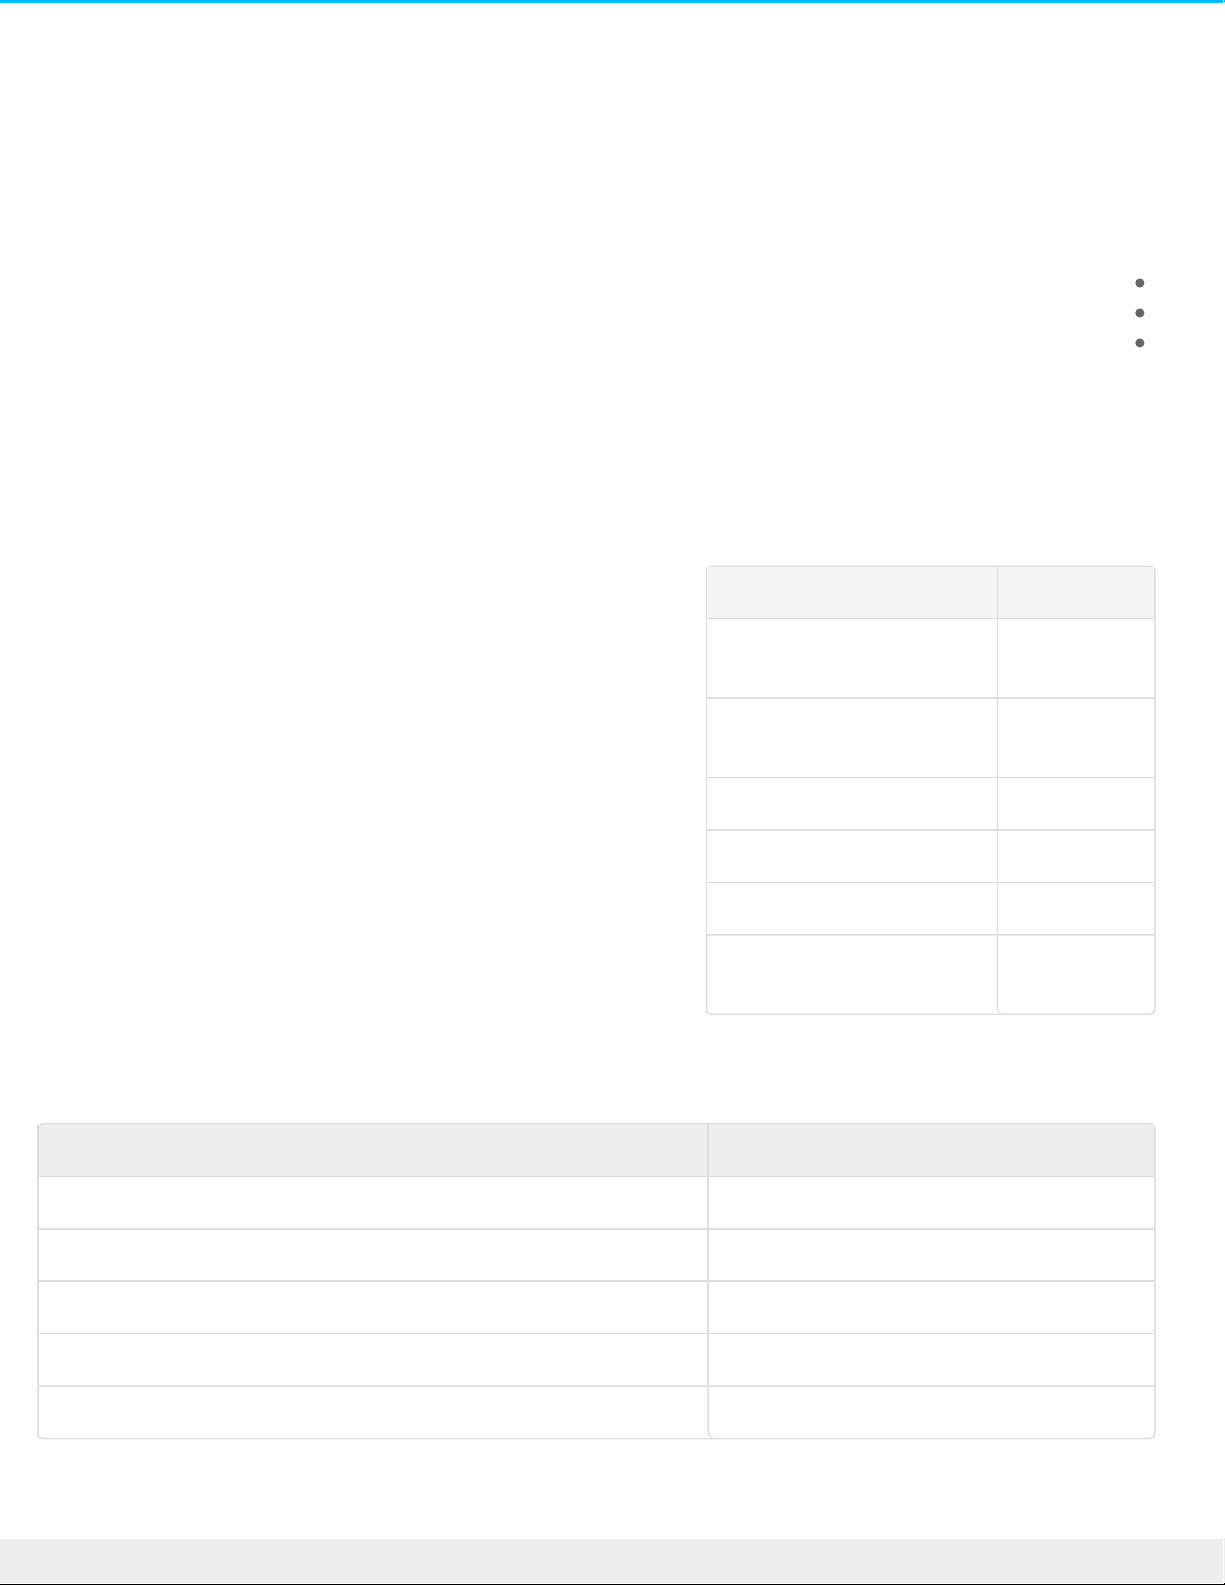
:The following table lists the differences betwee n private and public shares
TypeAccess ibilityLoginAvailabilityDefault
share
PrivateLogin and password
require d
Passwordprotected
Computers on the network and remote
(access (must be enabled
admin or user
de fined
PublicAvailable to any user
on the network
NoneComputers on the network and remote
(access (must be enabled
Public
.For instructions on how to create and manage share s, see Share s
Access shares
.You have seve ral options for acce ssing shares
Option 1: Seagate Network Assistant - quick share access
.Use Se agate Network Assistant for quick acce ss to public shares. See Seagate Network Assistant for details
Option 2: Seagate Network Assistant - authenticate for private shares
Use Seagate Network Assistant to enter your username and password. See Seagate Network Assistant for
.details
Option 3: Operating system
.Use your operating system to open your NAS's shares
Option 4: Sdrive
Sdrive gives users and administrators e asy acce ss to share s and NAS OS on local and remote networks.
Sdrive’s unique file integration places a volume in an Explorer window (Windows) or on the de sktop (Mac). The
volume contains all public shares and the private share s allotted to the use r by the administrator. See Remote
37 Se agate NAS OS 4
10/18/16
Page 38

.Acce ss for de tails
Windows
.In an Explorer window address fie ld, type the \\[machine name] or \\[IP address ]] for your Seagate NAS .1
.Double click on the share you want to open .2
.Private shares will prompt you for your NAS OS username and password .3
.Alternatively, from the Start menu, select Run then type \\[machine name] or \\[IP address ]]. Choose OK
Mac
.From the de sktop, navigate to Go > Connect to Server .1
:In the dialogue window, type one of the following .2
afp://[machine name].local
smb://[machine name].local
[afp://[IP address
[s mb://[IP address
Creating Shortcuts to Shares
Create shortcuts to shares for quick access to your data
Create shortcuts using Seagate Network Assistant
Seagate Network Assistant can be configured to automatically mount share s on your compute r. Se e Seagate
.Ne twork Assistant for de tails
Create shortcuts using the operating system: Windows
7
.Open an Explorer window and navigate to Computer .1
.Choose Map Network Drive .2
Note on Bonjour: If your Windows computer is running Bonjour, the address name must include
..local. For example, \\[machine name].local
38 Se agate NAS OS 4
10/18/16
Page 39

Browse to and select the share you want to access (private share s will prompt you for your NAS OS user .4
.name and password). Choose OK
.Select a drive letter in the pull-down me nu and make certain that Reconnect at logon is se lected .5
.Choose Finish .6
Windows 8 and 10
.In an Explorer window address fie ld, type the \\[machine name] or \\[IP address]] for your Seagate NAS .1
.Right click on the share you want to access and choose Map Network Drive .2
.Select a drive letter in the pull-down me nu and make certain that Reconnect at s ign-in is selected .3
39 Se agate NAS OS 4
10/18/16
Page 40

.Choose Finis h. Private shares will prompt you for your NAS OS use r name and password .4
Create shortcuts using the operating system: Mac
Mount
Open a new Finder window and choose your NAS in SHARED > [machine name]. All public shares will appear. .1
.To access private shares, choose Connect As and ente r your NAS OS username and password
.Choose Connect .3
Mount at boot
.Before following the steps below, make certain to mount the shares as describe d above .1
.From the Apple icon in the menu bar, select System Preferences > Accounts > Login Items .2
.Choose the "+" sign to add a new ite m to the list and browse for the shares that you mounted .3
When you log on to the Mac operating system, the shares will automatically mount on your de sktop. If the
share s do not mount on the desktop, open a Finder window and check SHARED. If the shares are available in
SHARED but are not visible on the desktop, go to the Finder prefe re nces and change the settings to display
.connected se rvers on your desktop
Backup: Seagate NAS and PC/Mac
Back up your NAS
See Backup Manager for a complete explanation on how to automate backups of data stored on your NAS. You
:can back up your data to
(. Direct-attached storage (DAS
40 Se agate NAS OS 4
10/18/16
Page 41

.Another Seagate NAS OS device or compatible se rver on your local network
.Another Seagate NAS OS device or compatible se rver on a remote/offsite network
(Cloud storage (Amazon S3, Box, and more
Back up your computers
:Your NAS is fully compatible with popular backup solutions such as
Windows Backup and Windows File History
®Apple Time Machine
A share on your NAS can be se t as a backup target for these and other backup software. Make certain that the
user has acce ss to the target share. Keep in mind that deleting the target share will also de lete all associate d
.computer backups
Media Server
UPnP/DLNA
Configure your NAS to be a me dia server for UPnP/DLNA device s. To get started, enable UPnP/DLNA at Device
Manager > Services (see Se rvices). Once enabled, UPnP/DLNA-certified playe rs connected to your network
can play files located on your NAS. Examples of UPnP/DLNA players include Xbox, PlayStation, Smart TVs and
.many more
Media files stored on public shares are identifie d without the nee d to ente r a login and password. If you kee p
.media files on private shares, make ce rtain that your playback device is capable of requesting the credentials
Re-index the media server
To take an inve ntory of available multimedia files, you can re-index your NAS shares and desktop attached
.storage (DAS) connected to the NAS's ports
.If applicable, make ce rtain that your DAS are connected to the NAS OS device .1
Important info on NAS backup and RAID: RAID is a great solution to kee p your NAS running in case
of disk failure. However, RAID is not a backup solution and it does not offer protection against all
type s of hardware failure. There fore , administrators should back up NAS data to DAS or another
.NAS on a re gular basis. See Backup Manager for details
Note on Time Machine: Time Machine must be e nabled in NAS OS before a NAS share can be used
as a backup destination. Go to Device Manager > Services to enable the Time Machine service . See
.Services for further de tails
41 Se agate NAS OS 4
10/18/16
Page 42

(. Confirm that UPnP/DLNA is e nabled at Device Manager > Services (se e Services .2
.Pass the cursor to the right side of the UPnP/DLNA row to enable the pull-down me nu and select Edit .3
.Choose Re-index .4
Start a re-index as de scribed above if files appear to be missing on your multimedia shares or connected
.devices
The time for indexing to complete depends upon the total capacity of your storage and the size of your
multimedia library. If you have created many shares on your NAS, re -indexing can tax the CPU's resources.
Before starting the re-index, consider shutting off multime dia support for shares that do not store media files.
.See Services and Share s for further information on how to manage se rvices
iTunes
Your NAS can act as an iTunes music server. Copy your iTunes library to a share on your NAS and audio files will
be available to compatible devices on the network. For easy access on the entire network, use a public share .
To limit access to an iTunes library, use a private share with Se agate Network Assistant's Authentication (see
(. Seagate Network Assistant
.To turn on network sharing, follow the ste ps be low for your ve rsion of iTunes
(. Enable the iTunes se rvice on your NAS OS device. Go to Device Manager > Services (se e Service s .1
.Pass the cursor to the right side of the iTunes row and enable the Edit pull-down me nu .2
.Choose Start .3
42 Se agate NAS OS 4
10/18/16
Page 43

To acce ss the iTunes library, compute rs on the network should launch the iTunes application and choose the .4
.NAS OS de vice as the source for music
Share music with iOS 9 devices
:To share the iTunes library with iOS mobile devices
.Mount the share with the iTunes library on a computer on the network .1
.Launch the iTunes application on the computer .2
.Enable sharing in iTunes Preferences .3
.On the iOS device, launch the Music app and tap the category pulldown menu .4
.Tap the home sharing option to view the iTunes library on your NAS .5
.Use public shares with iOS devices
FTP
FTP (file transfer protocol) is used to transfer files from one computer to another via the local network or the
Internet. This protocol allows you to exchange files with your colleagues, clients, or business partners se curely,
.as only people with a use r account will have access
(. The FTP service is disabled by default but you can start it at Device Manager > Services page (se e Services
Technical note: The iTunes Se rver Service supports the following file types: .mp3, .wav, .aac, .pls,
.and .m3u
43 Se agate NAS OS 4
10/18/16
Page 44

Once FTP is e nabled, your NAS can be accessed using an Internet browser or FTP client software. FTP client
software is very helpful if you wish to share, download, and upload data within a dedicated application rather
.than an Internet browser. Examples of FTP client software include Filezilla and Cyberduck
Local FTP access
To use the FTP service on your local network, enter your NAS's IP address or de vice name in the FTP client's
addre ss field or in an Inte rnet browser's address fie ld. Your NAS's IP address is available on the Network page
(. or Se agate Network Assistant (see Network and Seagate Network Assistant
(Public Access Folders (non-password protected
(ftp://[IP-address]/ (For example, ftp://192.168.10.149
( ftp://[machine name]/ (For e xample, ftp://seagate -r8 or ftp://seagate -r8.local
(Private Access Folders (password protected
When following the directions below, usernames and passwords can vary depending upon the user. For
.e xample, the administrator's use rname and password are not the same as another use r's name and password
,ftp://[username :password@IP-address] (For e xample
(ftp://admin:adminpassword@192.168.10.149
,ftp://[username :password@machine name]/ (For example
ftp://admin:adminpassword@seagate -r8/ or
/( ftp://admin:adminpassword@seagate-r8.local
Remote FTP access
You can access and share your NAS's files from a compute r outside of your network. To use FTP, you will nee d
.to know your router's public IP address
44 Se agate NAS OS 4
10/18/16
Page 45

From a computer on the same local network as the NAS, visit this page to learn your public IP address: .1
/http://www.whatismyip.com
.Note your public IP address .2
Launch an Internet browse r or FTP client software. Within the Internet browser or FTP client's addre ss .3
:field, type
(Public folders only: ftp://[Public IP-address (For example, ftp://94.10.72.149
Public and private folde rs: ftp://[use rname :password@Public IP-address (For example,
(ftp://admin:adminpassword@94.10.72.149
For further information on the public IP address for your route r, see your router's user manual or your Internet
.service provide r
SFTP
SFTP is a se cure version of the FTP service . Data is more secure when using SFTP but transfer rates are slower.
.Similar to FTP, SFTP is disabled by default but you can start it at Device Manager > Services
NFS
p>Network File Syste m (NFS) is a distributed file system protocol allowing the NAS to share directories and
.files with others over a network. Like SMB, NFS grants file-level access to users and programs
.NFS is wide ly distributed to host VMWare datastores or share d network folde rs in a Linux/UNIX e nvironment
When e nabling the NFS service on a share, it can be accessed with the following path:
[[NAS_NAME_OR_IP_ADDRESS]:/share s/[SHARE_NAME
:The NFS protocol is not active by default. To activate it
(. Go to Device Manager > Services (se e Service s .1
.Pass the cursor to the right side of the NFS row to e nable the Edit pull-down menu .2
.Choose Start .3
(Wake on LAN (WOL
Note on Network Backup Server and SFTP: Activating Network Backup se rver will disable SFTP (see
(. Backup Manager for details
.Important info: All NFS shares are public and available to e veryone on the network
45 Se agate NAS OS 4
10/18/16
Page 46

Your Seagate NAS can conserve energy by entering power saving mode . Use NAS OS to schedule power saving
mode when no one accesses the Seagate NAS and wake it up when your office is ready to work. See Power for
.more information on power saving mode s
Seagate Network Assistant can wake your NAS if you require acce ss before it is scheduled to e xit power saving
:mode. This feature is called Wake on LAN (WOL). Follow the steps below
(. Right-click the Seagate Network Assistant icon in the taskbar (Windows) or choose it in the menu bar (Mac .1
.Select Wake Up a Device .2
.Choose the NAS from the pull-down me nu .3
.Choose Wake up .4
.You can also wake up a NAS by applying a short push to its power button
Note on the MAC address lis t: If the list is empty the first time you launch Wake Up a Device,
enter the device's MAC address in the field and select Wake up. Once entered, Seagate
.Ne twork Assistant will keep the device's MAC address on the list
46 Se agate NAS OS 4
10/18/16
Page 47

NAS OS Login and Navigaon
Seagate NAS OS is a browser-based administration tool. Launch NAS OS to access apps, manage storage, add
.users, create shares, and much more
Log in to NAS OS
:Access the NAS OS login page with one of the following
Seagate Network Assistant
An Internet browser
Seagate Network Assistant
.See Seagate Network Assistant for instructions on software installation
.Windows: Right-click on the Seagate Network Assistant icon in the syste m tray .1
.Mac: Choose the Seagate Network Assistant icon in the menu bar
.Se lect [machine name] > Web Acces s .2
The login page will open in a new browse r window or tab. If your browse r is not open, Se agate Network .3
.Assistant will open it for you
Internet browser
:Launch an Internet browser and type the default addre ss for the NAS OS de vice
Windows without Bonjour: http://seagate -r4 or http://seagate-dp6
.Windows with Bonjour and Mac: http://se agate-r4.local or http://se agate -dp6.local
You can also type your NAS's IP address in the browser's URL (web address) field. For example: http://[IP-
(. address]. The IP address may be found in Se agate Network Assistant (se e Seagate Network Assistant
First login
47 Se agate NAS OS 4
10/18/16
Page 48

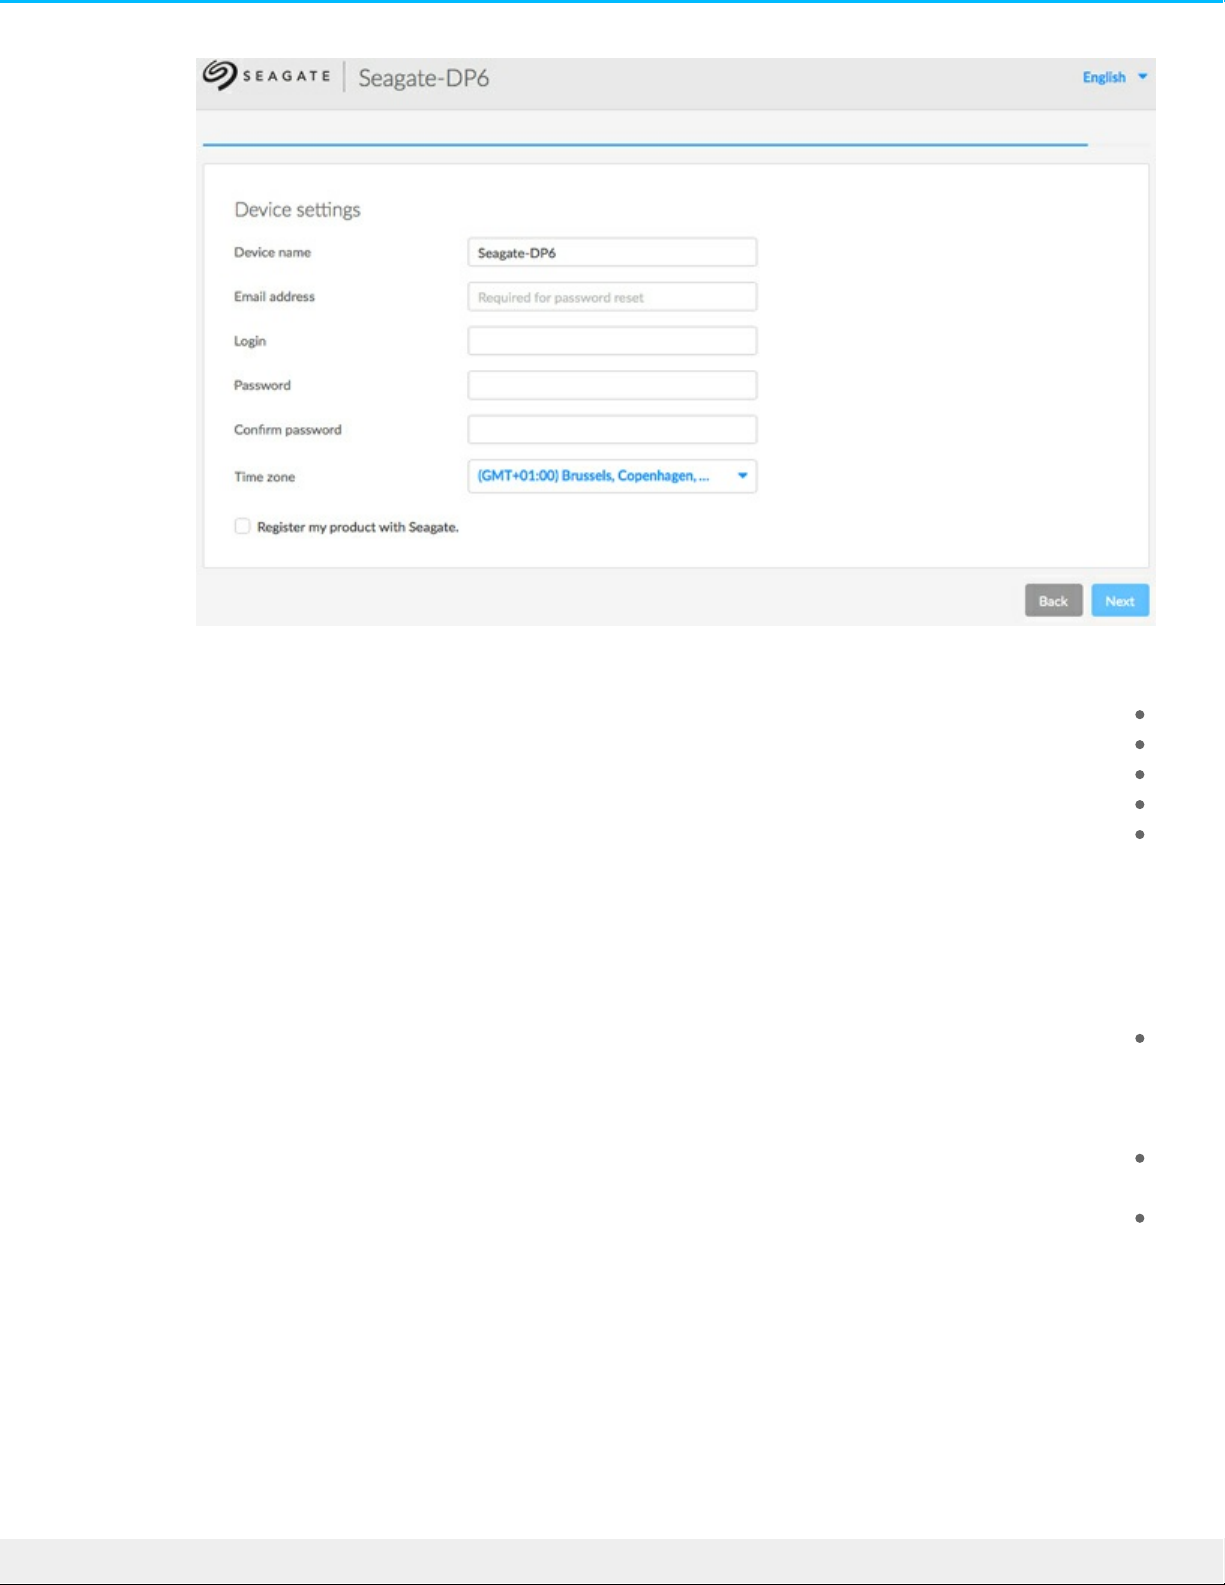
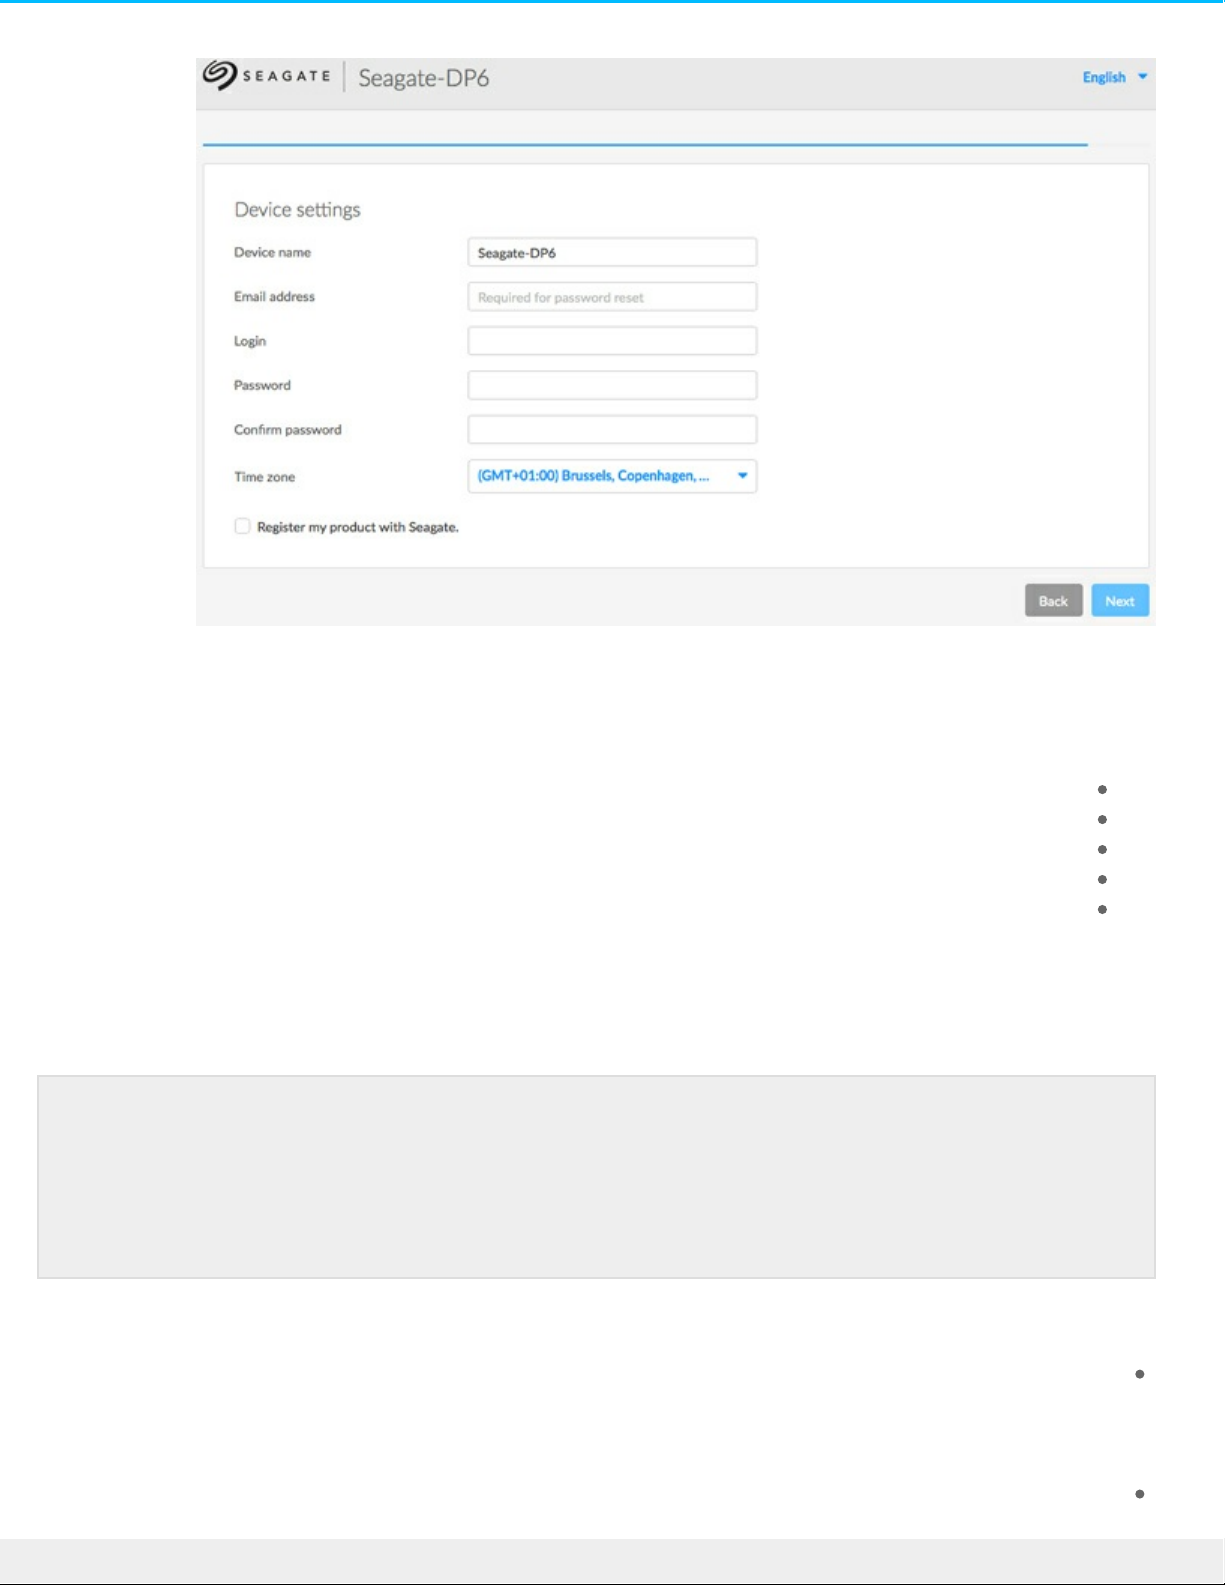
:For most users, the first NAS OS login is the final ste p of the setup wizard. You are prompted to
Create a device name. The default name of your NAS is based upon the product mode l. You can change it to
.mee t the needs of your environme nt
Create an administrator login name. The de fault is admin but you have the option to change it. A login name
.should be from 1-20 alphanumeric characters
Create and confirm the administrator’s pass word. The password should be from 4-20 alphanumeric
.characters and symbols. Consider using a strong password that is difficult for others to guess
.Create or reconfigure the RAID level
.Set the time zone
.Read and agree to Seagate’s Terms and Conditions . The box must be checked to complete the installation
Login
Important info on login credentials: Make certain to note your login credentials. NAS OS can help
users create a new password if the original password is not available. However, the option to
recover a password require s that the administrator add settings to Notifications and Users.
.Further information on how to se t up password recovery is listed below
48 Se agate NAS OS 4
10/18/16
Page 49

NAS OS prompts you for your login name and password. To avoid entering your crede ntials with each login,
.check the box next to Remember me
For added security when logging in, choose Switch to HTTPS at the NAS OS login page. While it offers more
.prote ction than HTTP, using HTTPS can affect your NAS’s performance
Recover a Lost Password
The administrator can configure NAS OS to help users recover forgotten or lost passwords. The administrator
:must
(. Assign an email se rver (see Notifications
(. Enter an email address for users (see Users
If the above conditions have been met, the administrator or user can follow the steps below to recover a
:password
?On the login page, choose Can’t acces s your account .1
(. Enter the login and type the Word ve rification (this ensures that the re quest is coming from a person .2
.Choose Send .3
.A re covery email arrive s in the user's inbox. In the email, choose the Click here link .4
.In the Reinitialize your password window, type your login and new password .5
.Choose Send .6
Launch NAS OS using Sdrive
Install Seagate Sdrive on your PC/Mac to acce ss your device’s home page. You must have a Seagate Access
.account to use Sdrive . See Sdrive for instructions on how to download and install the application
:Make ce rtain that Sdrive has be e n launched before following the directions below
.Choose the device you want to access .1
49 Se agate NAS OS 4
10/18/16
Page 50

.Windows: Right click the Sdrive icon in the system tray to choose the Seagate de vice
.Mac: Click the Sdrive icon in the syste m tray to choose the Seagate de vice
.Choose Manage device .2
NAS OS Navigation
NAS OS provides options to access apps, get help, re view events, and much more . While the ce ntral pane
interface will adjust to the app that you select, the frame d options remain available for easy access. The central
.pane is number 6 in the graphic below
:Menu: Select the me nu to .1
Choose an app
Quit an open app
Logout
Restart
Shut down
Search: Choose the magnifying glass icon to enable the search fie ld. Type a search term that applies to your .2
.NAS OS de vice
.Help: Choose the question mark to revie w the NAS OS use r manual or create a support case .3
Notifications : Choose the bell icon to re view the latest events on your NAS OS device. Event options .4
include All, Warning, and Error. You can also select View all notifications to be directed to the Notifications
.page
Apps: The Home page’s central pane prese nts apps from Seagate and third party de velopers. Choose an app .5
to be directe d to its inte rface. Only the central pane will change base d upon the app you have selected.
:Core NAS OS features are divided into default apps
50 Se agate NAS OS 4
10/18/16
Page 51

.App Manager: Add and manage apps
.Backup Manager: Create and manage backup jobs
.Device Manager: Change the se ttings, add users, cre ate shares, and much more
.Download Manager: Create and manage download jobs
Hardware state: A green light indicates that the NAS ‘s hardware is ope rating as expected. Click it to see a .6
.pop-up window with additional details regarding the hardware
.LAN connection and IP address: The LAN ports connected to the network and their IP addresses .7
Copyright .8
.Credits : Click Credits to see the open source licensing information .9
Login: administrator and user
Administrator
An administrator has access to all NAS OS management functions. However, an administrator does not have
. access to all shares by de fault. The administrator must assign access to himse lf, similar to standard users
User
:The default apps for a user are
.Filebrowser: Internet-based browse r for shares that the use r has been granted acce ss to
Device Manager (limited): The user can change his language and password pre fe re nce s. The administrator
.has the right to change a user’s password at any time
51 Se agate NAS OS 4
10/18/16
Page 52

Device Manager
The Device Manager app is the heart of NAS OS management. Use Device Manager to configure important
.settings such as users, share s, storage, and much more
Launch Device Manager
.Launch Device Manager from the Home page by choosing its app icon
Device Manager navigation
52 Se agate NAS OS 4
10/18/16
Page 53

The left pane lists the NAS OS management pages. Choose a page to manage its settings. The central pane
.changes to reflect the se lected page
For example, click Network to re view or revise se ttings for the Ethernet ports, port forwarding, MyNAS, and
.more. Upon choosing Network, the central pane changes to the interface for the page
Overview is the de fault page when first launching Device Manager. It gives you a summary of the NAS’s health
.and shortcuts to important settings
.Review the storage capacity, health and processor/RAM consumption
.Get quick summaries of the settings Shares, Users, Groups, Network, Services and Power
Click on a summary to go to its page. You can also add Shares, Users, and Groups from the Overview page by
.choosing +Add at the applicable se tting
Toggle to another app
On the upper left of the window, click the menu icon (three horizontal lines) and then choose Device Manager
53 Se agate NAS OS 4
10/18/16
Page 54

[. or the down arrow > [App name
Shares
Your NAS's storage is divided into shares, also known as network folders. The Shares page allows you to create
new shares, assign access rights to users and groups, and to adjust service s by share . By default, your NAS OS
de vice has two share s, admin and Public. You can be gin working with these shares immediately and create new
.shares as neede d
Shares, Users, and Groups
Allotting storage and network permissions for multiple departme nts and users in a branch office or corporate
network can be complicate d. It takes forethought and planning to configure which user is part of what group with
access to how many shares. For this re ason, the settings Shares, Users, and Groups are close ly related in NAS OS.
The cross-functionality betwee n these three settings allows the administrator to add use rs to groups in the
Users or Groups se ttings as well as shares to use rs and groups in the Users and Groups se ttings. The wizard for
each setting prompts the administrator to choose shares, users, and groups. Additionally, users and groups can
.be added to a new share when following the Add share wizard
However, creating a new share , user, or group requires that the administrator use its respective setting. For
example, the administrator must choose the Shares setting to add a ne w share and the Users setting to add a
new user. Though each setting can be revised at any time, it is highly recommended that the administrator plan
ahead when first adding share s, users, and groups to NAS OS. With a map of users, groups, and shares, the
.administrator can simplify access rights. See the example be low
Sample setup: Shares, Users, and Groups
.An administrator has mapped permissions for 40 shares, 20 users, and 10 groups
To get started, the administrator adds the 20 shares using the Add share wizard on the Shares page. The
administrator ignores the prompts to add users and groups to each share since new users and groups have yet
.to be cre ated
Note on the admin s hare name: The name of the share admin will update automatically if the
administrator changes the login name from the de fault admin. For e xample, if the administrator
.used her name , Sally, during the installation, admin becomes Sally
Important info: In text fields, you can e nter 1 to 20 characte rs using letters, numbers, hyphens, and
underscores. No other symbols, special characters, punctuation, or spaces may be used. Do not
.begin or e nd with a hyphen or unde rscore
54 Se agate NAS OS 4
10/18/16
Page 55

Next, the administrator adds the 20 users using the Add user wizard on the Users page. The administrator
.ignore s the prompts to add users to shares and groups since new groups have ye t to be cre ated
Finally, the administrator adds the 10 groups using the Add group wizard on the Groups page. In this ste p, the
:administrator will assign
Each user to a specific group
Share permissions for each group
The Groups se tting is the last ste p since it can cover more users at one time rather than assigning share
.pe rmissions for each new use r
The generic sample setup may not apply to all environments. However, NAS OS gives the administrator fre e
.re ign to configure permissions on the Shares, Users, and Groups pages
Public and private shares
:The following table shows the differences be twee n private and public share s
TypeAccess ibilityLoginAvailabilityDefault
share
PrivateLogin and password
require d
Passwordprotected
Computers on the network and remote
(access (must be enabled
admin or user
de fined
PublicAvailable to any user
on the network
NoneComputers on the network and remote
(access (must be enabled
Public
Existing shares
:Shares are organized in a table
.Click on the te xt in the Name column to change the share name
(. Click on the empty space or text in the Description column to add or revise details for the share (optional
The number in the Groups column (two silhouettes) shows how many groups have acce ss to the share. Click
on the numbe r to vie w and edit the group. Public indicates that the share is available to everyone on the
.network
The number in the Us ers column (one silhouette) shows how many use rs have access to the share. Click on
the number to view and e dit user access. Public indicates that the share is available to eve ryone on the
.network
Click on the text in the Services column to add or re move se rvices. Only active services are available. See
be low for instructions on how to adjust se rvices on a share and Se rvices for details on how to e nable and
.disable service s in NAS OS
To revie w and edit the options for a share, pass the cursor to the far right of its row to make the Edit pull-
down menu visible. Most of the options are explained above. Additional options include changing network
.access (public or private ) and deleting the share
55 Se agate NAS OS 4
10/18/16
Page 56

Add share
:Choose Add share and follow the wizard to completion. Consider the following when creating your share
The Add share wizard features four ste ps: name the share, Set group permissions, Set user permissions, and
.Summary
Name the share: A share must have a name from 1 to 20 characters using letters, numbers, hyphens, and
.underscores. Do not be gin or end with a hyphen or an underscore
Name the share: If your NAS OS device has more than one volume, a pull-down menu allows you to select the
.volume for the share
.Name the share: Checking the box next to Public gives e veryone on the local network access to the share
Set group permissions/Set user permissions: The administrator can skip these steps if permissions will be
.assigned in the Users or Groups settings. Choose Next to re ach the Summary
Set group permissions/Set user permissions: When adding groups or user permissions, you must drag selected
ite ms to the Read access column or the Read+write access column. To add multiple items, make all your
.selections before dragging them to a column
56 Se agate NAS OS 4
10/18/16
Page 57

Set group permissions/Set user permissions: If a user or group is mistakenly dragged to the Read access column
.or Read+write access column, you can drag it back to the No access column
Set user permissions: Checking the box next to Enable Read access to gues ts on the network allows all users
.on the network to view files on the share . Howeve r, they cannot modify files or write data to the share
Add remote share: distributed le system namespaces
((DFS-N
During the course of a day, a use r may access multiple files store d on many shares connected to your local area
network (LAN). To find all the shares and volume s spre ad about the network, a user can hunt through a long list
.of NAS device s and se rvers
NAS OS DFS-N allows administrators to add compatible share s to a single NAS OS de vice. Accessing shares on
a single device simplifies data management for the administrator and the user. Similar to creating a new share ,
the administrator adds remote shares from other NAS OS device s or servers on the LAN. The other NAS OS
.device or server is called the Host
NAS OS DFS-N supports NAS OS share s and SMB shares/volumes. SMB or, server message block, is a standard
.protocol for sharing network volume s. It is native to Windows and supported on Mac OS
Add remote share
:Choose Add remote share and follow the instructions below for your Host type
NAS OS Host
The wizard se arches the local network for NAS OS device s. Se lect the host NAS OS device for the shares .1
.you want to add and choose Next
Enter your cre dentials for the host NAS OS device and choose Next. In most instances, you will use a login .2
.with administrator rights. You can choose Gues t when adding public share s
Select the shares to add and choose Next. If you do not see the share s you want to add, make certain that .3
.the credentials you ente re d in step 2 have acce ss rights to the shares on the host NAS OS device
.Review the Summary page and choose Finish .4
Third party NAS or s erver Host
Enter the IP address for the host in the empty fie ld and choose Next. Though an IP addre ss is generally .1
.more reliable, you can also enter the NAS’s/server’s network name
Important info: Even if you succeed in adding the share/volume using the Host’s name, you can
experie nce problems when attempting to access the volume on a PC/Mac. This may be due to
the network’s naming service. Should you encounter issues with the network name, it is
.re commended that you try again using the IP address
57 Se agate NAS OS 4
10/18/16
Page 58

.Enter the name of the share on the host NAS/serve r and choose Next .2
.Review the Summary page and choose Finis h .3
Adding remote shares on offsite networks
NAS OS gives you the option to add shares/volume s from NAS OS and third party NAS/serve r devices that are
locate d outside the LAN (offsite network). When choosing the Host NAS, follow the instructions for Third party
NAS or server Host, even if you want to acce ss a NAS OS device . When choosing the NAS, you must enter its
.public IP addre ss and use the proper crede ntials
Seagate cannot guarantee the stability and performance of re mote shares/volumes from offsite networks.
There are many factors that can affect the connection including, but not limited to: firewalls, se curity settings,
.route rs, Inte rnet service providers, and administration
Share tabs
:Adding remote shares to the NAS changes the Shares page. There are two tabs
.Local: Access all share s created on the NAS
.Remote: Access all share s added from other NAS de vices
Managing remote shares/volumes
The host NAS/serve r manages its shares. Only the administrator for the host NAS de vice can adjust the
.re mote shares’ credentials, access rights, quotas, e tc
To avoid potential conflicts with accessing remote shares, administrators should use the same credentials on
the NAS OS device and the host NAS/serve r. For example, Logan is a use r on the NAS OS device Seagate-DP6.
The administrator for Seagate-DP6 has added a remote volume called Data. The host server for Data is called
Seagate-DWSS4, a Windows server. The administrator for Seagate-DWSS4 must create a login and password for
Logan. To make the login experie nce to Data easie r for Logan, the administrators for Seagate-DP6 and Seagate-
.DWSS4 agree to use the same credentials on both NAS devices
The administrator for the NAS OS device can revise how the name appears on the Shares page and users on the
:network
Choose the Remote tab .1
.Locate the remote share you want to rename and click on the words in its name column .2
.Enter the name in the field .3
Accessing remote shares/volumes
Accessing remotes share s is similar to accessing shares created on the NAS OS device. There are minor
diffe rences that administrators should consider before authorizing users to access remote share s. Review the
.information below before adding remote shares to your NAS OS de vice
58 Se agate NAS OS 4
10/18/16
Page 59

The host NAS/server manages the remote share/volume. Since management includes crede ntials, make
certain that applicable usernames and passwords have been added to the host NAS/server. For e xample,
Logan is a user on the NAS OS device Seagate-DP6. The administrator for Seagate-DP6 has added a re mote
volume called Data. The host server for Data is called Seagate-DWSS4, a Windows serve r. The administrator for
Seagate-DWSS4 must create a login and password for Logan. To make the login experie nce to Data easier for
Logan, the administrators for Seagate-DP6 and Seagate-DWSS4 agree to use the same credentials on both
.NAS/server de vices
SMB is native to Windows. Users with Windows computers can access remote shares/volume s using the
operating syste m or Seagate Network Assistant. For further de tails, se e Share s: Access and Transfer Files.
When first accessing the remote share , the use r will be prompted for the username and password created on
.the host NAS/serve r
SMB is supported on Mac OS. The native protocol for Mac OS is Apple File Protocol (AFP). Each time that a Mac
user atte mpts to access a network drive , it will automatically use AFP rather than SMB. Therefore , a Mac user
cannot acce ss re mote shares with Seagate Network Assistant since the application uses the operating system’s
de fault network settings. Mac use rs should follow the instructions below when accessing a remote
:share/volume
.Go to Finder > Go > Connect to server .1
In the Server Address field, enter s mb://[name of NAS OS device] and choose Connect. Entering smb is very .2
important since it tells the operating system to use the SMB protocol when searching for shares/volumes on
.the NAS
The user is prompte d for a Name and Password. As recomme nded above, the administrators for the NAS OS .3
and host device s should use the same credentials for use rs. Enter the username and password cre ate d on
.both device s. Choose Connect
59 Se agate NAS OS 4
10/18/16
Page 60

.The remote share /volume is ready to use .4
Revise share settings
To revise a share’s se ttings, pass the cursor to the far right of its row to make the Edit pull-down menu visible.
:Options on the Edit pull-down menu diffe r for public and private shares
Public: Change to private share, Services, and Delete
Private: Users, Groups, Change share to public, Services, and Delete
Since public share s are available to e veryone on the network, there is no need to manage user and group
.access
Users/Groups: change access rights
From the Edit pull-down menu, choose Us ers or Groups. The pop-up window includes three tabs for Users,
.Groups, and Overview
Important info regarding remote shares: Settings for re mote shares can be revised on the host
.NAS/server
60 Se agate NAS OS 4
10/18/16
Page 61

.Select the tab you wish to manage .1
The left-hand column lists the users or groups with No access to the share. Select the user or group to be .2
granted access and drag it to the Read access column or the Read+write access column. You can e nable read
access for everyone on the network by checking the box next to Enable Read access to gues ts on the
.network
.Choose Close to confirm the changes .3
Private and public: change the share’s network status
:Select the applicable setting to
Change a public share into a private share
Change a private share into a public share
Services: change the services for a specic share
File protocols and se rvice applications can be enabled and disabled on the Services page. A service is available
to all share s when it is e nabled and not available when it is disabled. However, an administrator may want to
.e nable a service for certain shares but turn it off for others
Example 1: The administrator creates a share called Time Machine to use as the backup destination for a Mac on
the network. Since the Mac runs Time Machine® for its backups, the share must have Apple File Protocol (AFP)
and Time Machine services. Both services can be e nabled on the NAS’s Service s page. However, all other
computers on the network are PCs. There fore, the administrator disables AFP and Time Machine on all other
.shares
Example 2: A doctor’s office wants to use a share called Entertainment to store media files. A player in the
waiting room that is UPnP/DLNA compatible will access the media files. All other share s store patient
information and office files. The administrator knows that enabling UPnP/DLNA on all share s can tax the
processor. It will also slow down Re-Indexing the media. Therefore, the administrator disables UPnP/DLNA on
.all shares exce pt Entertainment
Enable/Dis able a service on a s pecific share
.Pass the cursor to the far right of the share's row to make the Edit pull-down me nu visible .1
.Choose Services .2
:Perform one of the following .3
Deselect the check box next to the se rvice you want to disable
Select the check box next to the service you want to e nable
If you do not see the service you want enable/disable, confirm that it has been enabled on the NAS’s
.Services page
.Choose Save .4
.Important info: Services must be enabled on the Se rvices page for them to appear on a share
61 Se agate NAS OS 4
10/18/16
Page 62

Delete
.Pass the cursor to the far right of the share's row to make the Edit pull-down me nu visible .1
.Choose Delete .2
.Confirm in the dialogue window .3
Users
.Choose the Users page to add and manage user accounts
Shares, Users, and Groups
Allotting storage and network permissions for multiple departme nts and users in a branch office or corporate
network can be complicate d. It takes forethought and planning to configure which user is part of what group with
access to how many shares. For this re ason, the settings Shares, Users, and Groups are close ly related in NAS OS.
The cross-functionality betwee n these three settings allows the administrator to add use rs to groups in the
Users or Groups se ttings as well as shares to use rs and groups in the Users and Groups se ttings. The wizard for
each setting prompts the administrator to choose shares, users, and groups. Additionally, users and groups can
.be added to a new share when following the Add share wizard
However, creating a new share , user, or group requires that the administrator use its respective setting. For
example, the administrator must choose the Shares setting to add a ne w share and the Users setting to add a
new user. Though each setting can be revised at any time, it is highly recommended that the administrator plan
ahead when first adding share s, users, and groups to NAS OS. With a map of users, groups, and shares, the
.administrator can simplify access rights. See the example be low
Sample setup: Shares, Users, and Groups
.An administrator has mapped permissions for 40 shares, 20 users, and 10 groups
To get started, the administrator adds the 20 shares using the Add share wizard on the Shares page. The
administrator ignores the prompts to add users and groups to each share since new users and groups have yet
.to be cre ated
Next, the administrator adds the 20 users using the Add user wizard on the Users page. The administrator
.ignore s the prompts to add users to shares and groups since new groups have ye t to be cre ated
Finally, the administrator adds the 10 groups using the Add group wizard on the Groups page. In this ste p, the
Deleting a s hare and data: Deleting a share also deletes all files on the share and will cause any
.associated backup jobs to fail
62 Se agate NAS OS 4
10/18/16
Page 63

:administrator will assign
Each user to a specific group
Share permissions for each group
The Groups se tting is the last ste p since it can cover more users at one time rather than assigning share
.pe rmissions for each new use r
The generic sample setup may not apply to all environments. However, NAS OS gives the administrator fre e
.re ign to configure permissions on the Shares, Users, and Groups pages
Existing users
.User data is organized in a table
:The icons in the far left column indicate a user's rights
.Blue use r with plus sign: Administrative privileges
.Blue use r: Standard use r privileges
.Grey use r: The user was imported from an active directory with no administrative privileges
.Choose the text in the Login column to change the use r name
Choose the text in the Pas sword column to change the use r's password. A password is created during the
.setup for the first administrator and in Manage use rs for additional users
Passwords can only be changed for users created on the NAS. Contact the administrator for the active
.dire ctory to change settings for imported users
Passwords that are linked to Seagate Access accounts can be changed for signing into the NAS.
However, changes to the password on the NAS are not taken into account by the user’s Seagate Access
account. Therefore , users must continue to enter the original password that was cre ate d for the
63 Se agate NAS OS 4
10/18/16
Page 64

.Seagate Access account. It is highly recommended to keep passwords as consistent as possible
The email address can be filled in automatically when associating a user with a Seagate Access account.
With or without a Se agate Access account, the administrator can click the text in the Email column to
change a user's e mail address. However, if a user is associated with a Seagate Access account, it is highly
.re commended to keep the email addre ss unchanged
The light in the Se agate Acce ss column is green if the user is associated with a Se agate Access account. It is
.grey if the use r does not have a Seagate Access account
.Click a gree n light to log out of the Seagate Access account
.Click a grey light to create a Seagate Access account for a user
The number in the Shares column (folder icon) indicates how many share s the user can access. Choose the
.numbe r to view the assigned shares
The number in the Groups column (double silhouette icon) shows to how many groups the use r belongs.
.Choose the number to view the groups
To se t a storage capacity limit for a user, click on the white circle in the Quota column. Once the quota is set,
.the white circle will turn green
Add a user
:Choose Manage users and follow the wizard to completion. You can
Invite us ers: invite local and remote users to join your NAS and to create a Se agate Access account. Use
this option for users who require remote acce ss to the NAS. You must e nter an email addre ss for a user to
create a Se agate Access account. The user re ceives the invitation via email with instructions on how to
.complete the account
.See invites : review pending user invitations
Create user: cre ate a user for local access to the NAS. You can create a local user and add the Seagate
.Acce ss account late r
:Conside r the following when completing the fie lds in this step
A login can have from 1 to 20 characters using letters, numbers, hyphens, and unde rscores. Do not begin or
.e nd with a hyphen or an underscore
.A password can have from 4 to 20 characters and is case-se nsitive
An email address is optional when cre ating a local user. It can be helpful for quota notifications and
.password recovery
.To give the use r administration privileges to the NAS, check the box next to Adminis trator
Set group permissions: To add a use r to a group, drag the group name from the No access column to the
Access column. To add the user to multiple groups, make all your selections before dragging them to the
Access column. The administrator can skip the group me mbership step if membe rship will be assigned in the
.Groups settings
Set share permissions: To give the user access to a share, drag the share to the Read access column or the
Read+write access column. To give access to multiple shares, make all your selections before dragging them
to one of the columns. If a share is mistakenly dragged to the Read access column or Read+write acce ss
column, you can drag it back to the No access column. The administrator can skip this step if access will be
.assigned in the Shares or Groups se ttings
User: access to shares and rights
64 Se agate NAS OS 4
10/18/16
Page 65

A user can access NAS shares that have been assigned to him by the administrator (see Share s ). When
accessing the shares for the first time, the user is prompted for the password created by the administrator on
the Users page (se e Shares: Access and Transfer Files). In addition, a user can log on to NAS OS using his login
and password, which is very helpful with Seagate MyNAS remote access. Howeve r, NAS OS management rights
.are limited for standard use rs
(. Access the Filebrowser app to upload, download, and share files via the Internet (see Filebrowser
An administrator has access to all NAS OS management fe atures, including the ability to re vise a password that
.has been changed by a user
Revise user settings
To revise a user’s settings, pass the cursor to the far right of its row to make the Edit pull-down menu visible.
:Options on the Edit pull-down menu diffe r for use rs and administrators
Users : Groups, Shares, Delete, Set Administrator, and Quota
Administrator: Groups, Shares, and Quota
Groups/Shares: change groups and access rights
From the Edit pull-down menu, choose Groups or Shares. The pop-up window includes three tabs for Shares,
.Groups, and Overview
Edit acces s rights to shares
.Select the Shares tab .1
65 Se agate NAS OS 4
10/18/16
Page 66

.The column No access lists the share s that the user cannot open .2
Add access to s hares: Se lect the applicable share s in the No access column and drag them to the Read
.access column or the Read+write acce ss column
Remove access to s hares : Select the applicable shares in the Read access column or the Read+write
.access column and drag them to the No access column
.Choose Close to confirm the changes .3
Edit group membership
.Select the Groups tab .1
.The column No access lists the groups that the user has not joined .2
Add a us er to groups: Se lect the applicable groups in the No access column and drag them to the Access
.column
Remove a us er from groups: Select the applicable groups in the Access column and drag them to the No
.Access column
.Choose Close to confirm the changes .3
Delete a user
.Pass the cursor to the far right of the user's row to make the Edit pull-down menu visible .1
.Choose Delete .2
.Confirm in the dialogue window .3
Change NAS OS management rights: administrator and user
.An administrator can be changed to a standard user and a standard user can be elevate d to an administrator
.Pass the cursor to the far right of the user's row to make the Edit pull-down menu visible .1
:Select the applicable setting to .2
Set Adminis trator
Set local us er
Set storage quotas
:Limit the user’s storage capacity by following the steps below
.Pass the cursor to the far right of the user's row to make the Edit pull-down menu visible .1
.Choose Quota .2
.Click on the te xt in the Quota column .3
(. Choose the radio button next to Set limit and ente r the quota in gigabytes (GB .4
.Choose Save .5
Important info on the first administrator: The original administrator who configured the NAS OS
.device remains an administrator. It is not possible to delete or change the original administrator
66 Se agate NAS OS 4
10/18/16
Page 67

Importing users from an active directory
If you have successfully connecte d to an active directory domain, you will see a button on the Users page
labeled Import from domain. Go to Se ttings for instructions on how to join your NAS OS device to an active
.dire ctory
:To add users from the active directory
.Choose Import from domain .1
.At the prompt, type a few characters in the text fie ld to find the users you want to import .2
.Hold down the control key (Windows users) or command key (Mac users) to select multiple users .3
.Choose Import .4
The imported users will appear in the table. You can identify users imported from the domain by their grey .5
.icons
Managing users imported from an active directory
The administrator of the original domain manages use rs imported from an active directory. For e xample,
passwords, email accounts, and groups are all determined within the original domain. See Settings for
.instructions on synchronizing changes from an active directory to NAS OS
:The administrator of the NAS OS de vice can adjust the following settings for imported users
Access rights to shares on the NAS OS de vice
Delete an importe d user from the NAS OS device
Set quotas for storage capacity on NAS OS volume s
Groups
.Administrators can use Groups to set access rights for many users at once rather than individually
Shares, Users, and Groups
Allotting storage and network permissions for multiple departme nts and users in a branch office or corporate
network can be complicate d. It takes forethought and planning to configure which user is part of what group with
access to how many shares. For this re ason, the settings Shares, Users, and Groups are close ly related in NAS OS.
The cross-functionality betwee n these three settings allows the administrator to add use rs to groups in the
Users or Groups se ttings as well as shares to use rs and groups in the Users and Groups se ttings. The wizard for
each setting prompts the administrator to choose shares, users, and groups. Additionally, users and groups can
.be added to a new share when following the Add share wizard
However, creating a new share , user, or group requires that the administrator use its respective setting. For
example, the administrator must choose the Shares setting to add a ne w share and the Users setting to add a
new user. Though each setting can be revised at any time, it is highly recommended that the administrator plan
ahead when first adding share s, users, and groups to NAS OS. With a map of users, groups, and shares, the
67 Se agate NAS OS 4
10/18/16
Page 68

.administrator can simplify access rights. See the example be low
Sample setup: Shares, Users, and Groups
.An administrator has mapped permissions for 40 shares, 20 users, and 10 groups
To get started, the administrator adds the 20 shares using the Add share wizard on the Shares page. The
administrator ignores the prompts to add users and groups to each share since new users and groups have yet
.to be cre ated
Next, the administrator adds the 20 users using the Add user wizard on the Users page. The administrator
.ignore s the prompts to add users to shares and groups since new groups have ye t to be cre ated
Finally, the administrator adds the 10 groups using the Add group wizard on the Groups page. In this ste p, the
:administrator will assign
Each user to a specific group
Share permissions for each group
The Groups se tting is the last ste p since it can cover more users at one time rather than assigning share
.pe rmissions for each new use r
The generic sample setup may not apply to all environments. However, NAS OS gives the administrator fre e
.re ign to configure permissions on the Shares, Users, and Groups pages
Existing groups
.Group data is organized in a table
68 Se agate NAS OS 4
10/18/16
Page 69

.A blue icon on the far left indicates that the group has been created in NAS OS
.A grey icon on the far left indicates that the group has bee n imported from a domain
Choose the text in the Name column to change the group name. The name of a group from a domain cannot
.be changed in NAS OS
(. Choose the e mpty space or te xt in the Des cription column to add or revise de tails for the group (optional
The number in the Shares column (folder icon) shows how many share s the group has acce ss to. Choose the
.numbe r to view the shares
The number in the Us ers column (user icon) shows how many users belong to the group. Choose the numbe r
.to view the users
To revie w settings for the group, pass the cursor to the right of the group's row to make the Edit pull-down
.menu visible
Add a group
.NAS OS provide s two de fault groups, Administrators and Users
.All Administrators are automatically added to the Administrators group
.All users are automatically adde d to the Users group
To create a new group, choose Add group and follow the wizard to completion. Consider the following when
:creating a user
The Add group wizard fe atures the following ste ps: name the group, set share permissions, set user membership
.to the group, set app permissions and Summary
Name the group: A group name can have from 1 to 20 characters using lette rs, numbers, hyphens, and
.underscores. Do not be gin or end with a hyphen or an underscore
Set share permissions: The administrator can skip this step if access will be assigned in the Shares or Users
.settings. To skip the step, choose Next
Set share permissions: To give the group access to a share, drag the share to the Read access column or the
Read+write access column. To give acce ss to multiple share s, make all your selections be fore dragging them
.to the one of the columns
Set share permissions: If a share is mistakenly dragged to the Read access column or Read+write access column,
you can drag it back to the No access column. The administrator can skip this step if membe rship will be
.assigned in the Users se ttings. To skip the step, choose Next
Set user membership to the group: To add a user to the group, drag the use r’s name from the No access column
to the Access column. To add multiple use rs to the groups, make all your se lections be fore dragging them to
.the Access column
.Set app permissions: Drag the apps that the group can access
Revise group settings
.Default groups: The de fault shares Administrators and User cannot be deleted
69 Se agate NAS OS 4
10/18/16
Page 70

To revise a group’s settings, pass the cursor to the far right of its row to make the Edit pull-down me nu visible.
:Options on the Edit pull-down menu include
Users
Shares
Delete
Users/Shares: change user membership to the group and access
rights to shares
From the Edit pull-down menu, choose Us ers or Shares. The pop-up window includes two tabs for Shares and
.Users
Edit us er membership to the group
.Select the Us ers tab .1
.The column No access lists the users that are not membe rs of the group .2
.Add a user to groups: Select the users in the No access column and drag them to the Access column
.Remove a user from the group: Select users in the Access column and drag them to the No Access column
.Choose Close to confirm the changes .3
Edit acces s rights to shares
.Select the Shares tab .1
.The column No access lists the share s that the group cannot open .2
Add access to s hares: Se lect the applicable share s in the No access column and drag them to the Read
.access column or the Read+write access column
Remove access to s hares : Select the applicable shares in the Read access column or the Read+write
.access column and drag them to the No access column
.Choose Close to confirm the changes .3
70 Se agate NAS OS 4
10/18/16
Page 71

Delete a user
.Pass the cursor to the far right of the user's row to make the Edit pull-down menu visible .1
.Choose Delete .2
.Confirm in the dialogue window .3
Importing groups from an active directory
If you have successfully connecte d to an active directory domain, you will see a button on the Groups page
labeled Import from domain. (Go to Settings for instructions on how to join your NAS OS device to an active
.( directory
:To add users from the active directory
.Choose Import from domain .1
.At the prompt, type a few characters in the text fie ld to find the users you want to import .2
.Hold down the control key (Windows users) or command key (Mac users) to select multiple users .3
.Choose Import .4
The imported users will appear in the table. You can identify users imported from the domain by their grey .5
.icons
Managing groups imported from an active directory
The administrator of the original domain manages groups imported from an active directory. For example,
passwords, email accounts, and use rs are all de termined within the original domain. See Settings for
.instructions on synchronizing changes from an active directory to NAS OS
:The administrator of the NAS OS de vice can adjust the following settings for imported users
.Acce ss rights to shares on the NAS OS device
.De lete an importe d group from the NAS OS device
Settings
.Configure your NAS’s basic settings on the Se ttings page
General
Device name: The device name identifie s the Se agate NAS OS device on your network. You can change it
from the default by passing the cursor to the right of the name. Choose the pe ncil icon when it appears and
.e nter a new name
The de vice name is limited to 15 characters and is case -sensitive. Use alphanumeric characte rs without
.spaces or hyphens. Do not begin or end the name with a hyphen
71 Se agate NAS OS 4
10/18/16
Page 72

If a NAS OS device is connected to the network with a name that already exists, an alternate name is
automatically created to avoid conflicts. For example, a second Seagate 8-bay Rackmount NAS on your
.network will automatically be called Seagate-R8-1 if Seagate-R8 is present
.Language: Pass the cursor to the right and choose the pe ncil icon to change the NAS OS language
.Temperature unit: To change the unit, pass the cursor to the right and choose the pencil icon
Time
.You can se t the time manually or, synchronize with a local or network time server
Synchronization: Use the slider to turn time synchronization on or off. It also enables a pop-up window to
.choose a time server or ente r your own
On: If synchronization is on or off and you want to change the time serve r, click on the slider. The
Synchronization pop-up window includes a pull-down menu in Registered and a field for Custom. Use the
Registered pull-down menu to se lect a popular time server. For a local time server or a network time
server that is not on the Registered pull-down menu, ente r the URL in the Custom field. Choose Save to
.update the time se rver
.Off: Click on the slider and choose Cancel in the Synchronization pop-up window
Date/Time: The date and time are set automatically if you assign a time serve r in synchronization. If a time
server is not selected, you can change the date and time by passing the cursor to the right and choosing the
.pe ncil icon
Zone: Pass the cursor to the right and select the pencil icon. You can choose your time z one from the drop-
.down window
Workgroup/Domain
:Your NAS can join a Windows Workgroup or a Windows Active Directory
Workgroup: Select the radio button for Workgroup and choose the pencil icon to type its name (use from 1
(. to 15 alphanume ric characters
Domain: Select the radio button for Domain to join a Windows Active Directory on your network (see the
next paragraph for instructions on ente ring your Active Directory cre dentials). Joining an Active Dire ctory
.allows the administrator to import existing users and groups, fore going the need to re-enter cre dentials
Connect to an Active Directory
.Select the Domain radio button .1
At the prompt, fill in the Fully-qualified domain name, Administrator login, and Administrator password. For .2
more complex network configurations, choose the Advanced Criteria arrow and fill in the Server name and
Active Domain Troubleshooting: The information below provides general information on joining
.and leaving a domain. For additional information, see Getting Help
72 Se agate NAS OS 4
10/18/16
Page 73

.Server IP fields
.Once connecte d, you can import users and groups from the domain. See Users and Groups for details .3
Synchronize Users/Groups
Except for acce ss rights to shares on the NAS OS device, the domain’s administrator manages all users and
groups imported from the domain. If a user's/group's account has been changed by the domain administrator
within the Windows Active Dire ctory se rver (e.g. password re vision, deleted from the domain, etc.), you can
update the account in NAS OS by choosing the button Synchronize imported users /groups. The button only
.appears once you have joined a domain
Leave the domain
:To remove the NAS's connection to a domain
.Choose the Leave button .1
.Authenticate by entering the domain administrator's username and password .2
Users and groups that were imported may still be liste d on the Users and Groups pages. To re move all .3
importe d users and groups from the NAS, choose the button Remove the imported users/groups (this
(. button replaces Synchronize imported users /groups once you leave a domain
NAS OS
This section of the Se ttings page provides basic hardware and software information. NAS OS automatically
checks for update s to the software. You can change the fre quency by passing the cursor to the right and
.choosing the pencil icon. To manually check for an update to NAS OS, choose Check now
73 Se agate NAS OS 4
10/18/16
Page 74

Services
The Services page provides a list of file protocols and application se rvices available to the NAS OS device.
Based upon the needs of computers on the network, the administrator can choose to maintain certain services
.while leaving others turned off
:Examples
The administrator may wish to turn AFP (Apple Filing Protocol) off if there are no Apple computers on the
.network
The administrator can enable the FTP service in order to provide acce ss to the NAS via a third-party FTP
.application. Se e FTP for details
Status colors
.The Status column provide s details on the state of the service
ColorState
GreenStarted
WhiteStopped
OrangeReady for use
Service options: start/stop, share access, advanced
parameters
74 Se agate NAS OS 4
10/18/16
Page 75

Options for a service are available in the Edit pull-down menu. Se rvice options can include: Start/Stop, Share
access, and Advanced parameters. Some se rvices have options specific to its features. For example, the iTunes
.and UPnP service s include Re-Index to take inventory of media files
.To enable the Edit pull-down menu, pass the cursor to the far right of a service
Start/Stop a service
.Pass the cursor to the far right of its row to make the Edit pull-down menu visible .1
.Choose Start or Stop .2
Share access: services for a specic share
A service is available to all shares when Start is se lected and not available when Stop is selected. However, an
.administrator may want to enable a service for certain share s but turn it off for others
Example 1: The administrator creates a share called Time Machine to use as the backup destination for a Mac on
the network. Since the Mac runs Time Machine® for its backups, the share must use the Apple File Protocol
(AFP) and Time Machine services. Both se rvices can be e nabled on the Se rvices page. However, all other
computers on the network are PCs. There fore, the administrator disables AFP and Time Machine on all other
.shares
Example 2: A doctor’s office wants to use a share called Entertainment to store media files. A player in the
waiting room that is UPnP/DLNA compatible will access the media files. All other share s store patient
75 Se agate NAS OS 4
10/18/16
Page 76

information and office files. The administrator knows that enabling UPnP/DLNA on all share s can tax the
processor and slow down Re-Indexing the media. Therefore, the administrator disables UPnP/DLNA on all
.shares exce pt Entertainment
The administrator can enable or disable service s on specific shares on the Service s page or the Shares page.
. For details on managing services on the Share s page, see Shares
:Follow the directions be low to enable/disable an active se rvice on specific shares
.Pass the cursor to the far right of the share’s row to make the Edit pull-down menu visible .1
.Choose Share access .2
:Select an option be low .3
.Enabled on all s hares: Click on the radio button next to Enabled on s hares by default and choose Save
Enabled on s pecific shares : Click on the radio button next to Specific shares. In the window, click on the
check boxes next to the share s that will use the service . Choose Save once you have se lected the
.shares
Services summary
.Review the type s of services below
File services
SMB: SMB (se rver message block) is enabled by default since it is native to Windows and supported on Mac
.OS
NRB: Deleting data on a share permanently remove s all associated files. By enabling the NRB (network
recycle bin) se rvice, deleted files will be moved to the share’s recycle bin. This can be ve ry helpful if a user
accidentally remove s data that a co-worker is using on a project. The data is e asily recove re d from the
recycle bin rather than desperate ly searching through the last NAS backup. NRB is only compatible with
.shares that use SMB and it appears as a folder on the share
AFP: AFP can be started manually for computers running Mac OS. AFP must be started if the Time Machine
.service will be enabled
.NFS: See NFS
.FTP/SFTP: See FTP
WebDAV: WebDAV (Web-based distribute d authoring and ve rsioning) is a standard format for
collaborative workflows and data sharing. You can give local and remote se rvers acce ss to shares by
.e nabling the WebDAV se rvice on your NAS OS de vice
Application services
Seagate Access: Se e Remote Access
Time Machine: See Backup: Seagate NAS and PC/Mac
UPnP/DLNA: See Media Server
iTunes: See Media Server
.Network Backup: See Backup Manager. Note: Activating Network Backup server will disable SFTP
Download machine: Se e Download Manager
76 Se agate NAS OS 4
10/18/16
Page 77

SSH Access
Administrators with advanced networking skills can log in to NAS OS using secure shell (SSH), an encrypted
protocol used for communication betwee n device s. Using a command-line inte rface, the administrator can
automate data management and backups as well as re view the NAS’s se ttings. The administrator also has the
.right to access data stored on the NAS via SSH
Printer server
Printer server is enabled by default. An orange light me ans that NAS OS does not dete ct a printe r connected to
one of the NAS’s USB ports. The light will turn green once a compatible printer is found. Follow the directions
:below to share a printer on the network via the NAS OS device
.Connect your printer to a USB port on your NAS .1
.Pass the cursor to the far right of the printe r row to make the Edit pull-down menu visible and choose Start .2
.Check the status of the Printer server .3
Computers on your network may re quire specific drivers to use the printe r. See your printer’s user manual for
.details
Network
.The Network page features four tabs to manage the NAS’s network se ttings
.Connections: Revie w or change se ttings for the LAN ports; link aggregation; and IPv4 or IPv6 addresses
.Proxy: Assign a proxy serve r for Internet access
Remote access: Configure remote acce ss using Seagate MyNAS or DynDNS. Details on Seagate ’s remote
.access solutions are available at Remote access
.Port forwarding: Review and adjust the route r’s port numbers for select services
Connections tab
IPv6 mode
.You can turn on IPv6 addre ssing by clicking on the IPv6 mode slider
Connections table
Important info: For multi-function printers, only the print fe ature is supported. If your printer has a
scan feature, it will not work when connected to the NAS. In addition, only PostScript printers are
supported. If your printer does not appear in the printer service , it is likely that it does not support
PostScript printing. This is freque ntly the case with multi-function and photo printers. Seagate
.cannot guarantee that your printer supports the proper protocols to make it a networked printe r
77 Se agate NAS OS 4
10/18/16
Page 78

The Connections table lists the general network se ttings for the LAN ports. The number of LAN ports depends
.upon your NAS mode l
.Star icon: The star appears on the primary LAN. See the note below regarding the primary LAN
Name: The de fault names for the LAN ports are LAN 1, LAN 2, etc. Click on the name to ente r a new name
.for the LAN port
.Type: The type of cable attached to the LAN port
IP address : This column shows the NAS’s IPv4 addresses. If your network is DHCP-enabled for IPv4, the
.LAN ports are automatically assigned IPv4 addresses
IPv6 address: This column shows the NAS’s IPv6 addresses. If IPv6 is turned on and your network is DHCP-
.e nabled, the LAN ports are automatically assigned IPv6 addre sse s
Status: A green circle me ans that the LAN port is connected to an active network. A white circle shows
.there is no connection to a network
.Speed: The speed of the network
Icons representing the LAN ports sit below the Connections table. An icon will become highlighted when the
:cursor is passed over the port’s row. The icons also indicate the following
.Connected Ethernet end: The port is connected to a network
.Disconnected Ethernet end: The port is not connected to a network
LAN Edit menu
To revie w or modify settings for a LAN port, pass the cursor to the far right of its row to make the Edit pull-down
me nu visible. Available se ttings in the pull-down menu differ based upon the NAS’s LAN connections.
Specifically, Define as primary will only appear if the NAS has more than one LAN connection
LAN Edit menu: Edit
.Choose Edit to review and update important settings on the LAN port
.Name: Type a new name in the LAN port's Name field
IPv4 tab: The de fault IP configuration setting for the LAN port is Automatic (DHCP). To use a static IP, click on
the pull-down me nu and choose Manual. For the static IP addre ss to take effect, all fields (including Default
gateway and DNS server) must be completed be fore choosing Save. Check the box next to Default gateway
.to enter or revise the gateway address. The LAN port will revert to automatic if a field is left blank
78 Se agate NAS OS 4
10/18/16
Page 79

IPv6 tab: This tab is available when the IPv6 slider is turned on. The default IP configuration se tting for the
LAN port is Automatic (DHCP). To change the LAN port’s addre ss, click on the pull-down me nu and choose
Manual. For the new address to take effect, complete the Global IPv6 address and IPv6 default gateway
.fields before choosing Save
Advanced tab: Click on the pull-down menu to adjust the frame size for your NAS. Note: Changing the size of
the frames can affect the NAS’s performance . It is highly recommende d that administrators confirm that
the router and other network de vices support jumbo frame s before choosing a higher frame size on the
.NAS
LAN Edit menu: Dene as primary
:A star next to the LAN’s name marks it as the primary Ethernet port. The primary Ethernet port
.Carries the data when the NAS is configured for fault tolerance
.Acts as the gateway to the Internet when the NAS is bridged across two separate networks
.You can reassign the role of primary port
Pass the cursor to the far right of the secondary LAN port (no star) to make the Edit pull-down menu .1
.visible
.Choose Define as primary .2
.The star icon will move to the port to reflect the change .3
LAN Edit menu: Disable/Enable
.Turn the LAN port off/on
Port aggregation and linking LAN ports
Seagate NAS OS supports port aggregation for NAS devices e quipped with two or more LAN ports. Review the
.instructions be low to learn how to configure your NAS for port aggregation
Important info on static IP addresses : Changes to the IP address must be consistent with the values
of the router and network. You can lose contact with your NAS by typing addresses that are not
.available on your network
The primary LAN and Seagate Network As s istant: If you e xperience problems with Seagate
.Ne twork Assistant, confirm that LAN 1 is connecte d to the network and that it is the primary LAN
Important info on connecting multiple LAN ports: When connecting both LAN ports to one or more
routers, make certain to configure your NAS OS de vice for multiple networks, load balancing, or
fault tolerance . Leaving all ports active without creating a bridge or bond can create problems with
.the NAS OS device ’s network identification, pote ntially losing its IP address
79 Se agate NAS OS 4
10/18/16
Page 80

Port aggregation: Bridge the data on your NAS OS device between
two networks
Two separate networks can share the NAS. Connect LAN 1 to the router on the first network and LAN 2 to the
.route r on the second network
Both LANs should have gree n circles in the Status column. If one of the LAN ports is not active, try to enable it in
.the Edit me nu
With a bridged connection, e ach LAN port should have its own unique IP address to reflect se parate networks.
You can confirm the bridge by checking the subnets of the IP addresses. The subnet is the third se gment of
.numbe rs in an IP addre ss. For example, the subnet of the address 192.168.3.20 is 3
Port aggregation: Enhance your NAS’s performance with load
balance
Configure both Ethernet ports to act together for speeds up to 1.5 times faster than a single LAN connection.
.You also get adde d security should one of the Ethernet cables or ports fail
.Before following the directions below, make ce rtain that your switch or route r supports link aggregation
.Connect LAN 1 and LAN 2 to the same switch or router .1
:If one LAN is liste d as inactive .2
.Confirm that it is securely connected to the device and to your router
Pass the cursor to the far right of the LAN port to make the Edit pull-down me nu visible. If the option is
.available, choose Enable
.With both LANs enabled, choose Link .3
.Select Load balancing and choose Next .4
.Check the boxes next to e ach LAN port and choose Next .5
You can give a unique name to the load balance bond in the Name field. This type of Ethernet bonding will .6
create a unified IP address (DHCP or static). To use a static address, choose Manual in the IPv4 or IPv6
pull-down menus and complete all the fields. The manual IP address must be consistent with the values of
.your network
.Choose Finis h .7
The two LAN ports are listed as one on the Connections tab. Note that the number in the Spee d column has
.also changed
:Break the load balance bond
.Pass the cursor to the far right of the LAN’s row to make the Edit pull-down menu visible .1
.Choose Remove link and Continue at the prompt .2
Removing the link can disable the secondary LAN interface . Pass the cursor to the far right of the disabled .3
.LAN port to make the Edit pull-down me nu visible and choose Enable
80 Se agate NAS OS 4
10/18/16
Page 81

Port aggregation: Failover protection using fault tolerance
Configure fault tolerance to keep your NAS connecte d to the network even if one Ethernet port or cable fails.
Before following the directions below, make ce rtain that your network switch or route r supports link
.aggregation
.Connect LAN 1 and LAN 2 to the same switch or router .1
:If one LAN is liste d as inactive .2
.Confirm that it is securely connected to the device and to your router
Pass the cursor to the far right of the LAN port to make the Edit pull-down me nu visible. If the option is
.available, choose Enable
.With both LANs enabled, choose Link .3
.Select Fault tolerance and choose Next .4
.Check the boxes next to e ach LAN port and choose Next .5
Fault tolerance automatically switches to the se condary LAN if it cannot detect the primary LAN. In this .6
step, click on the pull-down me nu and choose the type of fault detection for the bond: Phys ical (e.g. a bad
Ethernet cable or Ethernet port) or Logical (e.g. contact with another IP addre ss). For logical fault tolerance,
enter the IP address that the NAS OS device will ping to confirm the stability of the primary LAN, as well as
the frequency of the ping. The IP addre ss should target a separate server, a computer on the network, or
.another device that can manage the task
.Choose Next .7
You can give a unique name to the fault tolerance bond in the Name field. This type of Ethernet bonding will .8
create a unified IP address (DHCP or static). To use a static address, choose Manual in the IPv4 or IPv6
pull-down menus and complete all the fields. The IP addre ss must be consistent with the values of your
.network
.Choose Finis h .9
.The two LAN ports are liste d as one on the Connections tab
:Break the fault tolerance bond
.Pass the cursor to the far right of the LAN’s row to make the Edit pull-down menu visible .1
.Choose Remove link and Continue at the prompt .2
Removing the link can disable the secondary LAN interface . Pass the cursor to the far right of the disabled .3
.LAN port to make the Edit pull-down me nu visible and choose Enable
Port aggregation: LAN failover for load balancing versus fault
tolerance
Both bonding and fault tolerance can save you from losing productivity should a single LAN fail (e.g. NAS port,
router port, or cable). In the event of LAN failure in a load balance bond, it can take a few minutes for the NAS
to switch to single LAN mode. Fault tolerance will make the switch instantly, allowing for uninte rrupte d
.communication with the NAS
Proxy tab
A proxy server is used to connect network de vices to the Internet. If necessary, your NAS can be configured to
81 Se agate NAS OS 4
10/18/16
Page 82

.use a proxy se rver
.Click on the Internet acces s pull-down me nu and choose Proxy server .1
.Complete the fields for the proxy se rver's IP address, port, and optional authentication information .2
.Choose Apply .3
Remote access tab
.See Remote Acce ss
Port forwarding tab
.Use this tab to manage the port forwarding rules for your NAS
Port numbers on the NAS and the network router are used to direct traffic for dive rse features such as
Internet access, file services (e.g. SMB, AFP, NFS), and application se rvices (e.g. remote acce ss, Download
Manager, etc.). Automatic port forwarding is turned on by default and the port numbers are the same for both
.the NAS port and Router port columns
In most instances, automatic port forwarding should help you access services on the NAS. Howeve r,
enterprise -leve l network security or port availability on a router can prevent access to ports. There fore, it may
be nece ssary to change the router port numbers manually for one or more services. Before adjusting numbe rs
82 Se agate NAS OS 4
10/18/16
Page 83

in the port forwarding table, confirm that the ports are available on your router. For example, if you intend to
change download machine to router port number 8800, you must make ce rtain that port 8800 is available on
your route r and assigned to your NAS. Additionally, your router must be compatible with UPnP-IGD/NAT-PMP
.protocols. Se e your router's use r manual for details
.To change the route r port for a se rvice on the NAS, choose its value in the Router port column
To disable port forwarding for a service, pass the cursor to the far right of its column to make the Edit pull-down
.menu visible and choose Disable
Power
:Use the Power page to revie w and change settings for
NAS power manageme nt
UPS manageme nt
NAS power management
:The NAS OS Power page provide s two leve ls of e nergy economy
Power conservation
Power saving mode
Power conservation
During periods of inactivity, NAS OS spins down the hard drives. In addition to conse rving energy, spinning
.down the hard drives when they are not in use can help to extend their life spans
The de fault period of inactivity before spinning down the hard drive s is 20 minutes. To re vise this time , click on
.the pull-down menu for Turn off the hard drives
Power saving mode
Many work environments may not require the NAS to be active all hours of the day or eve n the entire week.
The administrator can take advantage of anticipated down time by scheduling the NAS to power off and power
.on as needed
While in power saving mode, the NAS suspends all activity, including spinning down the hard drives and turning
off its fans and LEDs. All processe s enabled in NAS OS, including downloads and backups, will be te rminate d.
83 Se agate NAS OS 4
10/18/16
Page 84

Since the shares are not accessible and the device cannot be managed via NAS OS, power saving mode should
.be used when no one is accessing the NAS's data
Example 1: The six employees of a small printing company arrive at the office no e arlier than 6:00 AM and all
activity stops after 10:00 PM. To save power and extend the life of the NAS’s hardware, the administrator
.schedules the NAS to power on at 5:00 AM and power off at 11:00 PM
Example 2: The 50 employe es at a branch office require 24-hour access to the NAS Monday through Friday.
However, the branch office manager prefers that employees do not work during the weekend. Therefore, the
.administrator de cide s to schedule the NAS to power on Monday at 6:00 AM and power off Friday at 11:00 PM
Schedule power saving mode
.Click the slider for Power saving mode to enable the schedule .1
Set the time of day that the NAS will wake from power saving mode. Click on the day of the week in the .2
.Power on column
.In the pop-up window, choose the radio button next to Scheduled and se t the time .3
.Choose Save .4
Set the time of day that the NAS will ente r power saving mode. Click on the day of the wee k in the Power off .5
.column
.In the pop-up window, choose the radio button next to Scheduled and se t the time .6
.Choose Save .7
84 Se agate NAS OS 4
10/18/16
Page 85

Wake the NAS from power saving mode
To wake the NAS from power saving mode, apply a short press to the power button. You can also use the Wake
(. (on LAN function in Se agate Network Assistant (see Wake on LAN (WOL
UPS management
:NAS OS supports three types of UPS (uninterruptible power source) manageme nt
Single NAS device: Direct connection to a UPS
Multiple NAS devices A: One NAS OS device takes the role of Network UPS server
Multiple NAS devices B: The UPS connects directly to the router and acts as the Network UPS server
Single NAS: Direct connection
.Follow the directions below when connecting a single NAS OS device to a UPS
.Confirm that no one is accessing the NAS OS device and power it off .1
Important info: Seagate cannot guarante e that all UPS de vices are compatible with NAS OS UPS
.management
Important info: Make ce rtain to re view the UPS’s documentation before connecting it to your NAS
.devices
85 Se agate NAS OS 4
10/18/16
Page 86

Connect the NAS to a supported UPS via power and USB cables. The USB cable is required for the UPS .2
.management information
. Power on the NAS and go to the Power page. The UPS should appear in the UPS manageme nt section .3
Battery threshold level refers to the percentage of power available to the UPS’s battery. In the eve nt that a
working environment loses power, the NAS automatically powers off when the UPS reaches the threshold level.
Without the UPS’s threshold level, power is sudde nly cut off to the NAS, pote ntially causing the loss and
.corruption of data
.The administrator can adjust the threshold by clicking on the pencil icon
Multiple NAS devices A: A NAS OS device is the network UPS
server
The instructions below suggest adding all NAS OS de vices to the UPS at once. Howeve r, you can connect each
.NAS OS de vice as required by your working environment
Confirm that no one is acce ssing the first NAS OS device and power it off. This NAS will become Network .1
.UPS se rver
Connect the first NAS to a supporte d UPS via power and USB cables. The USB cable is required for the UPS .2
.management information
.Power on the first NAS and go to the Power page. The UPS should appear in the UPS manageme nt section .3
.Check the box next to Network UPS server .4
.Confirm that no one is accessing the other NAS OS devices on the same network and power them off .5
.Connect the othe r NAS devices to the UPS via power cables only and power them on .6
.For each NAS OS device, go to the Power page and choose Add a network UPS server .7
.In the pull-down me nu for Network UPS type, select Seagate NAS UPS s erver .8
.Select the first NAS and choose Save .9
86 Se agate NAS OS 4
10/18/16
Page 87

Battery threshold level refers to the percentage of power available to the UPS’s battery. In the eve nt that a
working environment loses power, the NAS de vices automatically power off when the UPS reaches the
threshold level. Without the UPS’s threshold level, power is sudde nly cut off to the NAS devices, potentially
.causing the loss and corruption of data
The administrator can adjust the threshold on the first NAS by clicking on the pencil icon. Unlike the first NAS,
.the other NAS de vices cannot adjust the battery threshold level
Remove the network UPS server
.Choose Remove the network server to disconnect a NAS from the network UPS server
Multiple NAS devices B: The UPS is the network UPS server
The following configuration requires a UPS with an Ethernet port to connect to the same router as the NAS OS
de vices. Additionally, the UPS must support SNMP to communicate with the NAS OS de vices on the network.
.Refer to your UPS’s documentation for further details
The instructions below suggest adding all NAS OS de vices at once. However, you can connect each NAS OS
.device as required by your working environment
Connect the UPS to a power source and the network router according to the instructions provided in the .1
.UPS’s documentation
.Confirm that no one is accessing the NAS OS devices and power them off .2
87 Se agate NAS OS 4
10/18/16
Page 88

.Connect the NAS OS de vices to the UPS via power cables only and power them on .3
.For each NAS OS device, go to the Power page and choose Add a network UPS server .4
.In the pull-down me nu for Network UPS type, select SNMP UPS .5
Enter the UPS’s IP addre ss and, if applicable, SNMP community. Refe r to the UPS’s administration tool for .6
.its IP address
.Choose Save .7
NAS OS cannot adjust the battery threshold level when connecting to a UPS serve r via the network. Check the
.documentation for your UPS to learn more on how to manage the device
Remove the network UPS server
.Choose Remove the network server to disconnect a NAS from the network UPS server
Security
Use the Security tab to prevent potential attackers from re aching your NAS OS de vice. You can also control
.access to your NAS OS device using Ban and White lists
Auto Block
Enable auto block to block IP addresses that have made numerous failed attempts to log into the de vice and
automatically add them to the Ban list. IP addresses on the ban list are prevented from accessing your NAS OS
.device
:Click the switch to enable auto block. See below for the de fault settings for auto block
Maximum failed logins: 3
Failed logins within (minutes): 2
Block for (minutes): 2
.The settings can be changed when auto block is enabled
To prevent users from losing access due to failed logins, add their IP addre sses to the Whitelist. Click Whitelis t
88 Se agate NAS OS 4
10/18/16
Page 89

.and then enter the IP addre sse s
Auto block is optimized for FTP and SSH protocols. You can manage the ban list by clicking Ban list and manually
.e ntering or re moving IP addresses
Certicate
An SSL Certificate is a data file with an encrypted key targeted for use by your company or organization. While
your NAS OS de vice’s default certificate offers high security, you can create a unique certificate for use with
.your NAS OS device. Costs for SSL Certificates vary by third-party provider
Custom SSL Certificates can be uploade d to your NAS OS device to replace the default certificate. To take
advantage of the se curity provided by an SSL Certificate, make certain to choose Switch to HTTPS at the NAS
.OS login page
DDOS
Distributed denial-of-service (DDoS) is a type of attack in which multiple devices target a single de vice. The
multiple devices can attack from local and wide area networks or via the Inte rnet and are often infected with a
Trojan. The end result is a denial of service for the target device . You can improve your NAS OS device ’s
.chances of avoiding such an attack by clicking the switch to e nable DDoS prote ction
Services on LAN Ports
89 Se agate NAS OS 4
10/18/16
Page 90

.Enable or disable select service s on one or both of your NAS OS device ’s LAN ports
Monitoring
.Monitoring provide s a summary of the NAS OS device's hardware and the health of its components
System tab
System details will vary base d upon your NAS OS de vice. For example, an enclosure with a single Ethernet port
.can only list one LAN. Also, NAS OS devices with audible alarms include the option to turn the sound on or off
When re viewing the System tab, place your cursor over the charts and graphics on the page for additional
readings. Moving the cursor over the graphic for the fan shows its current revolutions per minute (RPM).
.Additional readings are available with RAM, CPU, and Ne twork
Upper pane: General health, temperature, and fans
A gree n check mark on the upper left indicates that your hardware is operational and there are no
problems. A red "X" alerts you to pote ntial problems with the hardware . It is accompanied by an error
.message, such as the device has reached a critical temperature
The running time below the check mark indicates consecutive hours and minutes of operation. The clock will
90 Se agate NAS OS 4
10/18/16
Page 91

restart each time the de vice is powered on, restarted, or wakes up from power saving or de ep sleep
.mode s
The temperatures of the device's CPU and casing are located on the upper right
(Upper middle pane: Casing (select NAS OS devices only
Click on the ID light slider to make the ide ntification LED blink. This is helpful when locating a rackmount NAS
.on a rack with many de vices
.Click on the Sound slider to enable or disable the audible alert
Casing: A gree n circle means that the enclosure’s top cover is closed. Check the cover if the circle is not
.green
Power: A green circle indicates that the power supplies are working as expected. Check the power supplies if
.the circle is not green
Middle pane: Resources
The Resources pane shows dynamic graphics of the demands placed upon the CPU and RAM. To the right, a
real-time graph offers constant updates on the NAS’s network transfe r rate s. For an expanded look at CPU,
.RAM, and network performance, click Details in the Resources pane
A gree n circle next to the LAN means that it is connecte d to the network. A white circle means that the LAN
.is not connected to the network
91 Se agate NAS OS 4
10/18/16
Page 92

Lower pane: Process
The Process pane lists the five processes that are placing the highest demands upon the CPU. Click on
.Details in the Process pane to se e the full list of proce sses
Temperature and fan warnings
Temperature error: Check the placement of your NAS to make certain that it is not receiving an abnormal
amount of heat from e xternal sources (e.g. sun from a window, heating duct, exhaust from other
.e lectronics, etc.). If the problem persists, see Getting Help for links to contact customer support
.Fan error: Check the fan performance line graph to dete rmine if the fans are running too high or not at all
.Drive error: Select the Drive tab to review the status for the NAS's hard drives
92 Se agate NAS OS 4
10/18/16
Page 93

Drive tab
93 Se agate NAS OS 4
10/18/16
Page 94

Review basic information for each hard drive in the enclosure, including the mode l number, capacity,
temperature, and SMART status. SMART stands for Se lf-Monitoring, Analysis and Reporting Technology. SMART
status should be use d for informational purposes only, specifically when diagnosing hard drives. It lets you know
if the hard drive is re porting or experiencing errors. If a hard drive has an error, run a SMART test by selecting
.the Autotest button
:Additional notes on the Drive tab
.Acce ptable Temperature values may differ based upon the make and model of the hard drive
.The dynamic photo of your NAS will highlight the hard drive selecte d in the hard drive table
.Choose SMART s tatus to review the full SMART report on the selected hard drive
Notications
Use the Notifications page to manage how the administrator receives update s on the health of the NAS OS
:device. The page has two tabs
Notifications: NAS OS alerts and activity
SNMP: Monitoring and managing the NAS using the Simple Network Management Protocol
Notications tab
Email notications
94 Se agate NAS OS 4
10/18/16
Page 95

NAS OS can send important activity updates to the administrator via email. Se e the table be low for e vents that
.trigger email notifications
Email notification triggers
Event
identifier
DescriptionRecipient
CapacityThe total available capacity is less than 10%Administrator
QuotaThe user has reached 90% of his storage quotaAdministrator
DownloadA download job has completed or a download job
error has occurred
Administrator
BackupA backup job has failedAdministrator
FanThe fan has stoppedAdministrator
TemperatureThe product has remained at maximum
temperature for at least one minute
Administrator
Password
recovery
A user has recovered his/her passwordAdministrator or use r, de pending on
who made the request
Turn Email notifications on or off by clicking on its slider. The default se rver for email notifications is Seagate, a
.secure email syste m
Administrators have the option to use an alternative e mail server. Pass the cursor over Seagate and click on the
:pencil icon. Choose Custom in the pull-down menu and complete the fie lds in the pop-up window
Enter the SMTP address for your email serve r. You can use an in-house SMTP server or third-party
.providers such as Gmail, Outlook, and Yahoo
.You have the option to e nable SSL by checking its box
If your email se rver requires verification, check the box next to SMTP authentication to enter the
.username and password
.Test the connection by checking the box next to Send a verification email
Recent activity
Review the eve nts for the NAS OS device. To parse the events list into categories and sub-categorie s, choose
.Filter
The eve nts list is important when troubleshooting the NAS OS de vice with Seagate te chnical support. A full log
.of events is available for download by choosing Download System Log
95 Se agate NAS OS 4
10/18/16
Page 96

.To purge all events from the log list, choose Clear logs
SNMP tab
Administrators with advanced networks that include SNMP can add the NAS OS device as an agent. NAS OS
.supports SNMP versions v1/v2 and, for enhanced security, v3
Turn on the SNMP agent by clicking on its slider. To make changes to the SNMP configuration, pass the cursor
.ove r a setting and click on it
Storage
The information below identifie s and explains the functions on the Storage page. For directions on how to
.configure RAID for your NAS OS device , go to RAID
NAS OS volume and RAID management
NAS OS supports multiple volumes, each with its own level of RAID. The maximum numbe r of supporte d
volume s depends upon the amount of disks in the NAS's enclosure. For e xample, a NAS OS device with eight
.hard drive s can have up to eight volume s
Enhanced data protection: NAS OS SimplyRAID
No matter the capacity of your hard drives, NAS OS SimplyRAID will prepare the storage for immediate use as
:well as future e xpansion. SimplyRAID allows you to
Install disks of varying capacities
Replace smaller capacity hard drives with larger capacity hard drives
Upgrade storage capacity without deleting or moving data
Protect data without compromising performance
When using hard drives of varying capacitie s, SimplyRAID will attempt to optimiz e available storage for your
.data
Standard disk conguration: Manual RAID
While the benefits of SimplyRAID are highly recommended, the Storage page also gives you the option to
:manually configure your hard disks as
JBOD
(RAID 0 (minimum two hard drives
(RAID 1 (minimum two hard drives for data protection
(RAID 1+Spare (minimum three hard drives
(RAID 5 (minimum three hard drive s
96 Se agate NAS OS 4
10/18/16
Page 97

(RAID 5+Spare (minimum four hard drive s
(RAID 6 (minimum four hard drive s
(RAID 6+Spare (minimum five hard drive s
(RAID 10 (minimum four hard drives
(RAID 10+Spare (minimum five hard drives
Storage overview
:Choose Storage > Overview to
.Review the list of the NAS's volumes and their current state
.Configure new hard drives added to the NAS
Manage
97 Se agate NAS OS 4
10/18/16
Page 98

The Manage button is available when the enclosure has new or unused hard drive s. Choose Manage on the
.Storage Overview page to create a new volume. For further information, see RAID
Internal and External volumes
Internal volume s are the volumes created from the disks inserte d into the NAS’s e nclosure. External volumes
.are storage de vices connecte d to the USB or eSATA ports. Click on a volume to review and adjust its se ttings
Volume settings
98 Se agate NAS OS 4
10/18/16
Page 99

.Choose a volume’s name on the left to view the tools to manage it
Name
The de fault name for the first new volume is Volume 1. The numbe r will rise incrementally when adding new
:volumes, Volume 2, Volume 3, e tc. To change the name
.Pass the cursor ove r the name of the volume and choose the pencil icon .1
Type the new name in the pop-up window .2
.Choose Save .3
.Due to the high level of se curity, an e ncrypted volume re tains its default name
Manage
99 Se agate NAS OS 4
10/18/16
Page 100

:Choose Manage on the volume page to
.Add hard drives to the volume
.Add a spare hard drive to the volume
.Repair the volume
.Expand the volume’s storage capacity
(. Change the encryption settings (if applicable
.Upgrade the volume from single-disk security to double-disk security
(. Format the volume (delete all data without deleting the volume
(. Delete the volume (permanently remove the volume and all of its data
Capacity
:A quick reference of the volume's
.Total storage capacity
.Available storage capacity
An i tooltip appears in the capacity row following the creation of an iSCSI target. Pass the cursor over the tooltip
.to view the amount of storage assigned to the volume's iSCSI target
Status
:Status gives you immediate fe edback on the health of the volume's RAID configuration
.OK. The RAID is ope rational and no problems have been detected
No data protection. Data is intact but one or more hard drives are missing or re porting errors. The amount
.of hard drives that can fail before this me ssage appears is contingent upon the level of RAID
Protected if one disk fails. RAID configurations with double-disk se curity will see this message if a single
.hard drive is missing or reporting errors
.Broken. The RAID is broken resulting in a loss of data
.Synchronizing. The system is synchronizing data across all the hard drives in the volume
.The volume is available for use while the RAID is synchronizing but NAS performance may be affecte d
.RAID data protection will be available once synchronizing is complete
.Choose the tooltip next to Synchronizing for details on its progress
Mode
Mode lists the volume's RAID level. Pass the cursor over the tooltip for details on the RAID's leve l of data
.prote ction
Storage graph
.A multicolor circle shows how the RAID distributes the volume's storage
.Dark blue: Storage capacity for your data
Light blue: Protection in case one or two hard drives fail. The light blue indicator will vary in size depending
.upon single or double disk protection
Green: Disk capacity that spans beyond the level of RAID. This space is reserved for expansion should you
.add new or, larger capacity hard drive s
:Factors that de termine the storage capacities for data, protection, and expansion
.The amount of hard drive s in the e nclosure
100 Se agate NAS OS 4
10/18/16
 Loading...