

Page 1
Seagate Innov8 User Manual
Click here to access an up-to-date online version
of th is docu ment. You will also fin d the most recent content as well as expandable illu strations, easier
navigation , and search capability.
Model:
Page 2

. . . . . . . . . . . . . . . . . . . . . . . . . . . . . . . . . . . . . . . . . . . . . . . . . . . . . . . . . . . . . . . . . . . . . . . . . . . . . . . . . . . . . . . . . . . . . . . . . . . . . . . . . . . . . . . . . . . . . . . . . . . . . . . . . . . . . . . . . . . . . . . . . . . . . . . . . . . . . . . . . . . . . . . . . . . . . . . . . . . . . . . . . . . . . . . . . . . . . . . . . . . . . . . . . . . . . . . . . . . . . . . . . . . . . . . . . . . . . . . . . . . . . . . . . . . . . . . . . . . . . . . . . . . . . . . . . . . . . . . .
. . . . . . . . . . . . . . . . . . . . . . . . . . . . . . . . . . . . . . . . . . . . . . . . . . . . . . . . . . . . . . . . . . . . . . . . . . . . . . . . . . . . . . . . . . . . . . . . . . . . . . . . . . . . . . . . . . . . . . . . . . . . . . . . . . . . . . . . . . . . . . . . . . . . . . . . . . . . . . . . . . . . . . . . . . . . . . . . . . . . . . . . . . . . . . . . . . . . . . . . . . . . . . . . . . . . . . . . . . . . . . . . . . . . . . . . . . . . . . . . . . . . . . . . . . . . . . . . . . . . . . . . . . . . . . . . . . . . . . . .
. . . . . . . . . . . . . . . . . . . . . . . . . . . . . . . . . . . . . . . . . . . . . . . . . . . . . . . . . . . . . . . . . . . . . . . . . . . . . . . . . . . . . . . . . . . . . . . . . . . . . . . . . . . . . . . . . . . . . . . . . . . . . . . . . . . . . . . . . . . . . . . . . . . . . . . . . . . . . . . . . . . . . . . . . . . . . . . . . . . . . . . . . . . . . . . . . . . . . . . . . . . . . . . . . . . . . . . . . . . . . . . . . . . . . . . . . . . . . . . . . . . . . . . . . . . . . . . . . . . . . . . . . . . . . . . . . . . . . . . .
. . . . . . . . . . . . . . . . . . . . . . . . . . . . . . . . . . . . . . . . . . . . . . . . . . . . . . . . . . . . . . . . . . . . . . . . . . . . . . . . . . . . . . . . . . . . . . . . . . . . . . . . . . . . . . . . . . . . . . . . . . . . . . . . . . . . . . . . . . . . . . . . . . . . . . . . . . . . . . . . . . . . . . . . . . . . . . . . . . . . . . . . . . . . . . . . . . . . . . . . . . . . . . . . . . . . . . . . . . . . . . . . . . . . . . . . . . . . . . . . . . . . . . . . . . . . . . . . . . . . . . . . . . . . . . . . . . . . . . . .
. . . . . . . . . . . . . . . . . . . . . . . . . . . . . . . . . . . . . . . . . . . . . . . . . . . . . . . . . . . . . . . . . . . . . . . . . . . . . . . . . . . . . . . . . . . . . . . . . . . . . . . . . . . . . . . . . . . . . . . . . . . . . . . . . . . . . . . . . . . . . . . . . . . . . . . . . . . . . . . . . . . . . . . . . . . . . . . . . . . . . . . . . . . . . . . . . . . . . . . . . . . . . . . . . . . . . . . . . . . . . . . . . . . . . . . . . . . . . . . . . . . . . . . . . . . . . . . . . . . . . . . . . . . . . . . . . . . . . . . .
. . . . . . . . . . . . . . . . . . . . . . . . . . . . . . . . . . . . . . . . . . . . . . . . . . . . . . . . . . . . . . . . . . . . . . . . . . . . . . . . . . . . . . . . . . . . . . . . . . . . . . . . . . . . . . . . . . . . . . . . . . . . . . . . . . . . . . . . . . . . . . . . . . . . . . . . . . . . . . . . . . . . . . . . . . . . . . . . . . . . . . . . . . . . . . . . . . . . . . . . . . . . . . . . . . . . . . . . . . . . . . . . . . . . . . . . . . . . . . . . . . . . . . . . . . . . . . . . . . . . . . . . . . . . . . . . . . . . . . . .
. . . . . . . . . . . . . . . . . . . . . . . . . . . . . . . . . . . . . . . . . . . . . . . . . . . . . . . . . . . . . . . . . . . . . . . . . . . . . . . . . . . . . . . . . . . . . . . . . . . . . . . . . . . . . . . . . . . . . . . . . . . . . . . . . . . . . . . . . . . . . . . . . . . . . . . . . . . . . . . . . . . . . . . . . . . . . . . . . . . . . . . . . . . . . . . . . . . . . . . . . . . . . . . . . . . . . . . . . . . . . . . . . . . . . . . . . . . . . . . . . . . . . . . . . . . . . . . . . . . . . . . . . . . . . . . . . . . . . . . .
. . . . . . . . . . . . . . . . . . . . . . . . . . . . . . . . . . . . . . . . . . . . . . . . . . . . . . . . . . . . . . . . . . . . . . . . . . . . . . . . . . . . . . . . . . . . . . . . . . . . . . . . . . . . . . . . . . . . . . . . . . . . . . . . . . . . . . . . . . . . . . . . . . . . . . . . . . . . . . . . . . . . . . . . . . . . . . . . . . . . . . . . . . . . . . . . . . . . . . . . . . . . . . . . . . . . . . . . . . . . . . . . . . . . . . . . . . . . . . . . . . . . . . . . . . . . . . . . . . . . . . . . . . . . . . . . . . . . . . . .
. . . . . . . . . . . . . . . . . . . . . . . . . . . . . . . . . . . . . . . . . . . . . . . . . . . . . . . . . . . . . . . . . . . . . . . . . . . . . . . . . . . . . . . . . . . . . . . . . . . . . . . . . . . . . . . . . . . . . . . . . . . . . . . . . . . . . . . . . . . . . . . . . . . . . . . . . . . . . . . . . . . . . . . . . . . . . . . . . . . . . . . . . . . . . . . . . . . . . . . . . . . . . . . . . . . . . . . . . . . . . . . . . . . . . . . . . . . . . . . . . . . . . . . . . . . . . . . . . . . . . . . . . . . . . . . . . . . . . . . .
. . . . . . . . . . . . . . . . . . . . . . . . . . . . . . . . . . . . . . . . . . . . . . . . . . . . . . . . . . . . . . . . . . . . . . . . . . . . . . . . . . . . . . . . . . . . . . . . . . . . . . . . . . . . . . . . . . . . . . . . . . . . . . . . . . . . . . . . . . . . . . . . . . . . . . . . . . . . . . . . . . . . . . . . . . . . . . . . . . . . . . . . . . . . . . . . . . . . . . . . . . . . . . . . . . . . . . . . . . . . . . . . . . . . . . . . . . . . . . . . . . . . . . . . . . . . . . . . . . . . . . . . . . . . . . . . . . . . . . . .
. . . . . . . . . . . . . . . . . . . . . . . . . . . . . . . . . . . . . . . . . . . . . . . . . . . . . . . . . . . . . . . . . . . . . . . . . . . . . . . . . . . . . . . . . . . . . . . . . . . . . . . . . . . . . . . . . . . . . . . . . . . . . . . . . . . . . . . . . . . . . . . . . . . . . . . . . . . . . . . . . . . . . . . . . . . . . . . . . . . . . . . . . . . . . . . . . . . . . . . . . . . . . . . . . . . . . . . . . . . . . . . . . . . . . . . . . . . . . . . . . . . . . . . . . . . . . . . . . . . . . . . . . . . . . . . . . . . . . . . .
. . . . . . . . . . . . . . . . . . . . . . . . . . . . . . . . . . . . . . . . . . . . . . . . . . . . . . . . . . . . . . . . . . . . . . . . . . . . . . . . . . . . . . . . . . . . . . . . . . . . . . . . . . . . . . . . . . . . . . . . . . . . . . . . . . . . . . . . . . . . . . . . . . . . . . . . . . . . . . . . . . . . . . . . . . . . . . . . . . . . . . . . . . . . . . . . . . . . . . . . . . . . . . . . . . . . . . . . . . . . . . . . . . . . . . . . . . . . . . . . . . . . . . . . . . . . . . . . . . . . . . . . . . . . . . . . . . . . . . . .
. . . . . . . . . . . . . . . . . . . . . . . . . . . . . . . . . . . . . . . . . . . . . . . . . . . . . . . . . . . . . . . . . . . . . . . . . . . . . . . . . . . . . . . . . . . . . . . . . . . . . . . . . . . . . . . . . . . . . . . . . . . . . . . . . . . . . . . . . . . . . . . . . . . . . . . . . . . . . . . . . . . . . . . . . . . . . . . . . . . . . . . . . . . . . . . . . . . . . . . . . . . . . . . . . . . . . . . . . . . . . . . . . . . . . . . . . . . . . . . . . . . . . . . . . . . . . . . . . . . . . . . . . . . . . . . . . . . . . . . .
. . . . . . . . . . . . . . . . . . . . . . . . . . . . . . . . . . . . . . . . . . . . . . . . . . . . . . . . . . . . . . . . . . . . . . . . . . . . . . . . . . . . . . . . . . . . . . . . . . . . . . . . . . . . . . . . . . . . . . . . . . . . . . . . . . . . . . . . . . . . . . . . . . . . . . . . . . . . . . . . . . . . . . . . . . . . . . . . . . . . . . . . . . . . . . . . . . . . . . . . . . . . . . . . . . . . . . . . . . . . . . . . . . . . . . . . . . . . . . . . . . . . . . . . . . . . . . . . . . . . . . . . . . . . . . . . . . . . . . . .
. . . . . . . . . . . . . . . . . . . . . . . . . . . . . . . . . . . . . . . . . . . . . . . . . . . . . . . . . . . . . . . . . . . . . . . . . . . . . . . . . . . . . . . . . . . . . . . . . . . . . . . . . . . . . . . . . . . . . . . . . . . . . . . . . . . . . . . . . . . . . . . . . . . . . . . . . . . . . . . . . . . . . . . . . . . . . . . . . . . . . . . . . . . . . . . . . . . . . . . . . . . . . . . . . . . . . . . . . . . . . . . . . . . . . . . . . . . . . . . . . . . . . . . . . . . . . . . . . . . . . . . . . . . . . . . . . . . . . . . .
. . . . . . . . . . . . . . . . . . . . . . . . . . . . . . . . . . . . . . . . . . . . . . . . . . . . . . . . . . . . . . . . . . . . . . . . . . . . . . . . . . . . . . . . . . . . . . . . . . . . . . . . . . . . . . . . . . . . . . . . . . . . . . . . . . . . . . . . . . . . . . . . . . . . . . . . . . . . . . . . . . . . . . . . . . . . . . . . . . . . . . . . . . . . . . . . . . . . . . . . . . . . . . . . . . . . . . . . . . . . . . . . . . . . . . . . . . . . . . . . . . . . . . . . . . . . . . . . . . . . . . . . . . . . . . . . . . . . . . . .
. . . . . . . . . . . . . . . . . . . . . . . . . . . . . . . . . . . . . . . . . . . . . . . . . . . . . . . . . . . . . . . . . . . . . . . . . . . . . . . . . . . . . . . . . . . . . . . . . . . . . . . . . . . . . . . . . . . . . . . . . . . . . . . . . . . . . . . . . . . . . . . . . . . . . . . . . . . . . . . . . . . . . . . . . . . . . . . . . . . . . . . . . . . . . . . . . . . . . . . . . . . . . . . . . . . . . . . . . . . . . . . . . . . . . . . . . . . . . . . . . . . . . . . . . . . . . . . . . . . . . . . . . . . . . . . . . . . . . . . .
. . . . . . . . . . . . . . . . . . . . . . . . . . . . . . . . . . . . . . . . . . . . . . . . . . . . . . . . . . . . . . . . . . . . . . . . . . . . . . . . . . . . . . . . . . . . . . . . . . . . . . . . . . . . . . . . . . . . . . . . . . . . . . . . . . . . . . . . . . . . . . . . . . . . . . . . . . . . . . . . . . . . . . . . . . . . . . . . . . . . . . . . . . . . . . . . . . . . . . . . . . . . . . . . . . . . . . . . . . . . . . . . . . . . . . . . . . . . . . . . . . . . . . . . . . . . . . . . . . . . . . . . . . . . . . . . . . . . . . . .
. . . . . . . . . . . . . . . . . . . . . . . . . . . . . . . . . . . . . . . . . . . . . . . . . . . . . . . . . . . . . . . . . . . . . . . . . . . . . . . . . . . . . . . . . . . . . . . . . . . . . . . . . . . . . . . . . . . . . . . . . . . . . . . . . . . . . . . . . . . . . . . . . . . . . . . . . . . . . . . . . . . . . . . . . . . . . . . . . . . . . . . . . . . . . . . . . . . . . . . . . . . . . . . . . . . . . . . . . . . . . . . . . . . . . . . . . . . . . . . . . . . . . . . . . . . . . . . . . . . . . . . . . . . . . . . . . . . . . . . .
. . . . . . . . . . . . . . . . . . . . . . . . . . . . . . . . . . . . . . . . . . . . . . . . . . . . . . . . . . . . . . . . . . . . . . . . . . . . . . . . . . . . . . . . . . . . . . . . . . . . . . . . . . . . . . . . . . . . . . . . . . . . . . . . . . . . . . . . . . . . . . . . . . . . . . . . . . . . . . . . . . . . . . . . . . . . . . . . . . . . . . . . . . . . . . . . . . . . . . . . . . . . . . . . . . . . . . . . . . . . . . . . . . . . . . . . . . . . . . . . . . . . . . . . . . . . . . . . . . . . . . . . . . . . . . . . . . . . . . . .
Cont en t sCont en t s
1 Introduction
Box content
Minim um system requirements
Hardware requirem ents
2 LED indicator and cables
Status light inform ation
USB-C
3 Connect your Innov8 to your computer
Step 1 – Connect to your computer
Step 2 – Registration and software
4 Safely remove your Innov8 from your computer
Safely remove external storage from a Windows PC
Safely remove external storage from a Mac
5 Back up your computer to your Seagate Innov8
What is a backup?
Backup options
6 Back up a Windows PC
Create a backup with Seagate Dashboard
Create a backup with Windows utilities
7 Back up a Mac
. . . . . . . . . . . . . . . . . . . . . . . . . . . . . . . . . . . . . . . . . . . . . . . . . . . . . . . . . . . . . . . . . . . . . . . . . . . . . . . . . . . . . . . . . . . . . . . . . . . . . . . . . . . . . . . . . . . . . . . . . . . . . . . . . . . . . . . . . . . . . . . . . . . . . . . . . . . . . . . . . . . . . . . . . . . . . . . . . . . . . . . . . . . . . . . . . . . . . . . . . . . . . . . . . . . . . . . . . . . . . . . . . . . . . . . . . . . . . . . . . . . . . . . . . . . . . . . . . . . . . . . . . . . . . . . . . . . . . . . .Eject via Finder window
. . . . . . . . . . . . . . . . . . . . . . . . . . . . . . . . . . . . . . . . . . . . . . . . . . . . . . . . . . . . . . . . . . . . . . . . . . . . . . . . . . . . . . . . . . . . . . . . . . . . . . . . . . . . . . . . . . . . . . . . . . . . . . . . . . . . . . . . . . . . . . . . . . . . . . . . . . . . . . . . . . . . . . . . . . . . . . . . . . . . . . . . . . . . . . . . . . . . . . . . . . . . . . . . . . . . . . . . . . . . . . . . . . . . . . . . . . . . . . . . . . . . . . . . . . . . . . . . . . . . . . . . . . . . . . . . . . . . . . . .Eject via Des ktop
. . . . . . . . . . . . . . . . . . . . . . . . . . . . . . . . . . . . . . . . . . . . . . . . . . . . . . . . . . . . . . . . . . . . . . . . . . . . . . . . . . . . . . . . . . . . . . . . . . . . . . . . . . . . . . . . . . . . . . . . . . . . . . . . . . . . . . . . . . . . . . . . . . . . . . . . . . . . . . . . . . . . . . . . . . . . . . . . . . . . . . . . . . . . . . . . . . . . . . . . . . . . . . . . . . . . . . . . . . . . . . . . . . . . . . . . . . . . . . . . . . . . . . . . . . . . . . . . . . . . . . . . . . . . . . . . . . . . . . . .Install Dashbo ar d on yo ur PC
. . . . . . . . . . . . . . . . . . . . . . . . . . . . . . . . . . . . . . . . . . . . . . . . . . . . . . . . . . . . . . . . . . . . . . . . . . . . . . . . . . . . . . . . . . . . . . . . . . . . . . . . . . . . . . . . . . . . . . . . . . . . . . . . . . . . . . . . . . . . . . . . . . . . . . . . . . . . . . . . . . . . . . . . . . . . . . . . . . . . . . . . . . . . . . . . . . . . . . . . . . . . . . . . . . . . . . . . . . . . . . . . . . . . . . . . . . . . . . . . . . . . . . . . . . . . . . . . . . . . . . . . . . . . . . . . . . . . . . . .Cre ate a co mputer backup
. . . . . . . . . . . . . . . . . . . . . . . . . . . . . . . . . . . . . . . . . . . . . . . . . . . . . . . . . . . . . . . . . . . . . . . . . . . . . . . . . . . . . . . . . . . . . . . . . . . . . . . . . . . . . . . . . . . . . . . . . . . . . . . . . . . . . . . . . . . . . . . . . . . . . . . . . . . . . . . . . . . . . . . . . . . . . . . . . . . . . . . . . . . . . . . . . . . . . . . . . . . . . . . . . . . . . . . . . . . . . . . . . . . . . . . . . . . . . . . . . . . . . . . . . . . . . . . . . . . . . . . . . . . . . . . . . . . . . . . .Verify that a backup is co mple te
. . . . . . . . . . . . . . . . . . . . . . . . . . . . . . . . . . . . . . . . . . . . . . . . . . . . . . . . . . . . . . . . . . . . . . . . . . . . . . . . . . . . . . . . . . . . . . . . . . . . . . . . . . . . . . . . . . . . . . . . . . . . . . . . . . . . . . . . . . . . . . . . . . . . . . . . . . . . . . . . . . . . . . . . . . . . . . . . . . . . . . . . . . . . . . . . . . . . . . . . . . . . . . . . . . . . . . . . . . . . . . . . . . . . . . . . . . . . . . . . . . . . . . . . . . . . . . . . . . . . . . . . . . . . . . . . . . . . . . . .Res tor e data fro m a Dashboard backup
. . . . . . . . . . . . . . . . . . . . . . . . . . . . . . . . . . . . . . . . . . . . . . . . . . . . . . . . . . . . . . . . . . . . . . . . . . . . . . . . . . . . . . . . . . . . . . . . . . . . . . . . . . . . . . . . . . . . . . . . . . . . . . . . . . . . . . . . . . . . . . . . . . . . . . . . . . . . . . . . . . . . . . . . . . . . . . . . . . . . . . . . . . . . . . . . . . . . . . . . . . . . . . . . . . . . . . . . . . . . . . . . . . . . . . . . . . . . . . . . . . . . . . . . . . . . . . . . . . . . . . . . . . . . . . . . . . . . . . . .Back up Windo ws 7
. . . . . . . . . . . . . . . . . . . . . . . . . . . . . . . . . . . . . . . . . . . . . . . . . . . . . . . . . . . . . . . . . . . . . . . . . . . . . . . . . . . . . . . . . . . . . . . . . . . . . . . . . . . . . . . . . . . . . . . . . . . . . . . . . . . . . . . . . . . . . . . . . . . . . . . . . . . . . . . . . . . . . . . . . . . . . . . . . . . . . . . . . . . . . . . . . . . . . . . . . . . . . . . . . . . . . . . . . . . . . . . . . . . . . . . . . . . . . . . . . . . . . . . . . . . . . . . . . . . . . . . . . . . . . . . . . . . . . . . .Back up Windo ws 8 / Windo ws 8.1
. . . . . . . . . . . . . . . . . . . . . . . . . . . . . . . . . . . . . . . . . . . . . . . . . . . . . . . . . . . . . . . . . . . . . . . . . . . . . . . . . . . . . . . . . . . . . . . . . . . . . . . . . . . . . . . . . . . . . . . . . . . . . . . . . . . . . . . . . . . . . . . . . . . . . . . . . . . . . . . . . . . . . . . . . . . . . . . . . . . . . . . . . . . . . . . . . . . . . . . . . . . . . . . . . . . . . . . . . . . . . . . . . . . . . . . . . . . . . . . . . . . . . . . . . . . . . . . . . . . . . . . . . . . . . . . . . . . . . . . .Back up no n-system file s
. . . . . . . . . . . . . . . . . . . . . . . . . . . . . . . . . . . . . . . . . . . . . . . . . . . . . . . . . . . . . . . . . . . . . . . . . . . . . . . . . . . . . . . . . . . . . . . . . . . . . . . . . . . . . . . . . . . . . . . . . . . . . . . . . . . . . . . . . . . . . . . . . . . . . . . . . . . . . . . . . . . . . . . . . . . . . . . . . . . . . . . . . . . . . . . . . . . . . . . . . . . . . . . . . . . . . . . . . . . . . . . . . . . . . . . . . . . . . . . . . . . . . . . . . . . . . . . . . . . . . . . . . . . . . . . . . . . . . . . .Back up Windo ws 8 syste m files
. . . . . . . . . . . . . . . . . . . . . . . . . . . . . . . . . . . . . . . . . . . . . . . . . . . . . . . . . . . . . . . . . . . . . . . . . . . . . . . . . . . . . . . . . . . . . . . . . . . . . . . . . . . . . . . . . . . . . . . . . . . . . . . . . . . . . . . . . . . . . . . . . . . . . . . . . . . . . . . . . . . . . . . . . . . . . . . . . . . . . . . . . . . . . . . . . . . . . . . . . . . . . . . . . . . . . . . . . . . . . . . . . . . . . . . . . . . . . . . . . . . . . . . . . . . . . . . . . . . . . . . . . . . . . . . . . . . . . . . .Back up Windo ws 8.1 sys tem files
. . . . . . . . . . . . . . . . . . . . . . . . . . . . . . . . . . . . . . . . . . . . . . . . . . . . . . . . . . . . . . . . . . . . . . . . . . . . . . . . . . . . . . . . . . . . . . . . . . . . . . . . . . . . . . . . . . . . . . . . . . . . . . . . . . . . . . . . . . . . . . . . . . . . . . . . . . . . . . . . . . . . . . . . . . . . . . . . . . . . . . . . . . . . . . . . . . . . . . . . . . . . . . . . . . . . . . . . . . . . . . . . . . . . . . . . . . . . . . . . . . . . . . . . . . . . . . . . . . . . . . . . . . . . . . . . . . . . . . . .Back up Windo ws 10
4
4
4
4
6
6
6
7
7
7
9
9
9
9
9
11
11
11
13
13
13
13
13
14
14
14
14
14
14
15
15
16
Page 3

. . . . . . . . . . . . . . . . . . . . . . . . . . . . . . . . . . . . . . . . . . . . . . . . . . . . . . . . . . . . . . . . . . . . . . . . . . . . . . . . . . . . . . . . . . . . . . . . . . . . . . . . . . . . . . . . . . . . . . . . . . . . . . . . . . . . . . . . . . . . . . . . . . . . . . . . . . . . . . . . . . . . . . . . . . . . . . . . . . . . . . . . . . . . . . . . . . . . . . . . . . . . . . . . . . . . . . . . . . . . . . . . . . . . . . . . . . . . . . . . . . . . . . . . . . . . . . . . . . . . . . . . . . . . . . . . . . . . . . . .
. . . . . . . . . . . . . . . . . . . . . . . . . . . . . . . . . . . . . . . . . . . . . . . . . . . . . . . . . . . . . . . . . . . . . . . . . . . . . . . . . . . . . . . . . . . . . . . . . . . . . . . . . . . . . . . . . . . . . . . . . . . . . . . . . . . . . . . . . . . . . . . . . . . . . . . . . . . . . . . . . . . . . . . . . . . . . . . . . . . . . . . . . . . . . . . . . . . . . . . . . . . . . . . . . . . . . . . . . . . . . . . . . . . . . . . . . . . . . . . . . . . . . . . . . . . . . . . . . . . . . . . . . . . . . . . . . . . . . . . .
. . . . . . . . . . . . . . . . . . . . . . . . . . . . . . . . . . . . . . . . . . . . . . . . . . . . . . . . . . . . . . . . . . . . . . . . . . . . . . . . . . . . . . . . . . . . . . . . . . . . . . . . . . . . . . . . . . . . . . . . . . . . . . . . . . . . . . . . . . . . . . . . . . . . . . . . . . . . . . . . . . . . . . . . . . . . . . . . . . . . . . . . . . . . . . . . . . . . . . . . . . . . . . . . . . . . . . . . . . . . . . . . . . . . . . . . . . . . . . . . . . . . . . . . . . . . . . . . . . . . . . . . . . . . . . . . . . . . . . . .
. . . . . . . . . . . . . . . . . . . . . . . . . . . . . . . . . . . . . . . . . . . . . . . . . . . . . . . . . . . . . . . . . . . . . . . . . . . . . . . . . . . . . . . . . . . . . . . . . . . . . . . . . . . . . . . . . . . . . . . . . . . . . . . . . . . . . . . . . . . . . . . . . . . . . . . . . . . . . . . . . . . . . . . . . . . . . . . . . . . . . . . . . . . . . . . . . . . . . . . . . . . . . . . . . . . . . . . . . . . . . . . . . . . . . . . . . . . . . . . . . . . . . . . . . . . . . . . . . . . . . . . . . . . . . . . . . . . . . . . .
. . . . . . . . . . . . . . . . . . . . . . . . . . . . . . . . . . . . . . . . . . . . . . . . . . . . . . . . . . . . . . . . . . . . . . . . . . . . . . . . . . . . . . . . . . . . . . . . . . . . . . . . . . . . . . . . . . . . . . . . . . . . . . . . . . . . . . . . . . . . . . . . . . . . . . . . . . . . . . . . . . . . . . . . . . . . . . . . . . . . . . . . . . . . . . . . . . . . . . . . . . . . . . . . . . . . . . . . . . . . . . . . . . . . . . . . . . . . . . . . . . . . . . . . . . . . . . . . . . . . . . . . . . . . . . . . . . . . . . . .
. . . . . . . . . . . . . . . . . . . . . . . . . . . . . . . . . . . . . . . . . . . . . . . . . . . . . . . . . . . . . . . . . . . . . . . . . . . . . . . . . . . . . . . . . . . . . . . . . . . . . . . . . . . . . . . . . . . . . . . . . . . . . . . . . . . . . . . . . . . . . . . . . . . . . . . . . . . . . . . . . . . . . . . . . . . . . . . . . . . . . . . . . . . . . . . . . . . . . . . . . . . . . . . . . . . . . . . . . . . . . . . . . . . . . . . . . . . . . . . . . . . . . . . . . . . . . . . . . . . . . . . . . . . . . . . . . . . . . . . .
. . . . . . . . . . . . . . . . . . . . . . . . . . . . . . . . . . . . . . . . . . . . . . . . . . . . . . . . . . . . . . . . . . . . . . . . . . . . . . . . . . . . . . . . . . . . . . . . . . . . . . . . . . . . . . . . . . . . . . . . . . . . . . . . . . . . . . . . . . . . . . . . . . . . . . . . . . . . . . . . . . . . . . . . . . . . . . . . . . . . . . . . . . . . . . . . . . . . . . . . . . . . . . . . . . . . . . . . . . . . . . . . . . . . . . . . . . . . . . . . . . . . . . . . . . . . . . . . . . . . . . . . . . . . . . . . . . . . . . . .
. . . . . . . . . . . . . . . . . . . . . . . . . . . . . . . . . . . . . . . . . . . . . . . . . . . . . . . . . . . . . . . . . . . . . . . . . . . . . . . . . . . . . . . . . . . . . . . . . . . . . . . . . . . . . . . . . . . . . . . . . . . . . . . . . . . . . . . . . . . . . . . . . . . . . . . . . . . . . . . . . . . . . . . . . . . . . . . . . . . . . . . . . . . . . . . . . . . . . . . . . . . . . . . . . . . . . . . . . . . . . . . . . . . . . . . . . . . . . . . . . . . . . . . . . . . . . . . . . . . . . . . . . . . . . . . . . . . . . . . .
. . . . . . . . . . . . . . . . . . . . . . . . . . . . . . . . . . . . . . . . . . . . . . . . . . . . . . . . . . . . . . . . . . . . . . . . . . . . . . . . . . . . . . . . . . . . . . . . . . . . . . . . . . . . . . . . . . . . . . . . . . . . . . . . . . . . . . . . . . . . . . . . . . . . . . . . . . . . . . . . . . . . . . . . . . . . . . . . . . . . . . . . . . . . . . . . . . . . . . . . . . . . . . . . . . . . . . . . . . . . . . . . . . . . . . . . . . . . . . . . . . . . . . . . . . . . . . . . . . . . . . . . . . . . . . . . . . . . . . . .
. . . . . . . . . . . . . . . . . . . . . . . . . . . . . . . . . . . . . . . . . . . . . . . . . . . . . . . . . . . . . . . . . . . . . . . . . . . . . . . . . . . . . . . . . . . . . . . . . . . . . . . . . . . . . . . . . . . . . . . . . . . . . . . . . . . . . . . . . . . . . . . . . . . . . . . . . . . . . . . . . . . . . . . . . . . . . . . . . . . . . . . . . . . . . . . . . . . . . . . . . . . . . . . . . . . . . . . . . . . . . . . . . . . . . . . . . . . . . . . . . . . . . . . . . . . . . . . . . . . . . . . . . . . . . . . . . . . . . . . .
. . . . . . . . . . . . . . . . . . . . . . . . . . . . . . . . . . . . . . . . . . . . . . . . . . . . . . . . . . . . . . . . . . . . . . . . . . . . . . . . . . . . . . . . . . . . . . . . . . . . . . . . . . . . . . . . . . . . . . . . . . . . . . . . . . . . . . . . . . . . . . . . . . . . . . . . . . . . . . . . . . . . . . . . . . . . . . . . . . . . . . . . . . . . . . . . . . . . . . . . . . . . . . . . . . . . . . . . . . . . . . . . . . . . . . . . . . . . . . . . . . . . . . . . . . . . . . . . . . . . . . . . . . . . . . . . . . . . . . . .
. . . . . . . . . . . . . . . . . . . . . . . . . . . . . . . . . . . . . . . . . . . . . . . . . . . . . . . . . . . . . . . . . . . . . . . . . . . . . . . . . . . . . . . . . . . . . . . . . . . . . . . . . . . . . . . . . . . . . . . . . . . . . . . . . . . . . . . . . . . . . . . . . . . . . . . . . . . . . . . . . . . . . . . . . . . . . . . . . . . . . . . . . . . . . . . . . . . . . . . . . . . . . . . . . . . . . . . . . . . . . . . . . . . . . . . . . . . . . . . . . . . . . . . . . . . . . . . . . . . . . . . . . . . . . . . . . . . . . . . .
. . . . . . . . . . . . . . . . . . . . . . . . . . . . . . . . . . . . . . . . . . . . . . . . . . . . . . . . . . . . . . . . . . . . . . . . . . . . . . . . . . . . . . . . . . . . . . . . . . . . . . . . . . . . . . . . . . . . . . . . . . . . . . . . . . . . . . . . . . . . . . . . . . . . . . . . . . . . . . . . . . . . . . . . . . . . . . . . . . . . . . . . . . . . . . . . . . . . . . . . . . . . . . . . . . . . . . . . . . . . . . . . . . . . . . . . . . . . . . . . . . . . . . . . . . . . . . . . . . . . . . . . . . . . . . . . . . . . . . . .
. . . . . . . . . . . . . . . . . . . . . . . . . . . . . . . . . . . . . . . . . . . . . . . . . . . . . . . . . . . . . . . . . . . . . . . . . . . . . . . . . . . . . . . . . . . . . . . . . . . . . . . . . . . . . . . . . . . . . . . . . . . . . . . . . . . . . . . . . . . . . . . . . . . . . . . . . . . . . . . . . . . . . . . . . . . . . . . . . . . . . . . . . . . . . . . . . . . . . . . . . . . . . . . . . . . . . . . . . . . . . . . . . . . . . . . . . . . . . . . . . . . . . . . . . . . . . . . . . . . . . . . . . . . . . . . . . . . . . . . .
Create a backup with Time Machine
Restore data from a Tim e Machine backup
8 Optional Formatting and Partitioning
About file system for m ats
Formatting instructions
9 Hard drive tests
Seagate diagnostic tool (Windows only)
Windows diagnostic tool
Mac diagnostic tool
10 Frequently asked questions
All users
Battery
Mac
Windows
. . . . . . . . . . . . . . . . . . . . . . . . . . . . . . . . . . . . . . . . . . . . . . . . . . . . . . . . . . . . . . . . . . . . . . . . . . . . . . . . . . . . . . . . . . . . . . . . . . . . . . . . . . . . . . . . . . . . . . . . . . . . . . . . . . . . . . . . . . . . . . . . . . . . . . . . . . . . . . . . . . . . . . . . . . . . . . . . . . . . . . . . . . . . . . . . . . . . . . . . . . . . . . . . . . . . . . . . . . . . . . . . . . . . . . . . . . . . . . . . . . . . . . . . . . . . . . . . . . . . . . . . . . . . . . . . . . . . . . . .Verify that a backup is co mple te
. . . . . . . . . . . . . . . . . . . . . . . . . . . . . . . . . . . . . . . . . . . . . . . . . . . . . . . . . . . . . . . . . . . . . . . . . . . . . . . . . . . . . . . . . . . . . . . . . . . . . . . . . . . . . . . . . . . . . . . . . . . . . . . . . . . . . . . . . . . . . . . . . . . . . . . . . . . . . . . . . . . . . . . . . . . . . . . . . . . . . . . . . . . . . . . . . . . . . . . . . . . . . . . . . . . . . . . . . . . . . . . . . . . . . . . . . . . . . . . . . . . . . . . . . . . . . . . . . . . . . . . . . . . . . . . . . . . . . . . .Mac
. . . . . . . . . . . . . . . . . . . . . . . . . . . . . . . . . . . . . . . . . . . . . . . . . . . . . . . . . . . . . . . . . . . . . . . . . . . . . . . . . . . . . . . . . . . . . . . . . . . . . . . . . . . . . . . . . . . . . . . . . . . . . . . . . . . . . . . . . . . . . . . . . . . . . . . . . . . . . . . . . . . . . . . . . . . . . . . . . . . . . . . . . . . . . . . . . . . . . . . . . . . . . . . . . . . . . . . . . . . . . . . . . . . . . . . . . . . . . . . . . . . . . . . . . . . . . . . . . . . . . . . . . . . . . . . . . . . . . . . .Windo ws
. . . . . . . . . . . . . . . . . . . . . . . . . . . . . . . . . . . . . . . . . . . . . . . . . . . . . . . . . . . . . . . . . . . . . . . . . . . . . . . . . . . . . . . . . . . . . . . . . . . . . . . . . . . . . . . . . . . . . . . . . . . . . . . . . . . . . . . . . . . . . . . . . . . . . . . . . . . . . . . . . . . . . . . . . . . . . . . . . . . . . . . . . . . . . . . . . . . . . . . . . . . . . . . . . . . . . . . . . . . . . . . . . . . . . . . . . . . . . . . . . . . . . . . . . . . . . . . . . . . . . . . . . . . . . . . . . . . . . . . .Windo ws
. . . . . . . . . . . . . . . . . . . . . . . . . . . . . . . . . . . . . . . . . . . . . . . . . . . . . . . . . . . . . . . . . . . . . . . . . . . . . . . . . . . . . . . . . . . . . . . . . . . . . . . . . . . . . . . . . . . . . . . . . . . . . . . . . . . . . . . . . . . . . . . . . . . . . . . . . . . . . . . . . . . . . . . . . . . . . . . . . . . . . . . . . . . . . . . . . . . . . . . . . . . . . . . . . . . . . . . . . . . . . . . . . . . . . . . . . . . . . . . . . . . . . . . . . . . . . . . . . . . . . . . . . . . . . . . . . . . . . . . .Mac
. . . . . . . . . . . . . . . . . . . . . . . . . . . . . . . . . . . . . . . . . . . . . . . . . . . . . . . . . . . . . . . . . . . . . . . . . . . . . . . . . . . . . . . . . . . . . . . . . . . . . . . . . . . . . . . . . . . . . . . . . . . . . . . . . . . . . . . . . . . . . . . . . . . . . . . . . . . . . . . . . . . . . . . . . . . . . . . . . . . . . . . . . . . . . . . . . . . . . . . . . . . . . . . . . . . . . . . . . . . . . . . . . . . . . . . . . . . . . . . . . . . . . . . . . . . . . . . . . . . . . . . . . . . . . . . . . . . . . . . .Pr o blem: My file transfe rs are to o s lo w.
. . . . . . . . . . . . . . . . . . . . . . . . . . . . . . . . . . . . . . . . . . . . . . . . . . . . . . . . . . . . . . . . . . . . . . . . . . . . . . . . . . . . . . . . . . . . . . . . . . . . . . . . . . . . . . . . . . . . . . . . . . . . . . . . . . . . . . . . . . . . . . . . . . . . . . . . . . . . . . . . . . . . . . . . . . . . . . . . . . . . . . . . . . . . . . . . . . . . . . . . . . . . . . . . . . . . . . . . . . . . . . . . . . . . . . . . . . . . . . . . . . . . . . . . . . . . . . . . . . . . . . . . . . . . . . . . . . . . . . . .Pr o blem: My battery kee ps lo s ing po wer.
. . . . . . . . . . . . . . . . . . . . . . . . . . . . . . . . . . . . . . . . . . . . . . . . . . . . . . . . . . . . . . . . . . . . . . . . . . . . . . . . . . . . . . . . . . . . . . . . . . . . . . . . . . . . . . . . . . . . . . . . . . . . . . . . . . . . . . . . . . . . . . . . . . . . . . . . . . . . . . . . . . . . . . . . . . . . . . . . . . . . . . . . . . . . . . . . . . . . . . . . . . . . . . . . . . . . . . . . . . . . . . . . . . . . . . . . . . . . . . . . . . . . . . . . . . . . . . . . . . . . . . . . . . . . . . . . . . . . . . . .Pr o blem: The dr ive ico n do es no t appear o n my des kto p.
. . . . . . . . . . . . . . . . . . . . . . . . . . . . . . . . . . . . . . . . . . . . . . . . . . . . . . . . . . . . . . . . . . . . . . . . . . . . . . . . . . . . . . . . . . . . . . . . . . . . . . . . . . . . . . . . . . . . . . . . . . . . . . . . . . . . . . . . . . . . . . . . . . . . . . . . . . . . . . . . . . . . . . . . . . . . . . . . . . . . . . . . . . . . . . . . . . . . . . . . . . . . . . . . . . . . . . . . . . . . . . . . . . . . . . . . . . . . . . . . . . . . . . . . . . . . . . . . . . . . . . . . . . . . . . . . . . . . . . . .Pr o blem: The dr ive ico n do esn't appe ar in Co mputer.
16
16
17
18
18
18
18
19
19
19
20
20
20
21
22
22
22
22
22
22
23
23
23
Page 4

Introducon
Welcome to the user manual for Seagate Innov8, a leading-edge hard drive that combines bold aluminum
de sign with Seagate's groundbreaking technology. Innov8 is the first battery-powe red hard drive with vast
capacity and impressive performance. Connect Innov8 to your USB-C-compatible computer for fast transfers
of all your data.
Review this user manual for instructions on how to manage your Innov8. If you are having trouble, consult the
Frequently asked questions section to help resolve common issues.
For advanced troubleshooting or to report a problem with your Seagate device, contact Seagate custome r
support.
Box content
Seagate Innov8
USB-C cable
Quick Start Guide
Software: Lyve and Seagate Dashboard
Minimum system requirements
You can connect your Innov8 to a computer that mee ts the following minimum requirements:
Windows 7 or highe r
Mac OS X 10.7 or higher
Hardware requirements
Connect your Innov8 to a computer with a USB-C port. This device has not been tested for use with USB
2.0/3.0 Type A ports.
Important info: Save your packaging. In the event that the drive should need to be repaired or
serviced, it must be returned in its original packaging.
4Se agate Inno v8
3/14/16
Page 5

Important info regarding USB-C cables: Third-party USB-C cables can be faulty or defective due
to improper materials and/or construction. Only use the USB-C cable included with your Innov8.
Using third-party USB-C cables or, USB-C to USB Type A cables of any kind voids your warranty.
5Se agate Inno v8
3/14/16
Page 6
LED indicator and cables
Status light informaon
Your hard drive features a status light that provides general information about the product. Refer to the table
be low for details.
Light color Status
White Drive is on and ready
Red Low batery
Off Drive is off
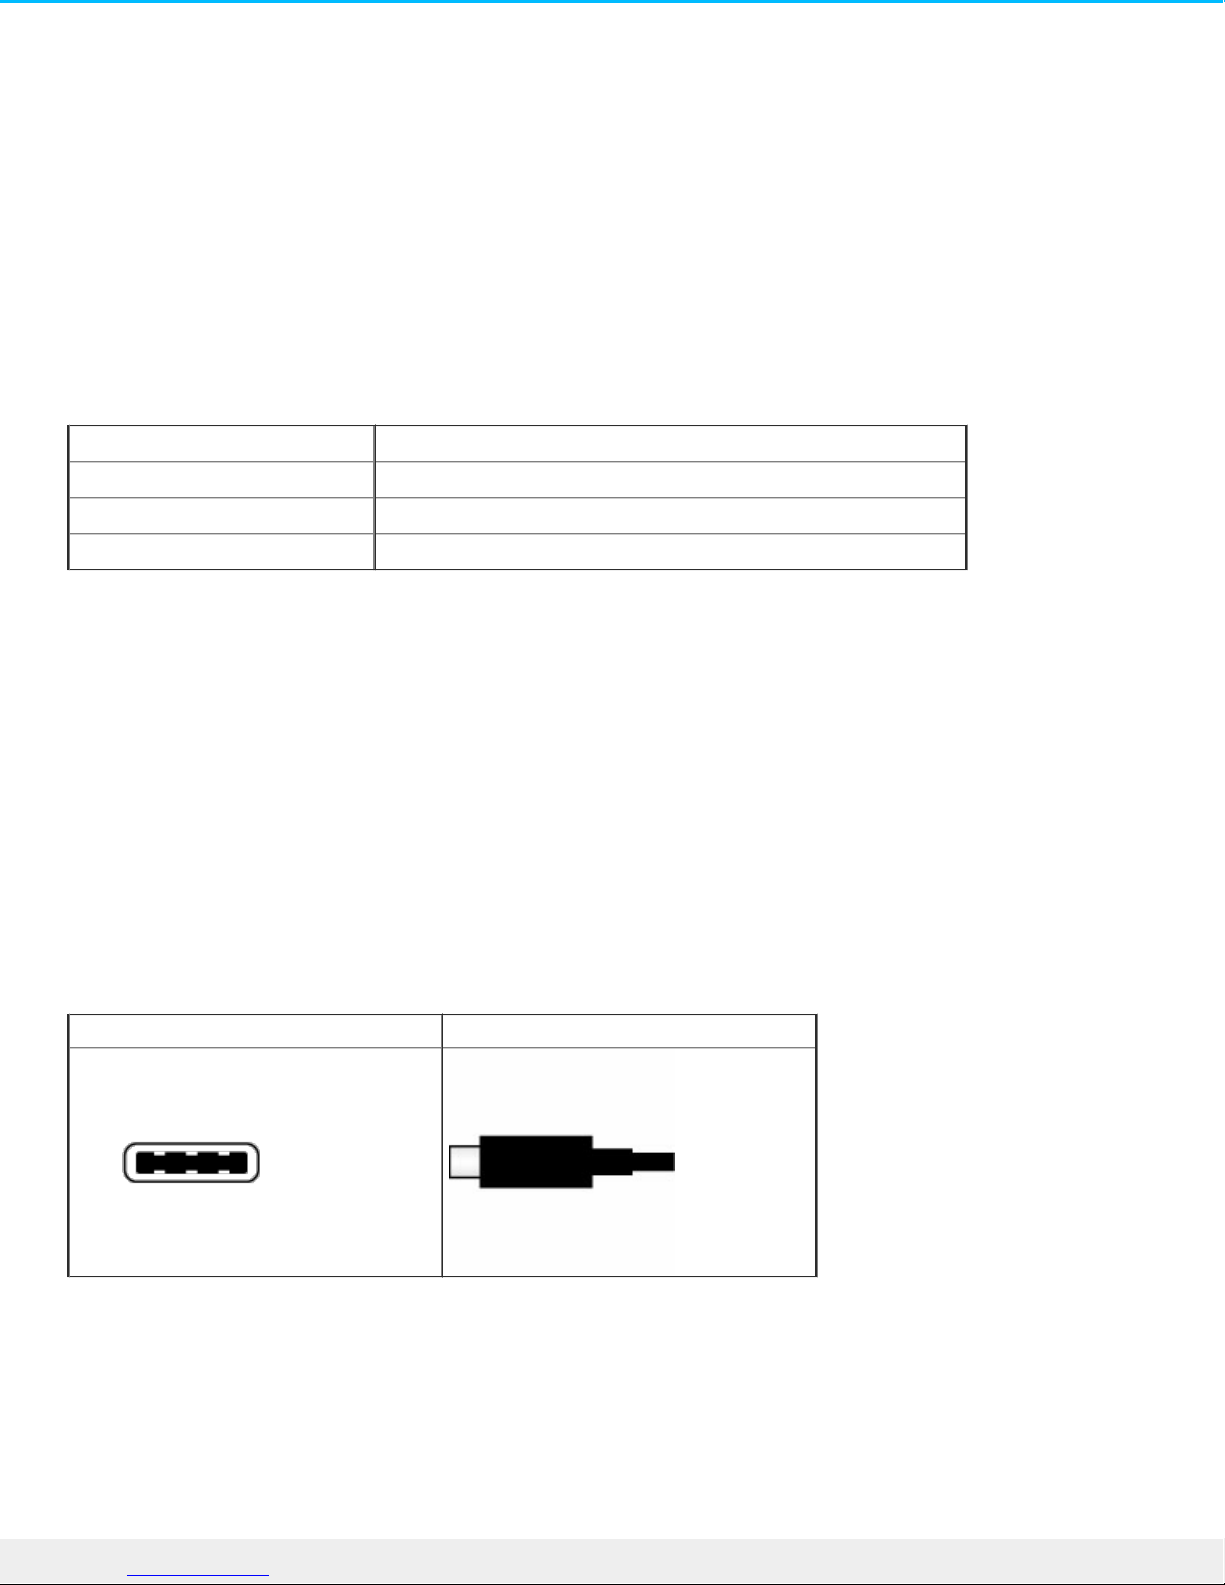
USB-C
USB is a se rial input/output technology for connecting peripheral devices to a computer. USB-C is the latest
implementation of this standard and it provides higher bandwidth and new power manageme nt features.
Transfer rates can attain up to 5Gb/s as oppose d to USB 2.0's 480Mb/s. This means USB-C is theoretically up
to ten times faster than its prede cessor.
Make certain to use the USB-C cable included with your Innov8. Due to poor construction, many third-party
USB-C cables can cause irreparable harm to devices such as your computer and Innov8. Se agate is not
responsible for damage to your Innov8 caused by third-party cables.
Connector face Cable end
6Se agate Inno v8
3/14/16
Page 7
Connect your Innov8 to your computer
Your Innov8 is compatible with computers that feature a USB-C port.
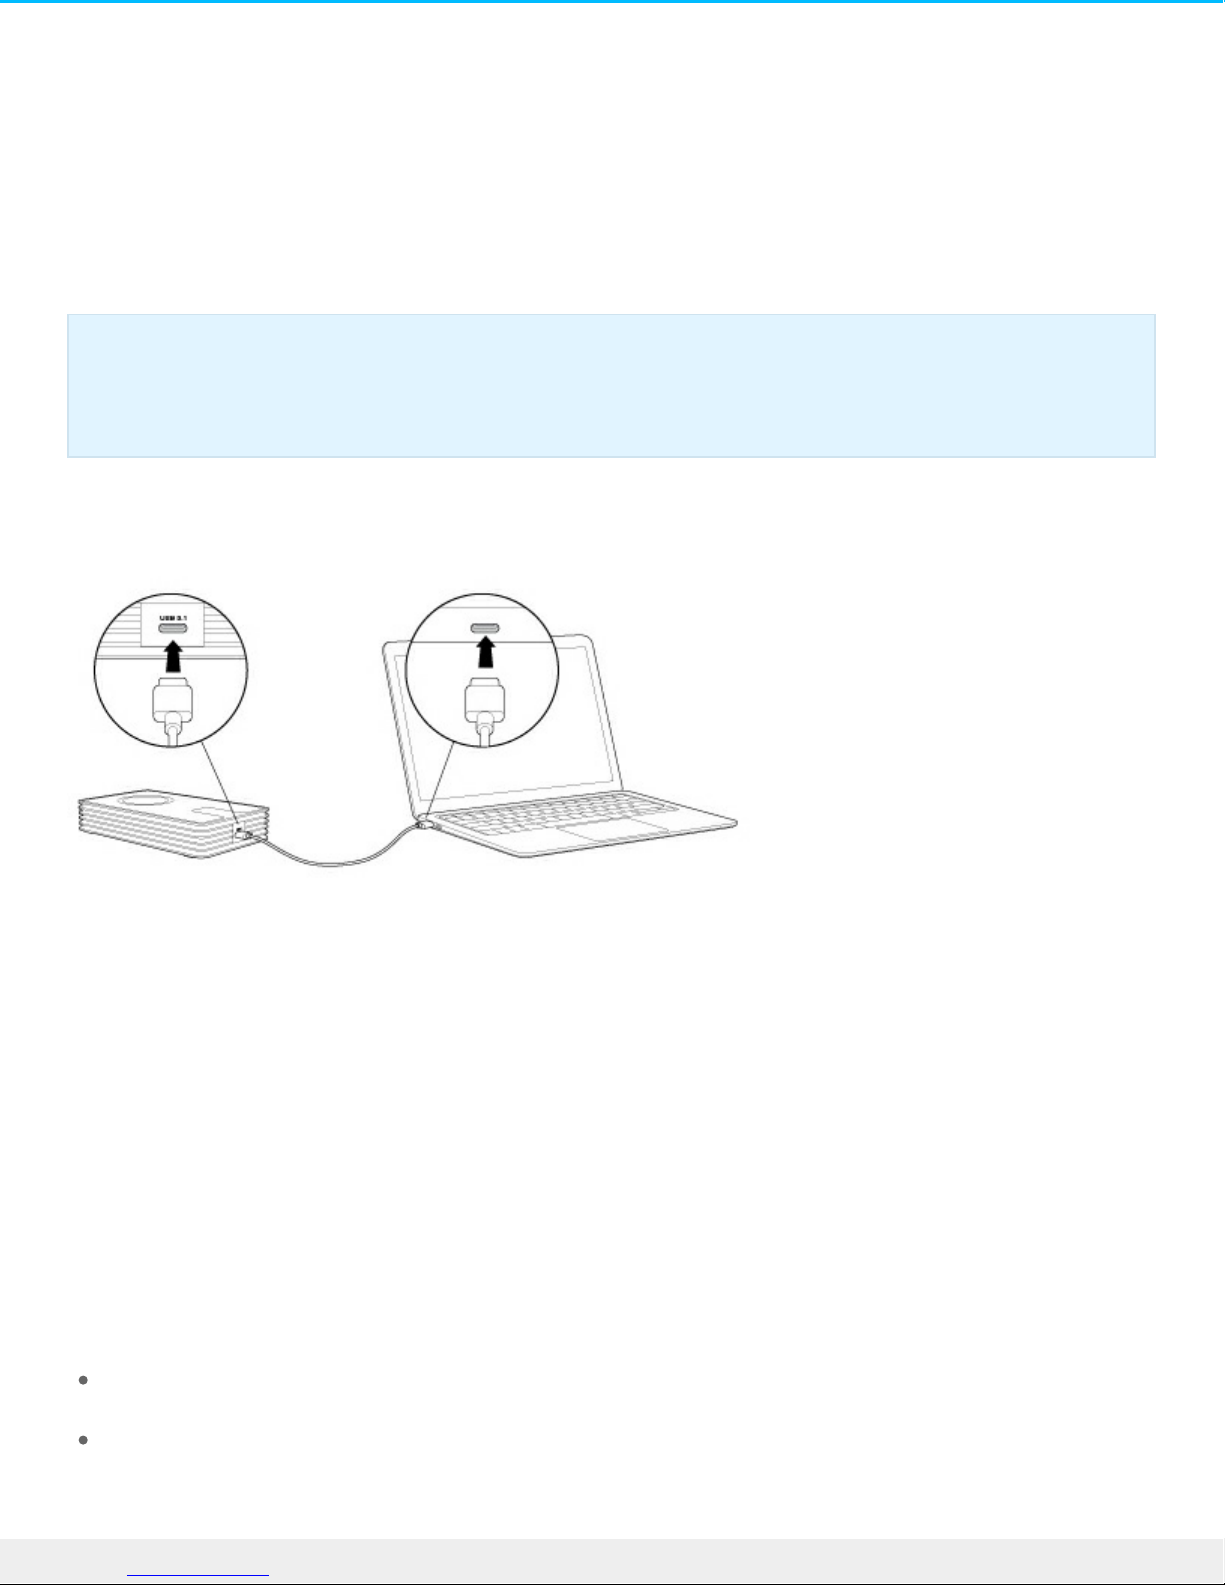
Step 1 – Connect to your computer
Attach one e nd of the included USB-C cable to the Innov8 and the other end to a USB-C port on your
computer. The LED may turn red be fore changing to white.
Your Innov8 is approximately 75% charged out of the box. The battery charges automatically when it is
connected to your computer.
Step 2 – Registraon and soware
Register your Seagate Innov8 to assure quality Seagate support and receive the latest news regarding your
de vice. You can register your device and install Seagate software in a few simple steps.
Software included with your Innov8:
Lyve–Automatically collect photos and vide os stored on all your de vices and display them in one
organized vie w. For de tails, visit Lyve.
Dashboard–Backup software for your Windows computers, mobile device s and social media. For
de tails, see Dashboard.
Important info regarding USB-C cables: Third-party USB-C cables can be faulty or defective due
to improper materials and/or construction. Only use the USB-C cable included with your Innov8.
Using third-party USB-C cables or, USB-C to USB Type A cables of any kind voids your warranty.
7Se agate Inno v8
3/14/16
Page 8

1. Ope n the Innov8 volume in Windows Explorer or the Mac desktop.
2. Launch the installer.
Windows: double click Start_Here_Win
Mac: double click Start_Here_Mac
3. Follow the on-scree n instructions to register your Innov8 and install Seagate software.
For advanced troubleshooting or to report a problem with your Seagate device, contact Seagate custome r
support.
8Se agate Inno v8
3/14/16
Page 9

Safely remove your Innov8 from your
computer
Always eject a storage drive from your computer before physically disconnecting it. Your computer must
pe rform filing and house keeping operations on the drive before it is removed. Therefore, if you unplug the
drive without using the operating system’s software, your files can become corrupt or damaged.
Safely remove external storage from a Windows PC
Use the Safely Remove tool to eject the hard drive you want to remove.
1. Click the Safely Remove icon in your Windows System Tray to view the devices you can eje ct.
If you don't see the Safely Remove Hardware icon, click the Show hidden icons arrow in the system tray
to display all icons in the notification area.
2. In the list of devices, choose the device you want to remove . Windows displays a notification when it is
safe to remove the de vice.
3. Disconnect the hard drive from the computer.
Safely remove external storage from a Mac
There are se veral ways you can eject your hard drive from a Mac. See below for two options.
Eject via Finder window
1. Ope n a Finde r window.
2. In Devices on the sidebar, right-click the drive .
3. Select Eject Innov8 .
4. When your Finder window close s, you can disconnect the hard drive from your Mac.
Eject via Desktop
1. Select the de sktop icon for your hard drive and drag it to the Trash.
2. When the image is no longer visible on your desktop, you can physically disconnect the hard drive from
your Mac.
9Se agate Inno v8
3/14/16
Page 10

10Se agate Innov8
3/14/16
Page 11

Back up your computer to your Seagate
Innov8
What is a backup?
There are two types of backup:
System backup: A system backup copie s everything on your computer onto an external storage device
including the operating system, applications and data. If the computer’s hard drive fails, the computer can
be restored to its former state with the backed up system data.
File backup: A file backup copies select data file s onto an external storage device. If the computer’s hard
drive fails, the files are safe on the external storage drive but the operating system and applications must
be reinstalled.
Backup opons
The following table shows how you can back up data from your computer to your Innov8.
System backup File backup
Seagate Dashboard
x
(Windows only)
Copy and paste x
Windows System Image Backup
(Creates an image of the PC.
Windows 7, 8 and 10)
x x
Windows 7 Backup and Restore x x
Windows 8 File History x
Important info: Windows requires a repair or restore CD/DVD or USB de vice for full system
backups.
11Se agate Innov8
3/14/16
Page 12

Windows 10: Backup and Restore
(Windows 7) or File History
x
(Backup and Restore)
x
(File History)
Mac Time Machine x x
Click the links below for further information regarding each backup solution:
Seagate Dashboard
Windows System Image Backup
Windows 7 Backup and Restore
Windows 8 and 10 File History
Mac Time Machine
When initiating a backup task, make certain that your Innov8 has sufficient capacity to hold the data you want
to back up.
All of the options in the table can be automated except for copy and paste. Seagate recommends that you
choose an automated backup solution. Copying and pasting is a manual task that requires your attention with
each change to a file on your computer. If you forget to manually copy files, you risk losing important data
should your computer’s hard drive e xperience problems. Further, automated solutions, once created, only
require that you connect your Innov8 to your computer.
Click one of the following links to learn how to back up your computer.
Back up a Windows PC
Back up a Mac
12Se agate Innov8
3/14/16
Page 13

Back up a Windows PC
Select a backup type :
Create a backup with Seagate Dashboard
Create a backup with Windows utilities
Create a backup with Seagate Dashboard
Seagate Dashboard is free , e asy-to-use backup software that is included with Seagate drives. The
instructions in this use r manual can help you quickly set up a basic Dashboard backup. For details on
additional Dashboard features such as Cloud sync and backing up mobile devices, see the Seagate
Dashboard User Manual.
Install Dashboard on your PC
Install Dashboard when running the se tup included on the Innov8 volume. You can also
download the installer from the Seagate Dashboard we bsite.
Create a computer backup
1. Ope n Seagate Dashboard.
2. On the Home page, click PC backup.
3. Choose a backup plan:
Back up Now. Seagate Dashboard be gins backing up all your pe rsonal files and continues to back up
new or revise d files on your PC.
New Backup Plan. Select specific folders and files, a drive and the frequency for the backup.
4. Click Start backup.
Verify that a backup is complete
You can verify that your backups are working as e xpected in Seagate Dashboard Restore or in the Backup
Important info: Before you back up your PC, make certain that your Innov8 is correctly formatted
for Windows. Seagate recommends using NTFS.
Important info: Before you create a backup with Seagate Dashboard, verify that no additional
setup is required for your Innov8.
13Se agate Innov8
3/14/16
Page 14

Log.
1. Ope n Seagate Dashboard.
2. Choose one of the following:
On the Home page, click Restore.
A list of all backup jobs displays with the dates and times of each job.
On the Home page, click PC backup. Click Backup Log.
An activity log displays.
Restore data from a Dashboard backup
You can retrieve files that you have backed up to your storage drive with a backup plan.
1. Ope n Seagate Dashboard.
2. On the Home page, click Restore.
3. Select a backup plan to use for restoring files.
4. Select the date to restore from.
5. Select the data you want to restore.
6. Choose the destination for the data you want to restore.
7. Click the check mark.
Create a backup with Windows ulies
The Windows operating system includes backup software.
Back up Windows 7
1. Click the Start button and choose Control Panel.
2. Click System and Security and then choose Backup and Restore.
3. Click Set up backup and complete the on-screen instructions. Make certain to choose your Innov8 as the
backup de stination.
Back up Windows 8 / Windows 8.1
Windows 8 has separate backup utilities for your non-system files (documents, media, graphics, etc.) and
system files.
Back up non-system files
1. Connect your Innov8 to your computer.
2. Ope n Control Panel and se lect File History.
3. Click Turn on. Make certain to choose your Innov8 as the backup destination.
4. (Optional) To customize your backups with scheduling options, the number of backup ve rsions and more,
click Advanced Settings.
Back up Windows 8 system files
14Se agate Innov8
3/14/16
Page 15

1. Connect your Innov8 to your computer.
2. Ope n the Control Panel and select Windows 7 File Recovery.
3. Click Set up Backup.
4. Follow the on-scree ns instructions and make ce rtain to choose your Innov8 as the backup destination.
Back up Windows 8.1 system files
1. Connect your Innov8 to your computer.
2. Ope n the Control panel and select File History.
3. Click System Image Backup (lowe r left corner of File History).
4. Click Turn on.
5. Follow the on-scree ns instructions and make ce rtain to choose your Innov8 as the backup destination.
Back up Windows 10
Windows 10 includes both File History and Backup and Restore (Windows 7). You can search for and launch
each utility then use the directions above to configure backups.
15Se agate Innov8
3/14/16
Page 16

Back up a Mac
Time Machine is the built-in backup utility for the Mac ope rating system. It keeps a copy of all your files so
you can recover older versions at any time . Further, a Time Machine backup can restore the entire system
on your current internal hard drive or a replacement hard drive.
Create a backup with Time Machine
When you first connect a new drive to your computer, Time Machine may ask if you want to use the drive
for backing up. Confirm that you want to use the disk as a backup de stination and move to step 3 below. If
you don’t see this me ssager, follow steps 1 and 2 below.
1. In the Apple pull-down menu, click System Preferences.
2. Click Time Machine. Time Machine may ask if you want to use the drive for backup.
3. Choose Use as Backup Disk. If you do not see the prompt, click Add or Remove Backup Disk and
choose your Innov8.
4. If Innov8 is formatted as exFAT, a message asks you to confirm that you want to erase all files on your
hard drive. Choose Erase if you want to continue or Don't Erase to exit the application.
5. (Optional) Select Encrypt backups if you want to password-protect your backups.
Time Machine runs automatic backups to kee p your data safe. Therefore, make certain that your Innov8 is
connected to your Mac so that backups occur as often as possible.
Verify that a backup is complete
Important info: Time Machine requires a hard drive that is formatted as Mac OS Extende d
(Journaled) and Innov8 is preformatted as exFAT. Time Machine automatically formats Innov8
when it is selected as the destination hard drive. Since formatting the hard drive deletes all of
your data, make certain to back up your files be fore choosing Innov8 as the de stination for Time
Machine.
Important info: Time Machine changes the attributes of a hard drive partition. Users with
standard user rights to the Mac have read-only rights to the Time Machine partition. Therefore,
when users drag files to a Time Machine partition they receive a prompt asking for an
administrator name and password.
Note: Backups continue even if your Mac is taking a Power Nap.
16Se agate Innov8
3/14/16
Page 17

1. Confirm that your Innov8 is connected to your Mac.
2. Ope n System Preferences > Time Machine.
3. Review the backup information.
4. (Optional) For more detailed information, check your system log:
Go to Go > Utilities > Console.
If you do not see two panels, click Show Log List.
Click All Messages.
In the search box, type backup.
Restore data from a Time Machine backup
1. Click the Time Machine icon in the menu bar (upper right, circular arrow with clock).
2. Choose Enter Time Machine.
3. Select the files or folders you want to restore and click Restore.
17Se agate Innov8
3/14/16
Page 18

Oponal Formang and Paroning
Your Innov8 is formatted as e xFAT for compatibility with Windows and Mac out of the box. If you intend to
use your Innov8 with only one computer, you can change it to the operating system's native format. Review
the details below to learn which format is be st for you.
About file system formats
Mac
Mac OS Extended (HFS+): compatible with Mac only. Mac OS Extended refers to the file system used by
Mac OS X.
exFAT: compatible with Mac and Windows. exFAT is used as an alternative to FAT32 since it doe s not share
the same limitations. It is therefore an excellent cross-platform file system.
FAT32: compatible with Mac and Windows. A FAT32 partition can reach 2TB when formatted on a Mac. The
individual file size is limited to 4GB. FAT32 can affe ct your hard drive’s pe rformance.
Mac file system formats
Use HFS+ if:
…you will be using the storage device on Macs only.
Use exFAT if:
…you will be using your storage device with Mac and Windows computers.
Use FAT32 if:
…you will be using your storage device with Windows and Mac computers and at least one of these
computers is incompatible with exFAT.
Windows
NTFS: since it is the native file system for Windows, volumes created in NTFS are read and write with
computers running Windows. Mac OS X 10.5 or higher may read and write to the NTFS partitions with the
help of third-party drivers. There are two formats for NTFS, MBR and GPT. The maximum volume size for
MBR is 2TB while the more recent GPT format does not assign limits to file or partition sizes.
exFAT: compatible with Mac and Windows. exFAT is used as an alternative to FAT32 since it doe s not share
the same limitations. It is therefore an excellent cross-platform file system.
FAT32: compatible with Mac and Windows. A FAT32 partition can reach up to 32GB when formatted with
Windows. The individual file size is limited to 4GB. FAT32 can affect your hard drive’s performance.
Windows file system formats
Use NTFS if:
…you will be using the storage device only with Windows computers. Performance is optimal when
compare d to exFAT or FAT32.
18Se agate Innov8
3/14/16
Page 19

Use exFAT if:
…you will be using your storage device with Windows and Mac computers.
Use FAT32 if:
…you will be using your storage device with Windows and Mac computers and at least one of these
computers is incompatible with exFAT.
Formang instrucons
The steps below help you format and partition a storage device.
Windows
1. Make sure the storage device is connected to and mounted on the computer.
2. Right click on Computer and choose Manage. From the Manage window select Disk Management.
3. From the list of storage devices in the middle of the Disk Management window, locate your Seagate
de vice.
4. To create a new partition, right click on the volume and select New Simple Volume. Follow the on-screen
instructions when the New Simple Volume Wizard appears.
Mac
1. Make sure the storage device is connected to and mounted on the computer.
2. Select Go > Utilities in the Finder me nu bar.
3. In the Utilitie s folder, double-click Disk Utility. All connected storage devices, partitions or disk images
are displayed in the left column.
4. Select the Seagate drive in the left-hand column.
5. Click the Erase tab.
6. Choose a format from the drop-down window.
7. Enter a name for the volume.
8. Click Erase and confirm your se lection in the pop-up window.
Caution: Formatting erases everything on the storage device. Seagate highly recommends that
you back up all data on your storage device before performing the steps below. Seagate is not
responsible for any data lost due to formatting, partitioning or using a Seagate storage device.
Note: Refer to your operating system's documentation for more information on formatting and
partitioning storage de vices.
19Se agate Innov8
3/14/16
Page 20

Hard drive tests
If you experie nce problems with your Seagate external storage, you can run diagnostic tests on its hard
drive. Windows and Mac offer utilities to test and repair hard drives and Seagate provides utlities for
Windows.
Seagate diagnosc tool (Windows only)
Download Se atools for Windows and follow the steps below to help determine the health of your device .
Make certain to back up data on your storage device before running the test.
1. Close all ope n applications be fore running the hard drive diagnostic tests.
2. Before starting the test, make certain that the computer is powered on. The computer must be plugged
into its power supply and the powe r supply should receive power from a wall socket.
3. Power management controls must be suspended during the tests. To adjust power management
settings:
Click Start or the Windows icon on the bottom left corner of your Windows de sktop.
Go to Control Panel.
Choose Power Options.
Choose Change plan settings.
Choose Change advanced power settings
Expand the Hard Disks in the window.
Confirm that the se tting is set to Never.
4. Confirm that you have the correct storage device connected to your computer. Seatools for Windows
can be used with Seagate, Samsung, LaCie and Maxtor storage devices. Safely remove all other hard
drives.
5. If you have not done so, back up data on your storage device before running the test.
6. Launch Seatools and choose the tests to run from the menu:
Fix all
S.M.A.R.T. check
Short Drive Self Test
Short Generic
Long Ge neric (progresse s at 1% increments and can take several hours to complete)
Following the test, a log for each drive is save d to the program installation folder. To read the log, click
Help>View Log File. You can also view a log in Help by clicking Pass Info or Fail Info, depending on your
results.
Windows diagnosc tool
Windows includes a utility called Check Disk (ChkDsk) that can be used to repair bad sectors on the hard
20Se agate Innov8
3/14/16
Page 21

drive. Always back up your data before running Check Disk scans on your hard drive. If a bad sector is found,
data that had been available can be inaccessible once the bad se ctor is reallocated.
Follow the steps below to run Check Disk:
1. Launch Command Prompt. You can type cmd in Search to easily locate and launch Command Prompt.
2. Type chkdsk X: /f. “X“ is the letter for your hard drive
The length of time for the test to complete can vary and is usually longer for higher capacity storage devices.
Mac diagnosc tool
Mac OS includes Disk Utility, a tool for formatting, testing and repairing hard drives. Disk Utility’s test and
repair option is called First Aid.
Always back up your data before running First Aid scans on your hard drive. If a bad sector is found, data that
had be en available can be inaccessible once the bad se ctor is reallocated.
Follow the steps below to run First Aid:
1. From the Finde r, click Go > Utilities > Disk Utility.
2. Hard drives are listed on the left of the Disk Utility window. Find your Seagate device and click it.
Information about the drive is available, including the file system. Additionally, partitions are visible in
the left column as a second indented row under the storage device.
3. Click a partition to select it.
4. Click the First Aid tab/button.
5. Click Verify Disk. If Disk Utility reports that the disk needs to be repaired, click Repair Disk.
6. If you have additional partitions, repeat the test on each one.
21Se agate Innov8
3/14/16
Page 22

Frequently asked quesons
For help se tting up and using your Seagate hard drive, review the frequently asked questions below. For
additional support resources, go to Seagate customer support.
All users
Problem: My file transfers are too slow.
Q: Are both ends of the included USB-C cable firmly attached?
A: Review troubleshooting tips for cable connections below:
Check both ends of the USB cable and make sure that they are fully seated in their respective ports.
Try disconnecting the cable, waiting 10 seconds, and then reconnecting it.
Try a different USB cable.
If the drive is still not recognized, restart your computer and try again.
Q: Are there other USB devices connected to the same port or hub?
A: Disconnect Innov8 from the hub and connect it to a USB-C port on your computer.
Q: Is the hard drive connected to a USB 2.0/3.0 Type A port on your computer or hub?
A: Innov8 does not support connections to USB Type A ports. Connect Innov8 to a USB-C port on your
computer.
Q: Does your computer or ope rating system support USB 3.0 transfer rates?
A: Confirm that your computer and operating system support USB 3.0 transfer rates. Se lect USB-C ports
support USB 2.0 transfer rates.
Q: Is your computer's internal hard drive limiting transfer spe eds?
A: A computer with a low-performance internal hard drive can limit transfer spe eds for external hard drives.
Baery
Problem: My baery keeps losing power.
Q: Is your Innov8 frequently connected and disconnected from one or more computers?
A: The battery can lose its charge quickly if it is frequently disconnected and reconnected to power sources.
Mac
22Se agate Innov8
3/14/16
Page 23

Problem: The drive icon does not appear on my desktop.
Q: Is your Finder configured to hide hard drives on the desktop?
A: Go to Finde r and then check Preferences > General tab > Show these items on the desktop. Confirm that
Hard Disks is se lected.
Q: Is your drive mounting in the operating system?
A: Ope n Disk Utility at Go > Utilities > Disk Utility. If the drive is listed in the left-hand column, check your
Finder preferences to se e why it is not displayed on the desktop (review the question above).
Q: Does your computer's configuration meet the minimum system requirements for use with this drive ?
A: Refer to the product packaging for the list of supported operating systems.
Q: Did you follow the correct installation steps for your operating system?
A: Review the installation steps in Connect your Innov8 to your computer.
Windows
Problem: The drive icon doesn't appear in Computer.
Q: Is the drive listed in Device Manager?
A: All drive s appe ar in at least one place in Device Manager.
Windows 7 and 10: Click Start and right click on the Computer to select Device Manager.
Windows 8: In the modern interface, type Device Manager and then click it.
Look in the Disk Drives se ction and, if necessary, click the plus sign to vie w the full list of de vices. If you're
uncertain that your drive is listed, unplug it and then reconnect it. The entry that changes is your Seagate
drive.
Q: Is your drive listed next to an unusual icon?
A: Windows Device Manager usually provides information about failures with peripherals. While the Device
Manager can assist with troubleshooting most problems, it may not display the e xact cause or provide a
precise solution.
An unusual icon next to the hard drive can reveal a problem. For example, instead of the normal icon based
on the type of device, it is instead an exclamation mark, question mark or an X. Right click this icon and then
choose Properties. The General tab provide s a potential reason why the device is not working as expected.
23Se agate Innov8
3/14/16
 Loading...