

Page 1
Page 2

Seagate Global Access
Contents
Using Web Access .......................................................................................................... 1
Using the Sign In Page ...................................................................................... 1
Signing In to Seagate Global Access .................................................... 2
Creating a Seagate Global Access Account ........................................ 2
If You Forget Your Password ................................................................. 5
Viewing Central Axis Details .................................................................. 7
Accessing Folders via the Web ........................................................................ 8
Using Folder Commands ................................................................................. 10
Downloading Folders ............................................................................. 10
Adding Files to a Folder ........................................................................ 12
Creating a Folder ................................................................................... 15
Sharing a Folder ..................................................................................... 17
Updating the Folder List ........................................................................ 19
Selecting a View Option .................................................................................. 19
Using File Commands ...................................................................................... 21
Overwriting Files .................................................................................... 21
Previewing Images ................................................................................ 23
Downloading Files ................................................................................. 25
Managing Shared Folders .......................................................................................... 28
Working with Shares ........................................................................................ 29
Viewing Shared Folders ........................................................................ 29
Editing Shares ........................................................ ................................ 30
Removing a Share ................................................................................. 31
Sorting Shared Folders ......................................................................... 33
Receiving a Share ............................................................................................ 34
Managing Account Settings ...................................................................................... 36
Creating a Display Name ................................................................................. 36
Using the Account Settings Page ................................................................... 37
Index .................................................................................................................................... 39
i
Page 3
Seagate Global Access
Using Web Access
Note: Although you can store and work with files 2 GB or larger on your Central Axis, you cannot
access or add files 2 GB or larger via the Seagate Global Access website.
The Web Access feature allows you to use the Seagate Global Access website to access,
download, and work with files and folders stored on your Central Axis and enabled for Web
Access.
• Files and folders can be accessed remotely via the web even if your computer is
turned off as long as your Central Axis is on.
• Files downloaded to a local computer now reside on that computer. If you don’t want
the files to remain on that computer (for example, if you’re on a public computer at
an Internet cafe), be sure to delete the downloaded files and empty the Recycle Bin
before you log off from the computer.
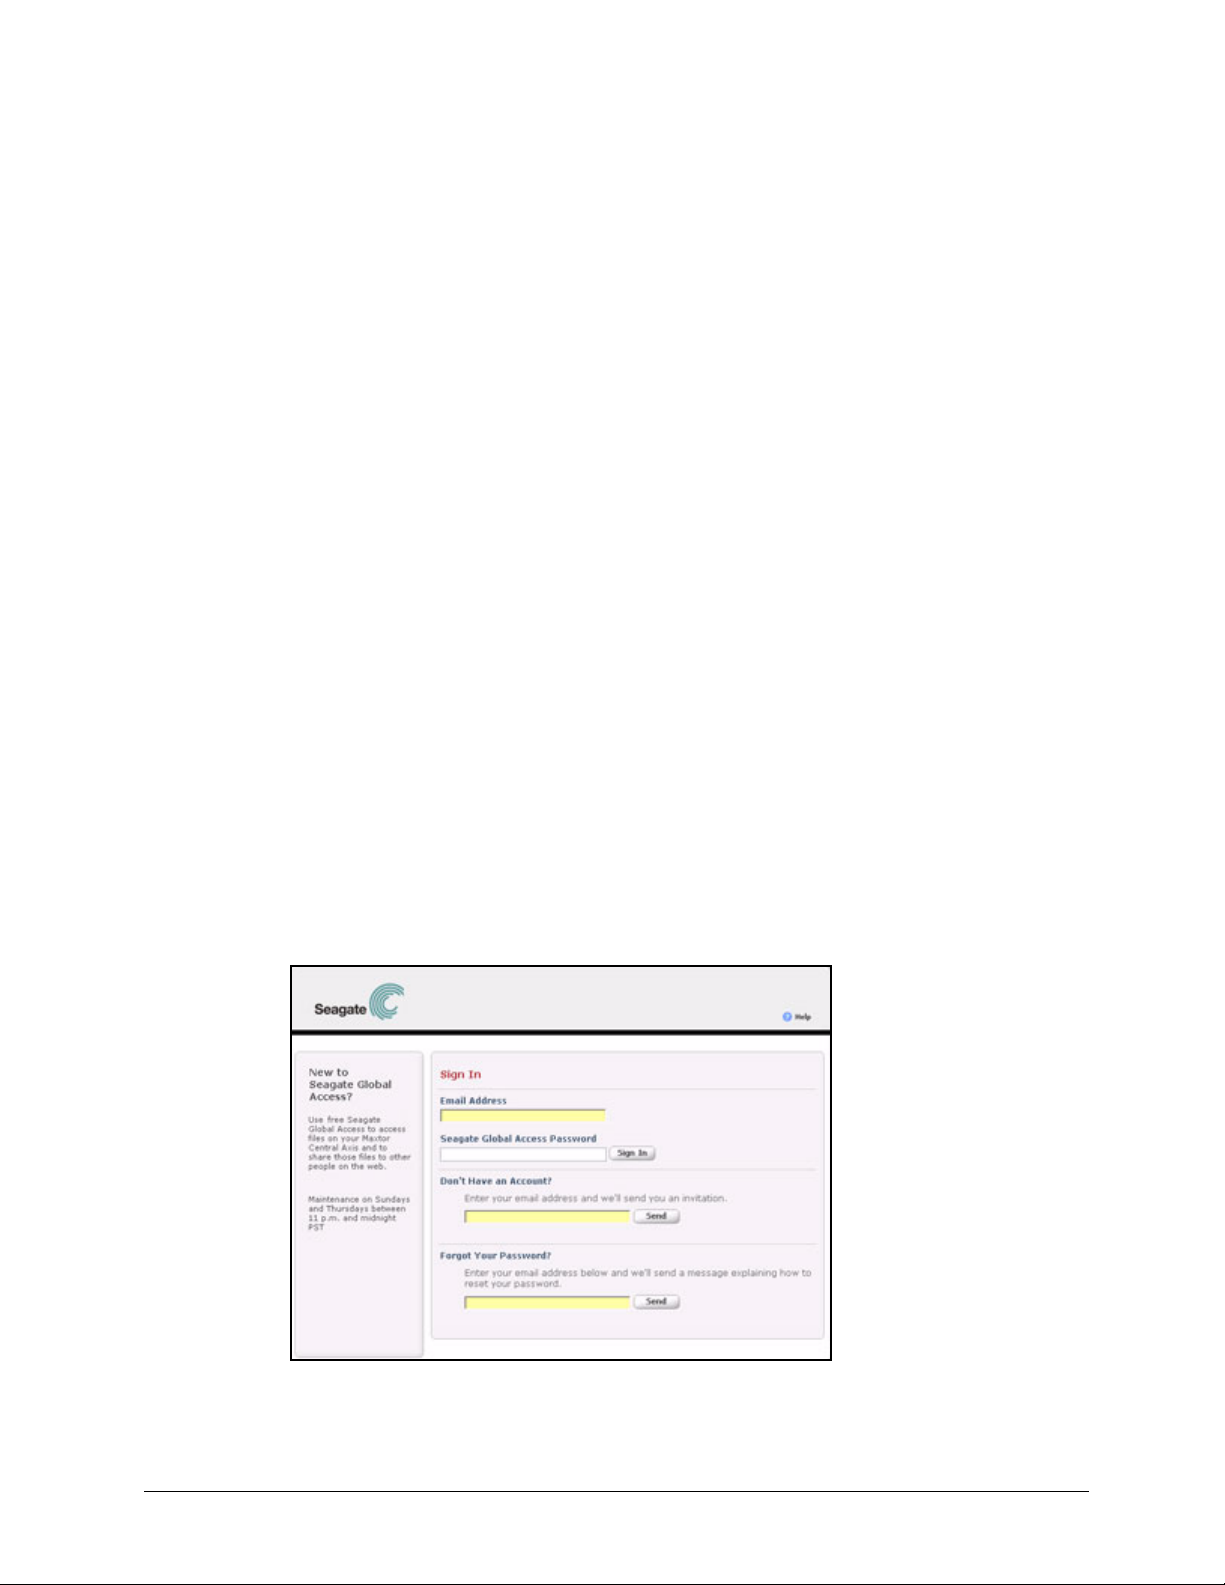
Using the Sign In Page
The Seagate Global Access Sign In page can be used to sign into your Global Access
account to use Web Access & Sharing, create a new Global Access account, and access
your Global Access account if you forget your password.
To open the Seagate Global Access Sign In page,
• Go to the Seagate Global Access website at http://globalaccess.seagate.com.
The Seagate Global Access Sign In page opens:
Figure 1: Seagate Sign In Page
Using the Sign In Page 1
Page 4

Seagate Global Access
Signing In to Seagate Global Access
To sign in to Seagate Global Access and access files stored on your Central Axis,
Step 1. On the Seagate Global Access Sign In page, enter the email address and
password you used to create your Seagate Global Access account.
Step 2: Click Sign In.
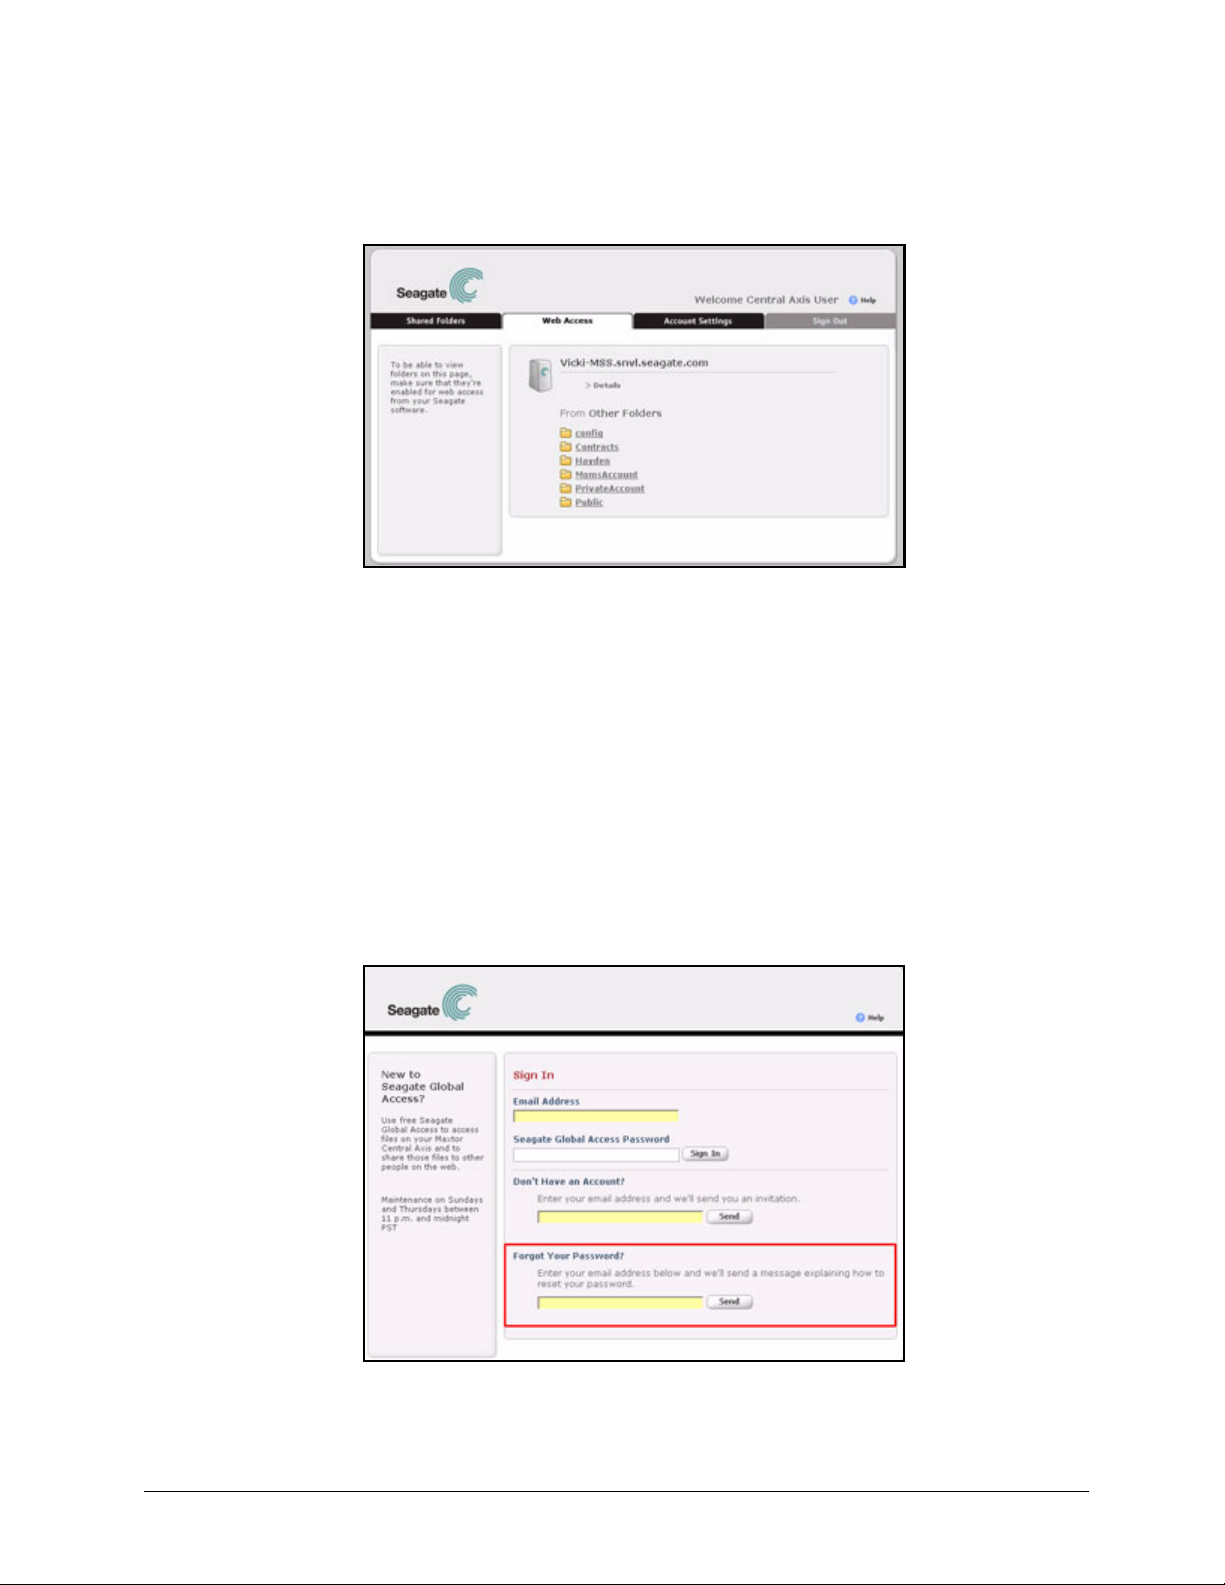
The Seagate Web Access page opens:
Figure 2: Seagate Web Access
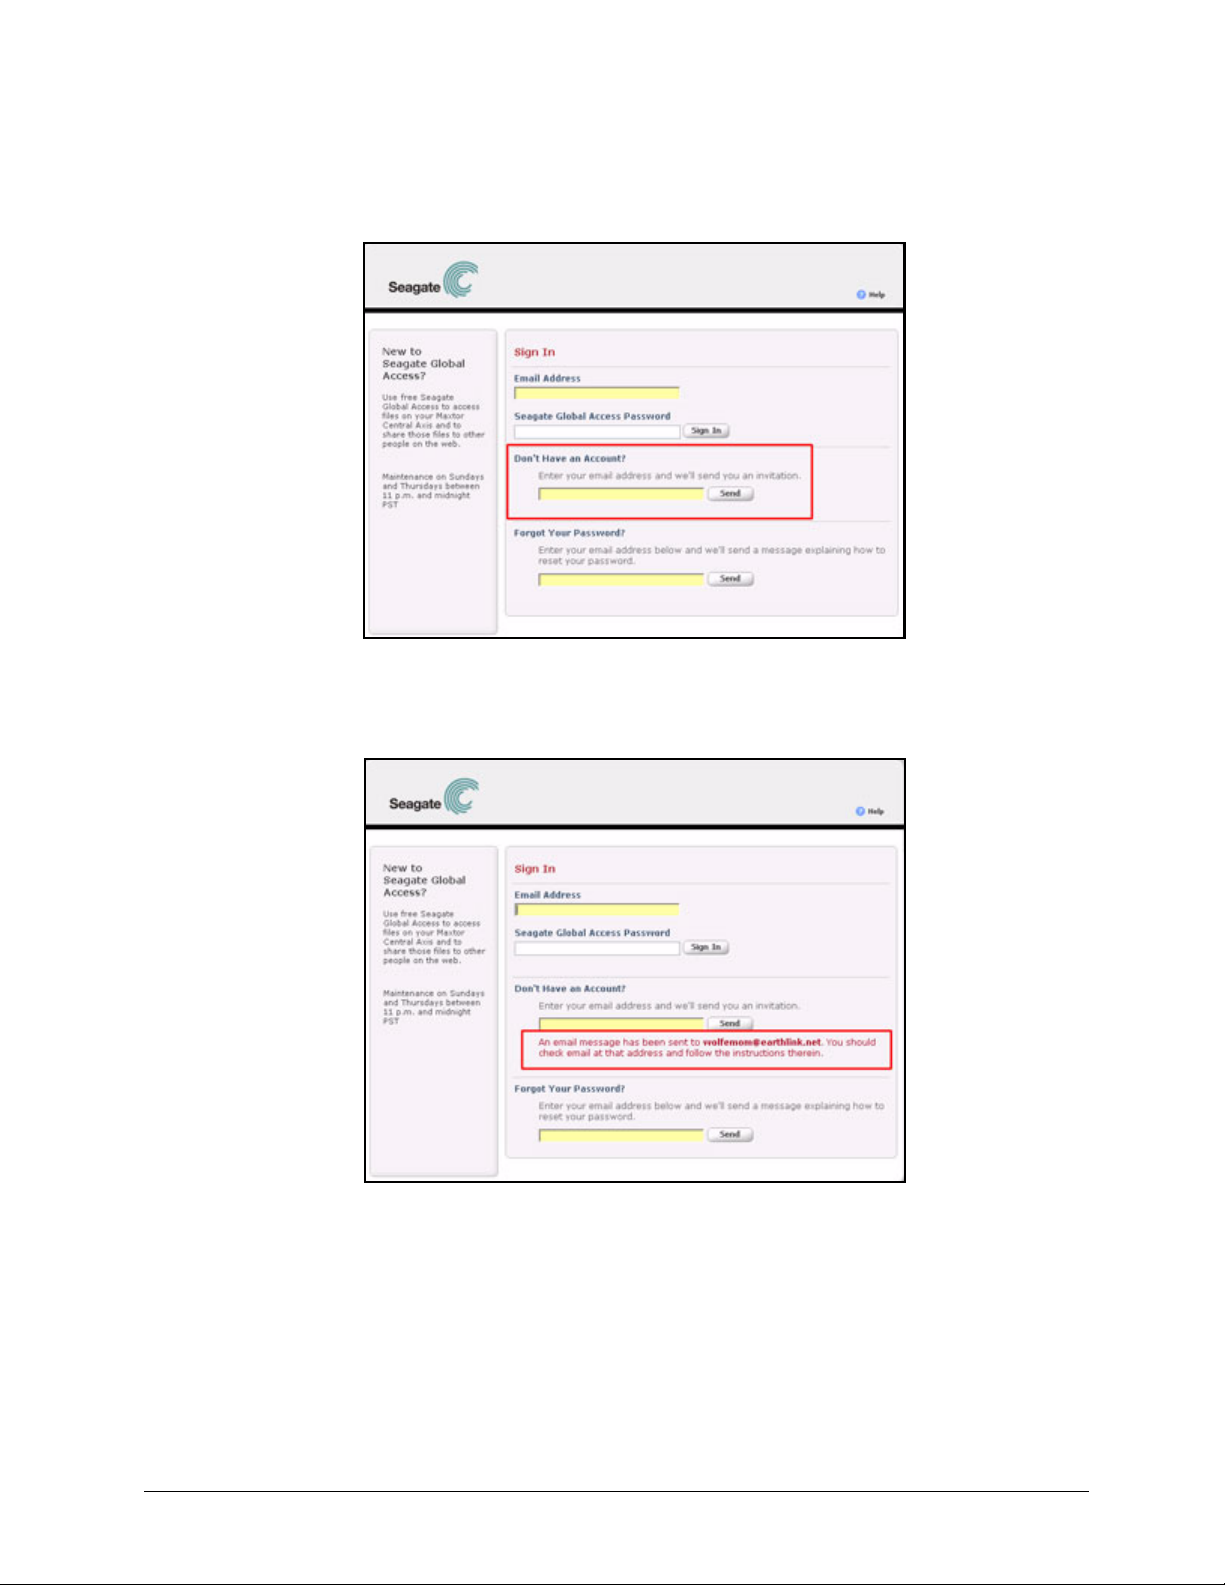
Creating a Seagate Global Access Account
If you don’t yet have a free Seagate Global Access account, you can create one now.
Step 1. On the Seagate Global Access Sign In page, enter your email address below
Don’t have an account? and click Send.
Using the Sign In Page 2
Page 5
Seagate Global Access
Figure 3: Seagate Sign In Page
The page refreshes to indicate that Seagate has sent you an email:
Figure 4: Create Global Access Account Email Sent
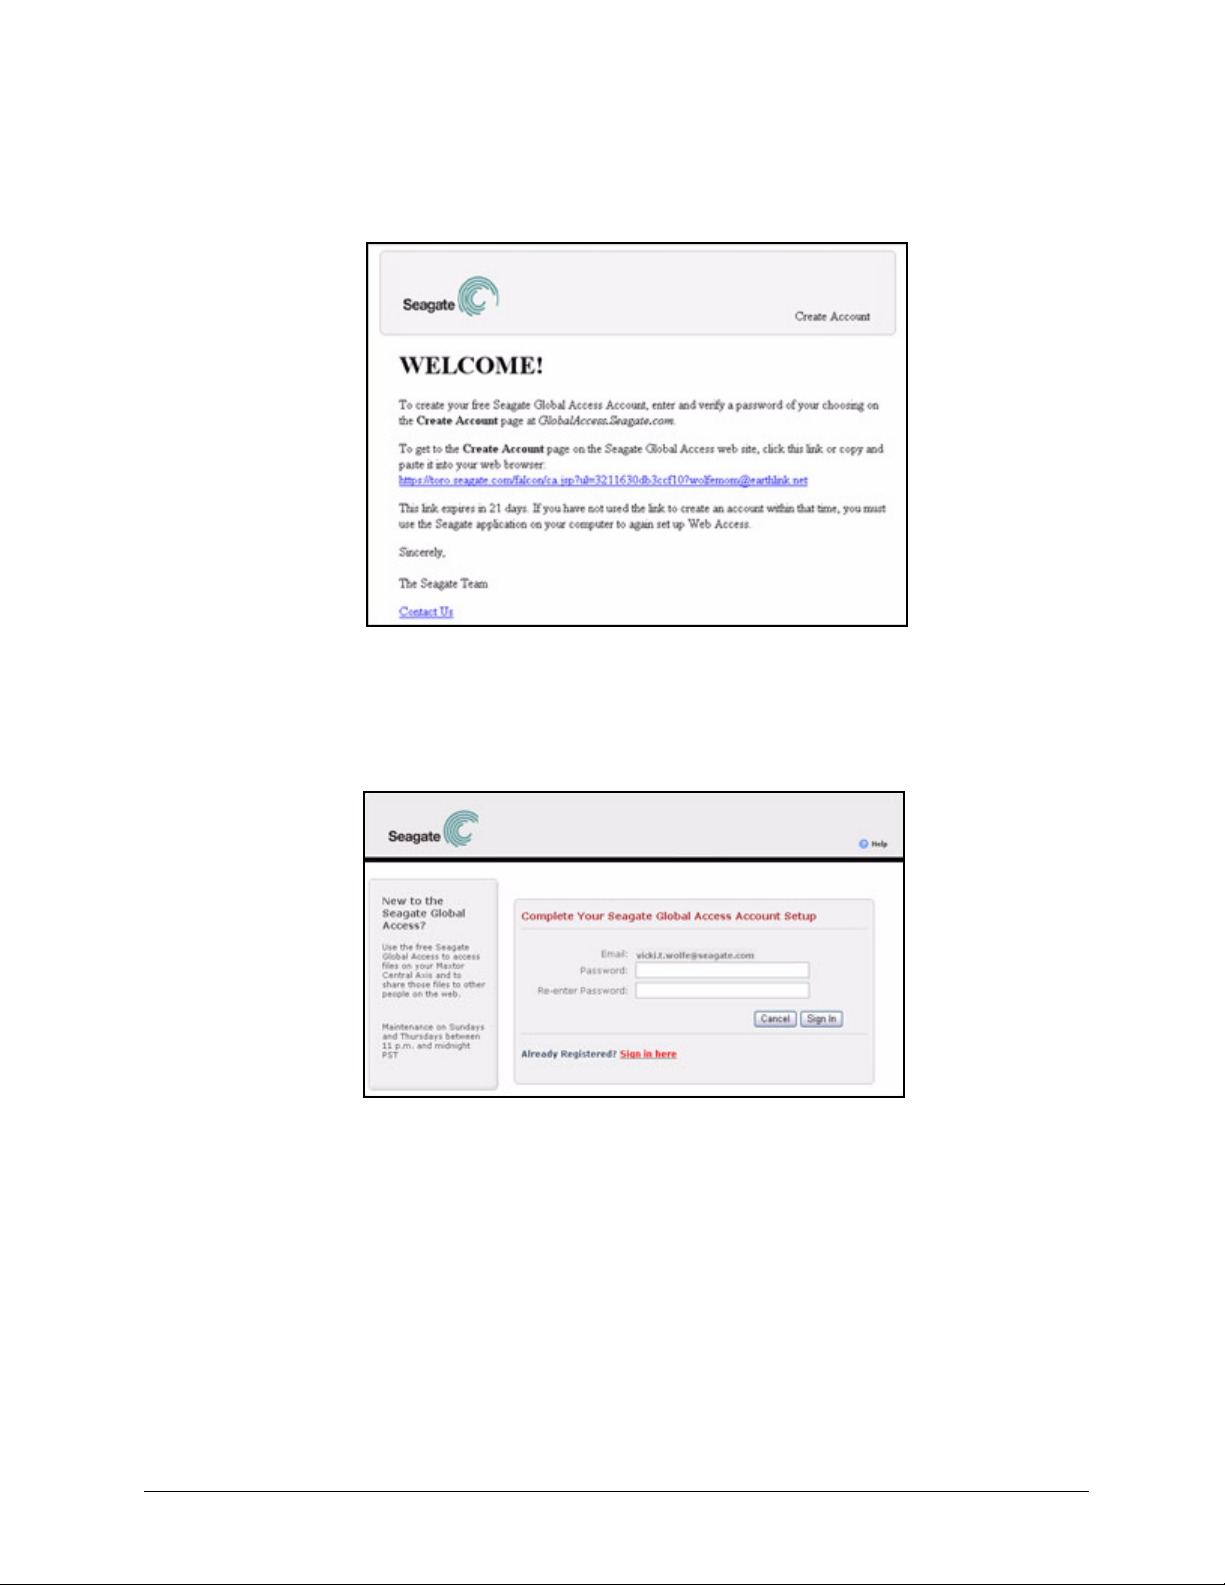
Step 2: Check your email account for the email from Seagate, which contains a link to the
web page on which to open a Seagate Global Access account:
Using the Sign In Page 3
Page 6
Seagate Global Access
Figure 5: Create Global Access Account Email
Step 3: Click the link in the Seagate email.
The Seagate Global Access Account Setup page opens:
Figure 6: Seagate Global Access Account Setup
Your username is the email address you used to register for your Global Access
account.
Step 4: Enter and re-enter a password for your Global Access account and click Sign In.
The Seagate Web Access page opens:
Using the Sign In Page 4
Page 7
Seagate Global Access
Figure 7: Seagate Global Web Access
You’ve created a Seagate Global Access account and can access folders stored
on your Central Axis via the web.
If You Forget Your Password
If you forget the password you used to create your Seagate Global Access account, you
can use the Sign In page to reset the password and access your account.
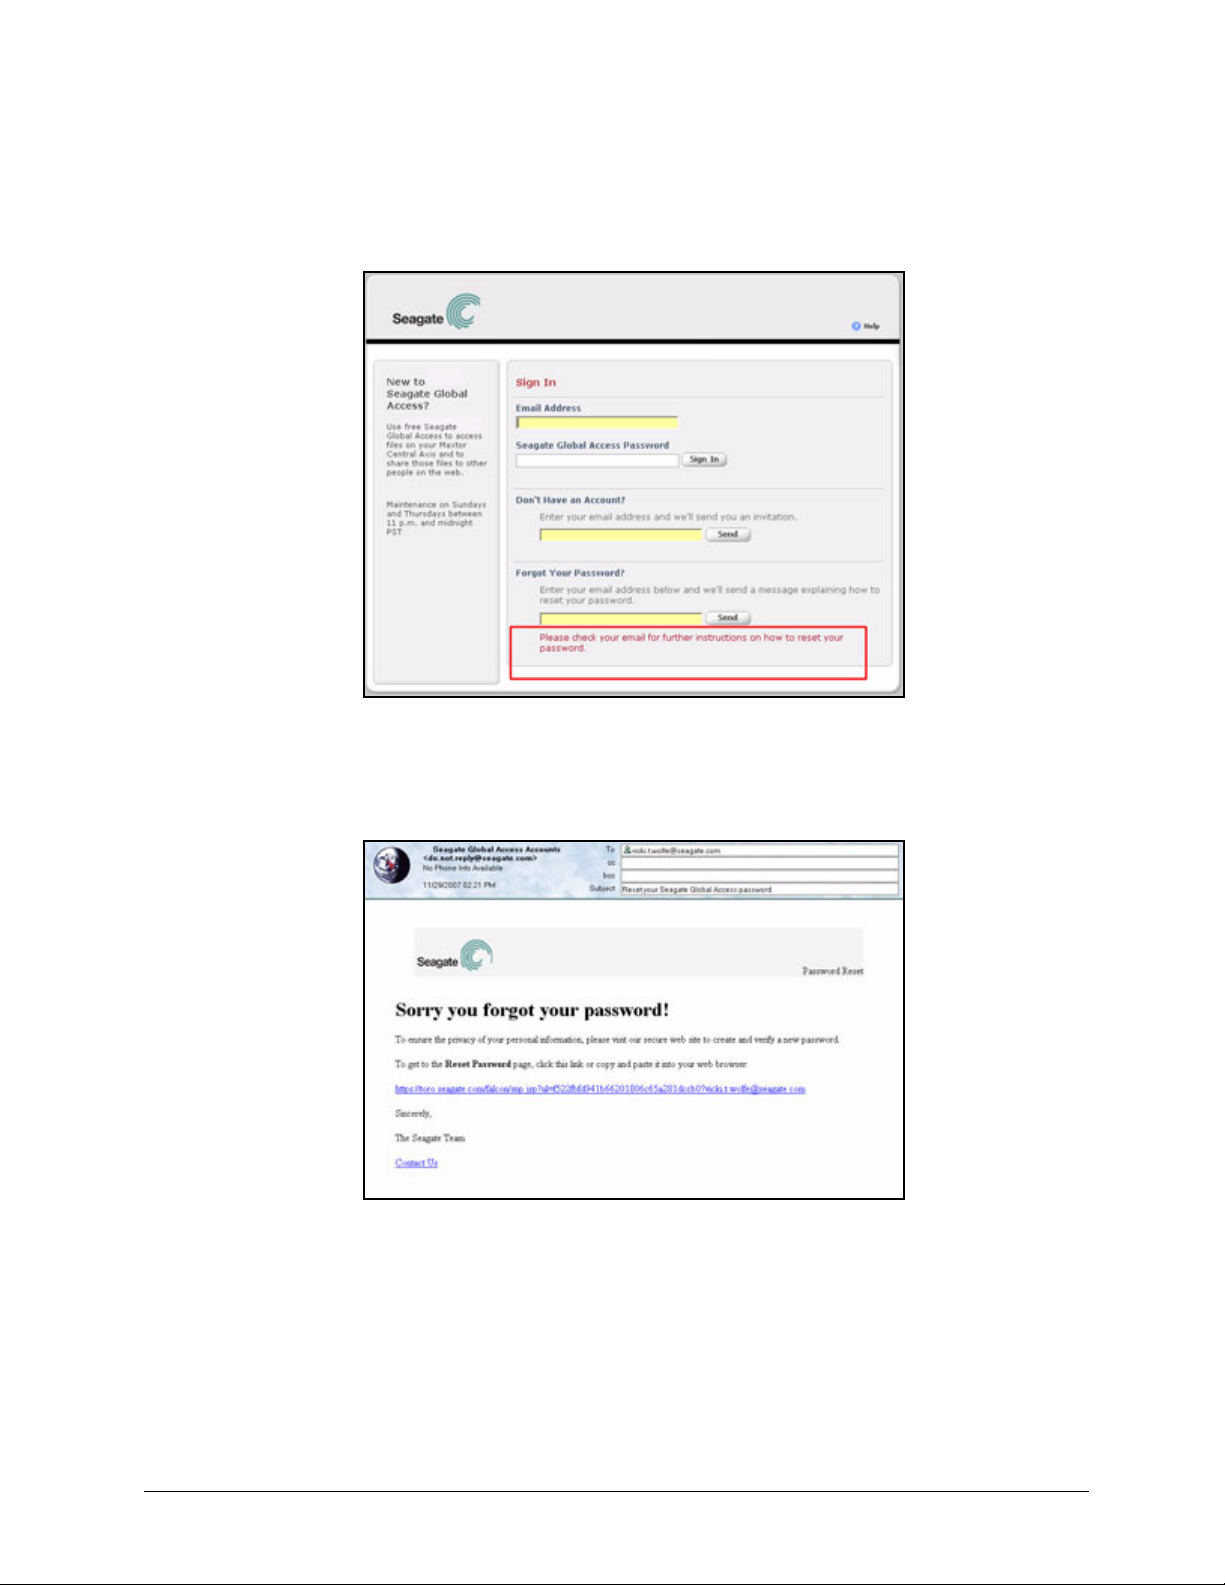
If you forget your password,
Step 1. On the Seagate Global Access Sign In page, enter your email address below
Forgot your Password? and click Send.
Figure 8: Forgot Your Password
Using the Sign In Page 5
Page 8
Seagate Global Access
The page refreshes to indicate that Seagate has sent you an email:
Figure 9: Forgot Your Password - Check Email
Step 2: Check your email account for the email from Seagate, which contains a link to the
web page on which to open a Seagate Global Access account:
Figure 10: Reset Password Email
Step 3: Click the link in the Seagate email.
The Reset Password page opens:
Using the Sign In Page 6
Page 9
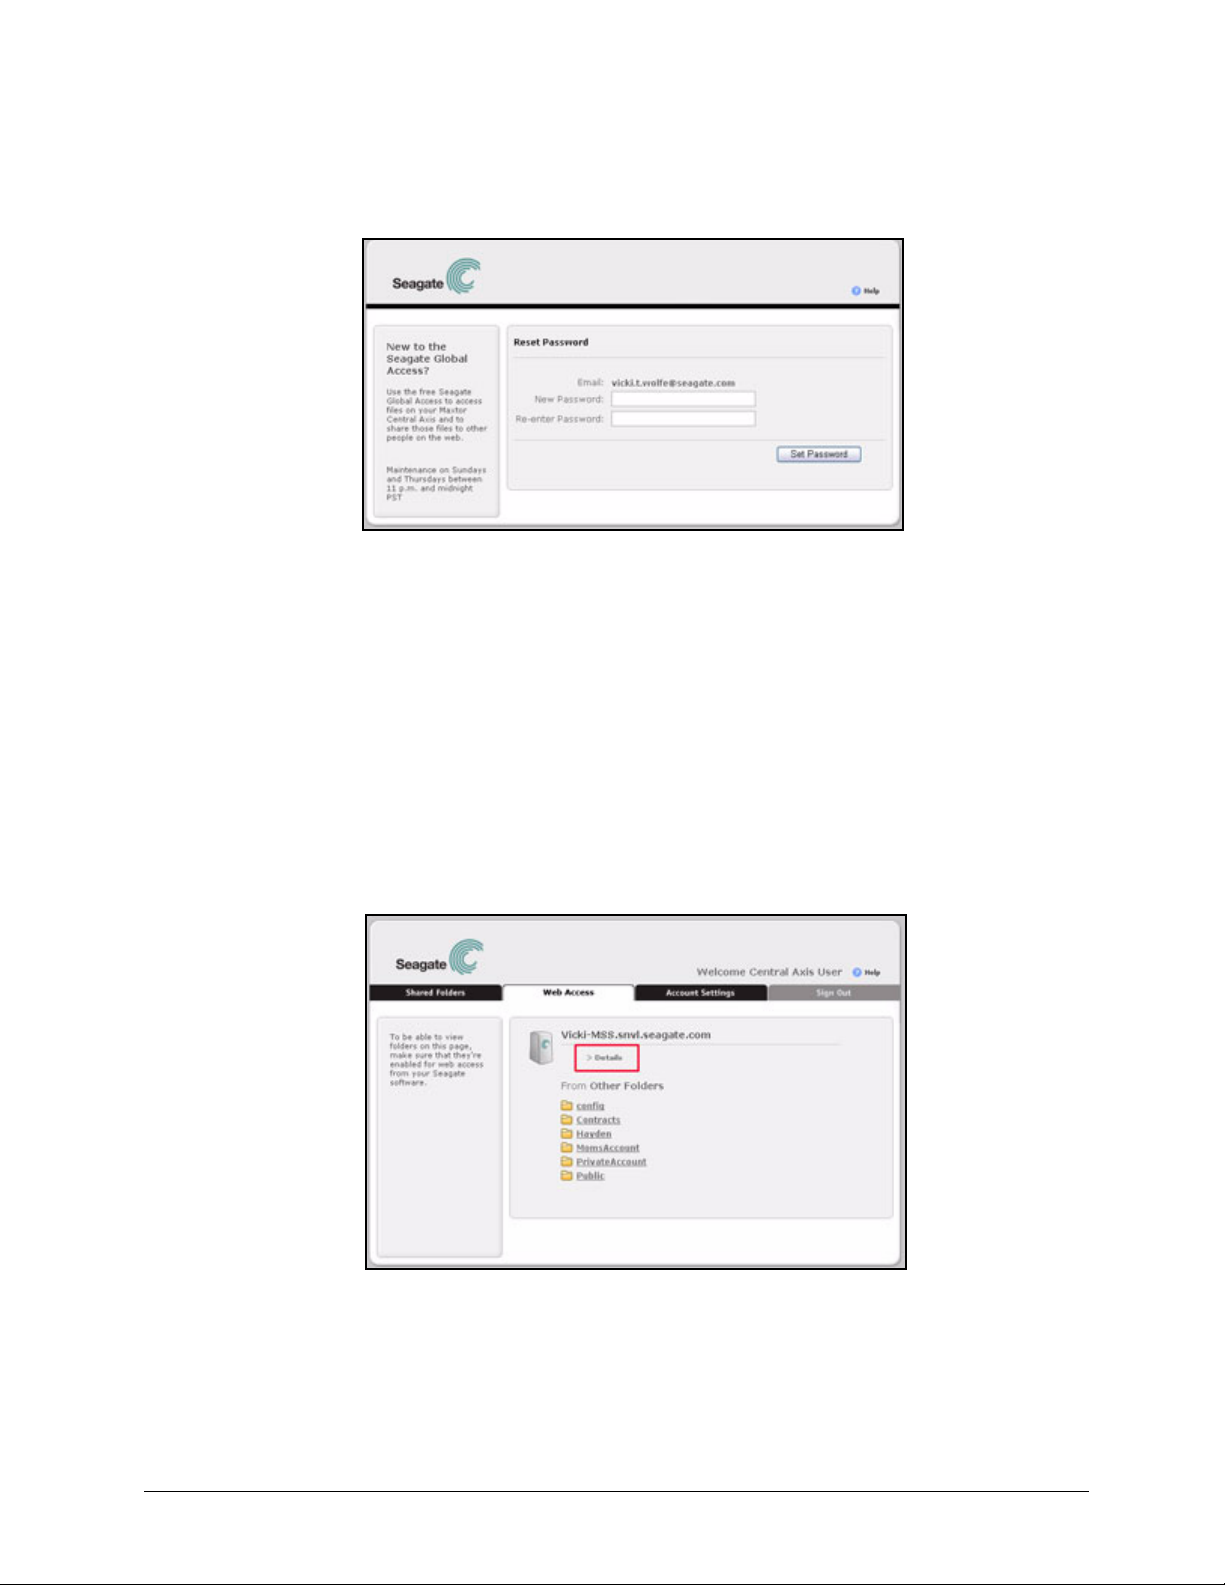
Figure 11: Reset Password Page
Step 4: Enter and re-enter a new password and click Set Password.
The Web Access page opens and you can access the files on your Central Axis.
Seagate Global Access
Viewing Central Axis Details
You can use the Details link on the Web Access page to check the status of your Central
Axis.
To view the status details of your Central Axis,
Step 1. On the Web Access page, click Details:
Figure 12: Details
The Details page opens:
Using the Sign In Page 7
Page 10
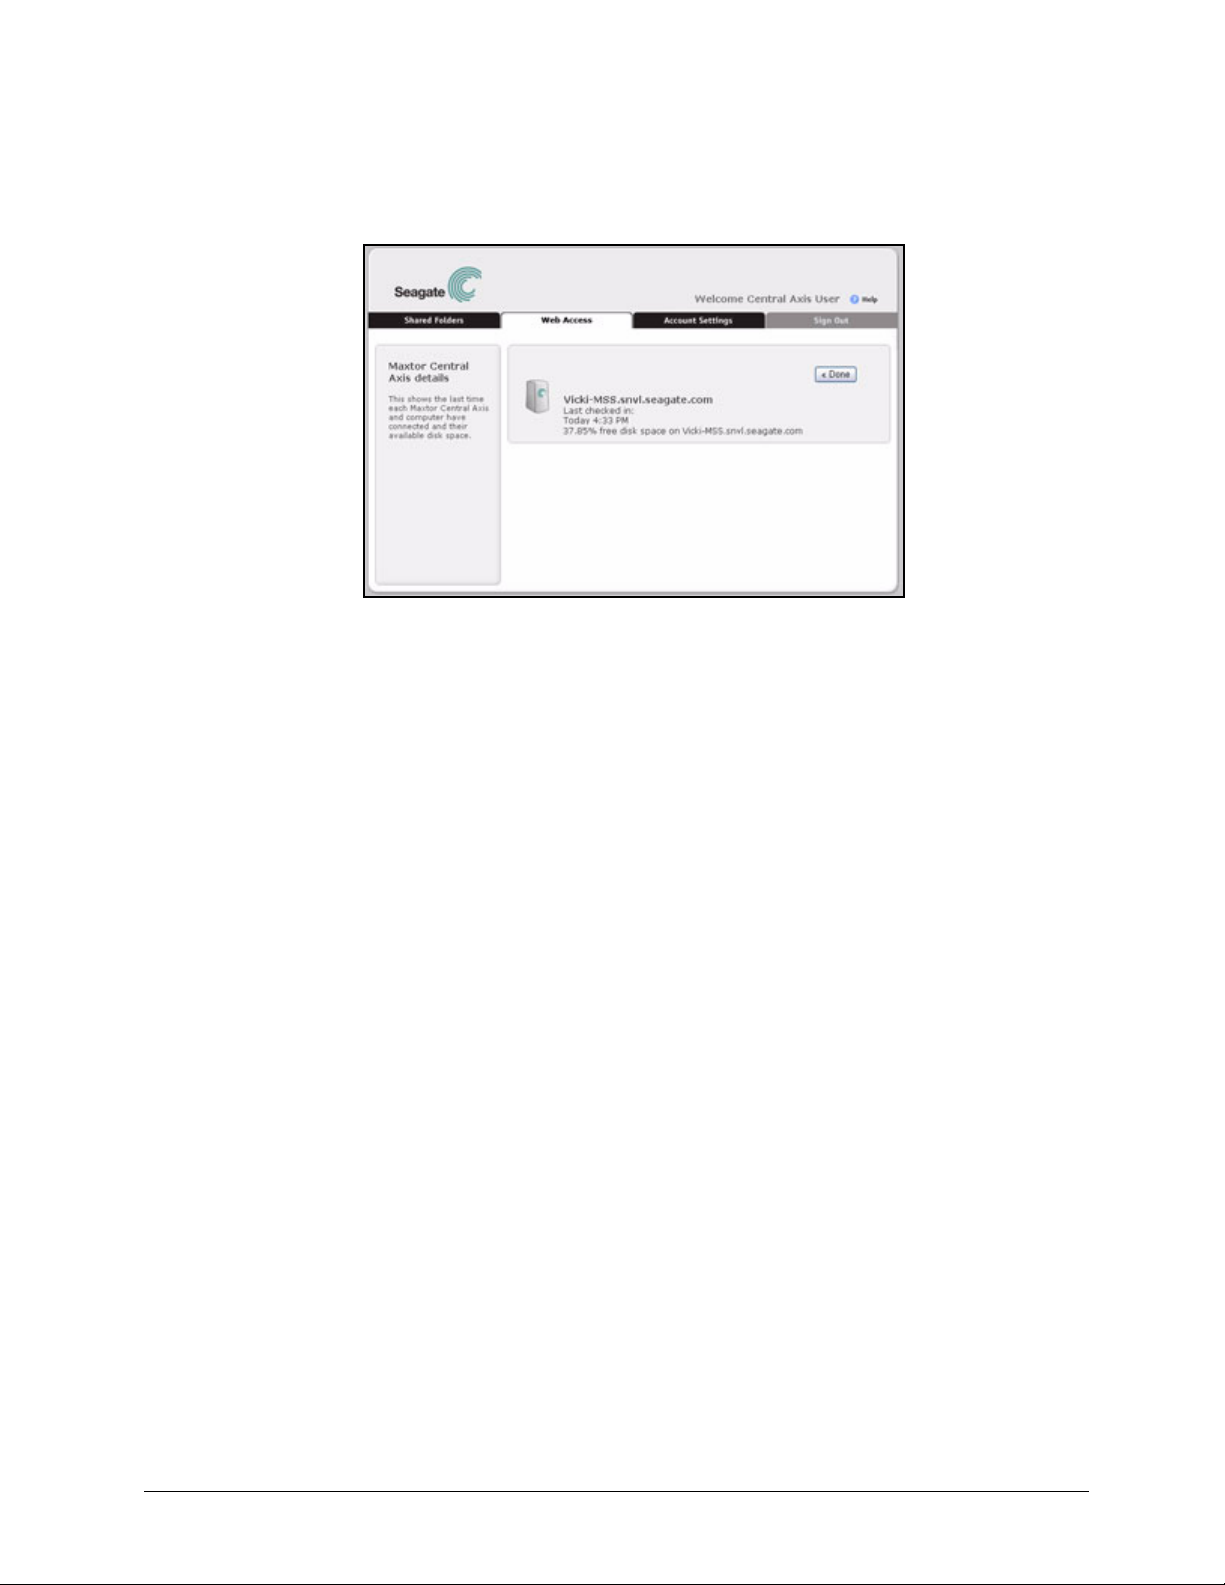
Figure 13: Central Axis Details
Seagate Global Access
Displayed is information on when the Central Axis last checked into the Seagate
web service, how much free disk space remains on the Central Axis, and what
other computers are connected to your Central Axis.
Step 2: Click Done to return to the Web Access page.
Accessing Folders via the Web
A folder must be stored on your Central Axis and you must have enabled Web Access
before you can access it via the Global Access website. For additional information, refer to
the Maxtor Central Axis User Guide.
In addition, you must have full access to folders stored on the Central Axis to see those
folders via Web Access. For additional information, refer to the Maxtor Central Axis Admin
Guide.
To access a stored folder from a computer not connected to your Central Axis,
Step 1. On the Web Access page, click the folder you want to access:
Accessing Folders via the Web 8
Page 11
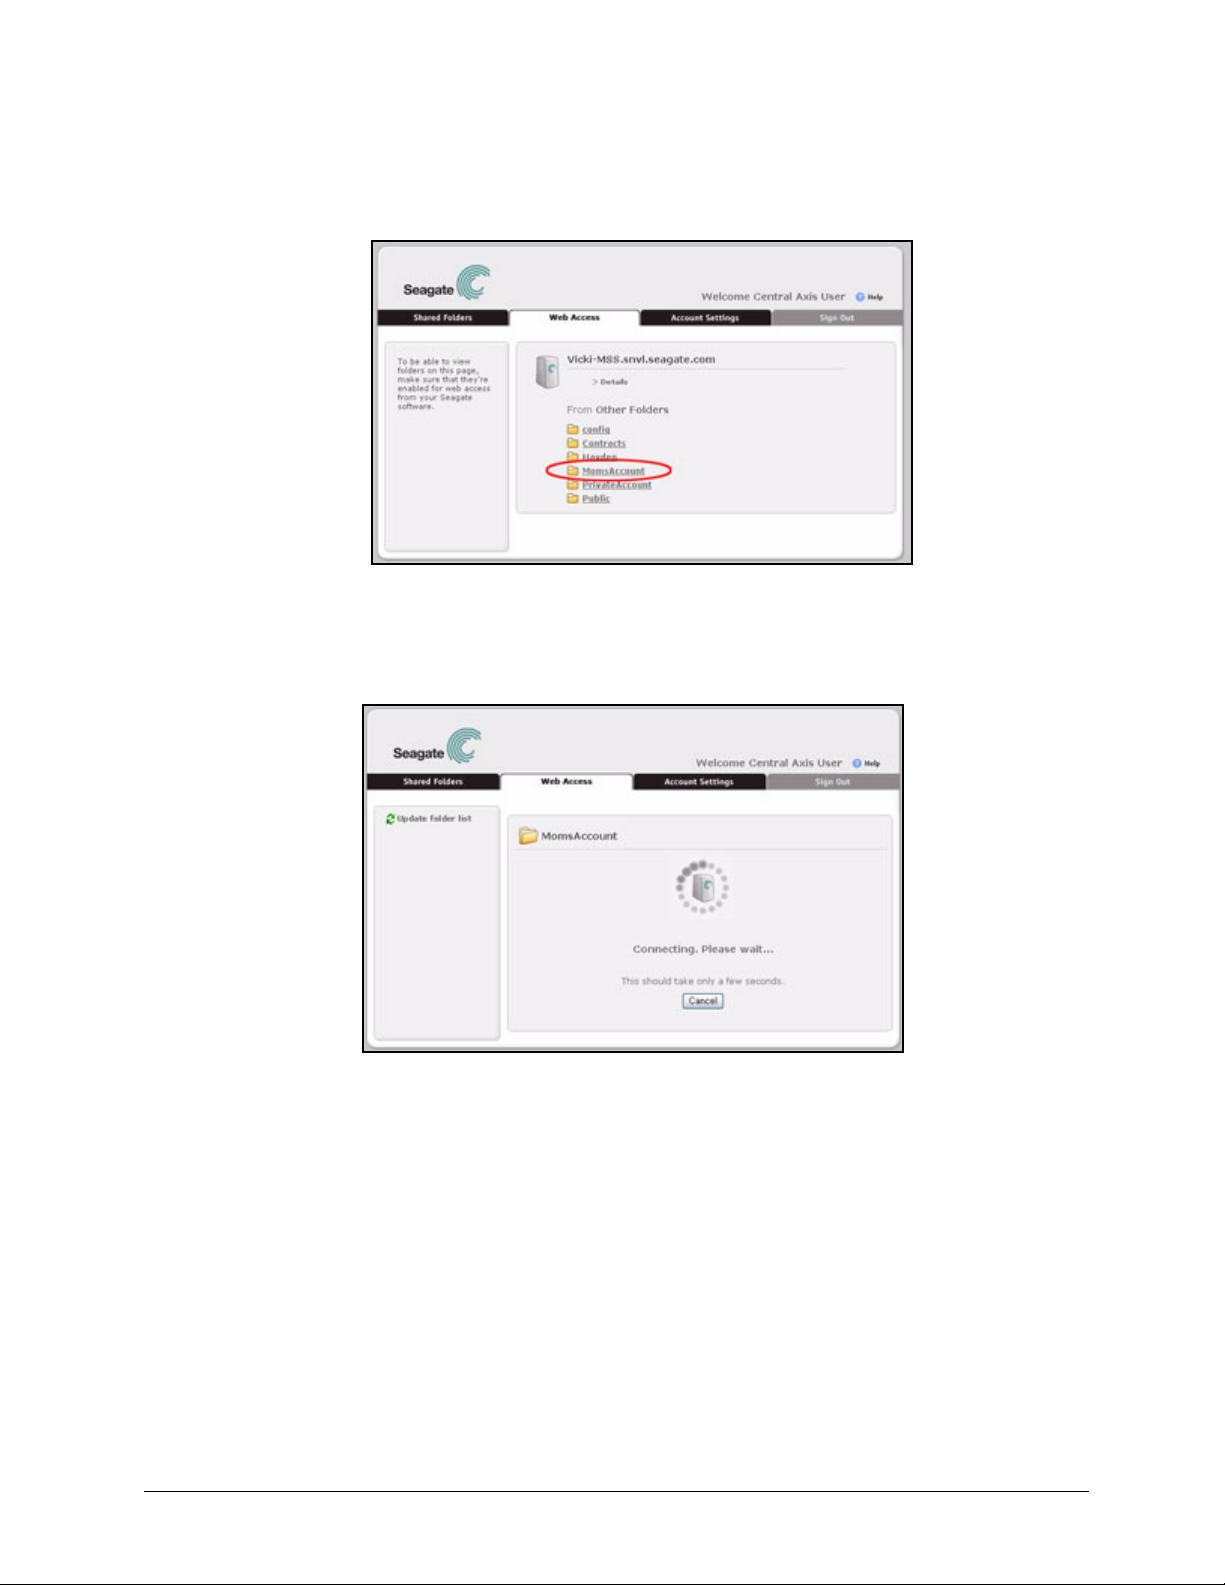
Seagate Global Access
Figure 14: Web Access
The Connecting page informs you of the progress as the Seagate website
accesses the folder on your Central Axis:
Figure 15: Connecting
When the connection has been made, the contents of the selected folder are
displayed:
Accessing Folders via the Web 9
Page 12
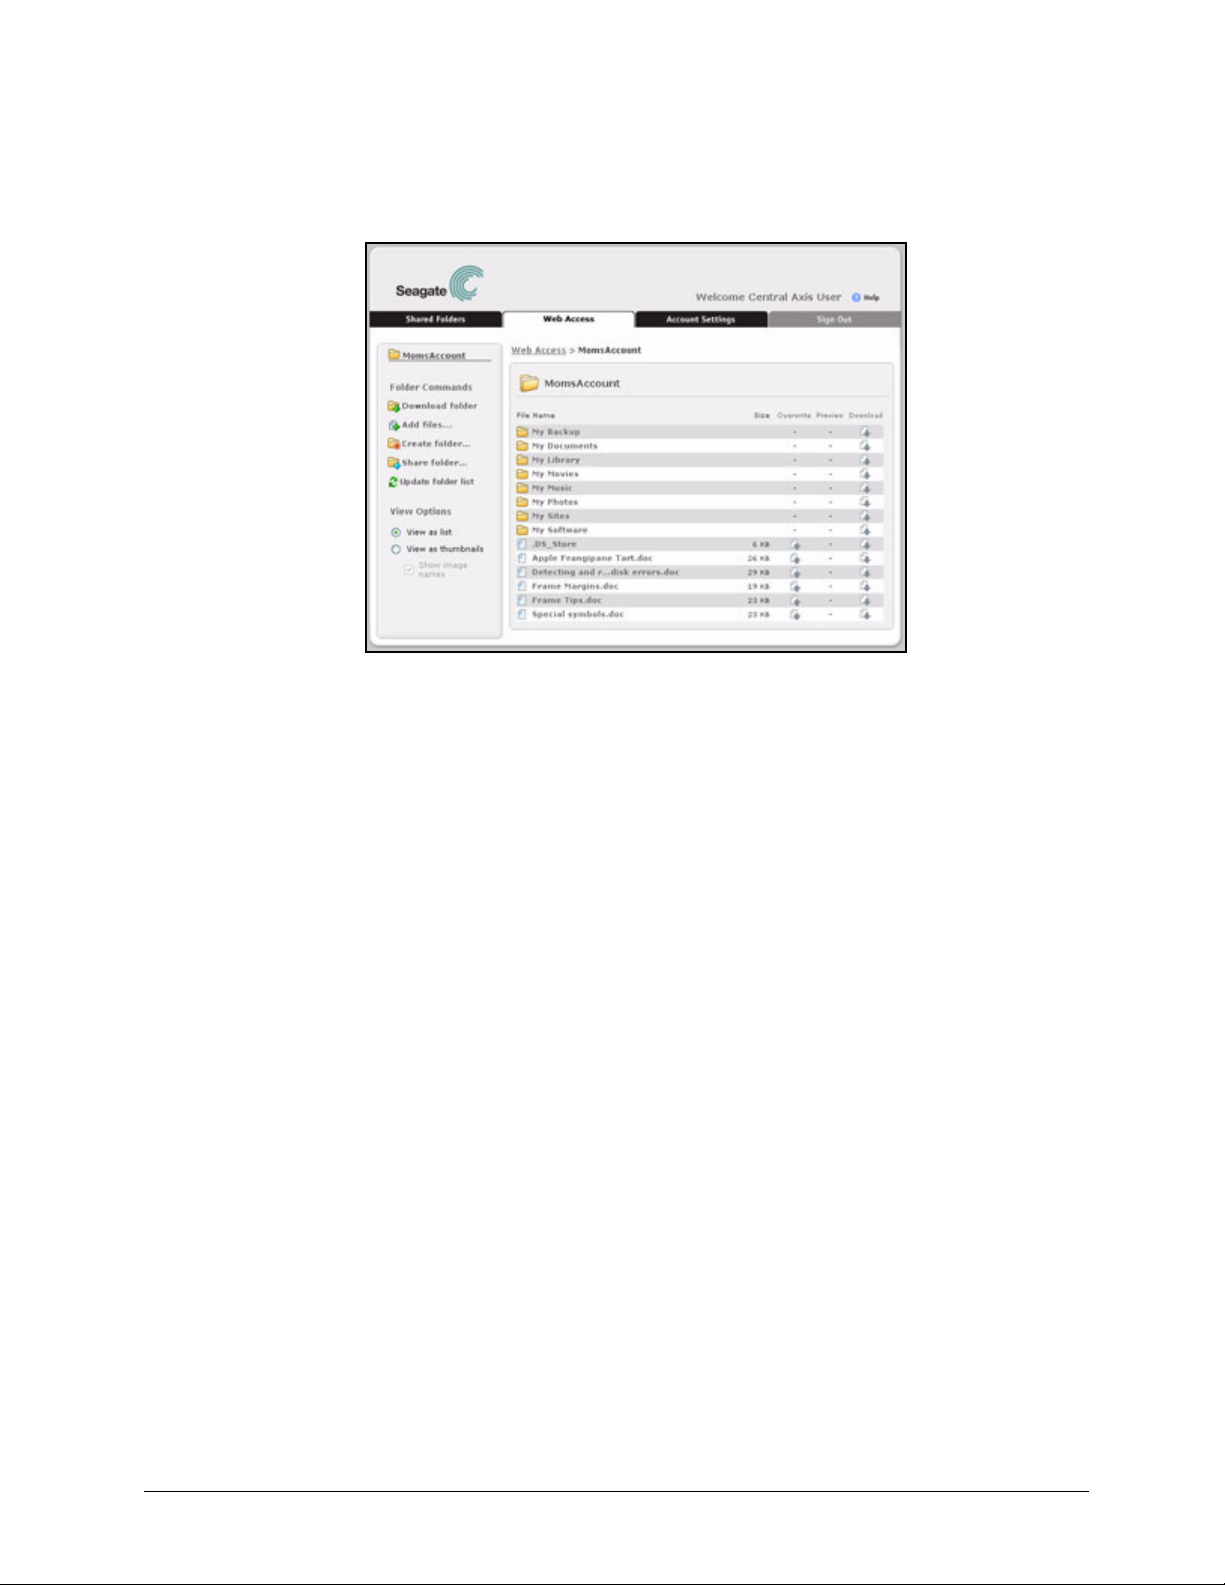
Seagate Global Access
Figure 16: Files and Subfolders - List View
Step 2: Click on a folder to display the data stored in it.
Note: Although you can store and work with files 2 GB or larger on your Central Axis, you cannot
access or add files 2 GB or larger via the Seagate Global Access website.
Using Folder Commands
The Folder Commands are found on the left side of the Global Access Web Access and
Folder Sharing pages:
Using Folder Commands 10
Page 13
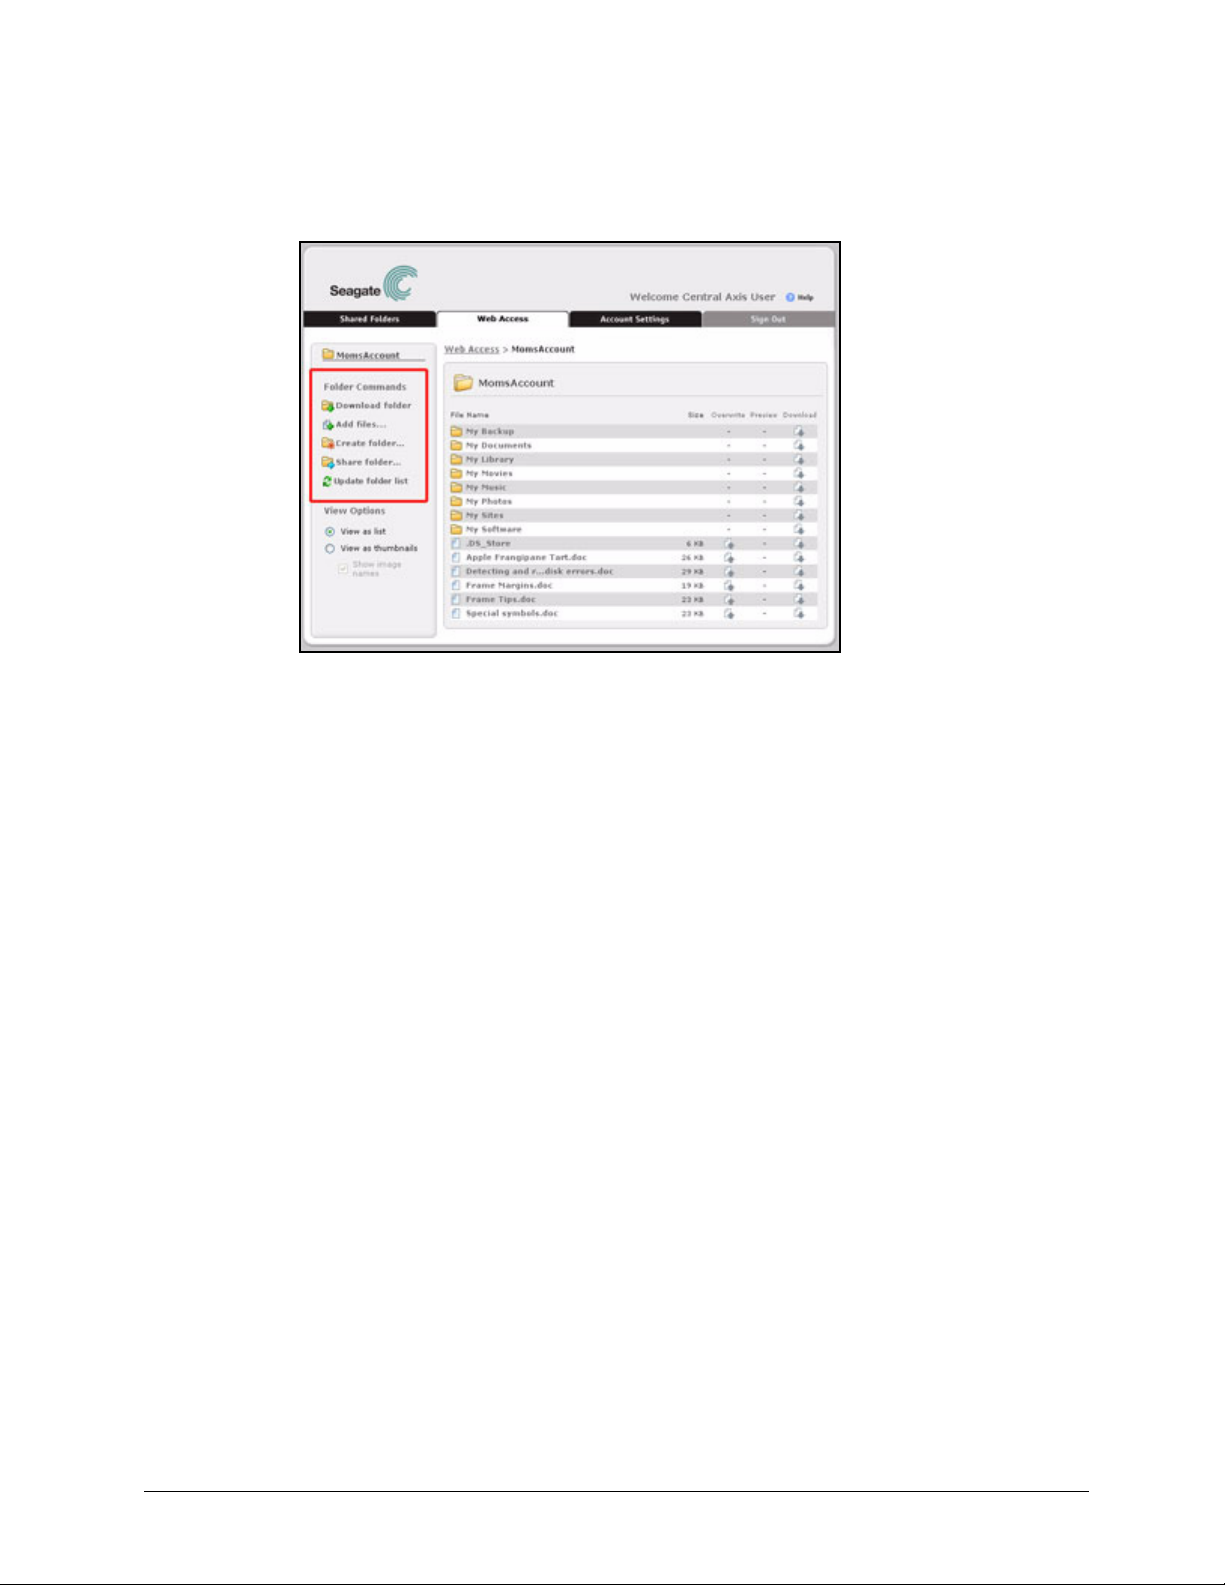
Seagate Global Access
Figure 17: Folder Commands
The Folder Commands allow you to perform these actions with folders stored on your
Central Axis:
• Download folders
• Add files to folders stored on the Central Axis
• Create new folders within a folder stored on the Central Axis
• Share folders via the Global Access website
• Update the folder list
Downloading Folders
To download a folder to a local computer,
Step 1. In the Folder Commands menu, click Download folder:
Using Folder Commands 11
Page 14

Seagate Global Access
Figure 18: Downloaded Folder
A File Download window opens:
Figure 19: File Download
Note: The appearance of the browser windows varies according to the browser you’re using.
Step 2: Decide whether to open or save the folder.
If you select Save, a Save As window opens:
Using Folder Commands 12
Page 15
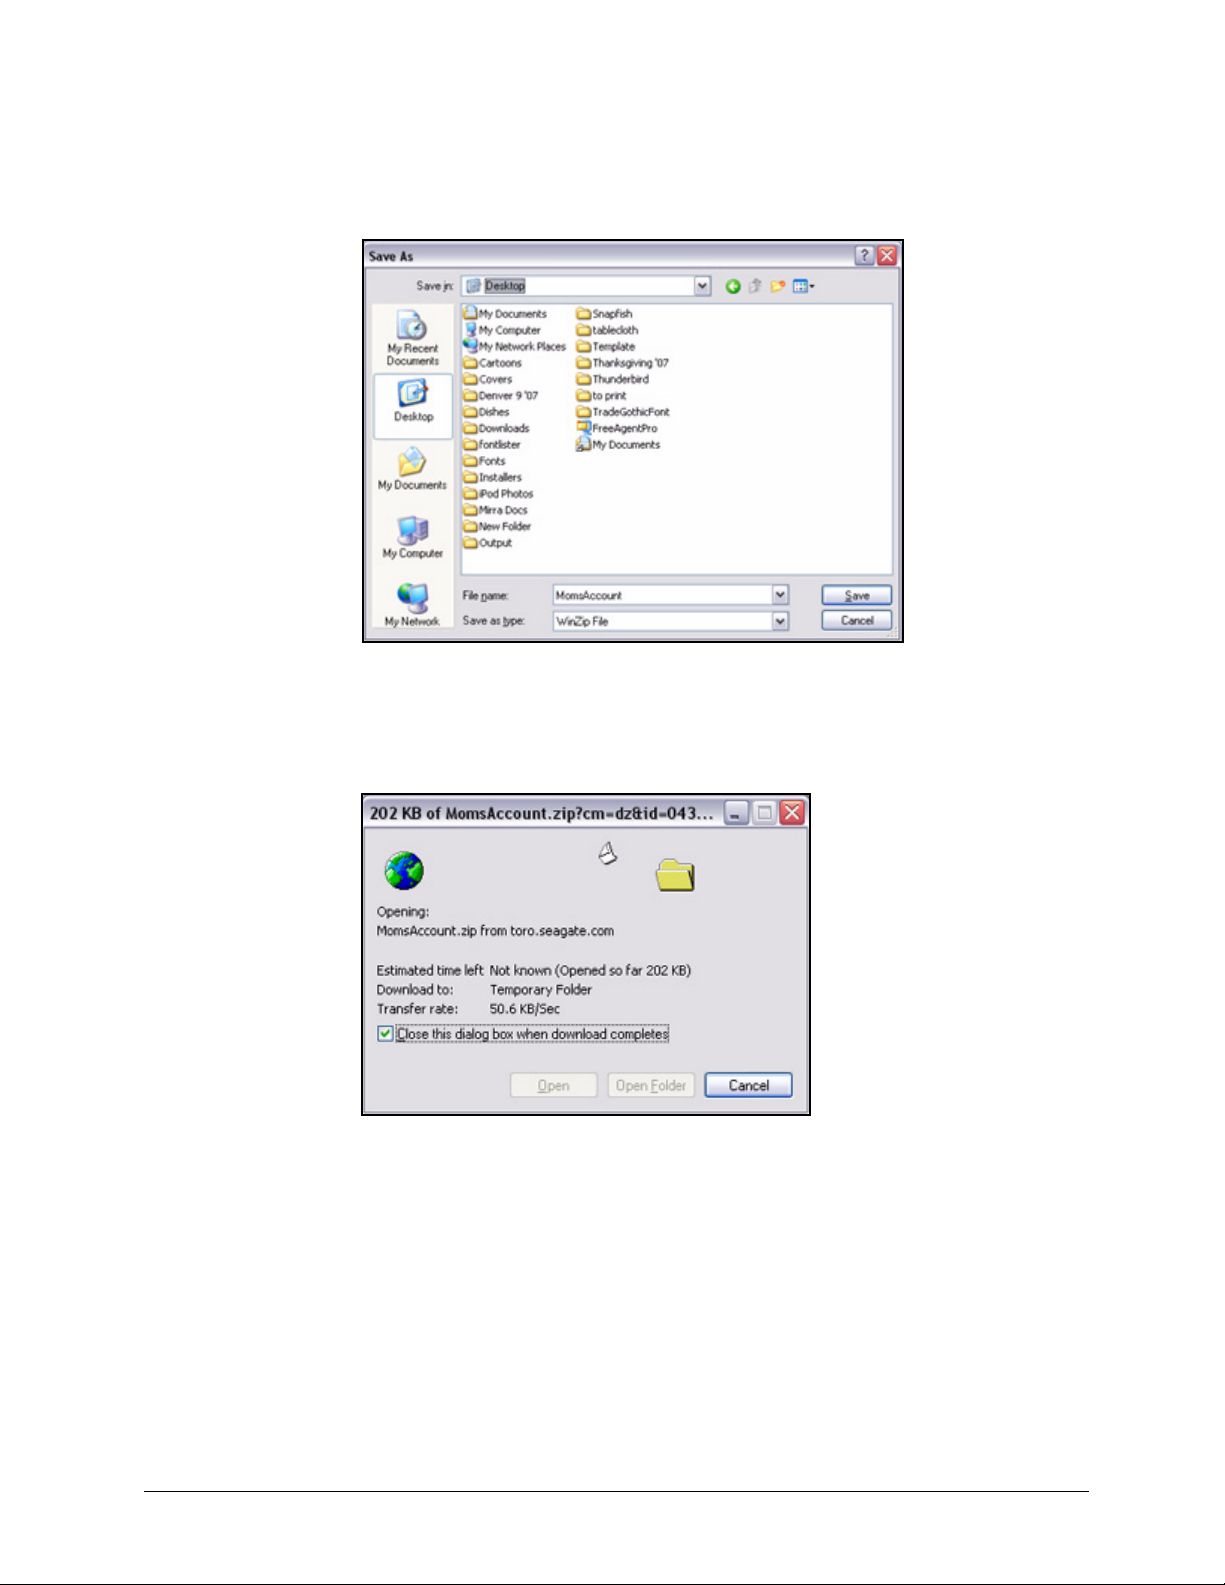
Seagate Global Access
Figure 20: Save Downloaded File
Step 3: Select a destination at which to save the folder and click Save.
A window displays the progress of the download:
Figure 21: Download Progress
When the download is complete, the file opens if you selected Open or appears at
the chosen location on your computer if you selected Save.
Adding Files to a Folder
Note: Although you can store and work with files 2 GB or larger on your Central Axis, you cannot
access or add files 2 GB or larger via the Seagate Global Access website.
Using Folder Commands 13
Page 16

Seagate Global Access
You can use Global Access to add files remotely from a local computer to a folder on your
Central Axis. You can add up to five files to a folder at one time.
To add files to a folder on your Central Axis,
Step 1. In the Folder Commands menu, click Add files:
Figure 22: Add Files
The Add Files page opens:
Figure 23: Add Files
Step 2: Click Browse next to each address box to browse to and select a file to add to this
folder.
A Choose File window opens:
Using Folder Commands 14
Page 17

Figure 24: Choose File
Seagate Global Access
Step 3: Select a file to be added and click Open.
The path to the selected file is displayed in the file name box.
Step 4: Repeat Steps 3 and 4 until you’ve added up to five files to be added to this folder.
Figure 25: Files Selected to be Added
Step 5: When you’ve selected all the files to be added, click Add Files.
A message confirms that your files have been saved to your Central Axis.
Using Folder Commands 15
Page 18
Seagate Global Access
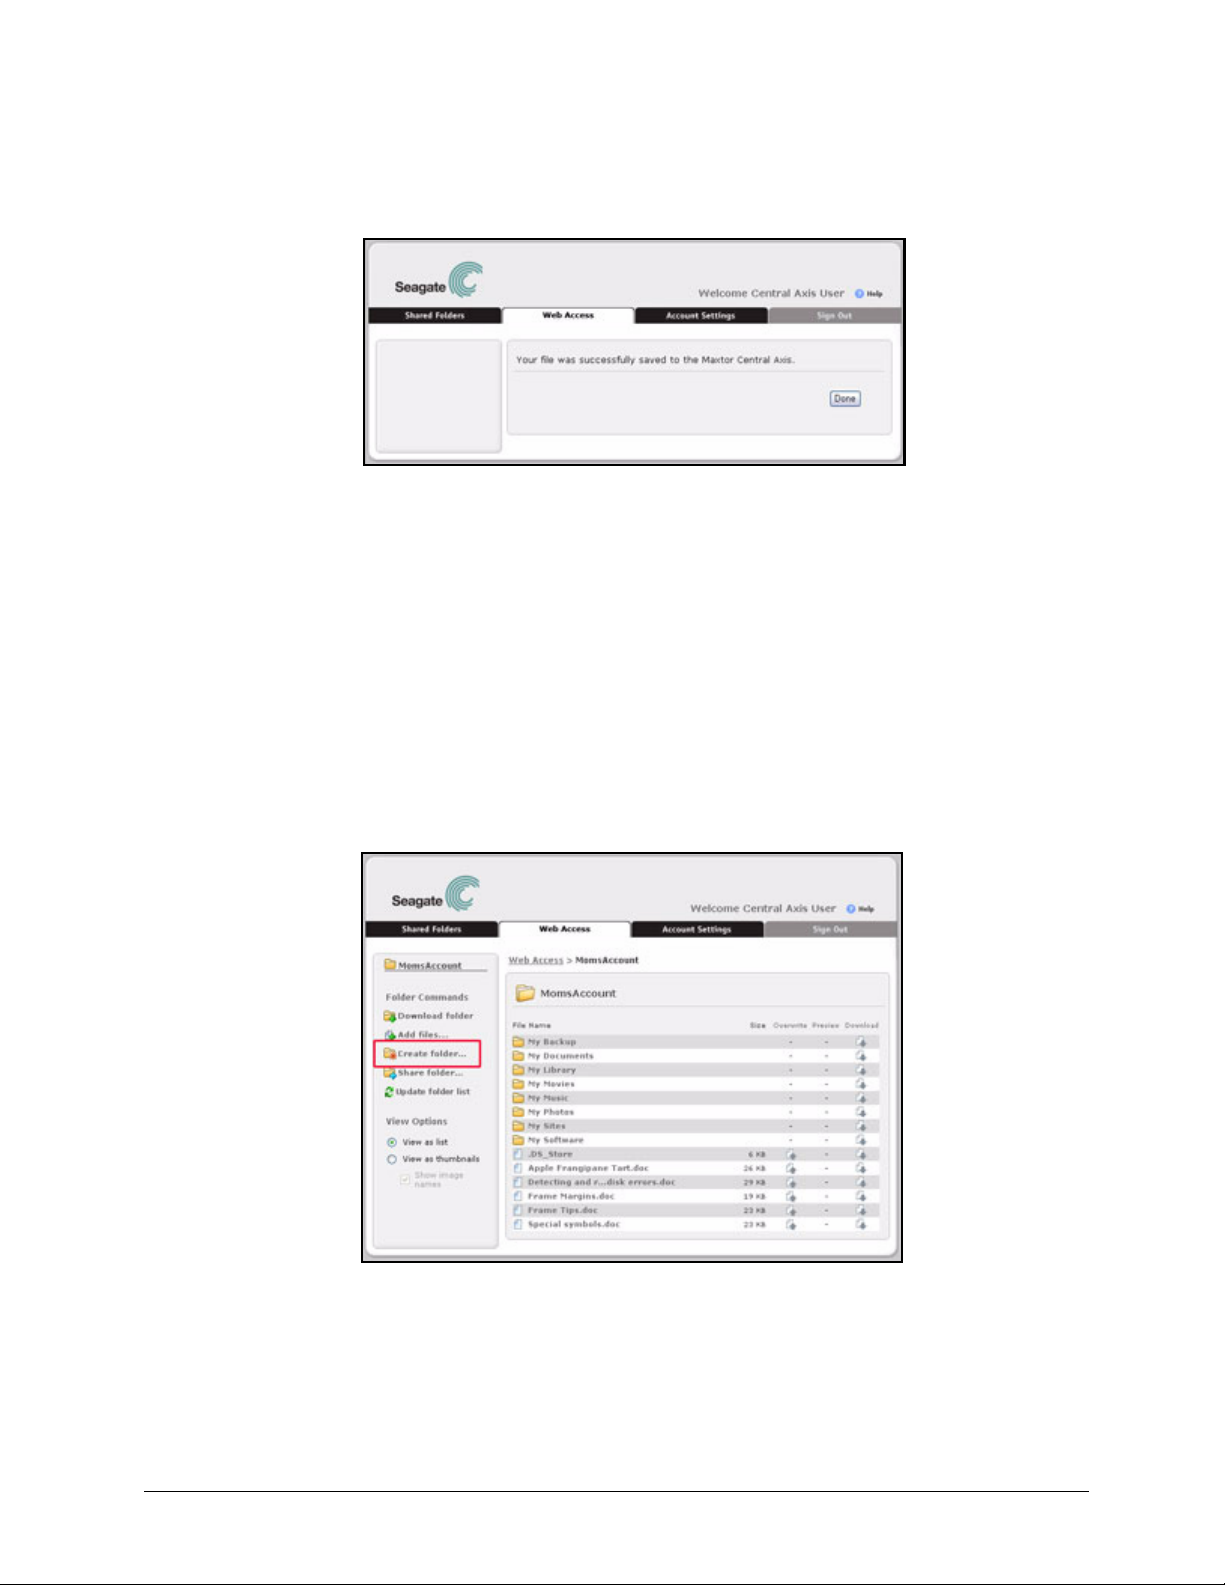
Figure 26: Add Files Confirmation
Step 6: Click Done to return to the Web Access page for the parent folder.
The files you’ve added to this folder are now displayed.
Creating a Folder
You can use Global Access to create a new folder within a parent folder on your Central
Axis.
To create a new folder within the parent folder,
Step 1. In the Folder Commands menu, click Create Folder:
Figure 27: Create Folder
The Create Folder window opens:
Using Folder Commands 16
Page 19

Figure 28: Create Folder
Step 2: Enter a name for the new folder and click Submit.
A message confirms that your folder is being created and recommends clicking
Update folder list in the Folder Commands menu to refresh the page and display
your new folder:
Seagate Global Access
Figure 29: Add Files Confirmation
Step 3: Click Close to return to the Web Access page for the parent folder.
Step 4: In the Folder Commands menu, click Update folder list:
Using Folder Commands 17
Page 20

Seagate Global Access
Figure 30: Update Folder List
The page refreshes and the new folder is displayed.
Sharing a Folder
Once a folder has been stored on your Central Axis, you can share it with others via the
Global Access website. When you share a folder, share recipients receive an email from
Seagate inviting them in your name to access the shared folder via the Seagate Global
Access website. The Create Share page collects the information to be entered in the Share
Invitation email.
To share a stored folder,
Step 1. In the Folder Commands menu, click Share folder:
Using Folder Commands 18
Page 21

Seagate Global Access
Figure 31: Share Folder
The Create Share page opens:
Figure 32: Create Share
Step 2: Enter the information to be used in your Share Invitation email:
(a) Share to: Enter the email addresses of those with whom the folder is to be
shared, separating the addresses with a comma.
(b) Cc: Indicate whether to copy the Share invitation email to yourself.
Using Folder Commands 19
Page 22

Seagate Global Access
(c) Subject: Identify the folder to be shared, using any description you wish.
(d) Message: Write a message to the people with whom you’re sharing this folder.
(e) Allow recipients to: Indicate whether the people with whom you’re sharing
this folder may add files to or change files within the folder (Write to folder) or
download images contained in the folder.
Step 3: Click Share to send the Share Invitation and return to the Web Access page for
the shared folder.
An email is sent to the people with whom you’ve shared the folder inviting them to
click the link in the email to go to the Seagate Global Access web page.
Updating the Folder List
When you add a folder to the parent folder, you must refresh the page before the new folder
is displayed in the folder list.
To refresh the folder list,
• In the Folder Commands menu, click Update folder list:
Figure 33: Update Folder List
The page refreshes to display the new folder in the folder list.:
Selecting a View Option
Use the View Options menu options to choose whether to view the contents of a folder as
a list or as thumbnails. If you select the thumbnail view, you can choose whether to display
image names.
Selecting a View Option 20
Page 23

Seagate Global Access
To select a view option,
•In the View Options menu, select View as list or View as thumbnails (with or without
showing image names):
Figure 34: List View
Figure 35: Thumbnail View
Note: It’s easier to get file size information, overwrite, preview, or download a file in List view.
Selecting a View Option 21
Page 24

Seagate Global Access
Using File Commands
The file commands allow you to work with the files and folders stored in a parent folder.
Overwriting Files
You can use Web Access to download a file from your Central Axis and edit it on a local
computer not connected to the Central Axis. Then you can upload the edited version and
save it to the Central Axis. When you save an edited version, you overwrite the original
version.
To overwrite a file with an edited version,
Step 1. Click the Overwrite icon next to the file:
Figure 36: Overwrite
The Overwrite page opens:
Using File Commands 22
Page 25

Seagate Global Access
Figure 37: Overwrite
Step 2: Click Browse to find the edited version of the file on your local computer.
The Choose file window opens:
Figure 38: Choose File
Step 3: Find the file and click Open.
The path to the selected file is displayed in the file name box:
Using File Commands 23
Page 26

Figure 39: Overwrite Populated
Step 4: Click Overwrite.
Seagate Global Access
The older version of the file on your Central Axis is overwritten with the edited
version. When the overwrite is complete, a message confirms that your file has
been saved to your Central Axis:
Figure 40: Overwrite File Confirmation
Step 5: Click Done to return to the Web Access page for the folder.
Previewing Images
You can preview images stored in stored folders and download them to your computer if
you’ve been given download privileges.
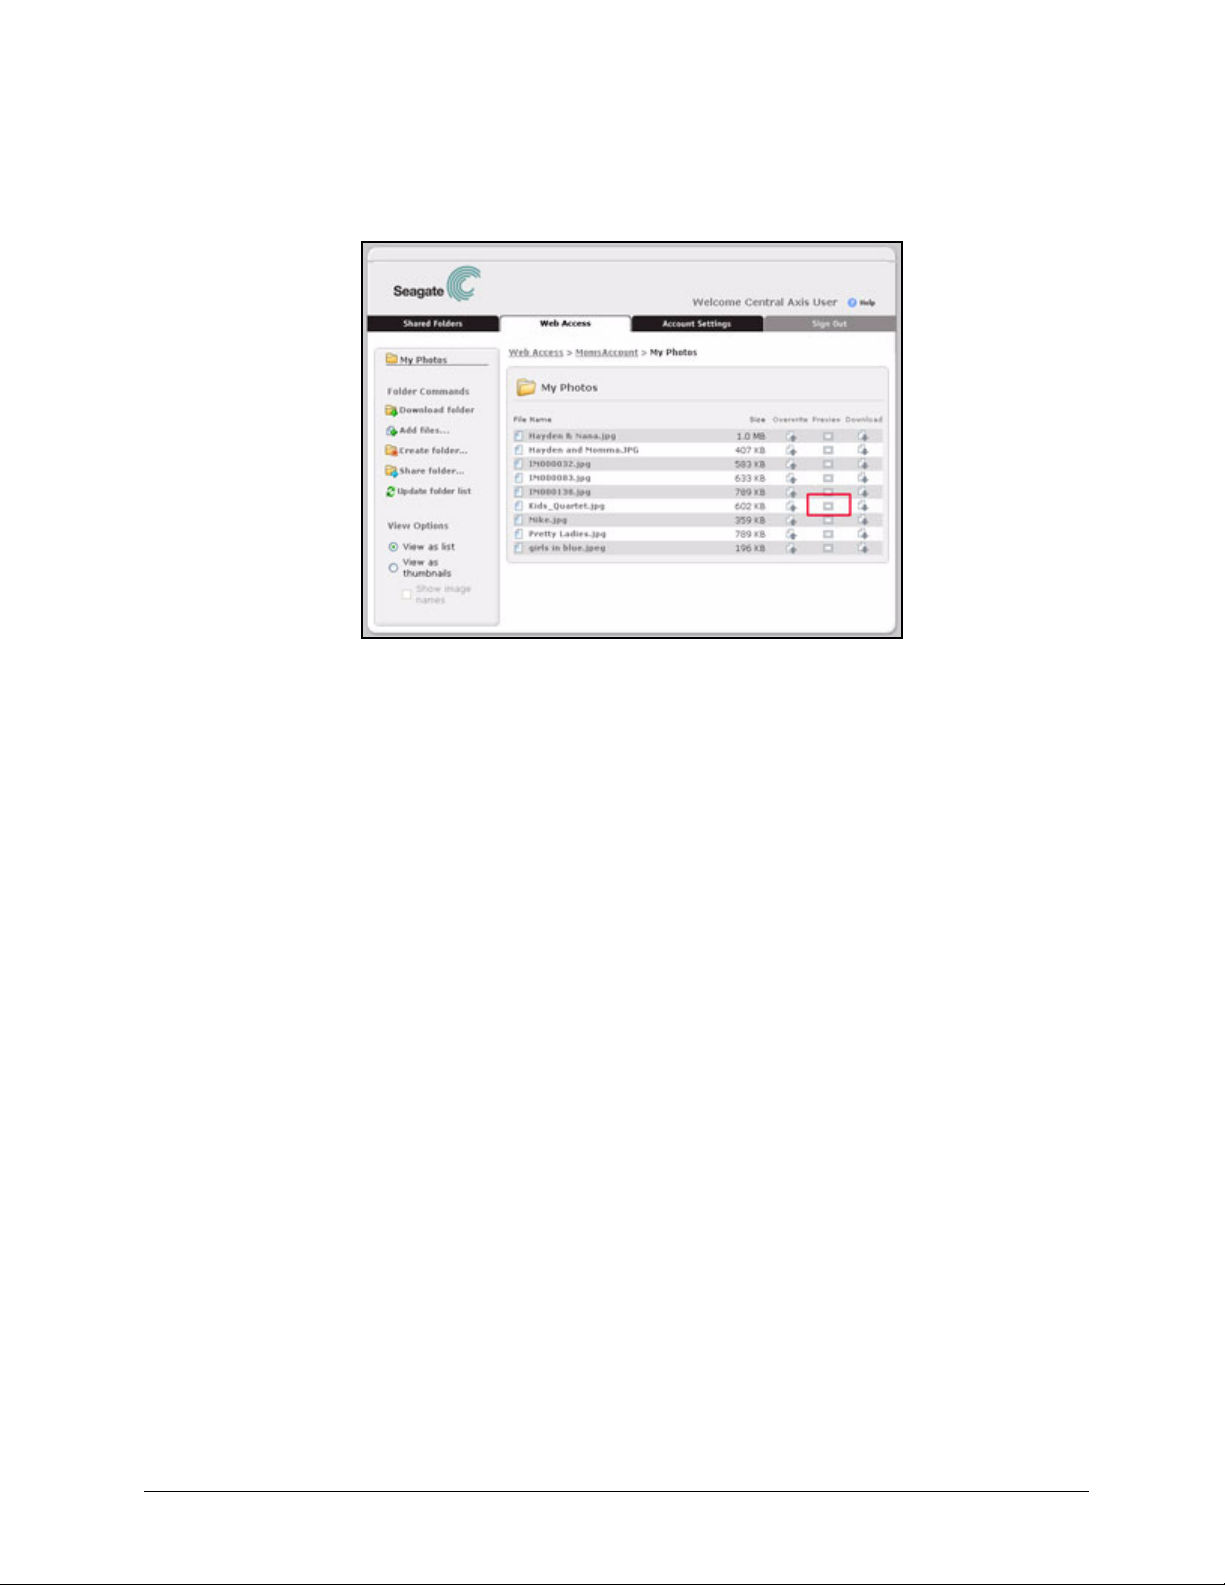
To preview an image,
Step 1. If you’re viewing the images in a list, click the Preview icon next to the image:
Using File Commands 24
Page 27
Seagate Global Access
Figure 41: Preview
If you’re viewing the images as thumbnails, click the image itself.
The Image Preview window opens:
Using File Commands 25
Page 28

Seagate Global Access
Figure 42: Image Preview Window
Step 2: Use the controls across the top of the Image Preview window to view your
images:
• Click Previous and Next to move back and forth through the images in this
folder.
• Click Play to start a slideshow of the images and Slower and Faster to control
the display time for each slide.
• Click Download to download an image to your local computer.
Downloading Files
Instead of downloading an entire parent folder, you can download an individual file or folder
stored in it.
To download a file or folder,
Step 1. Click the Download icon next to the file or folder:
Using File Commands 26
Page 29

Figure 43: Download a File or Folder
Seagate Global Access
If you’re viewing files as thumbnails, click on the thumbnail itself.
A File Download window opens:
Figure 44: File Download
Note: The appearance of the browser windows varies according to the browser you’re using.
Step 2: Decide whether to open or save the item.
If you select Save, a Save As window opens:
Using File Commands 27
Page 30

Seagate Global Access
Figure 45: Save Downloaded File
Step 3: Select a destination at which to save the item and click Save.
A window displays the progress of the download:
Figure 46: Download Progress
When the download is complete, the item opens if you selected Open or appears
at the chosen location on your computer if you selected Save.
Using File Commands 28
Page 31
Managing Shared Folders
The Shared Folders page on the Seagate Global Access website allows you to view and
manage folders you’ve shared with others as well as folders others have shared with you.
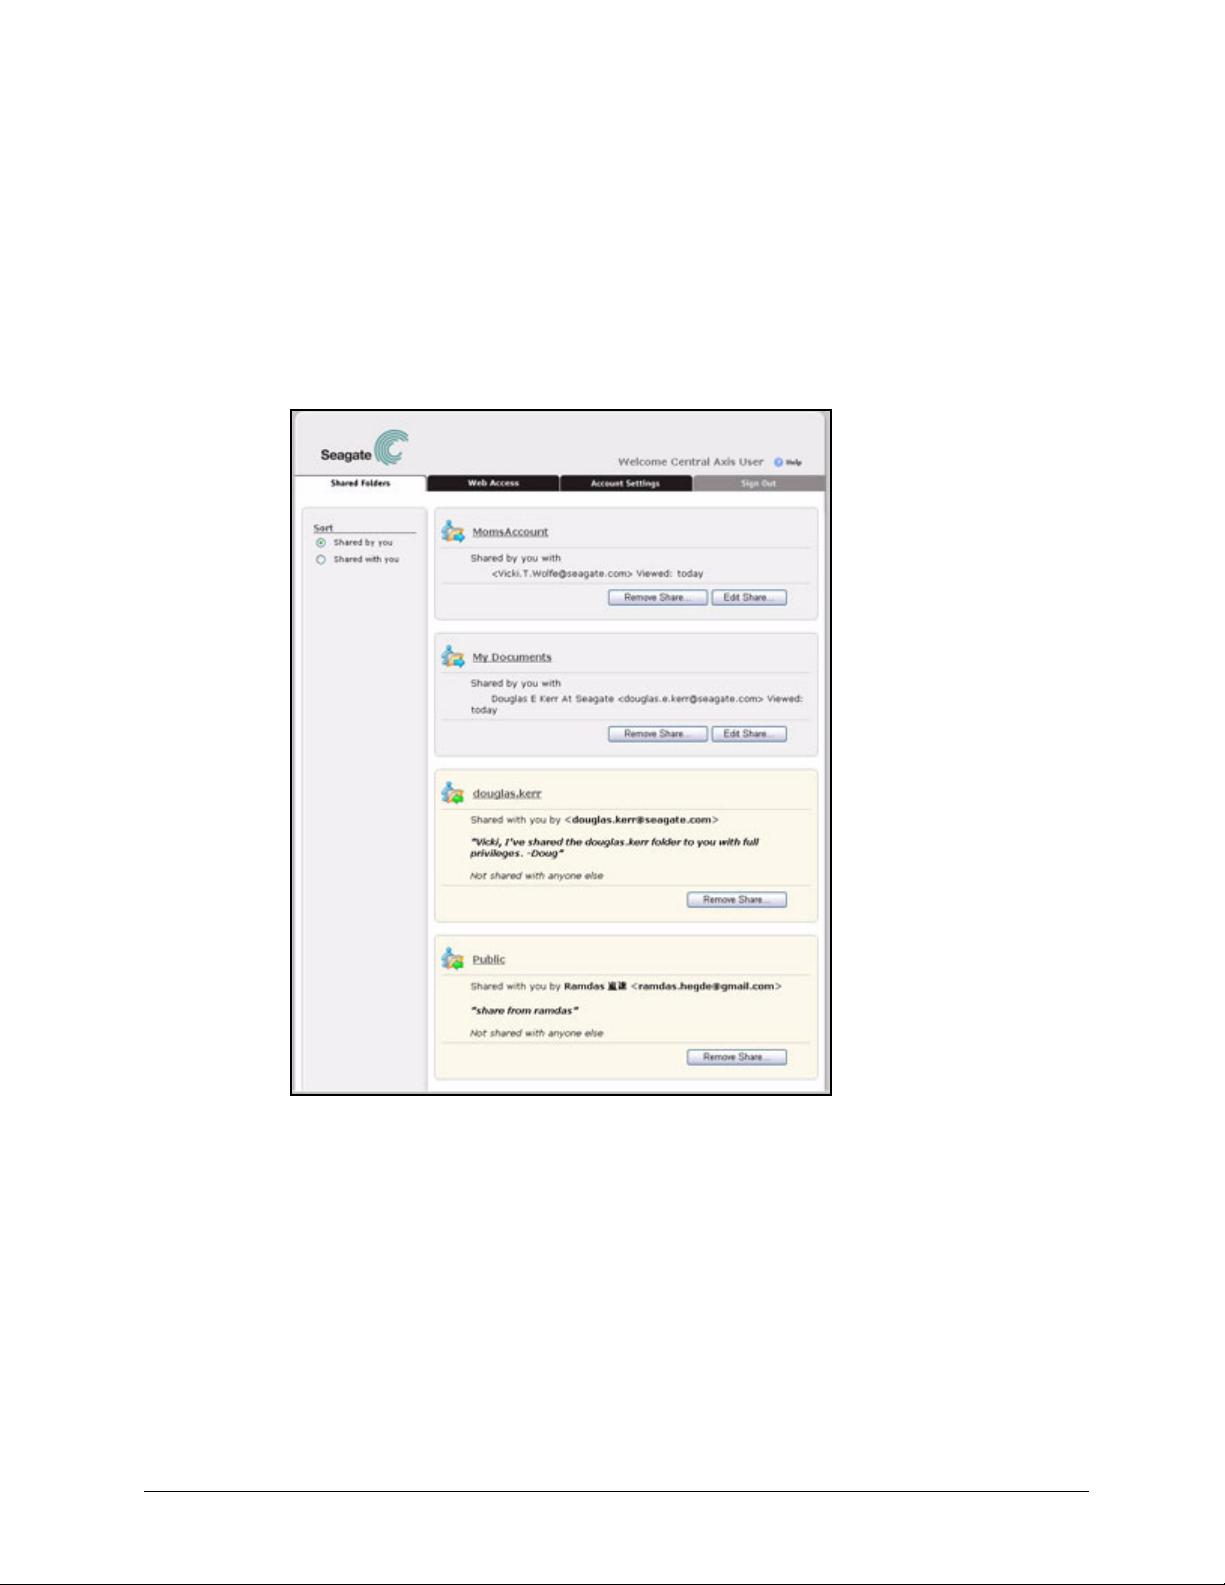
Seagate Global Access
Figure 47: Shared Folders
Listed are the folders you’ve shared with others and folders others have shared with you.
• For each folder you’ve shared with others, the recipients’ email addresses and the
date the folder has most recently been viewed are displayed.
• For each folder shared with you, the email address of the person sharing the folder,
a message from that person, and the people in addition to you with whom the folder
has been shared are displayed.
28
Page 32

Working with Shares
The Folder Commands allow you to perform these actions with shared folders:
• Download folders
• Add files to folders stored on the Central Axis
• Create new folders within a folder stored on the Central Axis
• Update the folder list
Viewing Shared Folders
To view the contents of a shared folder,
Step 1. On the Shared Folders page, click on the folder to be opened.
The folder contents are displayed:
Seagate Global Access
Figure 48: Shared Folder Contents
Step 2: Depending on the Share permissions created for this Share, manage this shared
folder as you manage your stored folders via Web Access.
Note: The Folder and File Commands and View Options available on this page are described in
detail in the Web Access section.
Working with Shares 29
Page 33

Seagate Global Access
Editing Shares
You can edit a Share you’ve set up with others to add or remove Share recipients or alter
the Share permissions.
To edit a Share,
Step 1. On the Shared Folders page, click Edit Share beneath the folder whose Share
settings you want to modify.
Figure 49: Edit Share
The Share page for that folder opens:
Working with Shares 30
Page 34

Seagate Global Access
Figure 50: Edit Share Options
Step 2: Add or remove Share recipients, change your message, or edit Share
permissions.
Step 3: Click Save Changes.
Your changes are saved and you return to the Shared Folders page.
Removing a Share
You can remove both folders you’ve shared and folders others have shared with you.
To remove a shared folder,
Step 1. On the Shared Folders page, click Remove Share beneath the folder you want
to remove.
Working with Shares 31
Page 35

Seagate Global Access
Figure 51: Remove Share
A Remove Share page verifies that you really want to remove this Share.
Figure 52: Remove Share Confirmation
Working with Shares 32
Page 36

Seagate Global Access
Step 2: Click Remove to complete the removal of the Share and return to the Shared
Folders page.
The removed folder no longer appears in the list of shared folders.
Sorting Shared Folders
You can sort shared folders to display either the folders you’ve shared with others or the
folders others have shared with you at the top of the page.
To sort shared folders,
• On the Shared Folders page, click Sort:
Figure 53: Sort
The page refreshes to display the shared folders in the selected order.
Working with Shares 33
Page 37

Seagate Global Access
Receiving a Share
When a folder is shared with you by another Central Axis user, you follow the same
procedure as those with whom you’ve shared a folder.
Note: For information on how to share a folder with others, see the Web Access section.
To access a folder shared with you by another Central Axis user,
Step 1. Check your email for a Share Invitation message from Seagate Global Access:
Figure 54: Share Invitation Email
Step 2: Click either View Folder link in the email.
The Shared Folder Sign In page opens:
Figure 55: Share Signin
Receiving a Share 34
Page 38

Seagate Global Access
Step 3: Enter your Seagate Global Access password and click Sign In.
Note: If you haven’t yet created a Seagate Global Access account, see the Web Access section
for information on how to create one.
Step 4: The Shared Folders page displays the contents of the folder being shared with
you.
Figure 56: Shared Folder Contents
When you display the main Shared Folders page, the newly shared folder is now
listed.
Receiving a Share 35
Page 39

Managing Account Settings
Use the Seagate Global Access Account Settings page to create or change a display
name, change your password, and set a default folder view option.
To manage your Seagate Global Access account settings,
• Click the Account Settings tab.
The Account Settings page opens:
Seagate Global Access
Figure 57: Account Settings
Creating a Display Name
Your display name is the name by which you’re welcomed at the top of the Seagate Global
Access pages:
Creating a Display Name 36
Page 40

Seagate Global Access
Figure 58: Display Name
If you haven’t selected a display name, your email address is used. You can continue to
use your email address or you can create a display name for yourself. Once you’ve created
a display name, you can use the Account Settings page to change it.
Using the Account Settings Page
To manage your account settings,
Step 1. For Display Name, enter a name of your choosing or, if a display name already
exists, make the desired change.
Step 2: To change your Seagate Global Access password, enter your current password
and then enter and re-enter the new password.
Step 3: Choose whether to show folders in list view or in thumbnail view. You can always
change the folder view on the Web Access page.
• Uncheck Show folders in list view by default to show folders in thumbnail
view by default.
Step 4: Click Save Changes.
A message confirms the changes to your account settings:
Figure 59: Account Settings Changes Saved
Using the Account Settings Page 37
Page 41

Seagate Global Access
Step 5: Click a tab to display another Global Access web page or click Sign Out.
Using the Account Settings Page 38
Page 42

Index
A
Accessing Folders via the Web 8
Adding Files to a Folder 12
C
Creating a Display Name 36
Creating a Folder 15
Creating a Seagate Global Access Account 2
D
Downloading Files 25
Downloading Folders 10
Seagate Global Access
E
Editing Shares 30
I
If You Forget Your Password 5
M
Managing Account Settings 36
Creating a Display Name 36
Using the Account Settings Page 37
Managing Shared Folders 28
Working with Shares 29
O
Overwriting Files 21
P
Previewing Images 23
R
Receiving a Share 34
Removing a Share 31
S
Selecting a View Option 19
Sharing a Folder 17
Signing In to Seagate Global Access 2
Sorting Shared Folders 33
U
Updating the Folder List 19
39
Page 43

Using File Commands 21
Downloading Files 25
Overwriting Files 21
Previewing Images 23
Using Folder Commands 10
Adding Files to a Folder 12
Creating a Folder 15
Downloading Folders 10
Sharing a Folder 17
Using the Account Setting Page 37
Using the Sign In Page 1
Creating a Seagate Global Access Account 2
Signing In to Seagate Global Access 2
Using Web Access 1
Using the Sign In Page 1
Seagate Global Access
V
Viewing Central Axis Details 7
Viewing Shared Folders 29
W
Working with Shares 29
Editing Shares 30
Removing a Share 31
Sorting Shared Folders 33
Viewing Shared Folders 29
40
 Loading...