

Scytek electronic ASTRA 300RS Product Manual

-
ASTRA 300RS
REMOTE START WITH KEYLESS ENTRY
AUTOMATIC TRANSMISSION ONLY
PRODUCT MANUAL
Remote Transmitters
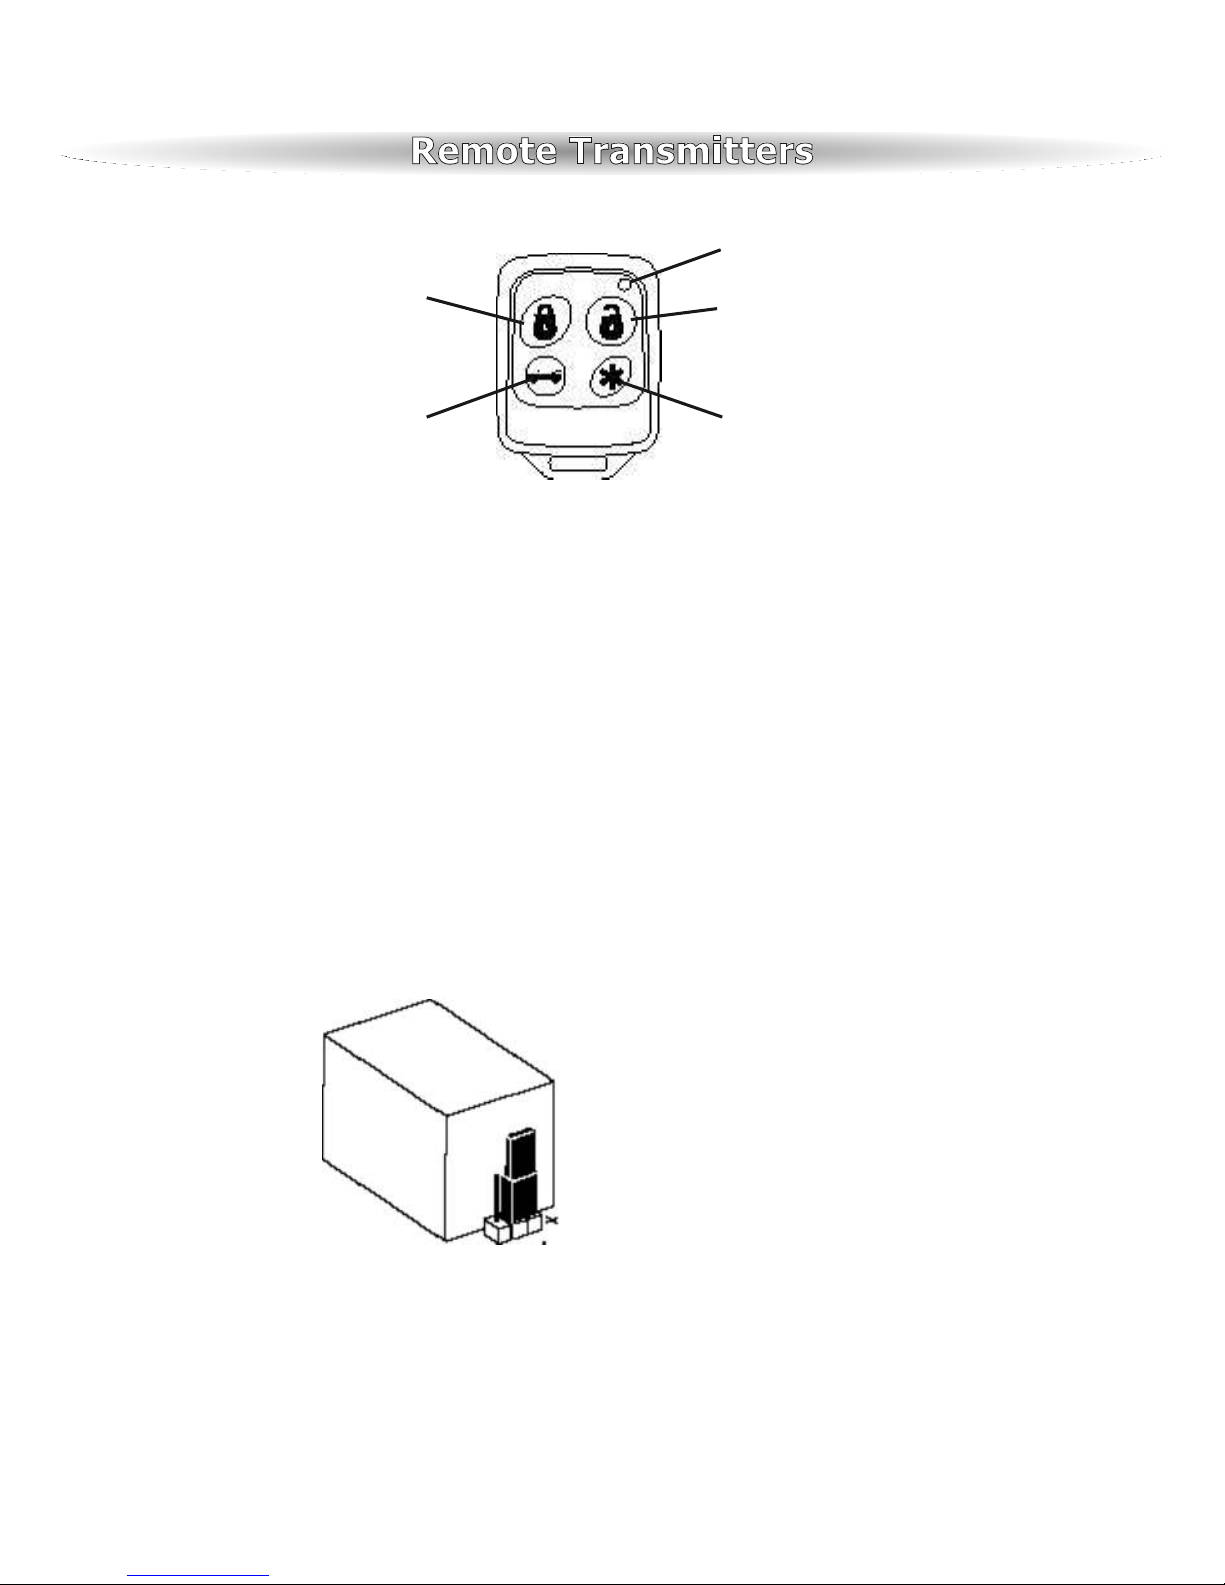
Remote Transmitter Description
LED
Button 1 Button 2
Button 3 Button 4
The Astra 300 is supplied with two 4-button Remote Transmitters used to control system operations.
Button 1
Locks the doors and when held for 2 seconds, activates the system’s Panic feature. Button 1
also locks the doors when the system is in Valet Mode.
Button 2
Unlocks the doors.
. Button 2 also unlocks the doors when the system is in Valet Mode.
Button 3
Button 4
Activates the Auxiliary 1 output. This output will remain on for as long as the button is pressed.
Activates and deactivates the remote start.
Jumper Selection
Carefully separate the top and bottom halves of the main unit case. Once the cover is removed, the parking
light polarity jumper will be visible next to the parking light relay. Set the jumper for the correct polarity
output as described below, then reassemble the main unit case.
Parking Light Output. Selects the polarity (+/-) for the output of the on-board Parking Light relay.
Left Pin and Center Pin = negative
Right Pin and Center Pin = positive

System Operation 300RS
Adding/Replacing One-Way Transmitters
To replace lost or stolen transmitters or to add additional transmitters into the system, have all desired
transmitters ready and follow the steps below.
Note: Up to 4 transmitters can be programmed to operate the system. To erase any previously stored
transmitter codes, be sure to program all 4 transmitter memory locations.
To program the transmitter(s):
1. Turn on the ignition key On, Off, On, Off, and back On.
· The Horn will flash 3 times.
2. Press and hold the Valet switch for 5 seconds.
· The Horn will flash 5 times.
· The LED will illuminate.
3. Press Button 1 on the first transmitter.
· The horn will flash once.
4. Repeat steps 3 for each transmitter (up to 4).
5. Turn off the ignition key.
Battery Replacement
Your Remote Transmitter uses a 12 volt alkaline battery (type 23A), which will require replacement in
time. Depending on the amount of use, the battery may last up to six months or more before it
needs replacement.
When the battery needs replacing, the system’s operating range will decrease or the transmitter LED
may not be as bright.
In order to change the battery, first remove 2 screws from the back of the transmitter and separate
the top and bottom halves of the case.
While replacing the battery make sure that the positive and negative terminals are positioned cor-
rectly, then carefully reassemble the transmitter case.
Panic Mode
In the event of an emergency the transmitter’s remote Panic feature can be used to instantly trigger
the Horn.
To activate the Panic Mode:
1. Press and hold Button 1 for 3 seconds.
· The horn will sound.
· The parking lights will flash.
· The doors will unlock* allowing access to the vehicle.
2. Press Button 2 to stop Panic Mode.
* If the ignition is on when the Panic feature is activated, the doors will lock for personal safety.
If not deactivated using Button 2, the Panic Mode will automatically exit after 30 seconds and the system
will be restored to its previous Lock/Unlock state.

System Operation 300RS
Remote Starting
To Remote Start the System:
1. Be sure the system is not in Valet Mode.
2. Press Button 1 on the remote for two seconds.
· The parking lights will flash 4 times and turn on.
· The Horn will chirp 4 times when starter confirmation chirps is enabled.
· The engine will start and run for the duration of its programmed Run Time.*
· The heater or air conditioner will turn on (if turned on prior to exiting the vehicle).
*If the engine fails to start on the first attempt, it will repeat the starting procedure 2 more times. If the vehicle
fails to start after a total of 3 times the parking lights will flash 4 times and the doors will lock (if installed).
Turn on the ignition and press the brake pedal to disengage the remote start feature and drive the vehicle
Remote Shut Down
When the the Remote Start feature is active, any of the following actions will shutdown the engine:
1. Pressing and releasing Button 1 within 1 second.
· After the engine shuts down the doors will lock (if installed).
2. Pressing the Brake Pedal.
3. Opening the Hood.
4. Remote Start Time-Out (completion of the timed run cycle).
Remote Unlocking
To unLock the doors:
1. Press and hold button 1 on the remote for 3 seconds. (this feature works only when engine is running).
· The doors will unlock.
· The parking lights will flash twice.
Auxiliary Function Outputs
The ASTRA 300RS are equipped with 1 Auxiliary Channel Output allowing the convenience features of the
system to be further expanded. This output can be programmed for pulsed, timed, or latched operation, and
used to add a number of optional features such as: power trunk release, power window activation, power
sunroof control, auxiliary lighting, audio/video system control, and more.
The Pulsed operation setting allows an output to activate as long as the button is held.
The Timed operation setting allows an output to activate when the transmitter button is pressed, and
remain activated for 10 seconds or until the transmitter button is pressed again.
The Latched operation setting allows an output to activate when the transmitter button is pressed, and
remain activated until the transmitter button is pressed again.
Emergency Valet Switch
If the transmitter becomes lost or inoperable, the Doors can still be unlocked using the following procedure. Before
beginning this procedure be sure to have the ignition key ready and know the location of the valet switch.
To Emergency Valet the system:
1. Unlock the door using the key.
2. Enter the vehicle.
3. Turn ignition key on.
4. Press and hold the valete switch until LED turns off.
· The system will deactivate the starter intrruptoutput.
5. The vehicle will now be able to start.
Valet Mode
The Valet Mode temporarily disables remote start system so the vehicle may be operated by a mechanic.
To activate or deactivate the Valet Mode:
1. Turn on the ignition.
2. Press and hold the valet switch for 5 seconds.
· The horn will chirp once and the LED light will stay ON to confirm the Valet Mode is on.
· The horn will chirp twice and the LED light will turn OFF to confirm the Valet Mode is off.
3. Turn off the ignition.
While in Valet Mode the remote transmitters will continue to lock and unlock the doors, and operate the optional aux-
iliary functions.
 Loading...