


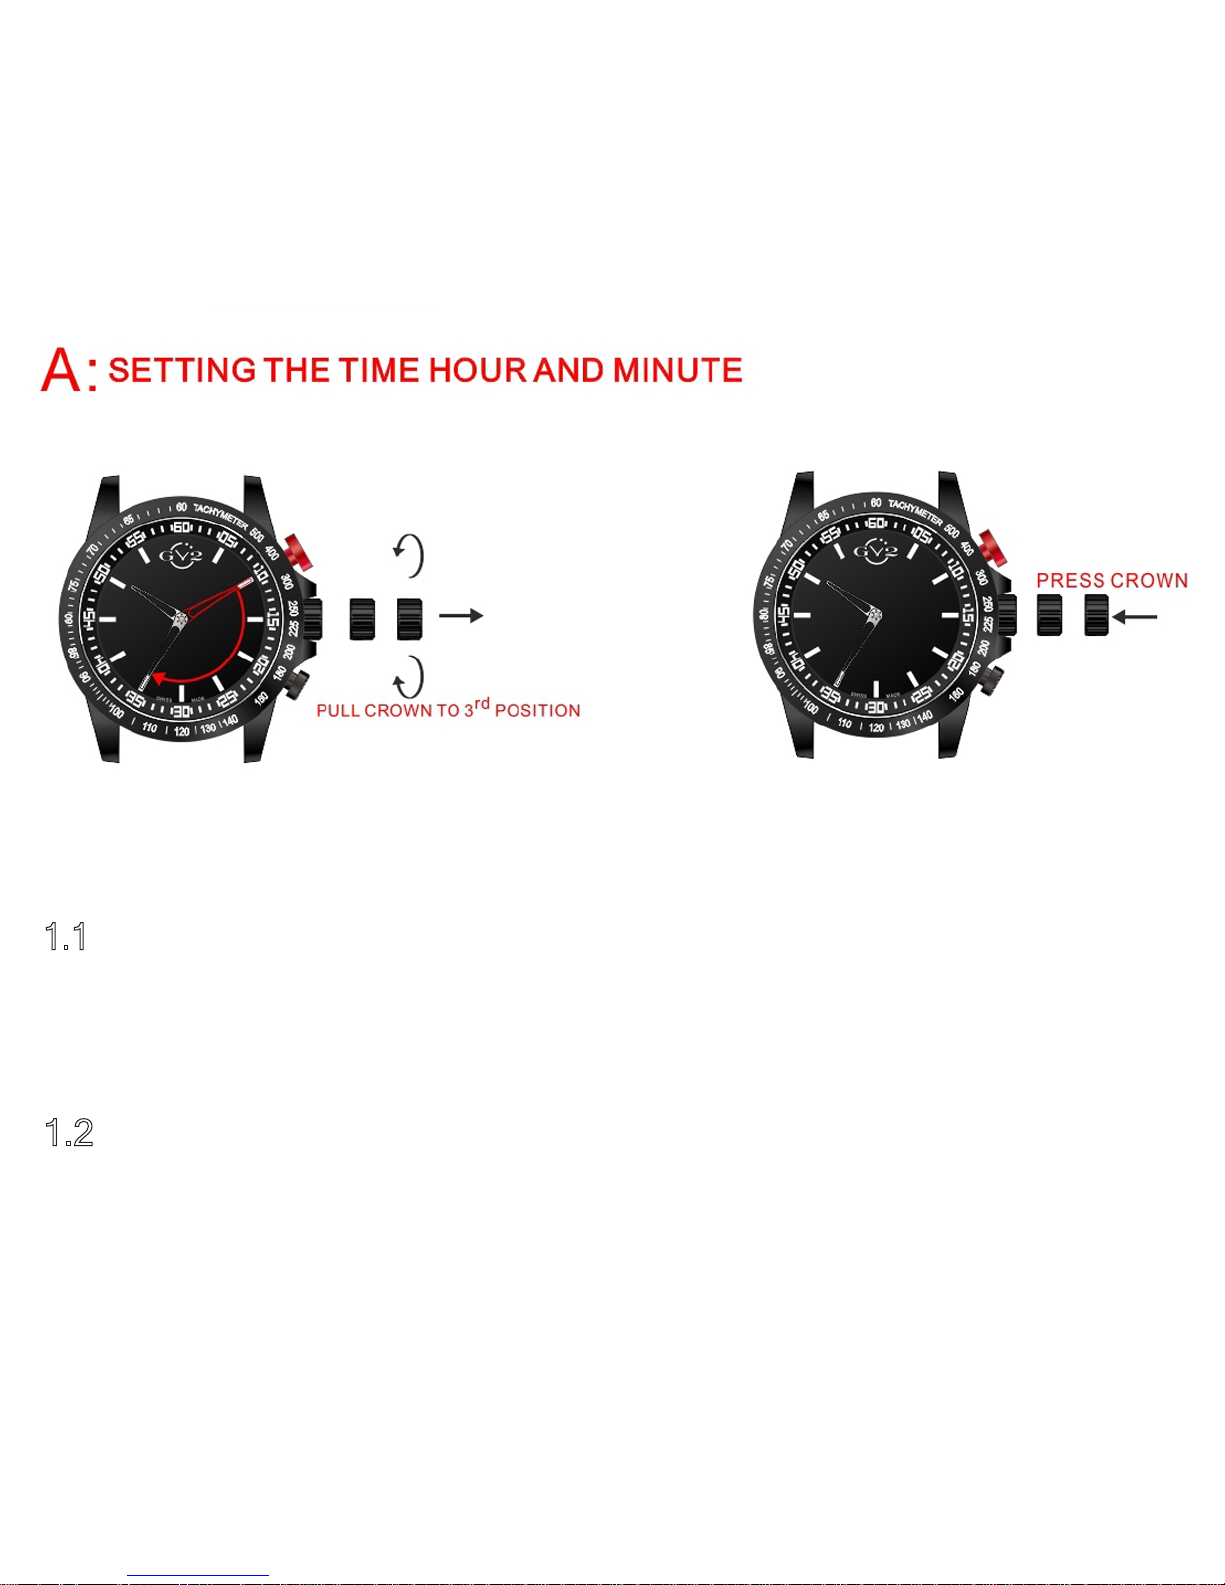
1.1 - Pull the setting crown at 3 o’clock to the third position and rotate either
direction until the corect time is indicated on the silver timekeeping
hands.
1.2 - When the time has been set, press crown all the way in again.
1.1
1.2

2.1 - Pull the setting crown to the third position and rotate counter-clockwise at
least two full cycles until the correct day is indicated on the day sub-dial
at 6 o’clock. The dial increments one day every 24-hours, so make sure
you are aware if the current time is AM or PM.
2.2
- When the correct day is indicated, press the setting crown all the way in.
2.1
2.2

3.1 - Pull the setting crown to the second position and rotate clockwise until
the correct date is indicated on the date wheel. You should make this
adjustment in the morning, so the date will not increment at noon.
3.2
- When the correct date is indicated, push the setting crown all the way in
again.
3.1 3.2

4.1 - Press and hold the lower black pusher for two seconds to enter the time
setting mode. You will hear a short beep when it is OK to set the red
tipped second time zone hand.
4.2 - Press the black pusher again and hold it down continuously until
this 24-hour dial indicates the desired time.
4.3 - After three seconds without pressing the black pusher, the watch will
automatically exit the setting mode.
4.1
4.2
4.3

5.1 – Pull the setting crown to the second position.
5.2
– Press the top red pusher until the small orange dial at 10 o’clock points
to “E” on the Power Reserve indicator.
5.3 – When you are finished, press the setting crown all the way in again. The
alarm function is on at this point. If you want the alarm to be off, press the
red pusher again until the small orange dial returns to the off position.
5.1
5.2
5.3

5.4 – Press red pusher until the Power Reserve dial is in the “Off” position.
5.5
– Pull the setting crown to the second position and rotate counter-clockwise
until the red-tipped alarm hand is at the desired position.
5.6
– Press the setting crown all the way in again.
5.4
5.5
5.6

5.7 – Press the red pusher again. The small dial at 10 o’clock will first show the
status of the power reserve for three seconds and then point to the “On”
position to indicate the alarm function is active.
5.8 – The alarm is active until red pusher is pressed again and the power reserve
dial returns to the “Off” position. The alarm can easily be turned on and off
as desired by pressing the red pusher.
5.7
5.8
 Loading...