

Page 1
Istruzioni di montaggio
Foro 8 mm
Foro
Foro
Foro
KS-10 VHF Marine Antenna 22 cm (9”) length
Code: PF AN NVHF00025
ITA
1 - Identicate la supercie sulla quale eettuare l’installazione
dell’antenna, la supercie deve essere pari e con uno spessore non
superiore a 25 mm.
• Posizionare l’antenna in una posizione possibilmente elevata
per migliorarne le performance di funzionamento.
• Evitare la presenza di elementi che possano schermare l’antenna o comunque limitarne il funzionamento.
• Il materiale della supercie è ininuente ai ni della installazione, meglio se di tipo metallico.
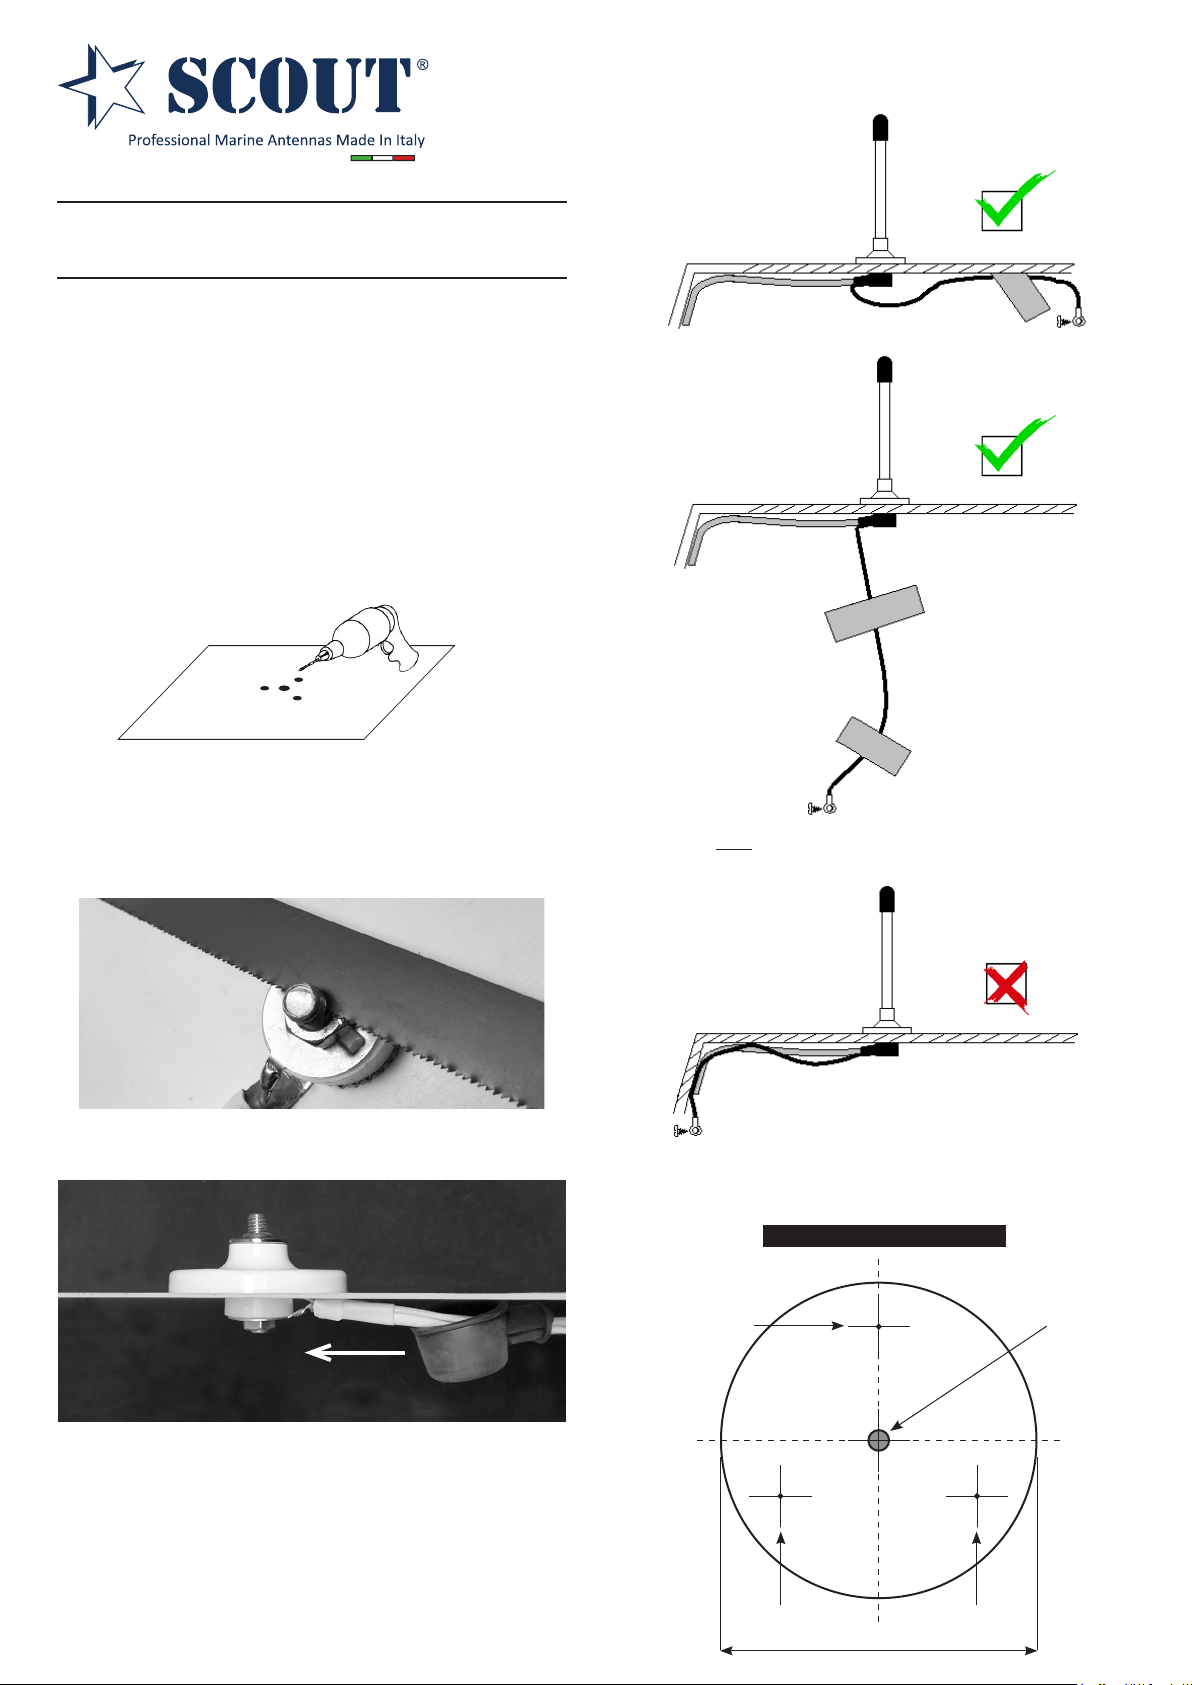
2 - Procedete alla foratura della supercie seguendo la dima di foratura riportata a fondo pagina.
3 - Posizionate l’antenna sulla supercie e ssatela con le tre viti autolettanti in dotazione.
OK
OK
4 - Collegate la matassa di cavo al centrale dell’antenna e ssatelo
con il dado in dotazione. Ora potete segare l’estremità eccedente del
centrale come indicato nella immagine sottostante.
5 - Potete ora coprire il collegamento con la cua di gomma in dotazione.
Attenzione: NON stendere il cavo di massa lungo il percorso del cavo
di comunicazione come illustrato sotto.
NO
7 - Montate inne il connettore PL in dotazione sull’estremità del cavo
coassiale e procedete al collegamento con l’apparato radio.
Dima di foratura per KS-10
6 - Stendete il cavetto bianco unipolare e ssatelo a mezzo dell’occhiello alla sua estremità con una vite autolettante, aiutandovi
eventualmente con del nastro adesivo. Nel caso in cui l’installazione
dell’antenna avviene su una supercie metallica si può evitare l’utilizzo del cavo di massa, quindi è possibile tagliarlo.
Seguono alcuni esempi di posa.
Scout S.r.l.
Via Enrico Fermi 90 - 41010 Limidi di Soliera MO - Italy - VAT nr. IT03625890367
Tel. +39 059 566650 - [email protected] - www.scoutantenne.com
56 mm
Page 2
Mounting instructions
Drill hole
Drill hole
Drill hole
Drill hole
KS-10 VHF Marine Antenna 22 cm (9”) length
Code: PF AN NVHF00025
ENG
1 - Choose the surface on which to install the antenna, the surface
must be even and with a thickness not exceeding 25 mm.
• The antenna should be installed in the place where is an all
round clear view of the horizon and as high as possible.
• Please keep clear the antenna from any obstacles.
• The surface material is irrelevant for the purpose of installation,
preferably metallic.
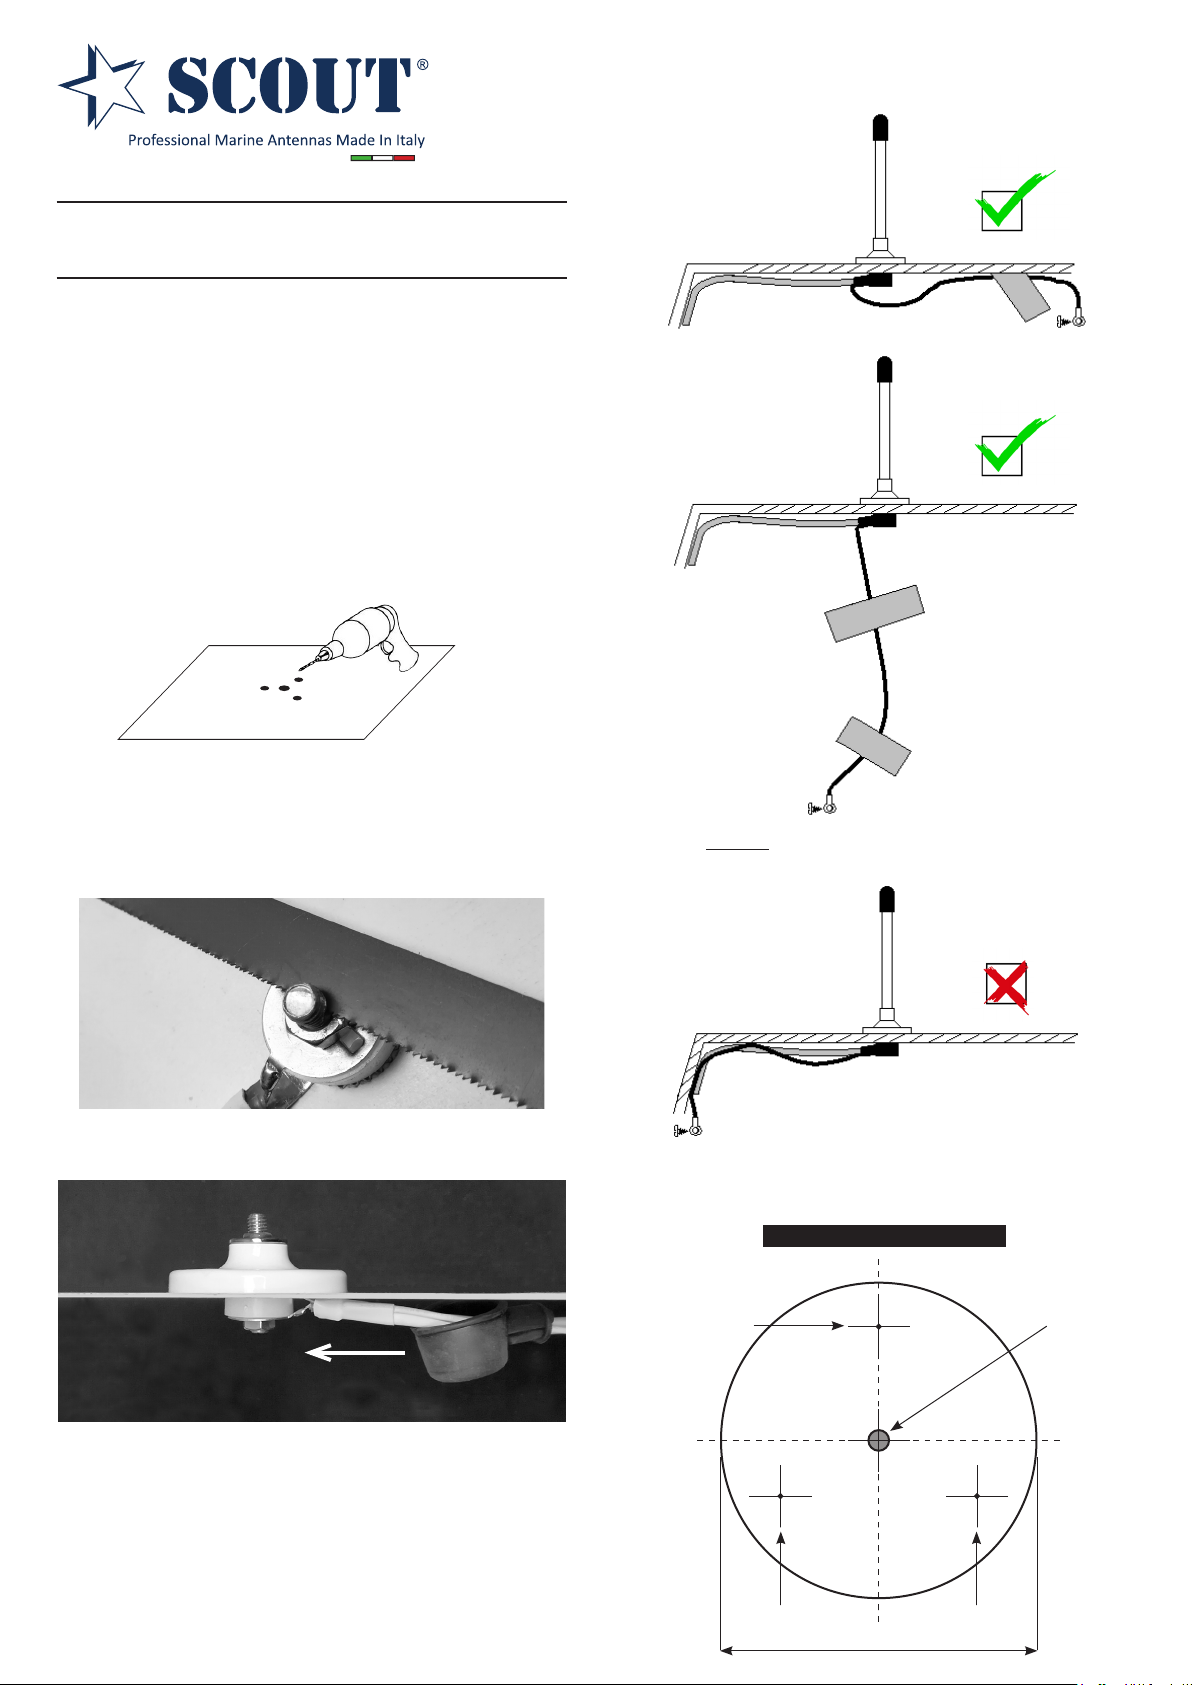
2 - Use the mounting template (that you’ll nd at the end of this page)
to drill the four holes on the surface.
3 - Set the antenna on the surface and secure it with the three selftapping screw included in the packaging.
OK
OK
4 - Connect the cable bundle to the antenna unit and secure it with
the supplied nut. Now you can cut o the excess central termination
as shown in the image below.
5 - You can now cover the connection with the supplied rubber boot.
Attention: DO NOT lay the ground cable along the path of the communication cable as shown below.
NO
7 - Finally you can mount the supplied PL connector on the end of the
coaxial cable and connect it to the VHF radio device.
KS-10 mounting template
6 - Run the unipolar white cable and fasten it to its end using a selftapping screw, in case you can use adhesive tape to help yourself.
If the antenna is installed on a metal surface, the use of the ground
cable can be avoided, so it is possible to cut it.
Here follow some installation examples.
Scout S.r.l.
Via Enrico Fermi 90 - 41010 Limidi di Soliera MO - Italy - VAT nr. IT03625890367
Tel. +39 059 566650 - [email protected] - www.scoutantenne.com
56 mm (2.2 in)
 Loading...