

Page 1

scout
installation guide
Page 2

hello! welcome to scout.
Scout is a do-it-yourself installation - no tools required.
Install Scout from your smartphone or tablet for realtime feedback and interactive instructions.
recommended installation:
visit scoutalarm.
mobile phone or tablet
com/install on your
alternate installation:
follow along with this paper-based
installation guide and your computer
at scoutalarm.
com/install
Page 3

overview of installation
The installation process should tak
less for the average system. Here’s what to expect:
1
register your system
2
install and test devices
3
choose a monitoring option
4
set modes and permissions
e 30 minutes or
Page 4
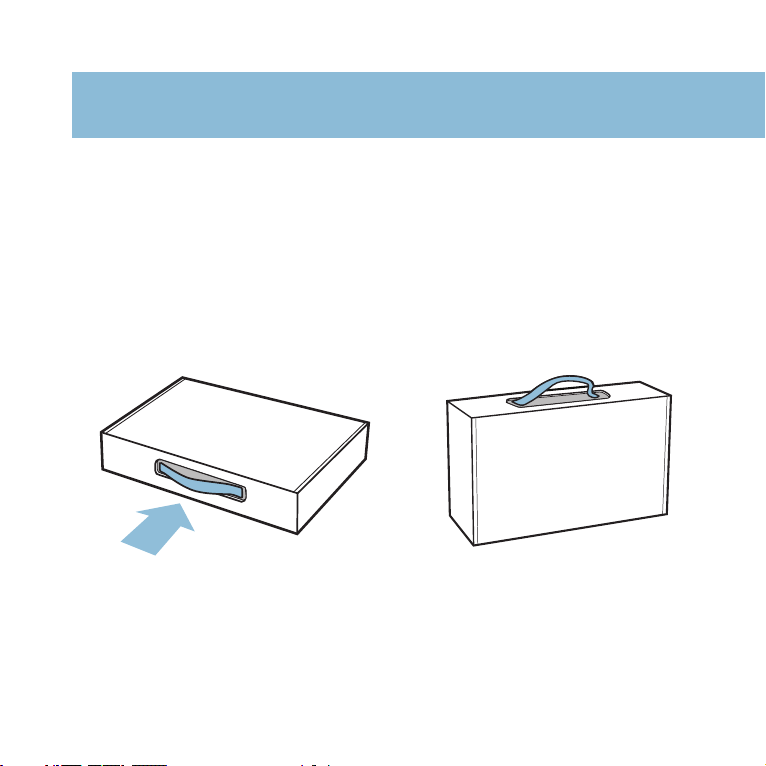
unboxing your system
Before you tak
box your system shipped in doubles as a carrier. Take
it with you around the house as you install so that you
can receive real-time feedback from the sensors and
save time.
e anything out of the box, note that the
Page 5
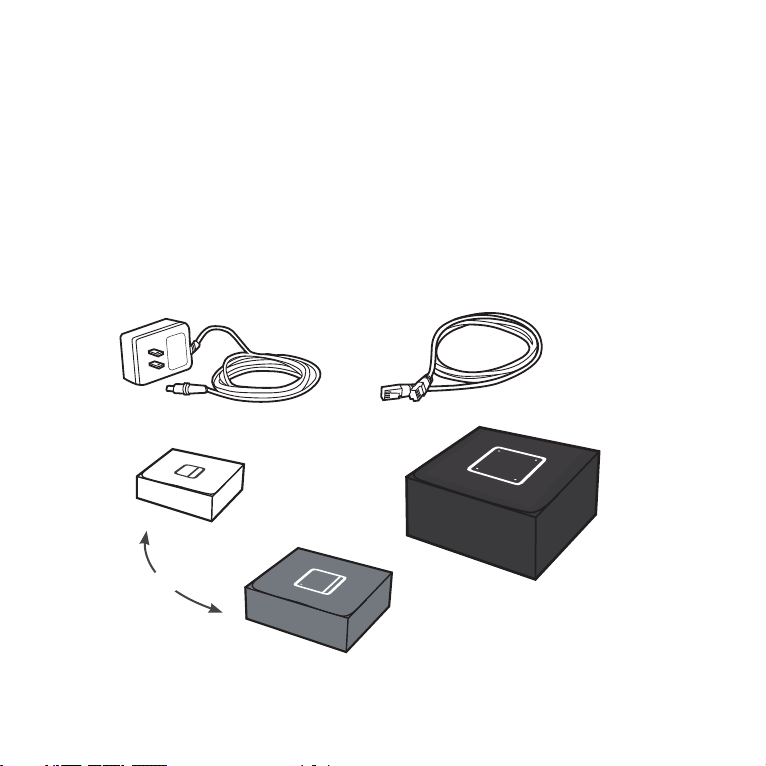
what’s in the box
A
t minimum, you should have received one Scout
hub and one Scout sensor. Please confirm that you
received the items pictured below and the contents
of your box match the order that you placed.
or
Page 6

register
5
Page 7
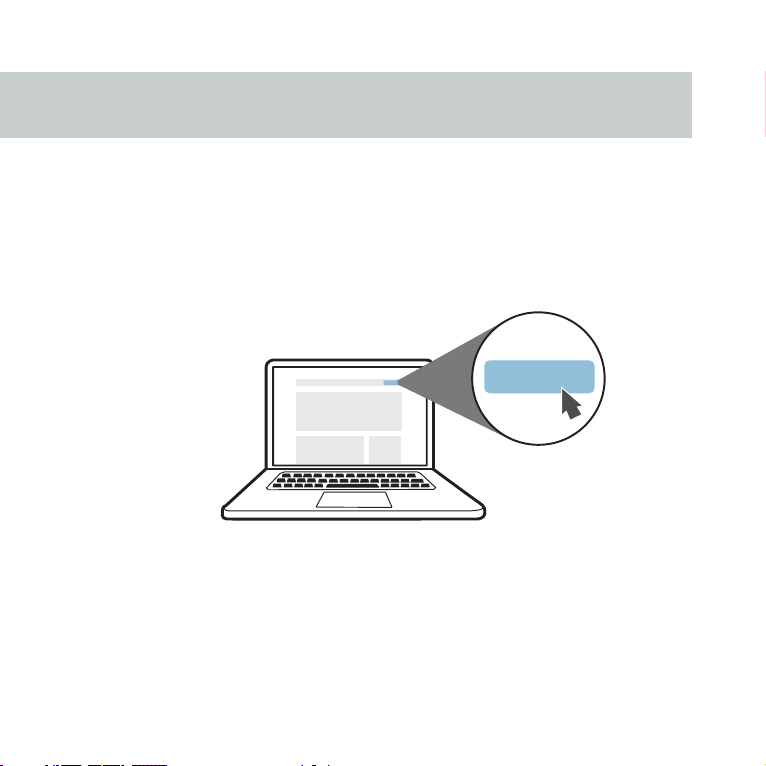
login and register
If you’re not using your phone or tablet to install
Scout, you’ll need to visit www
click “register” in the top right hand corner.
Fill out the form on screen to create your account and
register your system. Once you’ve completed these
steps, you’ll be ready to install the Scout hub.
.scoutalarm.com and
register
Page 8

have questions
If you have questions or need help at any point during
the installation:
Live chat with customer support on
our website at scoutalarm.
E-mail [email protected]
Visit our troubleshooting guide at
support.scoutalarm.com
?
com
Page 9

hub
9
Page 10
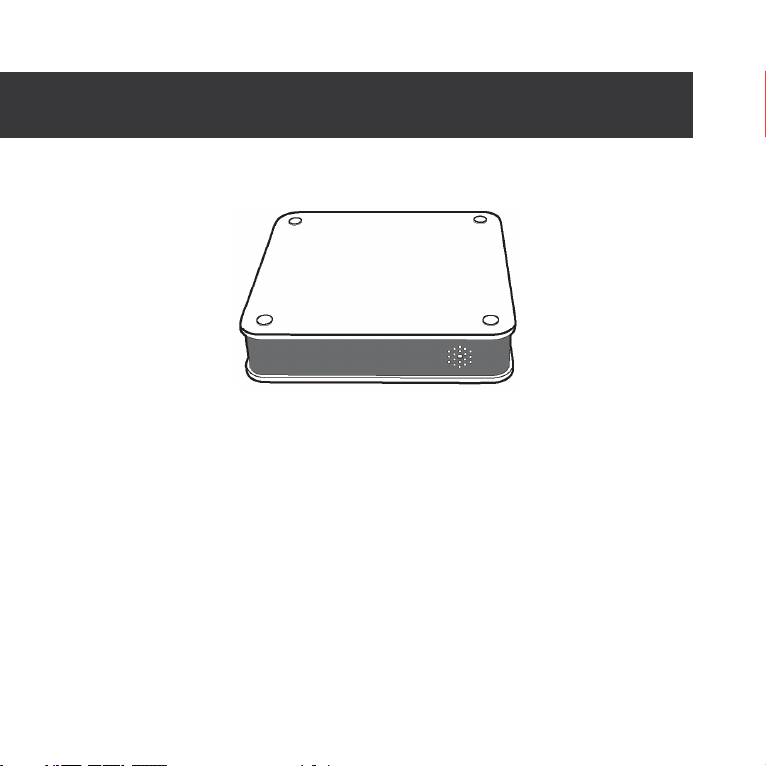
device: scout hub
The hub is the communication center of Scout and
essential to your system. The hub has a 100 ft. range
The hub box includes: The hub, a power cord and an
ethernet cord.
.
Page 11
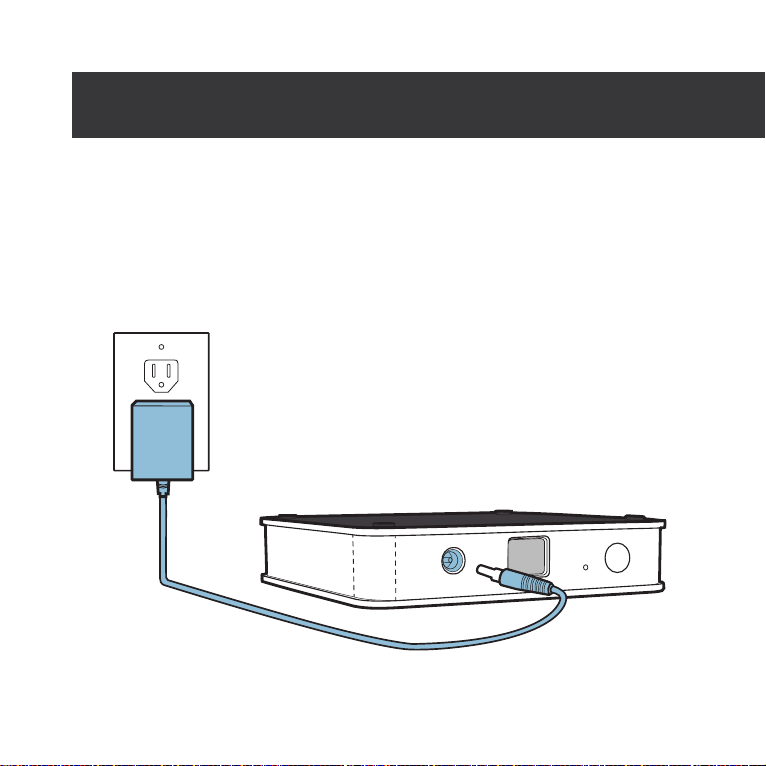
step one: power up
ocate a power outlet close to your router and plug the
L
power cord into the hub and the wall. A light on the hub
will turn on to indicate that it has been powered.
Page 12
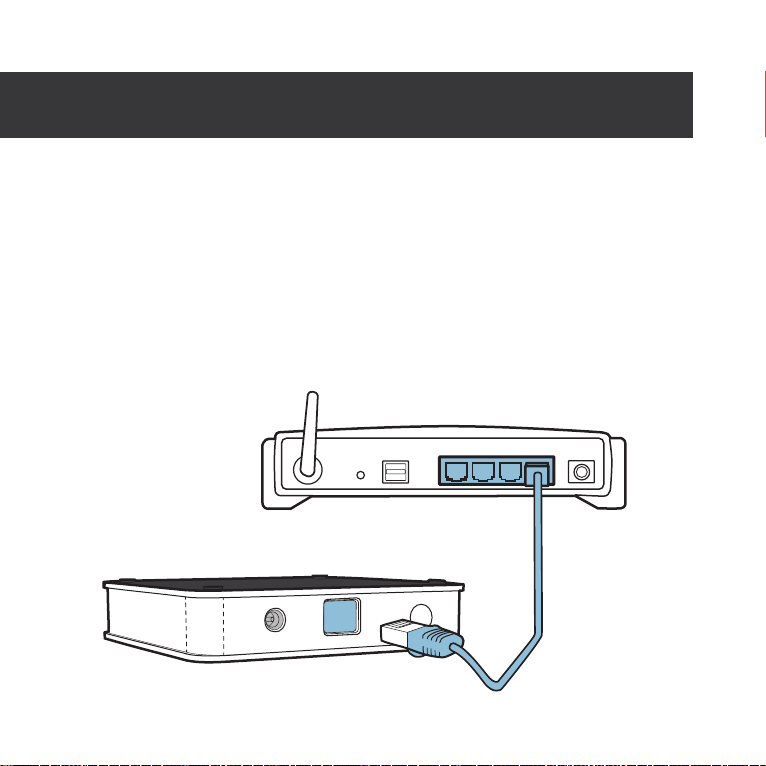
step two: connect internet
Plug the provided ethernet cord into your router and
then into the back of the hub
indicate that the ethernet plug is connected correctly.
If you do not have a router, click the question mark on
screen or visit support.scoutalarm.com for instructions.
. A light on the hub will
Page 13
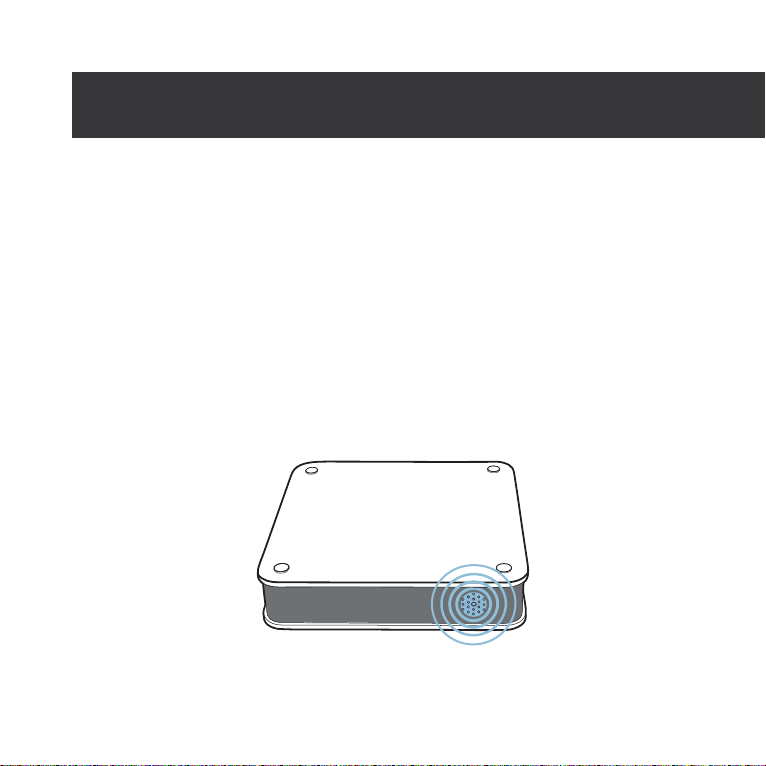
step three: confirm connection
As the hub connects, it will flash a variety of lights.
A solid green light means you are connected to our
server
If your Hub does not have a solid green light, please
click the question mark on screen or visit
support.scoutalarm.com.
.
Page 14
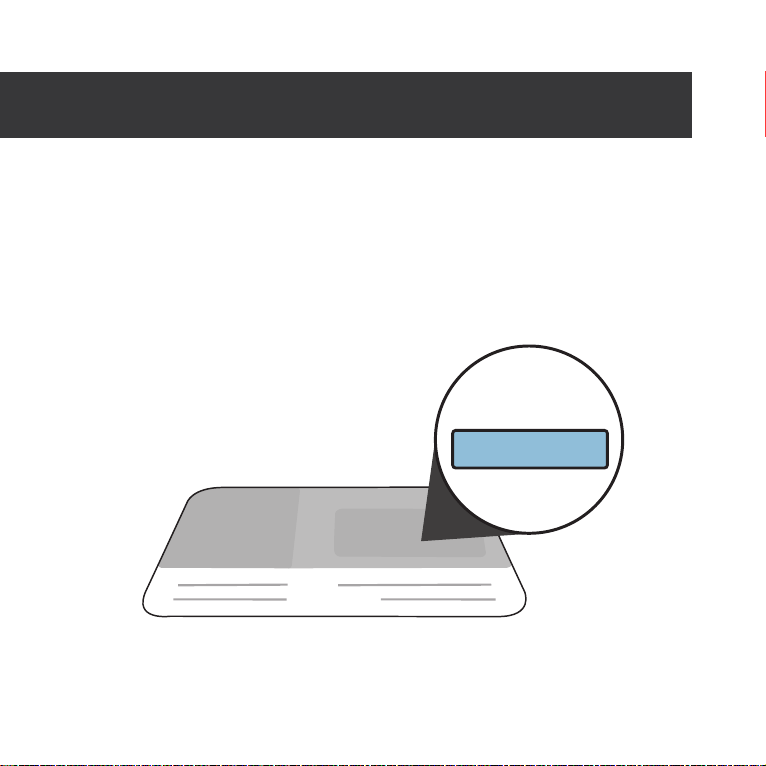
step four: enter install code
fter the hub is connected, input the installation code
A
in the field provided. The code can be found on the
large Quick Start Card you received in your shipment.
installation code:
A0000
S
Page 15
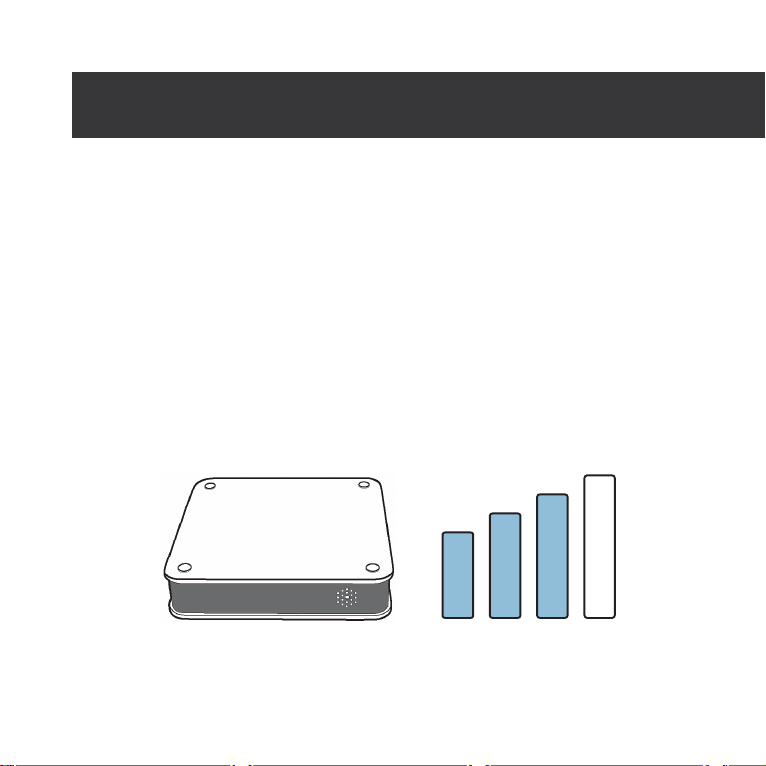
step five: pairing hub
The hub will start pairing once you enter the installation
code
. This process may be instant, but can take up to 3
minutes. The bars on screen will switch from unfilled to
filled.
Once the green light has changed from flashing green
to solid green, the hub has successfully paired.
Page 16
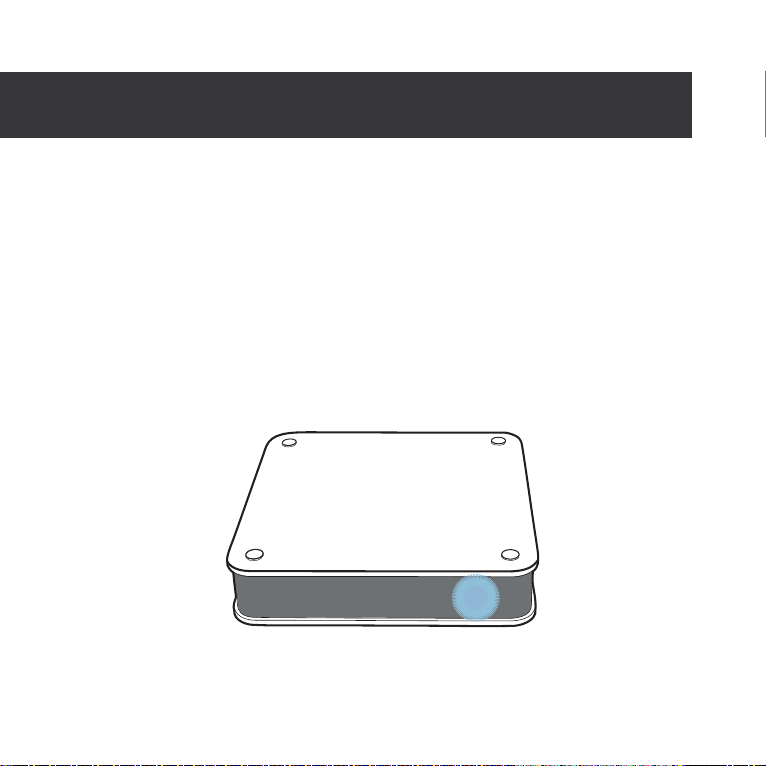
step six: finish install
If the Hub
successful pairing on screen by clicking “It’s solid,
install devices!”
If the green light isn’t solid, please click the question
mark on screen or visit support.scoutalarm.com.
’s light is solid green light, confirm a
Page 17

Important Installation Notes:
sensor sequence
Install the sensor closest to the hub first and
work your way out. Scout sensors have a
range of appro
battery pull tabs
pull
Only remove the battery pull tabs from one
device at a time. Pulling multiple tabs at once
may result in pairing the wrong device.
removing a sensor
If you incorrectly mounted a sensor
twist the device left and right to loosen the
adhesive. Pulling a device straight o may
damage the surface.
ximately 100 ft.
, slowly
Page 18

motion sensor
19
Page 19
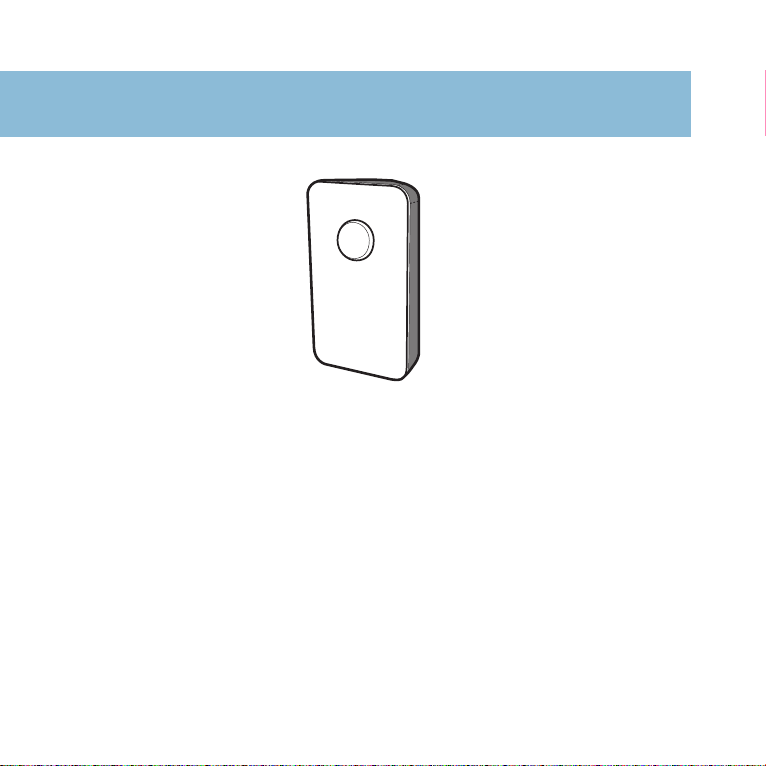
device: motion sensor
The motion sensor detects motion inside your home.
The motion sensor has a 20 ft. range and a 90 degree
field of view.
Be sure to pair this device from its desired location to
ensure you are in range of the Scout mesh network.
Page 20
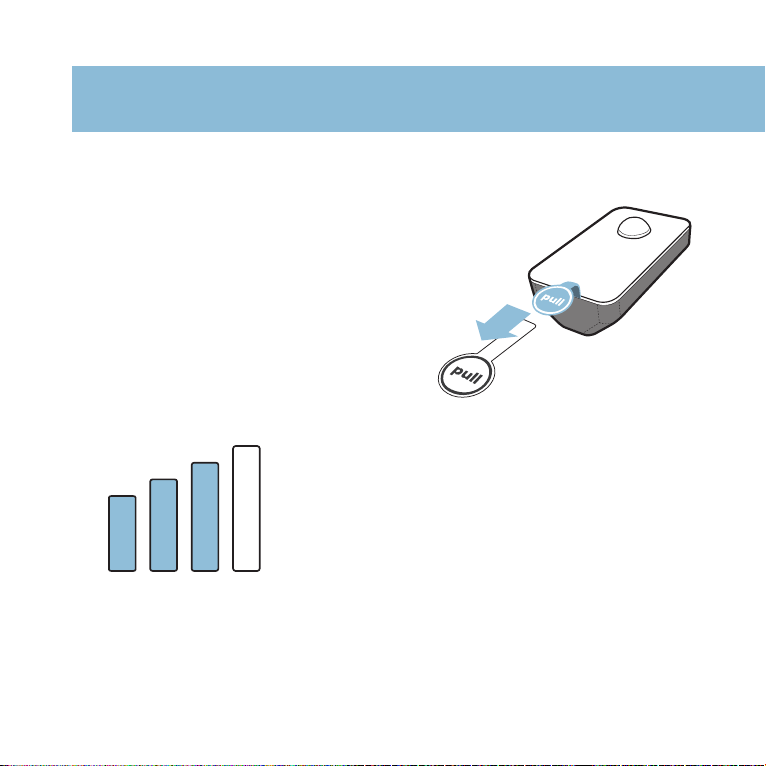
step one: power on
Hold the faceplate down and
remove the battery pull tab to
engage the battery
.
The motion sensor will immediately
enter pairing mode to pair with the
. It can take up to 3 minutes for
hub
the device to pair to the hub. The
bars on screen will switch from
unfilled to filled when paired.
Page 21
step two: placement
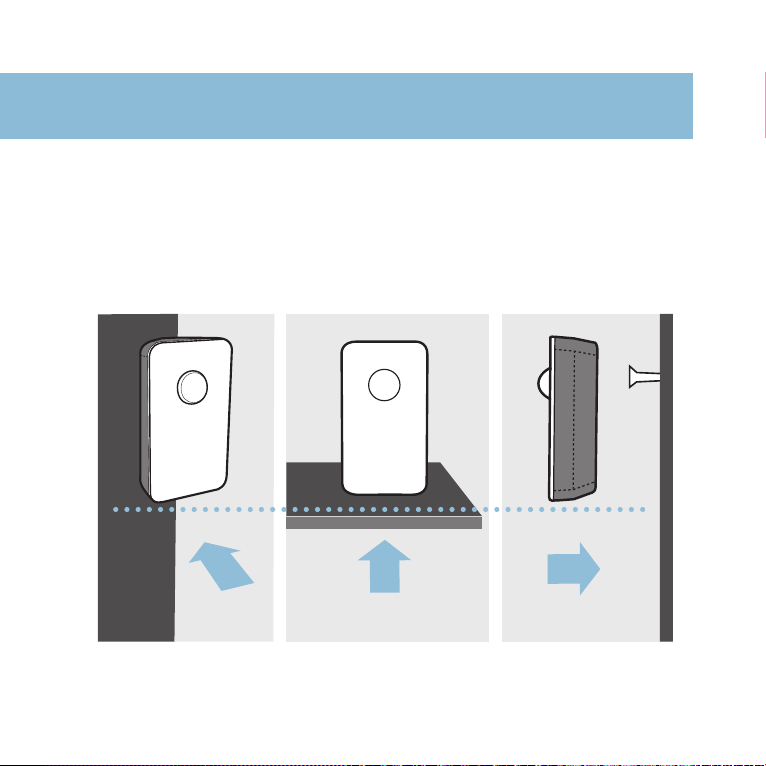
The motion sensor can be mounted in a corner, stand
freely on a shelf or be hung on a screw. It should be
5-6 ft. o of the ground, regardless.
5-6 ft.
Corner Shelf Flat
Page 22
step three: prep device
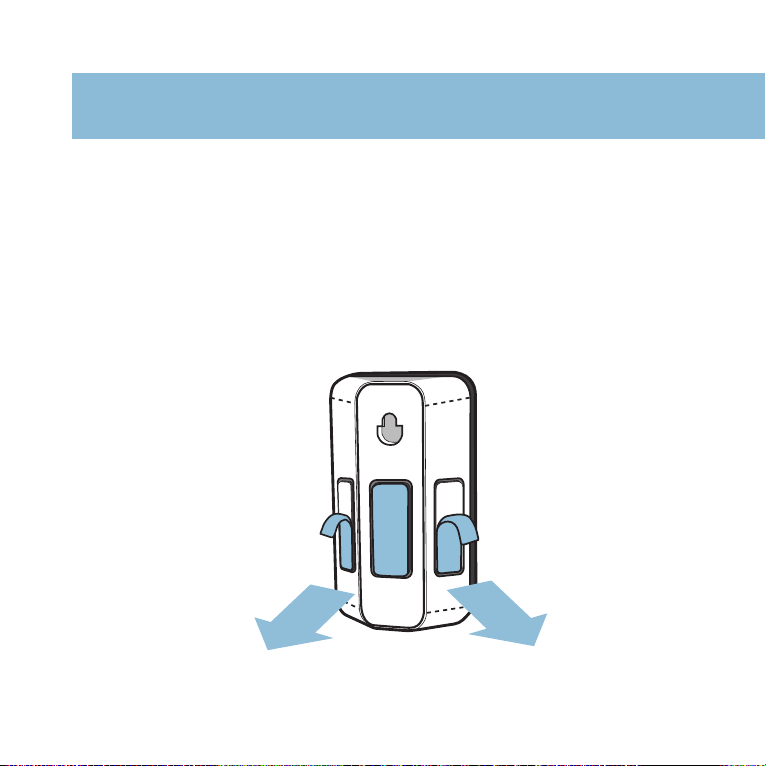
If the unit is freestanding on a shelf
this step. If you want to adhere the motion sensor, flip
the motion sensor over and remove the adhesive from
the appropriate pads. Place it in your desired location,
in range.
, you can bypass
Page 23
step four: name sensor
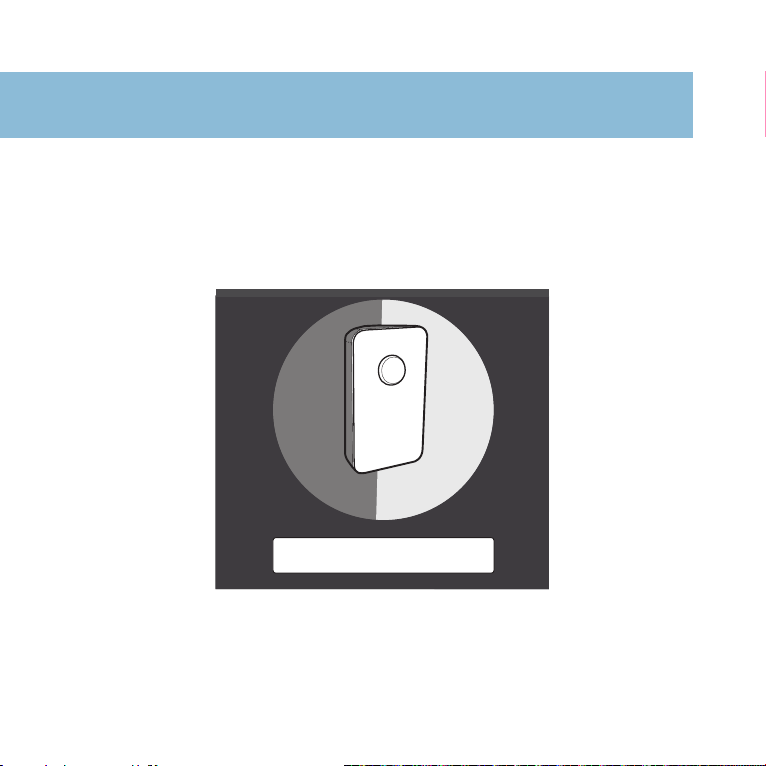
Name your motion sensor something unique and click
Submit. R
sensors.
epeat steps 1-4 if you have multiple motion
name sensor
If you have no more devices, you are done installing.
...
Page 24

door panel
25
Page 25
device: door panel
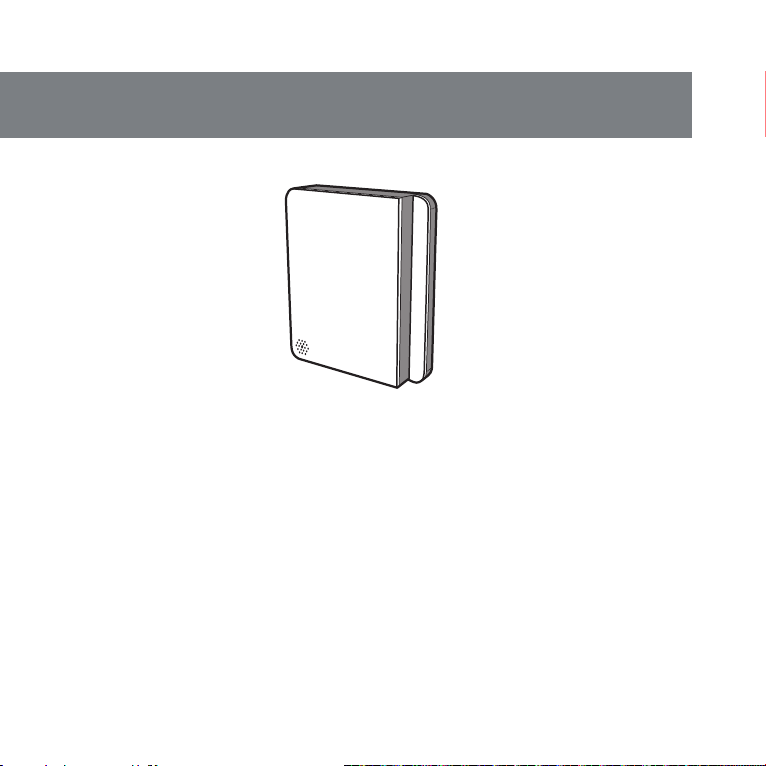
The door panel monitors door activity and allows you
to arm and disarm the system. It must be placed inside
your home. Pair this device from its desired location to
ensure you are in range of the Scout mesh network.
The door panel box includes: one large panel, one
small panel, two RFID key FOBs and one RFID sticker.
Page 26
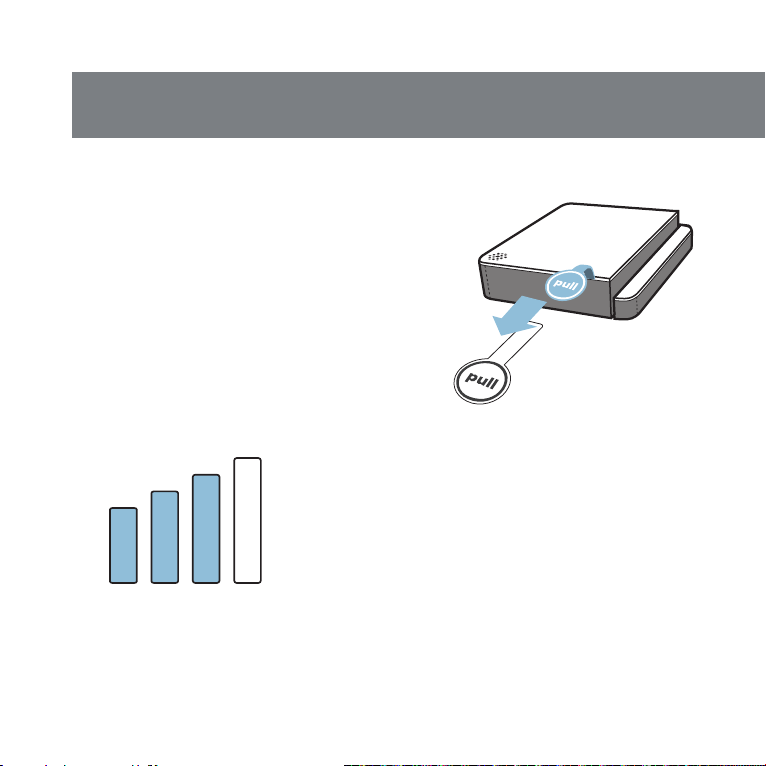
step one: power on
Hold the faceplate down and
remove the battery pull tabs to
engage the batteries.
The door panel will immediately
enter pairing mode to pair with the
. It can take up to 3 minutes for
hub
the device to pair to the hub. The
bars on screen will switch from
unfilled to filled and the door panel
will “chirp” once when paired.
Page 27
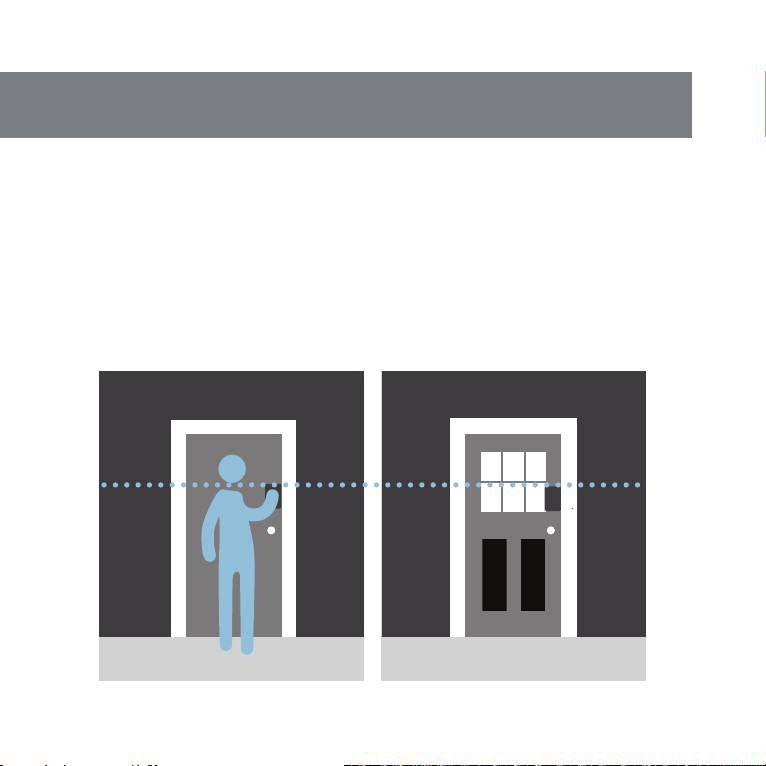
step two: positioning
Before we adhere the door panel, test your device
with the on-screen instructions to confirm you’re
within range
shoulder height. One piece will move with the door
while the other piece stays stationary on the frame.
. You’ll want the panel to be at about
Page 28
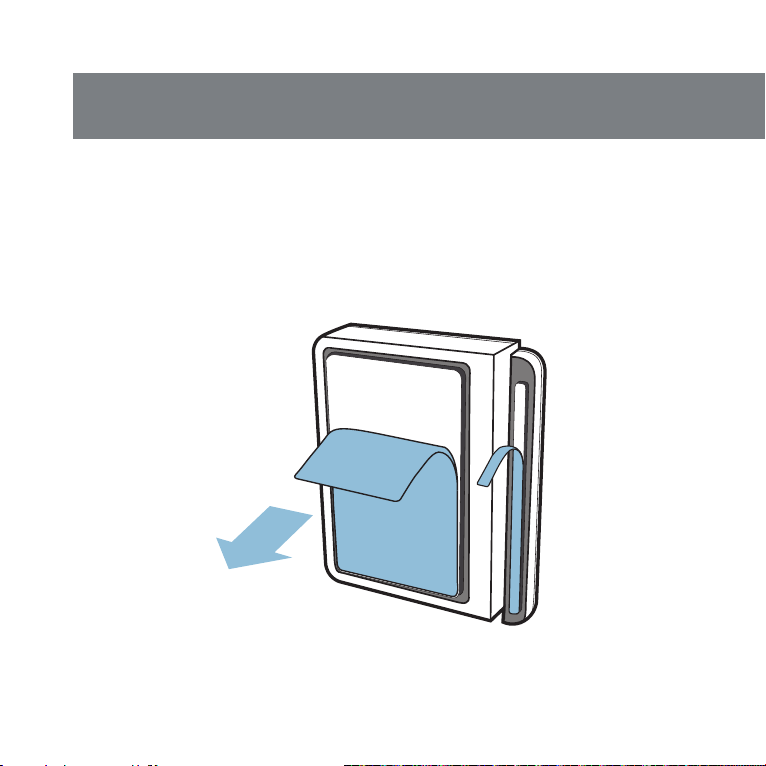
step three: prep device
Flip the large panel over and remove the adhesive
small panel will be adhered later, so you can first test
the magnet oset.
. The
Page 29

step four: place device
Adhere the large panel on your desired location, flush
with the edge and level to where you will place the
small panel.
Before removing the adhesive on the smaller panel,
line it up with the larger panel and test the proposed
placement on screen. If the icon is not changing, you
will have to move it closer
. Once confirmed, adhere.
Page 30
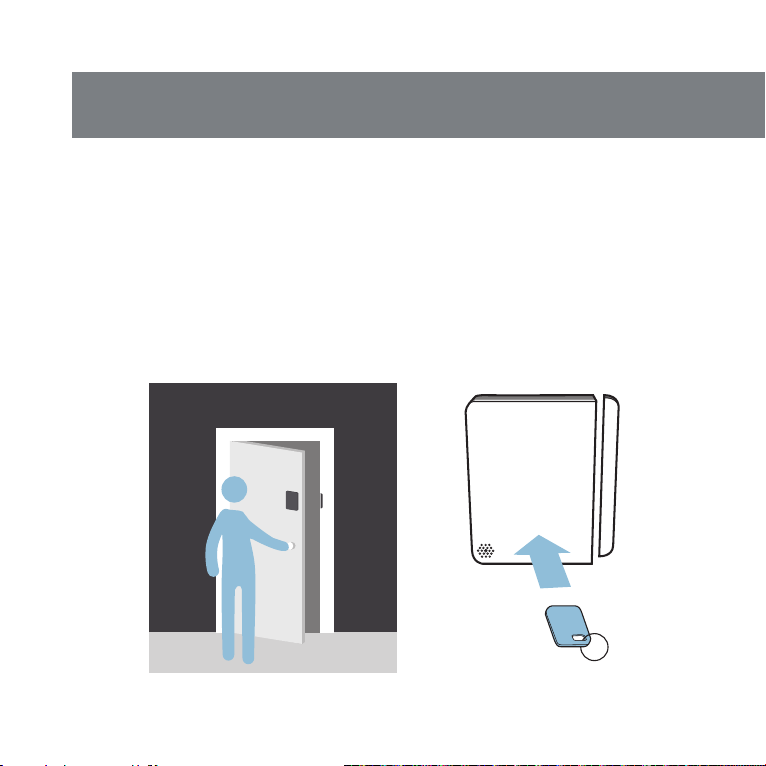
step five: test it
Once both panels are adhered, confirm the door panel
is working. Open and close the door to trigger the
“chirp
key fob to the door panel, as well, to test arming and
disarming.
” noise and the icon change on screen. Tap a
Page 31

step six: name it
Name your door panel something unique and click
Submit. R
panels.
epeat steps 1-6 if you have multiple door
name sensor
If you have no more devices, you are done installing.
...
Page 32

access sensor
Page 33
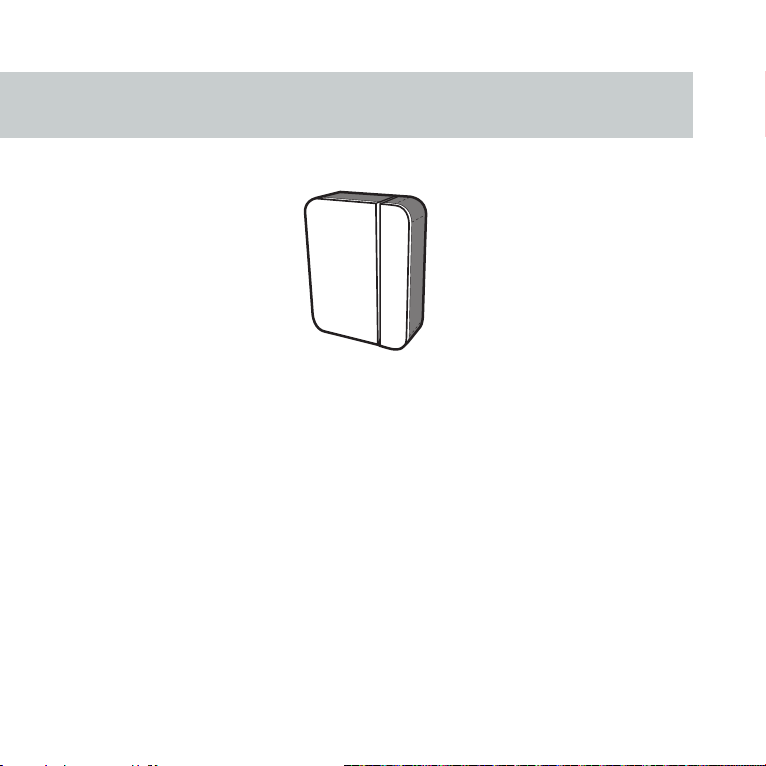
device: access sensor
The access sensor is for monitoring the opening and
closing of any door
Be sure to pair this device from its desired location to
ensure you are in range of the Scout mesh network.
The access sensor box includes: one large panel and
one small panel.
, window, cabinet, or safe.
Page 34
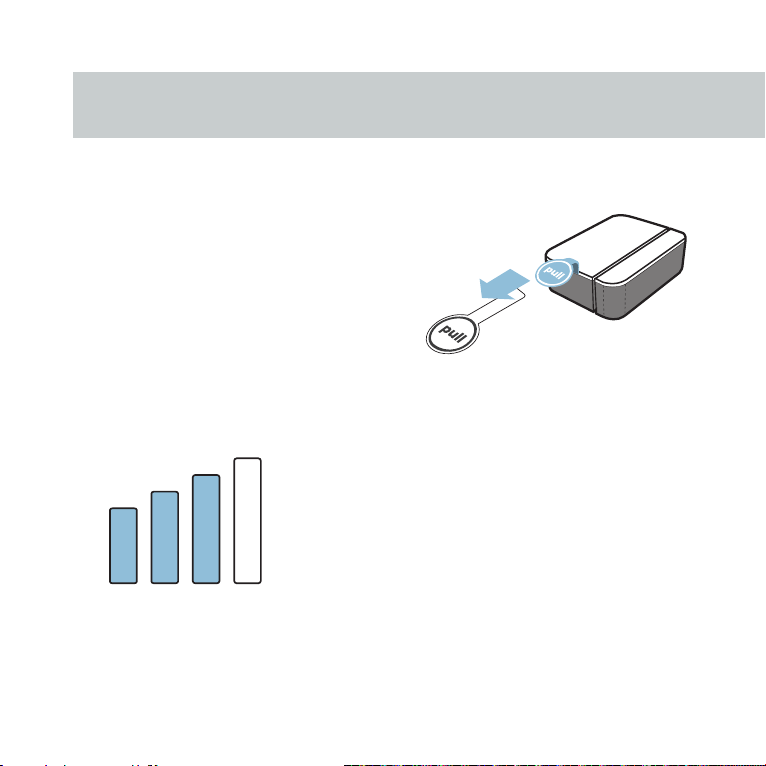
step one: power up
Hold the faceplate down and
remove the battery pull tab to
engage the battery
.
The access sensor will immediately
enter pairing mode to pair with the
. It can take up to 3 minutes for
hub
the device to pair to the hub. The
bars on screen will switch from
unfilled to filled when paired.
Page 35
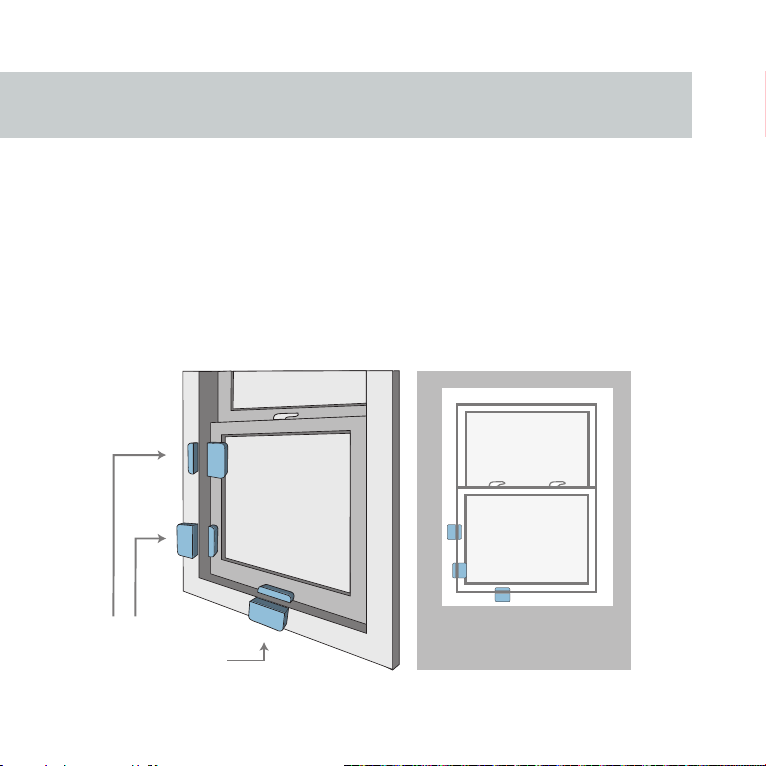
step two: positioning
Whether you’re placing the sensor on a window or
, there are multiple configurations to consider.
door
The reference images on the following two pages
demonstrate your options. One piece will always
move and one piece will always be stationary.
placement
(choose ONE)
Page 36
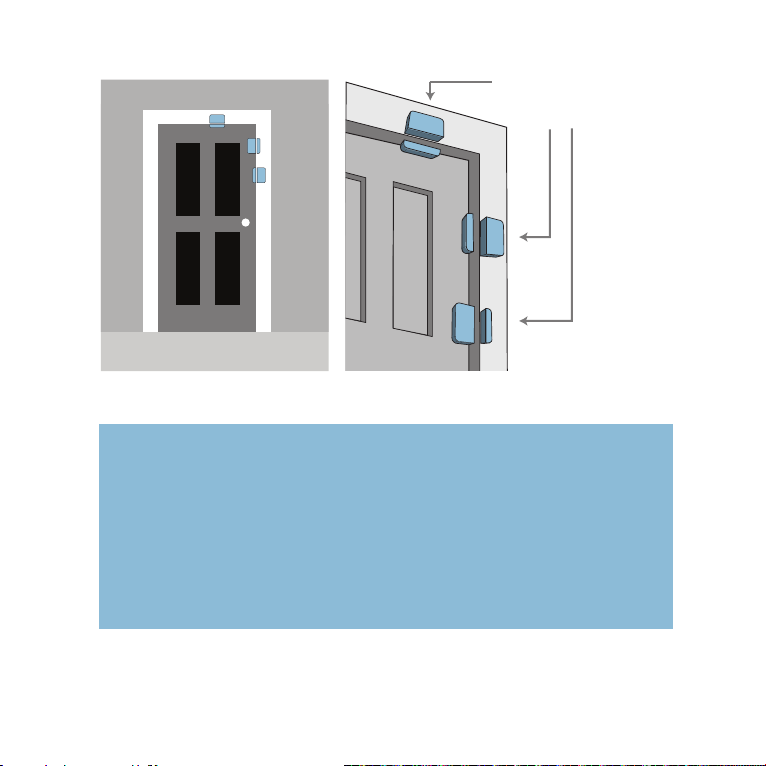
placement
(choose ONE)
Tip: There are thousands of window and door
variations in the world. W
e can’t illustrate all of
them in this guide, but we’ve considered almost
every possible installation. If the illustrations
above don’t work for you, find more illustrations
at support.scoutalarm.com
Page 37
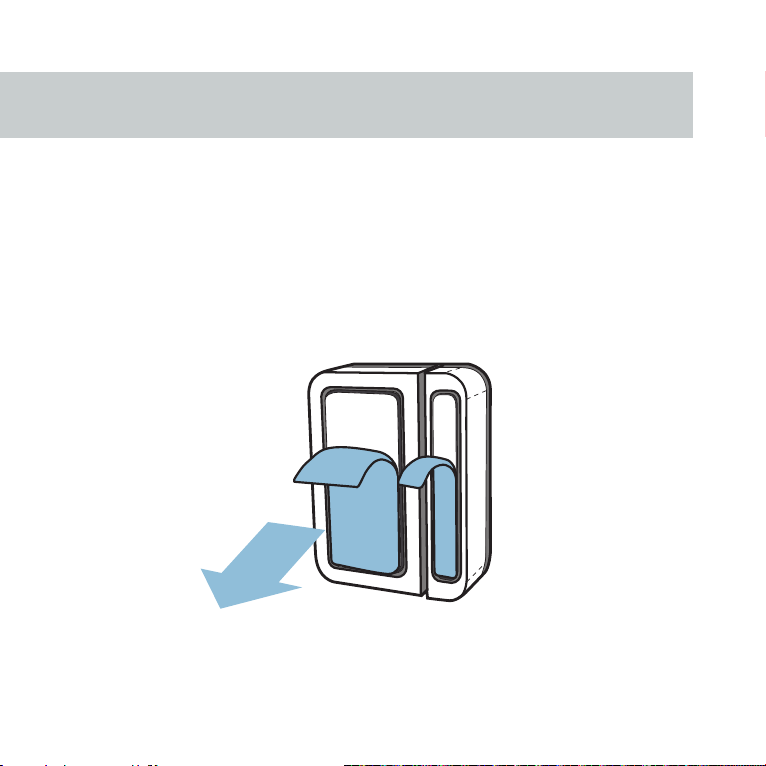
step three: prep device
Flip the large panel over and remove the adhesive
small panel will be adhered later, so you can first test
the magnet oset.
. The
Page 38
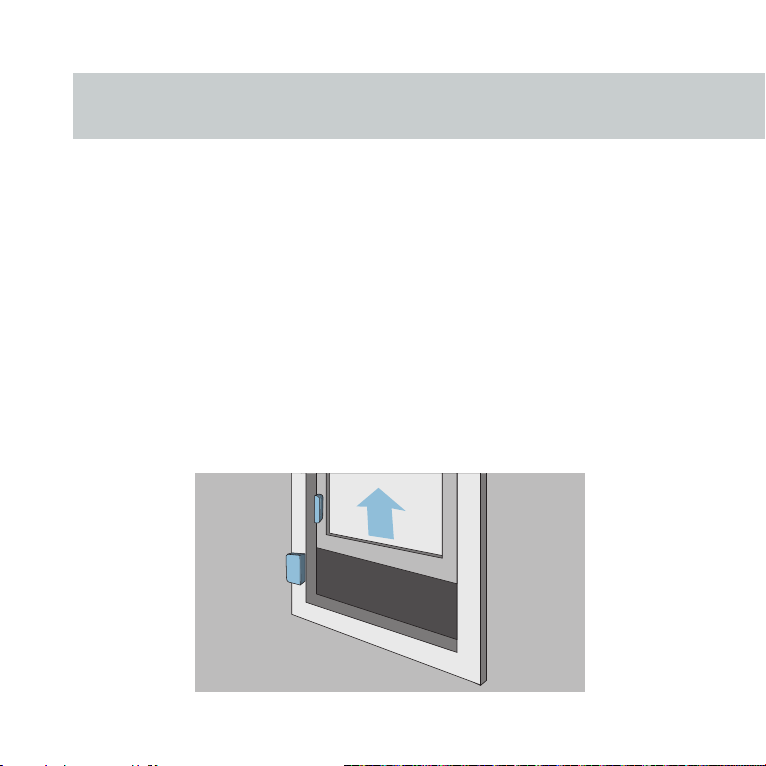
step four: place device
Adhere the large panel on your desired location, flush
with the edge and level to where you will place the
small panel.
Before removing the adhesive on the small panel,
line it up with the large panel and test the proposed
placement on screen. If the icon is not changing, you
will have to move it closer
. Once confirmed, adhere.
Page 39
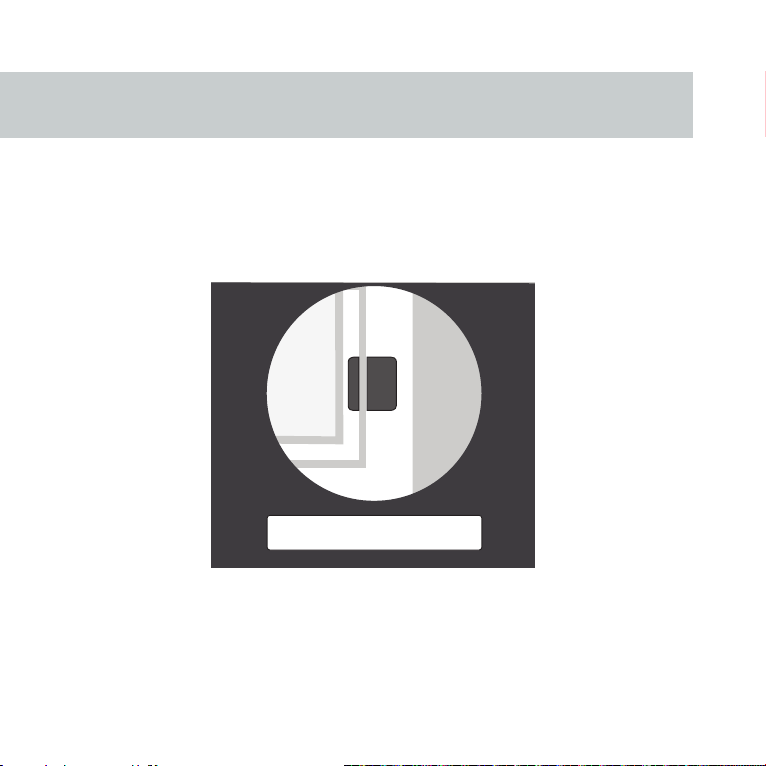
step five: name it
Name your access sensor something unique and click
Submit. R
sensors.
epeat steps 1-5 if you have multiple access
name sensor
If you have no more devices, you are done installing.
...
Page 40

register rfid
41
Page 41
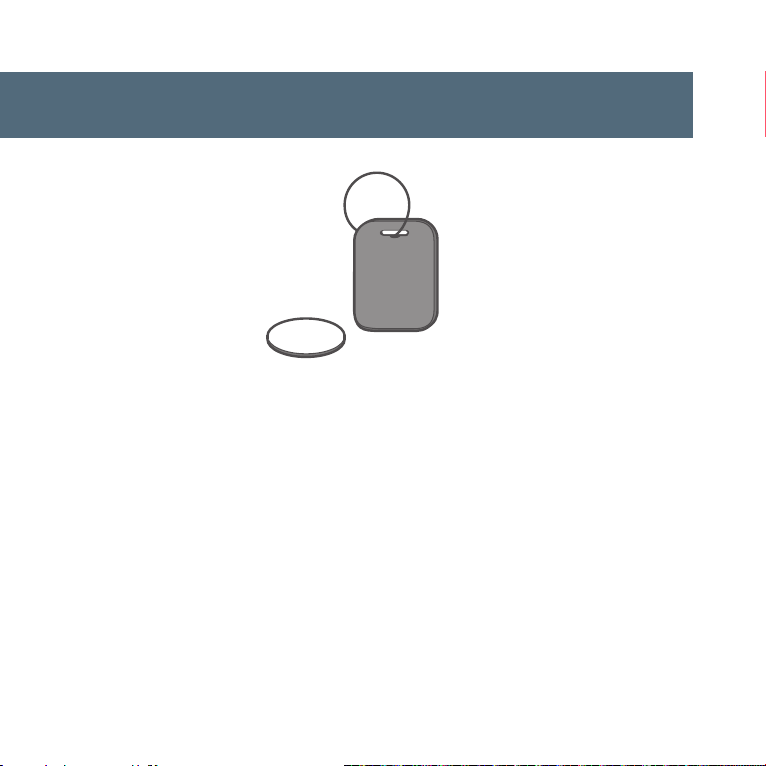
device: rfid
The RFID k
and disarm the system manually. Tap them to any door
panel to arm and disarm.
Two RFID key fobs and one RFID sticker are packaged
with each door panel you ordered.
Place RFID key fobs on your keychain. Place the RFID
sticker on a secret object around your house, in case
you lose your keys or have an unexpected guest.
ey fobs and RFID sticker allow you to arm
Page 42
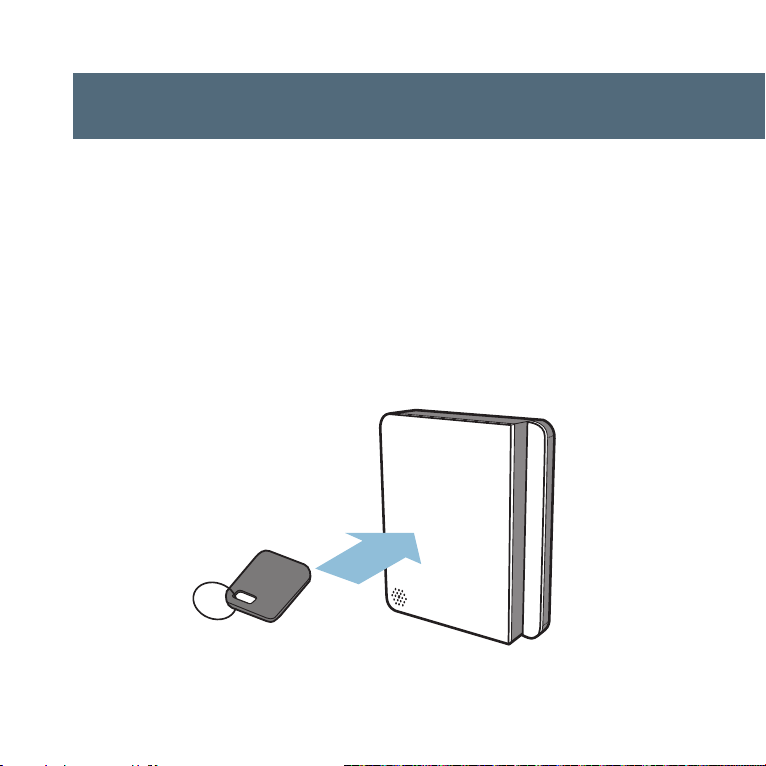
step one: tap to door panel
Choose an RFID fob or stick
register. Tap it to the door panel. The light will turn
blue when it senses an object in it’s field. The light
will turn green and “chirp” when the RFID device has
been read successfully.
er that you would like to
Page 43

step two: name it
Name the RFID device and click Submit. W
name of the fob on the attached sticker to keep
track of it. You can grant and revoke RFID device
access through the Scout dashboard at any time.
Repeat steps 1 & 2 until you have registered all of
your RFID devices.
name rfid...
rite the
Page 44

warranty info
45
Page 45

Scout Informational Guide
This informational guide contains important instructions on safety
regulatory information and the limited hardware warranty for your Scout Alarm device. The
latest user instructions and any updates to this informational guide can be found at:
www.scoutalarm.com/ScoutAlarm-Install-Guide.pdf
, handling, disposal, recycling,
Important Safety Instructions
R
ead all safety and operating instructions before using your Scout Alarm hardware to avoid
injury. Keep these instructions somewhere where you can find them for future reference.
Heed all warnings contained herein.
This product is not intended to be used to control or monitor, directly or indirectly, industrial
equipment or medical equipment of any kind.
Do not install your device near water, or expose the product to any water or liquid of any
kind.
Many of Scout’s devices operate on battery power. Battery-powered detection sensors will
not operate and your alarm will not sound if the batteries are low or dead. Monitor your
device’s battery level often to ensure proper operation.
Use a dry cloth to clean your Scout device. Do not use liquids of any kind. Exposure to
liquids, detergents, or abrasive cleaners may scratch your device and could aect
performance.
Do not install your Scout device near any heat sources. Stoves, radiators, registers and
other heat producing devices can cause damage that may aect performance.
Only install your Scout devices in accordance with the installation instructions provided
to you. Improper installation may result in poor performance. Scout is not responsible for
damages resulting from the improper installation of devices by the user.
Operating Environments:
Operating environment details can be found at scoutalarm.
com/legal
Page 46

Recycling and Disposal
The above symbol on your Scout device and the device
European Union’s Waste Electrical and Electronic Equipment (WEEE) Directive. In accordance
with WEEE, your Scout device should be disposed of or recycled of separately from normal
household waste. The end user is responsible to dispose of this product by taking it to a
WEEE-designated facility. Separately collecting and recycling waste equipment will help
conserve natural resources, protect overall health and the environment. Please contact your
local environmental oce, an electronic waste disposal company or the vendor from which
you purchased this device for more information about recycling.
’s packaging is in accordance with the
Certifications and Regulatory Compliance
Certifications and Regulatory Compliance
This device has undergone FCC, CE, and PTCRB compliance testing.
FCC Compliance Statement:
This devices complies with FCC standards for home or oce use and with Part 15 of the FCC
Rules. Operations of this device is subject to the following two conditions: 1) this device may
not cause harmful interference, and 2) this device must accept any interference, including
interference that may cause undesired operation of the device.
Model name: SCHUB01
This equipment has been tested and found to comply with the limits for a Class B digital
device, pursuant to part 15 of the FCC Rules. These limits are designed to provide reasonable
protection against harmful interference in a residential installation. This equipment generates,
uses and can radiate radio frequency energy. And, if not installed and used in accordance with
the instructions, may cause harmful interference to radio communications. However, there
is no guarantee that interference will not occur in a particular installation. If this equipment
does cause harmful interference to radio or television reception, which can be determined by
turning the equipment o and on, the user is encouraged to try to correct the interference by
one or more of the following measures:
Reorient or relocate the receiving antenna.
Increase the separation between the equipment and the receiver.
Page 47

Connect the equipment into an outlet on a circuit dierent from that to which the receiver
is connected.
Consult the dealer or an experienced radio/TV technician for help.
Warning to the user:
Changes or modications to the product not expressly approved by Scout Security, Inc. could
void your right to use or operate your product.
Where shielded interface cables or accessories have been provided with the product or
specified additional components or accessories elsewhere defined to be used with the
installation of the product, they must be used in order to ensure compliance with FCC limits.
Model name: SCHUB01
This device and it’s antennas(s) must not be co-located or operating in conjunction with
any other antenna or transmitter except in accordance with FCC multi-transmitter product
procedures.
Model name: SCHUB01
FCC Radiation Exposure Statement:
This equipment complies with FCC radiation exposure limits set forth for an uncontrolled
environment. This equipment should be installed and operated with minimum distance 20cm
between the radiator & your body.
Canada Compliance S
This device complies with Industry Canada license-ex
subject to the following two conditions: 1) this device may not cause harmful interference, and
2) this device must accept any interference, including interference that may cause undesired
operation of the device.
Le présent appareil est conforme aux CNR d’Industrie Canada applicables aux appareils
radio exempts de licence. L’exploitation est aurorisee aux deux conditions suivantes: 1)
l’appareil ne doit pas produire de brouillage, et 2) l’utilisateur de l’appareil doit accepter toute
brouillage radioélectrique subi, meme si le brouillage est susceptible d’en compromettre le
fonctionnement.
Model name: SCHUB01
This device and it’s antennas(s) must not be co-located or operating in conjunction with
any other antenna or transmitter except in accordance with IC multi-transmitter product
procedures.
tatement
empt RSS standard(s). Operation is
Page 48

Model name: SCHUB01
Cet appareil et son antenne (s) ne doit pas être co-localisés ou fonctionnement en association
avec une autre antenne ou transmetteur.
Model name: SCHUB01
IC R
adiation Exposure Statement:
This equipment complies with IC RSS-102 radiation exposure limits set forth for an
uncontrolled environment. This equipment should be installed and operated with mini
distance 20cm between the radiator & your body.
Cet équipement est conforme aux limites d’exposition aux rayonnements IC établies pour un
environnement non contrôlé. Cet équipement doit être installé et utilisé avec un minimum de
20 cm de distance entre la source de rayonnement et votre corps.
Under Industry Canada regulations, this radio transmitter may only operate using an antenna
of a type and maximum (or lesser) gain approved for the transmitter by Industry Canada. To
reduce potential radio interference to other users, the antenna type and its gain should be so
chosen that the equivalent isotropically radiated power (e.i.r.p.) is not more than that necessary
for successful communication.
Conformément à la réglementation d’Industrie Canada, le présent émetteur radio peut
fonctionner avec une antenne d’un type et d’un gain maximal (ou inférieur) approuvé
pour l’émetteur par Industrie Canada. Dans le but de réduire les risques de brouillage
radioélectrique à l’intention des autres utilisateurs, il faut choisir le type d’antenne et son gain
de sorte que la puissance isotrope rayonnée équivalente (p.i.r.e.) ne dépasse pas l’intensité
nécessaire à l’établissement d’une communication satisfaisante.
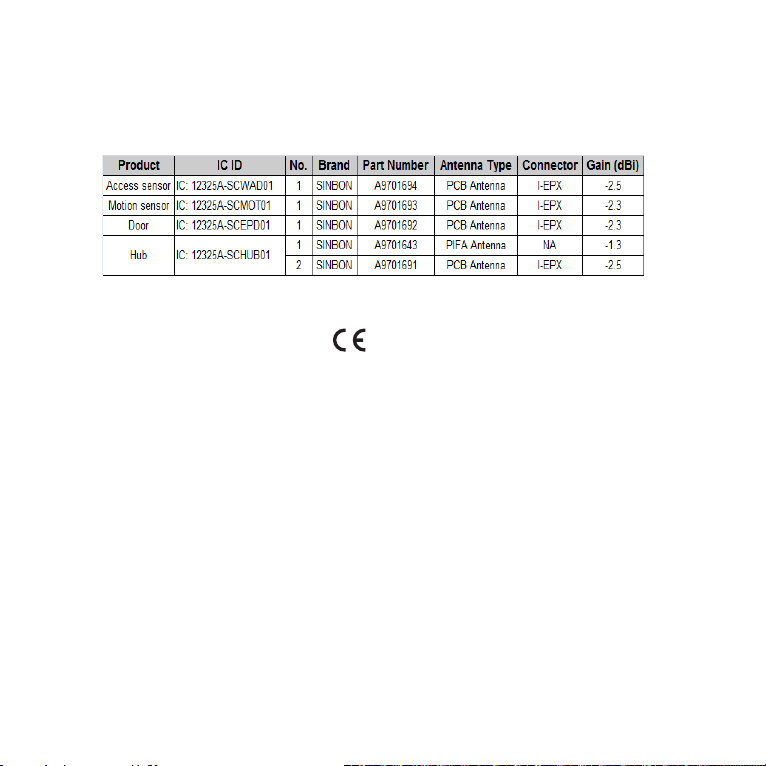
This radio transmitter (IC:12325A-SCHUB01 / IC:12325A-SCEPD01 / IC:12325A-SCWAD01 / IC:
12325A-SCMOT01) has been approved by Industry Canada to operate with the antenna types
listed below with the maximum permissible gain and required antenna impedance for each
antenna type indicated. Antenna types not included in this list, having a gain greater than the
maximum gain indicated for that type, are strictly prohibited for use with this device.
Le present emetteur radio (IC:12325A-SCHUB01 / IC:12325A-SCEPD01 / IC:12325A-SCWAD01
/ IC:12325A-SCMOT01 ) a ete approuve par Industrie
Canada pour fonctionner avec les types d’antenne énumérés ci-dessous et ayant un gain
admissible maximal et l’impédance requise pour chaque type d’antenne. Les types d’antenne
non inclus dans cette liste, ou dont le gain est supérieur au gain maximal indiqué, sont
mum
Page 49
strictement interdits pour l’exploitation de l’émetteur.
Antenna list
European Compliance S
A copy of the EU declaration of Conformity is available at: www
tatement
.scoutalarm.com/legal
Service and Support
Ex
cept for its battery, your Scout device does not contain any user-serviceable parts. If you
need service, contact Scout at one of the numbers below. Helpful information is also available
on our website at: support.scoutalarm.com
Toll-Free Within the United States: 1-844-AT-SCOUT (287-2688)
Outside the United States: use the number above, carrier charges apply - please contact your
telecom service provider for details
The hours our customer support is available may be found at: support.scoutalarm.com
Scout’
s Address:
Scout Security Inc.
2023 W. Carroll
Ste. C-206
Chicago, IL 60612 USA
Page 50

Software License Agreement
Use of any Scout device constitutes acceptance of the Scout and third-party software
terms found at: www.scoutalarm.com/legal
license
Scout Alarm One (1) Year Limited Warranty
Scout Security
certain registration requirements, against material defects in materials and workmanship for
a period of one (1) year from the date of purchase (“Warranty Period”), to the original end user
purchaser (the “Warranty”). You must register for the Warranty online at www.scoutalarm.com/
warranty/register for your Product to be covered by the Warranty. Except where prohibited by
applicable law, the Warranty is nontransferable and is limited to the original purchaser. The
Warranty gives you specific legal rights, and you may also have other rights that vary under
local laws.
This Warranty does not apply to any Product misused, abused, altered or used other than
as approved in writing by Seller, as determined by Seller’s inspection of the Product. Other
limitations on this Warranty are described in Seller’s End User License Agreement (“EULA”)
located at www.scoutalarm.com/legal. If any defect in material or workmanship occurs during
the applicable warranty period in any of the Products, as determined by Seller’s inspection of
the Goods, your sole and exclusive remedy shall be as set forth in the EULA.
Seller reserves the right to clarify, amend, restate or otherwise modify the terms of the
Warranty and the EULA in its sole discretion. In the event that there is a conflict related to
the terms of the Warranty as described on this Warranty Card and the EULA, the terms of the
EULA shall control.
Prior to submitting a Warranty claim, Seller recommends you visit the support section at
support.scoutalarm.com to obtain technical assistance. To obtain Warranty service you must
speak with a Seller service agent, the authorized dealer from which you purchased the
Product(s), or open a service request through our website at support.scoutalarm.com. Be
prepared to describe the problem you are experiencing with the Product in detail so that
Seller may best assist you.
, Inc. (“Seller”) warrants your Scout alarm hardware (“Product(s)”), subject to
Page 51

52
scout alarm
sleek. secure
. smart.
 Loading...