

Page 1
USER MANUAL
NU100/150/220/300
Part Number 99300403-01 Version: B
Page 2

Page 3

NUUndercounterIceMakerUserManual TableofContents
B1
Table of Contents Page
Preface, ice maker model and serial number introduction Page B2
Overview of the ice maker, electrical and plumbing requirements Page B3-B4
Ice maker size Page B5-B7
Installation of the ice maker Page B8
How the ice maker works Page B9
General operation of the ice maker Page B10
Scheduled maintenance Page B11-B12
Troubleshooting table Page B13-B14
Warranty card Page B15
Page 4

NUUndercounterIceMakerUserManual Preface
B2
Preface
Firstly, thank you for choosing our ice maker,
we sincerely wish you will use our ice maker for
a long time.
Our ice makers are designed by experts in the
industry following certain standards and
manufactured in a fully controlled process. We
believe that our innovative and high quality
products will not cause you any harm as long
as you install and use our machine according to
the manual correctly.
This manual will guide you on how to use our
ice maker correctly, how to avoid the machine
breakdowns and how to achieve its best
performance. Please do not reach into the
compressor or evaporator area with your hand
so you can avoid touching control and safety
devices.
Please read the manual thoroughly, especial
the warnings and notices, the machine model
and serial number need to be provided when
you contact any service provider.
Delivery
Please check the following items when the unit
is delivered:
Whether the packing and exterior of the ice
maker is intact.
Whether the ice maker model is the same
as your order.
Whether the components are in good
condition and whether the accessories and
documents in the storage bin are complete.
Whether the interior of the ice maker is
undamaged.
If there is serious damage or it lacks parts,
please inform your carrier and dealer
immediately. What is stated in the manual is
general; there could be a slight difference
between your unit and the machine supplied.
The copyright for the contents of the manual
belongs to the manufacturer; please don’t
duplicate the manual without the
manufacturer’s written approval. Scotsman will
improve the product continuously and reserves
the right to change the product without further
notice.
Transportation
Please use a forklift with a fork thickness of
less than 40mm to handle the ice maker.
Warranty
Scotsman Ice Systems (Shanghai) Co., Ltd. is
responsible for the warranty of the ice maker;
please refer to the warranty card for more
details.
If the machine is in need of replacement
components or parts, we require you to use
Scotsman Shanghai company exclusive parts,
otherwise the warranty becomes invalid.
Ice maker model and serial number
Ice maker model
Example:NU150HA2
Serial number
The serial number includes 12 digits; the first
two letters are the series name, the next two
numbers refer to the year the machine was
manufactured, then the two digit month codes,
the final six digits are the serial identifier.
NU 14 06
000001
Serial identifier
Month
Year
Series name
NU 15 0 H
A
2
Design change number
A=Air Cooled
W=Water Cooled
H=Half Cube; F=Full Cube
Power
0 = 220V 50Hz;
24h Ice Capacity
(21
℃
Air/10 ℃ Water)
*
=
Series Name
Page 5
NUUndercounterIceMakerUserManual Summary
B3
Summary
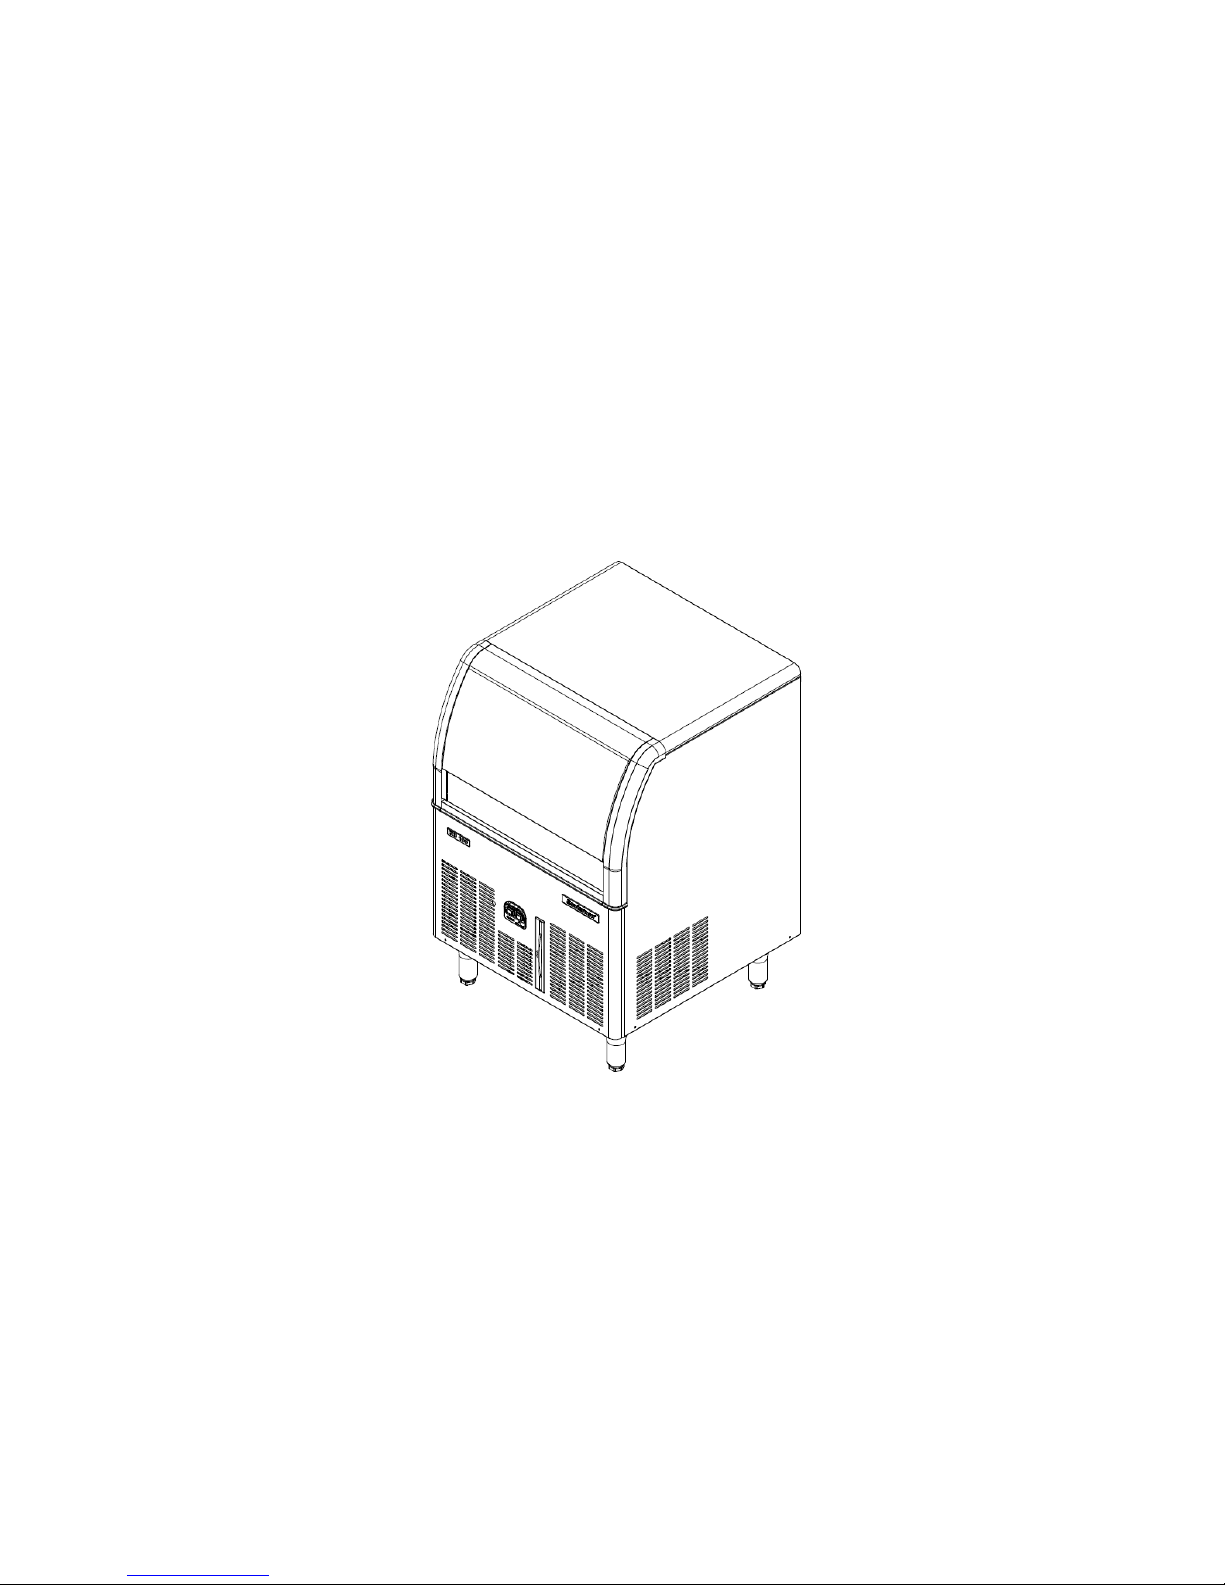
The NU100/150/220/300 commercial ice maker
in this manual is electronically controlled; it is
equipped with an advanced and unique
electronic control system, which can control the
operation of the ice maker automatically. When
the storage bin is full of ice, the ice maker will
stop working automatically and restart working
again when the bin is no longer full.
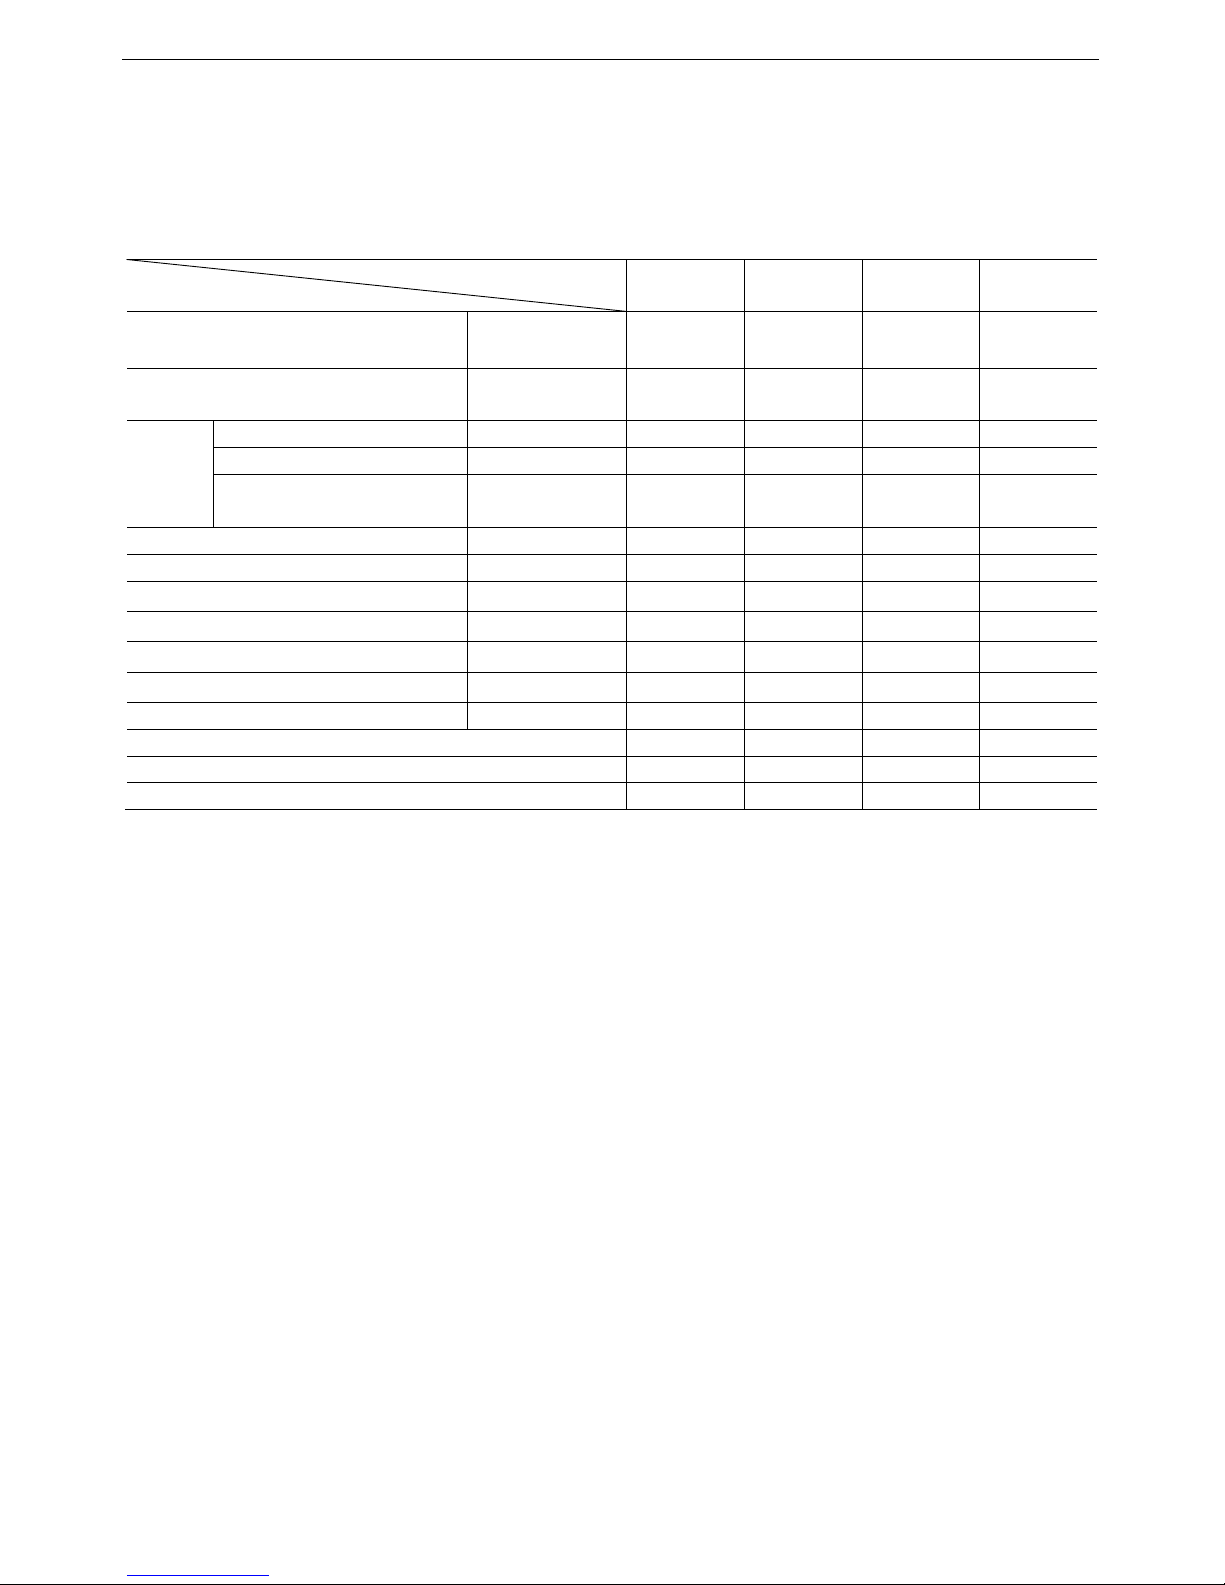
Model
Item
NU100 NU150 NU220 NU300
Capacity
(24 hours) ①
[kg]
45 68 100 132
Power
[V/Hz/
ph]
220/50/
1
220/50/1
220/50/1 220/50/1
(Size)
(width) mm
600 600 650 650
(depth) mm
610 610 690 690
(height with short foot)
(height with high foot)
mm
770
875
770
875
870
976
898
1004
Power cord [Ø mm2]
1.5 1.5 1.5 1.5
Power input # [W]
900 1000 1200 1500
Power consumption ①
[KWh/100lbs]
8 5.6 5.9 6.5
Power consumption ②
[KWh/100lbs]
12.6 8.5 8.5 9
Water consumption ①
[Gal/100lbs]
32 20 19 20
Water consumption ②
[Gal/100lbs]
32 20 19 20
Net weight [kg]
50 50 62 65
Cooling type
Air Air
Air Air
Refrigerant
R404a R404a R404a R404a
Charge
320 g 320 g 360 g 420g
# Maximum working condition
① At 21℃ (70℉) ambient temperature/10℃
(50℉) water temperature
② At 32℃ (90℉) ambient temperature/21℃
(70℉) water temperature
Notes: The manufacture reserves the right to
change the model or specifications of the
product without further notice.
Page 6

NUUndercounterIceMakerUserManual Summary
B4
Safety instruction
In order to ensure the machine works normally
for a long time, before installation, please read
the manual carefully and follow it strictly. The
manufacturer is not responsible for any
damage or bodily injury due to ignoring the
safety instructions. If there is any doubt, please
contact the local dealer.
Installation requirements
Please consider the following items in
determining the installation location:
Power source: the power switch for the ice
maker should be easily reachable, be sure
that the power supply is reliably grounded.
Water supply: the water supply switch
should be easily reachable.
Water drain: be sure that the drain pipe
extending from the unit has a minimum 3
cm drop per meter.
In order to reach its high performance and
ensure durability, please pay attention to the
following items:
The water temperature should be between
5℃ to 35℃.
The water pressure should be between 1
bar to 5 bar.
The power supply should be accordance
with the requirements on the nameplate.
The fuse of the power supply switch should
be a bipolar fuse. The gap between the
bipolar should be more than 3mm.
The working ambient temperature should
be between 10℃ to 40℃.
For the required ventilation, the distance
between the machine and the wall on the
sides and back should be more than 150
mm.
Be sure the machine is leveled correctly.
Don’t hang curtains or pile goods around
the machine to avoid overheating caused
by bad ventilation, be sure there is no heat
source (such as a stove, oven, etc.) around
the machine and the working environment
of the ice maker should not be overly humid。
Note:
In order to avoid any hygiene and health safety issues,
the water for making ice should be potable. If needed,
please install a water filter or water processor.
Page 7

NUUndercounterIceMakerUserManual Size
B5
NU100/150 Size
With Short Foot With High Foot
Page 8

NUUndercounterIceMakerUserManual Size
B6
NU220 Size
Page 9

NUUndercounterIceMakerUserManual Size
B7
NU300 Size
Page 10

NUUndercounterIceMakerUserManual Installation
B8
Installation
Installation steps:
Be sure the ice maker is level (level the
machine with the supplied legs in the
storage bin)
Connect the water supply with the supplied
pipe.
Set the supplied water drain pipe on the
drain outlet; be sure there is a minimum 3
cm drop per meter.
Turn on the water supply switch.
Plug the power source plug into the socket.
Press the power switch button to ‘on’
position.
(Installation chart)
Air Outlet
Air Inlet
10~40 ℃
Important:
The ice maker should be installed by an authorized
maintenance personnel.
Page 11

NUUndercounterIceMakerUserManual HowtheIceMakerWorks
B9
How the ice maker works
For the NU100/150/220/300 ice maker, the
water for making ice is pumped into the spray
bar by a water pump. After flowing out of the
holes of the spray bar, then it will flow over the
surface of the evaporator plate with a constant
and even speed. On the evaporator plate,
some of the water will turn into ice; the
remaining water will flow into to the water
trough by gravity and will be re-circulated by
the water pump.
Freezing Cycle
The refrigerant gas discharged from the
compressor goes into the condenser, where it
is cooled and condensed into a liquid. The
liquid will flow into the drier filter and then it will
pass through the expansion valve. After that,
the pressure and temperature of the refrigerant
liquid will get much lower.
The refrigerant starts evaporating when it gets
into the serpentine pipes on the back of the
evaporator plate and cools the water flowing
over the front of the evaporator plate.
The refrigerant evaporates in the evaporator;
finally, the liquid changes into vapor and then it
will be pumped into the compressor where the
cycle starts again.
The 30 seconds before the freezing cycle starts
is the pre-cooling period, in this period, the
compressor is working, water pump is not, the
fan is working (controlled by the temperature
sensor on the condenser) and water inlet valve
is working (controlled by the water-level sensor
in the water trough).
The freezing cycle is controlled by the ice
thickness sensor, as long as the sensor
touches the ice for 30 consecutive seconds, the
ice thickness has reached the set point. Then,
the freezing cycle ends. The total length of
freezing cycle depends on the ambient
temperature and ice thickness setting.
Defrosting cycle
As soon as the controller detects the ice
thickness has reached the set point, the
machine will go into the defrosting cycle.
Hot refrigerant gas discharged from the
compressor directly flows into the serpentine
pipes of the evaporator, which bypasses the
defrost valve.
The refrigerant circulating in the serpentine
pipes heats the evaporator plate, which will
cause the ice cubes to melt. The ice cubes will
separate from the evaporator plate, then fall off
and go into the ice chute by gravity, finally
going into the storage bin.
When the ice has been harvested, the defrost
cycle will end. Then, the hot gas valve and
drain valve close (according to the PC board
setting); and the unit goes into its new ice
making cycle.
Page 12

NUUndercounterIceMakerUserManual GeneralOperatingInstruction
B10
General Operating Instruction
Turn on the machine
After the power is switched on, with the three
minute water cleaning procedure ends, the ice
maker will enter into the ice making cycle
automatically; after 20 to 25 minutes, the first
batch of ice will fall into the storage bin.
Before the first ice making cycle, be sure to
sanitize the interior of the storage bin with
sanitizer, then rinse it with clean water.
Stop the machine
There are two buttons on the NU front panel,
the switch on right side is the power switch with
which can switch off the power after you press
the button.
Power Switch Panel
Or you can stop the ice maker by cutting off the
circuit breaker.
Ice thickness adjustment
The ice thickness has been adjusted to the
optimal level before it was shipped out, if you
find that the ice is irregular in your use, you can
check whether the ice thickness sensor is too
close or too far from the evaporator plate, if
needed, adjusts the screw on the sensor
properly to achieve the suitable thickness.
Ice thickness sensor
The buttons on the front panel
(see Fig. Power Switch Panel)
There are two switches on the NU front panel:
the right green switch is the power switch, the
red switch is the cleaning switch.
The lamps on the control box
BMLX—Ice full ZBLX—Freezing
TBLX—Defrosting SWLX—Water Supply
R1LX—Water Shortage
Alarm
R2LX—High Temperature
Alarm
CLLX—Cleaning CLEAN—Clean button
MODE—Mode Button
Control Box Panel
Buttons Instruction
Mode Button Functions
Press the button one time in order, then the
machine enters the next step:
Power on - Water Supply – Pre-Cooling –
Freezing - Defrosting - Ice Bin Full Detecting
The function of the cleaning button
When the power switch is on, the clean button
only activates in the first minute. Hold the clean
button for five seconds, the ice maker will enter
into the cleaning procedure automatically. With
Scotsman special cleanser and sanitizer, the
ice maker can be better cleaned and sanitized.
Alarm lamps failure description:
lamps State Failure Description
BMLX + R1LX On Ice chute failure
ZBLX + R1LX On Ice making delayed more
than five times in a row
R1LX + R2LX On Condenser sensor failure
BMLX + R2LX On Ice thickness sensor
failure
SWLX + R2LX On Water level sensor failure
R1LX On Shortage of water
R2LX On High temperature alarm
R1LX + R2LX Blinks High pressure alarm
TBLX Blinks Ice harvest delayed more
than three times in a row
SWLX Slowly
Blinks
Water temperature sensor
failure
Warning:
Only authorized maintenance people are allowed to
press the MODE button.
Note:
The machine running noise should be under 70dB.
Notes:
If the room temperature is below 15 ℃, the ice making
cycle is shorter (about 10 to 15 minutes).
If the room temperature is over 30 ℃, the ice making
cycle is longer (about 15 to 30 minutes).
Page 13

NUUndercounterIceMakerUserManual ScheduledMaintenance
B11
Scheduled Maintenance
In order to prevent bacteria on the ice, please
pay attention to the following items:
Don’t store any goods in the storage bin.
Keep the ice scoop clean.
There is an ice scoop holder designed for
holding ice scoop which is located on the
right side of the bin.
Ice Scoop Holder
Keep the storage bin door closed.
When cleaning the floor around the ice
maker. Be sure to prevent the fan motor
from sucking in dust.
In order to avoid any damage to the machine,
please pay attention to the following items:
Don’t cut off the water supply when the
machine is running.
Open or close the door of the storage bin
gently, slamming or hitting the door is
prohibited.
In order to avoid bad ventilation or
worsening the sanitation, please don’t pile
any goods on the top or around the
machine.
Clean and maintenance
Clean or replace the air filter
The NU series air cooled ice makers are
equipped with an air inlet filter. As the ice maker
runs, dust will be sucked into the machine
through the filter, thus excessive dust cuts
down the air volume to be sucked in as well as
the efficiency of the ice maker.
In order to enable the ice maker to work
efficiently, be sure to clean the air filter monthly.
If the filter is damaged, call the Scotsman
service agent to replace it.
Air filter
Monthly inspection
If the ice cubes are abnormal, please take the
spray bar down from over the evaporator; put it
in warm water diluted with a neutral de-scaling
solvent to wash its surface and spiracles, and
then rinse it with clean water.
For ensuring that the ice maker is clean, please
wipe the interior of the storage bin with a
cleanser diluted in the lightly warm water, then
sterilize it with liquid sanitizer, finally rinse it
with clean water.
Use a soft cloth and cleanser specially made
for stainless steel to clean the panels of the ice
maker.
Cleaning and sanitizing the water system
The sanitation of the water system is very
important; it needs to be washed at least twice
a year, call an authorized service agent to do it.
We suggest you use the cleanser/sanitizer
made specially for ice makers to deal with scale
and mineral sediments
Automatically clean/rinse:
In the first minute after the power is turned on, press
the ‘clean’ button on front panel and hold it for five
seconds, then the ice maker enters into the
‘wash/rinse’ procedure automatically (the whole
process will take about 40 minutes). During the
process, the ‘CLLX’ light blinks quickly, at the end of
the process, the ‘CLLX’ light blinks slowly, restart
power or press the ‘MODE’ button and hold for more
than five seconds, then the ice maker will enter into
the normal ice making cycle.
Notes:
Don’t disassemble any fastened panels.
Call the authorized service agent to maintain and
clean your ice maker.
Be sure to lift the ice maker when you move the ice
maker to avoid damage to the supporting legs.
Don’t push or pull the ice maker.
Warning:
Be sure to cut off the power and water supply
before cleaning or servicing the ice maker.
Keep your hands completely dry.
Page 14

NUUndercounterIceMakerUserManual ScheduledMaintenance
B12
Troubleshooting analysis (inspection items to
do before calling the service provider)
Ice maker out of work (all the lamps are not
on)
Whether the manual switch is ‘on’?
Whether the fuse in the fuse box has
blown?
Whether the power plug is plugged in?
Whether the power switch on the front
panel is “on”?
Low ice capacity or low efficiency
Whether the water supply switch has been
switched on?
Whether the water temperature or ambient
temperature is too high?
Whether there is heat source near the
machine or bad ventilation around the
machine?
Ice cube shape is poor
Whether the water supply is sufficient?
Whether the air filter is blocked?
Whether some spiracles on the spray bar
are blocked?
Important:
The machine should be maintained by authorized
maintenance people.
If a wire is damaged, in order to avoid danger, call
authorized maintenance people to replace it.
Page 15

NUUndercounterIceMakerUserManual TroubleshootingTable
B13
Symptom Possible Cause Suggested Correction
Unit does not
run
Abnormal power supply Check the power supply voltage, if no voltage,
check the power line
Check the power supply voltage, if it is low, contact
the power company
The fuse on the PC board
blew
Replace the fuse. If the fuse is breaks again, check
the cause.
The machine stopped
abnormally (such as high
temperature protection)
Press the MODE key on the PC board to reset, the
machine starts or starts automatically two hours
later or unplug the power plug and plug it again
three minutes later, the machine starts.
Bin full Adjust the position of the ice cubes in the storage
bin to let the ice chute reset and then start the
machine
Abnormal water supply See the processing method for water-shortage
Compressor
cycles
intermittently
Low voltage Check circuit for overloading
Non-condensable gas in
system
Check the power supply voltage, if it is low, contact
the power company
Purge the system and re-charge
Compressor starting device
has loose wires
Check for loose wires in the starting device
Mechanical problem Replace compressor
Cubes too
small
Ice making cycle too short Check the distance between the ice thickness
sensor and the evaporator plate
Expansion valve partially
blocked
Check the expansion valve, if damaged, replace
it
Moisture in the system Purge the system and re-charge
Shortage of water See the processing method for water-shortage
Shortage of refrigerant
Check for leaks in the refrigeration system and
recharge
Cloudy ice
Shortage of water See the processing method for water- shortage
Dirty water supply Use water softener or a water filter
Accumulated impurities Cleaning according to the procedure
Water temperature sensor
failure
Replace the water temperature sensor
Shortage of
water
Water spilling out through ice
chute
Tighten the screws on the clamping plate of the
PVC pipe to reduce the water flow
Water inlet solenoid valve not
opening
Check, if damaged, replace it
Water leak in water tank
Check for the leaking points and repair them.
If necessary, replace it.
Water inlet valve blocked Replace the water inlet valve
Water drain valve leaking Check, if damaged, replace it
Page 16

NUUndercounterIceMakerUserManual TroubleshootingTable
B14
Symptom Possible Cause Suggested Correction
Irregular cube
sizes and some
cloudy cubes
Spray bar blocked Clean the spray bar
Shortage of water
See the processing method for
water-shortage
Machine not level Level the machine as required
Water temperature sensor failure Replace the water temperature sensor
Decreased ice
capacity
Inefficient compressor Replace the compressor
Water valve leak Check, if damaged, replace it
Spray pipe blocked Check, if blocked, clean it.
Non-condensable gas in system Vacuum and re-charge
Bad ventilation Improve ventilation or put the machine
in a good ventilation place
Too much dust on air filter Clean the air filter, if needed, replace it.
Expansion valve partially blocked Check, if damaged, replace it
Defrost valve leaking Change charged volume, release
slowly
Refrigerant over charge
Shortage of refrigerant
Vacuum and re-charge according to the
nameplate
Discharge pressure too high or
too low
Check for the cause of the incorrect
discharge pressure
Defrost valve blocked or not
open
Check, if damaged, replace it
Unit doesn’t defrost
or no ice
PC board failure
Check, if damaged, replace it
Defrost valve not opening Check, if damaged, replace it
Water inlet solenoid valve not
opening
Check, if damaged, replace it
Incorrect discharge
pressure
Inoperative condenser sensor Check, if damaged, replace it
Too much or too little refrigerant,
or non-refrigerant gas was
charged
Check whether the refrigeration system
is leaking
Vacuum and re-charge according to the
nameplate and the requirements from
Scotsman
Inoperative PC board Check, if damaged, replace it
Excessive water at
unit base
Water system leak
Check for leaking points and repair
them. If necessary, replace it.
Page 17

B15
WARRANTY CARD
Brand Model Serial No.
Name Dealer
Address Date of Purchase
Notes:
Please keep this card for warranty protection of your system.
WARRANTY CARD (DUPLICATE)
Brand Model Serial No.
Name Dealer
Address Date of Purchase
Notes:
Please return this card to factory for warranty protection.
Customer Signature:
Page 18

Notes:
Page 19

Page 20

EUROPE, MIDDLE EAST & AFRICA ASIA PACIFIC
Scotsman Ice Systems (Shanghai) Co., Ltd.
Scotsman Ice s.r.l.
Via Lainate 31
20020 Pogliano Milanese (MI) – ITALY
www.scotsman-ice.it - info@scotsman-ice.it
Tel. +39 02 93960350 - Fax +39 02 93540449
Address:
Room 2505, Building 2, No 20 Xuhong Middle Rd,
Shanghai, China. 200235
Phone:0086-21-61313200
Fax:0086-21-61313330
Hotline:0086-4006300076
E-Mail: sales@scotsman-china.com
Website:www.scotsman-china.com
Scotsman Industries Singapore Pte Ltd
140 Paya Lebar Road Singapore 409015
www.scotsman-ice.it
scotsman@scotsman.com.sg
Tel. +65 6738 5393 - Fax +65 6738 1959
 Loading...