

Page 1

Instructions
Kit Number: KDIL-PN-ID3
Kit Purpose: To lower the ice level in an ED300 ice dispenser when a Scotsman
Nugget ice machine is stacked on top of the dispenser.
Kit Contents:
Bin thermostat Baffle/cap tube bracket, grommets & fasteners Wire
KDIL-PN-ID3 11-0353-23 included included
Applications & Other Requirements:
N0422, N0622, N0922 or N1322 onto ED300. Also requires Cornelius adapter and
•
agitator kit.
Installation Sequence:
1. Agitators
2. Diverting plates
3. Adapter
4. Ice separator and thermostat bracket
5. Ice machine
6. Thermostat
17-3301-01
Page 2
Installation: Dispenser
1. Disconnect electrical power
from both the ice machine and
the dispenser.
2. Replace agitators.
3. Install adapter onto ED300
per its instructions.
4. Install triangular separator
into adapter per its instructions.
5. Attach thermostat bracket to separator, using
bolts from the Scotsman kit. Bracket mounts
inside of front separator flange, and it angles
back to the dispenser. Be sure grommets are
installed onto bracket's lower holes.
6. Install left and right diverting plates per
supplied instructions.
7. Place nugget ice machine onto adapter.
Position so that the ice chute is over the drop
zone hole in the adapter.
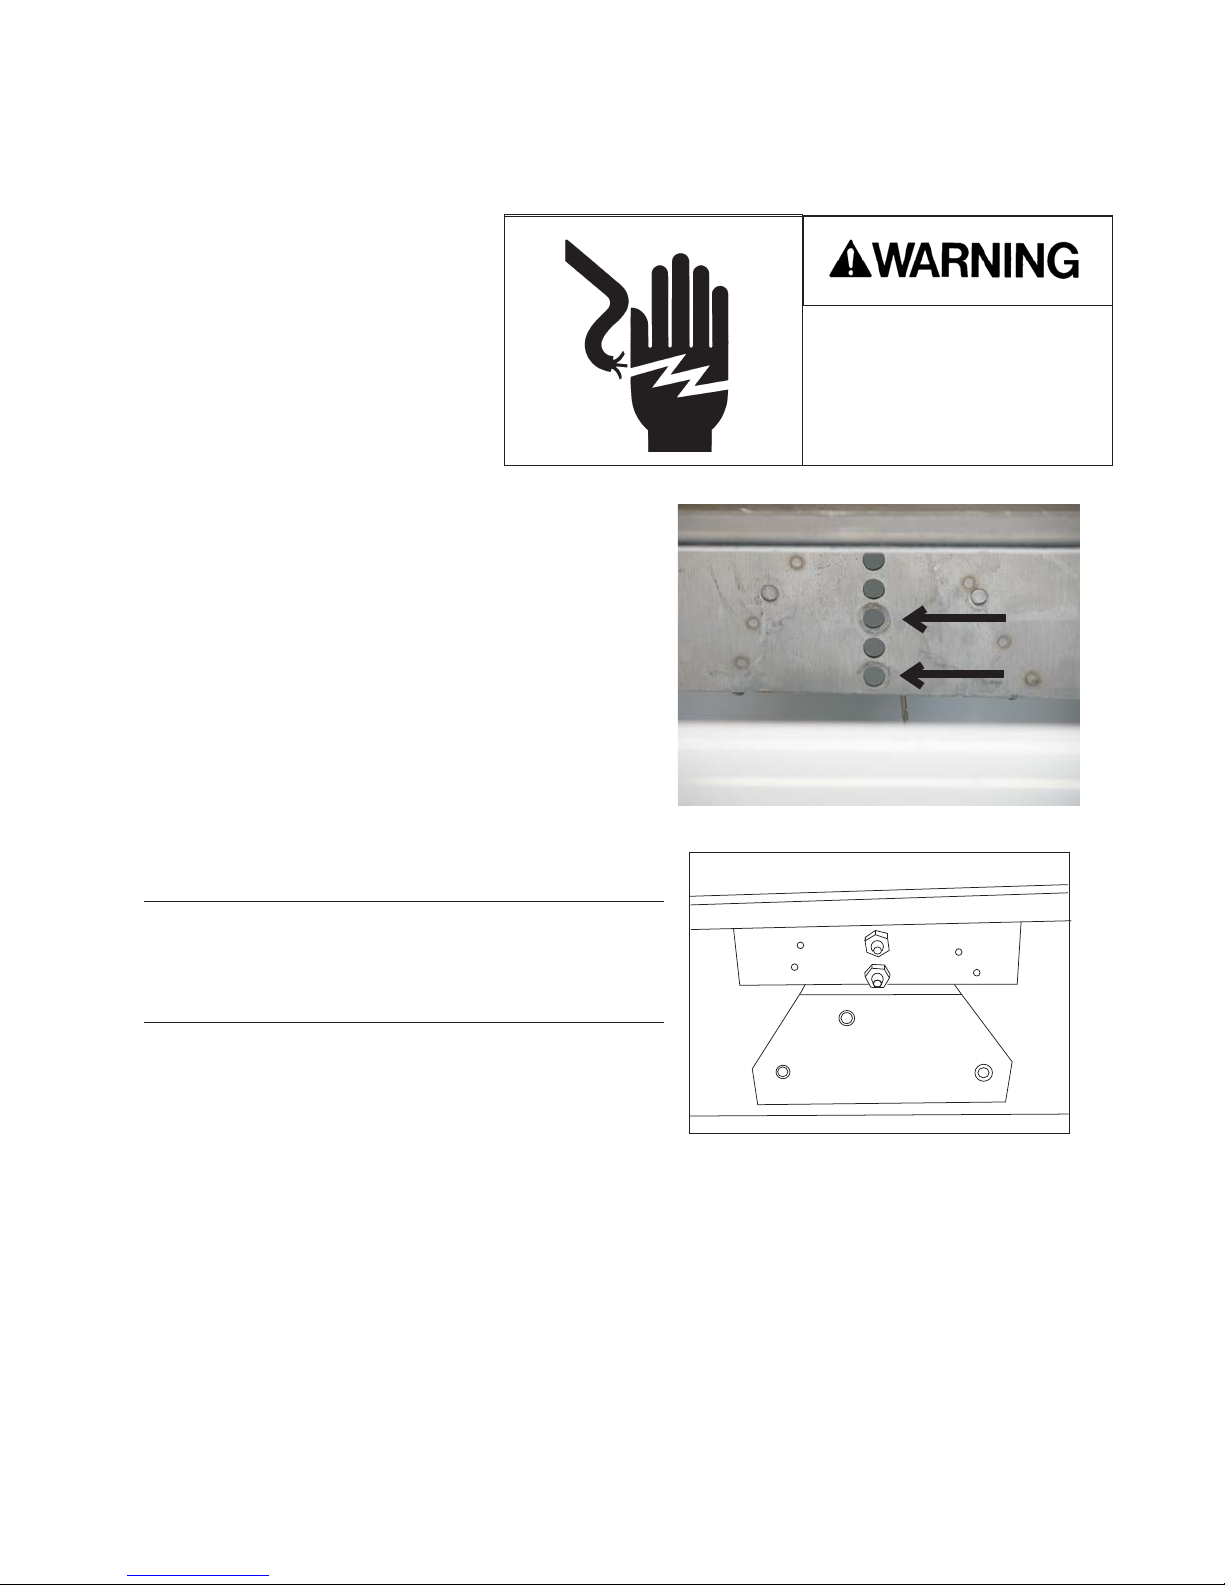
Electrical Shock Hazard
Disconnect electrical
power before beginning
Mount Bracket Here
Note: Machine will have to be moved during
installation of the bin thermostat. Do not seal
to adapter until the bin thermostat
installation is complete.
Ice Machine
8. Remove front panel.
Angle Bracket Back To Ice
9. Push bail clip back and remove chute cover.
10. Remove ice sweep.
11. Lift chute up and out of base.
12. Uncoil the bin thermostat capillary tube.
13. Mount the thermostat the control box support using the pre-punched holes.
Page 3

14. Open the control box door. Locate the blue wires connected together with an
14.5 in
insulted double male quick connect. Disconnect the blue wires at the quick connect.
15. Route the blue wires thru the snap bushing the bottom of the control box and
connect them to the thermostat.
16. Route bin thermostat capillary tube through the space next to the ice chute.
Thermostat Bracket
17. Route thermostat cap tube thru the hole in the top of the separator and down into
the dispenser. Pull all of it thru. See Figure A on next page.
18. Thread the cap tube thru the holes in the bracket as shown in Figure B on the next
page. A horizontal loop of cap tube will be on the ice side of the bracket.
19. Position the ice machine 14.5" from the right edge of the adapter. This will allow the
ice to fall into the dispenser equally to the left and right.
ED300
Adapter
20. Seal the ice machine to the adapter.
Dispenser:
21. Set the agitation for 2 seconds on, 3 hours off.
Reconnect electrical power.
Ice Machine
Return all panels and covers to their normal positions and secure with the original
screws.
Page 4

Figure A: Route Cap Tube Thru Hole In Separator
Thermostat
Cap Tube
Mounting
Bracket
Figure B: Route Cap Tube in Thermostat Bracket
 Loading...