

Meridian Ice Maker-Dispensers
Technical Service
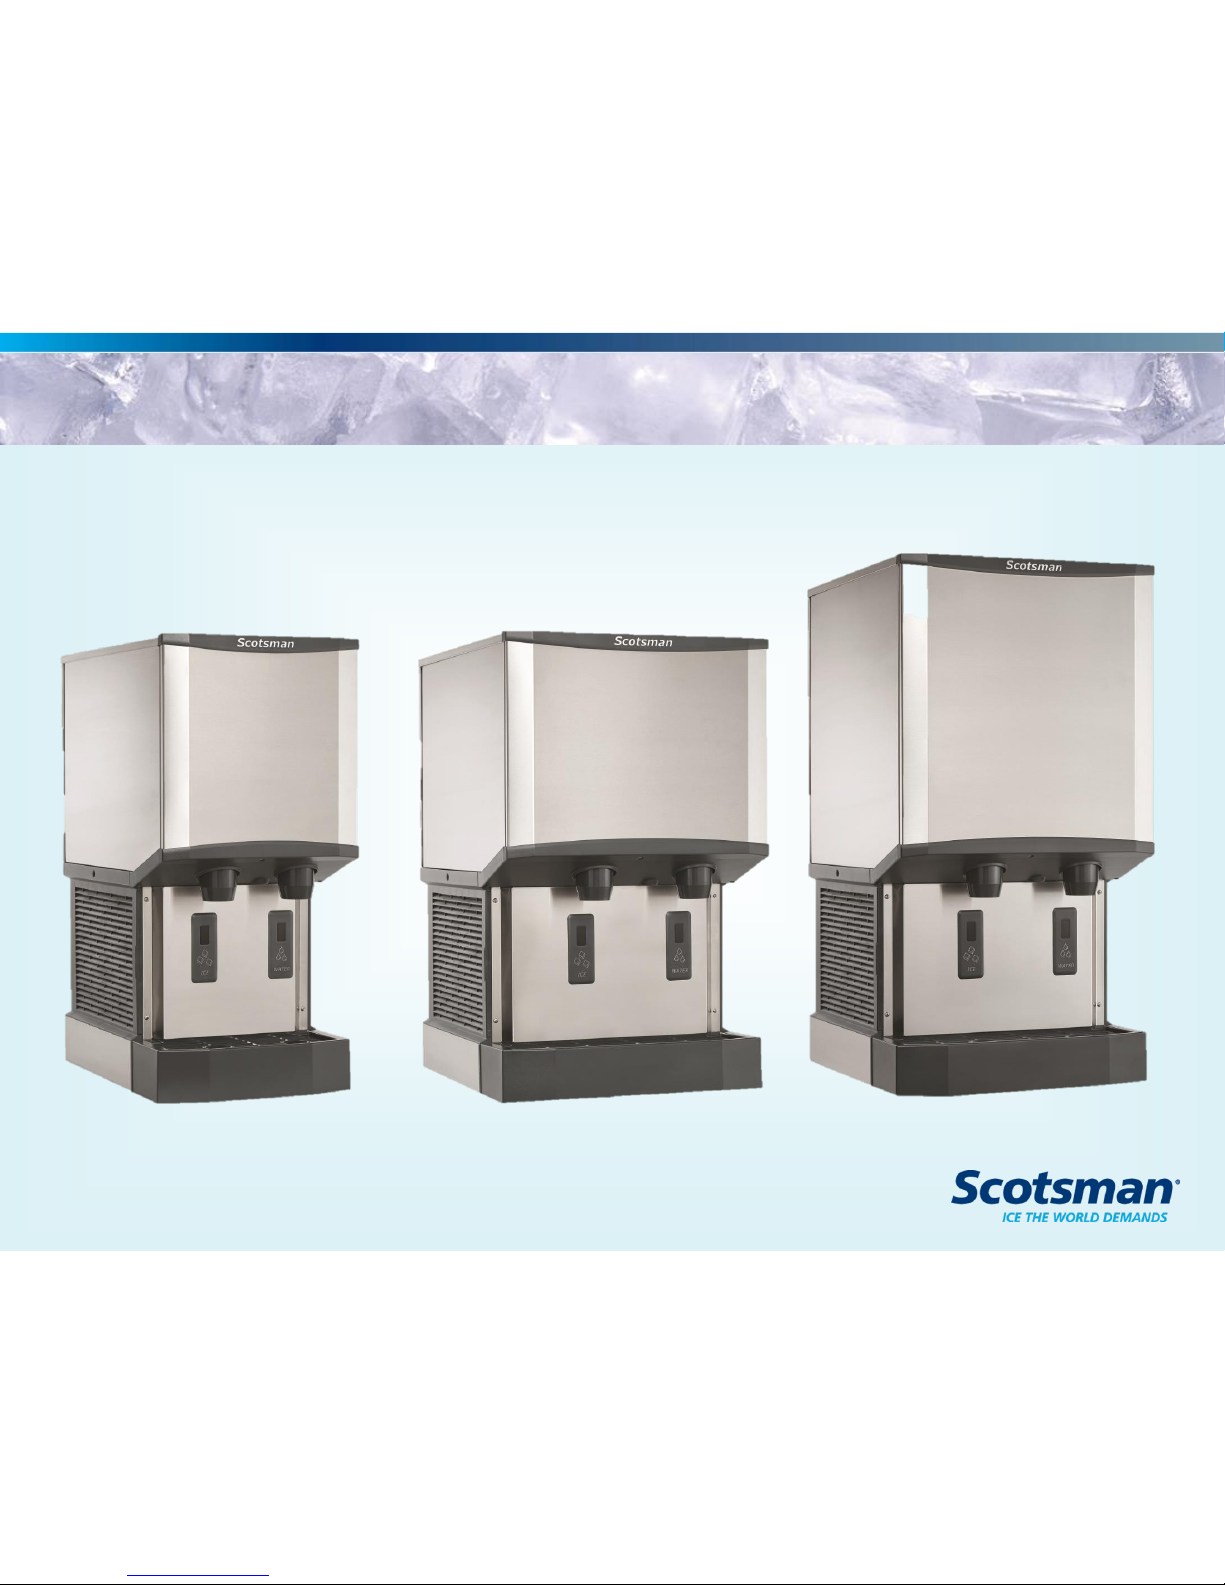
HID312, HID525 and HID540

What you will learn
• Introduction
• Installation
• Operation
• Maintenance
• Take It Apart
• Diagnostics

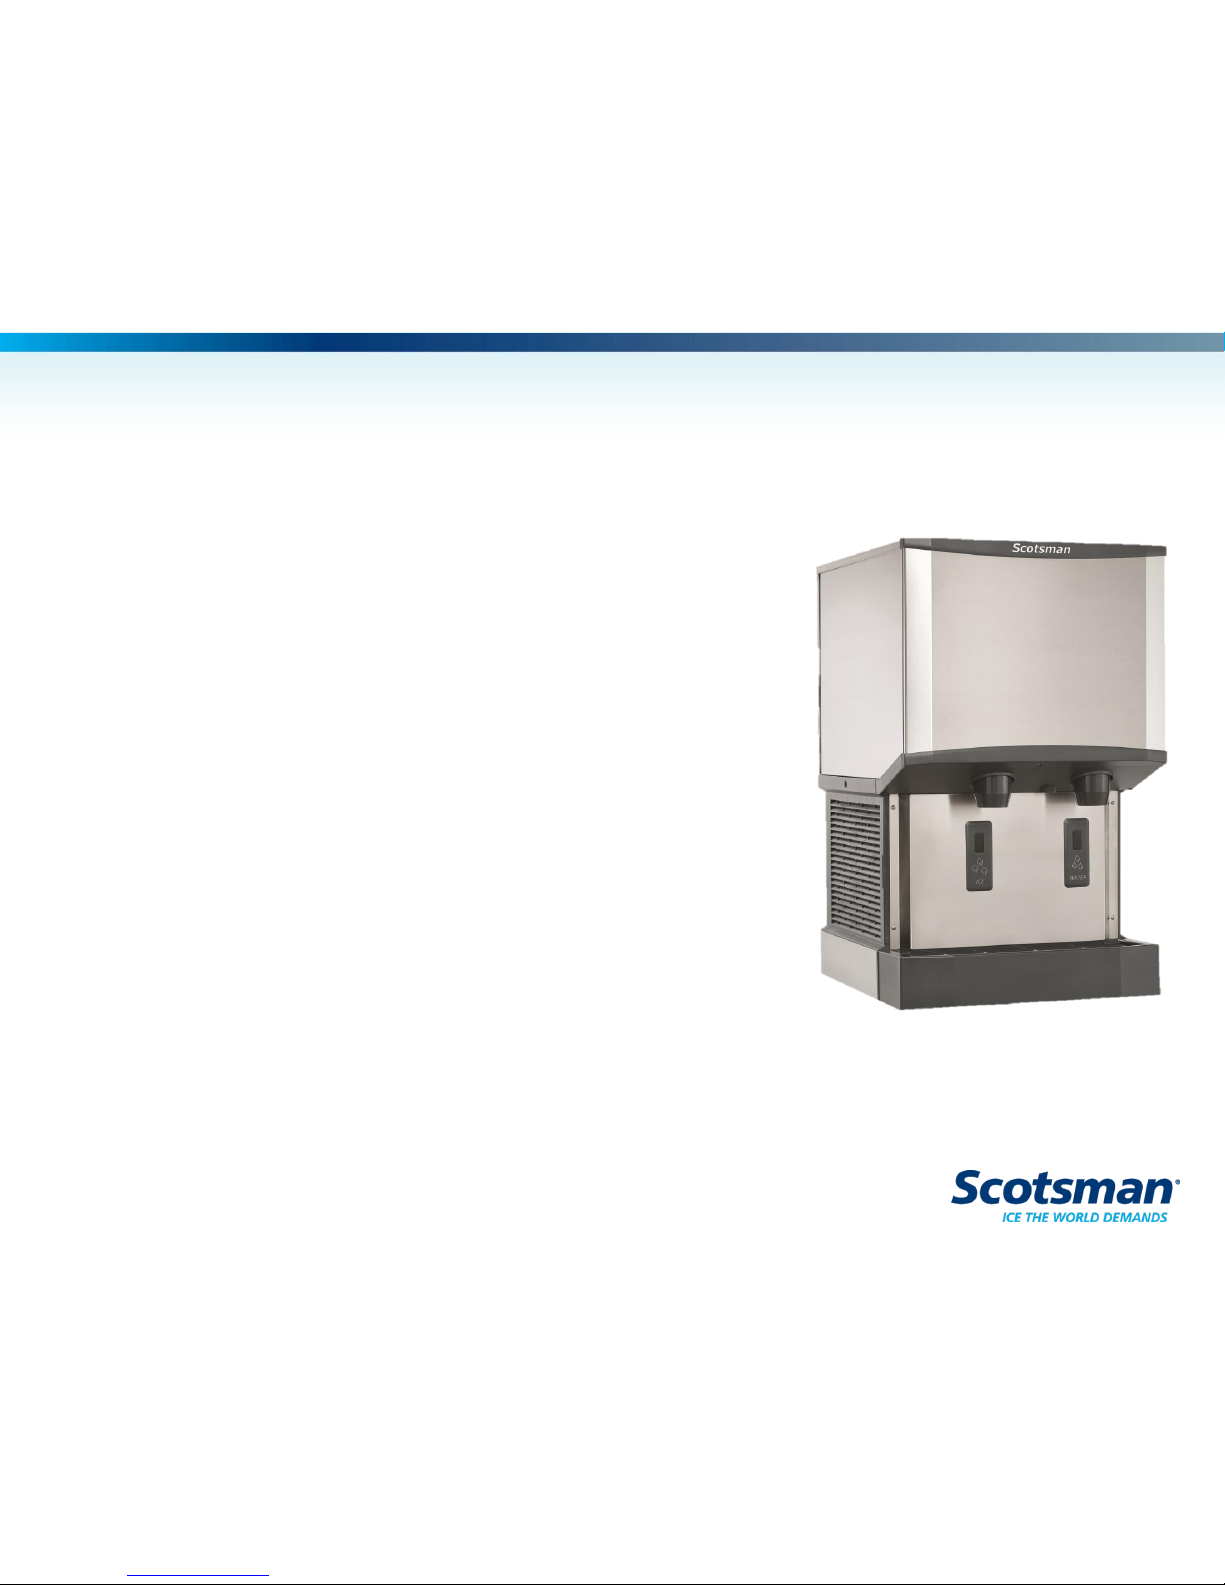
HID Ice Maker-Dispensers
• HID models replace MDT models
• 2 widths, 16 and 21 inches
– 21 inch models have 2 heights, 35 and 41 inches
• Bin storage 12, 25 and 40
• Touch Free dispensing
• Cord connected – 15 amp
• New ice form
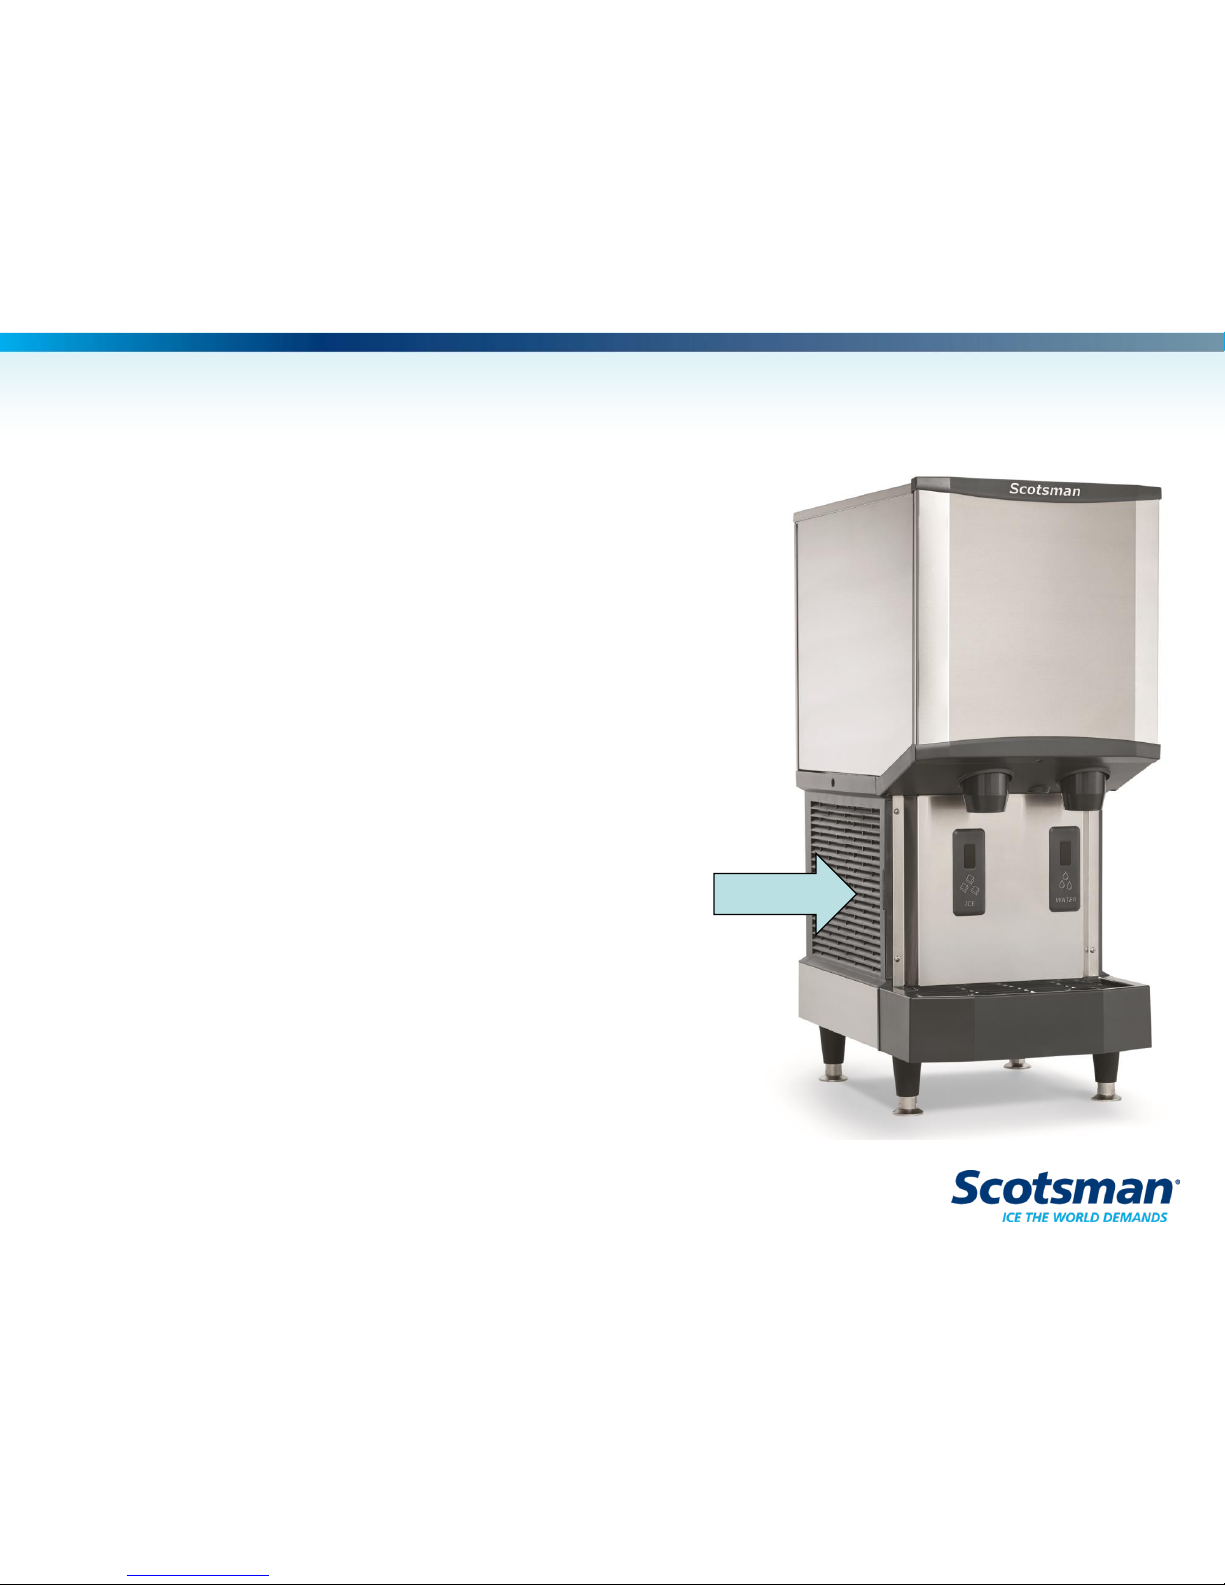
HID312
• 16 wide, 35 high
• 12 lb storage
• Air cooled only
– Washable air filter standard
– Air flow left to right
• Legs optional
• Wall mount version
– No drip tray
– Long splash panel
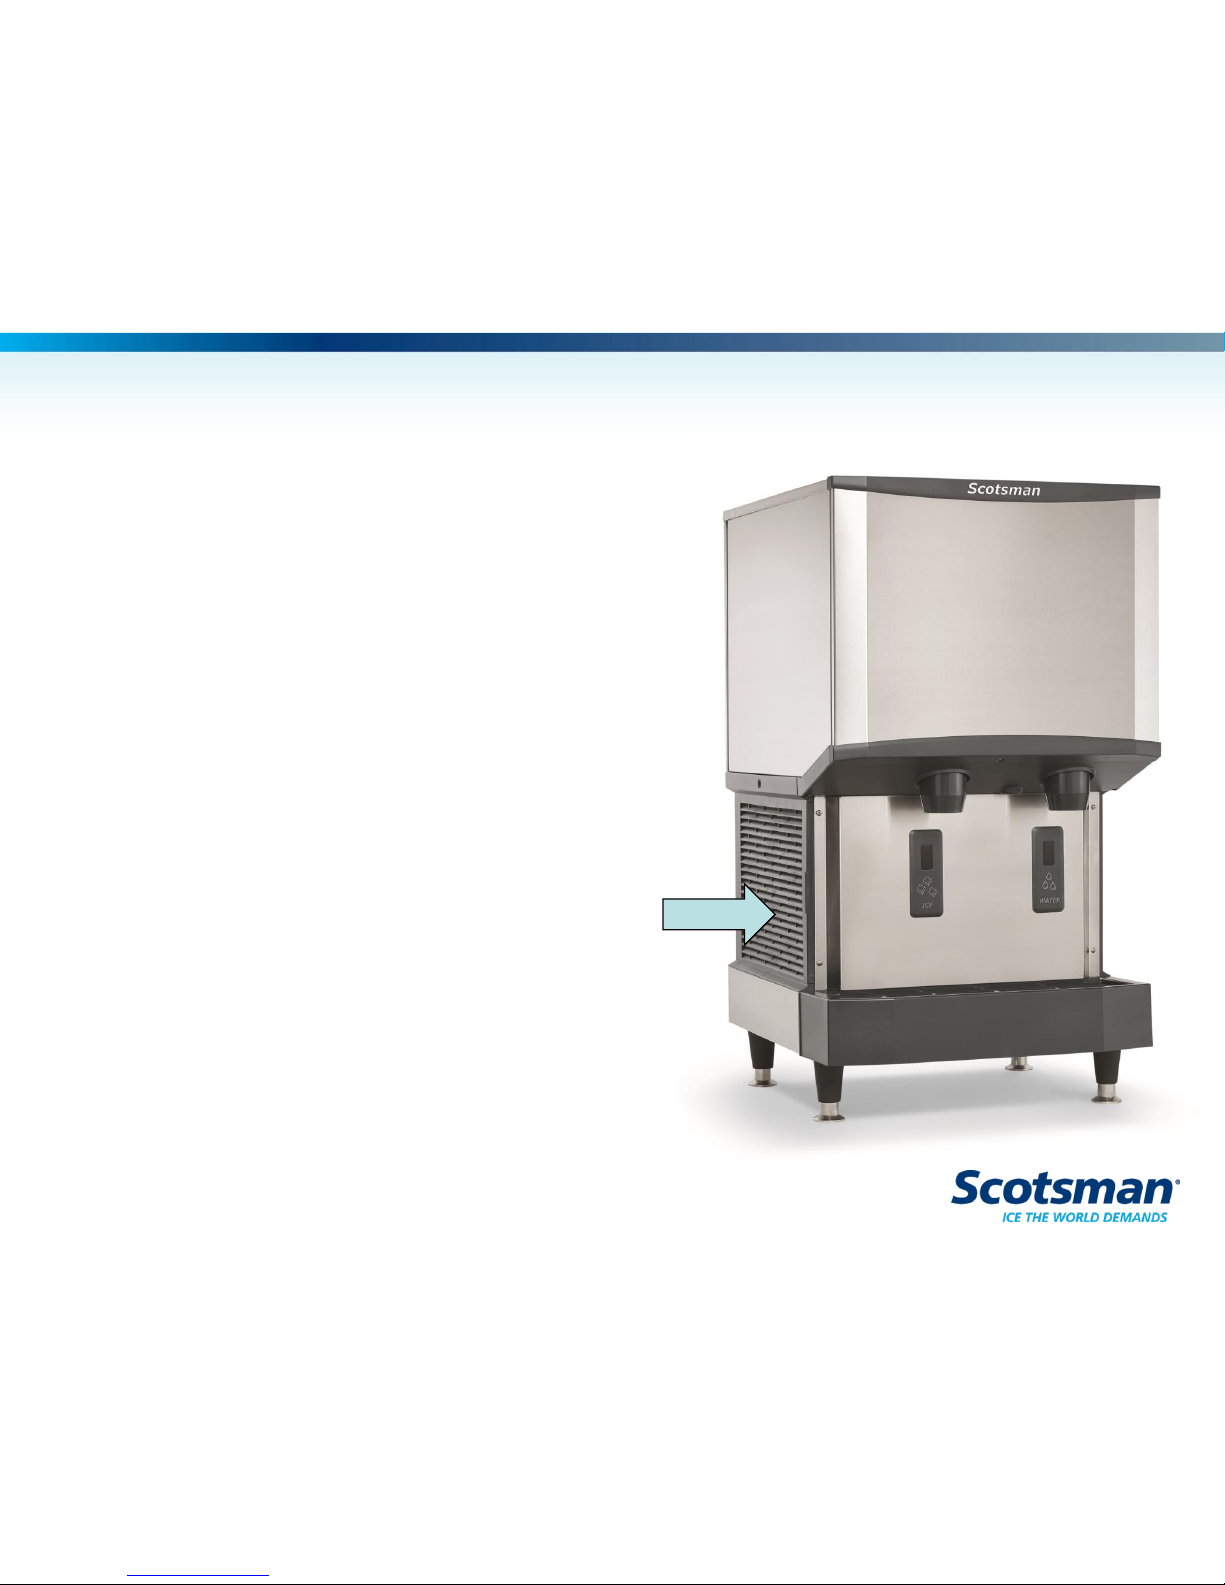
HID525
• 21 wide x 35 high
• 25 lb storage
• Air or Water Cooled
– Air flow left to right
– Washable air filter standard
• Legs optional
• Wall mount version
– No drip tray
– Long splash panel
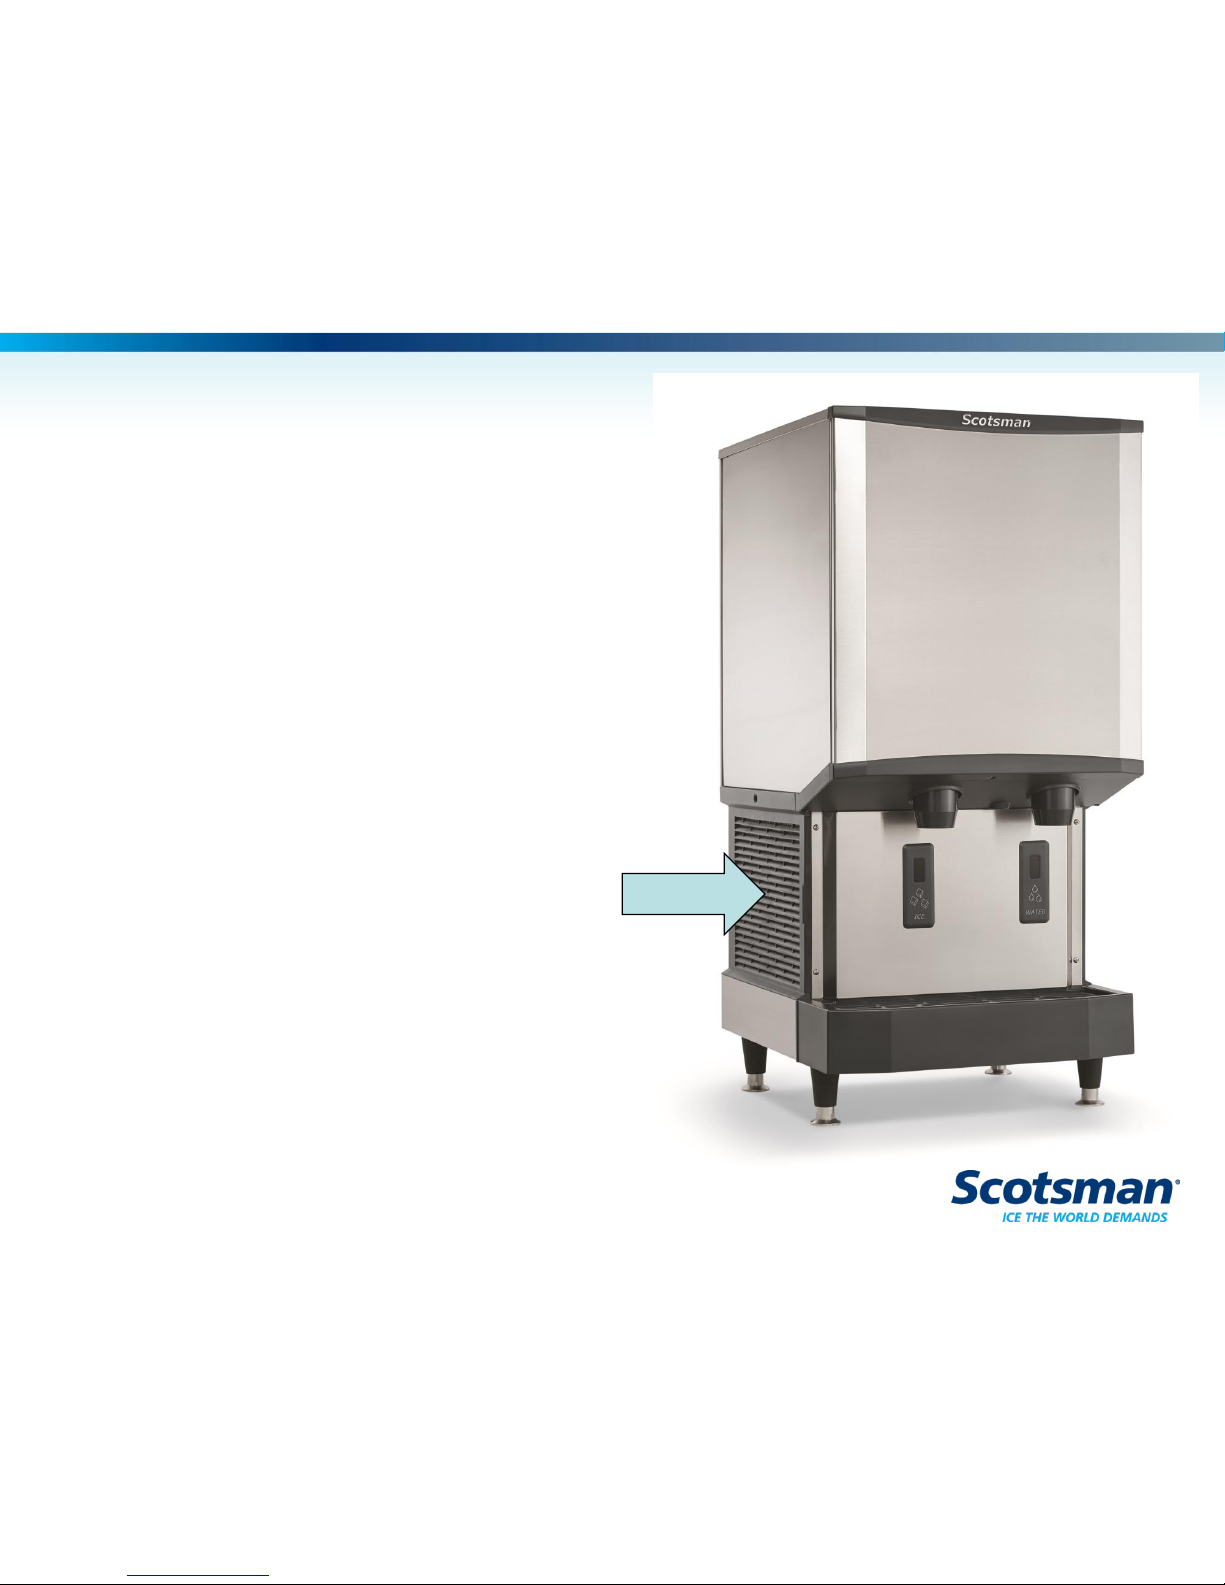
HID540
• 21 wide by 41 high
• 40 lb storage
• Air or Water Cooled
– Washable air filter standard
– Air flow left to right
• Legs optional
• Wall mount version
– No drip tray
– Long splash panel

Common Parts to Models – Excluding Voltage
• Same:
– Gear reducer
– Auger
– Evaporator
– Breaker
– Bearings
– Water seal
– Controller
– Sensors
• Same
– Compressor
• HID525 and
HID540
– Dispense drive
motor
– Construction
• Chutes
• Many panels
– Operation
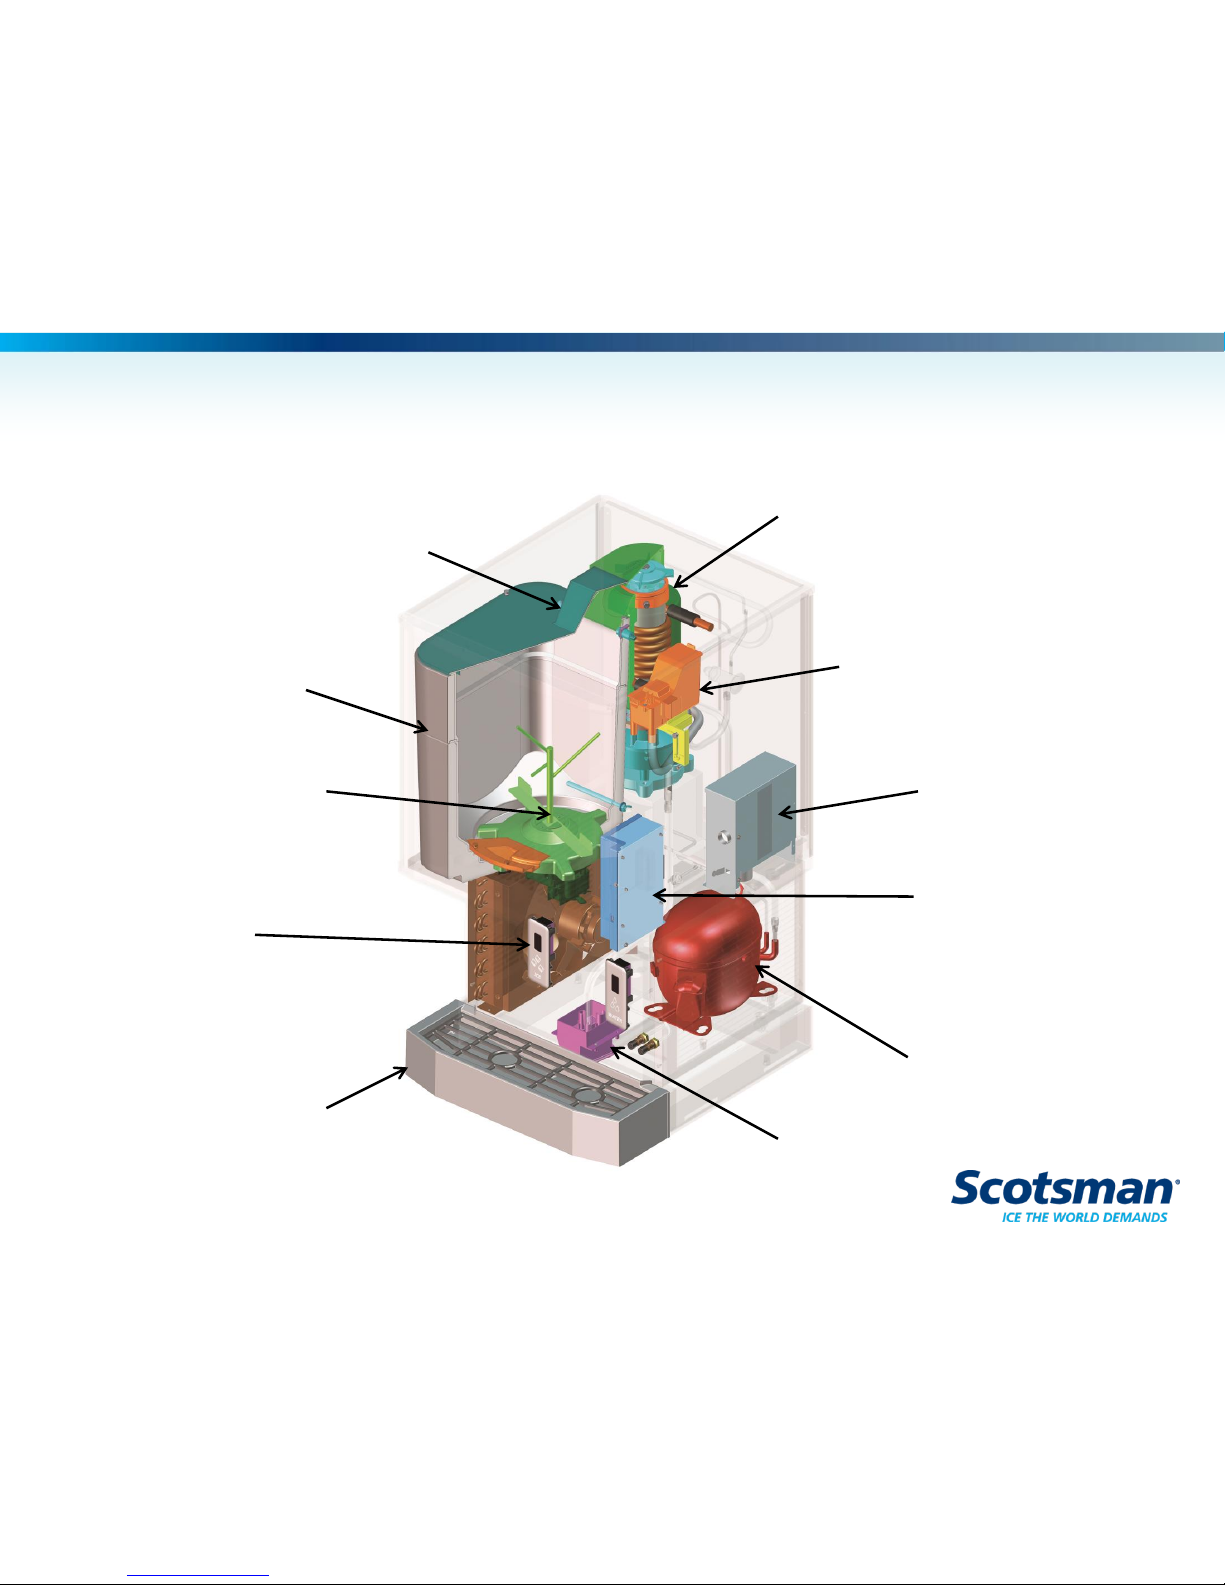
Component Location
Ice Making Apparatus
Control Box
Compressor
Drain Basin
Drip Tray
Dispense
Sensor
Agitator
Ice Storage Bin
Photo Eye Bin Control
Controller
Water Reservoir

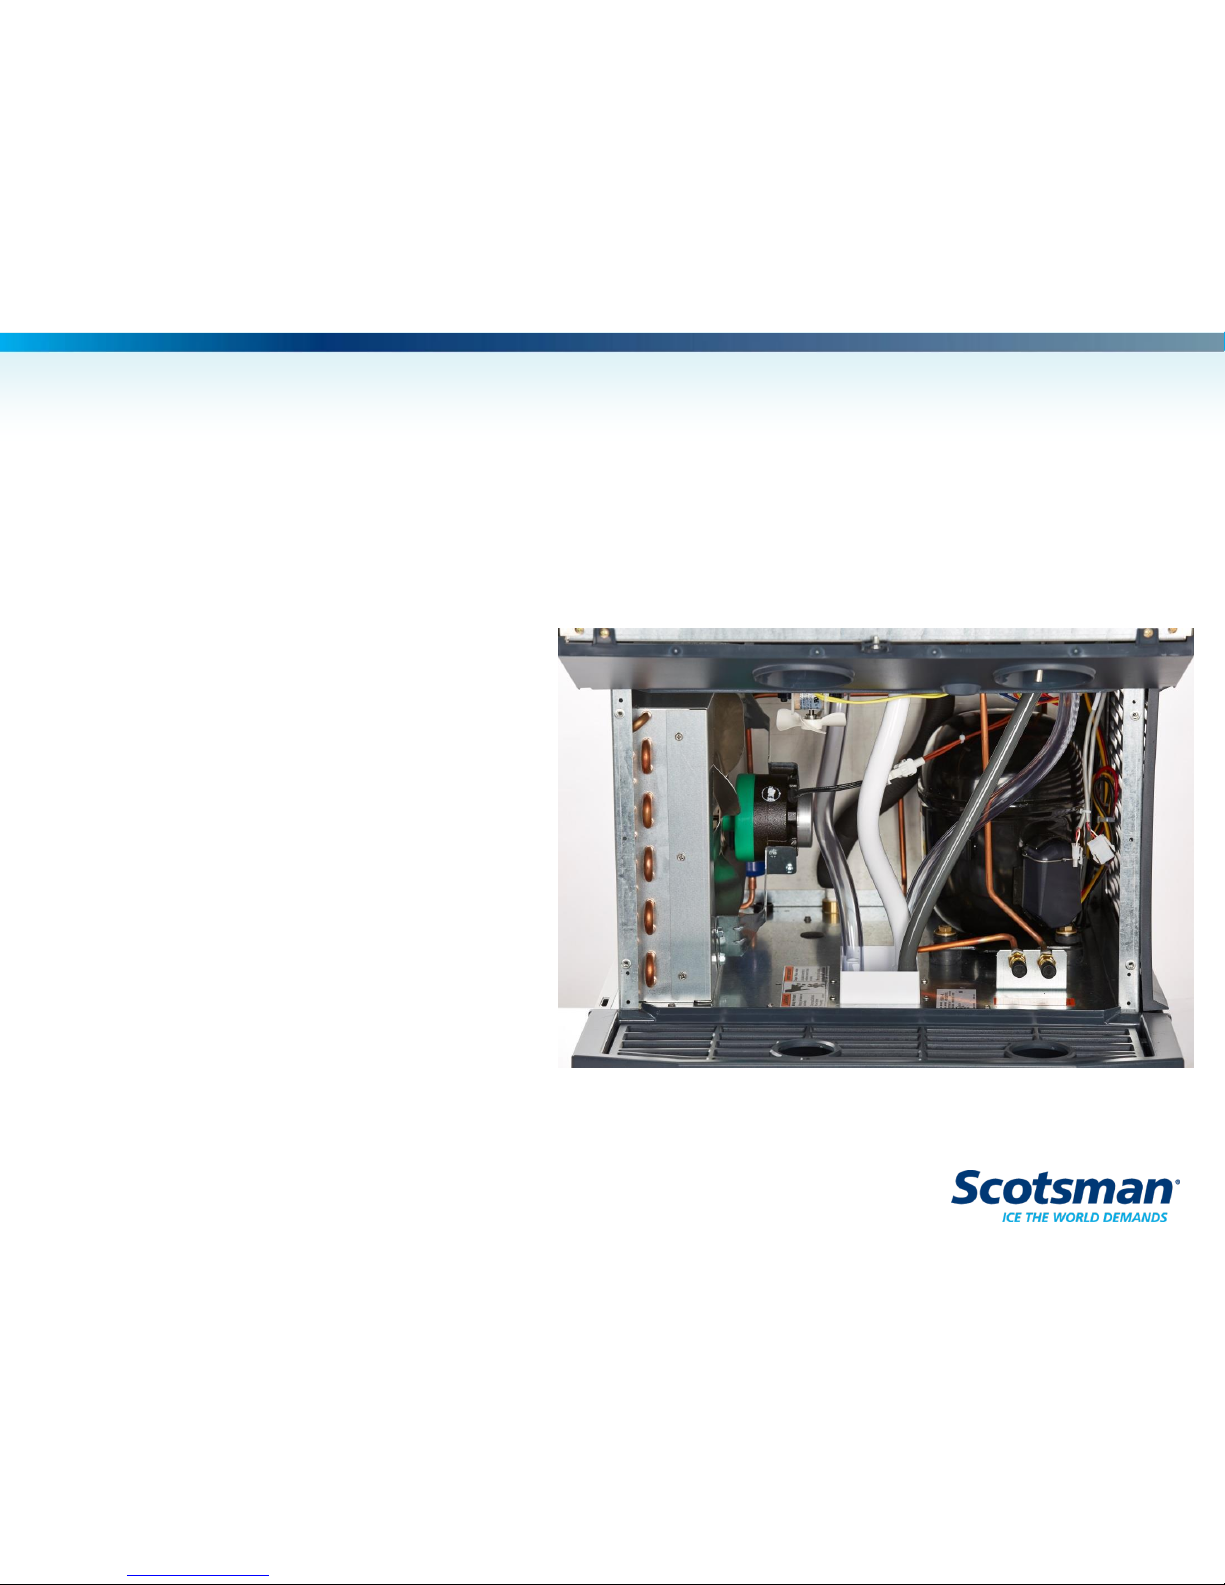
Installation - Utilities
• Recessed area
– Power cord
• 5-15P plug
– Water fitting
• 3/8 male flare
– Elbow included
• Remember to
flush the line!
– Drain fitting
• ¾ FPT
• Vent horizontal
runs
Drain
Water
Power
90o Flare elbow
ships with unit

Water Filtration and Treatment
• Water conductivity limit: 10 microSiemens/cm
• Taste and Odor Filters
– Use if water has objectionable taste
– This type contains activated carbon
– T & O Filters remove chlorine
• Chlorine frequently added by water treatment plant to kill
bacteria
• Risk of increased bacteria growth by using a
Taste and Odor filter
– Other types available
Installation
• No parts to assemble
• Place on counter
– Do NOT lift on drip tray
– Rubber bumpers on bottom
– Seal cabinet to counter
– Or use legs
• Place on stand
– Bolt to stand
– Seal cabinet to stand
Pre – Start Check
• Remove front panel
• Remove splash
panel, check for:
– All hoses in place
– Drip tray on all the
way
– Tubes chaffing
– Loose parts
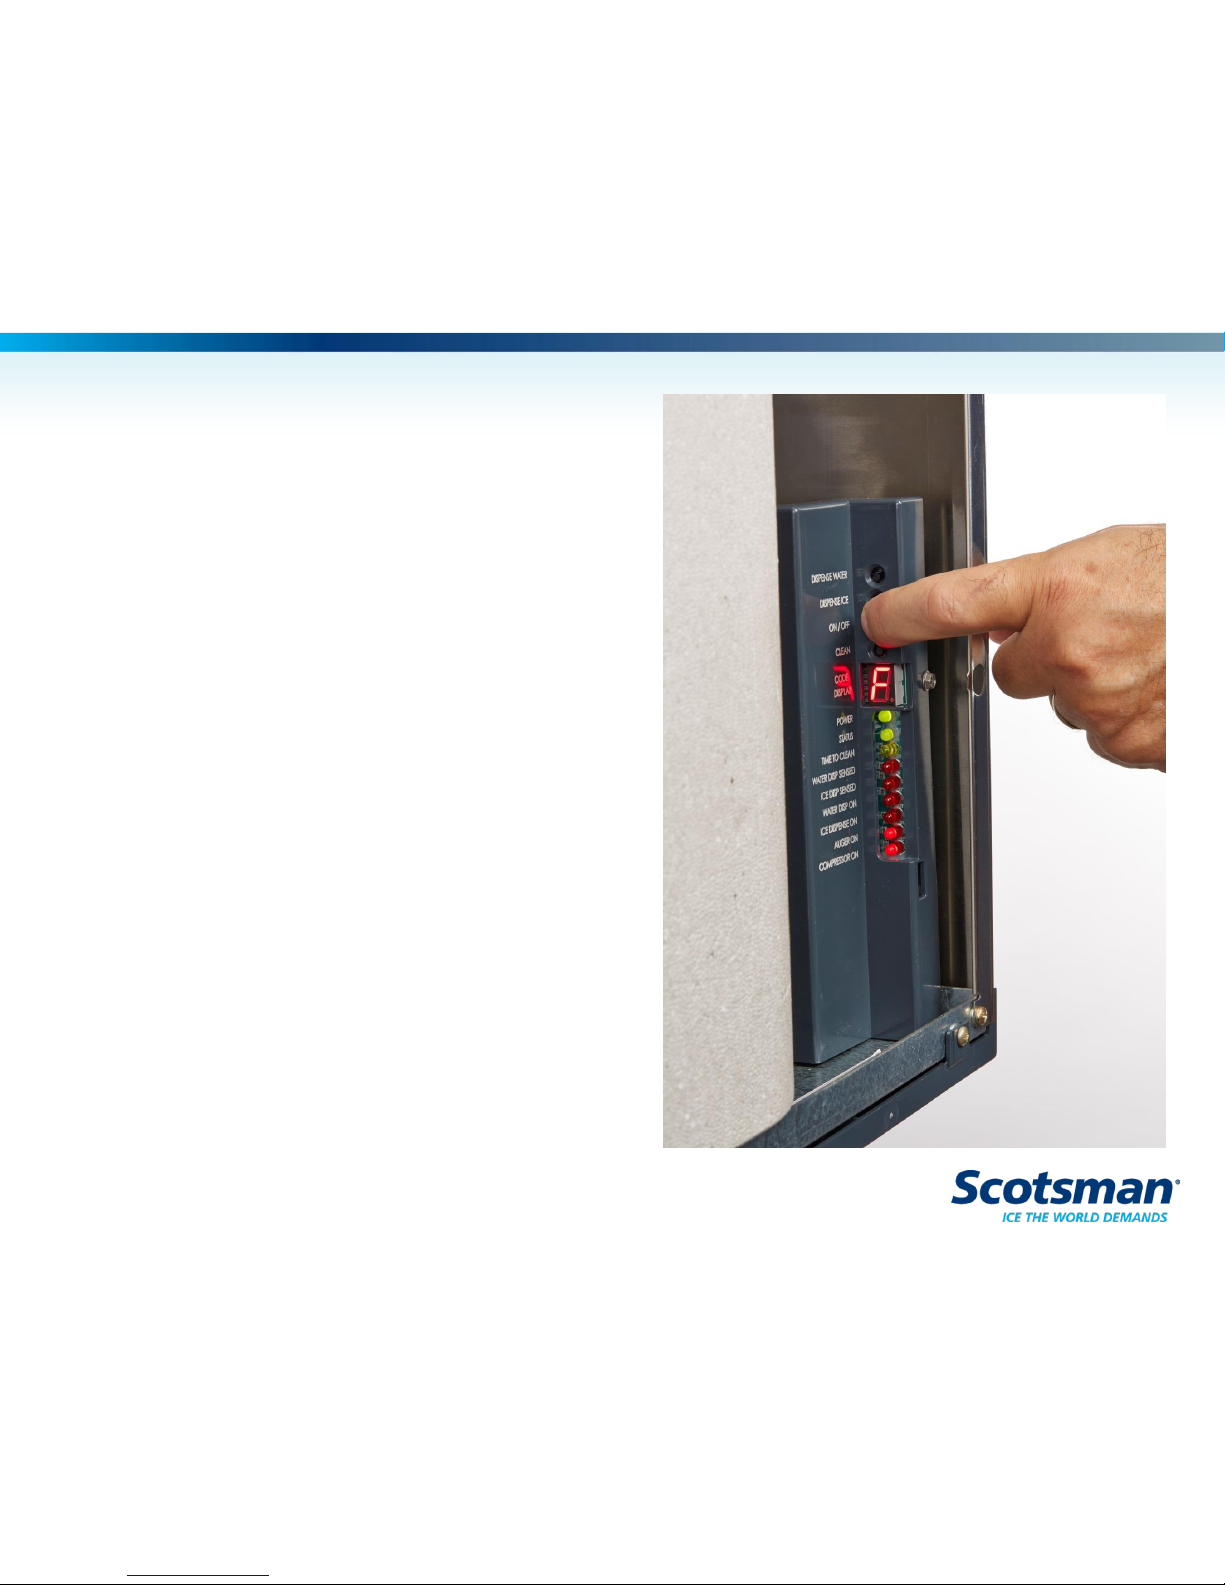
Installation – Start Up
• Turn on water supply
– Confirm no leaks
• Connect power
• Push On-Off button
– F displayed
– Auger motor starts
• Auger light on
– Compressor starts
• Compressor light on

Start Up
• Check dispensing of ice and water
• Check bin control for shut off
– Remove bin cover, block eyes in chute
• Pour water in drip tray, check draining
• Return front panel to unit
• Return splash panel to unit
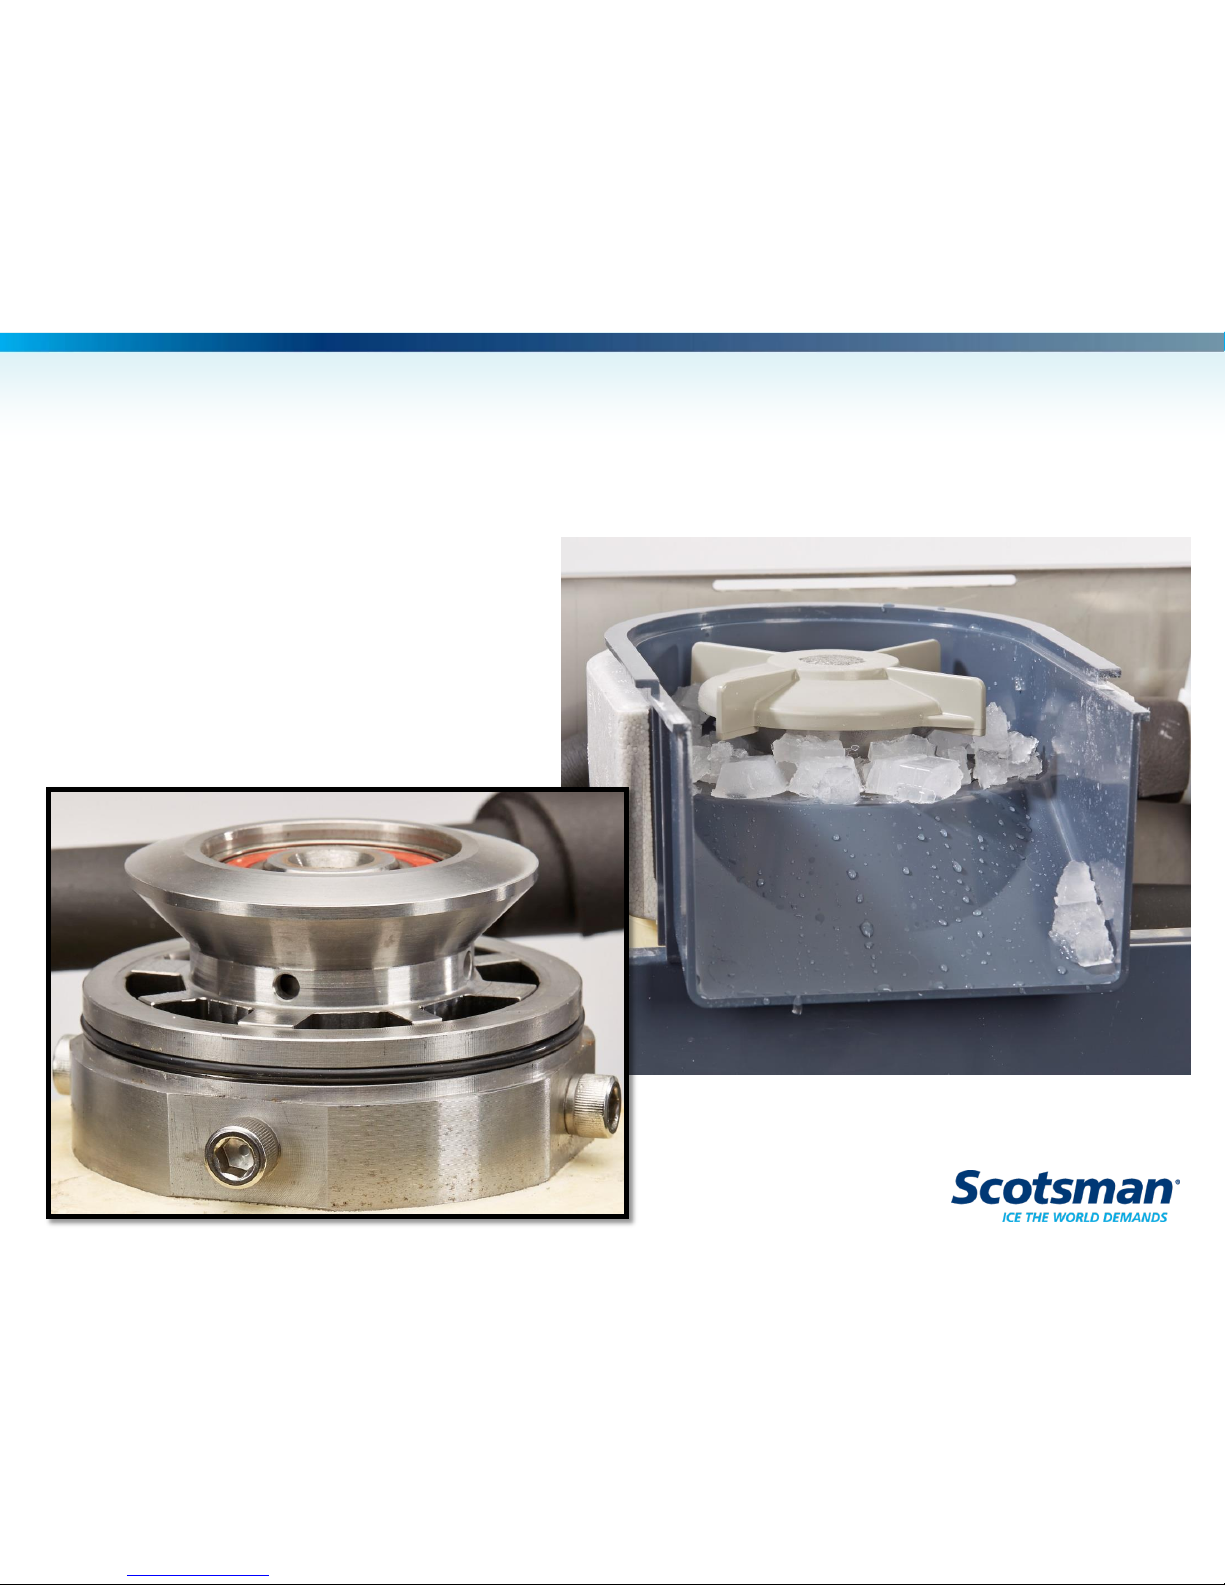
Ice Form
• Extruded ice
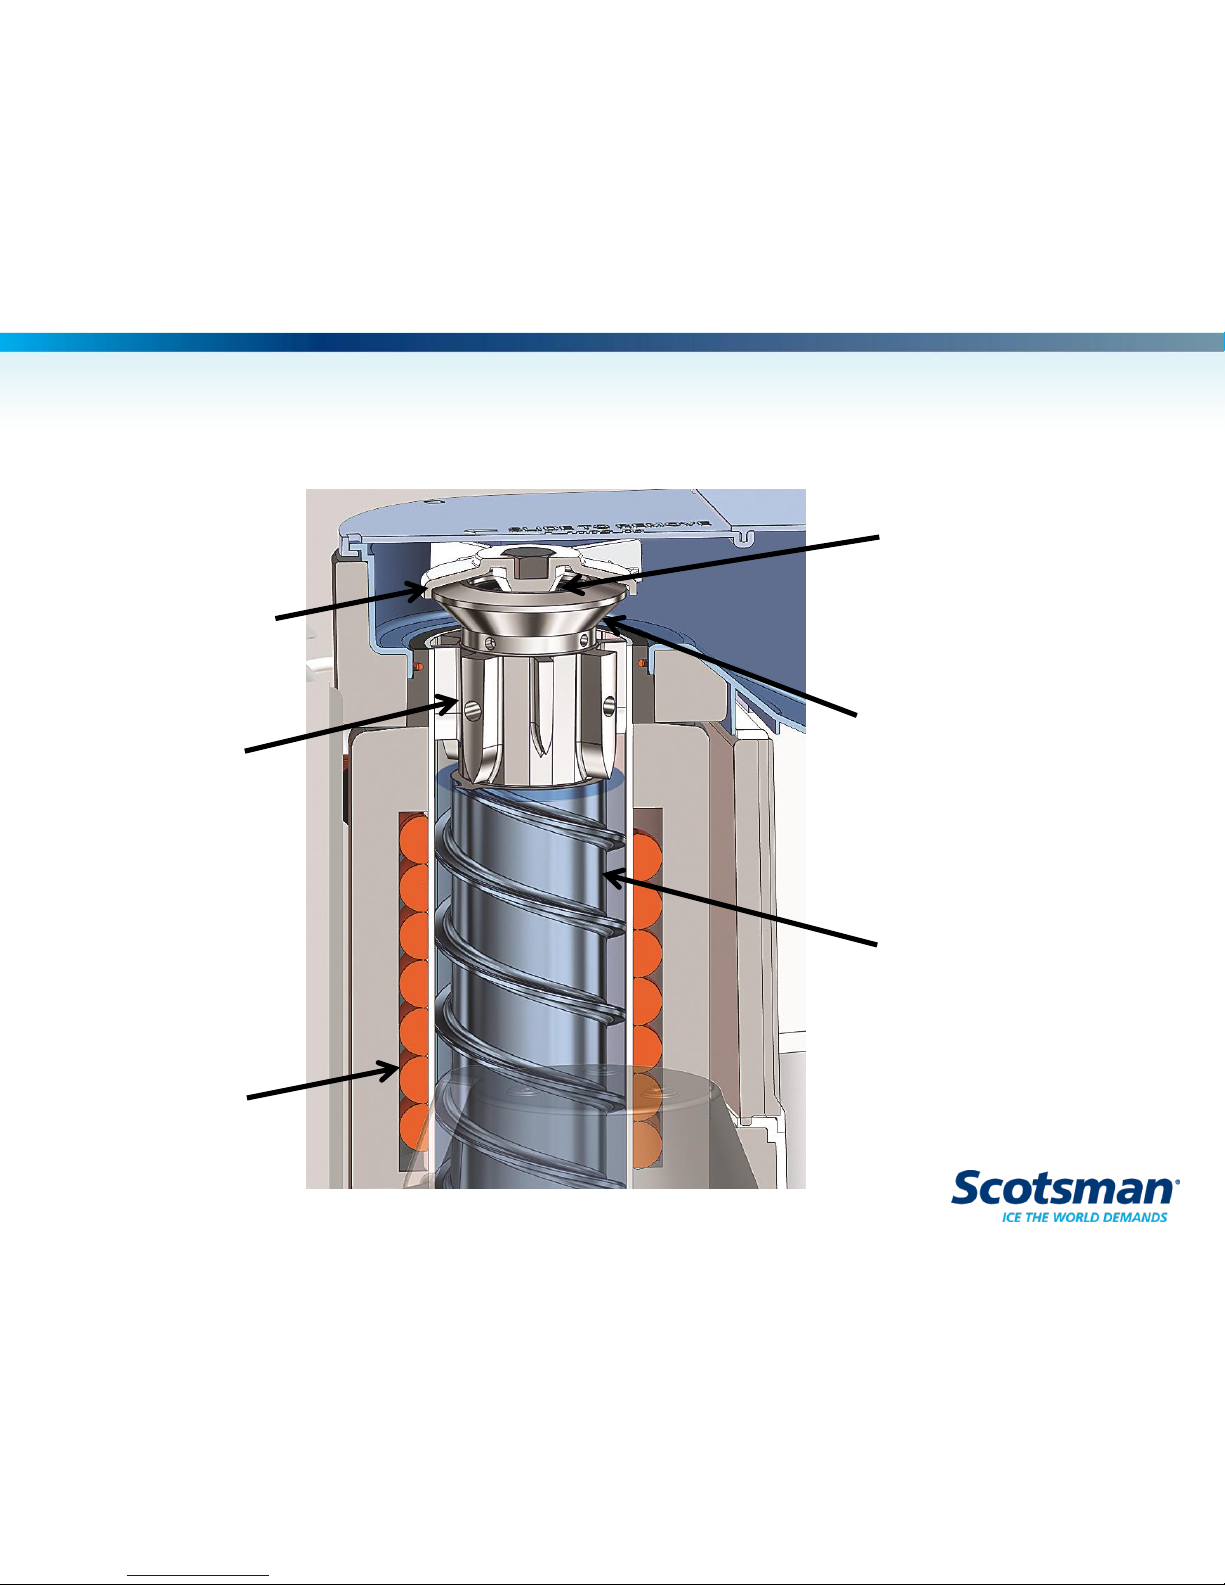
Ice Making Type: Continuous Flow
Ice Sweep
Extruding
Slots
Evaporator
Top Bearing
Ice Breaker
Auger
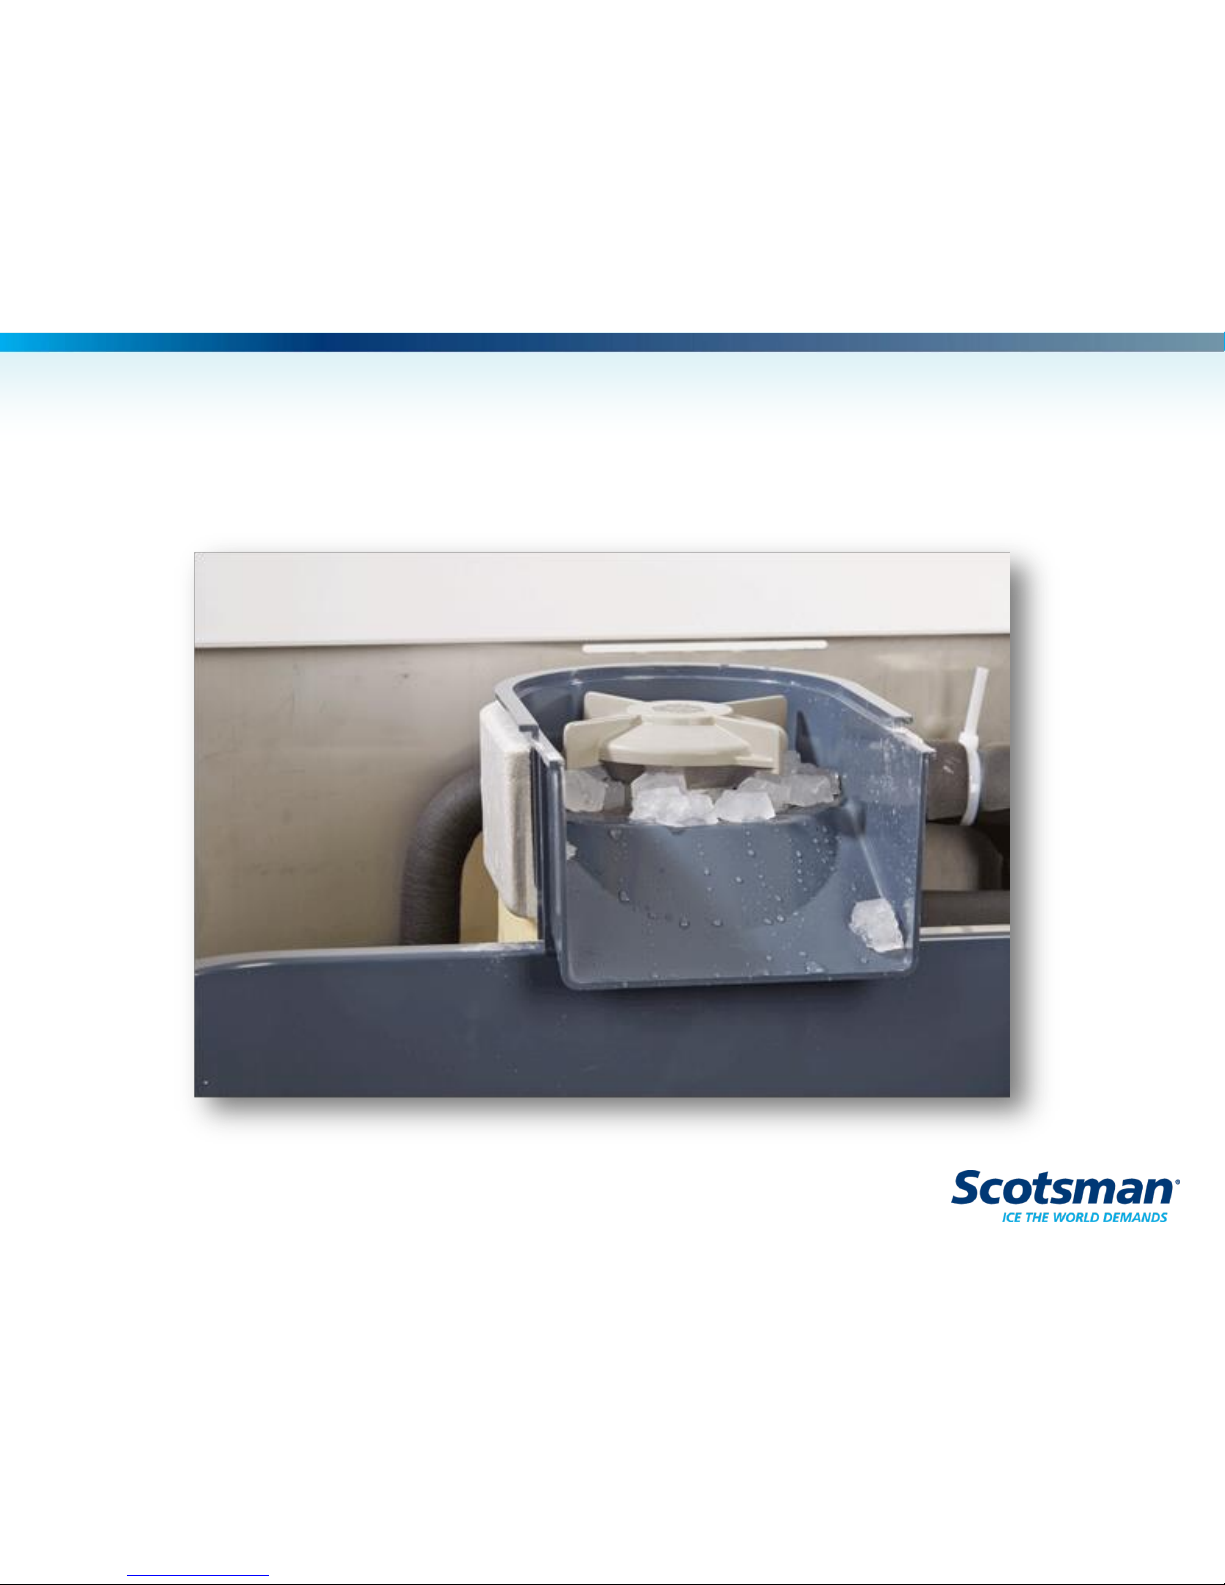
Ice Making
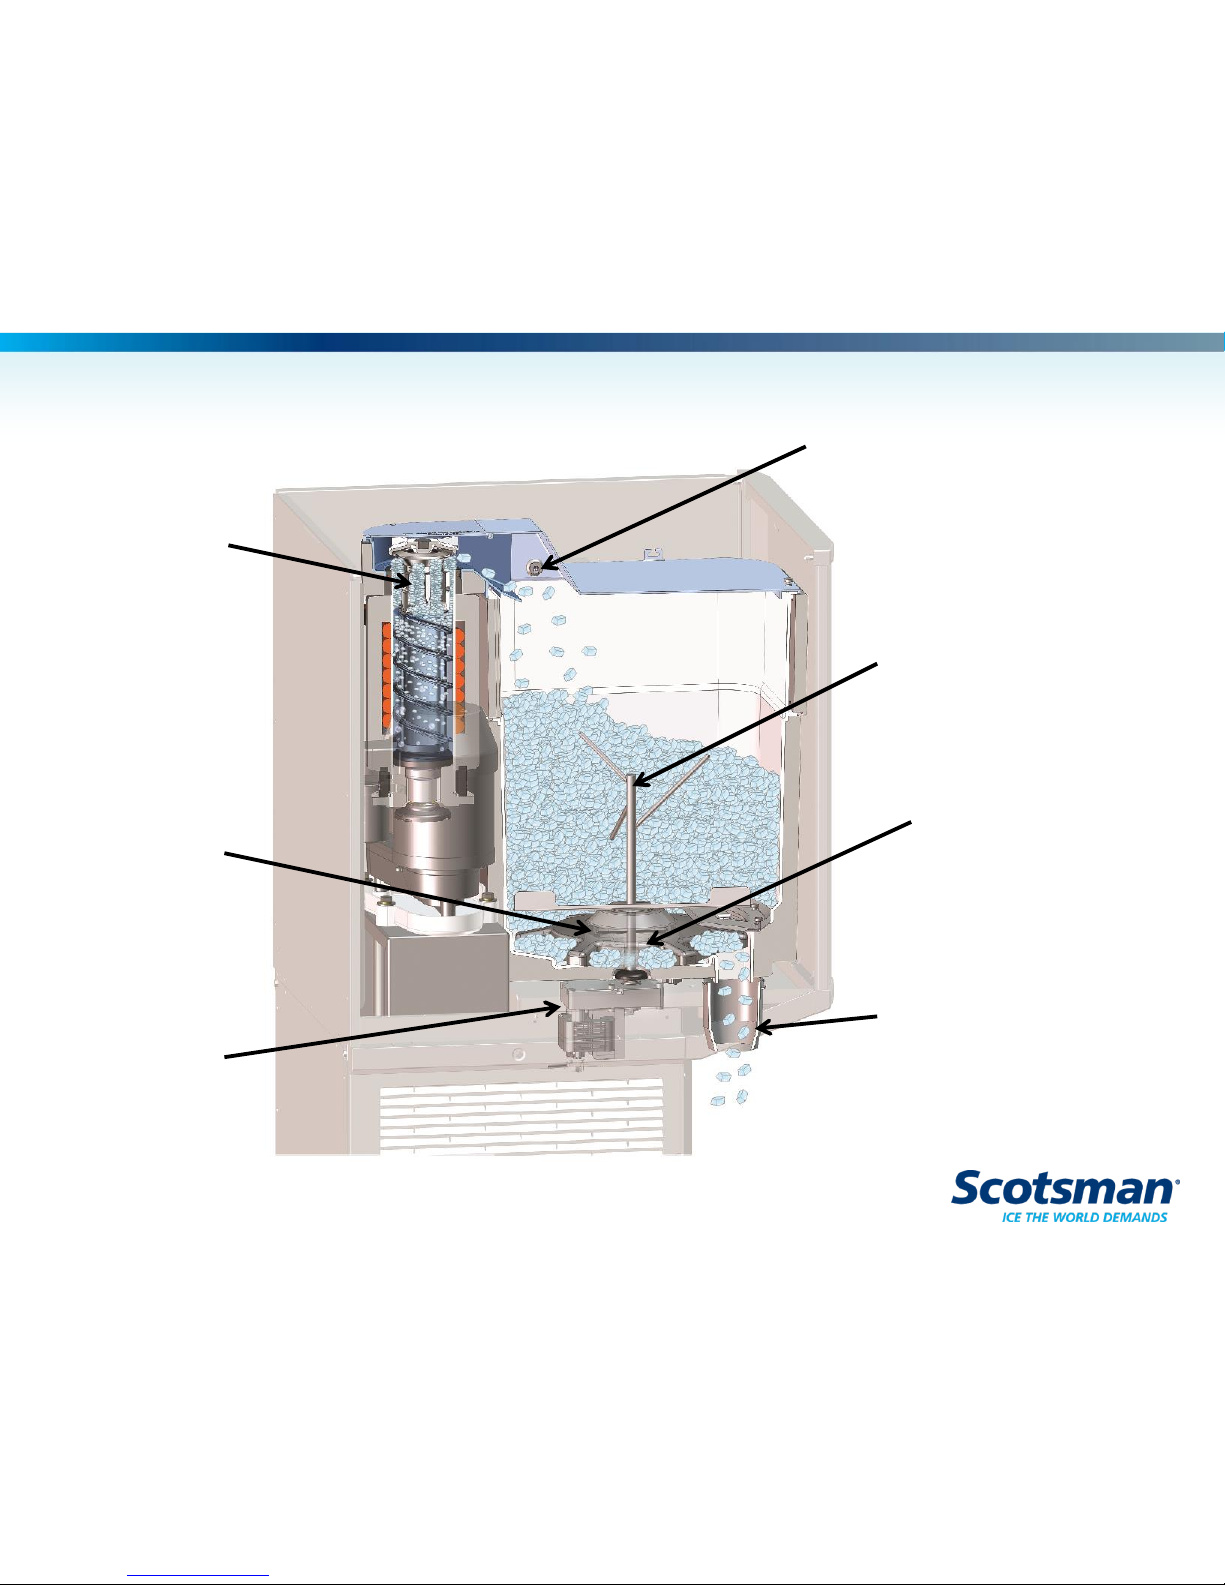
Ice Vending
Photo Eye Sensor
Dispense Agitator
Drive Pin
Dispense Chute
Extruded Ice
Dispense
Rotor
Dispense
Drive
Motor
Operation – 115 volt models @ 70/50
HID312
- R-134a (PSIG)
HID525
or 540 - R-404A (PSIG)
Suction
Discharge
Suction
Discharge
6
- 8
102
-105
30
-32
235
-250
Compressor
Amps
Gear Reducer
Amps
HID312
4.1
– 4.3
1.1
– 1.3
HID525
or 540
5.5
– 5.9
1.1
– 1.5

Maintenance
• Flush out drain
• Drip tray removal and cleaning
• Air filter cleaning
• Water system cleaning and sanitizing
• Dispense system cleaning and sanitizing

Clean out and flush drain
• Remove visible debris
– Coffee grounds
– Stir sticks
• Pour hot water into drip tray to flush out drain
– Suggest weekly flush if beverages are commonly
dumped in it
– Can remove drip tray if drain is slow or plugged
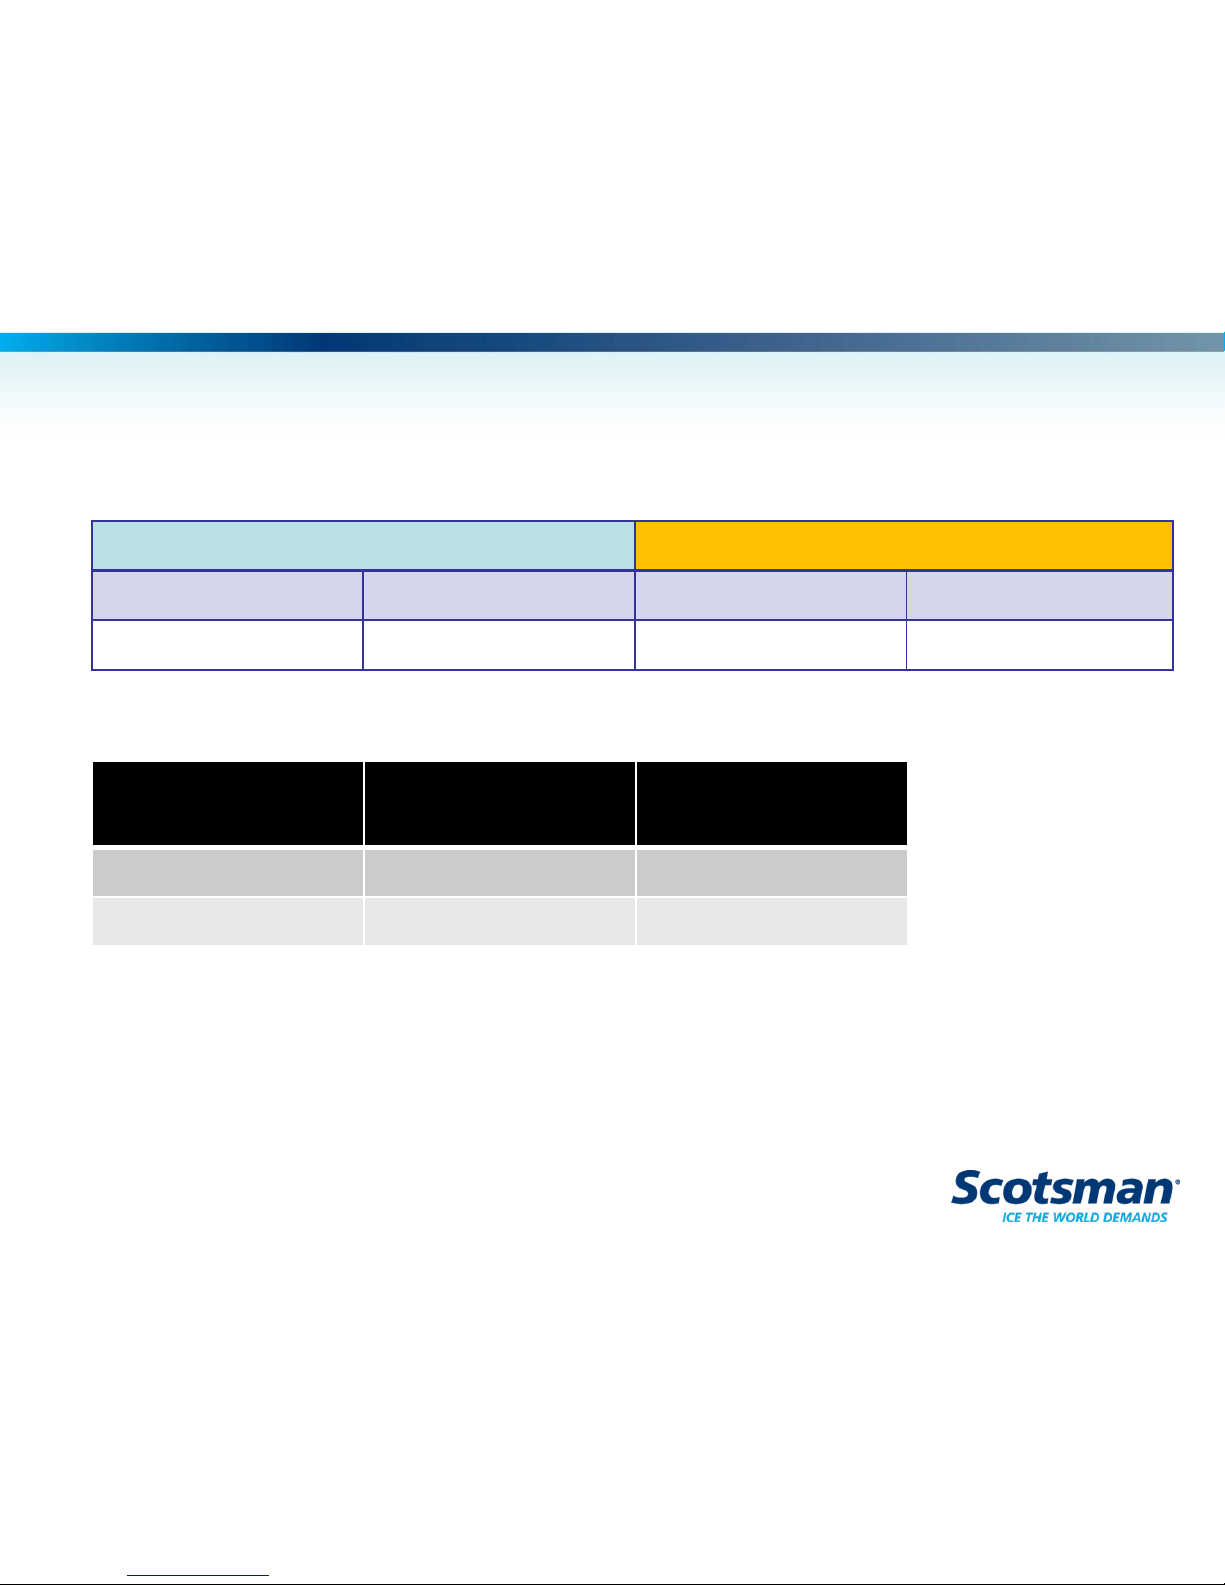
Drip Tray
• Remove splash panel
• Pull drip tray out to remove
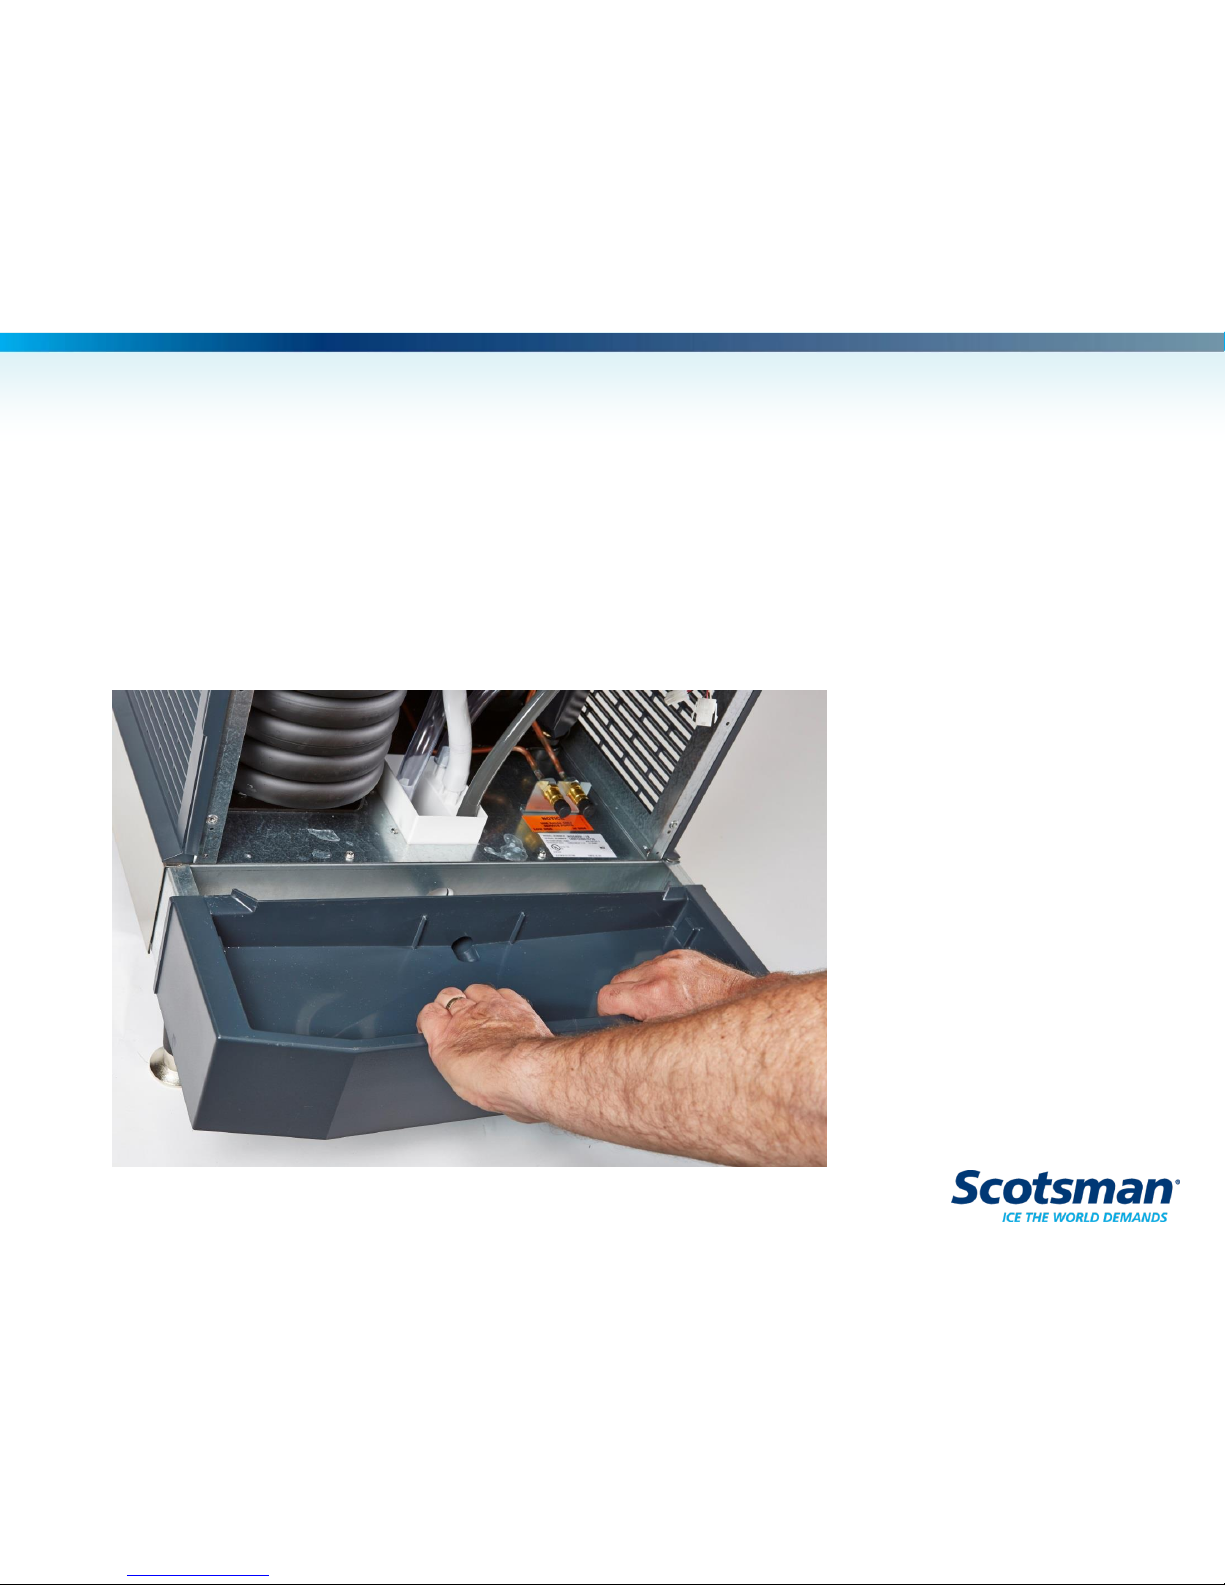
Drain System
• Drip tray drains into basin
• Basin drains to rigid PVC
pipe
– .8” ID
• 15” from inlet to back of unit
To ease removal add very small amount of
food grade lube to drain stub or o-ring.
 Loading...