

Page 1
Instructions
Head Pressure Control Add-On Kit
Required when a C0830R, C1030R or C1448R is to be
connected to a Remote Condenser coil that is not
equipped with a Head Pressure Control Valve.
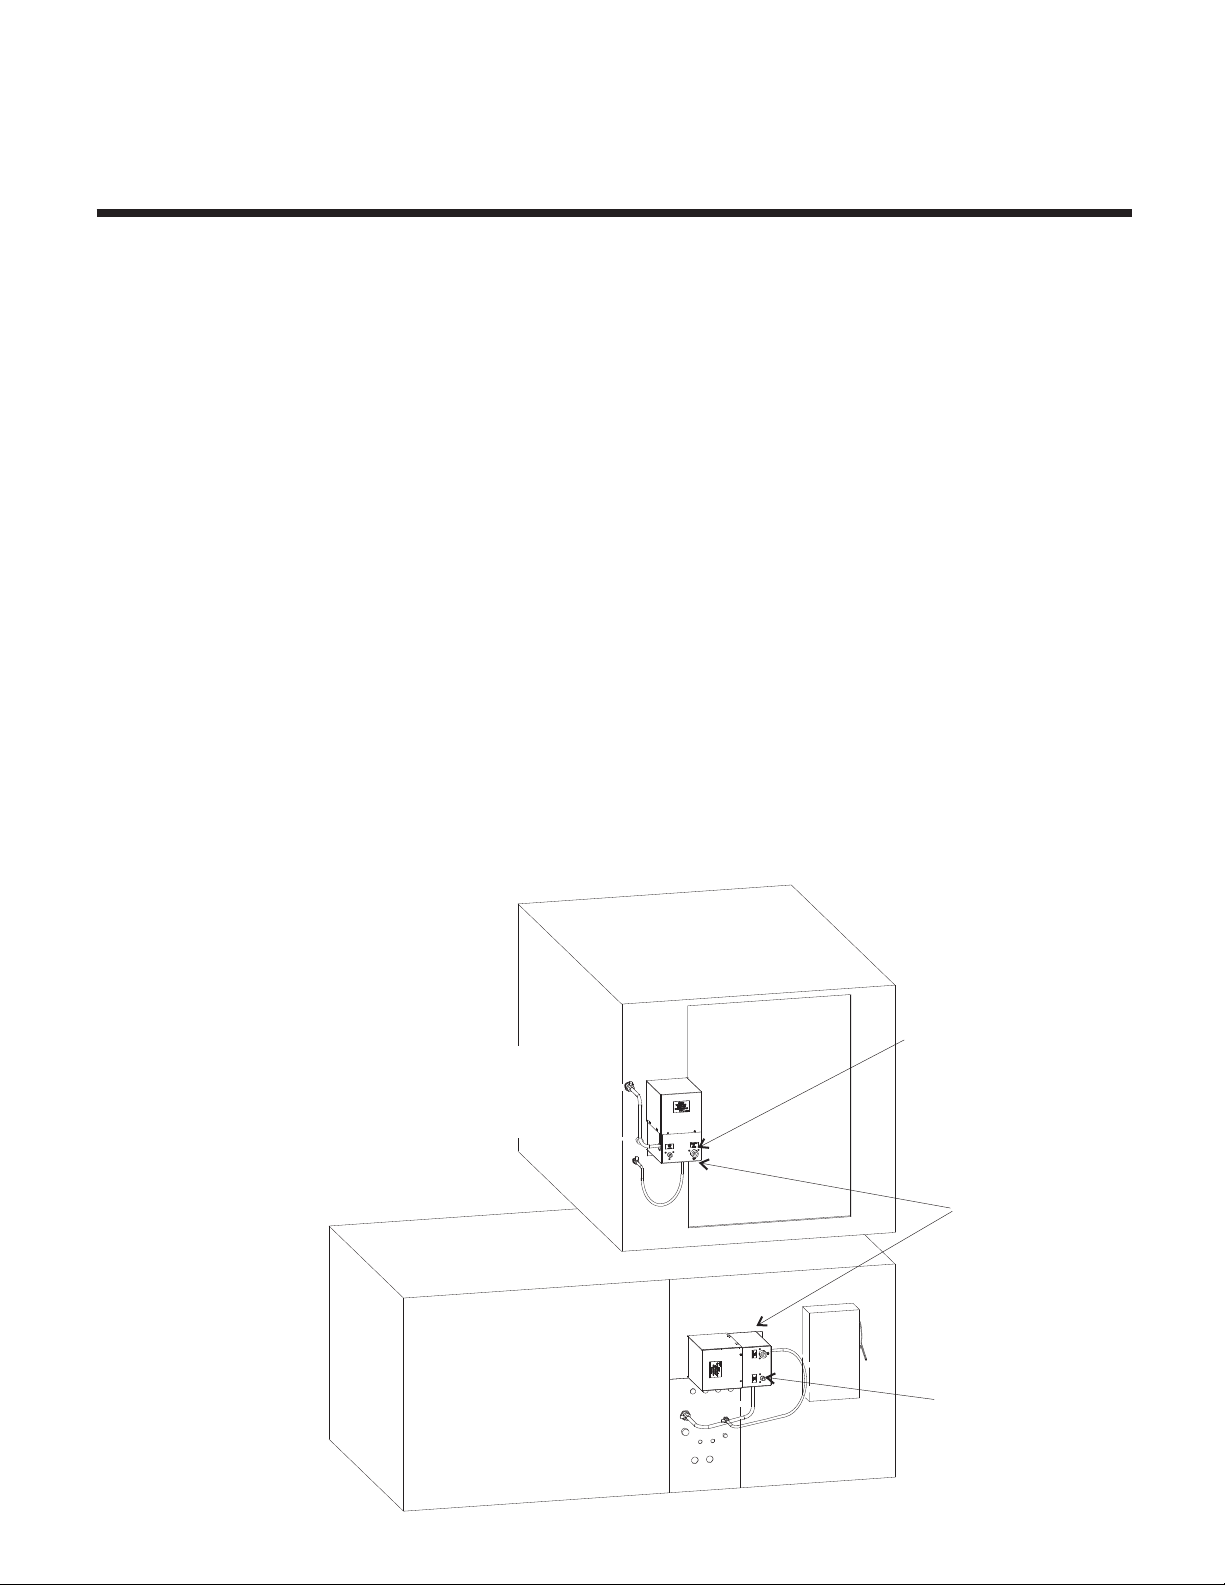
Fits two types of central condensers. Rotate the box and move the tubing to align
the fittings to those on the condenser to be used.
Required Tools: Screwdriver; Drill; 5/32" drill bit; Two Adjustable Wrenches; POE Oil
1. Remove cover from metal box.
2. Locate correct position on condenser: Note locations from illustration below.
3. Use metal box as a template, mark the positions of 4 holes to be drilled to mount the box to the
condenser.
4. Drill four .157" (#22 or 5/32" bit) dia. holes. Be SURE that there are no functional components in
line with the holes being drilled.
5. Secure the box to the condenser sheet metal.
Central
Condenser
Examples
G series
condenser
connections
X series condenser
connections
Pre-Charged Lines
from Ice Machine
Metal Box
Pre-Charged Lines
from Ice Machine
17-2985-01 Rev A page 1 of 3
Page 2

Condenser Coil Connection
The condenser coil may contain refrigerant or nitrogen or it could be empty.
Check at the access valve with a leak detector to confirm the contents. If refrigerant, it will be
R-404A and you can connect the headmaster kit.
If it is not refrigerant, purge it and then evacuate the coil. Then add a small amount of R-404A
before connecting the headmaster kit.
If it is empty, evacuate it, add some R-404A and check for a leak. If no leak is found connect the
headmaster kit.
Page 3

Coupling Attachment
Connect the coupling to the matching
fitting on the G or X series condenser,
as shown on page 1.
6. Remove plastic covers from the
condenser’s quick connects and those to
be used to connect to the condenser.
7. Thoroughly clean and lubricate the
threads and diaphragms of both the
condenser’s and the kit’s quick
connects. Use Polyolester oil.
8. Mount the box to the condenser with
the screws from the kit.
9. Start the swivel nuts by hand.
Use a back up wrench to be
•
certain that the tubing is NOT
ROTATING. Only the SWIVEL
NUTS should be rotating!
• Then use an adjustable wrench to
tighten them until no threads are
seen AND a very definite
resistance is felt.
10. Mark the positions of the swivel nuts
to the condenser panel.
11. Rotate the swivel nuts additional
one-quarter turn.
12. Place cover on metal box & secure
with screws.
13. Finish the balance of the installation.
Ice machine’s precharged line sets will
now connect to the quick connect fittings
on the metal box instead of the
condenser’s.
Clean and Lubricate Couplings
Tighten Swivel Nuts
Rotate Each Swivel Nut ¼ Turn More
 Loading...