

Page 1
IN-DASH MULIN-DASH MUL
IN-DASH MULIN-DASH MUL
IN-DASH MUL
TI-PURPOSE KIT FORTI-PURPOSE KIT FOR
TI-PURPOSE KIT FORTI-PURPOSE KIT FOR
TI-PURPOSE KIT FOR
1981-99 SUBARU VEHICLES1981-99 SUBARU VEHICLES
1981-99 SUBARU VEHICLES1981-99 SUBARU VEHICLES
1981-99 SUBARU VEHICLES
SU2020SU2020
SU2020SU2020
SU2020
This instruction booklet is based on carefully documented data and research of automobile dash disassembly, wire harness/codes
and information pertaining to installation of this kit (#HA1560) in 1990-UP Acura/Honda Vehicles. Scosche Industries, Inc. can not
be held responsible for discrepancies/inconsistencies that may occur due to the automobile during the installation of components
while using this booklet.
LIABILITY DISCLAIMER
1982-87 Brat Pickup*
1981-85 DL Hatchback*
1986-89 DL Hatchback
1981-84 DL Sedan/Wagan
1985-89 DL Sedan/Wagan
1981-85 GL Hatchback*
NOTES:
•
See your vehicle’s instructions for any special tools your installation might require.
•
Read all instructions accompanying your car stereo/cassette player for proper wiring and mounting instructions.
This premium Multi-Purpose Kit is for 1981-99 select Subaru vehicles. Included are all the parts you need to mount your car
stereo/cassette, or CD player into your vehicle’s dash. Refer to the individual instruction in this manual to remove your
vehicle’s factory radio and assemble the kit.
INTRODUCTION
4
APPLICATIONS
KIT COMPONENTS
1986-89 GL Hatchback
1981-84 GL Sedan/Wagon
1985-89 GL Sedan/Wagon
1987-94 Justy
1995-99 Legacy
1990-94 Loyale
1985-89 RX Sedan
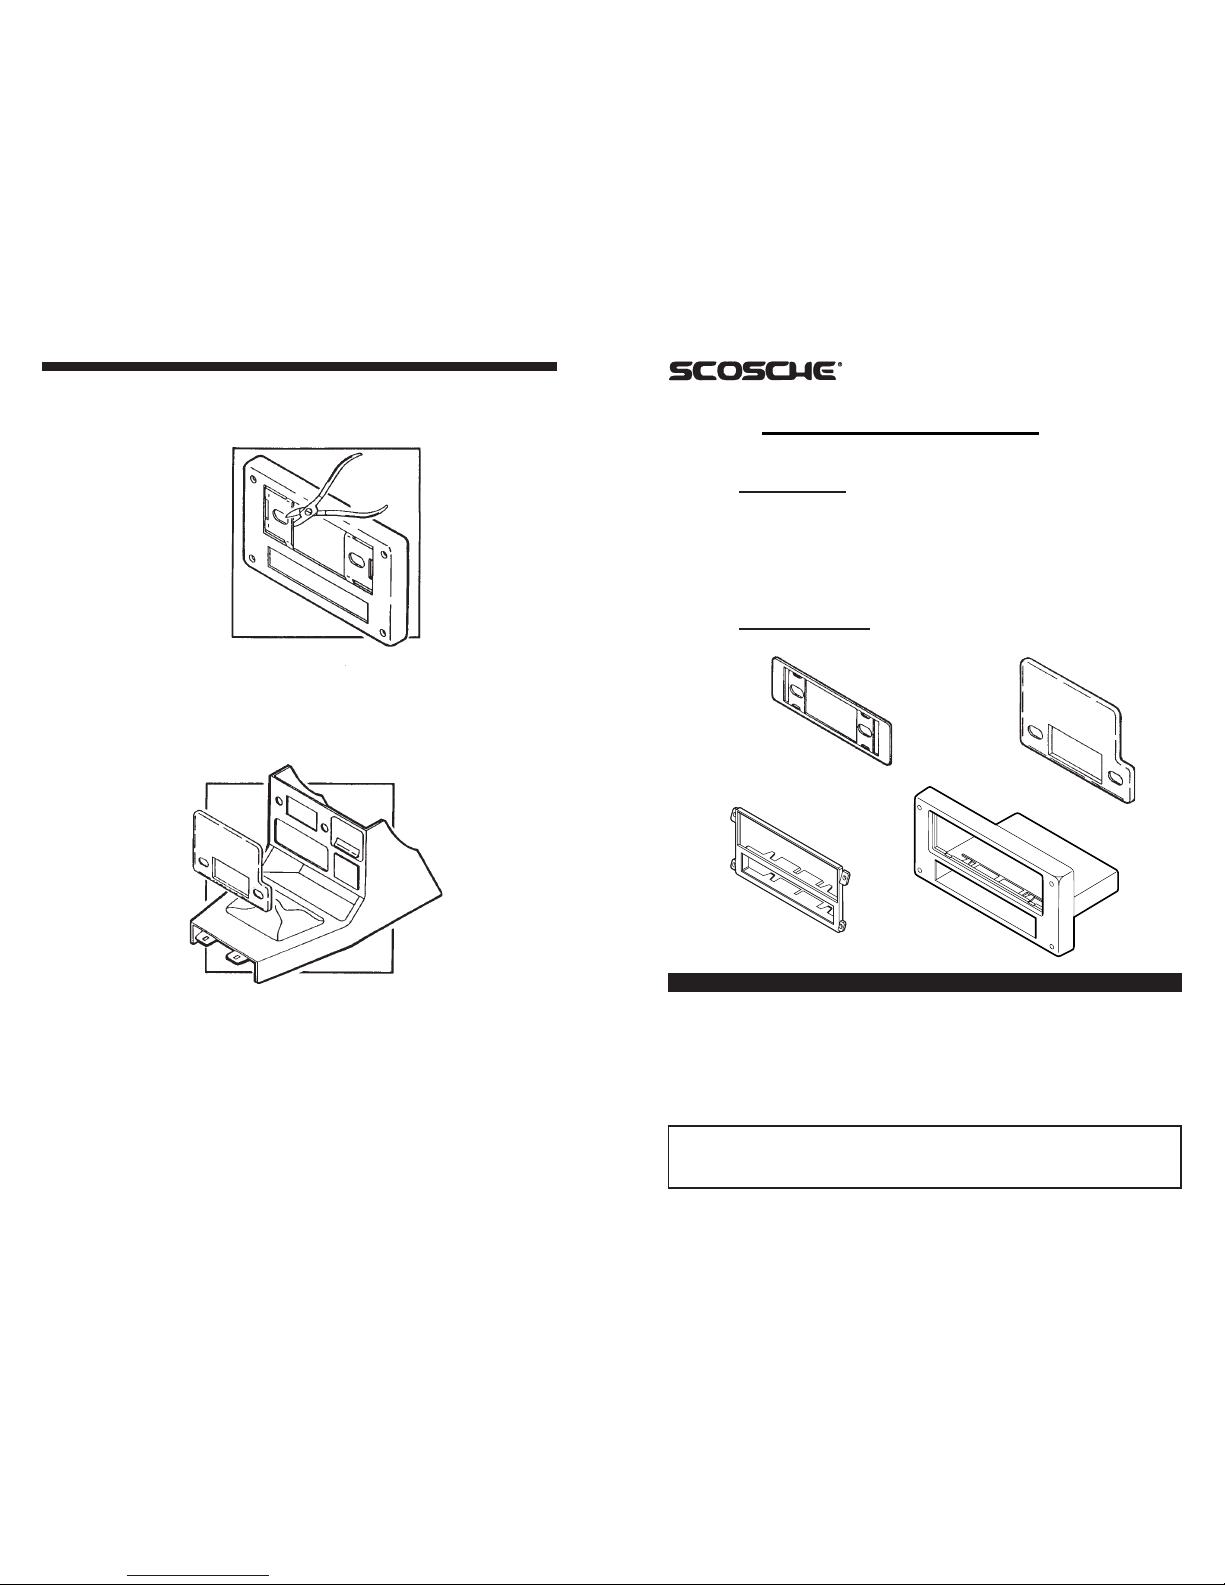
How to convert the faceplates for DIN radio installions
To convert a faceplate for a DIN radio installation, snip and remove the shaft supports where
indicated below.
How to prepare the factory console using 2694 panel. (Shaft radio only)
To convert the console for the Brat and 1981-85 DL and GL, hold 2694 panel against the
console and scribe the radio opening onto the pocket area. Using a Dremel tool, cut along the
outside of the scribed line.
2694 PANEL
2692 PANEL
* Shaft radio only
5693 PANEL
2697 PANEL
2692 PANEL
2694 PANEL*
Page 2
1982-87 Brat Pickup
1981-84 DL, GL Hatchback
1981-84 DL, GL Sedan/Wagon
RADIO REMOVAL
Disconnect negative battery terminal to prevent accidental short circult.
1. Remove (4) screws securing the console to the dash. Remove the console and disconnect the
speaker and antenna harness.
2. Slide the factory unit from the dash and disconnect all wiring.
3. Using 2694 panel as a template, scribe the radio opening onto the
console face. Using a Dremel tool, cut along the outside of the
scribed lines and remove. (Refer to page 4)
4. Place metal tabs over the radio shafts and insert the
unit into the console.
5. Make power, speaker and antenna wiring
connections,
re-connect the battery terminal and test the unit.
2 3
1986-89 DL, GL Hatchback
1985-89 DL, GL Sedan/Wagon
1985-89 RX Sedan
1990-94 Loyale
RADIO REMOVAL
Disconnect negative battery terminal to prevent accidental short circult.
1. Unsnap the center dash panel and remove (7) Phillips screws securing the radio bracket tabs to
the dash.
2. Slide the assembly from the dash cavity and disconnect all wiring.
3. 2-SHAF T RADIO INSTALLATION: Align the unit in 2692 panel and secure with shaft nuts.
Make all wiring connections and secure the unit/kit assembly to the dash with (4) screws.
DIN RADIO INSTALLATION: Convert 2692 panel by cutting and removing the shaft supports.
Secure the trimplate to the dash with (4) screws and make
all wiring connections. Insert the DIN
cage into the radio opening and
slide the unit until secure.
1987-94 Justy
RADIO REMOVAL
Disconnect negative battery terminal to prevent accidental short circult.
1. Remove the ashtray and (3) screws from the retaining bracket. Remove (4) climate control
knobs and gently pry off the cover with a small screwdriver.
2. Remove (2) screws behind the control cover and (2) screws above the ashtray bracket.
3. Detach the trim bezel and disconnect the clock and cigarette lighter wiring. Slide the existing
radio out and unplug the leads.
4. 2-SHAFT RADIO INSTALLATION: Place brackets over the shafts as shown. Align the radio
in the trim bezel and place 2697 panel over the radio shafts. Secure with shaft nuts. Make all
wiring connections and re-attach the trim bezel.
DIN RADIO INSTALLATION: Convert 2697 panel by cutting
and removing the shaft supports. Place the trimplate over
the bezel and secure it with the DIN cage. Insert the
DIN unit. Make all wiring connections and re-attach
the trim bezel.
1995-99 Legacy
RADIO REMOVAL
Disconnect negative battery terminal to prevent accidental short circult.
1. Remove emergency brake cover.
2. Remove center console cover.
3. Remove ashtray and extract (1) screw from that location.
4. Pop out trim center piece between A/C controls & radio bezel, extract (2) screws from behind.
5. Remove radio trim bezel.
6. Extract (4) screws securing radio, unplug & remove.
2697 PANEL
2694 PANEL
2692 PANEL
2692 PANEL
2697 PANEL
(Shaft radio only)
5693 PANEL
 Loading...