

Page 1
MI3015B
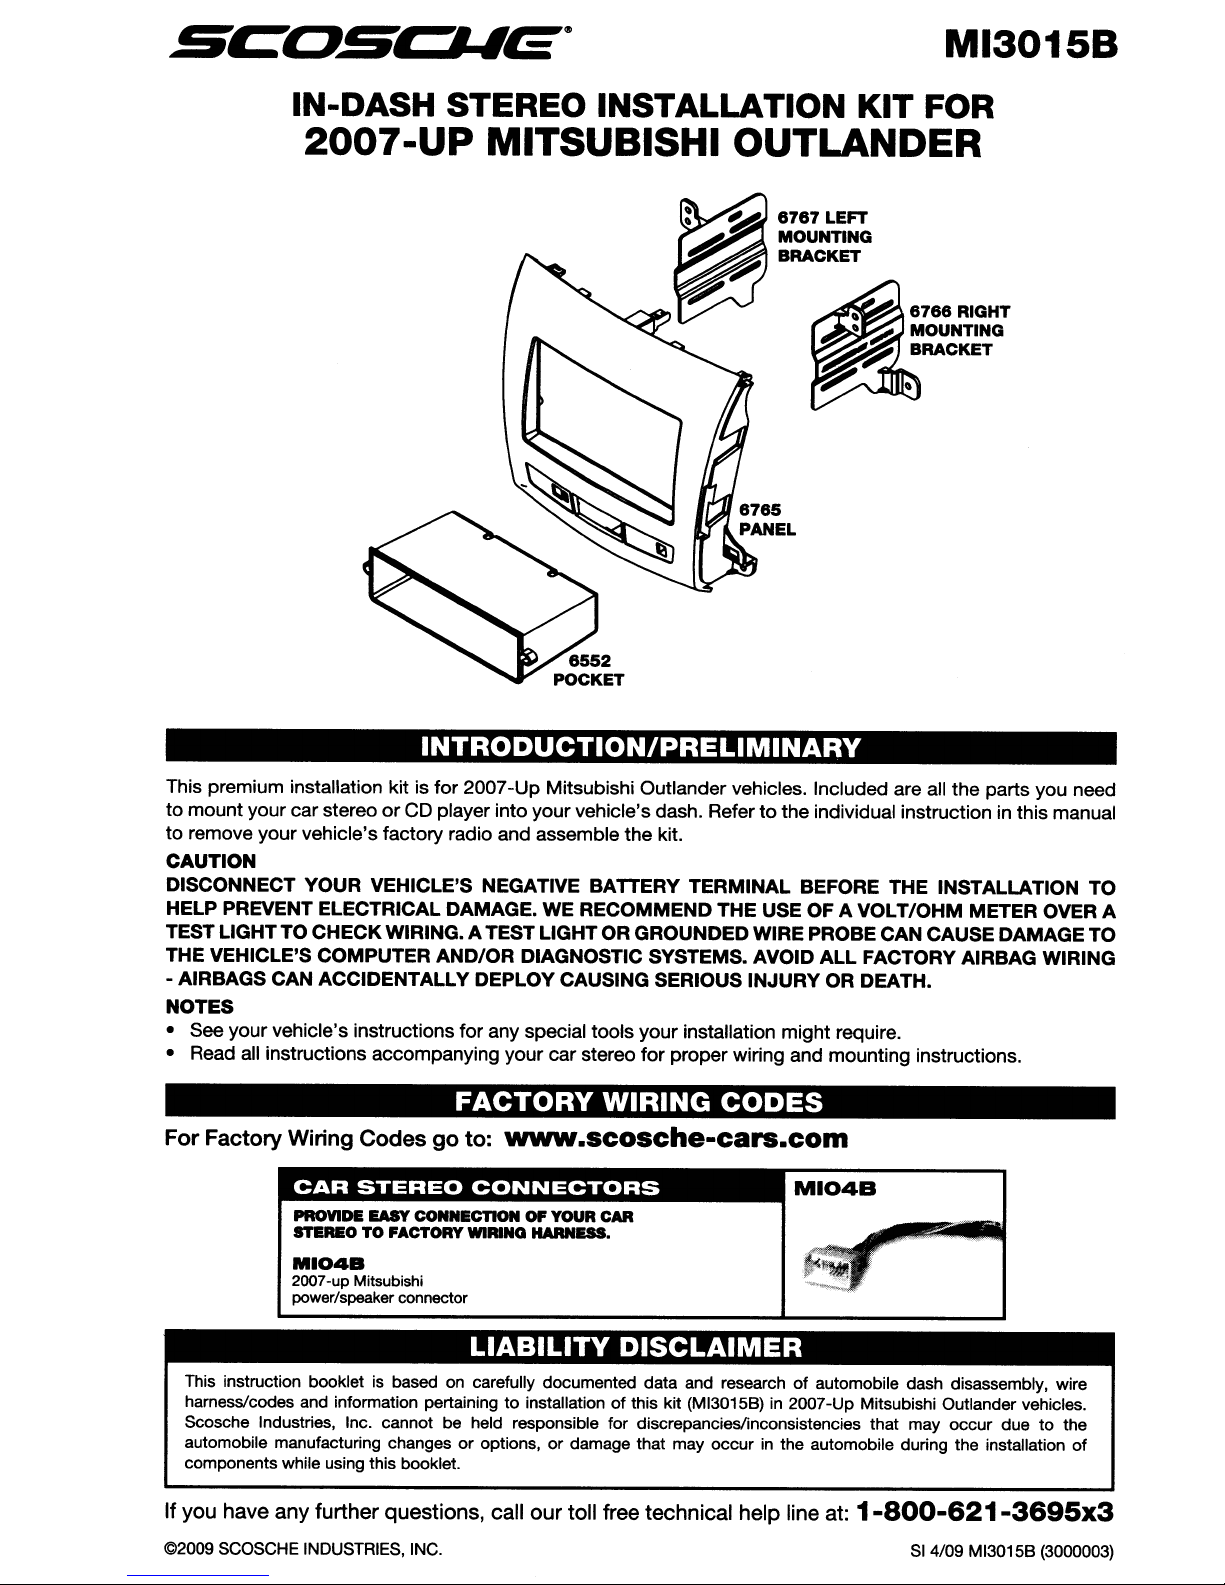
IN-DASH STEREO INSTALLATION KIT FOR
2007-UP
MITSUBISHI OUTLANDER
6767
LEFT
MOUNTING
BRACKET
INTRODUCTION/PRELIMINARY
This premium installation kit is for2007-Up Mitsubishi Outlander vehicles. Included are all the parts you need
or
to mount your car stereo
to remove your vehicle's factory radio and assemble the kit.
CAUTION
DISCONNECT YOUR VEHICLE'S NEGATIVE BATTERY TERMINAL BEFORE THE INSTALLATION TO
HELP PREVENT ELECTRICAL DAMAGE. WE RECOMMEND THE USE OF A VOLT/OHM METER OVER A
TEST LIGHTTO CHECK WIRING. ATESTLIGHTOR GROUNDED WIRE PROBE CAN CAUSE DAMAGE TO
THE VEHICLE'S COMPUTER AND/OR DIAGNOSTIC SYSTEMS. AVOID ALL FACTORY AIRBAG WIRING
-
AIR
BAGS
CAN ACCIDENTALLY DEPLOY CAUSING SERIOUS INJURY OR DEATH.
NOTES
• See your vehicle's instructions for any special tools your installation might require.
• Read all instructions accompanying your car stereo for proper wiring and mounting instructions.
..
PROVIDE
sn
..
MI04B
2007-up Mitsubishi
powe~speakerconnector
CD player into your vehicle's dash. Refertothe individual instruction in this manual
•
EASY
OTOFACTORY
CONNECnGNOPYOUR
FACTORY
•
WIRING
HARNESS.
WIRING
• •
CAR
CODES
This instruction booklet is based on carefully documented data and research of automobile dash disassembly, wire
harness/codes and information pertaining
Scosche Industries, Inc. cannot be held responsible for discrepancieslinconsistencies that may occur due
automobile manufacturing changes
components while using this booklet.
If you have any further questions, call our toll free technical help line at:
©2009 SCOSCHE INDUSTRIES, INC.
LIABILITY
to
installationofthis kit (MI30158) in 2007-Up Mitsubishi Outlander vehicles.
or
options,ordamage that may occurinthe automobile during the installation
DISCLAIMER
1-800-621-3695x3
Sl
4/09 MI30158 (3000003)
to
the
of
Page 2
FACTORY
NON NAV:
1.
With panel removal tool, unsnap trim panel around climate controls.
2. Remove
3.
With panel removal tool, unsnap panel around Radio and Ale vents.
4. Remove
WITH NAV:
1.
With panel removal tool, unsnap vent panels on either sideoffactory radio.
2.
Remove
lights.
3.
Remove
(4)
Philips screws securing climate controls, disconnect and remove.
(4)
Philips screws securing factory radio, disconnect and remove.
(2)
Philips screws from factory panel. Pull out factory panel and disconnect Hazard/Passenger
(4)
Philips screws securing factory NAV radioindash. Remove and disconnect.
STEREO
REMOVAL
MOUNTING
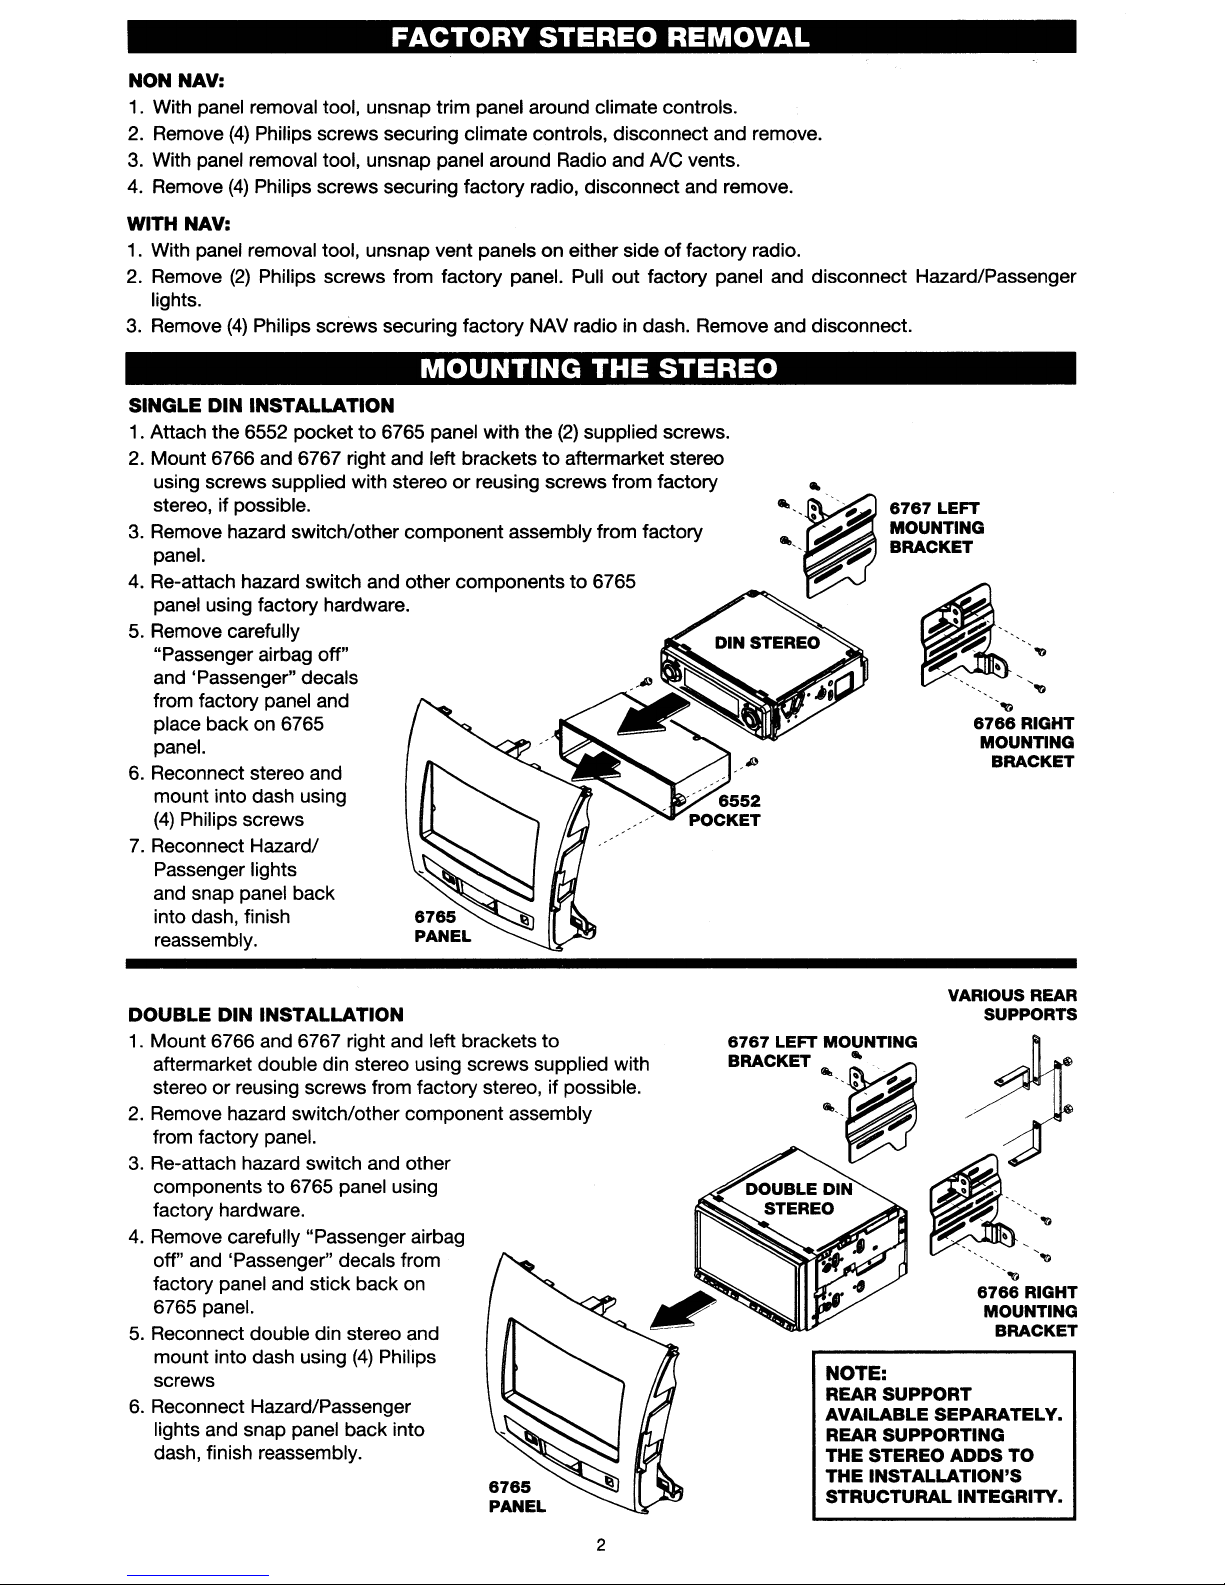
SINGLE DIN INSTALLATION
1.
Attach the 6552 pocketto6765 panel with the
2.
Mount 6766 and 6767 right and left bracketstoaftermarket stereo
using screws supplied with stereo or reusing screws from factory
stereo, if possible.
3.
Remove hazard switch/other component assembly from factory
panel.
4. Re-attach hazard switch and other components
panel using factory hardware.
5.
Remove carefully
"Passenger airbag off"
and 'Passenger" decals
from factory panel and
place back on 6765
panel.
6.
Reconnect stereo and
mount into dash using
(4)
Philips screws
7.
Reconnect Hazard/
Passenger lights
and snap panel back
into dash, finish
reassembly.
THE
(2)
supplied screws.
to
6765
STEREO
6767 LEFT
MOUNTING
BRACKET
.~
~
_
~~
'.
••••
.
.~
'
'''D
"D
6766
RIGHT
MOUNTING
BRACKET
DOUBLE DIN INSTALLATION
1.
Mount 6766 and 6767 right and left brackets
aftermarket double din stereo using screws supplied with
or
stereo
2.
Remove hazard switch/other component assembly
from factory panel.
3.
Re-attach hazard switch and other
components
factory hardware.
4. Remove carefully "Passenger airbag
off" and 'Passenger" decals from
factory panel and stick back on
6765 panel.
5.
Reconnect double din stereo and
mount into dash using
screws
6.
Reconnect Hazard/Passenger
lights and snap panel back into
dash, finish reassembly.
reusing screws from factory stereo, if possible.
to
6765 panel using
(4)
Philips
to
VARIOUS
REAR
SUPPORTS
....
6766
RIGHT
MOUNTING
BRACKET
NOTE:
REAR SUPPORT
AVAILABLE SEPARATELY.
REAR SUPPORTING
THE
STEREO
THE
INSTALLATION'S
STRUCTURAL INTEGRITY.
2
ADDS
TO
 Loading...