

Page 1
HY1604
IN-DASH DIN RADIO INSTALLATION KIT FOR
SELECT 2001-UP HYUNDAI VEHICLES
LIABILITY DISCLAIMER
This instruction booklet is based on carefully documented data and research of automobile dash disassembly, wire harness/
codes and information pertaining to installation of this kit HY1604 in select 2001-UP Hyundai Vehicles. Scosche Industries, Inc.
cannot be held responsible for discrepancies/inconsistencies that may occur due to the automobile manufacturing changes or
options, or damage that may occur in the automobile during the installation of components while using this booklet.
INTRODUCTION/PRELIMINARYINTRODUCTION/PRELIMINARY
INTRODUCTION/PRELIMINARYINTRODUCTION/PRELIMINARY
INTRODUCTION/PRELIMINARY
INTRODUCTION
VEHICLE APPLICATIONS:
HYUNDAI
2001-UP ELANTRA ............... 3
2001-UP SANTA FE .............. 3
Thank you for purchasing the Scosche HY1604 Installation Kit. This installation kit was
manufactured to the highest quality standards with the best materials available.
CAUTION:
Disconnect your vehicle’s negative battery terminal before the installation to help prevent
electrical damage. We recommend the use of a volt/ohm meter over a test light to check
wiring. A test light or grounded wire probe can cause damage to the vehicle’s computer and/
or diagnositic systems. Avoid all factory air bag wiring - air bags can accidentially deploy
causing serious injury or death.
NOTES:
• See your vehicle’s instructions for any special tools your installation might require.
• Read all instructions accompanying your car stereo/cassette player for proper wiring and
mounting instructions.
4
2002-05 Hyundai Sonata
RADIO REMOVAL:
1. Unsnap trim bezel, disconnect, and pull away.
2. Extract (4) Philips screws securing radio, disconnect and remove.
NOTE: REMOVE (4) PHILIPS SCREWS SECURING THE FACTORY METAL REAR SUPPORT IN THE DASH
OPENING TO INSURE THE KIT AND RADIO FITS, IF NECESSARY.
2003-UP Hyundai Tiburon
RADIO REMOVAL:
1. Using panel removal tool, pry out radio bezel carefully. Disconnect and remove.
2. Extract (4) Philips screws securing radio, disconnect, and remove.
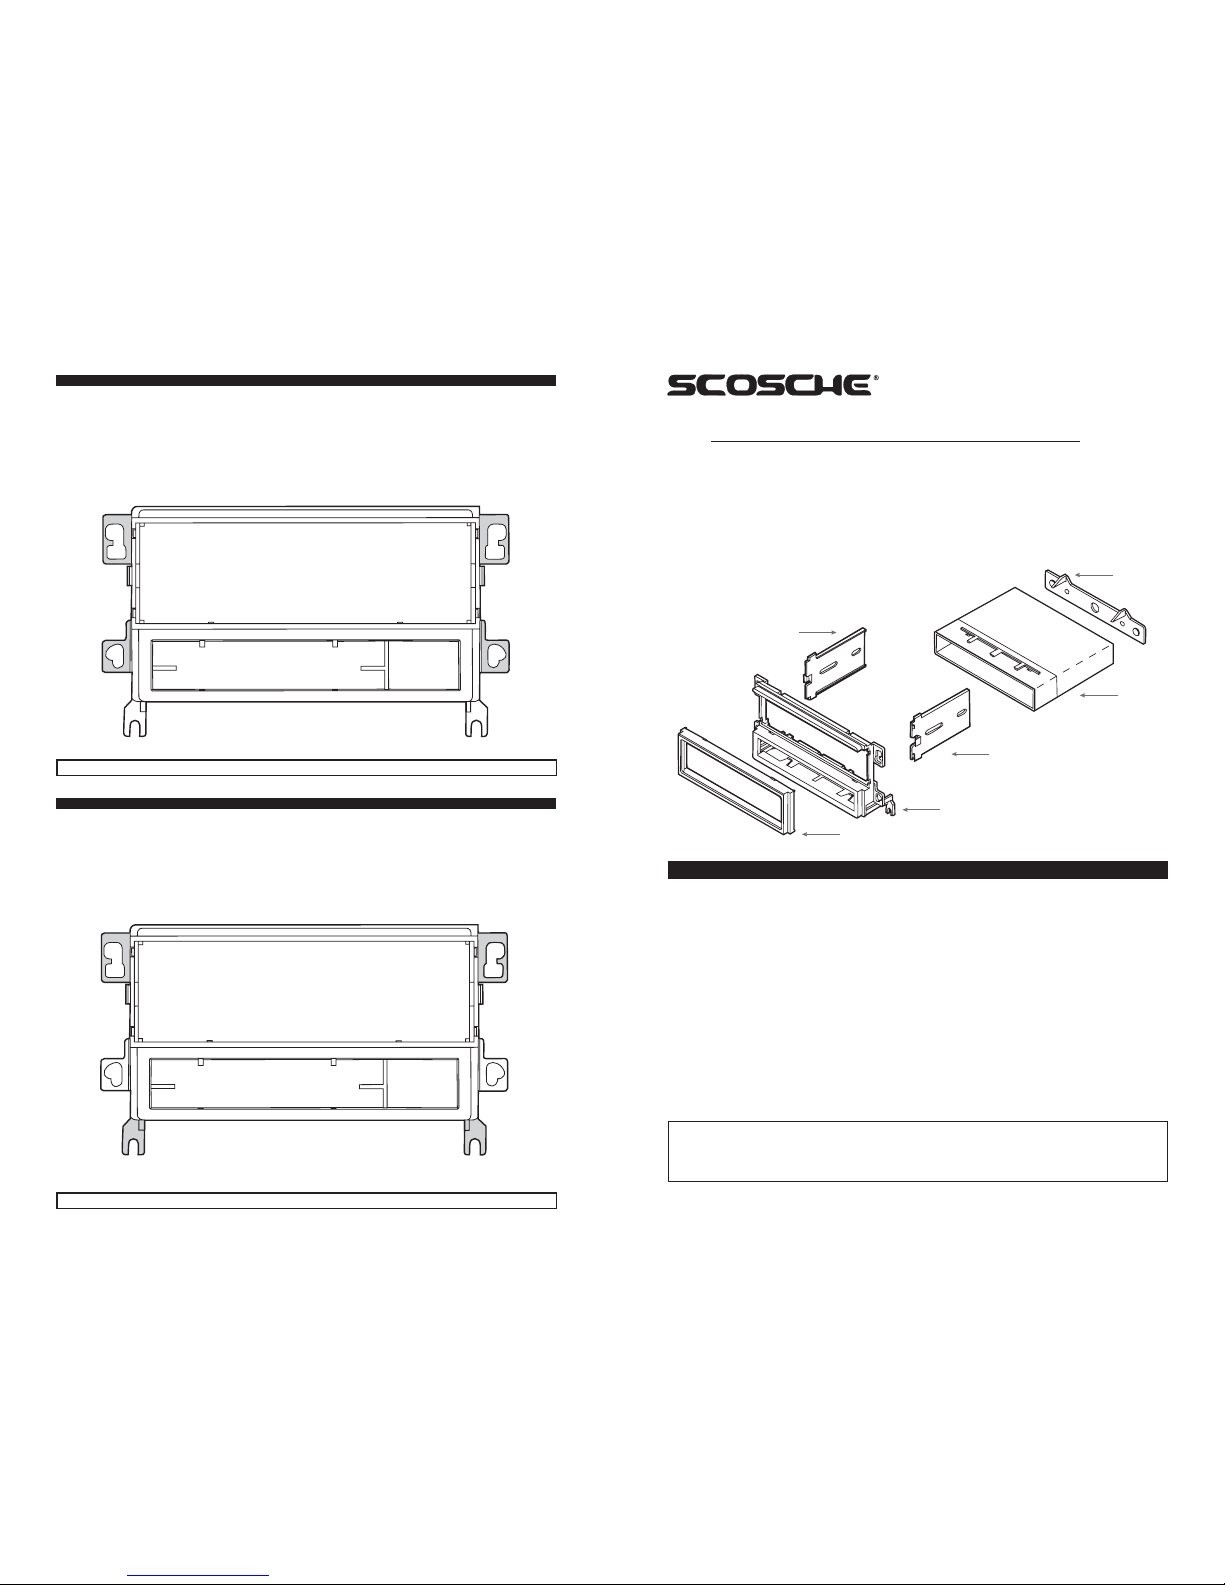
USE THE SHADED BRACKETS & THE INDICATED HOLE LOCATIONS. CUT OFF THE REMAINING BRACKETS AND DISCARD.
USE THE SHADED BRACKETS & THE INDICATED HOLE LOCATIONS. CUT OFF THE REMAINING BRACKETS AND DISCARD.
5125
POCKET
HY1604
RIGHT ISO
BRACKET
HY1604
LEFT ISO
BRACKET
REAR
SUPPORT
BRACKET
HY1604
KIT PANEL
HY1604
TRIM PANEL
2002-05 SONATA ................. 4
2003-UP TIBURON ............... 4
Page 2
POCKET ASPOCKET AS
POCKET ASPOCKET AS
POCKET AS
SEMBLSEMBL
SEMBLSEMBL
SEMBL
YY
YY
Y
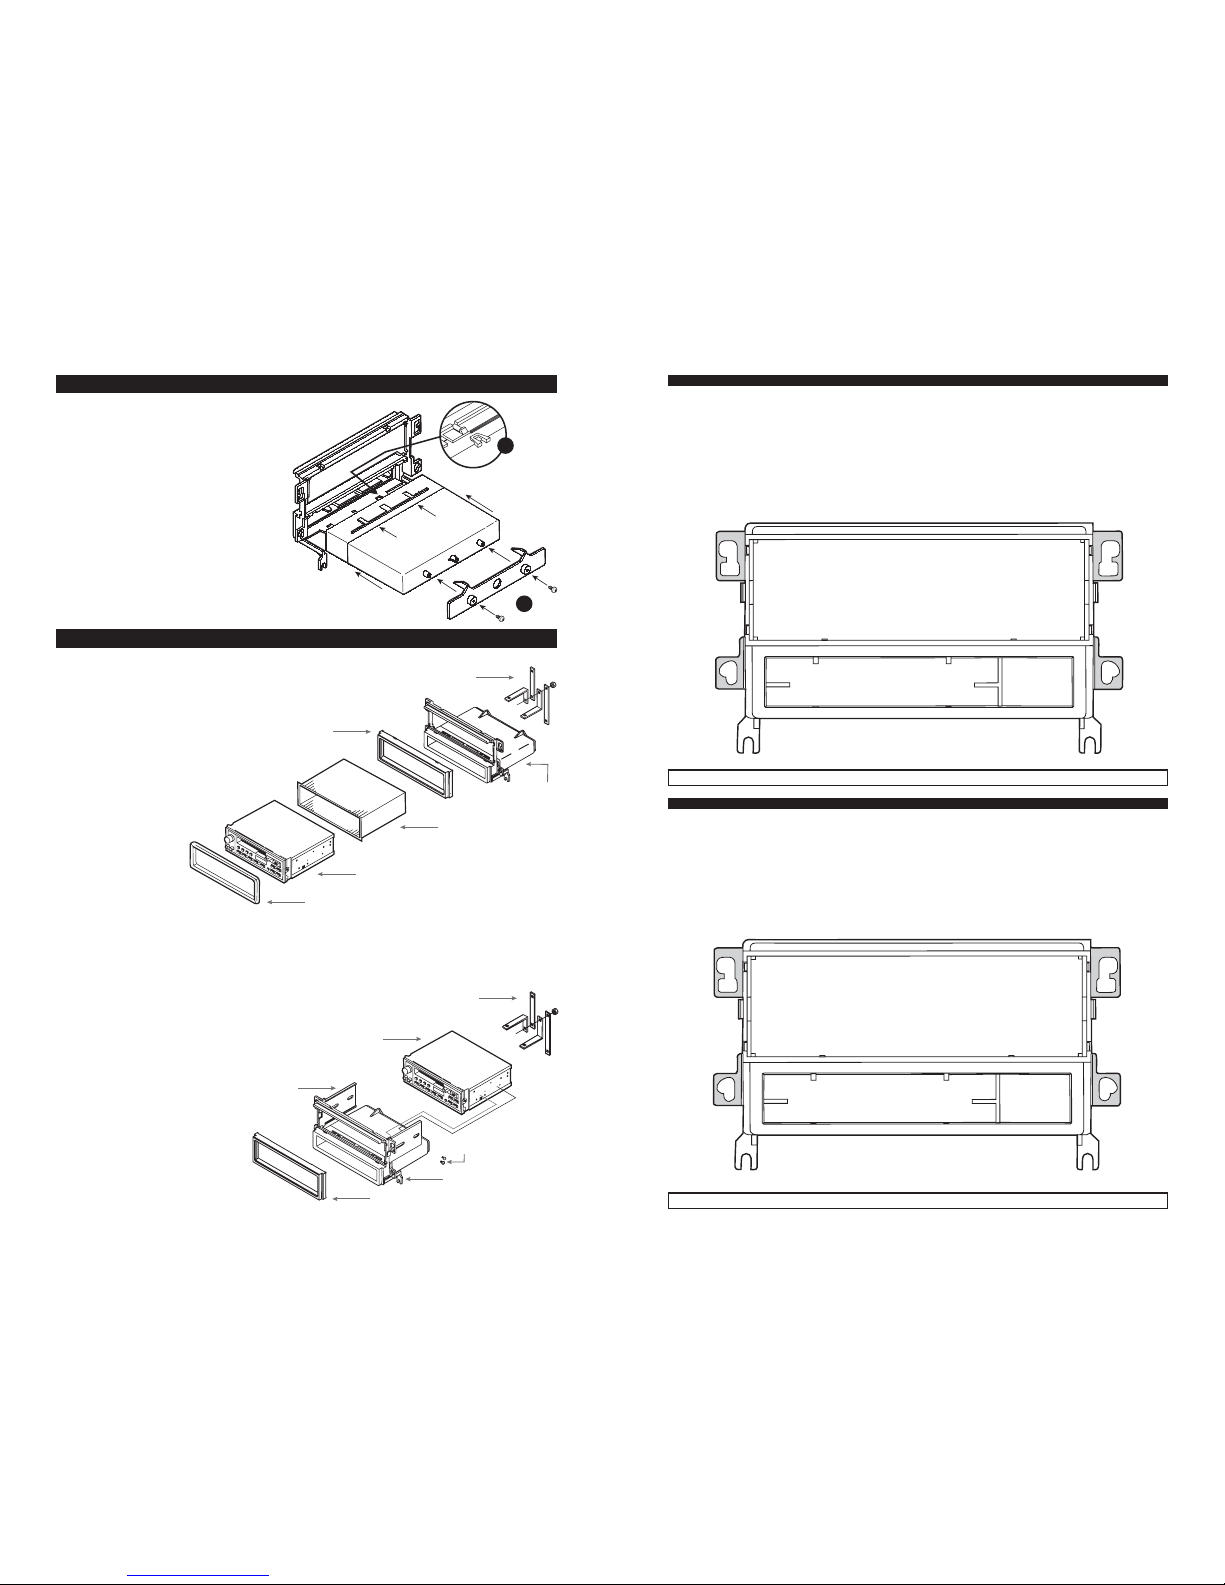
A. ATTACHING THE REAR BRACKET:
Align the (2) screw emboss locations
to the matching locations on the
pocket. When aligned, slide the
bracket together. Screw the (2)
supplied screws to the screw emboss
locations.
B. ATTACHING THE POCKET:
Align the pocket to the snaps of kit
panel. Snap the pocket into place on
the back of the kit panel.
MOUNTING THE RADIOMOUNTING THE RADIO
MOUNTING THE RADIOMOUNTING THE RADIO
MOUNTING THE RADIO
B
A
IN-DASH DIN PULLOT, DETACHABLE
FACEPLATE, (DIN-E) RADIOS
The kit panel comes DIN ready. Follow
the instructions supplied with the radio,
secure the mounting kit. Install the
assembly in the dash and use the rear
support strap supplied with the radio to
support the rear of the radio.
DIN-ISO MOUNT: (DIN-E Radio with Side Mounting Holes)
1. Snap the DIN ISO side mounting brackets
to the back of the mounting panel (1 left
and 2 right). Use supplied hardware to
bolt them to the back of the kit panel.
2. Snap the DIN-ISO trim ring into the radio
opening.
3. Load the radio from the REAR of the
mounting panel until the nose piece of
the radio comes through the front of
the kit.
4. Use the 5MM screws to secure the
radio from the sides.
CAUTION:
REAR SUPPORTING THE RADIO
ADDS TO THE INSTALLATION’S
STRUCTURAL INTEGRITY.
CAUTION:
REAR SUPPORTING THE RADIO
ADDS TO THE INSTALLATION’S
STRUCTURAL INTEGRITY.
DIN RADIO
HY1604 TRIM RING
RADIO
MOUNTING
SLEEVE
HY1604
MOUNTING
PANEL
HY1604
POCKET
REAR
SUPPORT
STRAP
5MM SCREWS
REAR
SUPPORT
STRAP
DIN RADIO
HY1604 ISO
MOUNTING
BRACKETS
HY1604
MOUNTING PANEL
HY1604
TRIM RING
2001-UP Hyundai Elantra
RADIO REMOVAL:
1. Remove ashtray and extract (2) Philips screws from behind.
2. Extract (2) Philips screws from top of instrument cluster.
3. Using panel removal tool, pry out dash bezel carefully. Disconnect and remove.
4. Extract (6) Philips screws securing radio and pocket. Disconnect and remove.
NOTE: REMOVE (4) PHILIPS SCREWS SECURING THE FACTORY METAL REAR SUPPORT IN THE DASH
OPENING TO INSURE THE KIT AND RADIO FITS, IF NECESSARY.
2001-UP Hyundai Santa Fe
RADIO REMOVAL:
1. Remove ashtray and extract (2) Philips screws and pull out the bottom dash bezel and disconnect.
2. Extract (2) Philips screws from top bezel and pry out with panel removal tool. Disconnect and remove.
3. Extract (4) Philips screws securing radio. Disconnect and remove.
NOTE: REMOVE THE FACTORY METAL REAR SUPPORT IN THE DASH OPENING TO INSURE THE KIT AND
RADIO FITS, IF NECESSARY.
2
3
USE THE SHADED BRACKETS & THE INDICATED HOLE LOCATIONS. CUT OFF THE REMAINING BRACKETS AND DISCARD.
USE THE SHADED BRACKETS & THE INDICATED HOLE LOCATIONS. CUT OFF THE REMAINING BRACKETS AND DISCARD.
Get top quality Scosche car audio products on our website.
 Loading...