

Page 1
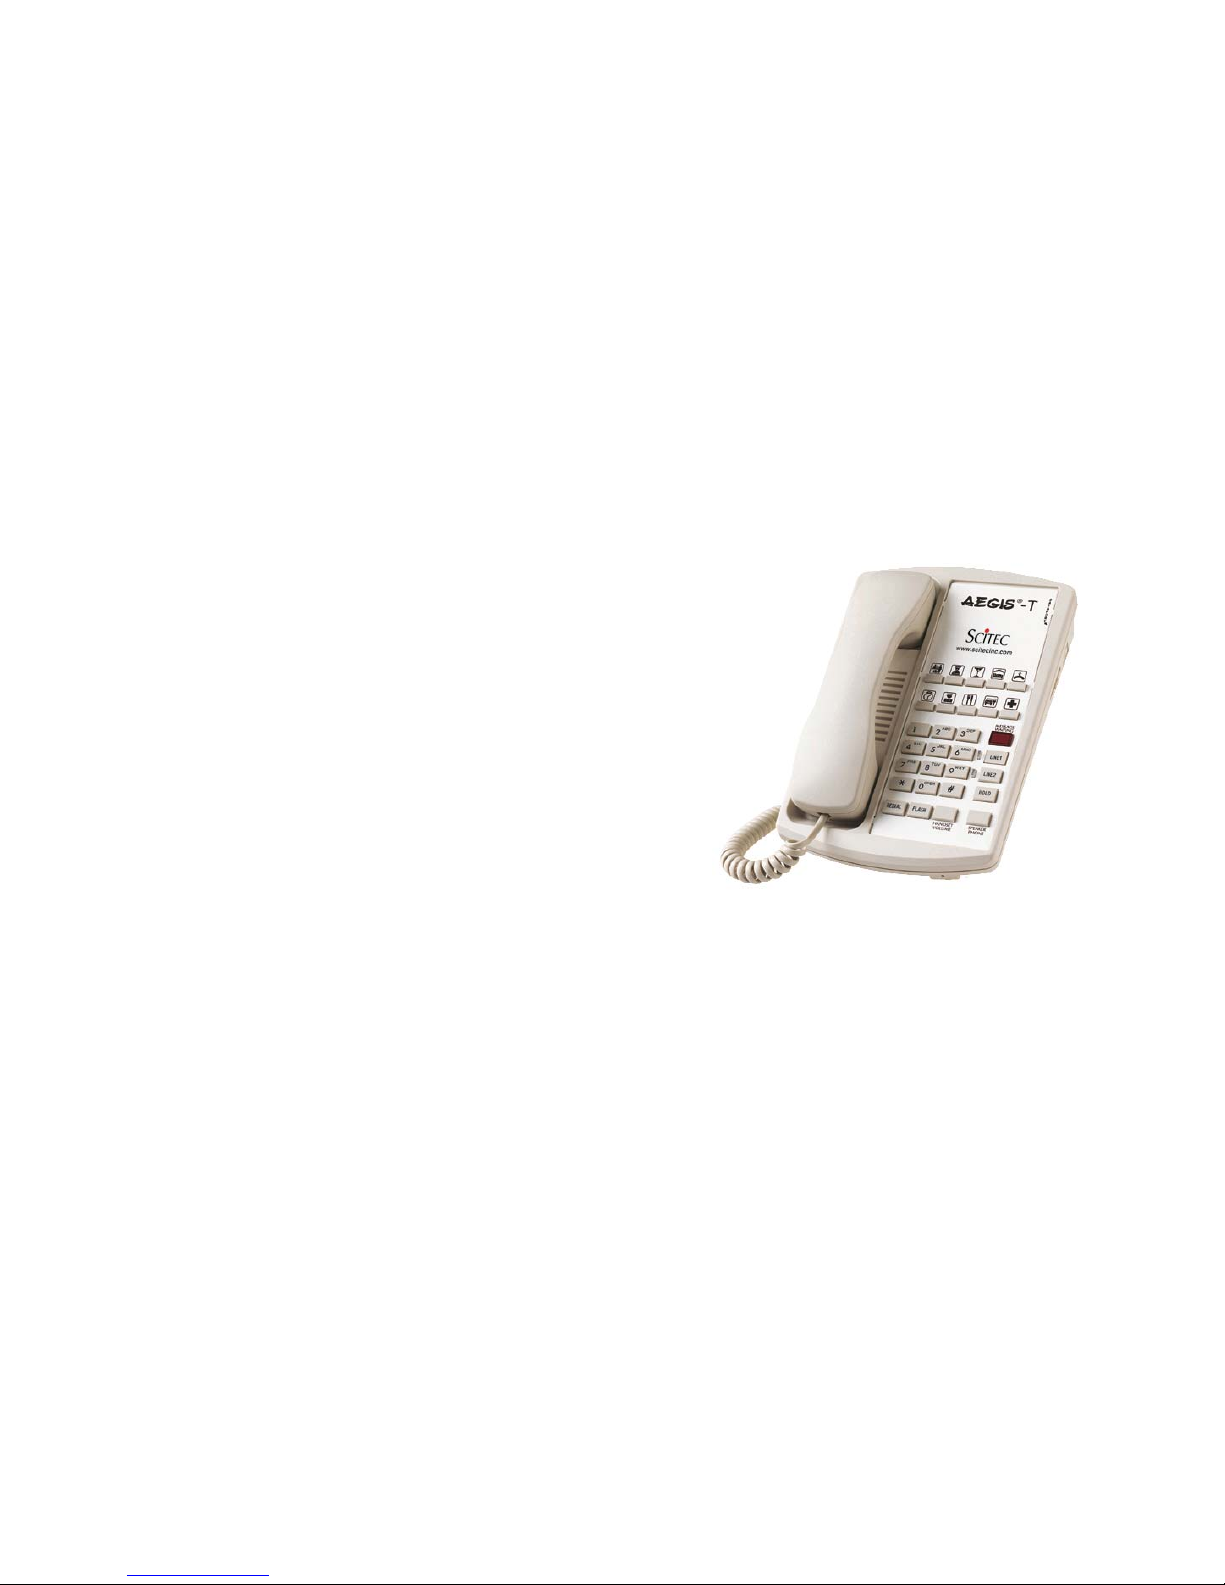
Aegis Series Telephone
User Manual
Unpacking your telephone:
This package should contain the following:
• Telephone base unit
• Handset
• Coiled handset cord
• Straight line cord
• This manual
Page 2
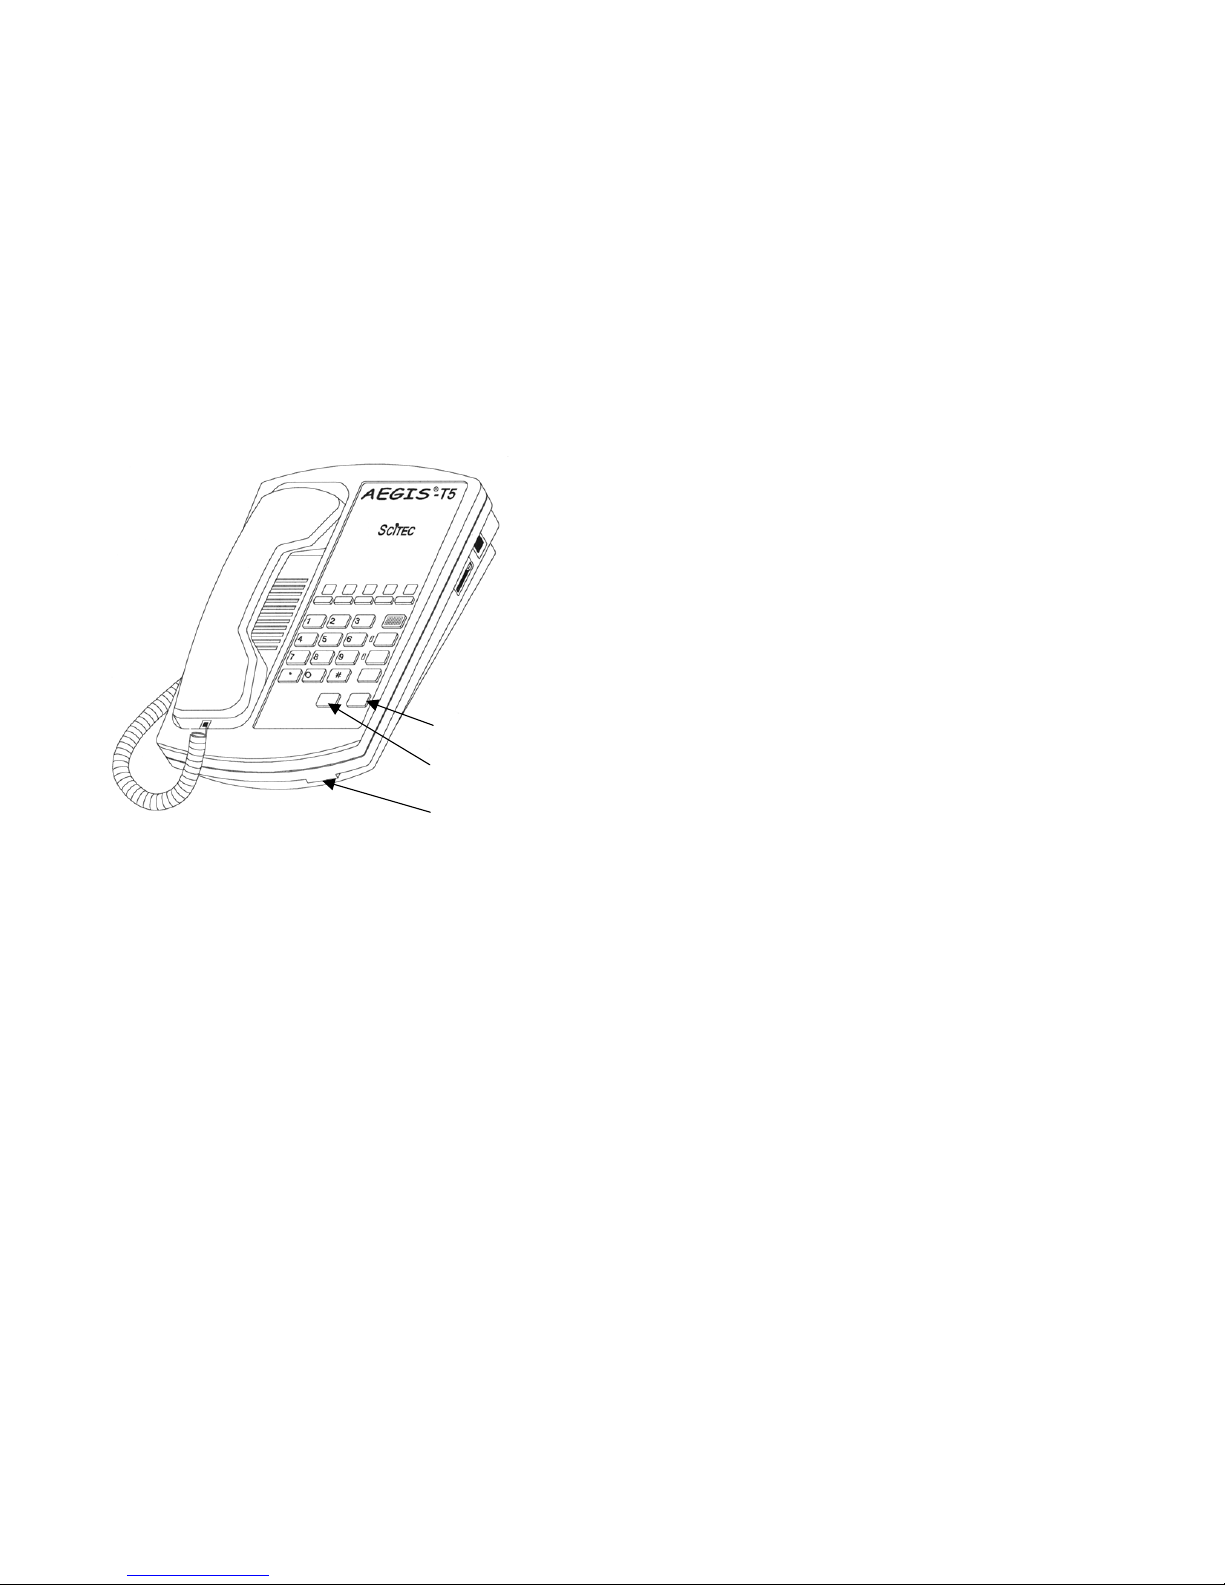
5. REDIAL key Automatically hangs up for 1 second before redialing
for convenient “one touch” redialing to busy numbers. (Not available
on Aegis T5 model)
6. STORE and PAUSE keys for programming speed-dial keys.
(Located underneath the faceplate)
7. Ringer volume control Adjust ringer volume from LOW to HIGH.
8. Volume control Key steps through the three available handset
volume levels [Normal – Medium – High -Normal].
9. Slide volume control Separate volume control for speakerphone.
10. Dataport Provides convenient access to the telephone line for
connecting a modem, fax, or answering machine.
11. Hearing aid compatible handset
Speakerphone
[SPKR] key
12. Handset Holder – Clip above the handset used to temporarily
hold up the handset without hanging up in wall mount
applications.
Volume control
[VOL] key
Microphone
13. Half duplex speakerphone. Calibrated for desktop use where
user is within arm’s reach of front of telephone.
Aegis T5
14. LED status indicators
a. A green light indicates the line is in use.
b. A red light indicates that a call in “On Hold”.
*
Feature only available on Memory equipped models.
Features:
Installation
1. Message waiting light and visual ringing indicator compatible with
both AT&T/Lucent LED and high voltage neon message waiting light
systems.
The Aegis Two-line Series telephones are designed for use behind a
registered PBX system. The telephone user or system installer must
supply a RJ-14 two-line modular wall jack to connect this telephone to the
PBX system. The PBX “station port” type must be “Industry Standard
Analog” or “POTS.” This telephone cannot be used with “digital” PBX
station ports.
2. Memory Keys* Up to 10 user programmable speed-dial keys.
16 digit storage capacity per key, including [FLASH] and [PAUSE].
3. FLASH key provides a 600mS (0.6 seconds) flash time. (Not
available on Aegis T5 model)
To install telephone, first snap supplied coiled handset cord into the jack
on the end of handset. Then place the handset in its cradle. Connect the
free end of the coiled handset cord to the jack on LEFT SIDE of the
telephone body, marked with a “handset” symbol.
4. HOLD key for “local hold”.
Page 3

Next, take the supplied straight, two-line telephone line cord and insert it
into jack on the REAR of telephone. Connect the other end of this cord to
a telephone system wall jack. Lift the handset. A dial tone should be
heard.
Converting to Wall Mount:
It is best to do this conversion before connecting the handset and line
cords
1. The wall/desk handset clip is on the front of the phone directly above
the speaker grill. This clip is spring loaded. Gently pull it up and turn
½ turn to change from desk to wall mount. In the wall position, the
clip extends up to hold the handset in place. This clip does not come
off so it cannot be lost.
2. Turn the telephone over so the telephone face is down.
3. Locate the wall-mounting bracket. Note the 4 retaining tabs on
bracket.
4. Rotate the wall-mounting bracket so that the Scitec “Sun” designs are
toward the bottom of the phone.
5. Insert the 4 retaining tabs of the wall-mounting bracket into the 4 slots
located near the middle of the telephone. Firmly push to insert the 4
retaining tabs. They will click into place.
6. Connect a short line cord into the jack on the rear of the phone.
Route the line cord through the line cord channel. Connect the other
end of the line cord to the phone jack on the wall.
7. Hold telephone in front of the 2 mushroom shaped mounting posts on
the wall jack. Line up both keyholes on wall-mounting bracket with the
2 posts. After engaging wall-mounting bracket with posts, slide
telephone down slightly. When properly installed the telephone will
be firmly attached to the wall.
Using the Aegis Series telephone:
Placing calls –
1. Press [LINE 1] or [LINE 2] to select an unused line.
2. Lift the handset, or press the speakerphone key.
3. Then use the dialing keys, redial, or press any of the “user
programmable” memory keys to “speed dial” a stored number.
Answering calls -
1. Press [LINE 1] or [LINE 2] to select the ringing line.
2. Lift the handset, or press the speakerphone key.
Placing a call on Hold –
a. Using handset: During a call, place the caller on hold by
pressing the [HOLD] key. Then replace the handset in its
cradle.
b. Using speakerphone: Press [HOLD] to place the caller
on hold.
Note - After a call has been placed “On-Hold”, the Line-in-Use light for
that line will change color from Green to Red.
Retrieving a held call –
a. Using handset: Lift the handset, and press [LINE1] or [LINE2]
to select the appropriate line.
b. Using speakerphone: Press the [SPKR] key, and press
[LINE1] or [LINE2] to select the appropriate line.
c. Using another extension: The call may also be retrieved from
another extension on the same phone line.
Adjusting volume:
On handset: Press the [VOL] key, located just to left of the
Speakerphone key. Each press of [VOL] moves to the next of 3 possible
settings of [Low – Medium – High -Normal], and repeats back to Low
volume on the 4
th
press. Adjust as desired.
On speakerphone: Use the slide control on the right side of the
telephone. Sliding this knob towards the rear of telephone increases
speaker volume. Small adjustments to speaker volume can greatly affect
the quality of speakerphone calls. Adjustment from call to call is
recommended to get best speakerphone quality.
Other feature keys:
Page 4

[FLASH] is used to access PBX system features, like “system hold,”
“transfer/conference,” or “call park.” Pressing [FLASH] has the same
effect as “tapping” the hookswitch. The standard flash time is 600msec.
[FLASH] may be stored in programmable speed-dial memory keys, along
with other digits. Please see your PBX system manual for additional
information and exact digit sequences required for accessing special PBX
system features.
[REDIAL] redials the last number dialed
, up to 16 digits total. It is not
necessary to hang up first before pressing [REDIAL], as pressing
[REDIAL] automatically hangs up for one second before redialing begins.
Ringer volume:
The ringer volume switch is located at rear of
telephone. Positions: LO - HI. “LO” ringer volume setting is
recommended for most users. If the telephone is installed in a very noisy
location, the “HI” ringer volume setting may be preferred.
Speed-Dial Key Programming
1. Before programming speed-dial keys, the telephone must be plugged
into an active telephone line. Then lift the handset, or press the
speakerphone key to take telephone “off-hook.”
2. Remove the faceplate from the phone.
3. Press the [STORE] key.
4. Dial the desired phone number to be stored. Include [PAUSE] or
[FLASH] when necessary. There is a 16 digit storage capacity for
each memory key.
Note – The [PAUSE] key will insert a 3.6 second pause before
the next number is dialed out. If a “9” prefix (or any other digit) is required
to access an outside telephone line, then a “pause” might be required
after the first number dialed. For example: 9 [PAUSE] 1 – 800 – 555 –
1212. A pause may also be required when accessing voice mail systems,
between dialing the voice mail system access number and entering the
user’s passcode.
5. Press the speed-dial key in which the number is to be stored.
6. To continue programming more keys, repeat steps 3-5. It is not
necessary to hang up first or obtain a new dial tone before continuing
with programming.
Note - Speed-dial memory key contents are retained even if telephone is
unplugged from an active telephone line.
Dataport:
The jack on the right side of the telephone (labeled DATA), next
to the speaker volume control, may optionally be used to connect a
computer modem, credit card terminal, or other similar accessory device
directly to telephone line. Any device plugged into the dataport will utilize
Line 2 when taken “off-hook”. Note that the telephone and device
plugged into the DATA jack cannot both be “off-hook” at the same time,
as both ports share the same telephone line.
Do not attempt to use Dataport for connecting the handset,
headset, or for connecting telephone to PBX. The dataport is ONLY
for connecting computer modems or similar accessory devices.
Required FCC Notice:
This equipment complies with Part 68 of the FCC rules and the
requirements adopted by the ACTA. On the bottom of this equipment is a
label that contains, among other information, a product identifier in the
format US:AAAEQ##TXXXX. If requested, this number must be provided
to the telephone company.
The REN is used to determine the number of devices that may be
connected to a telephone line. Excessive RENs on a telephone line may
result in the devices not ringing in response to an incoming call. In most
but not all areas, the sum of RENs should not exceed five (5.0). To be
certain of the number of devices that may be connected to a line, as
determined by the total RENs, contact the local telephone company. The
REN for this telephone is part of the product identifier that has the format
US:AAAEQ##TXXXX. The digits represented by ## are the REN without
a decimal point (e.g., 03 is a REN of 0.3).
If this equipment causes harm to the telephone network, the telephone
company will notify you in advance that temporary discontinuance of
service may be required. If advance notice isn't practical, the Telephone
Company will notify you as soon as possible. Also, you will be advised of
your right to file a complaint with the FCC if you believe it is necessary.
The Telephone Company may make changes in its facilities, equipment,
operations, or procedures that could affect the operation of this telephone.
If this happens, the Telephone Company will provide advance notice in
Page 5

order for you to make the necessary modifications in order to maintain
uninterrupted service.
If you experience trouble with this telephone, please contact Scitec, Inc.
at (217) 384-6041 for repair or warranty information. If the trouble is
causing harm to the telephone network, the Telephone Company may
request that you remove this equipment from the network until the
problem is resolved.
The customer can do the following repairs: replacement of cords or
handset; replacement of window for telephone number.
Connection to party line service is subject to state tariffs. Contact the
state public utility commission, public service commission or corporation
commission for information.
This telephone cannot be used on Telephone Company provided coin
service.
If your home has specially wired alarm equipment connected to the
telephone line, ensure the installation of the Aegis Series telephone does
not disable your alarm equipment. If you have questions about what will
disable alarm equipment, consult your telephone company or a qualified
installer.
This equipment is hearing aid compatible.
If the Aegis Series Two-line telephone is used with a leased system,
permission of the owner of the equipment must be obtained for
connection of the telephone because modification of the host system is
often required.
Jacks:
A plug and jack used to connect this equipment to the premises wiring
and telephone network must comply with the applicable FCC Part 68
rules and requirements adopted by the ACTA. A compliant telephone
cord and modular plug is provided with this product. It is designed to be
connected to a compatible modular jack that is also compliant. See
installation instructions for details.
The Aegis Series Two-line telephones use RJ14C USOC standard
modular jacks.
Page 6

Warranty:
Scitec, Inc. (“Scitec”) warrants your Aegis Series Two-line telephone to be free from
defects in material and workmanship for a period of five (5) years from the date of
purchase.
This warranty applies only to the original purchaser, and only to products employed in
normal use and service in standard commercial offices, schools/universities, hotel/motel
guest rooms, healthcare facilities, and/or residences.
This Warranty is only valid for merchandise purchased directly from Scitec or from an
authorized Scitec dealer or distributor.
If this product is found to be defective within the terms of this warranty
, Scitec's only
obligation -- and your exclusive remedy -- is the repair or replacement of this product, at
Scitec's discretion, provided that the product has not been damaged through misuse, abuse,
accident, modification, alteration, neglect or mishandling.
This warranty shall not apply to any product found to have been improperly installed,
configured, or used in any way not in accordance with the instructions supplied with this
product.
For repair or replacement, please call Scitec at (217) 384-6041 to request a “ Return
Authorization Form.” A simple one-page form and complete instructions will be sent to you,
to be filled out and returned to Scitec. You will be asked to describe the failure symptoms of
your telephone, provide the date purchased (and proof of purchase date if requested), and
provide the name of the Scitec dealer or distributor from which the telephone was
purchased. The completed form may then be faxed or mailed back to Scitec. Then, when
your return authorization request has been approved, Scitec will contact you with a “Return
Authorization Number” which
must be clearly placed on the outside of the box that you use
to return your telephone. You, the customer, are responsible for paying all shipping costs to
return your defective product to Scitec. Scitec then pays for shipping the repaired or
replaced product back to you.
Please note that Scitec will not accept, repair, or replace any products returned without a
“Return Authorization Number.” Any such
product sent to Scitec without a “Return
Authorization Number” will either be returned at the customer’s expense or be disposed of.
Scitec does not warrant and specifically disclaims any warranty, whether express or implied,
of the fitness for a particular purpose other than the warranty contained herein. No implied
warranty on this product, created by state law, shall extend beyond the term of this warranty
unless such law otherwise provides.
Scitec specifically disclaims any liability and shall not be liable for any consequential or
incidental loss or damage, including but not limited to damages to any equipment with which
this product is used. Some states do not allow the exclusion or limitation of incidental or
consequential damages so the above limitations or exclusions may not apply to you.
No agent, representative, dealer or employee of Scitec has the authority to increase or alter
the obligations or terms of this Warranty. This Warranty gives you specific legal rights and
you may have other rights, which vary from state to state.
 Loading...