

Page 1
MAGNETIC CONTACT TRANSMITTER
INTRODUCTION
The TX-3DS is a fully supervised magnetic contact transmitter. With a built-in reed
switch it can be used to secure doors and windows.
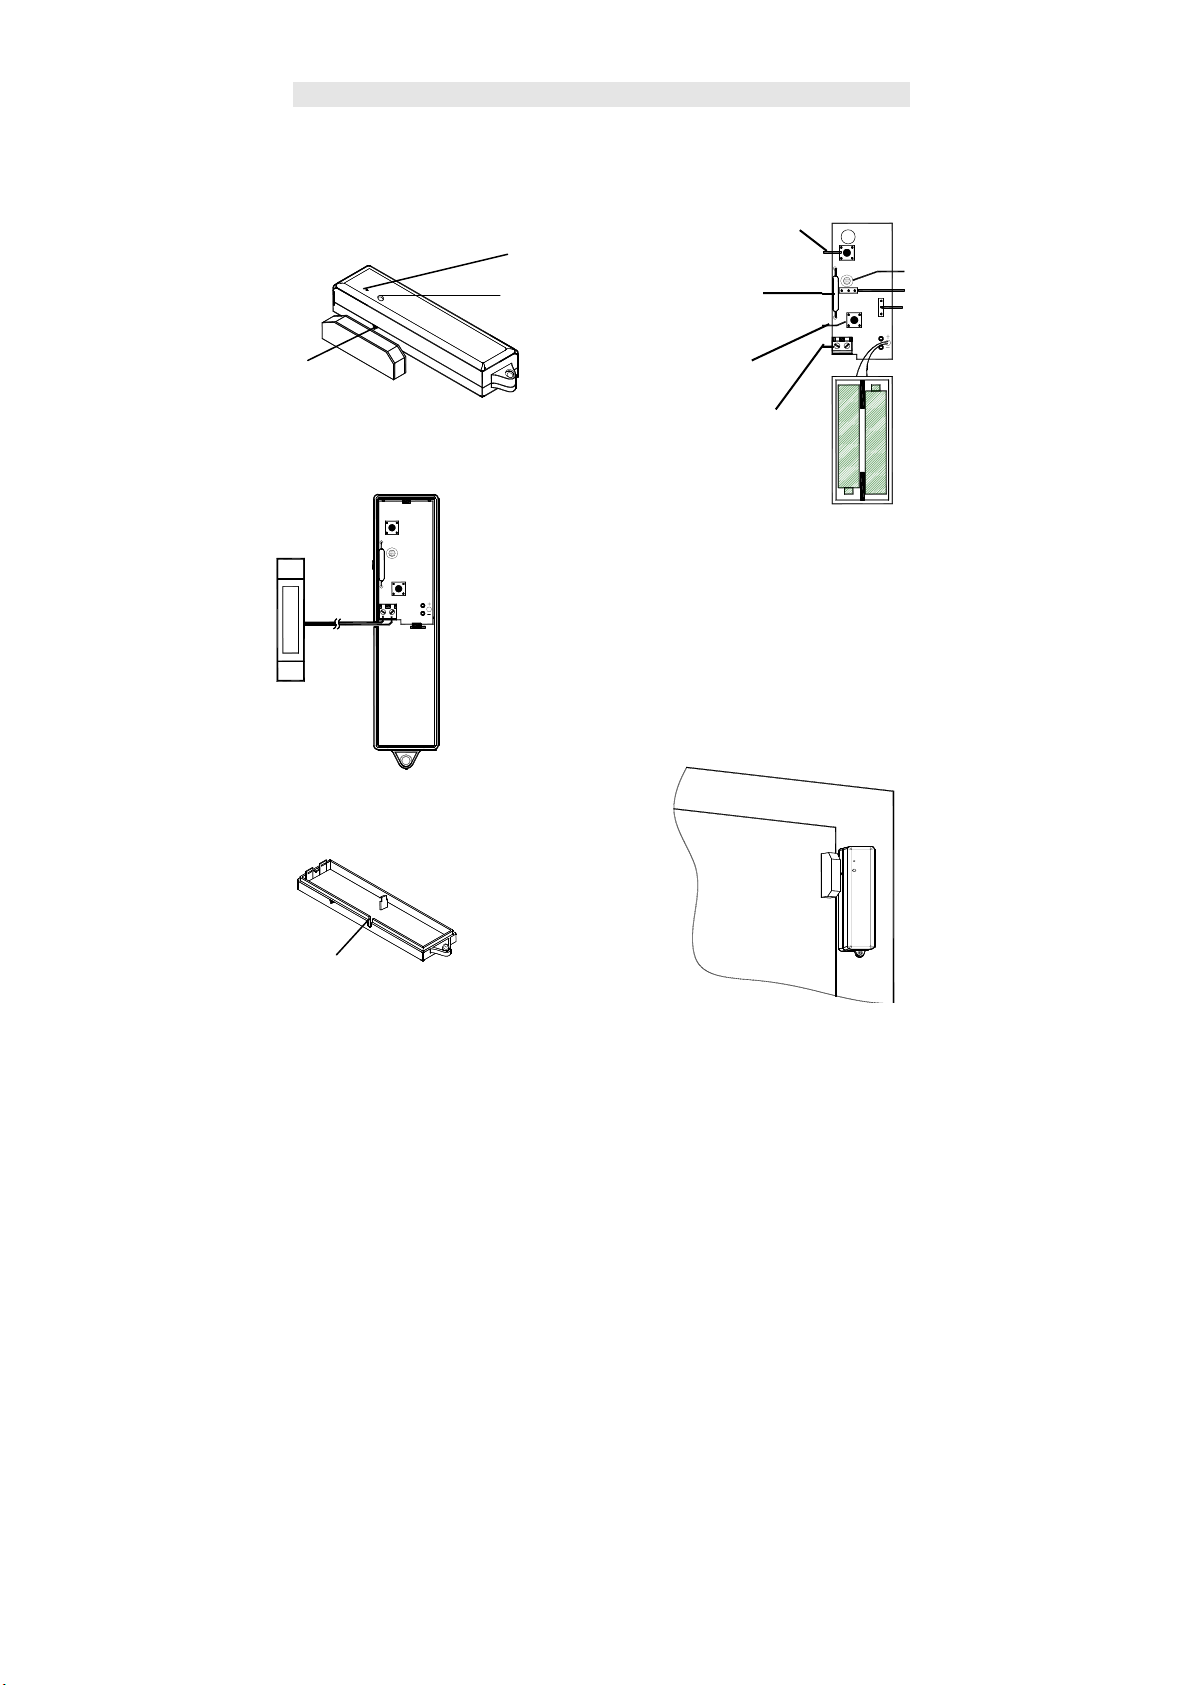
Magnet
Location
Mark
Fig. 1
Hole to reach TEST
button inside
Transmission
LED
Test Button
Reed
Sensor
Tamper
Switch
Aux. Input
Terminals
Fig.2
JP3-DIS: No “CLOSE” signal is sent
when the door/window is
closed.
EN: Sends “CLOSE” signal when
the door/window is closed.
LED
JP3
Wiring Inlet
Fig. 4
Fig.3
Fig.5
Page 2

INSTALLATION
A. Enrolling Code
1. Loosen the screw of the TX-3DS, then open the upper case and insert two
AAA alkaline batteries.
Important Notice: In order to reset the microprocessor properly before changing
the batteries, please press TEST button for 5 seconds to discharge the
energy that remains in the capacitors of TX-3DS. Otherwise, it may not
restart after changing batteries.
2. Select “Installer Mode” on the Base Unit, and enter Installer Password to gain
access authority. Then select \Set Device\Enroll Device\Burglar Sensor\Enter
Zone No. to enroll the ID of the TX-3DS by pressing its TEST button, or do
an open/close action on the TX-3DS. You may change its various attributes
under \Set Device\Change Device Setting\Burglar Sensor Change, to fulfill
different requirements.
B. Mounting
1. It is recommended to attach the transmitter to the fixed frame, and the magnet
to movable part (namely door or window). Refer to Figure 5, and make sure
the gap between the magnet and the mark side of the transmitter is kept within
1 cm.
2. Use the base of TX-3DS as a template, and mark the points on the mounting
surface through two mounting holes. Then drill two holes and attach the
transmitter base with the 2 screws supplied.
3. Close the upper cover on the transmitter and tighten the screw.
4. Mount magnet near transmitter’s mark side. Keep the gap between within 1
cm when door/window is closed.
Note: - If the transmitter is mounted on a metal frame, the RF transmission range
will shrink due to radio signal attenuation. To avoid this effect, you may
connect an external reed sensor to the AUX. Input Terminals of transmitter
PC Board (as shown in Fig.3) and place the transmitter away from the metal
frame. After connecting the external reed sensor, please use a pair of pliers
or cutter to break the plastic of the wiring inlet (refer to Fig. 4), and place the
wire across the wiring inlet before closing the cover. .
- For quick mounting, you may use the supplied double-stick tape and Velcro
to attach magnet and transmitter.
C. Testing
1. Momentarily open the door/window, and verify the transmission LED lights,
showing that transmission is in progress.
2. If the TX-3DS has been enrolled in the LS-30 Base Unit, the Base Unit
will respond accordingly when the door or window is opened. After
testing, close the top cover of the transmitter and tighten it with the screw.
Page 3

SPECIFICATIONS
Supervision: sends heartbeat signal at 60-minute interval. When Tamper or Low
Battery condition is detected, it reports automatically.
Power Source: two AAA alkaline batteries.
Current Drain: 5uA @ standby, 20mA @ operation
Estimated Battery Life: 3 years (@ actuated 10 times/day)
Transmitter Size: 20 x 29 x 123.5 mm
Transmitter Weight (w/o battery): about 34g
Page 4

Manual-BackCover.jpg (2544x3685x16M jpeg)
 Loading...