

Page 1
Owner's Manual
Model CR-100A Charge ’N Ride™ Fully Automatic
Ride-on Vehicle Battery Charger
Suitable for Many 12 Volt Fisher-Price® POWER WHEELS® Ride-On
Vehicle & Scooter Batteries.
Suitable for Many 12 Volt Pég-Perego™ Ride-On Vehicle Batteries.
Patent numbers 5,694,023, 4,829,225 & 5,889,385
–Save–
Important Safety Instructions
CHARGE 'N RIDE BATTERY CHARGER IS NOT A T0Y. KEEP OUT OF REACH OF CHILDREN.
SCHUMACHER ELECTRIC CORPORATION
801 BUSINESS CENTER DRIVE • MOUNT PROSPECT, ILLINOIS 60056-2179
Send Warranty Product Repairs to: 1025 E. Thompson, Hoopeston, IL 60942-0280
Call Customer Service if you have questions: 1-800-621-5485
00-99-000306/0403
1
Page 2

Model CR-100A Charge ’N Ride™ Fully Automatic
Ride-on Vehicle Battery Charger
Suitable for Many 12 Volt Fisher-Price® POWER WHEELS® Ride-On
Vehicle & Scooter Batteries.
Owner's Manual
Suitable for Many 12 Volt Pég-Perego™ Ride-On Vehicle Batteries.
–Save–
Important Safety Instructions
Warning – Read Rules for Safe Operation and Instructions Carefully
Working in vicinity of a lead-acid battery is dangerous. Batteries generate explosive gases during normal
battery operation. For this reason, it is of utmost importance that each time before using your charger, you
read this manual and follow the instructions exactly. Failure to do so could result in explosion and severe
personal injury.
To reduce risk of battery explosion, follow these instructions and those published by the battery manufacturer of any equipment you intend to use in vicinity of battery. Review cautionary markings on these products.
A. GENERAL BATTERY SAFETY
1. Battery charging must be done by an adult.
2. Before you use your battery charger, be sure to read all
instructions and cautions printed on:
• Battery Charger
• Battery
• Vehicle or unit using battery
3. Use battery charger on 12 Volt SEALED LEAD ACID type
rechargeable batteries only that are used in specific Fisher
Price® POWER WHEELS® or Pég Perego™ ride-on
vehicles. Charger is not intended to supply power to lowvoltage electrical systems.
WARNING: Do
cell batteries that are commonly used with home appliances.
These batteries may burst and cause injury to persons and
damage to property.
4. Use only attachments recommended or sold by
manufacturer. Use of non-recommended attachments may
result in fire, electric shock, or injury.
5. When disconnecting the battery charger, pull by the plug
not by the cord. Pulling on the cord may cause damage to
cord or plug.
6. Locate battery power cord so it cannot be stepped on, tripped
over, or subjected to damage or stress.
7. Do not operate charger with damaged cord or plug. Have
cord replaced immediately.
8. Do not operate charger if it has received a sharp blow, been
dropped, or otherwise damaged in any way. Take it to a
qualified professional for inspection and repair.
9. Do not disassemble charger. Take it to a qualified
professional when service or repair is required. Incorrect
reassembly may result in electric shock or fire.
10. To reduce risk of electric shock, unplug charger from outlet
before attempting any maintenance or cleaning.
not use battery charger for charging dry-
11. Do not use an extension cord unless absolutely necessary.
Use of an improper extension cord could result in fire or
electric shock. If an extension cord must be used, make
sure that:
• Pins on plug of extension cord are the same number,
size, and shape as those of plug on charger.
• Extension cord is properly wired and in good electrical
condition.
• Wire size is large enough for AC ampere rating of charger,
as specified below:
Length of cord (feet): 25 50 100 150
AWG size of cord: 18 18 16 14
12. Always charge battery in a well-ventilated area.
NEVER operate in a closed-in or restricted area without
adequate ventilation.
WARNING: Risk of explosive gas.
WARNING: Battery chargers get hot during operation and
must have proper ventilation. Air needs to flow around entire
charger. Do not set on flammable items like carpeting,
upholstery, paper, cardboard, etc. Will damage leather and
melt plastic and rubber.
13. Locate charger as far away from battery as DC charger
cables permit.
14. Do not expose charger to rain or snow.
15. NEVER charge a frozen battery. If battery fluid (electrolyte)
is frozen, bring into a warm area to thaw before charging.
16. NEVER set a battery on top of charger.
17. NEVER place charger directly above battery being charged.
Gases from battery will corrode and damage charger.
2
Page 3
B. PERSONAL PRECAUTIONS AND SAFETY
1. WARNING: Wear complete eye protection and clothing
protection when working with lead-acid batteries.
2. Make sure someone is within range of your voice or close
enough to come to your aid when you work with or near a
lead-acid battery.
3. Have plenty of fresh water and soap nearby for use if battery
acid contacts skin, clothing, or eyes. If battery acid contacts
skin or clothing, wash immediately with soap and water.
4. Avoid touching your eyes while working with a battery. Acid
particles (corrosion) may get into your eyes! If acid enters
your eye, immediately flood eye with running cold water for
at least 10 minutes. Get medical attention immediately.
5. Remove all personal metal items such as rings, bracelets,
necklaces, and watches when working with a lead-acid
battery. A lead-acid battery can produce a short-circuit
current high enough to weld a ring (or the like) to metal,
causing a severe burn.
6. Take care not to drop a metal tool or other metal onto the
battery. Metal may cause sparking or short circuit the battery
or another electrical device. Sparking may cause an
explosion.
7. Always operate battery charger in an open, well- ventilated
area.
8. NEVER smoke or allow a spark or flame in the vicinity of
the battery or engine. Batteries generate explosive gases!
9. NEVER allow children to charge the battery. Battery charging
must be done by adults only.
10. WARNING: Handling the cord on this product or cords
associated with accessories sold with this product, will
expose you to lead, a chemical known to the State of
California to cause cancer and birth defects or other
reproductive harm.
Wash hands after handling.
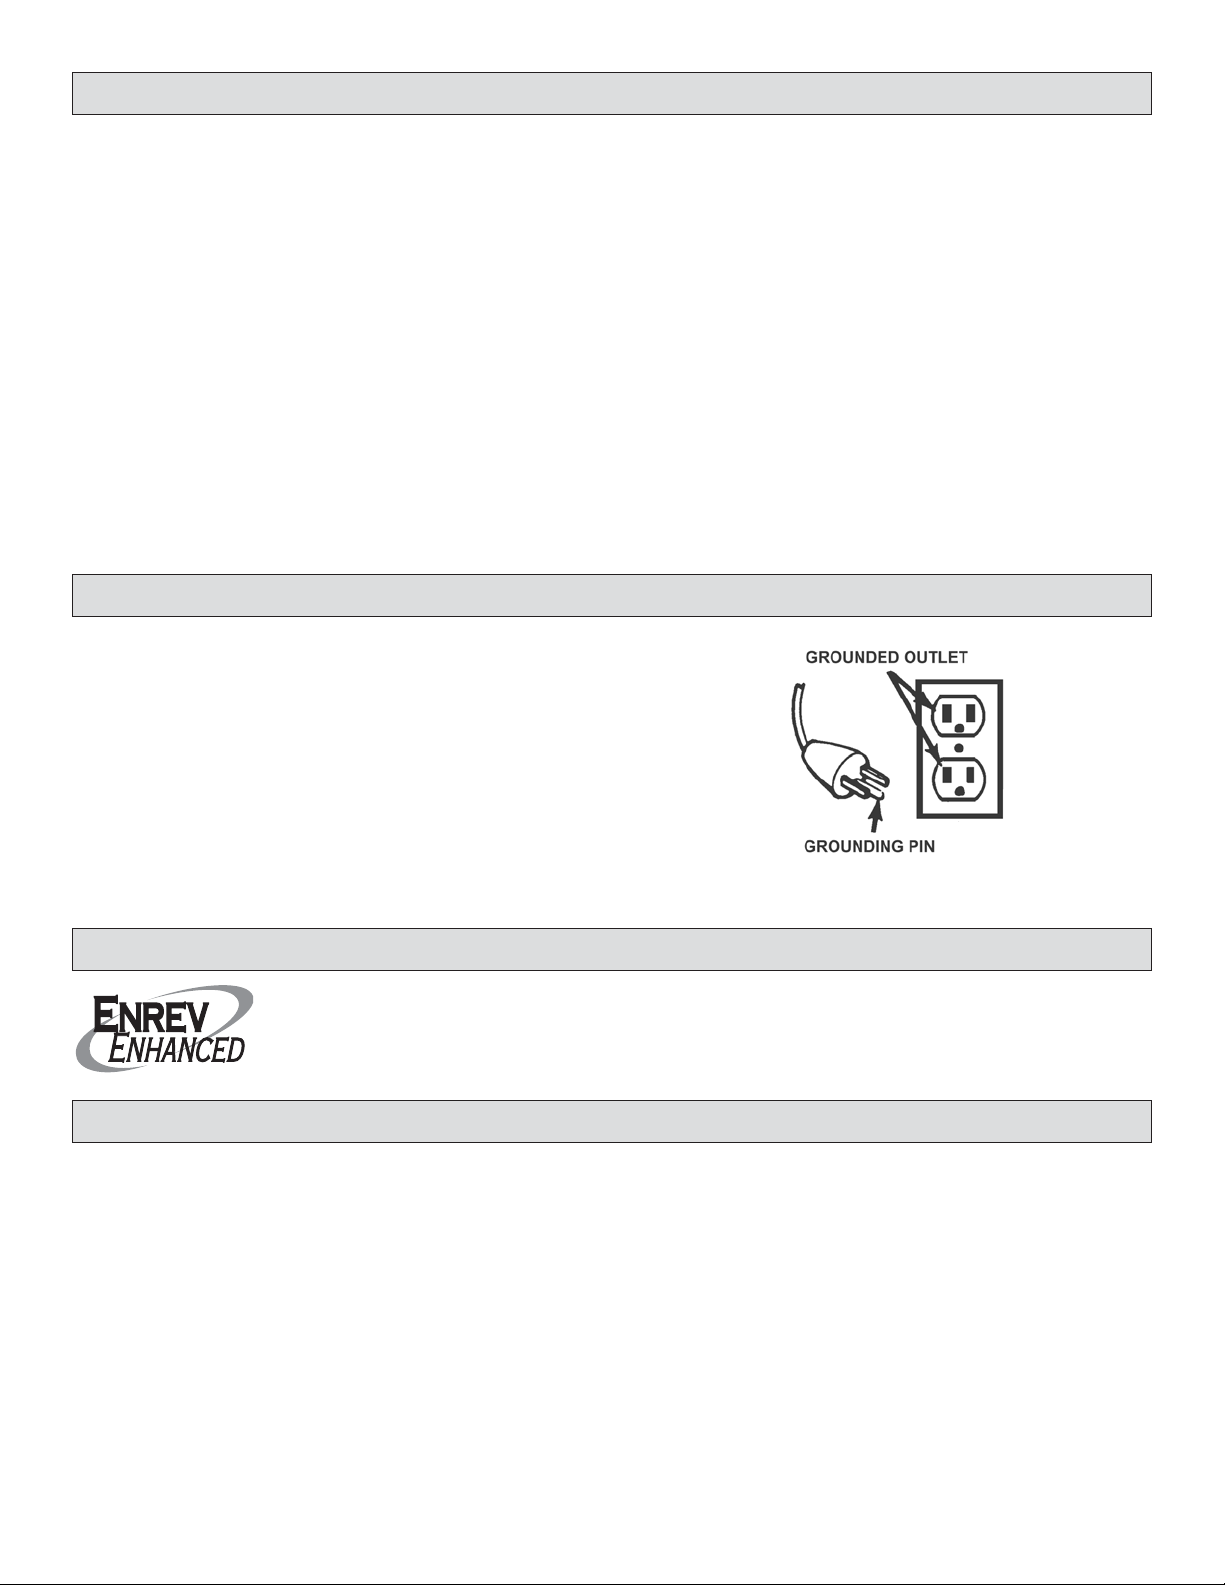
C. GROUNDING AND AC POWER CORD CONNECTION INSTRUCTIONS
Charger should be grounded to reduce risk of electric shock.
Charger is equipped with an electric cord having a grounding
plug. The plug must be plugged into an outlet that is properly
installed and grounded in accordance with all local codes and
ordinances.
DANGER – Never alter AC cord or plug provided – if it will not fit
outlet, have proper outlet installed by a qualified electrician.
Improper connection can result in a risk of an electric shock.
CAUTION – To reduce risk of fire or electric shock, connect
battery charger directly to grounding receptacle (three-prong).
An adapter should not be used with battery charger.
D. ENREV ENHANCED
Enrev Enhanced is a patented and proprietary battery charging technology that allows your Charge ‘N Ride™
charger to charge your battery more quickly and efficiently, providing you with long life for your rechargeable
battery. Patent numbers 5,694,023, 4,829,225 & 5,889,385.
E. PREPARING TO CHARGE
1. Make sure you have one of the 12 volt battery systems as
listed in “BATTERY TYPES AND CONNECTORS”.
2. Remove battery from vehicle to charge. Make sure all
accessories in the vehicle are off, so as not to cause an arc.
3. Clean and inspect battery. Examine the battery for excessive
wear, cracks, bulging or damage. If damage is detected, do
not charge and replace immediately. If battery is hot, allow
it to cool before charging.
4. Study all battery manufacturer’s specific precautions.
5. Be sure area around battery is well ventilated while battery
is being charged. Gas can be forcefully blown away by using
a piece of cardboard or other non-metallic material as a
fan.
3
Page 4

F. BATTERY TYPES AND CONNECTORS
These three connectors cover about 80% of the 12-Volt or two 6-Volt Ride-On Vehicles in the market. Vehicles prior to 1999 may have
different connectors.
NOTE: If you do not have any of the battery systems listed below, do not use the Charge ’N Ride™ to charge the battery.
NOTE: For a replacement harness assembly, contact Schumacher customer service at 1-800-621-5485.
If Your Battery Looks Like… And Your Vehicle's Wiring Or Follow These Instructions…
Charging Harness Look's Like…
Connect supplied harness assembly by
mating the blue connector (P/N 0203)
to the black connector (P/N 0202) on
the end of the charger. The two connectors should snap into place.
POWER WHEELS® by Fisher Price®
12 Volt 9.5 Ampere Hour. Type “12V”
power systems. Model 74777.
POWER WHEELS® by Fisher Price®
6 Volt 9.5 Ampere Hour. 12V Type “A”
power systems. Model 74522. Requires 2 batteries to make 12 volt
system.
Replacement part number for harness
P/N 1232.
Connect supplied harness assembly by
mating the blue connector (P/N 0203)
to the black connector (P/N 0202) on
the end of the charger. The two connectors should snap into place.
Replacement part number for harness
P/N 1202.
Connect black connector (P/N 0202) on
the end of charger directly to the battery. The two connectors should snap
into place.
Peg-Pérego™ 12V 12AH sealed
rechargeable battery with Blue
connector (P/N 0203).
No additional harness assembly is
needed.
Black - P/N 0202
4
Page 5

G. OPERATING INSTRUCTIONS
1. Disconnect the vehicle’s wiring harness to remove the
battery and then place battery upright. Examine the battery
for excessive wear, cracks, bulging or damage each time
you charge the battery. If damage is detected, do not charge
the battery and replace immediately. If the battery is hot,
allow it to cool before charging.
2. Select the proper charging connector for the battery – See
“BATTERY TYPES AND CONNECTORS” in Section F.
3. With the charger disconnected from the wall outlet, connect
the charger connector to the battery. Make sure the
connector is fully inserted into the battery or battery wire
harness.
4. Plug the charger into a standard wall outlet. If the battery is
connected correctly, the red LED will light solid and the unit
will begin charging the battery. If the red LED is flashing,
check the connection (See TROUBLESHOOTING).
5. QUICK CHARGE - When the green LED begins to flash,
the battery is “Ready to use”. Disconnect the charger from
the wall outlet and then disconnect the battery charger from
the battery.
H. LED DISPLAY
NOTE: The red LED will remain lit while the green LED is
flashing. For better results, leave the charger connected
until vehicle is ready to be used.
6. COMPLETE CHARGE – When the green LED turns solid
and the red LED turns off, the battery is completely charged
and is being maintained by the Charge ‘n Ride™. When
ready to use, disconnect the charger from the wall outlet
and then disconnect the battery charger from the battery.
NOTE: For longer battery life, the battery must be completely
charged after two consecutive quick charges.
NOTE: A pulsing noise is normal while the battery charger
is charging the battery. A buzz or hum is normal anytime
the AC power cord is connected to an electrical source (i.e.
wall outlet).
LED Indicators: The battery charger has two LED lights. They
indicate different functions.
FLASHING RED LED – A SLOW flashing red LED indicates the
battery is NOT correctly connected and the connections need to
be checked. The charger must detect a minimum of 1V in order
to turn the charger on. A RAPIDLY flashing red LED will indicate
the charger has detected a fault condition within the battery and
has aborted the charge. Disconnect the charger from the wall
outlet and from the battery. The battery should be replaced and
recycled.
SOLID RED LED – A steady glow indicates the charger is
CHARGING.
FLASHING GREEN LED – A flashing green LED indicates the
battery is nearing a complete charge. The battery is “Ready to
use”.
SOLID GREEN LED – A steady glow indicates that the battery
is COMPLETELY CHARGED and is being maintained.
5
Page 6

I. QUICK CHARGE AND COMPLETE CHARGE
The Charge ‘N Ride™ is equipped with a QUICK charge feature. When the green LED begins to flash, the battery is “Ready to use”.
When the green LED turns solid and the red LED turns off, the battery is completely charged and is being maintained by the Charge ‘n
Ride™. It is important to do a COMPLETE charge after no more than two QUICK charges (example: Quick – Quick – Complete) to
ensure longer battery life.
J. PROLONGED STORAGE
The Charge ‘N Ride™ will maintain the battery during extended periods of non-use. Simply leave the charger connected and it will
monitor the battery and charge as needed. During monitoring, the green LED will remain on. If the battery voltage drops to a preset level,
the charger will begin charging in the “Ready to use” state (the red LED will turn on and the green LED will flash until the battery is
completely charged).
K. MAINTENANCE/CLEANING/STORAGE INSTRUCTIONS
Very little maintenance is required for the battery charger. Follow common sense in wiping the charger clean and store in a clean, dry area.
1. After use, wipe any dirt or oil from connectors, cords, and
charger case with a dry cloth.
2. Coil charger cords to prevent damage.
3. Have any cracked or frayed cords replaced by a qualified
professional.
4. Store battery charger in a clean, dry area.
L. CIRCUIT BREAKER
This battery charger is equipped with a self-resetting circuit
breaker. This device protects the charger from temporary overloads. In the event of an overload, the circuit breaker will trip
open and after a short cooling off period will reset automatically.
This process is known as cycling and can be recognized by an
audible
clicking sound.
CAUTION: Cycling of the breaker is not a normal condition for
the charger and may indicate shorted battery cells or other battery fault. (See TROUBLESHOOTING).
6
Page 7

M. TROUBLESHOOTING
The battery charger is designed to work automatically. However, If a problem does occur, check the following:
PROBLEM POSSIBLE CAUSE SOLUTION
No LEDs are lit. Charger is not plugged in. Plug in.
AC outlet is not working. Plug in a lamp or other appliance to check to
see that the outlet is working.
Red LED continues to flash Battery voltage is less than one volt. Battery may need to be replaced.
when battery is connected. Suggestion: Use charger provided with vehicle
to bring voltage above one volt. Charge for the
recommended number of hours as listed in the
vehicle instruction manual.
Connection to battery is bad. Remove and reconnect connectors. Inspect
and clean terminals on battery and charger.
Circuit Breaker is open on charger. Wait a few minutes for circuit breaker to
reconnect (see Circuit Breaker Section).
Battery may be defective.
Fuse (if so equipped) on battery is Replace fuse with same type and amperage
open. rating.
Internal circuit breaker (if so equipped) Replace and recycle battery if breaker is
on battery is open. permanently open.
The green LED does not flash after The battery is very depleted or sulfated. Continue charging.
90 minutes.
The red LED is on while the green This is normal. Battery will continue Continue charging.
LED is flashing. to charge until complete.
The red LED is rapidly flashing. The charger detected a fault condition Replace and recycle the battery.
while charging the battery.
Shortened ride times. Normal under some conditions. Ride times vary depending on the type of car,
type of terrain, weight of rider, speed setting,
etc.
Battery is nearing end of life. Replace and recycle the battery.
Battery will not take a charge. Battery is sulfated, shorted or damaged. Replace and recycle the battery.
A new battery will not take a charge. Battery self discharged while on the Replace or return the battery.
store shelf and may be sulfated. Suggestion: Repeat charging or use the wall
pack charger supplied with the vehicle for the
first charge. Charge for the recommended
number of hours as listed in the vehicle
instruction manual.
The charger is making a humming This is normal. Continue charging.
or pulsing sound.
If you are unable to correct the problem using the troubleshooting chart, contact Customer Service at 1-800-621-5485.
7
Page 8

PRODUCT WARNING LABEL
LIMITED WARRANTY
SCHUMACHER ELECTRIC CORPORATION, 801 BUSINESS CENTER DRIVE, MOUNT PROSPECT, ILLINOIS 60056-2179 MAKES THIS LIMITED
WARRANTY TO THE ORIGINAL PURCHASER AT RETAIL OF THIS PRODUCT. THIS LIMITED WARRANTY IS NOT TRANSFERABLE.
Schumacher Electric Corporation warrants this battery charger for one year from date of purchase at retail against defective material or workmanship. If such
should occur, the unit will be repaired or replaced at the option of the manufacturer. It is the obligation of the purchaser to forward the unit together with proof of
purchase, transportation and/or mailing charges prepaid to the manufacturer or its authorized representative.
This limited warranty is void if the product is misused, subjected to careless handling, or repaired by anyone other than the manufacturer or its authorized
representative.
The manufacturer makes no warranty other than this limited warranty and expressly excludes any implied warranty including any warranty for consequential
damages.
THIS IS THE ONLY EXPRESS LIMITED WARRANTY AND THE MANUFACTURER NEITHER ASSUMES NOR AUTHORIZES ANYONE TO ASSUME
OR MAKE ANY OTHER OBLIGATION TOWARDS THE PRODUCT OTHER THAN THIS EXPRESS LIMITED WARRANTY. THE MANUFACTURER
MAKES NO WARRANTY OF MERCHANTABILITY OR FITNESS FOR PURPOSE OF THIS PRODUCT AND EXPRESSLY EXCLUDES SUCH FROM
THIS LIMITED WARRANTY.
SOME STATES DO NOT ALLOW THE EXCLUSION OR LIMITATION OF INCIDENTAL OR CONSEQUENTIAL DAMAGES OR LENGTH OF IMPLIED
WARRANTY SO THE ABOVE LIMITATIONS OR EXCLUSIONS MAY NOT APPLY TO YOU.
THIS WARRANTY GIVES YOU SPECIFIC LEGAL RIGHTS AND YOU MAY ALSO HAVE OTHER RIGHTS WHICH VARY FROM STATE TO STATE.
8
 Loading...