

Schumacher Charge 'n Ride CR1 Owner's Manual
0099001295-02
Voltage / Tensión: 6, 12
Amperage / Amperaje: 3
Model / Modelo: CR1
Automatic Battery Charger
Cargador de batería automático
OWNERS MANUAL
MANUAL DEL USUARIO
READ THE ENTIRE MANUAL BEFORE USING THIS PRODUCT.
FAILURE TO DO SO COULD RESULT IN SERIOUS INJURY OR DEATH.
LEA EL MANUAL COMPLETO ANTES DE UTILIZAR ESTE PRODUCTO.
CUALQUIER FALLA PODRÍA RESULTAR EN SERIAS LESIONES O
PODRÍA SER MORTAL.
DO NOT RETURN THIS PRODUCT TO THE STORE!
Contact Customer Service for assistance:
Phone: 800-621-5485
Email: services@schumacherelectric.com
Web: www.batterychargers.com
¡NO LO DEVUELVA ESTE PRODUCTO A LA TIENDA!
Contacte Servicios al Cliente para asistencia:
Teléfono: 800-621-5485
Correo Electrónico: services@schumacherelectric.com
Sitio Red: www.batterychargers.com
• 2 •
IMPORTANT: READ AND SAVE THIS SAFETY AND INSTRUCTION MANUAL.
SAVE THESE INSTRUCTIONS – This manual will show you how to use your charger
safely and effectively. Please read, understand and follow these instructions and
precautions carefully, as this manual contains important safety and operating instructions.
The safety messages used throughout this manual contain a signal word. The signal word
indicates the level of the hazard in a situation.
Indicates an imminently hazardous situation which, if not avoided, will result in
death or serious injury to the operator or bystanders.
Indicates a potentially hazardous situation which, if not avoided, could result in
death or serious injury to the operator or bystanders.
Indicates a potentially hazardous situation which, if not avoided, could result in
moderate or minor injury to the operator or bystanders.
Indicates a potentially hazardous situation which, if not avoided, could result in
damage to the equipment, vehicle or property.
Pursuant to California Proposition 65, this product contains chemicals known to
the State of California to cause cancer and birth defects or other reproductive
harm. Wash hands after handling.
1. IMPORTANT SAFETY INSTRUCTIONS – SAVE THESE INSTRUCTIONS.
This manual contains important safety and operating instructions.
RISK OF ELECTRIC SHOCK OR FIRE.
1.1 To reduce the risk of injury, the user must read and understand this instruction manual.
Use only batteries recommended in this manual. Other types of batteries may burst,
causing personal injury and damage to property. Dispose of the battery charger if the cord
becomes defective. Risk of electric shock. Use in a dry location only.
1.2 Children should not operate this charger.
1.3 Do not expose the charger to rain or snow.
1.4 If the output cable assembly and/or connector does not t or make a proper connection
with the ride-on toy’s battery connector, do not alter the connectors on the battery
charger or ride-on toy. Using this charger in a manner it was not designed for or making
modications to it can cause a risk of electric shock or re. Electric shock or re can cause
serious injury or death or damage to property.
1.5 Do not operate the charger with a damaged cord or plug; take it to a qualied service person.
1.6 Do not disassemble the charger; take it to a qualied service person when service or
repair is required. Incorrect reassembly may result in a risk of re or electric shock.
1.7 To reduce the risk of a battery explosion, follow these instructions and those published by
the battery manufacturer and the manufacturer of any equipment you intend to use in the
vicinity of the battery. Review the cautionary markings on these products.
2. PERSONAL PRECAUTIONS
RISK OF EXPLOSIVE GASES.
2.1 Remove personal metal items such as rings, bracelets, necklaces and watches when
working with a lead-acid battery. A lead-acid battery can produce a short-circuit current
high enough to weld a ring or the like to metal, causing a severe burn.
2.2 NEVER smoke or allow a spark or ame in the vicinity of the battery.
2.3 Use this charger for charging 6 and 12V LEAD-ACID batteries only. It is not intended
to supply power to a low voltage electrical system. Do not use this battery charger for
charging dry-cell batteries that are commonly used with home appliances. These batteries
may burst and cause injury to persons and damage to property.
2.4 NEVER charge a frozen battery.
2.5 Make sure that the charger cable connector makes a tight connection.
RISK OF CONTACT WITH BATTERY ACID. BATTERY ACID
IS A HIGHLY CORROSIVE SULFURIC ACID.
• 3 •
2.6 Be sure the area around the battery is well ventilated while the battery is being charged.
2.7 Read, understand and follow all instructions for the charger, battery, vehicle and any
equipment used near the battery and charger. Study all of the battery manufacturer’s
specic precautions while charging and recommended rates of charge.
2.8 If battery acid contacts your skin or clothing, immediately wash the area with soap and
water. If acid enters your eye, immediately ood the eye with cold running water for at
least 10 minutes and get medical attention right away.
2.9 If battery acid is accidentally swallowed, drink milk, the whites of eggs or water. DO NOT
induce vomiting. Seek medical attention immediately.
3. BATTERY CHARGING – AC CONNECTIONS
RISK OF ELECTRIC SHOCK OR FIRE.
3.1 This battery charger is for use on a nominal 120-volt circuit. The plug must be plugged into
an outlet that is properly installed and grounded in accordance with all local codes and
ordinances. The plug pins must t the receptacle (outlet). NOTE: Pursuant to Canadian
Regulations, use of an adapter plug is not allowed in Canada. Use of an adapter plug in
the United States is not recommended and should not be used.
3.2 An extension cord should not be used unless absolutely necessary. Use of an improper
extension cord could result in a risk of re and electric shock. If an extension cord must
be used, make sure:
• That the pins on the plug of the extension cord are the same size and shape as those of
the plug on the charger.
• That the extension cord is properly wired and in good electrical condition.
• That the wire size is large enough for the AC ampere rating of the charger as specied below.
3.3 Recommended minimum AWG size for extension cord:
• 100 feet (30.5 meters) long or less – use an 18 gauge (0.82 mm2) extension cord.
• Over 100 feet (30.5 meters) long – use a 16 gauge (1.31 mm2) extension cord.
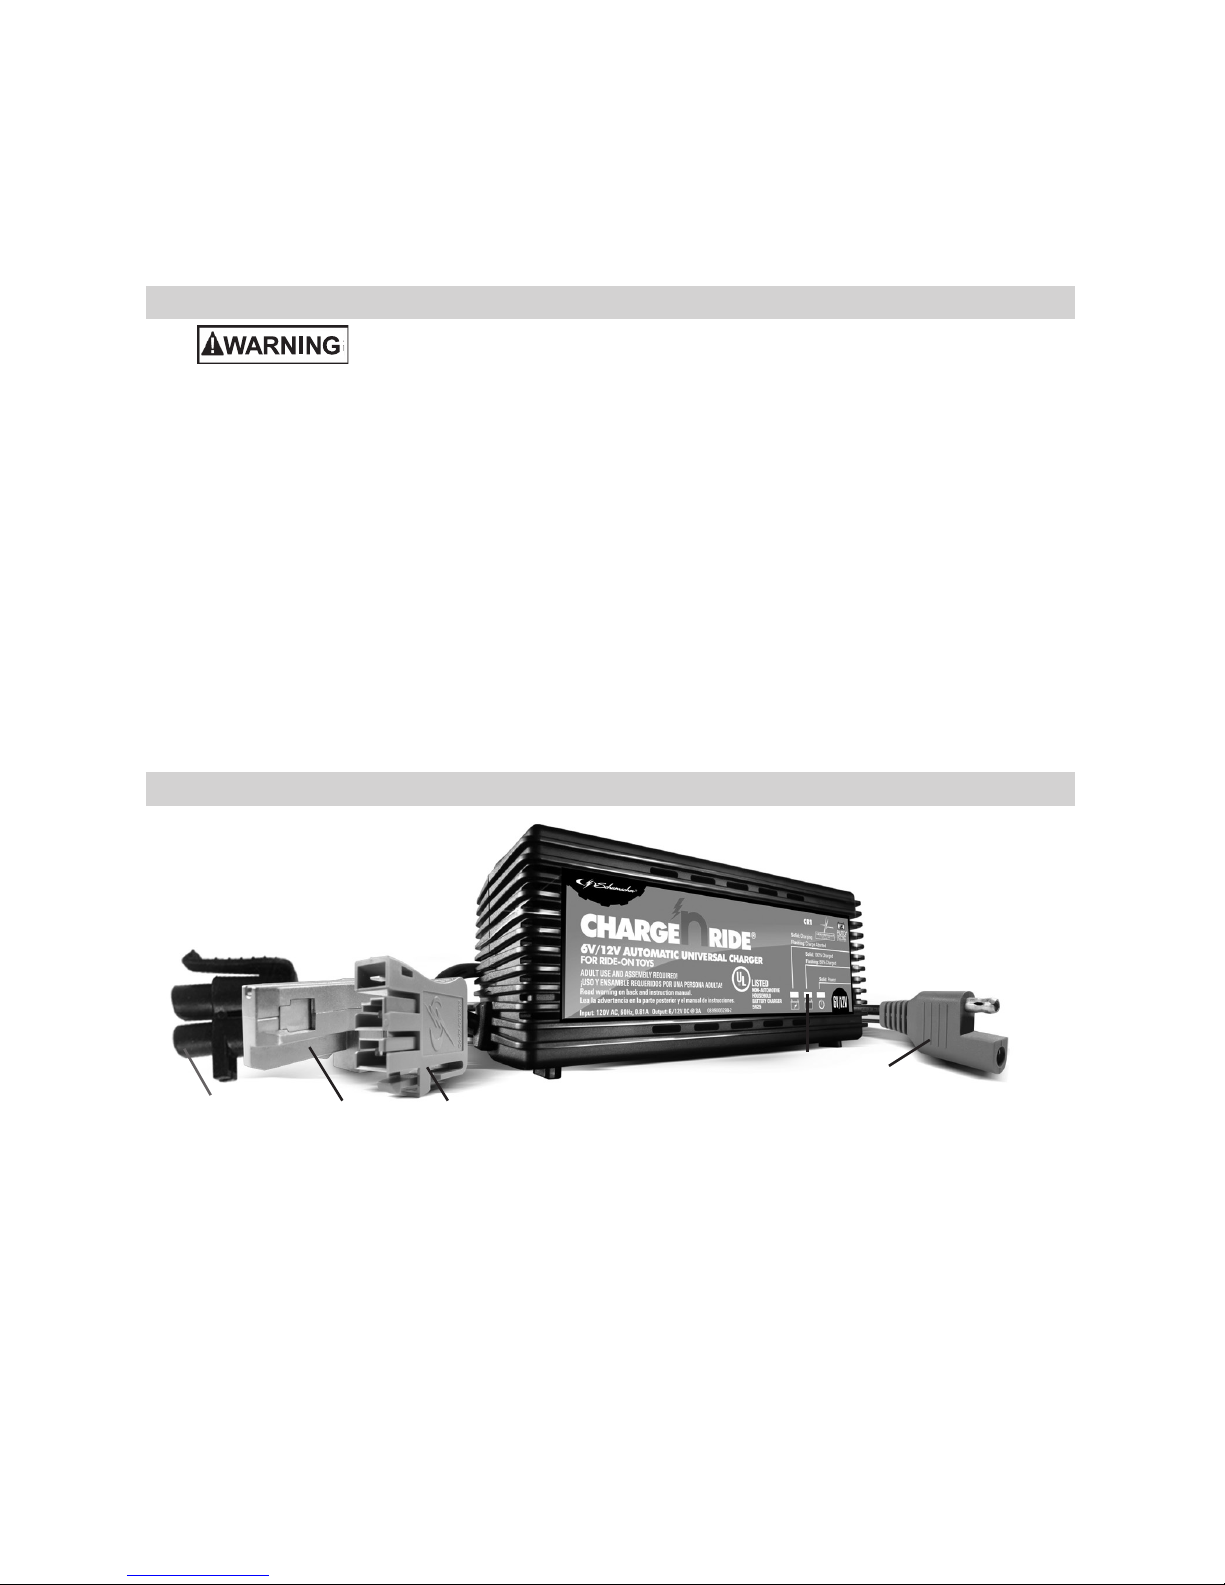
4. FEATURES
1
3
2
4
5
1. LED Display
2. Quick-Disconnect Cable
3. MotionTrendz
®
Small 6/12V Battery Connector
Cable Assembly
4. Power Wheels
®
12V Battery Connector Cable Assembly
5. Peg Perego
®
12V Battery Connector Cable Assembly
MotionTrendz®, Peg Perego® and Power Wheels® are registered trademarks of
independently owned and operated companies.
This product has not been licensed or endorsed by these companies or their manufacturers.
Peg Perego® is a registered trademark of Peg Perego® U.S.A. Inc.
Power Wheels® is a registered trademark of Mattel®, Inc.
MotionTrendz® is a registered trademark of Ballard Pacific Resources, Inc.
• 4 •
5. ASSEMBLY INSTRUCTIONS
Remove all cord wraps and uncoil the cables prior to using the battery charger.
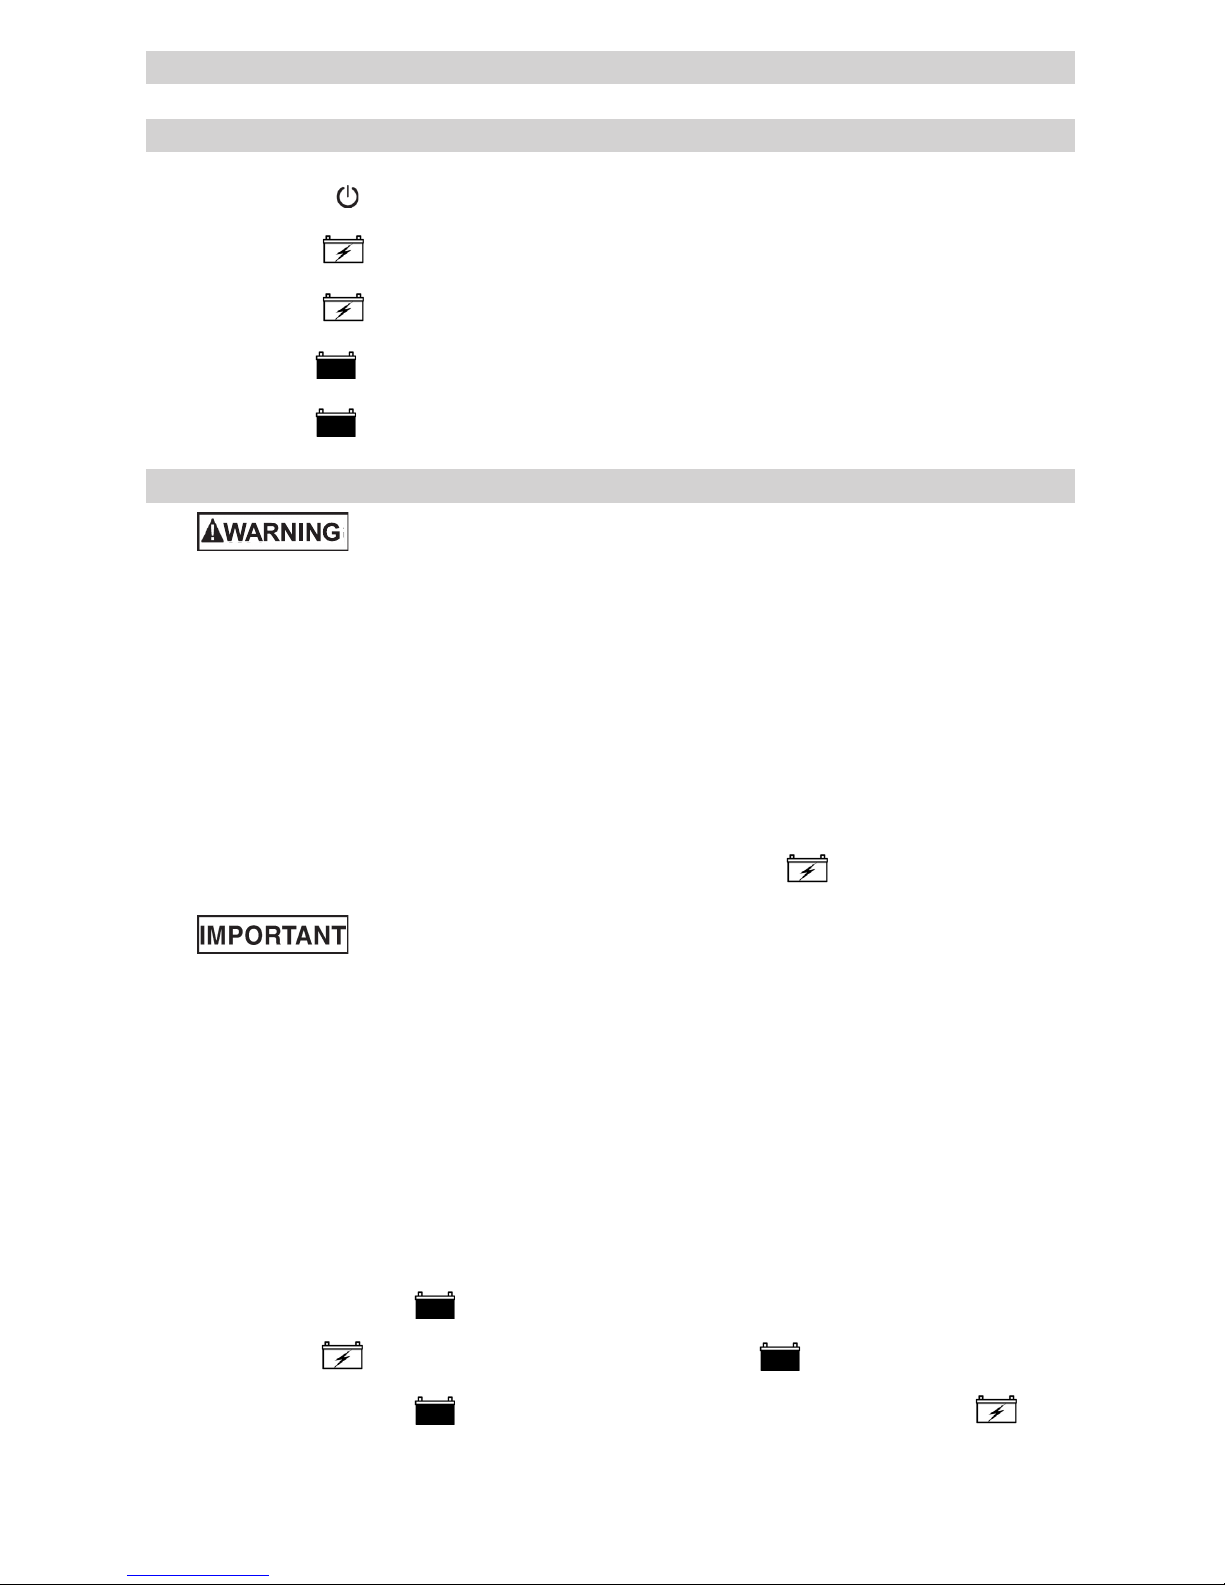
6. CONTROL PANEL
LED Display
A.C. POWER (red) LED lit:
There is AC power supplied to the battery charger.
CHARGING (yellow) LED lit:
The charger is charging the battery.
CHARGING (yellow) LED ashing:
The charger is in abort mode.
CHARGED (green) LED lit:
The battery is fully charged and the charger is in maintain mode.
CHARGED (green) LED ashing:
The battery is 80% charged and is ready to use.
7. OPERATING INSTRUCTIONS
This battery charger must be properly assembled in accordance with the
assembly instructions before it is used.
Battery Information
This charger can be used with 6 and 12V batteries; it automatically detects your battery type.
Charging
NOTE: Examine the battery for excessive wear, cracks, bulging or damage each time you
charge it. If damage is detected, do not charge the battery; replace it immediately. If the
battery is hot, allow it to cool before charging.
1. Select the proper output cable by matching the output cable connector to the vehicle’s
battery connector.
2. Connect the battery following the connection instructions described in Using the Quick-
Disconnect Cable Connectors section.
3. Connect the AC power following the precautions listed in section 3.
4. If you’ve connected everything correctly, the CHARGING LED should be lit,
indicating that the charger is charging.
This charger does not have an ON/OFF switch. ON and OFF are
controlled by plugging in the charger to the AC wall outlet. The charger will
not supply current to the battery clips until a battery is properly connected. The clips will
not spark if touched together.
Using the Quick-Disconnect Cable Connectors
1. Connect the output cable assembly to the charger. Make sure to place the charger on
a dry, non-ammable surface, such as metal or concrete.
2. With the charger disconnected from the wall outlet, connect the supplied harness
assembly by connecting the blue connector to the blue connector on the end of the
charger cable. Connect the other end of the cable assembly to the battery.
NOTE: See Replacement Parts for more connector information.
NOTE: Never connect the output cable assemblies together for use in other applications,
such as external battery or other power source charging, or to extend the output cable
length, as reverse polarity and/or overcharge conditions will occur.
Quick Charge
When the CHARGED LED begins to ash, the battery is ready to use. Unplug the
charger from the wall outlet and then disconnect the charger from the battery. NOTE: The
CHARGING LED will remain lit while the CHARGED LED is ashing.
Complete Charge
When the CHARGED LED stops ashing and stays lit and the CHARGING LED
turns off, the battery is completely charged and the charger has stopped charging and
switched to the Maintain Mode of operation. When ready to use, unplug the charger from
the wall outlet and then disconnect the charger from the battery.
• 5 •
NOTE: For longer battery life, the battery must be completely charged after two
consecutive quick charges. (Example: quick-quick-complete.)
Aborted Charge
If charging can not be completed normally, charging will abort. When charging aborts,
the charger’s output is shut off, and the CHARGING LED will blink. To reset after an
aborted charge, unplug the charger from the AC outlet, wait a few moments and plug it
back in.
8. MAINTENANCE/STORAGE INSTRUCTIONS
8.1 After use and before performing maintenance, unplug and disconnect the battery charger.
8.2 Use a dry cloth to wipe all battery corrosion and other dirt or oil from the connector, cords
and the charger case.
8.3 Servicing does not require opening the unit, as there are no user-serviceable parts.
Servicing should be performed only by qualied service personnel.
8.4 Store the charger unplugged, inside, in a cool, dry place.
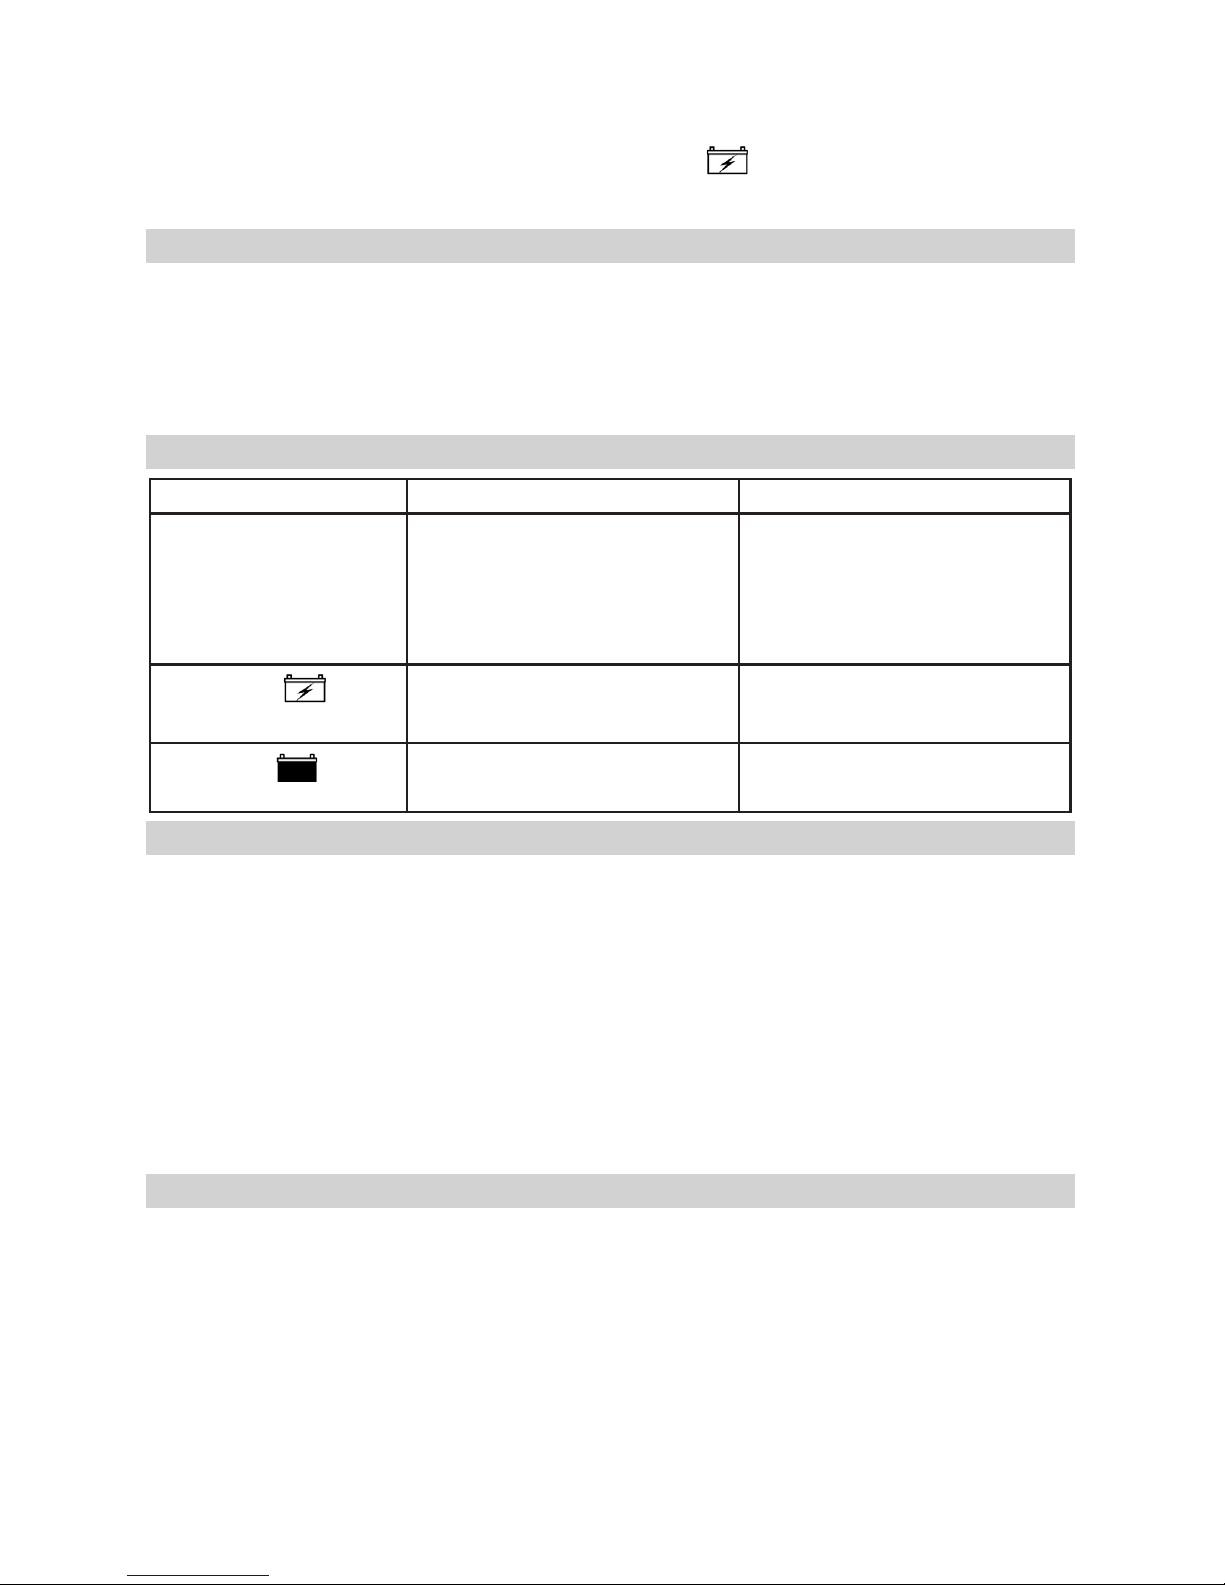
9. TROUBLESHOOTING
PROBLEM POSSIBLE CAUSE REASON/SOLUTION
Power light will not
turn on.
AC outlet is dead.
Poor electrical connection.
Check for an open fuse or circuit
breaker supplying the AC outlet.
Check the power cord
and extension cord for a loose
tting plug.
CHARGING LED is
ashing.
Charger is in abort mode. See Section 7 OPERATING
INSTRUCTIONS – Aborted
Charge.
CHARGED LED is
ashing.
Battery is 80% charged and is
ready to use.
See Section 7 OPERATING
INSTRUCTIONS – Quick Charge.
10. BEFORE RETURNING FOR REPAIRS
10.1 When a charging problem arises, make certain that the battery is capable of accepting a
normal charge. Double check all connections, the AC outlet for a full 120 volts and the quality
of the connections from the connector to the battery system. The connector must be clean.
10.2 When an UNKNOWN OPERATING PROBLEM arises, please read the complete manual and
call the customer service number for information. This will usually eliminate the need for return.
If the above solutions do not eliminate the problem, or for more information
about troubleshooting, call toll-free from anywhere in the U.S.A.
1-800-621-5485
7:00 a.m. to 5:00 p.m. Central Time, Monday through Friday
For REPAIR OR RETURN, contact Customer Service at 1-800-621-5485. DO NOT SHIP
UNIT until you receive a RETURN MERCHANDISE AUTHORIZATION (RMA) number
from Customer Service at Schumacher Electric Corporation.
11. SPECIFICATIONS
Input Voltage ........................................................................................................... 120 VAC
Output Current Rating .......................................................................................... 12V – 3.0A
...............................................................................................................................6V – 3.0A
Maximum Charge Voltage ..................................................................................12V – 15.4V
...............................................................................................................................6V – 7.7V
Maintain Voltage .................................................................................................12V – 13.6V
...............................................................................................................................6V – 6.8V
Size ........................................................................................................2⅝" H x 6" W x 3" D
Weight ......................................................................................................................... 2½ lbs
 Loading...