

Page 1
1
2
ANTINA SUPERIORE
UPPER DOOR
A
A
B
835÷885
3
548
C
C
E = 8 - =
F = - 346,5 =
D
G
2
H
2
45 cm
min
900 min
550 min
550
2
45 cm
min
H
± 3
838÷888
718
2
120÷170
E
F
L - 829
A = =
2
H
B = - 348 =
2
G
ANTINA INFERIORE
LOWER DOOR
L
L
C = =
- 45
2
D = 9,5 - =
G
2
± 2
± 2
898
4
N°5
65
10/2008 - 195053397.02
Page 2
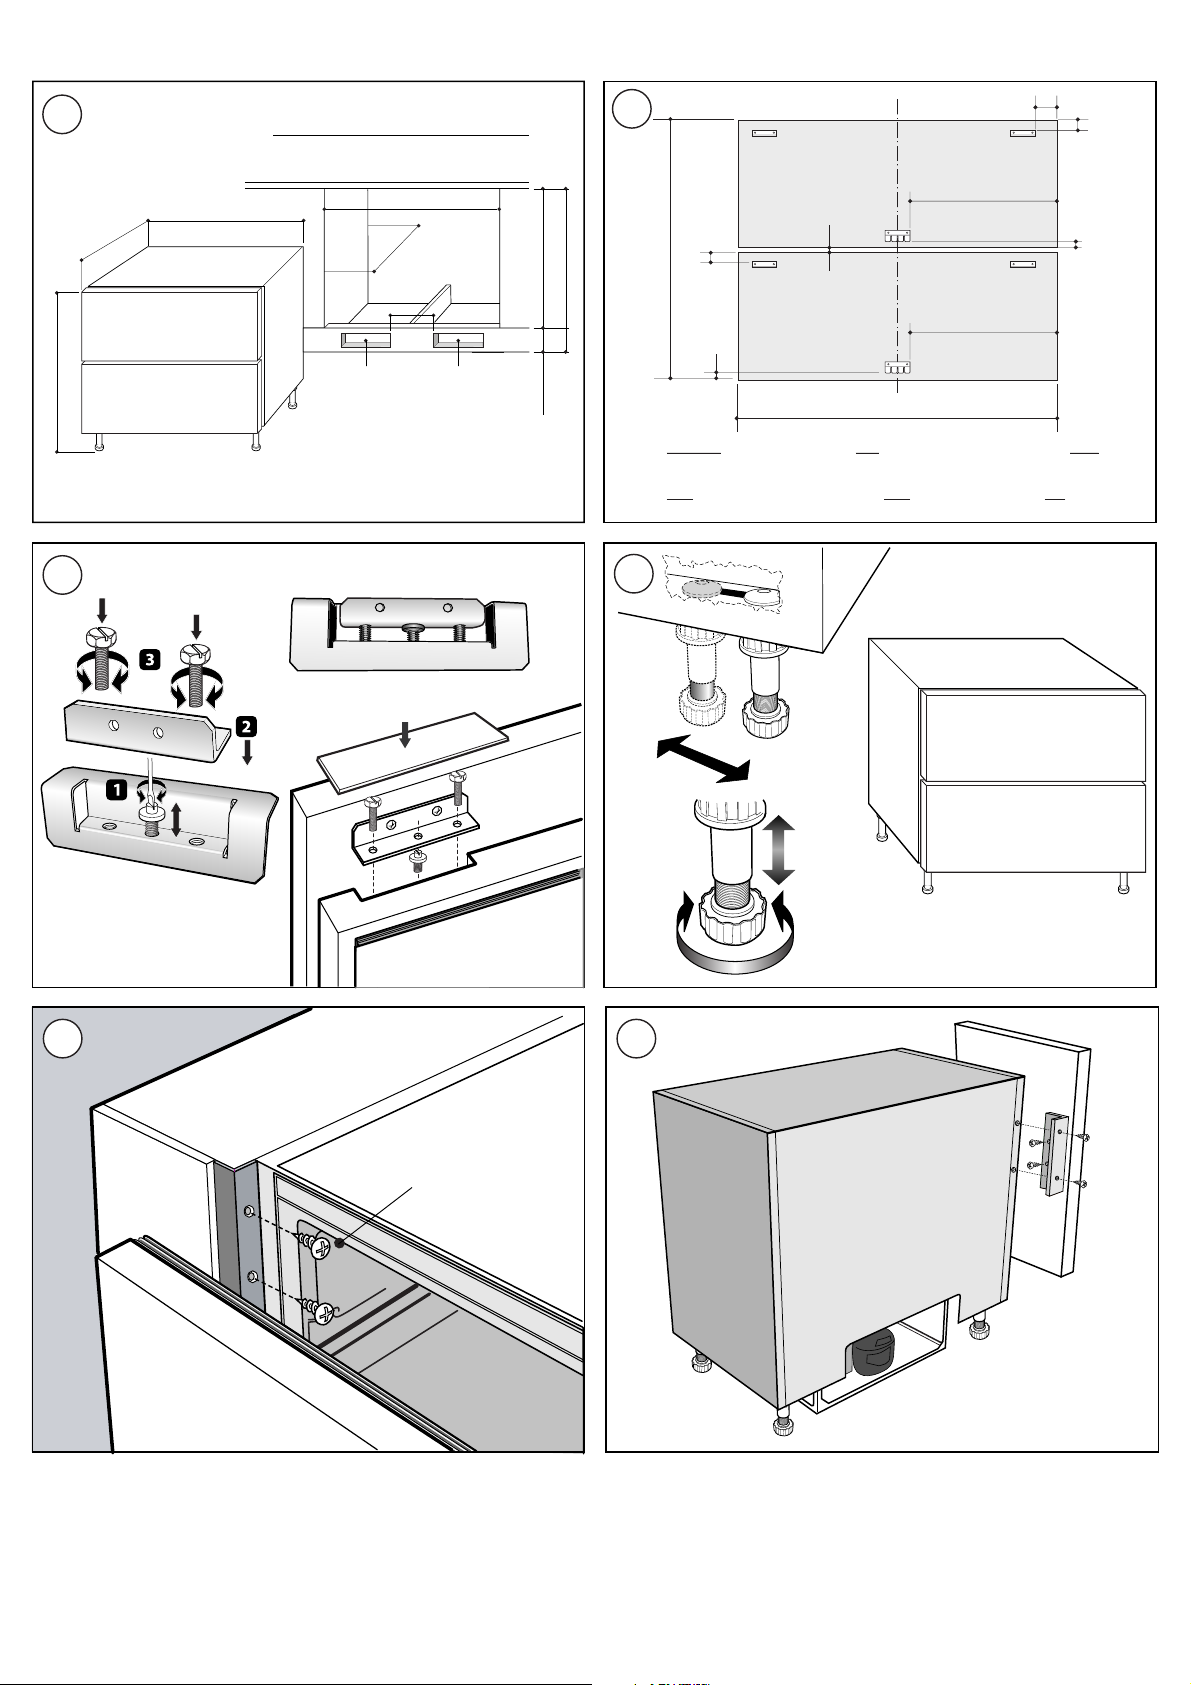
Istruzioni montaggio antine
PARTICOLARI
1. ANTINA SUPERIORE
2. ANTINA INFERIORE
3. SUPPORTO SUPERIORE
4. SUPPORTO INFERIORE
3.
1.
4.
2.
3.
3.
4.
3.
AK1091056 1011
1
Page 3

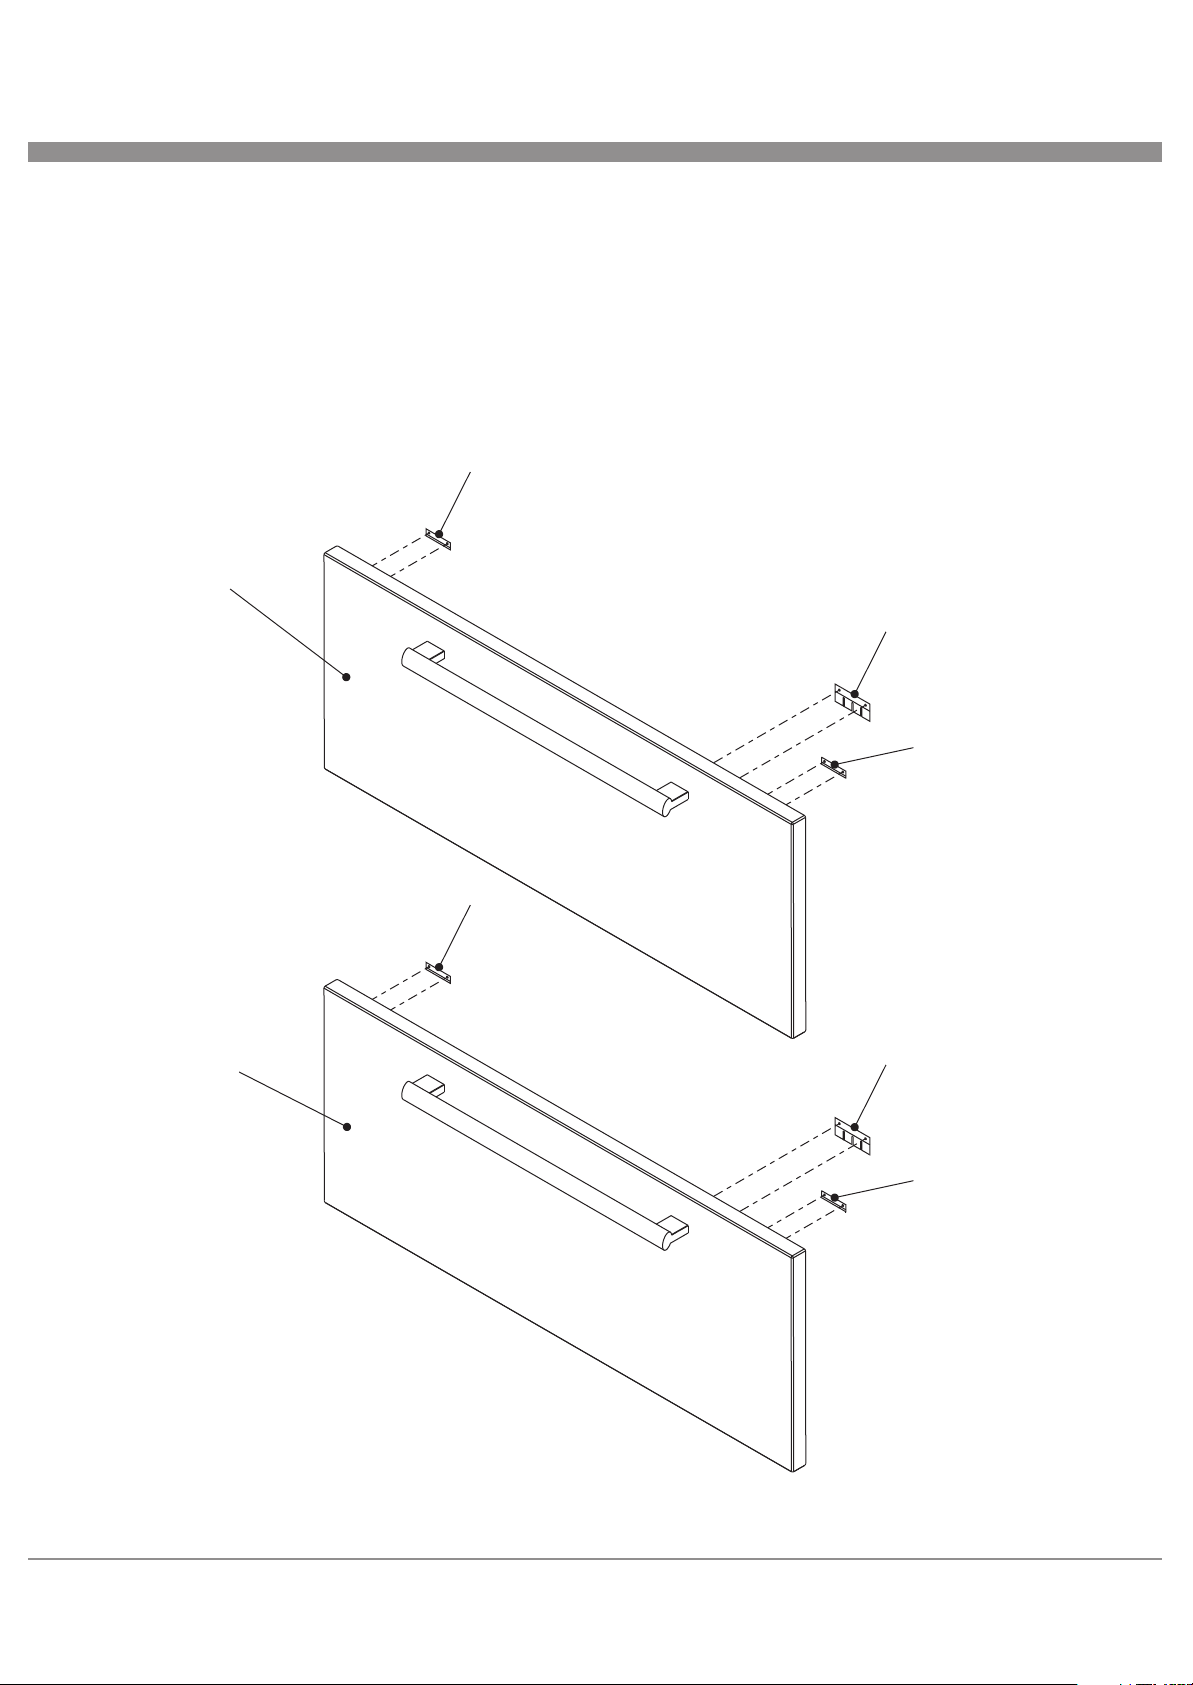
Istruzioni montaggio antine
3. 3.
Viti nei fori inferiori
Viti nei fori inferiori
3. 3.
Viti nei fori superiori
4.
4.
Viti nei fori superiori
Utilizzare le viti fornite in dotazione con le ante.
Per ogni anta prevedere il montaggio di tre staffe, due nella parte superiore ed una nella parte inferiore.
Pre-assiemare le ante come illustrato in figura: apporre la staffa 4 nel foro centrale inferiore e le staffe 3 nei due fori
laterali superiori.
Ripetere le operazioni per entrambe le ante.
Per l’installazione del prodotto seguire le istruzioni contenute nella documentazione all’interno del frigo.
Use the screws provided with the doors.
For each door kindly take into consideration the mounting of 3 brackets, 2 on the upper part and 1 on the lower part.
Prepare the doors as shown on the picture, insert the bracket no. 4 into the lower central hole and the bracket 3 into the
2 side upper holes.
Repeat the operations for both doors.
For the installation of the products please follow the instructions in the documentation inside the refrigerator.
Utiliser les vis fournies avec les portes.
Pour chaque porte prière de considerer le montage de 3 brides, deux dans la partie supérieure, et une dans la partie
inférieure.
Preparer les portes comme montré dans le dessin, monter la bride nr. 4 dans le trou au centre en bas et les brides nr. 3
dans les deux trous a coté en haut.
Répétez les operations pour les deux portes.
Pour l'installation du produit suivre les instructions dans la notice à l'intérieur du frigo.
Verwenden Sie die Schrauben mit den Türen zur Verfügung gestellt.
Bei jeder Tür ist die Montage von 3 Bügeln vorzusehen, zwei oben und eine unten.
Bereiten Sie die Türen vor, wie in der Abbildung gezeigt, montieren Sie Bügel nr. 4 in das unteren mittleren Loch und
Buegel nr. 3 in der oberen seitlichen Löchern.
Für beide Türe gleiches wiederholen.
Um das Produkt zu montieren, folgen Sie die Hinweise in der Gebrauchsanweisung im Kühlschrank.
Use los tornillos suministrados con las puertas.
Para cada puerta se deben montar 3 soportes, 2 en la parte superior y uno en la parte inferior.
Pre-montar la puerta tal como se ilustra en la figura: apoyar el soporte 4 en el agujero central inferior y el soporte 3 en
los 2 agujeros laterales superiores.
Repetir la operación para ambas puertas.
Para la instalación del producto seguir las instrucciones contenidas en la documentación dentro del frigorífico.
10/2011 - 195072691.02
2
 Loading...